Sofirn SP40 Headlamp

Well i havent had any problem with sofirm lights so far, so i cant really comment on their actual customer SERVICE, but i have been in contact with them for other things, and they are definitely very friendly and responsive! and judging by your experience, their service sounds very good…they should ship more stock to amazon warehouses around the world, they would blow up as the best value brand.

do u know if they have something equivalent to a ft03? i know their sp70 performs about the same, a little bit better, but its much more expensive and bigger.

I have used a FT03… maybe a Sofirn C8 is similar?

naw i just checked, theres nothing…the tk70 is 58kcd on turbo, only sp70 can match it with 160kcd at peak…shame

I've looked and looked and could not find any mention of anyone getting out the driver. So, here it is, done today...

A 20 mm FET+1 should fit fine, but I'll lose the charging. Anduril2 using the switch LED's is the plan.

It's fairly unique. There's a vertical board extending up from the driver and through the switch PCB at the head, 2 posts, so 4 contact: grnd, switch, and one for each color LED. So the first thing you need to do is de-solder the 4 contacts on the switch PCB, then it loosens the driver. Pop out the switch PCB (no wires), then lightly tap down on the exposed vertical board til the driver glue seal breaks - didn't take much taps using a small hammer and screwdriver.

Pieces:

Close up of the switch PCB showing the ends of a PCB sticking up through it, with solder contacts:

Solution? Solder wick to remove the solder joints:

All clear now, it's loose and can be popped out, no glue:

Solder filled wick:

Driver details, PIC MCU:

Empty cavity showing the hardened glue used on the driver, and cutout on the left for the vertical board, on the right for the LED wires:

Pieces. MCPCB is 16 mm with screw holes, 1.5 mm thick. Will re-use the MCPCB but gotta decide what 3535 LED to use...

Driver replacement should go fairly easy. For the switch, can run 3 wires up through those holes, and solder to the pads. I plan on reusing the stock MCPCB. For the driver, a standard 20 mm will do, but will de-solder the brass ring on the spring side of the stock driver and transfer to the new driver to keep the same spacing for contact to the batt tube.

Nice tear down Tom!

Thanks for the tear down!

Are you getting your driver boards done at OSHPark?

Thanx! Yep, usually at OSHPark. I got 20 mm's in in the "After Dark" finish - they look amazin!

Just fyi, I posted a mod of another right angle light, the Amutorch AL1, here in the mod thread:

What a driver :smiley: Now i see why it have no cooling ribs . Its possible, but unreasonable to modd this thing. Sofirn engineers have to be fired at once :smiley:

@Tom E Thanks for taking such detailed photos of each step of disassembly! This is a great reference.

Here's pics of the mod - 351D 2700K 95+ CRI reflowed onto stock MCPCB, 20 mm FET+1 DEL driver:

Transferred the brass ring from old driver to new. Thinking I may need the elevated contact surface with the battery tube:

From below, where the driver will go. Cleaned off all the glue, though it was tough goin. It left some scratches where the driver will sit on the edge:

From the top, sanded down the shelf to prep for the MCPCB. The circular patterns really aren't there, well, you can't feel them anyway:

Stock spring transferred, bypass added:

SIR800DP should be fine in this one. Tombstoned a 4.7K resistor for the AUX LED pinout:

All nice and clean, using Arctic MX-4:

Wired up. Long wires needed to reach the switch PCB:

Driver inserted (after flashing Anduril2), showing a shorty tube a friend sent me, total of 3 actually. Good for the SP40, SC31 Pro, and SC31B:

All soldered up, assembled. I do really like the Stickvise that someone on BLF recommended:

Has anyone had issues with the charging port on the SP40? Mine got really hot, started to smoke and now the light only has one mode. Off, on. And the red light on top flashes all the time. I’m not sure if its the fault of the headlamp or of the power supply feeding the USB.

Hi Tom E

Can you share the .hex with Anduril 2 for the SP40.
I got a Oshpark Del driver coming soon. Will do same mod as you did :slight_smile:

Sure. I'll rebuild new just in case of any updates. Can't recall off hand if updated after this mod.

Remind if I forget - got a list now of things to-do this eve...

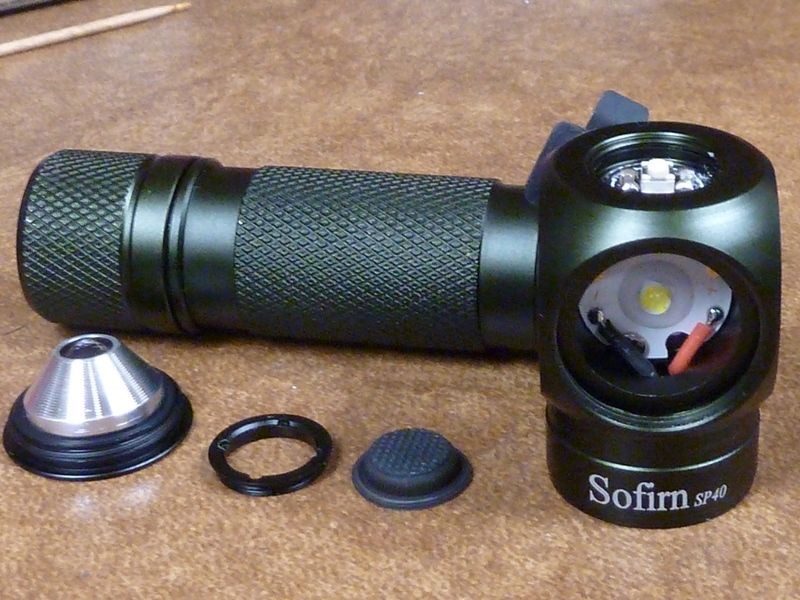
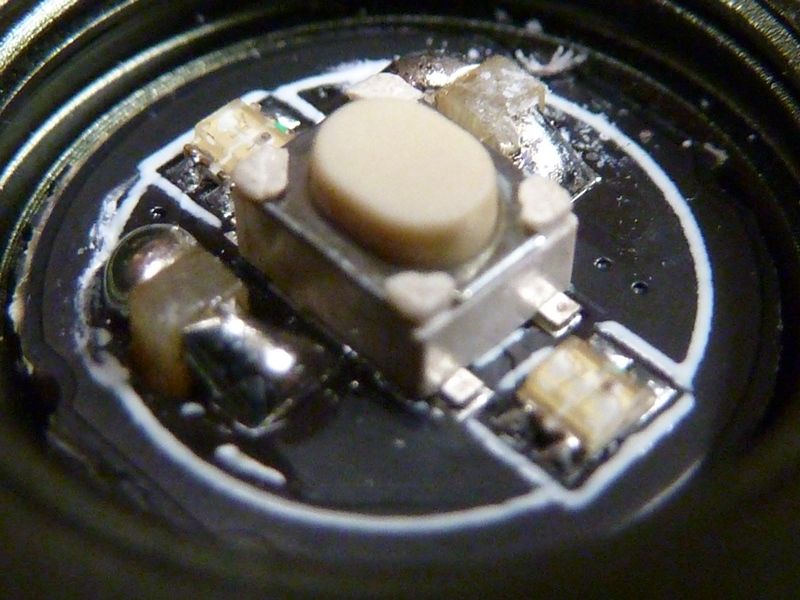
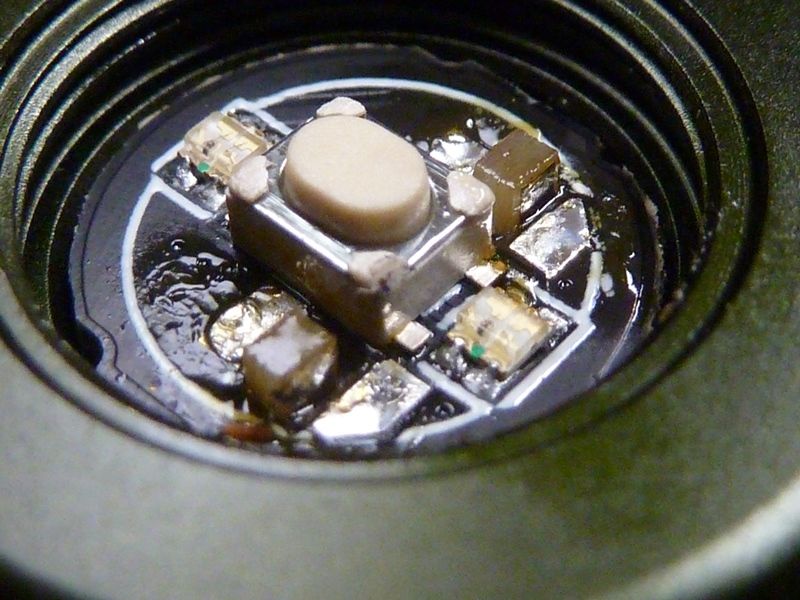
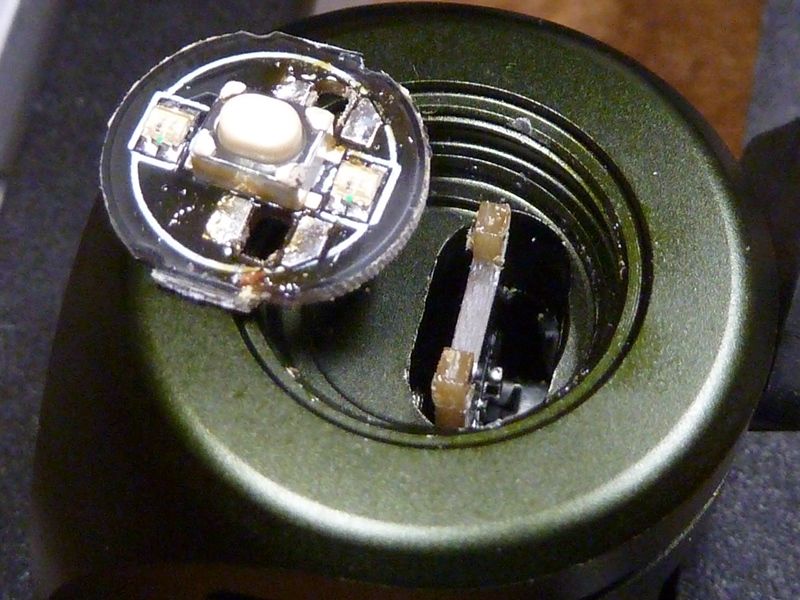
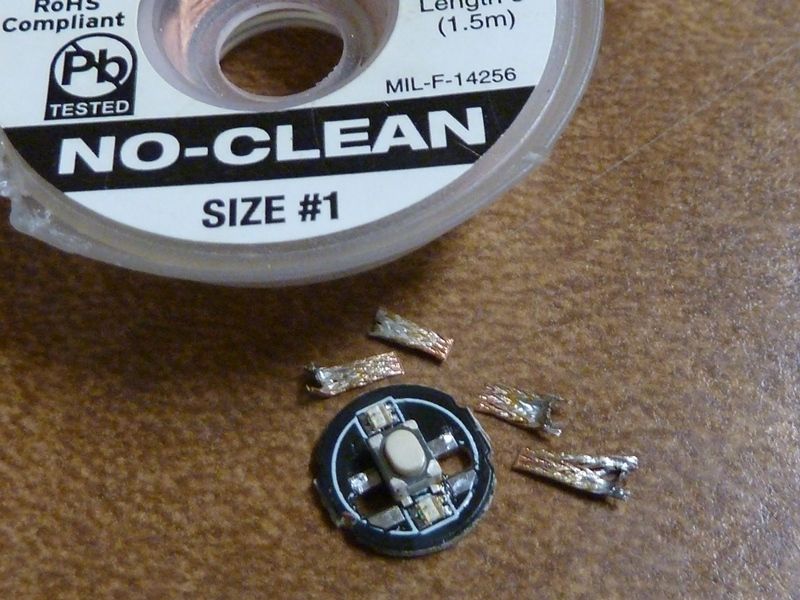
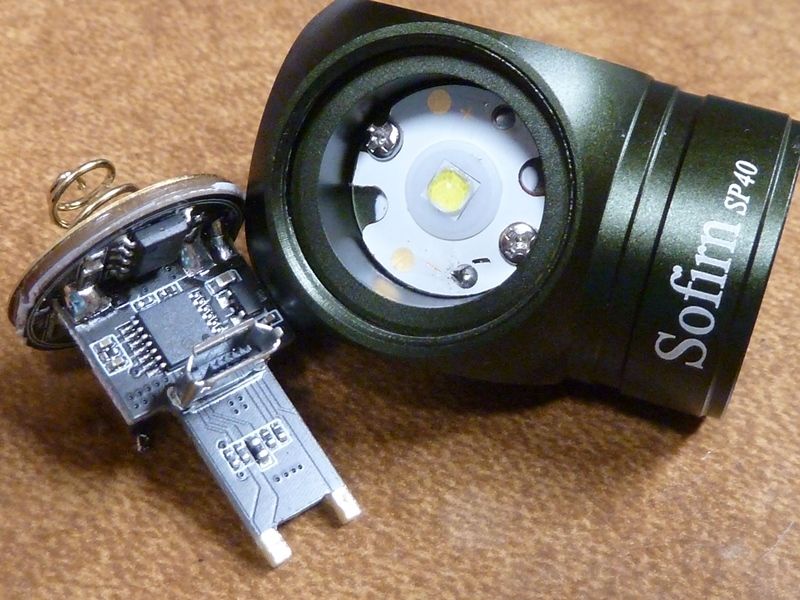
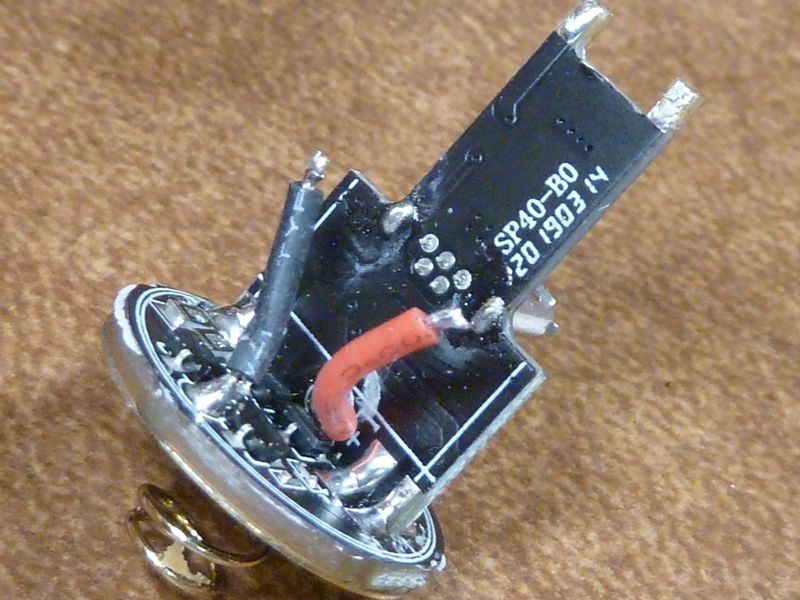
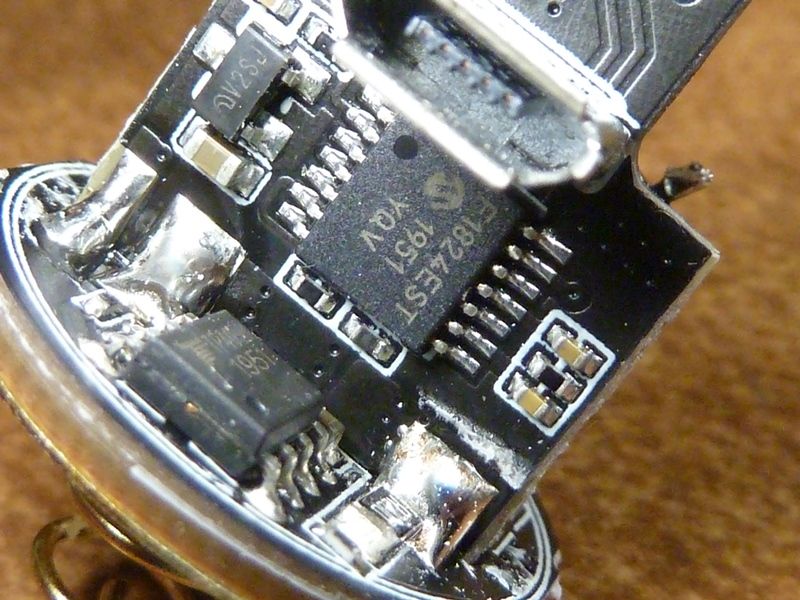
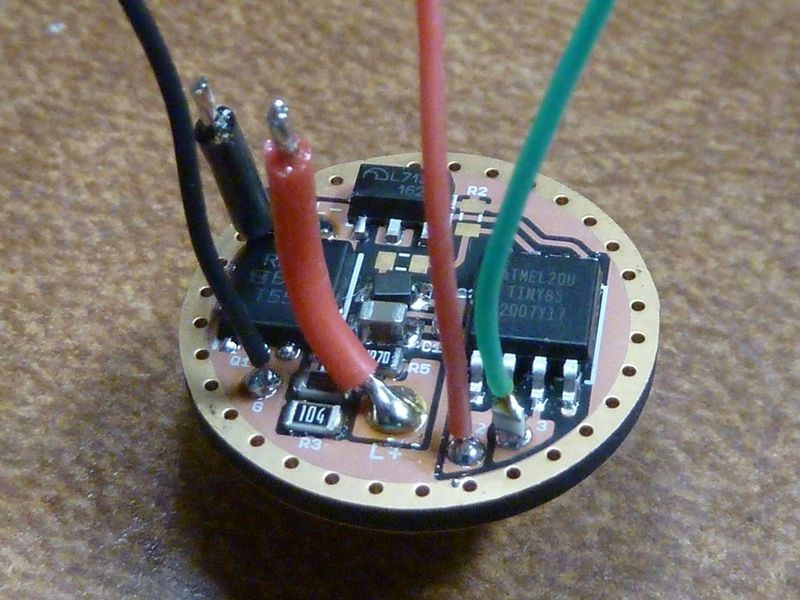
Here's the link to the Anduril2 for the modded SP40, with a FET+1 driver: google drive SP40

Let me know if it works, should be shared. It contains the .HEX file, as well as a ZIP file of the full source, configuration, and build files used. I use Atmel Studio 7 under Win 10.

The cfg file is as follows:


// Sofirn SP40 (rt. angle head) config options for Anduril 2
#define MODEL_NUMBER "0352" // Unique for this light, in MODELS listing
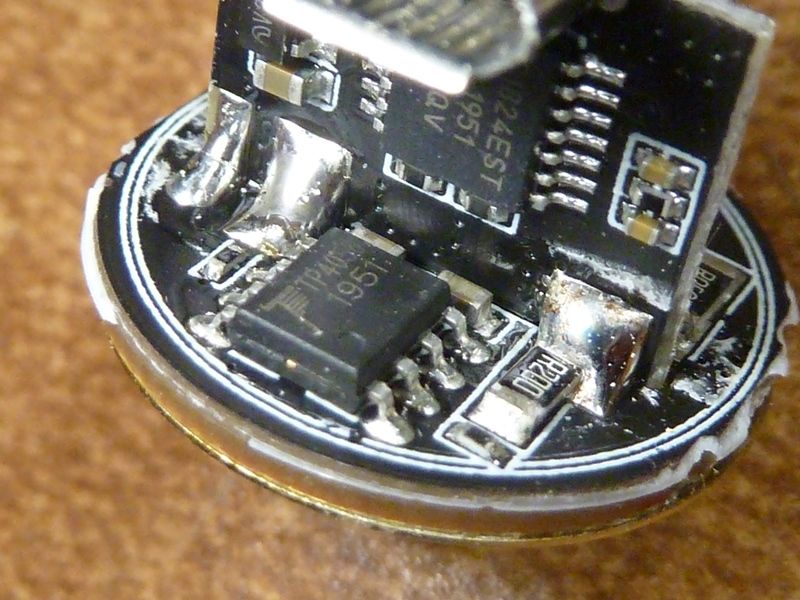
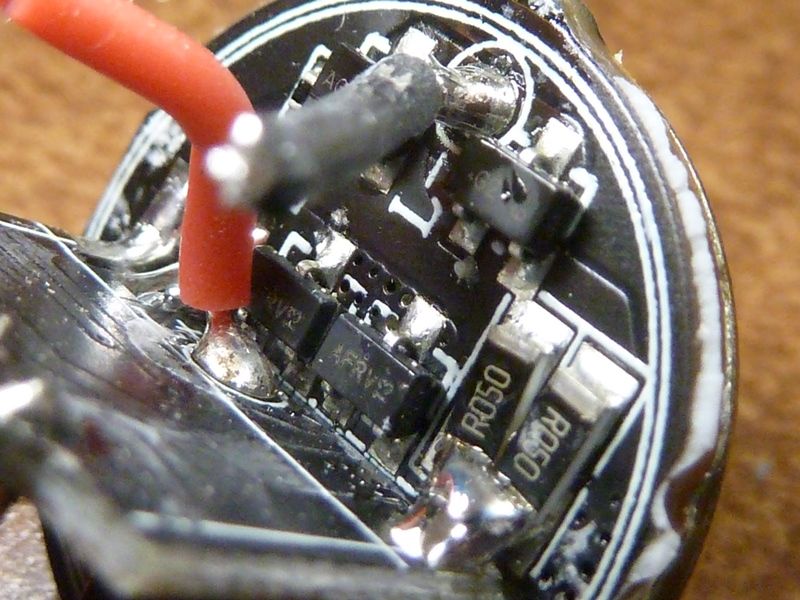
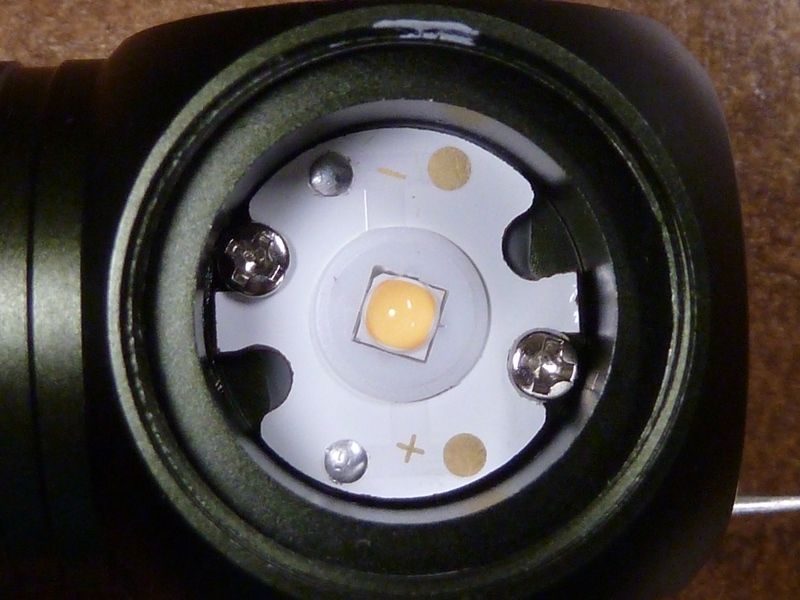
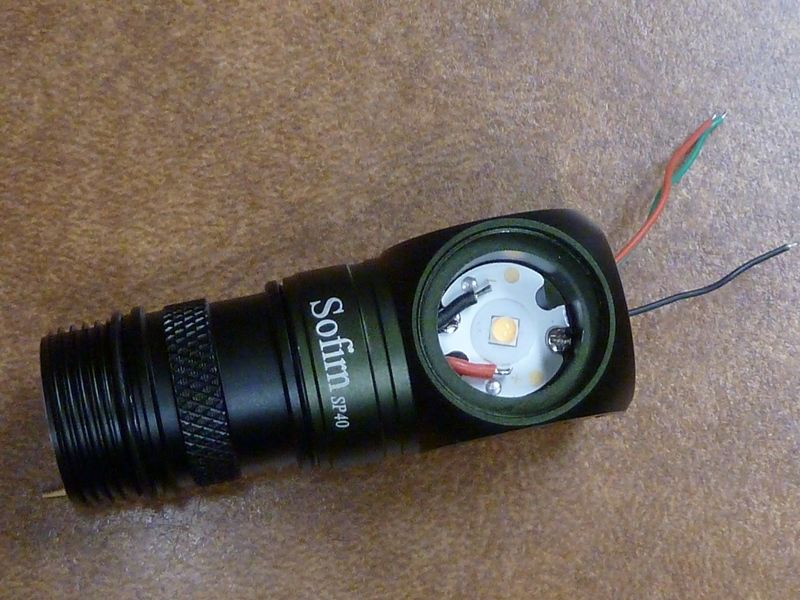
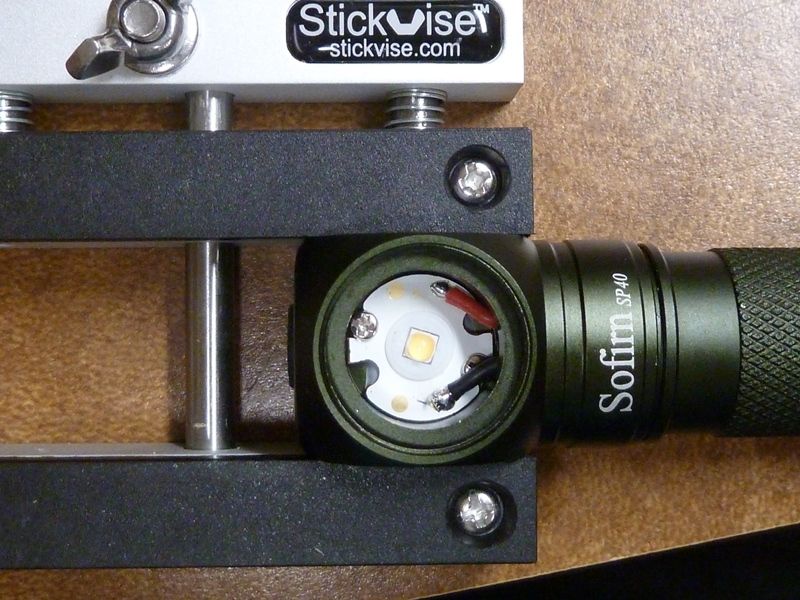
#include "hwdef-BLF_Q8.h" // same hardware as the Q8 (FET+1 with switch AUX LED)

// the button lights up
#define USE_INDICATOR_LED
// the button is visible while main LEDs are on
#define USE_INDICATOR_LED_WHILE_RAMPING
// enable blinking indicator LED while off
#define TICK_DURING_STANDBY
#define STANDBY_TICK_SPEED 3 // every 0.128 s
#define USE_FANCIER_BLINKING_INDICATOR
// off mode: high (2)
// lockout: blinking (3)
#define INDICATOR_LED_DEFAULT_MODE ((3<<2) + 2)

//--------------------------------------------------------------------------------------------
// TE 2020-11-15: Use the Emisar D1 as a reference for the ramp settings and thermal settings
//--------------------------------------------------------------------------------------------

// ../../bin/level_calc.py 1 65 7135 1 0.8 150
// ... mixed with this:
// ../../bin/level_calc.py 2 150 7135 4 0.33 150 FET 1 10 1500
#define RAMP_LENGTH 150
#define PWM1_LEVELS 1,1,2,2,3,3,4,4,5,6,7,8,9,10,12,13,14,15,17,19,20,22,24,26,29,31,34,36,39,42,45,48,51,55,59,62,66,70,75,79,84,89,93,99,104,110,115,121,127,134,140,147,154,161,168,176,184,192,200,209,217,226,236,245,255,255,255,255,255,255,255,255,255,255,255,255,255,255,255,255,255,255,255,255,255,255,255,255,255,255,255,255,255,255,255,255,255,255,255,255,255,255,255,255,255,255,255,255,255,255,255,255,255,255,255,255,255,255,255,255,255,255,255,255,255,255,255,255,255,255,255,255,255,255,255,255,255,255,255,255,255,255,255,255,255,255,255,255,255,0
#define PWM2_LEVELS 0,0,0,0,0,0,0,0,0,0,0,0,0,0,0,0,0,0,0,0,0,0,0,0,0,0,0,0,0,0,0,0,0,0,0,0,0,0,0,0,0,0,0,0,0,0,0,0,0,0,0,0,0,0,0,0,0,0,0,0,0,0,0,0,0,0,1,3,4,5,7,8,9,11,12,14,15,17,19,20,22,24,25,27,29,31,33,35,37,39,41,43,45,48,50,52,55,57,59,62,64,67,70,72,75,78,81,84,87,90,93,96,99,102,105,109,112,115,119,122,126,129,133,137,141,144,148,152,156,160,165,169,173,177,182,186,191,195,200,205,209,214,219,224,229,234,239,244,250,255
#define MAX_1x7135 65
#define HALFSPEED_LEVEL 14
#define QUARTERSPEED_LEVEL 6

#define RAMP_SMOOTH_FLOOR 1
#define RAMP_SMOOTH_CEIL 120
// 10, 28, 46, [65], 83, 101, 120
#define RAMP_DISCRETE_FLOOR 10
#define RAMP_DISCRETE_CEIL RAMP_SMOOTH_CEIL
#define RAMP_DISCRETE_STEPS 7


// safe limit ~50% power
#define SIMPLE_UI_FLOOR RAMP_DISCRETE_FLOOR
#define SIMPLE_UI_CEIL 120
#define SIMPLE_UI_STEPS 5

// stop panicking at ~75% power or ~1000 lm (use D1: D1 has a decent power-to-thermal-mass ratio)
#define THERM_FASTER_LEVEL (RAMP_SIZE*9/10) // throttle back faster when high

//---------------------------------------------------------------------------------------------
// TE - changes:
//---------------------------------------------------------------------------------------------
#undef DEFAULT_THERM_CEIL
#define DEFAULT_THERM_CEIL 55 // from 45 -> 65
#define MAX_THERM_CEIL 80 // from 70 -> 80

#define USE_2C_MAX_TURBO

// Make standard mode default, not Simple mode
#define SIMPLE_UI_ACTIVE 0

Thanks man. Highly appreciated.
Will give this a go when i come home in January.
With Anduril 2, a short battery and a Lh351 dogfarts. This will be pretty much perfect for trail running

Anyone in comms with Sofirn in regards to updating (moonlight, Type C port, etc.) this headlamp?

I find that using the 18350, the body is too short for the headstrap. How do you use 18350 with headstrap?

No problem for me….

Seems that you need to use the rubber strap on tailcap. I guess there’s no other way then.

I don’t own one, but it looks like maybe you can turn the battery tube around and it may work better. Assuming that the threads are the same on either end.