Hello, I bought this flashlight about 3 years ago from Fastech.com and it stopped working. It only turns on if the usb charger is attached. I have checked the battery and it's charged and will run another light. I asked Fastech if they will ask the manufacturer if they would sell me the LED driver. They said it will cost me $15. Is that a reasonable price? Should I look into an aftermarket driver instead?
I haven’t got that far. It looks like it disassembles through the bezel. It appears a special tool may be required. Something can be rigged, I think…… There is nothing to grab onto with a strap wrench.
Get a rubber mat or even the rubber strap of your wrench, push the light into the mat as hard as you can and twist. I’ve sometimes used double sided tape on the mat to give it more grip. Works most of the time
The first thing I did was clean the contacts. The pcb looks like it doesn’t move or isn’t loose. I have found that it came on for a bit and I cycled through the modes then shut it off and it won’t come back on again. Something must be loose inside then.
I still have not been able to remove the bezel. I have tried heating it up with a hair dryer but that didn’t work either.
edit - I got it off!
I imagine the switch needs to be pulled up and out:
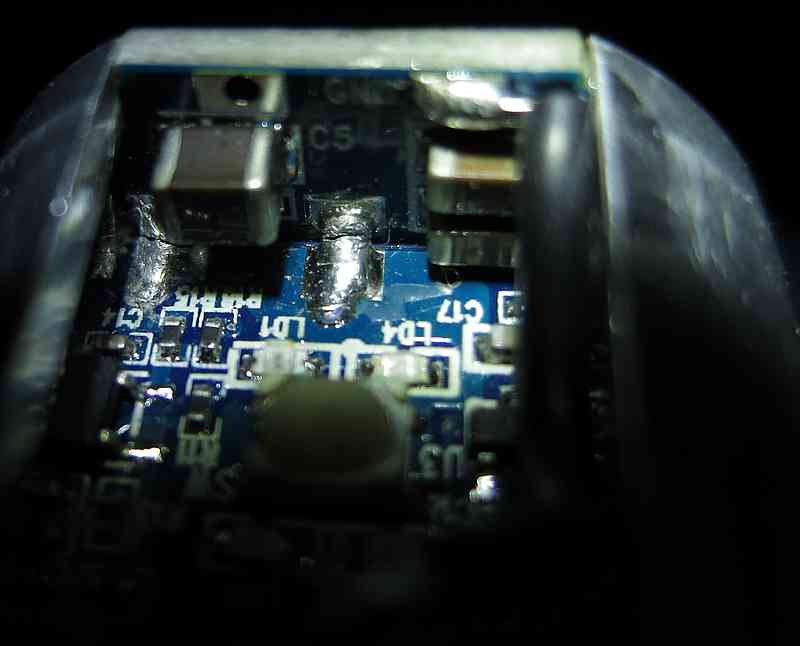
I think I found the problem. See the cracks in the solder? Are there any components that are very heat sensitive if I use a hair dryer to re-flow the solder?
I have a heat gun. I have used a hair dryer before, when I couldn’t find my heat gun, on something else. 1500 watts is pretty hot if you hold it very close. But that could burn out the dryer maybe due to air flow restriction.
That’s a very tight space to use a heat gun. The risk of unsoldering nearby components is high.
Make a temporary soldering iron tip extension by tightly wrapping the entire shaft of the tip with a piece of solid copper wire and extending it past the tip the distance you need then give it a snip.
Friction will keep the bare copper from sliding and you should get more than enough heat transfer to the end of the copper wire to reheat the solder on both sides of the broken connection to the point where it will bridge the gap.
Thanks, I’ll have to try that sometime. I didn’t catch your post in time. Here is my result. I need a lot of practice but at least the torch is working now.
Yeah, I made a mess in there. My hand shakes a little bit so solder got all over the place and I don’t have a wick or suction.
Well, in the end I could not get it working properly. I purchased a new driver. I told them that I think there should be a spring on the positive end as that may have contributed to the cracks in the solder (from dropping the heavy battery in there). They actually listened to me or they already made the change.
Interesting driver there, definitely would have had trouble finding something to work without the OEM. I've had a very similar behavior from a Lumintop light and am working with them to get the correct driver now. They sent me one but it was completely the wrong thing. If you have a toaster oven that will get up to 450°F-500°F it would be worth a shot to put it in there carefully for a reflow. It probably wouldn't be hot enough for lead-free solder but maybe. I'm not a fan of the brass buttons either but it does make sense for high current applications.
Glad you got the part to fix it up! Seems like a nice enough light that it's worth the cost.
Would the insulation on the attached wires able to handle 500°F?
The hair drier I used once for a video card made the cold or cracked solder joints shiny but that was probably just on the surface removing a visible crack over a still present crack underneath . It worked for a bit but did not last