These are what I used in my green S2+ build
I had already posted these on BLF back in 2015, but that was before this thread was started and I still use both of these lights regularly.
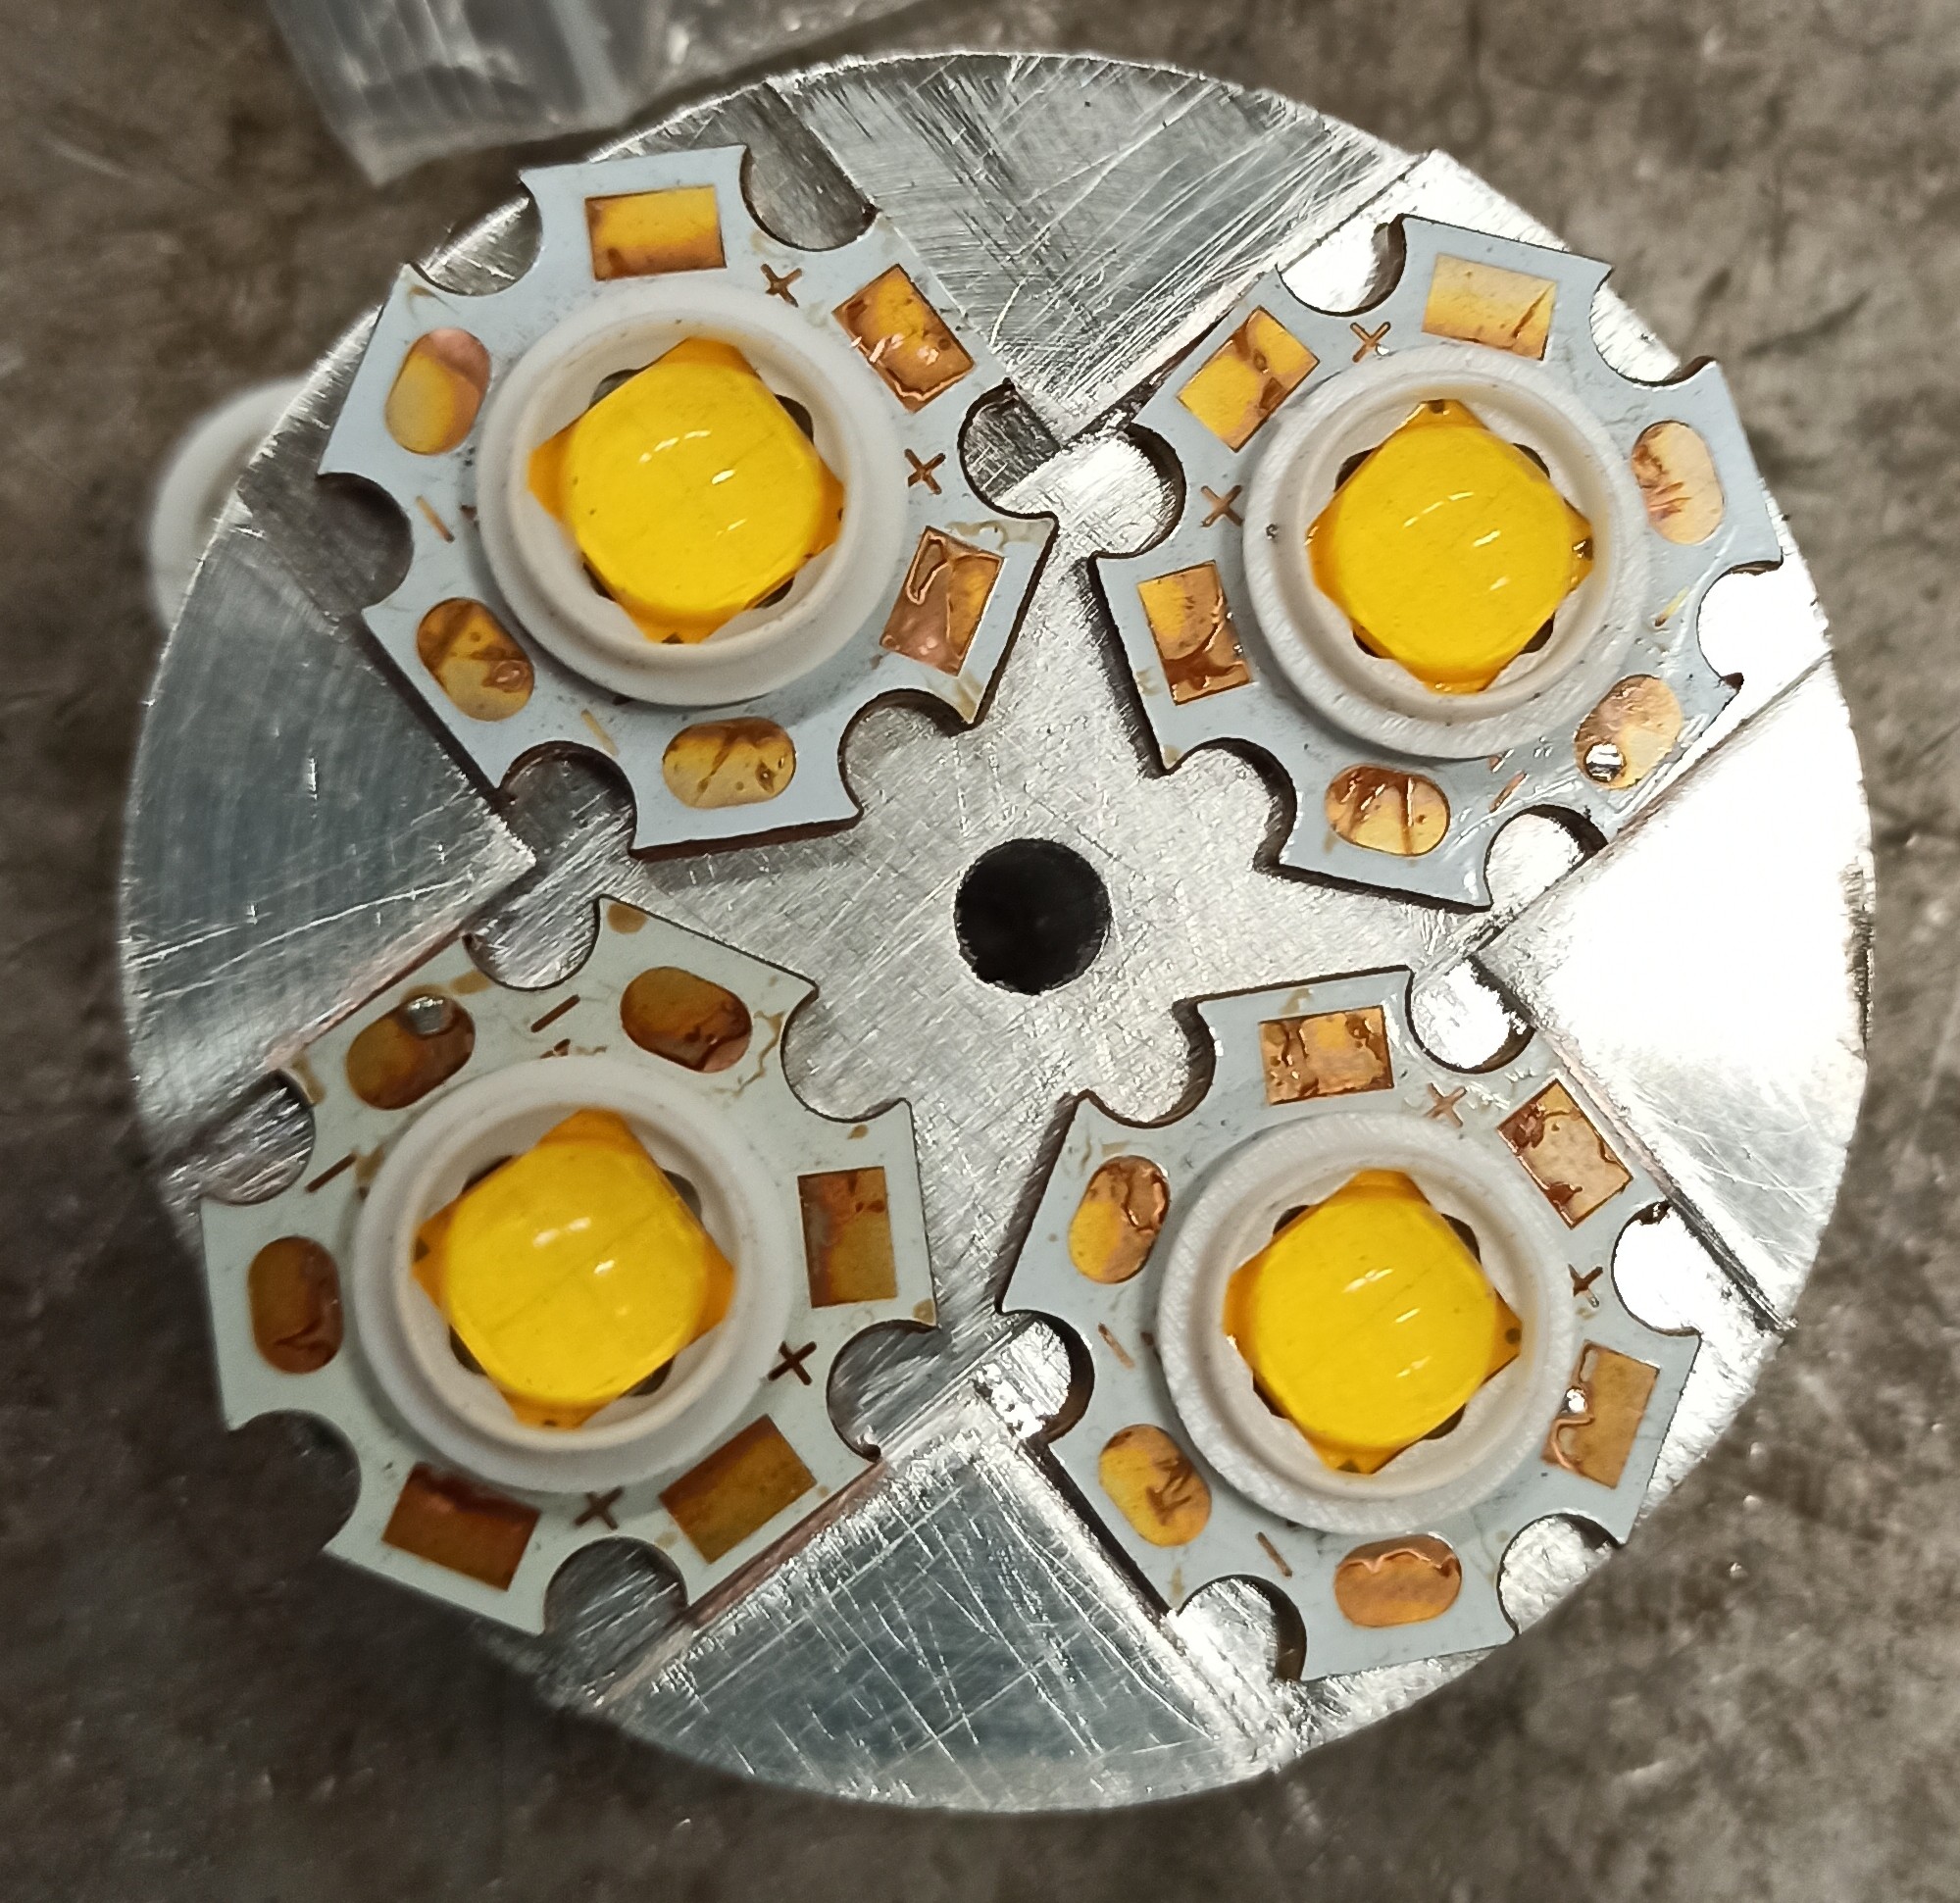
3x XP-L SpiderFire C2
Coast HP1 3x Nichia 219C - Original mod had an older type of Samsung LED and I upgraded it some time after this thread.
I’m currently working on a few lights, including swapping out the XP-L HI in my Sunwayman V10R for a 219B sw45k, and swapping out the 4x XP-L HI in my Emisar D4 for 4x LH351D 5000k.
Replaced the glass lens in my Acebeam TK17 Ti with a UCL acrylic lens.
I found it a little strange that a light that looks like it is built like a tank had a 20mm glass lens that was just 1mm thick. Seemed very fragile. I chose a UCL acrylic lens as I knew I could file down the edges so it would fit in the available space while being a lot more resistant to impacts.
I lucked out with my order from Flashlightlens.com too. I ordered 2 lenses, but they sent me 4. ![]()
Incidentally, the only other flashlight manufacturer that I know of who uses 1mm thick glass lenses in anything larger than the tiniest keychain light is Zebralight.
Mouser doesn’t differentiate tint bin codes, just Mfr part numbers. It’s luck of the draw. The ones I ordered were XPLAWT-H0-0000-000BV20E5 (highest flux bin; 70 CRI min).
The sw35 in my Bob McBob SC64c is quite pink.
CCT: 3500K | Ra: 97 | R9: 94 | Duv: –0.003
flashed fw1a, 2x fw3a with my fork of anduril 2, and reflowed from xpl hi 6500k -> 219c 5000k in fw1a, and 219c 4000k -> 219b sw45k in fw3t.

I modded my heat block today because it broke.
4.5 years ago I made a tiny heat block for reflowing leds and driver boards, from a block of aluminium, two cheap heating elements meant for 3D-printers and banana plug connectors to power it from a power supply. I posted about it here. It looked nice back then:
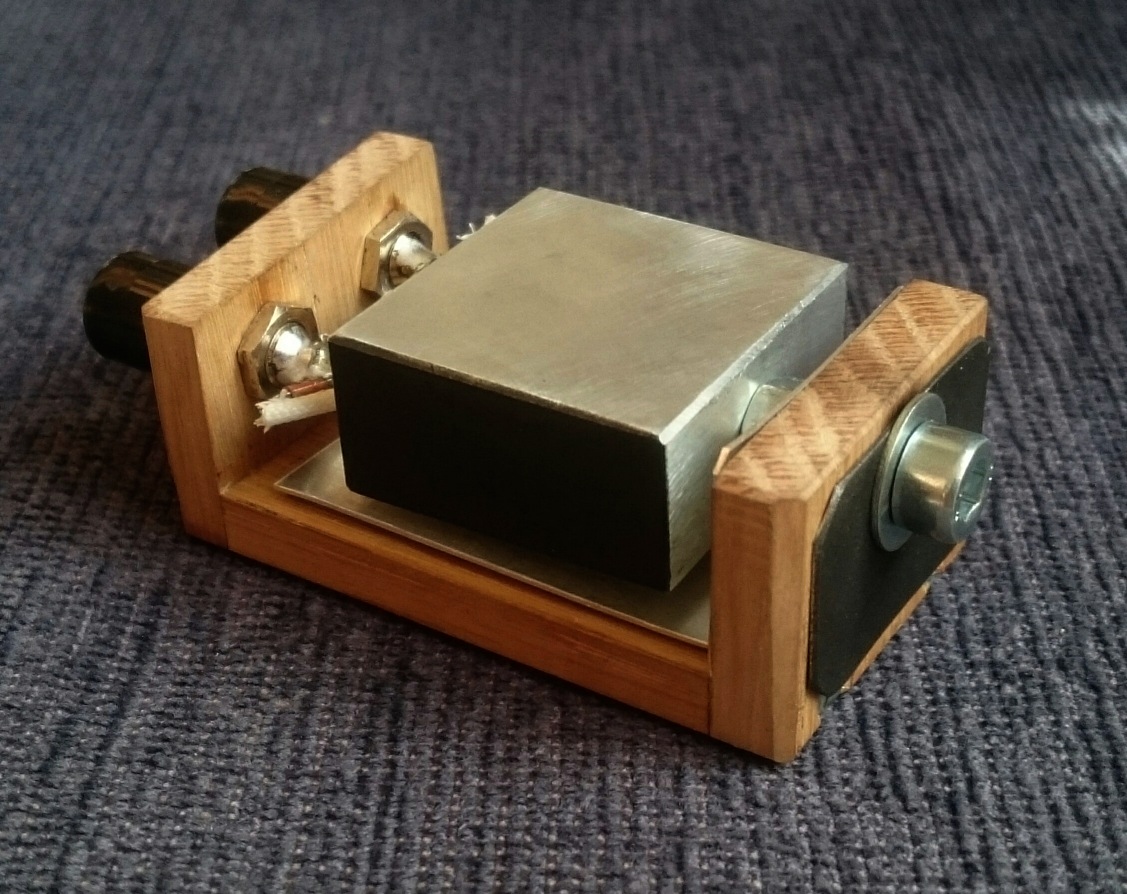
It has served me extremely well but after 4.5 years and countless refows, the wood has burned and recently has cracked. And I already was not happy that it was so tiny and instable that it was permanently clamped into a vice to be usable. So I disassembled the parts and made a new housing for the heat block. Here is what is leftover from the wooden housing:

And here is the new housing.


It has quite some improvements over the old version. 1) it can be used without the vice, 2) the wood is thermally further away from the heat block, so it will not likely char/disintegrate, 3) the block is mounted sturdier overall, 4) it provides some working-surface directly next to the block, to prepare and cool off the ledboards, that was really missing in the previous version.
It appears that I can use the same power supply setting as before, i.e. my standard 2.8 A for reflows (~18W) still gives around 200 degC in steady state. Apparently the heat loss speed in this new housing has not much changed.

This will work for many years to come ![]()
That looks great Djozz.
Much better than my setup. Whenever I want to do a reflow I stick a wooden clothespin in my adjustible mini-vise. I use the clothespin to hold the side of the star.
I use my left hand to hold the heat gun from my reflow station underneath the star blowing upward. I use tweezers in my right hand to manipulate the LEDs.
My setup may not be professional, but it is fast. I can heat up and reflow stars in 30 seconds to 1 minute with no need to preheat anything.
I’ve seen it done with candles or BIC lighters. I’ve done it like you once but I use my hotplate every time now. It’s just too easy. If I can come up with a way to do something with the hotplate instead of hot air or iron I’ll always choose that method.
Looks great! If I made such a homegrown solution I’d probably ruin the beautiful simplicity by trying to add a thermostat or at least a temperature readout.
Absolutely!
Before I had my block I did reflows with a small blowtorch under the board, worked like a charm, but using the heat block it feels good that the led never exceeds specified reflow temperatures. And having two hands free during reflows is always handy.
I have all the stuff in house to make a version with thermostat and tempeature read-out, but I just can’t be bothered building it. If I need to reflow a led, I go for 2.8A, if I need a bit hotter (for led testing I place the ledboard on a small aluminium plate and put them together on the hotplate so that the temperature rise is more gradual, more according to the reflow specs. This requires a bit hotter heat block) I go for 3A. I monitor with the infrared thermometer.
Sounds like you should make a little mount to hold the IR gun hands free ![]()
Looks great though. I love this kind of stuff
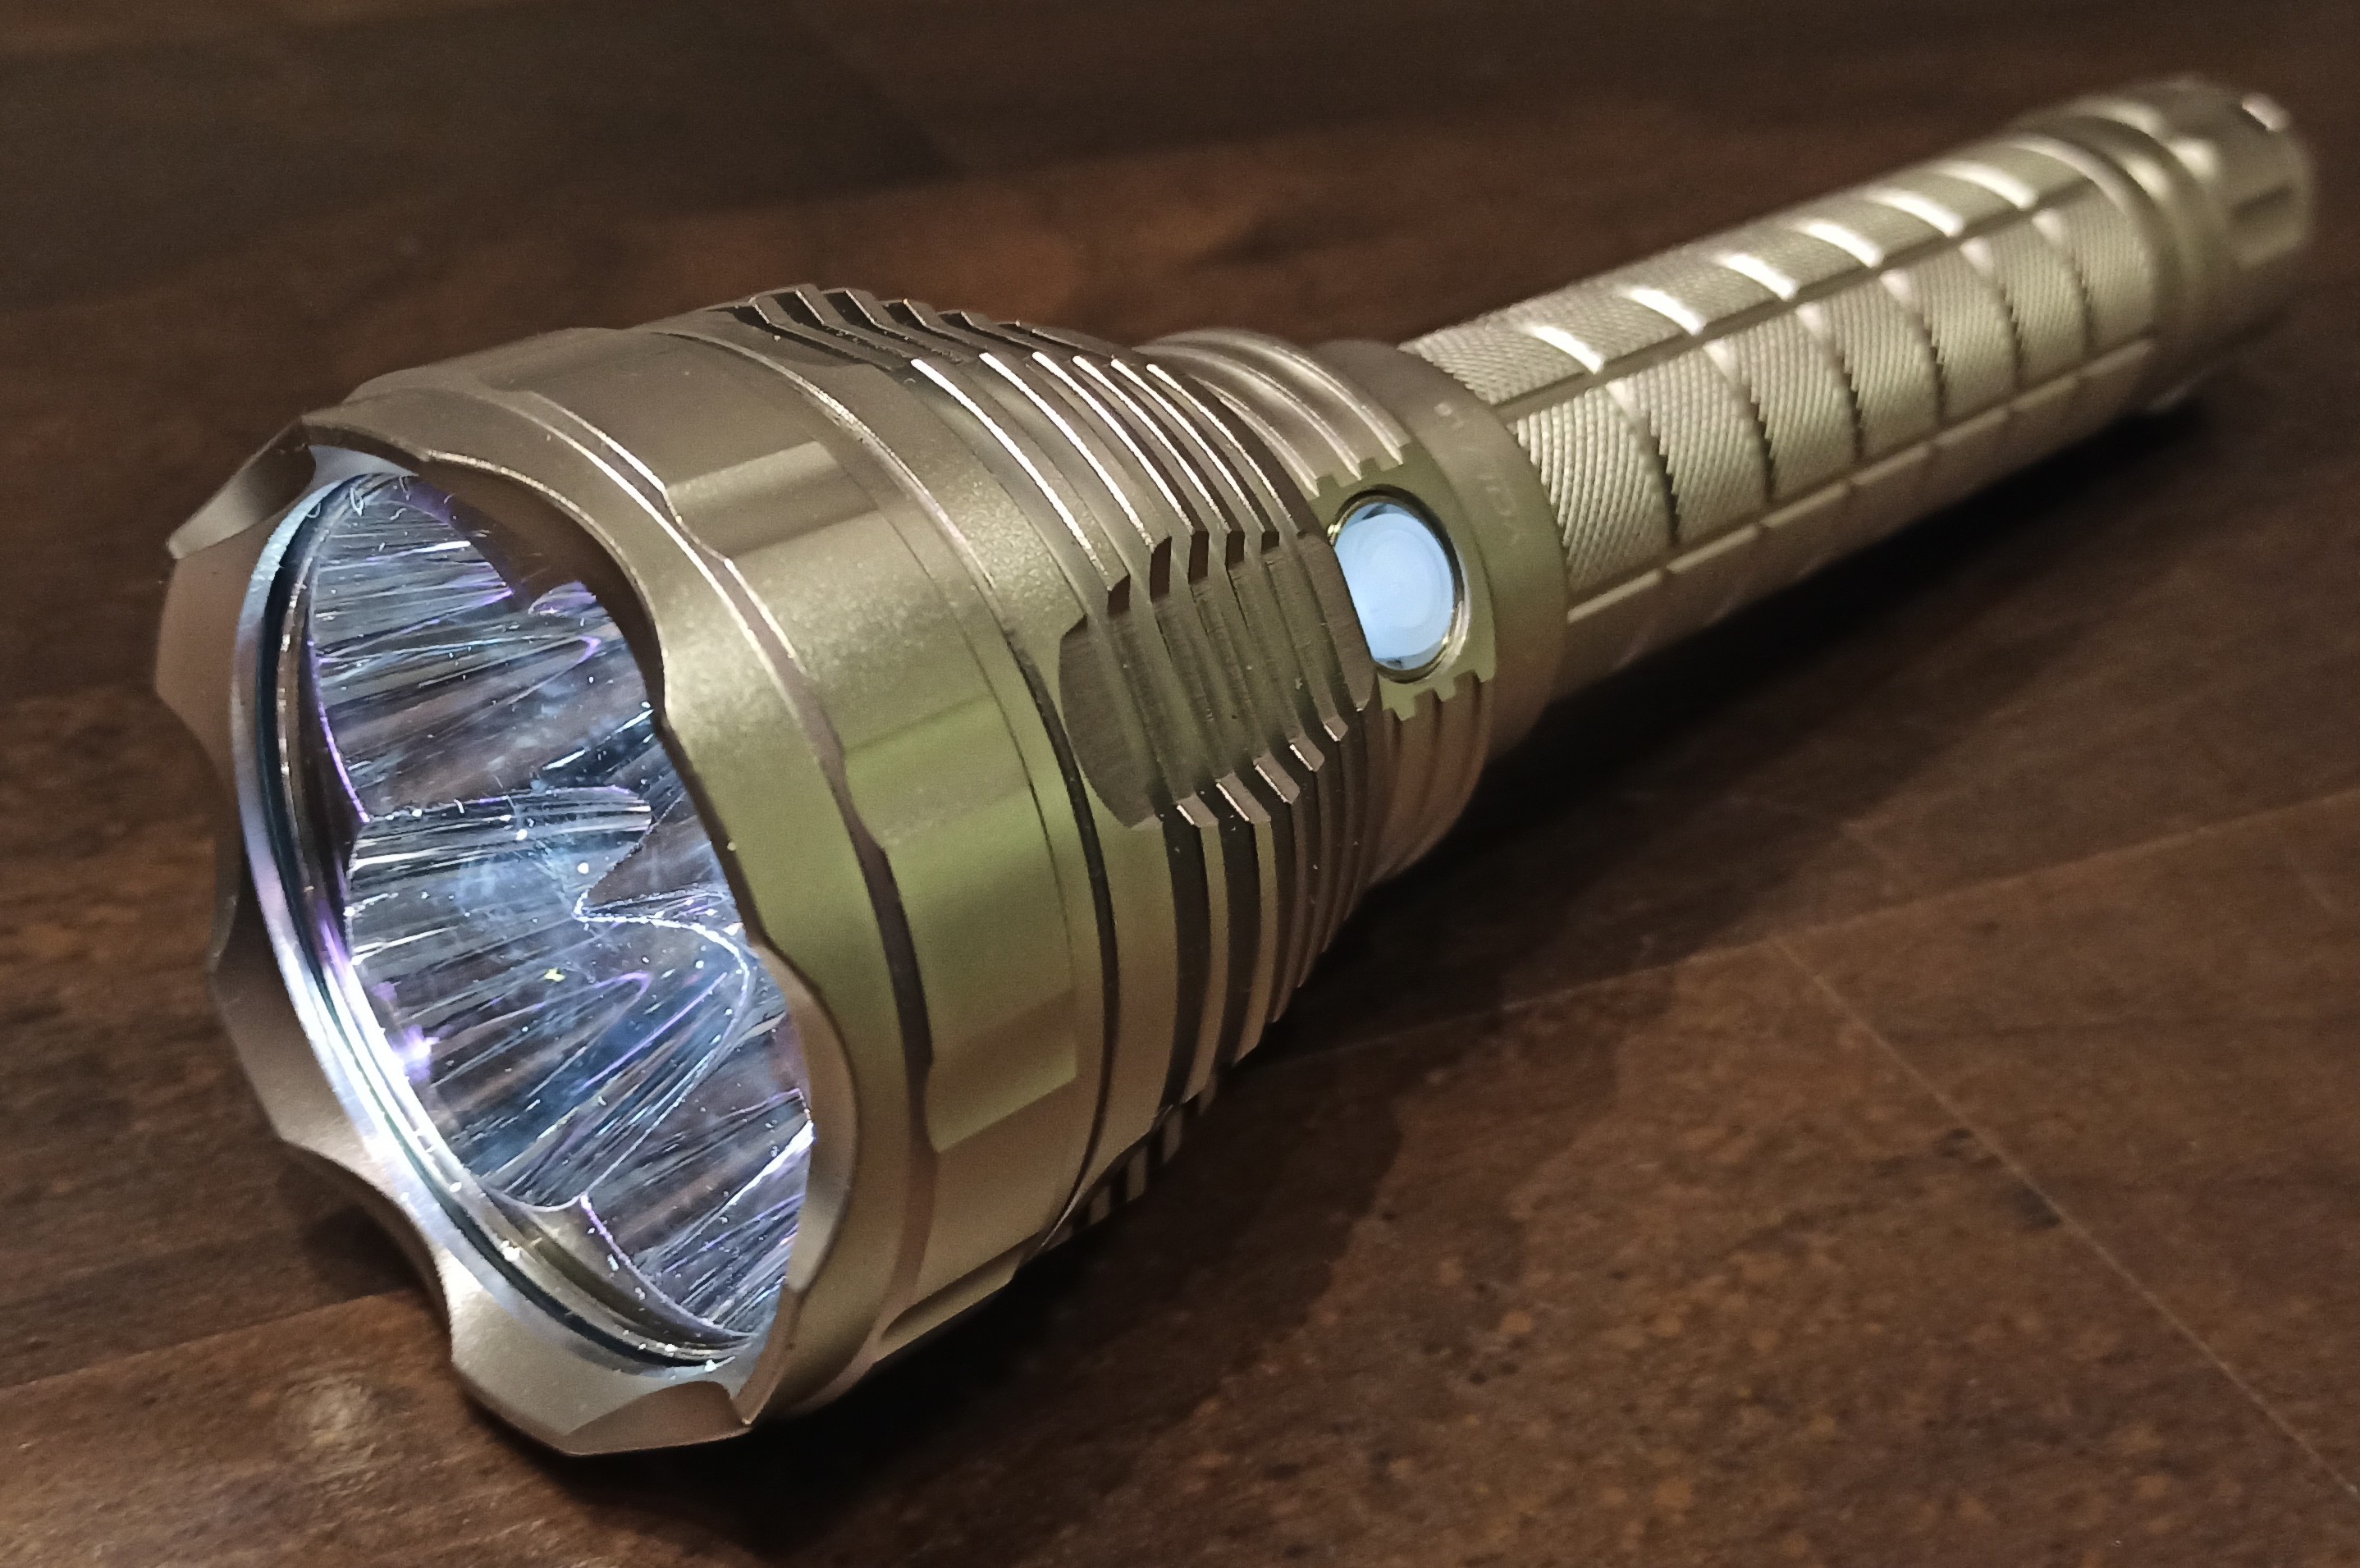
I built Convoy L6 quad with 4 XHP70.2’s and fet driver. Reflector and leds are from Kaidomain. Driver nd switch from MTN Electronics. I made aluminium spacer for 4 20mm mcpcb’s. It took lot’s of measuring and patience to get everything to fit together. Finally it’s done to be never used. ![]()


It looks good and I got a chuckle from your honesty . ![]()
Very nice work haukkeli! That must generate a serious amount of light!
Here is the reflector if some else wants to build similar. Spacer is from 50mm round stock. I machined grooves for pcb’s for easier assembly and made the spacer so that it gradually narrows towards the original shelf. I also bolted the spacer to reflector with leds in between, so that I could drop the whole package in. Cable management was the most difficult part of this project.
I haven’t actually tried it outside yet. Seem’s to be bright. Batteries are the limiting factor. Enerqic 5200mAh with 18A continuos discharge.
Nice work, Haukkeli!
Last night I successfully swapped a 219b SW45k into my Sunwayman V10R. I like it better than the cool white XP-L HI that was in there, and is still plenty bright. The low now goes down so far, I have to look at the LED to tell that it’s on.
Today, I swapped emitters in the Drop Blue Titanium AAA I received a couple days ago in the mail, which unfortunately wasn’t the 219C version. The XP-G3 it came with was one of the worst tints ever. Now it has a 219C 4000k and is much more useful. Head was glued so heated it up with a torch first and it loosened up.

Looks good Lotus_Darkrose. Where did you get the 219C 4500K from?
Thanks, and good catch, lol. It’s actually 4000k, just edited my post. It’s from mtnelectronics.com, I bought several.
I also worked on a few more flashlights today. I swapped in a 219C 4000k into a AAA Coast G22 flashlight, and added a diffuser as the reflector had an ugly beam.

I had a SS SingFire 14500 flashlight laying around, and also put a 219C 4000k into that, along with a 45 degree TIR.
