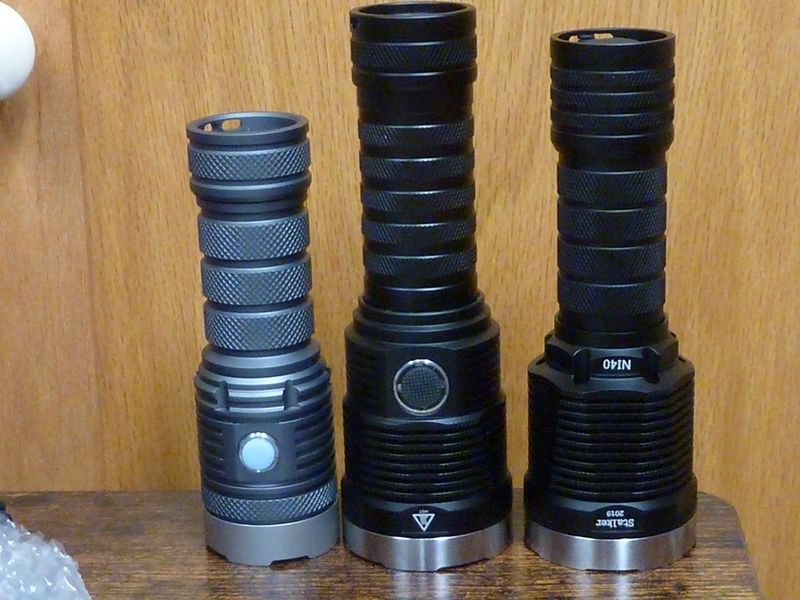
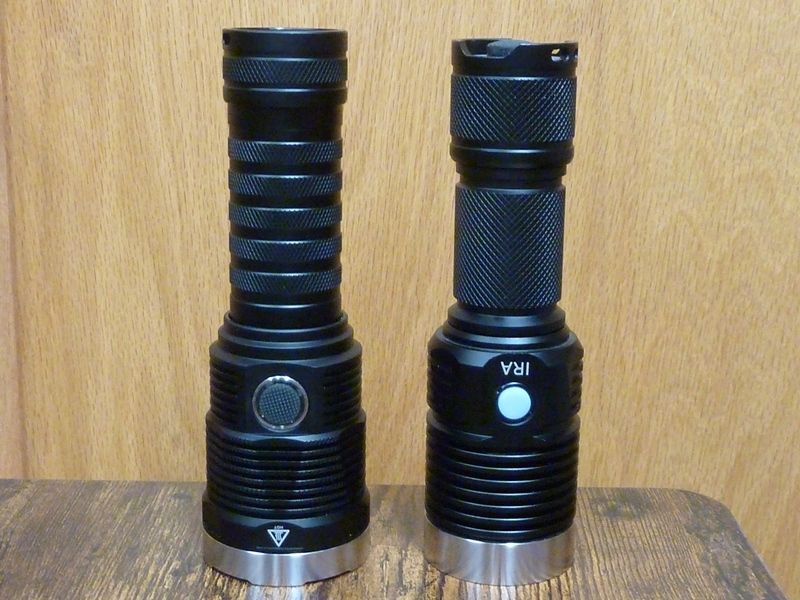
The NI03 Valkyrie is basically an e-switch version of their earlier model, the NI40 Stalker, plus extending the tube for 26800's vs the 26650 size of the NI40. These lights are the latest in the "IRA" product line. I have the original IRA weighing in at 357g, about 50g heavier that the NI03 though slightly smaller, and the NI03 is about 50g heavier than the NI40. Below you can see the two side by side and they have much in common in both size and style. The NI03 comes in heavier, slightly longer, with more mass in the hottest region just below the reflector, by the switch, with extra finning as well. I would say it's an improved design. It should be notes this is "only" a 26800 light. There's no included adapter for any other size, so if you want to use it with a 21700 or 26650, you would have to rig up/dyi something yourself.
The only retail source I know of for the Nightwatch brand is Nealsgadgets (https://www.nealsgadgets.com/collections/nightwatch).
The Nightwatch brand flashlights are a bit off the beaten path but I've always found them of high quality and the NI03 bears that out:
- nice square threads (expected nowadays)
- SS trimmings - switch bezel and front end bezel
- maximized finning
- knurled patterns on the battery tube, and more unique, they have knurling on the finning
- robust feel (on the heavy side), well balanced
- nice fitting LED alignments, centered
Compared to the original IRA light, bought from Enogear back in Nov 2017, but Enogear doesn't seem to be around anymore:
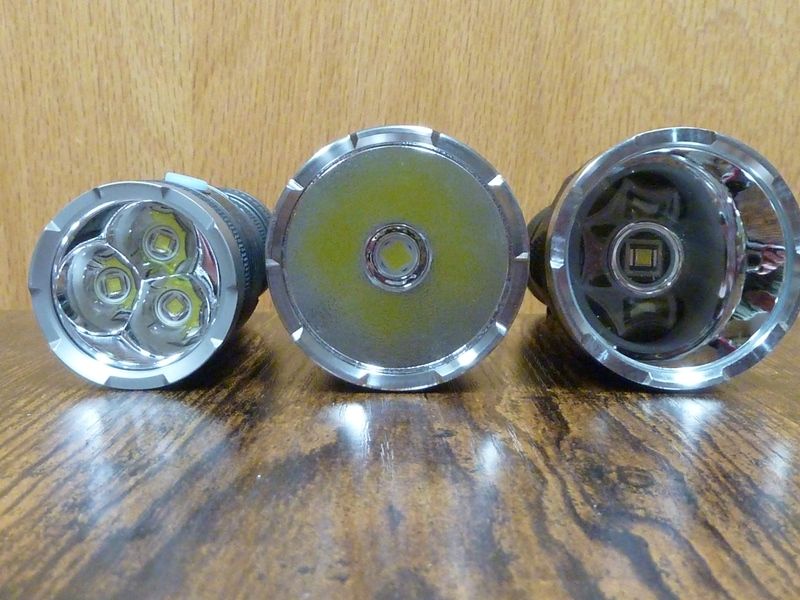
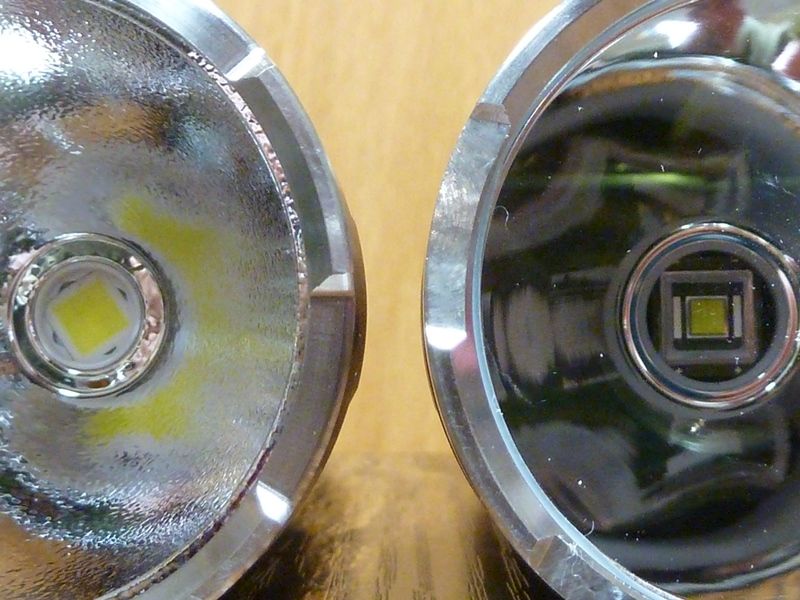
Comparing the 2 LED's:
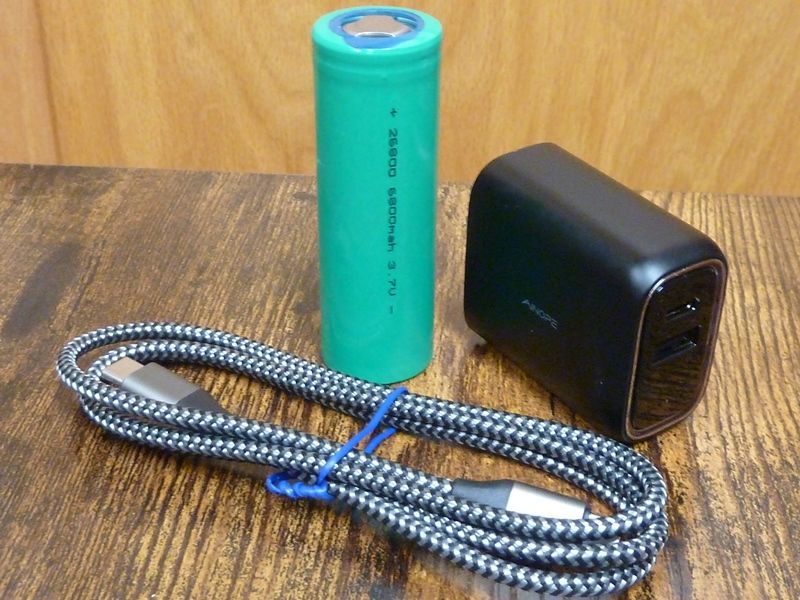
I received the kit version with the following included. The 26800 I'm sure is the Queen Battery rewrapped, though maybe Queen Battery's version is rewrapped. The C to C USB cable is nice quality, and the wall adapter is a high amp version with both A and C options:
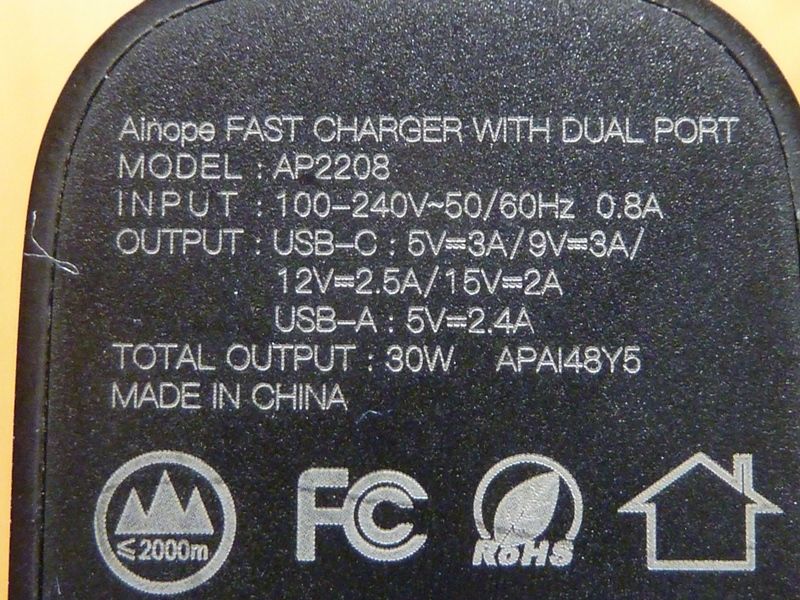
Details on the max charging levels:
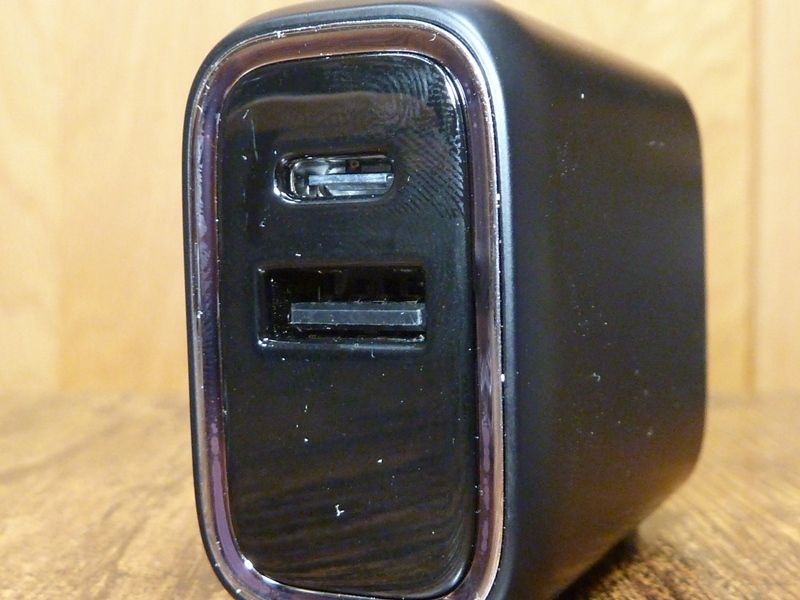
Showing both connectors:
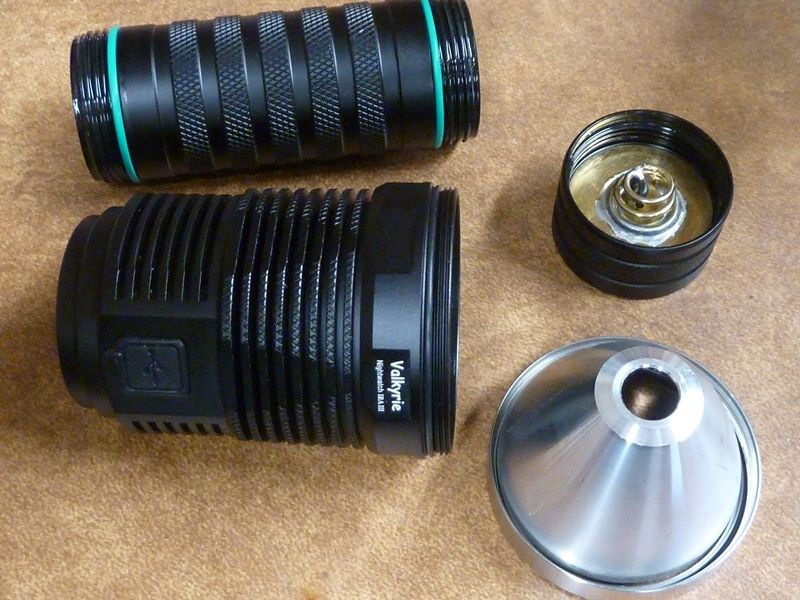
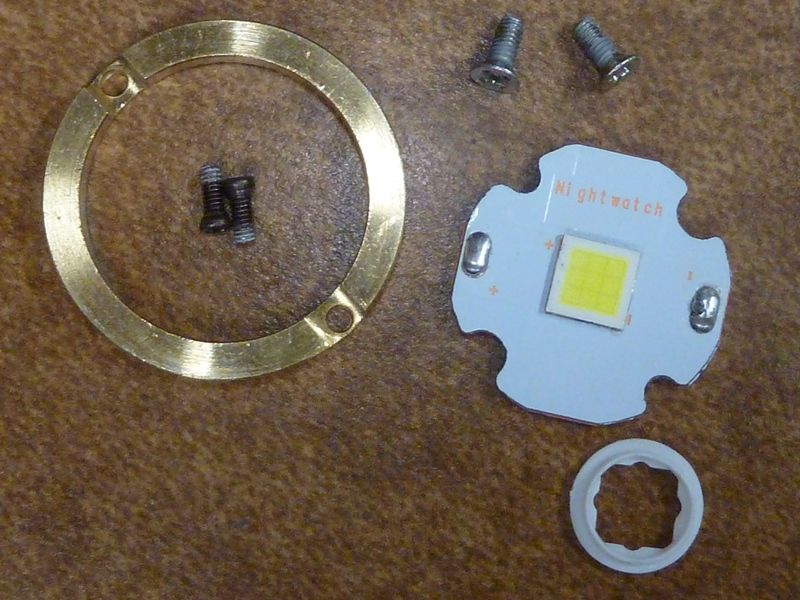
Main parts. Tailcap shown with the 20 AWG bypass I added:
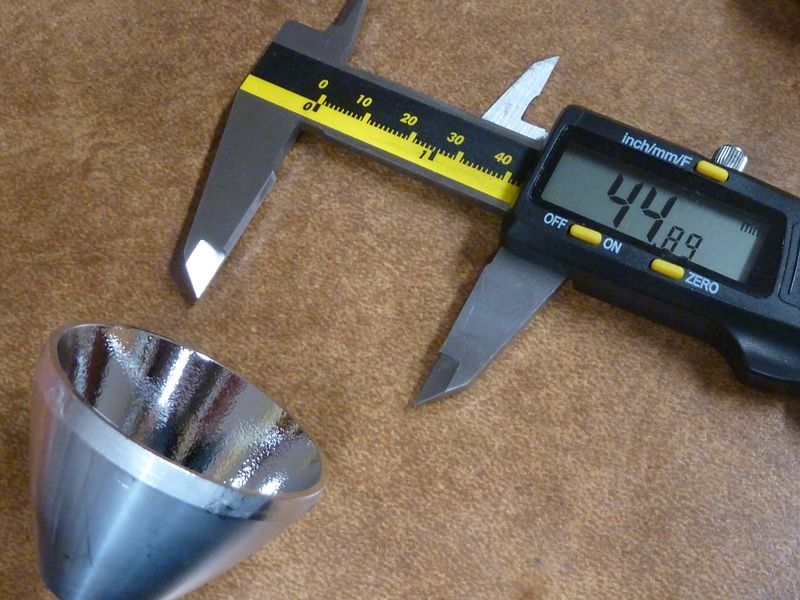
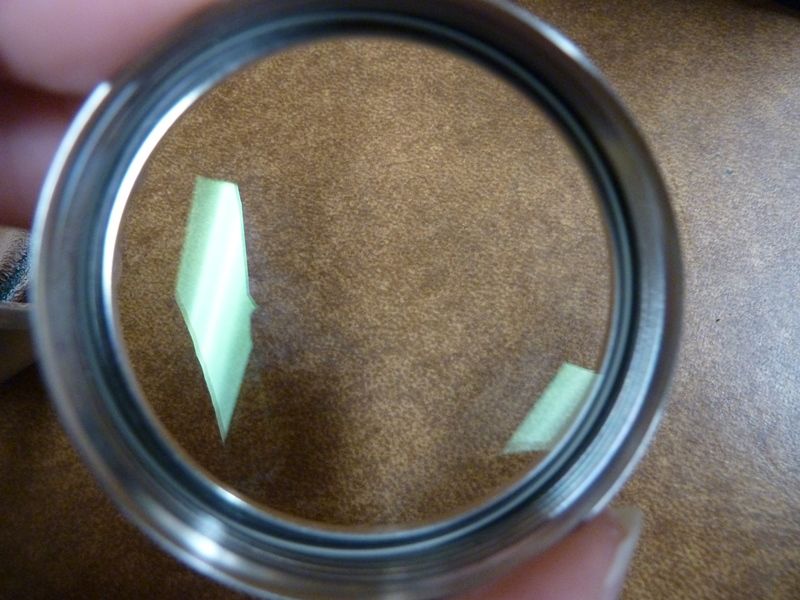
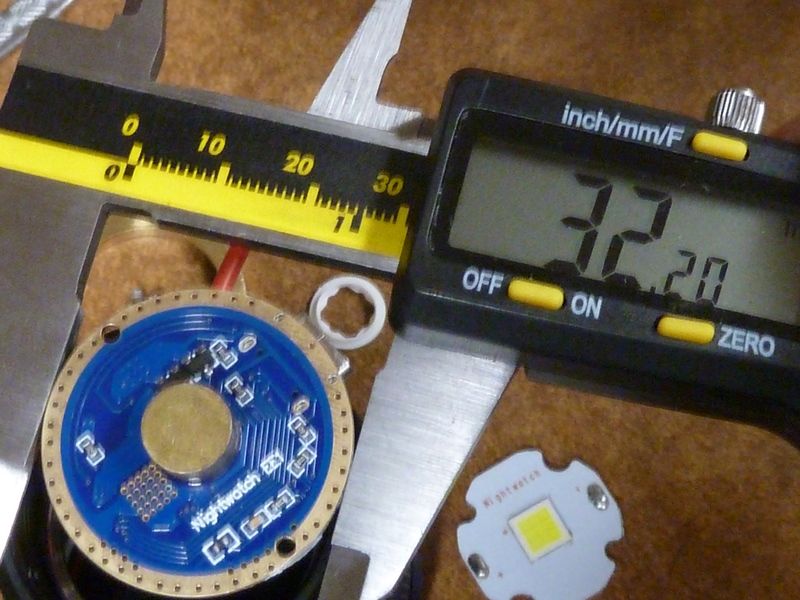
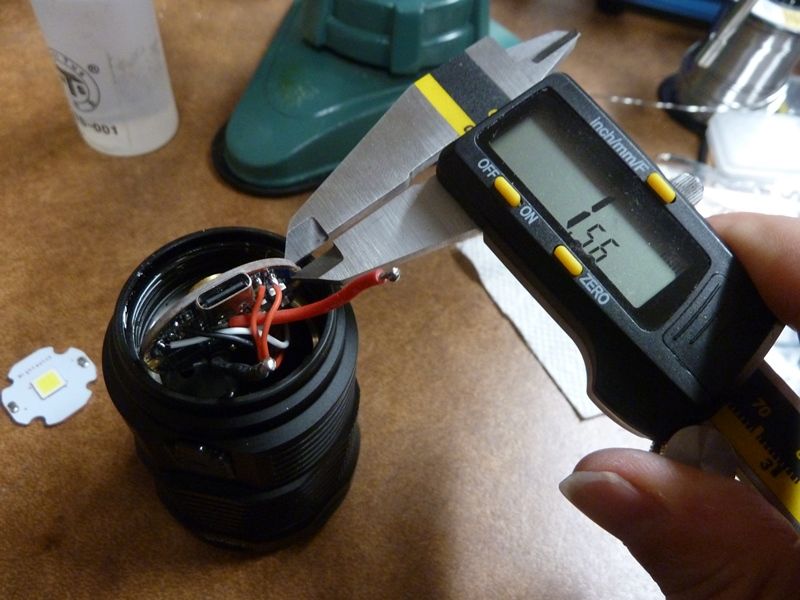
Reflector dimensions:
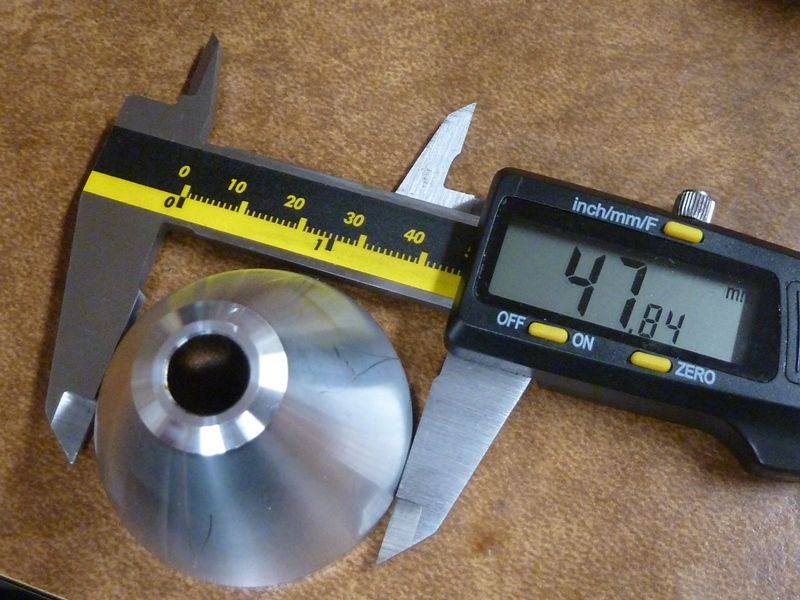
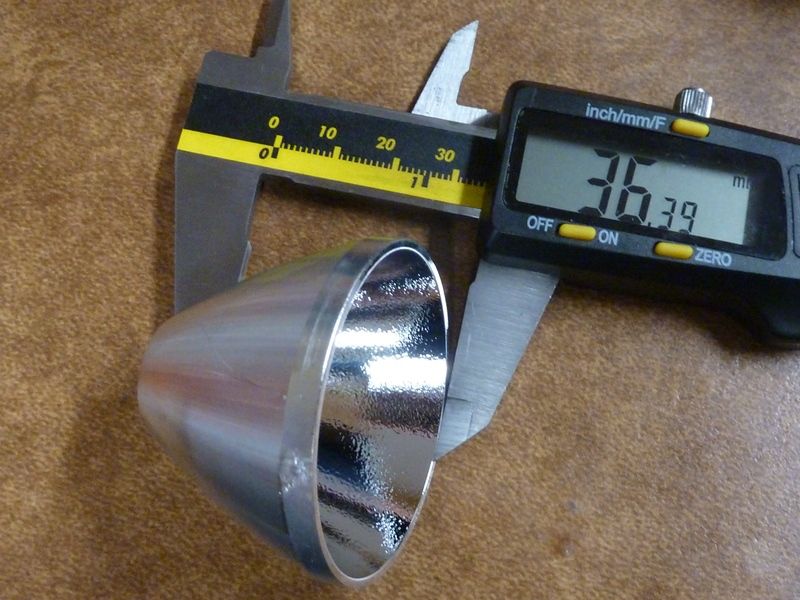
I.D. was taken as shown on the gauge:
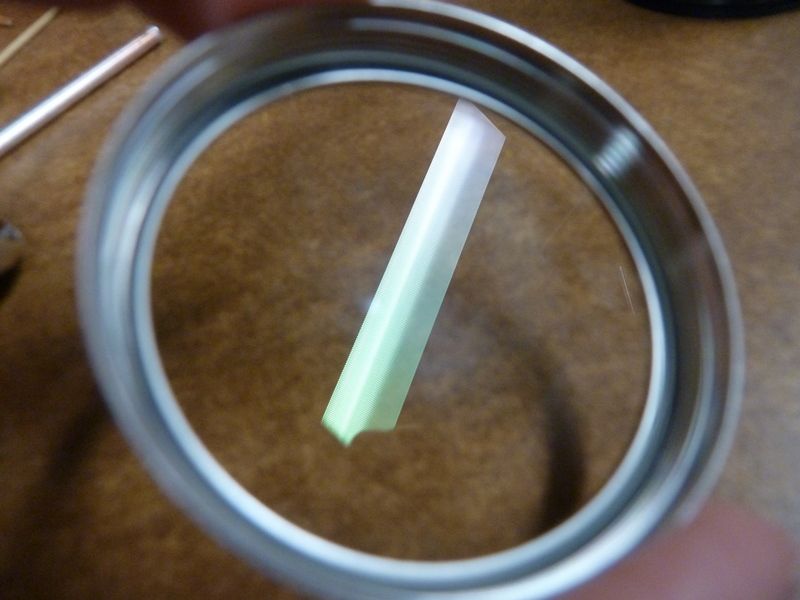
Here you can notice green in the AR reflection. It is a green AR, the preferred color to cut down on green in the beam:
A nice job on the soldering of the LED wires, but here you can see the excess thermal grease:
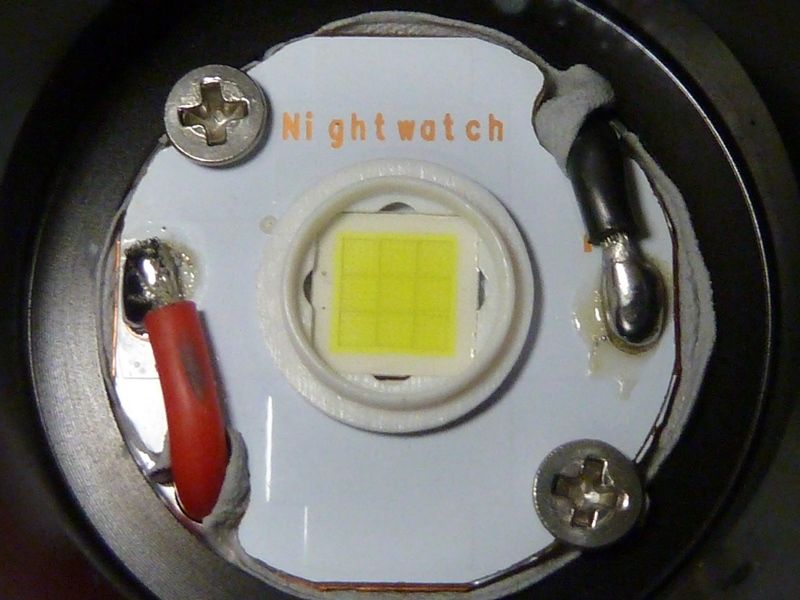
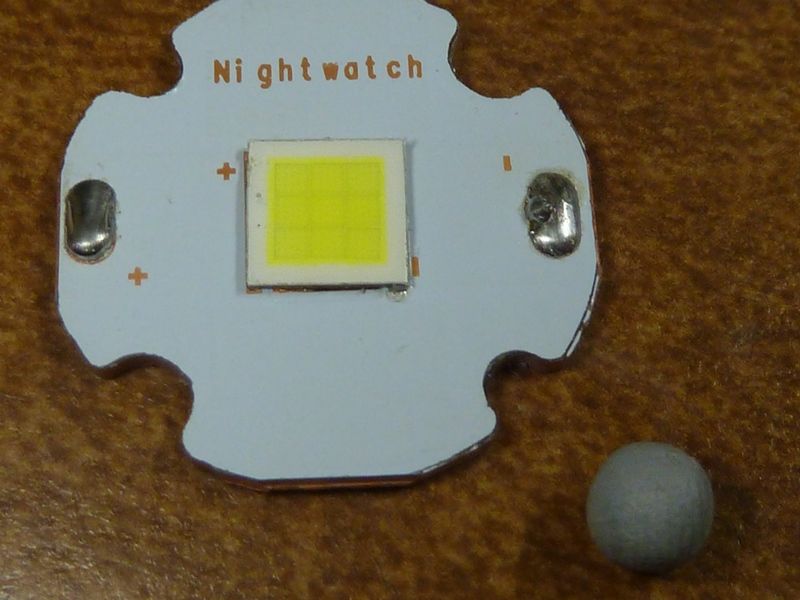
With some of the extra grease removed, close-up of the SFN55.2 LED:

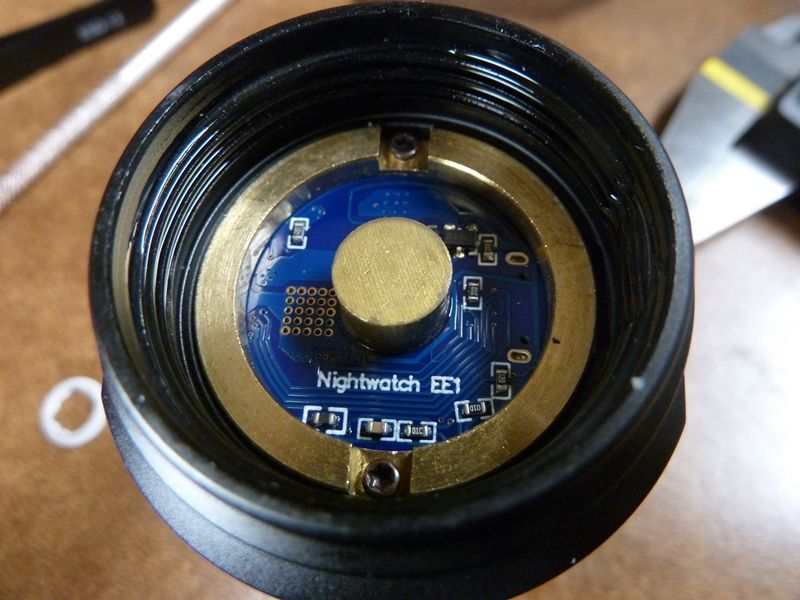
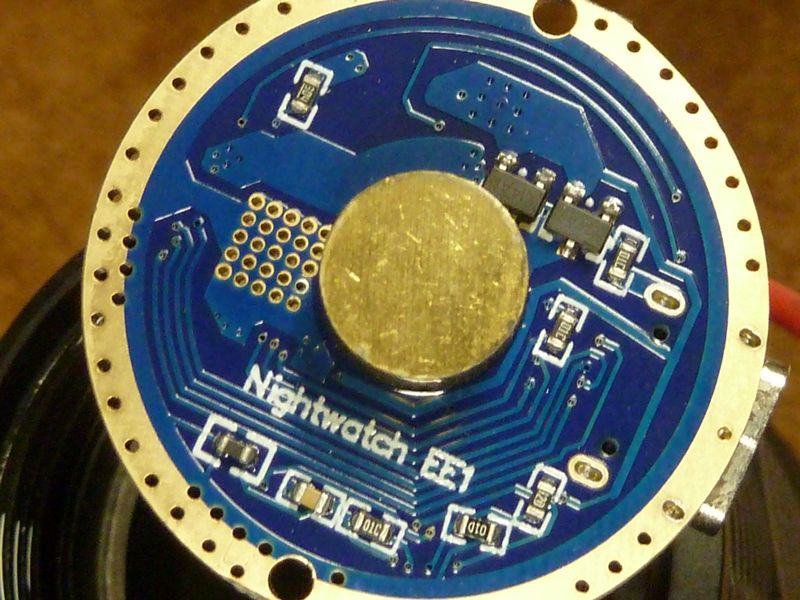
Driver backside, held in by a substantial brass retaining ring, and showing the raised brass contact. Never saw one this big in height before:
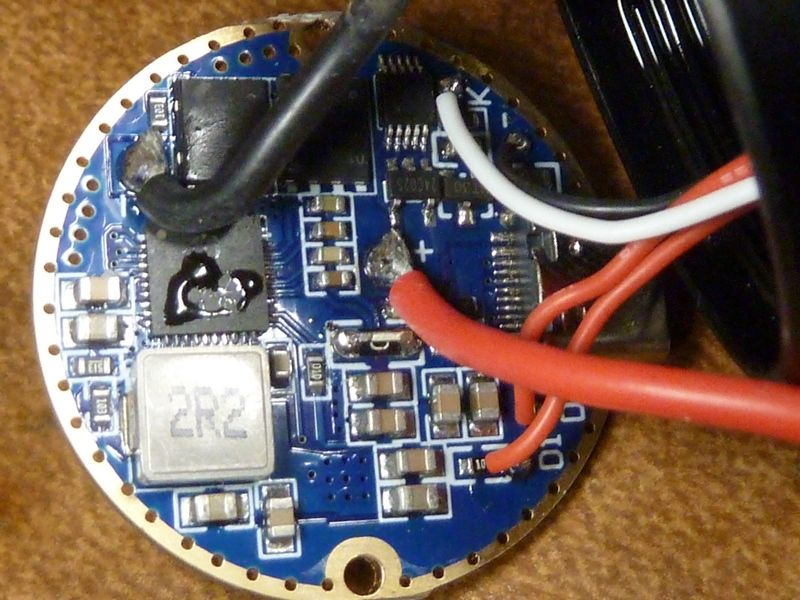
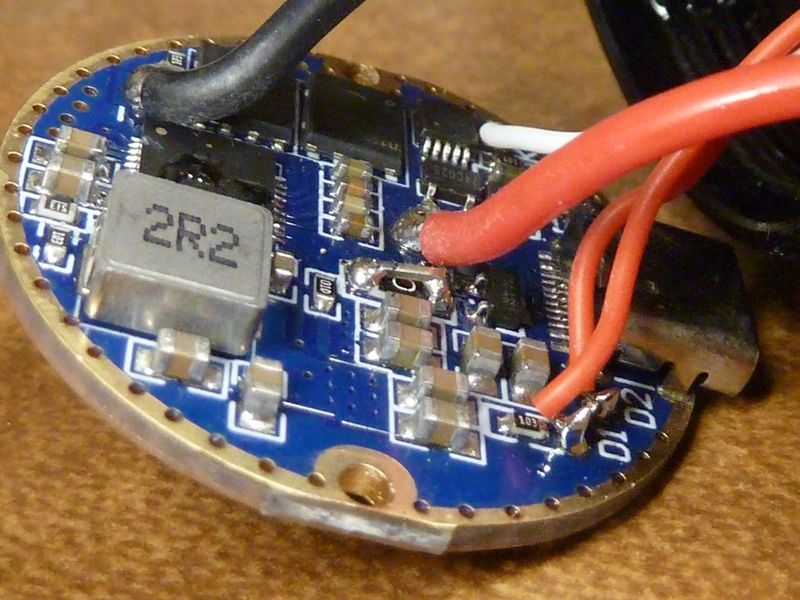
Driver details - driver circuitry is using 2 large FET's in parallel. The charging circuitry is more involved than the LED driver portion:
The MCPCB mount is clean with no noticeable burrs or contaminants, but the grease is a bit over done:
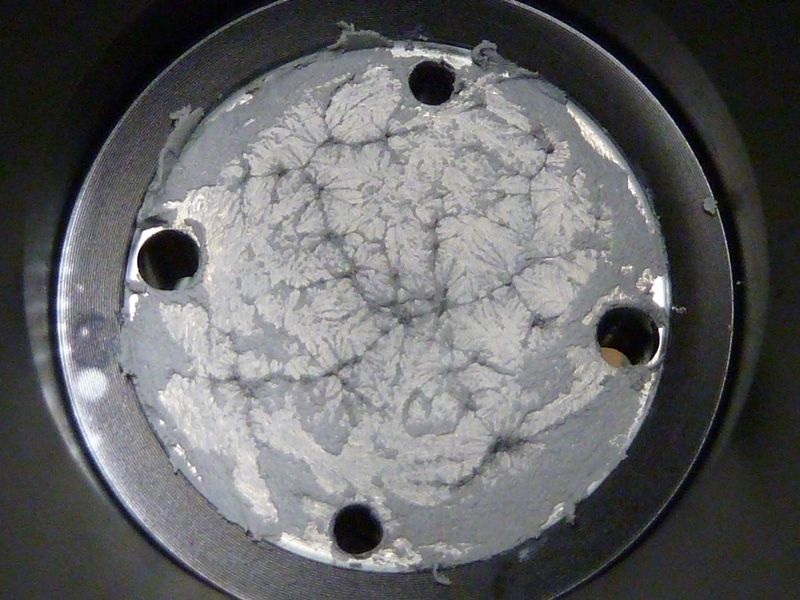
The grease is more like sill putty consistency. It's either dried out or comes this way, not sure. I've seen this type used before, but very different from Arctic Silver or my preferred grease MX-4. I would use probably 1/4 of the amount used here:
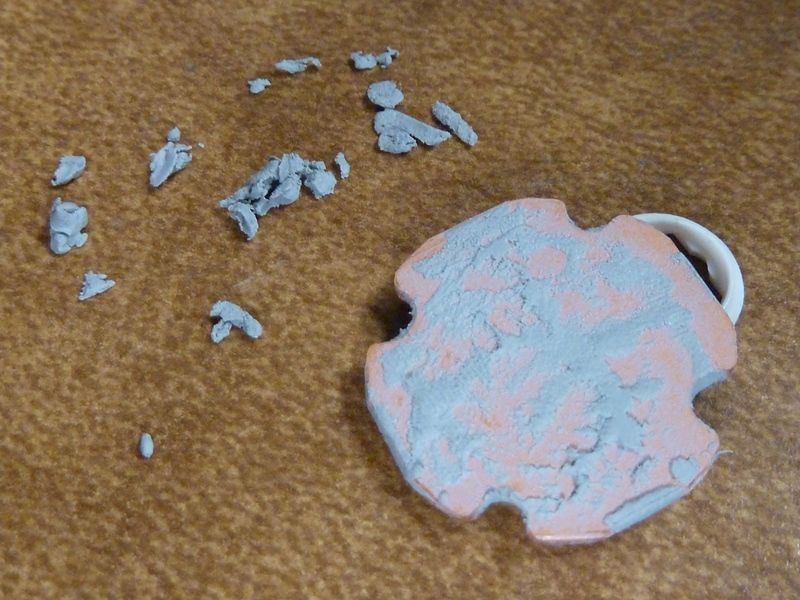
You can actually roll the stuff up, and the ball was made from all the extra, not what came off the surfaces:
The chunky driver retainer ring is held in place by 2 Torx size T6H screws, while the MCPCB is held down and in position by 2 countersunk flat head screws:
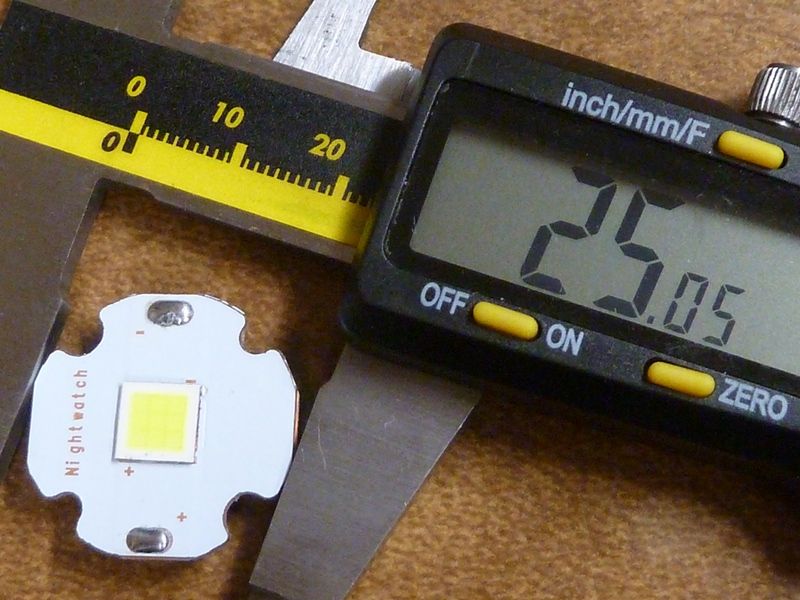
Dimensions of the MCPCB:
Driver dimensions:
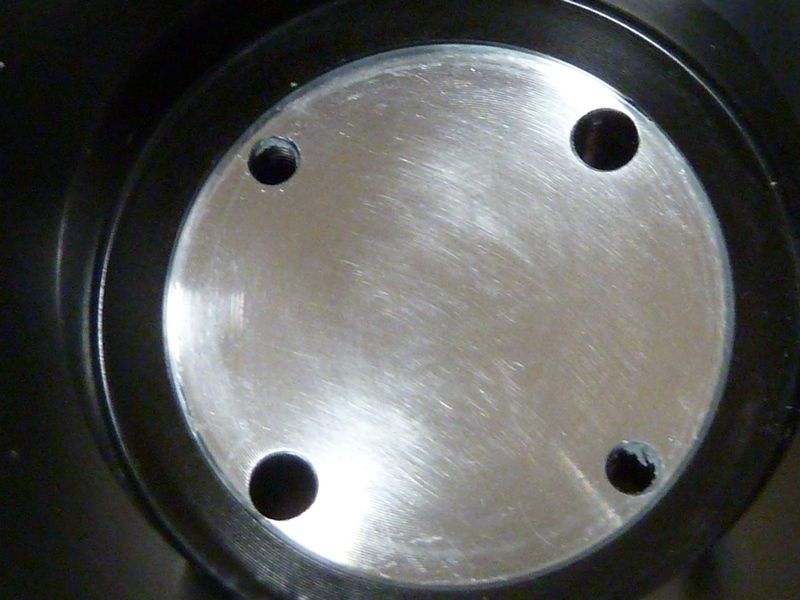
The MCPCB was clean of burrs, solder splashes, or any other debri -- stuff often found in teardowns. This is though after my sanding with 2000 GRIT paper, but didn't start with any rougher grade. It's not perfectly flat, as indicated by the marks in the middle but the 2000 GRIT did take some top off those marks, so figured it was good enough to go with:
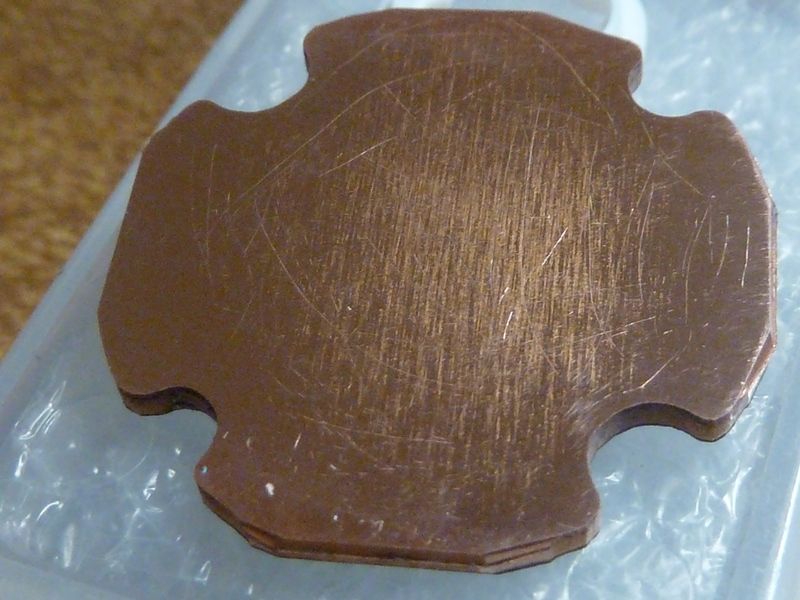
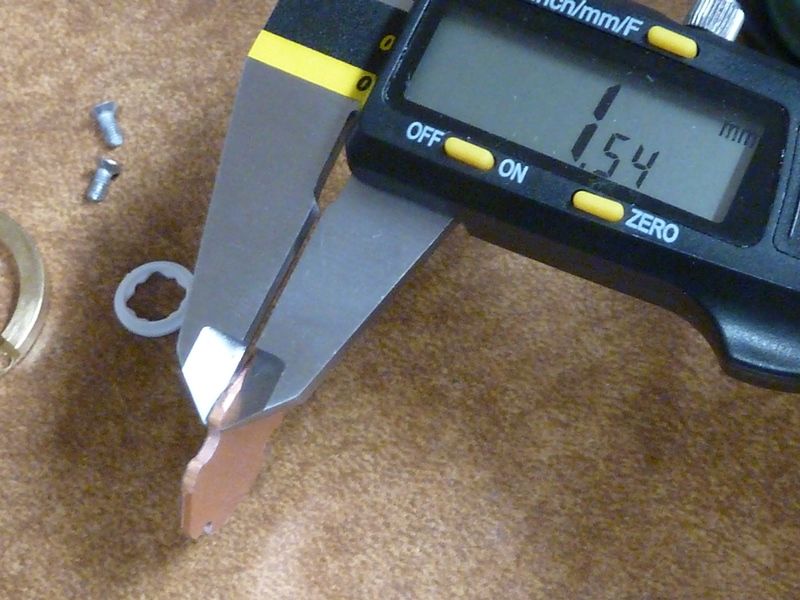
This surface was sanded at 1000 then 2000 GRIT paper. There were circular machine marks but they were very light. I did the sanding since I had it all apart anyway, and after the 2000 GRIT, it's almost a mirror finish. The noticeable scratch marks are very fine - you can't feel them, and the machine marks are all gone. This shelf is 9-10 mm thick! About the thickest shelf I've seen, which is common in the Nightwatch IRA series:
The switch bezel is SS with opposing notches -- 2 aspects much preferred for easy access:
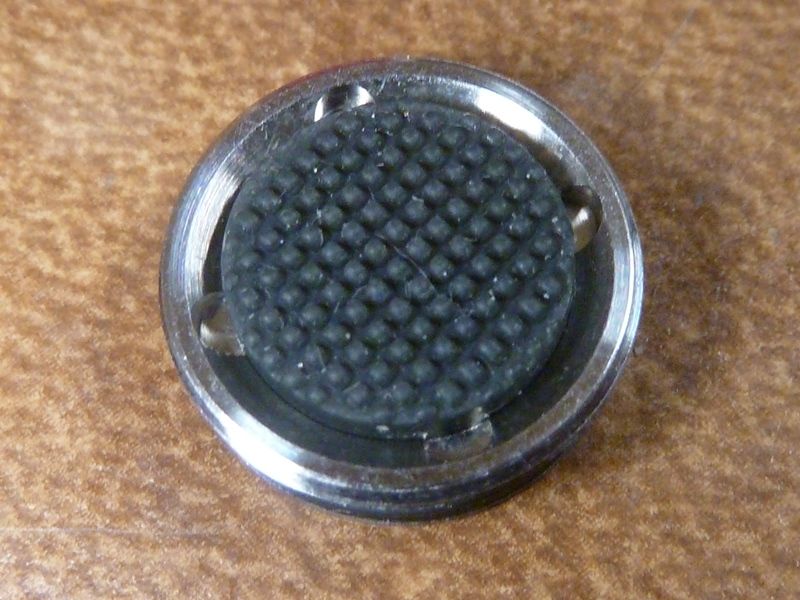
I noticed a slight gap between the boot and switch so added 2 layers of tape. Much better feel now:


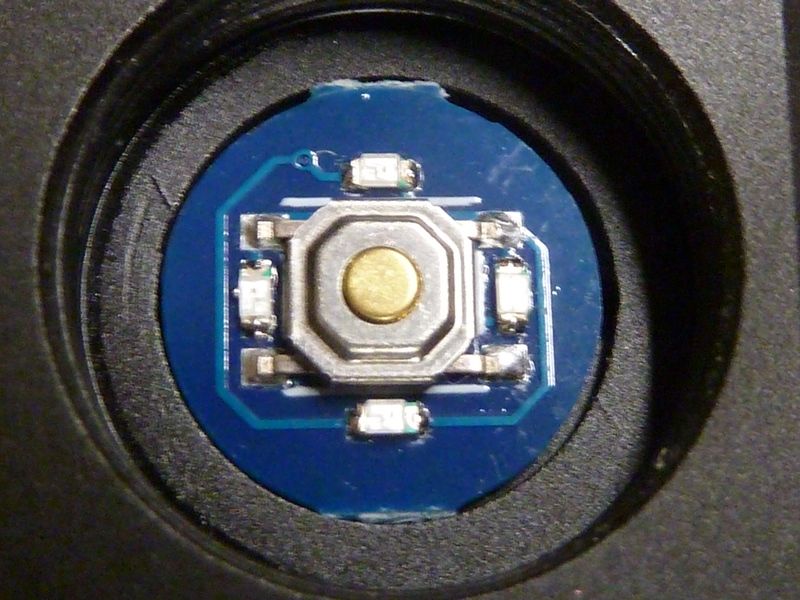
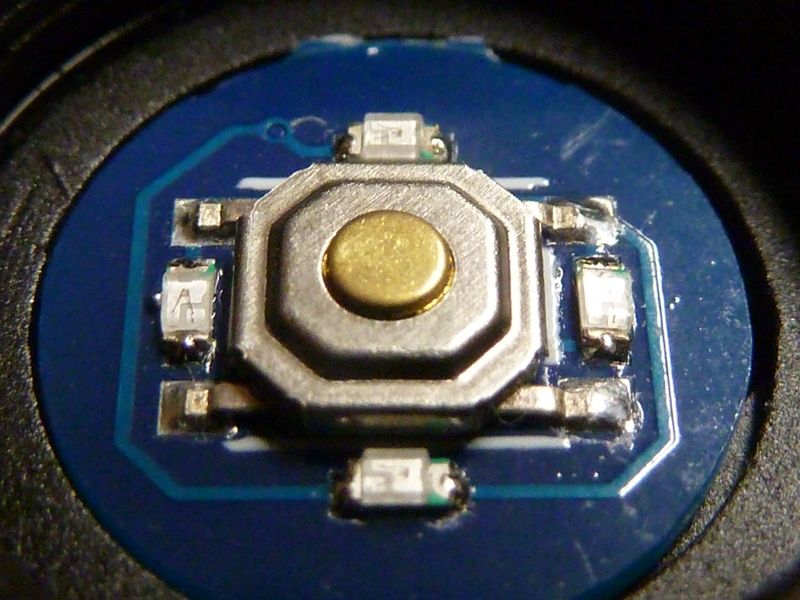
Nice payout of the LED's, in tight with the switch:
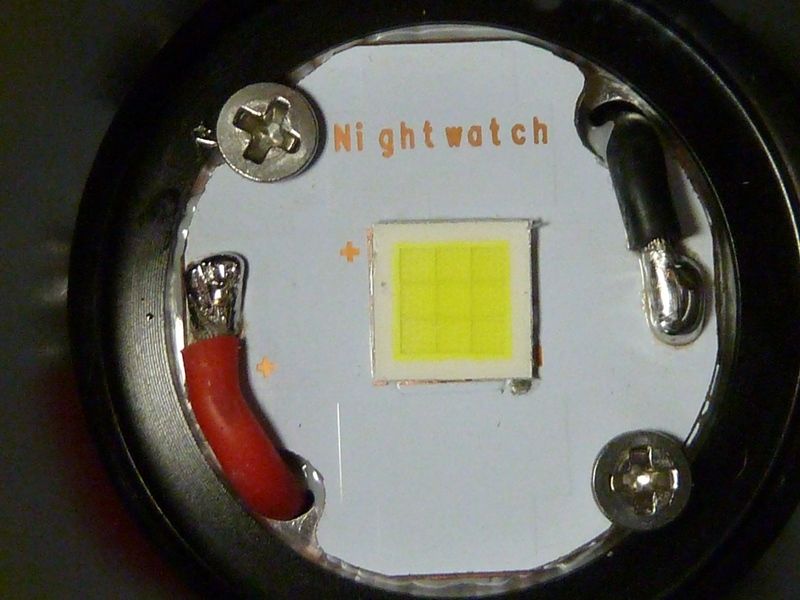
After MX-4 and assembly, a bit neater than stock. There's enough MX-4 to make it out the edges, but not too much to make a mess. Sometimes I'll use a small cut of paper towel soaked in isop. alcohol held by tweezers to wipe out excess from around the wires, but didn't need to in this case.
You might notice the LED here isn't perfectly centered on the pads. It's slight but noticeable. I looked at this carefully and didn't think it merited a reflow. I could have tried simply re-heating to better center it, but a full heating of a LED I thought always has some effect on the LED, either lifetime or max output, so not sure if the risk is worth whatever gain there might be:
Output Measurements
Tests were performed with the stock 26800 cell, charged to 4.20V.

Parasitic Drain
Measured 745 uA which is a bit too high. It should be under 200 uA. This light has no switch LED, and typically for no LED's I would measures 20-40 uA. I would suspect the charging circuit as the source of the leak, since I've found a few other lights that have had high parasitic drain because of the charging circuit. It's not as bad as some I've found that drain as much as 2500-5000 uA (4-5 mA), but it still shouldn't be this high.
Conclusion
This is not a complete review. Nick has a very comprehensive, excellent review on this light with the SFN55.2 option here: https://1lumen.com/review/nightwatch-ni03-valkyrie/, covering the UI, and the USB-C charging/power bank, discharge curves, measurements, and more. I very much recommend checking out his review.
The support of the 26800 cell is both a pro and con - great having this cell option but it leaves no other cell options.
It has a simple UI - lo/med/hi in rotation by 1C w/memory, 2C to turbo from ON/OFF, 3C to strobe from ON/OFF, 4C to lockout from ON/OFF. No access to a moon or low mode direct from OFF. Would be nice to have a 1H from OFF go direct to lo.
Pros
- quality host shell, robust thermal properties
- SFN55.2 LED - beam is consistent color, about as bright as a XHP70.2 but with better throw
- designed for the 26800 cell - high performing, high capacity
- nice SS bezel and SS button retainer
- thick 9-10 mm shelf for the MCPCB
- high amp output, direct FET driven at least on turbo
- PD capable for both charging and as a power bank
- fast PWM
Cons
- overstated lumens and throw specs
- no manual included, simple white box as shipped
- no manufacturer website or manufacturer retail presence
- designed for the 26800 cell, leaving no other battery option
- the simple UI, works but like to see access to lo from OFF (ex: 1H)
- LED not precisely centered
- too much thermal grease applied, and it's too dry, too thick
- high parasitic drain, but still under 1 mA (0.7 mA)