Got my SFT-40 LED in the mail from Convoy, and put it in the Mezzol X6 flashlight that I bought off AliExpress, along with a FET driver drawing 4.3A at the tail.
I recently put a YD5050 LED into my EagleEye X6-SE which is basically the same light. Here they are together.
I did notice some minor scratches on my D4(v1) glass lens.
So i searched how to remove the AR coating and tried it with succes!
Weakened the AR coating by letting it soak into IPA for 30 minutes and then polishing it with silver polish.
Now it looks like new! So after having success i did remove the AR coating of all my Emisar and Noctigons
Hmmm. I have one with a scratch I don’t like the appearance of.
I don’t have any IPA on hand though.
Do you think a stout or a pilsner would do the job?
Indeed, IPA works out well for this purpose. I learnt it the hard way a couple of years ago, after cleaning my mobile phones’s camera lense too often with IPA.
Nitecore Tini emitter swap looks daunting but it’s pretty simple reflow procedure using SMD Hot air gun ( I used cheap CO-Z brand). I heated the surrounding area avoiding direct heat on the led. The trickiest part for me is disassembly/reassembly. It needs Hex 0.9 bit for 6 screws.
Components are pushed out on the USB port hole side in the plastic housing. The white stuff is thermal paste on small heatspreader.
Brynnl S11 just needs to be pushed/pulled upwards from the body. I used the usb port. The led could be reflowed with heat gun but I de-soldered the pcb and used a hot place
Not a flashlight, but related. Had to open one of my lab power supplies (Korad KA3005P) because the rotary encoder was faulty. That power supply has a very nice modular design. To access the encoder I removed most of the (stacked) front boards.
After repairing and testing the encoder I’ve noticed that one of the carbon pads from the buttons was missing. Even worse, it’s from the on/off button! On a closer look it was obvious that it was always missing. They are molded in two steps and the pad got squished. A wonder that it worked all the time!
Instead of trying to fix it by attaching a new carbon pad with silicone glue I just swapped the on/off and lock button (which I never use).
I have the exact same power supply and I’ve modded the fan to make it quiter.
- replaced with Noctua fan (didn’t make much difference when case was on, probably because of bad case airflow design)
- added a small electrolytic capacitor across the fan to remove the clicking (from the nasty PWM)
added a 45°C thermal switch inline with the fan so it’ll only turn on when the heatsink starts to get hot (which means the fan is off most of the time when there’s not much load, which is how I usually use it)
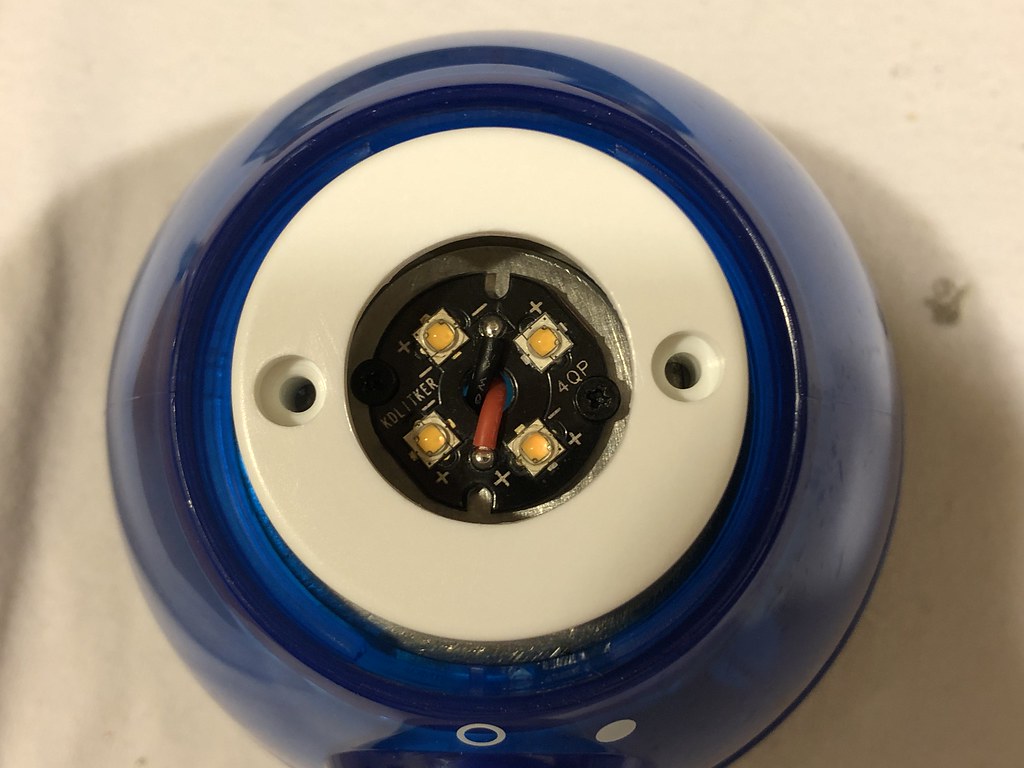
I modified an old incandescent 4 AA lantern with some leftover flashlight parts.
First I knew I had to give it a heatsink, so I found the largest thickest washer that fit perfectly into the lantern. I then stacked 2 more washers on top of it to cover the washer hole, sanded them flat, and soldered them together using my electric skillet. I drilled 2 holes to screw down the MCPCB and re-sanded the top washer to make sure that it was flat. The heatsink weighed in at 1.7 ounces (48 grams).
I then bent the spring on a 17mm 1 amp 12 mode Convoy driver and screwed it onto one of the unused posts in the body of the lantern. I also replace the stock wires with 24 AWG.
The basic switch looked good since it has big contact points.
In order to cover the gap between the lantern diffuser and the LEDs, I repurposed the bulb holder. I removed the bulb holder column and cut a large hole in the base. Without the base there was a lot of annoying light escaping out below the diffuser.
When I screw the top of the lantern onto the body, the diffuser presses down on the bulb holder base which then keeps the heatsink in place.
The quad 2700K SST-20 LEDs driven at 1 amps produces plenty of light and the heatsink works well enough to keep the heat in check. I have another one of these lanterns and plan on doing something similar with some additional leftover parts.
Emitter swap on a Fenix HL23 aa headlamp. The stock xp-g wasn’t bad at all - maybe 4500-5000k and nice white tint, but the new sw45 is better
I used a heat gun to soften the glue in the bezel and pliers to remove it. Slight damage from the pliers but I don’t mind on this old light. I reflowed with the same heat gun using the residual solder from the original.
Turned out to be a 15 min mod. Like I said, the stock emitter wasn’t bad at all so I don’t regret not doing this years ago.
That’s a nice DIY project. And much so making do with what you had at hand. I like your improvising and designing around what is a cheap lantern. I believe these types of projects are underrated but have their challenges.
So a couple of questions:
1- How did you set up the switch to toggle with that rotary knob?
2- What are you using as battery, the built-in 3 or 4 cell AA or did you mod that too?
I’ve picked up a few of these lanterns at the thrift store and was meaning to make something out of them. This got me thinking about some ideas.