I love the 1D builds, but every once in a while you got to stretch the limits and go for the big guns.
This will be an SST-90 Aspheric in a 4D Maglite, with a shower head.
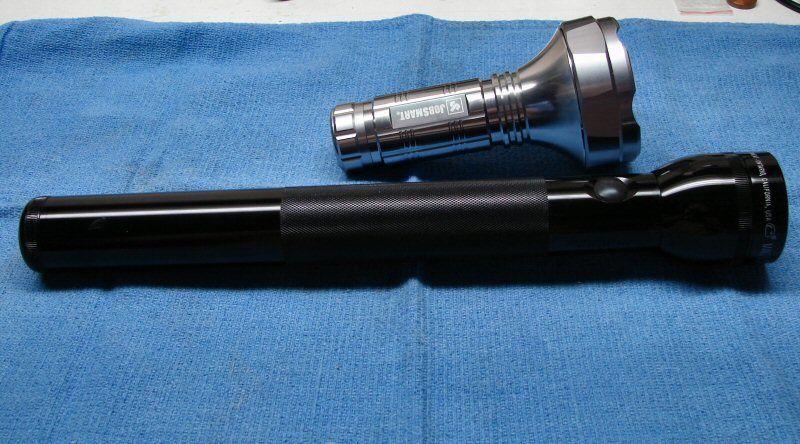
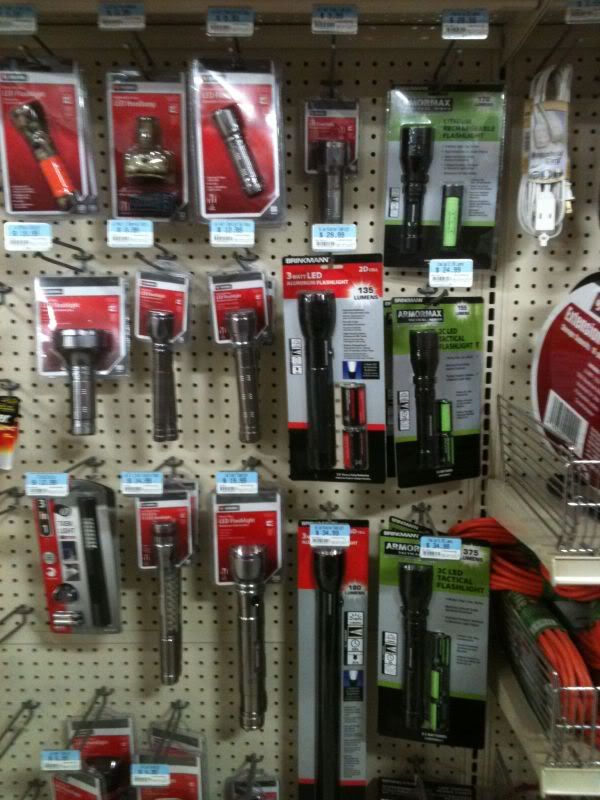
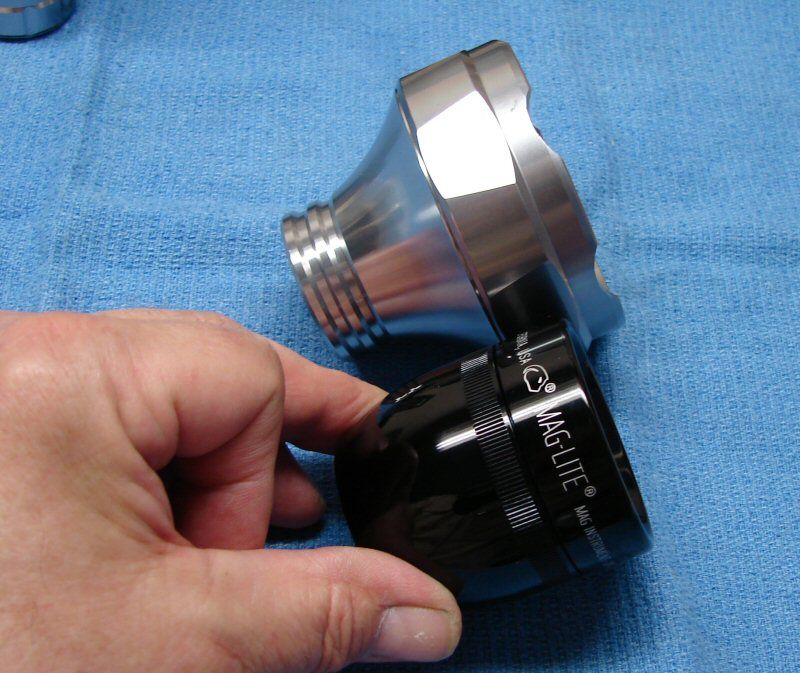
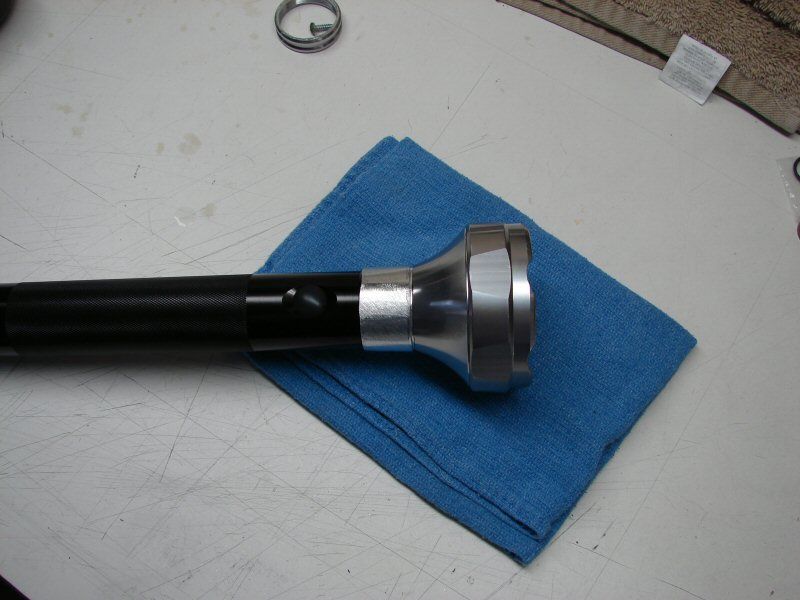
The 4D Maglite and the Jobsmart shower head light. I will be using parts of both.
Shower head will hold the large aspheric lens.
I will just be using the head on the Jobsmart light and modifying to make it work with a 2D.
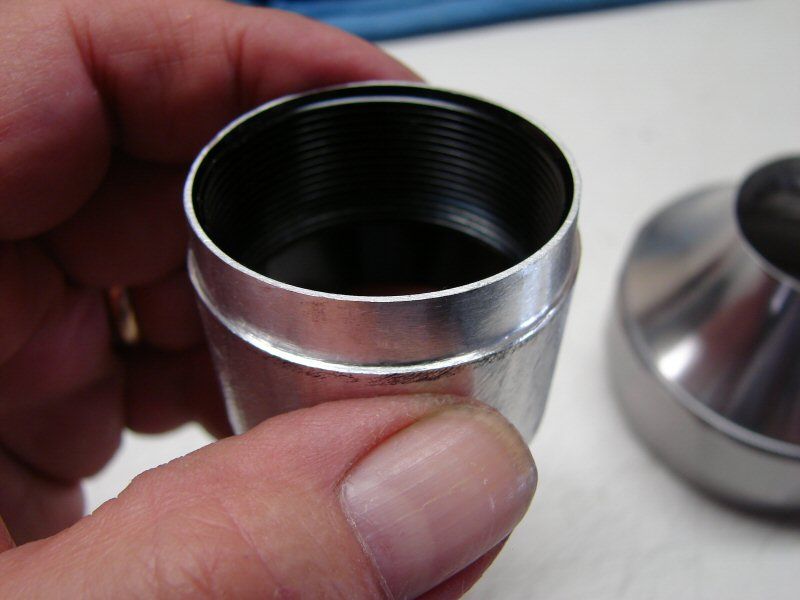
I need to keep the threads of the maglite head, so there will be a bunch of cutting, fitting and modding, to make the threads of the Maglite fit into the head of the Jobsmart light. Oh Boy!
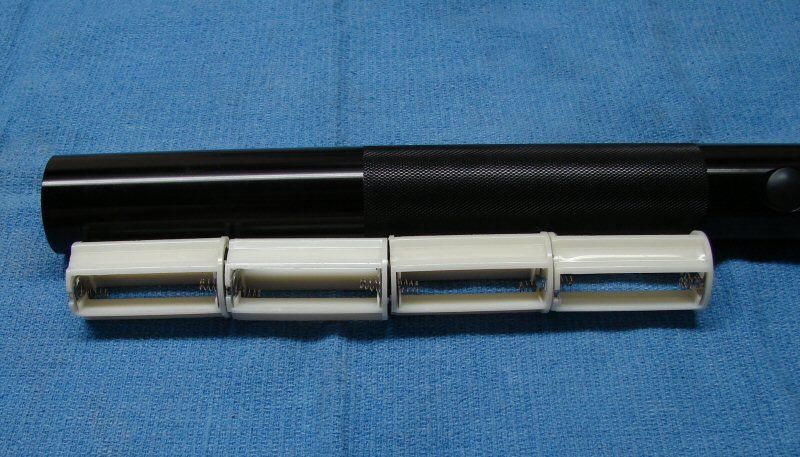
I will be using these battery holders. When I'm done, they will be one holder and the AA batteries will be done in a 4S/3P array. 4series/3parallel. 4.8vdc/6000ma
Got to go to work, this is just a teaser, of course.
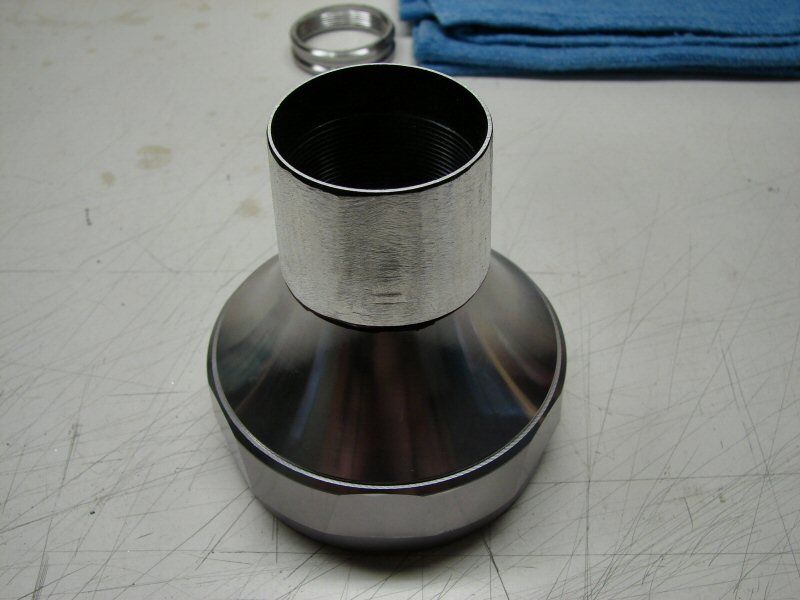
Ok, so I have to figure out how I'm going to put these two heads together, LOL. Two heads are better than one! Anyhow, the way I decided is to make the Maglite head into a threaded insert and put it into the end of the shower head.
Now, this is some undertaking for a hacksaw and files. I may be going a bit too far, past my abilities, but hell, all I can do is pass or fail, so here goes.
I only want the threaded section, so I cut the top part of the head off.
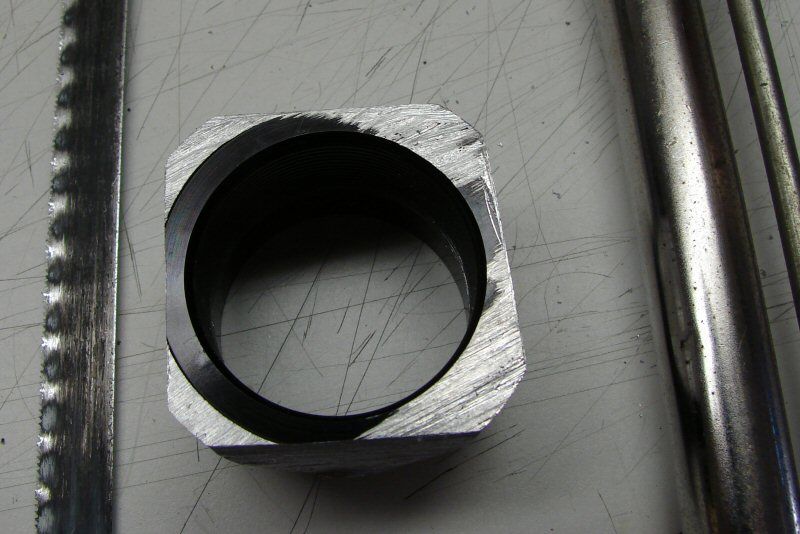
Then I cut four sides off the head and the next step will to be cut the four corners and thne cut eight corners, till I get it closer to a circle. Then it's file and dremel time.
That's all for now. It's getting hot again, as the warm air from the remnants of the hurricane is blowing in. Besides I'm tired after cutting those four sides.
--------------------------------------------------------------------------------
Ok, I've worked on the Maglite head some more. In the previous photo, I started cutting away the outside. In the next two, I have gotten to where I can work with a file.
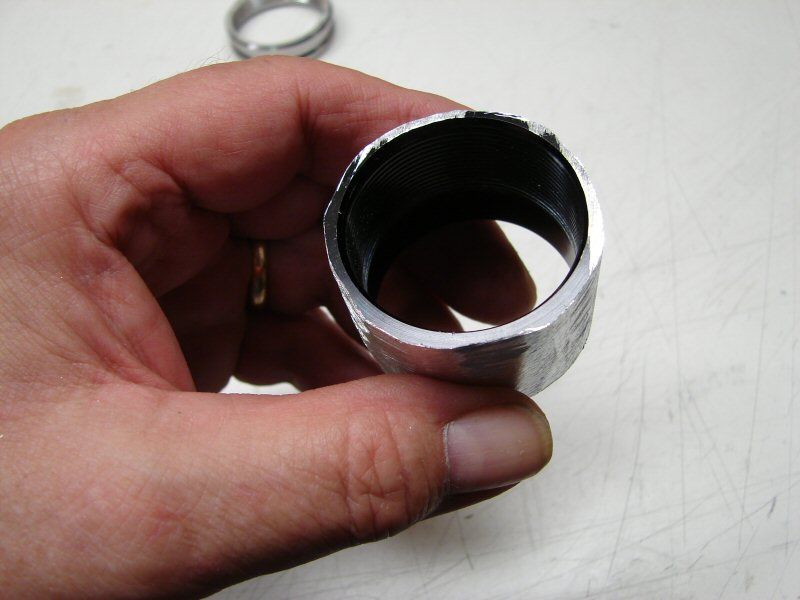
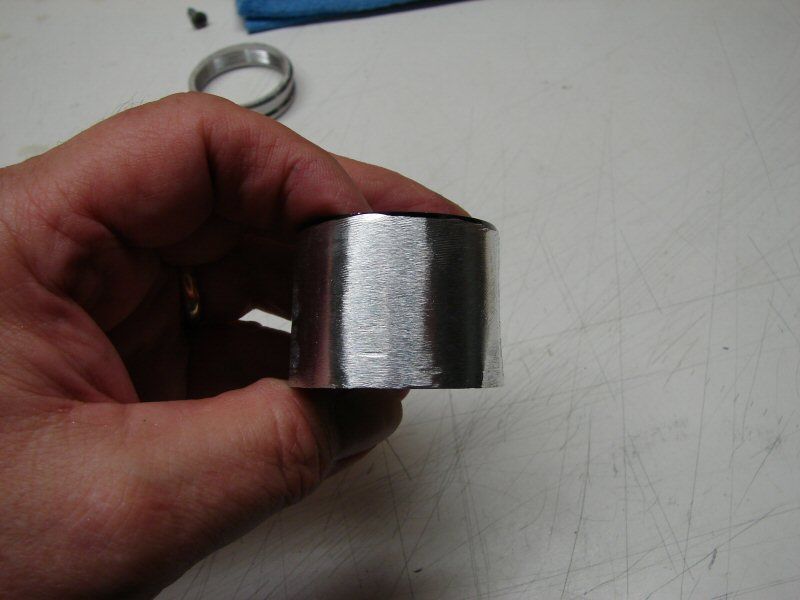
You can see I'm starting to get it rounded off on this side. I have a ways to go and it will never be completely round, so whatever will end up showing, I will probably have to paint with the textured paint, to disguise the slighty uneven surface.
------------------------------------------------------------------------------------------------------
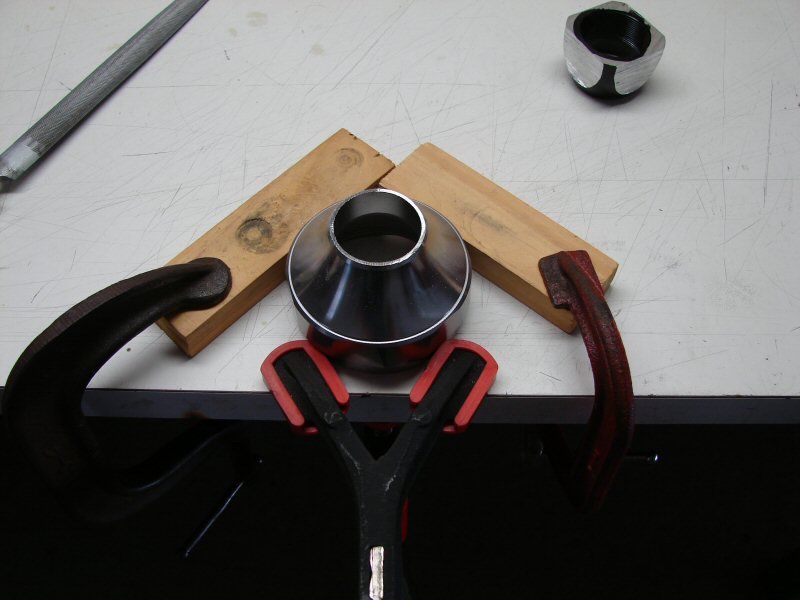
And, if you happen to have a small vise like me and have to work on a large part, here's a way to hold a part on the table top. Now I'm filing across the top edge, so it's not lifting the part up, so this clamp method does ok.
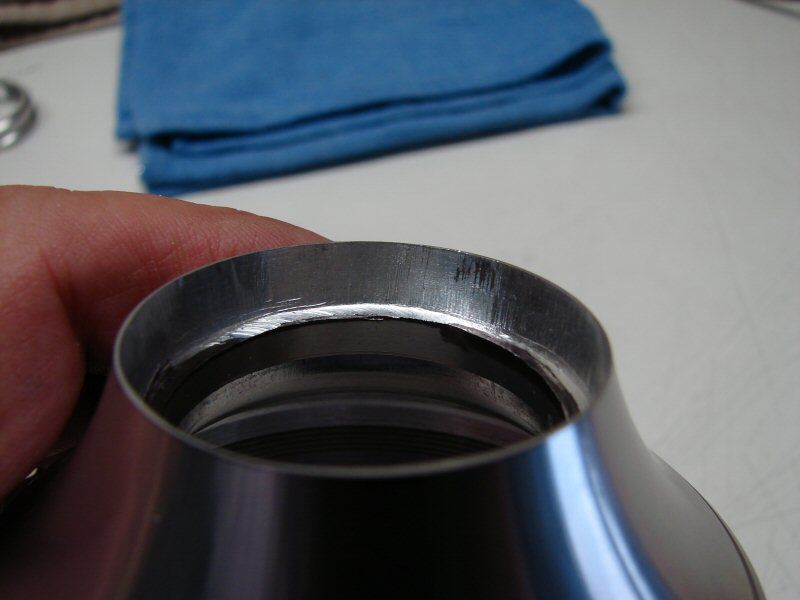
I had to remove part of the shower head (the small straight section), because it was too thin and I have to open this up, to let the mag threaded insert fit in. Things are going to be tight here, but there's more meat in the tapered section, so it should be ok.
-------------------------------------------------------------------------------------------------------
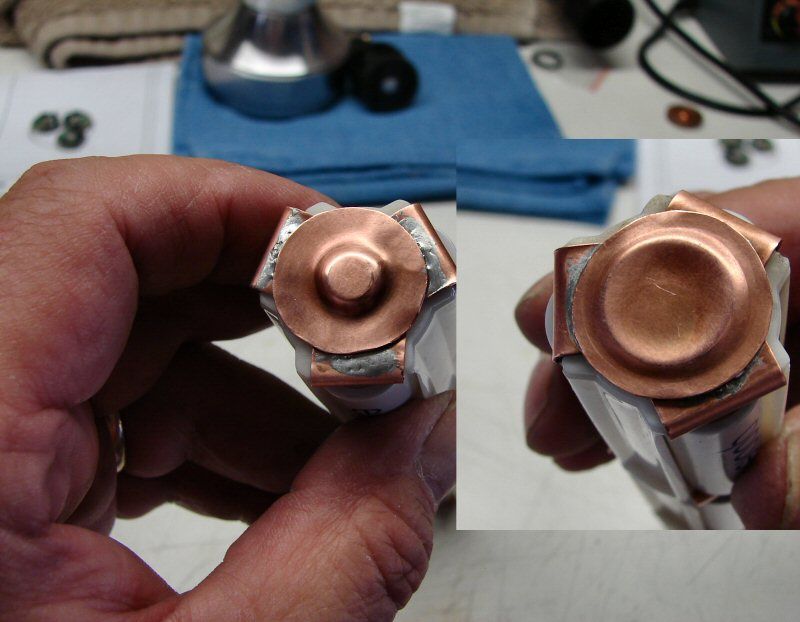
Well, I'm about at that point. The one where you continue, till something is ruined, or you give in and find someone with a lathe.
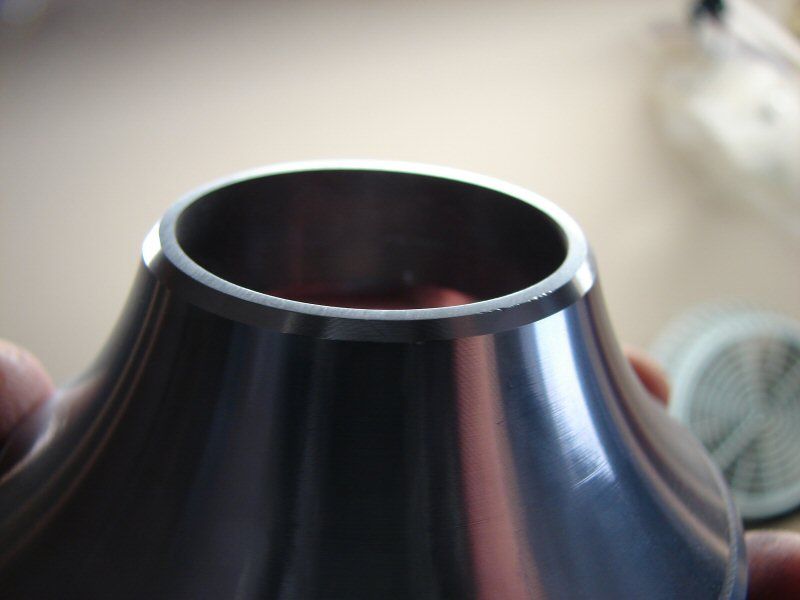
Here's the progress on turnung the Maglite head into an insert for the shower head.
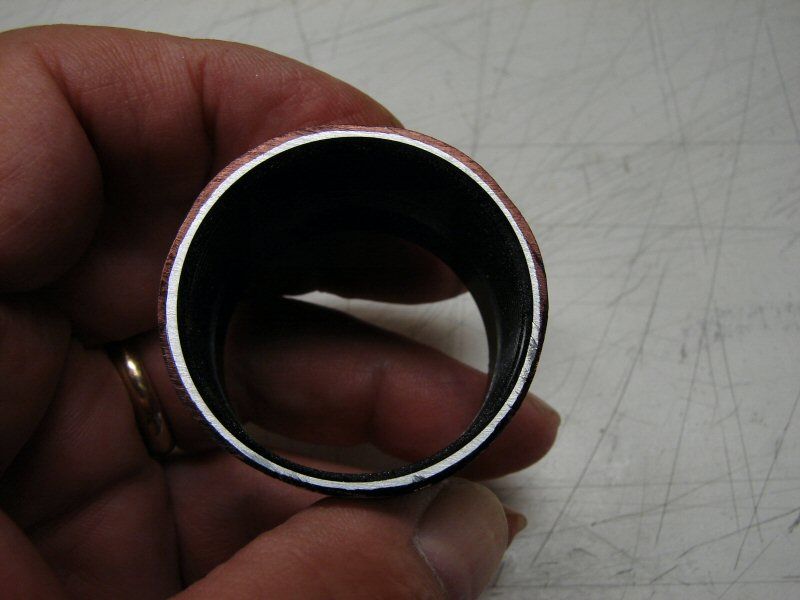
I've gotten a lot of material taken off and the black ring is what still needs to be taken off. The problem is that I am getting too thin. I am very concerned that it will fail, due to lack of strength. What I see is that a new threaded piece needs to be made (in place of this one). About 1/2" thick and then stepped down, to fit in the shower head.
If the insert were to be left as is it would be too big and a lot of material would have to be cut out in the shower head.
No matter what, I am getting to the point where I want things made more precise than "home made". You can make a lot of this "look good", but the precision done with lathes and mills is never there and I'm getting to where I want that precision. Hacks are hacks and they work, but I miss the precise fit and finish.
I'm going to have to think on this one for a little while. I can get the parts done in a shop or from several members in this or other forums, but then the already expensive light (SST90 right now will be like $120), will be Very expensive after machining costs (more like $200 total cost).
Dammed if you do, Dammed if you don't, LOL.
Later...
-------------------------------------------------------------------------------------------------------------------
Well, you know, after all the whining and bitching, I have to go finish what I started and if I can't.... Trashmaster takes over.
Trashmaster didn't have to appear, at least so far (the cape is in the laundry anyhow).
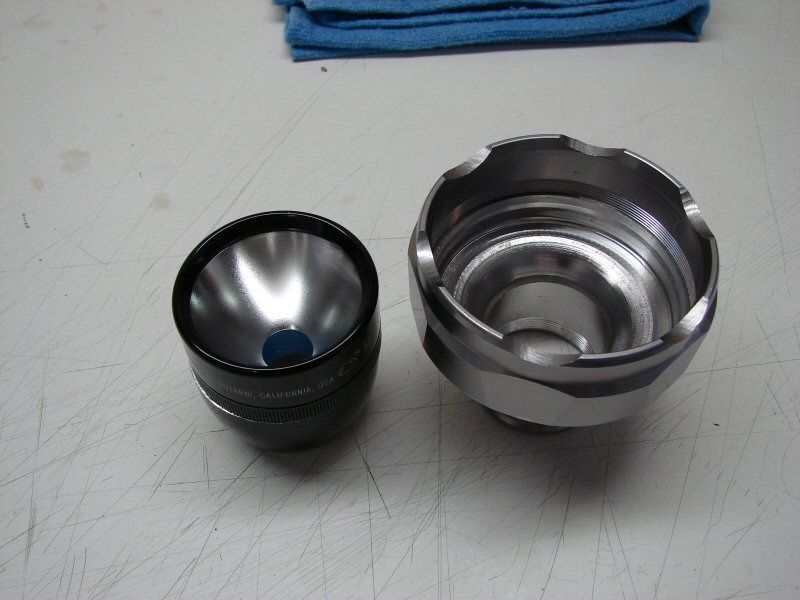
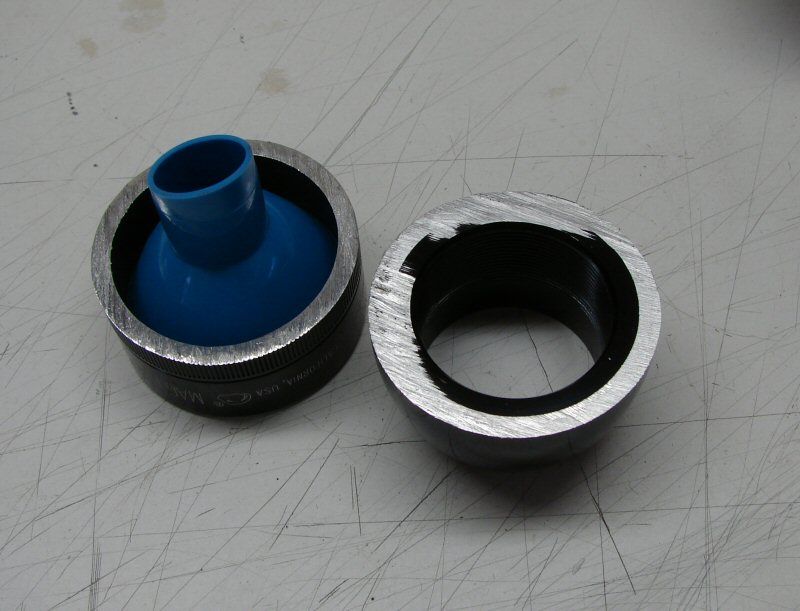
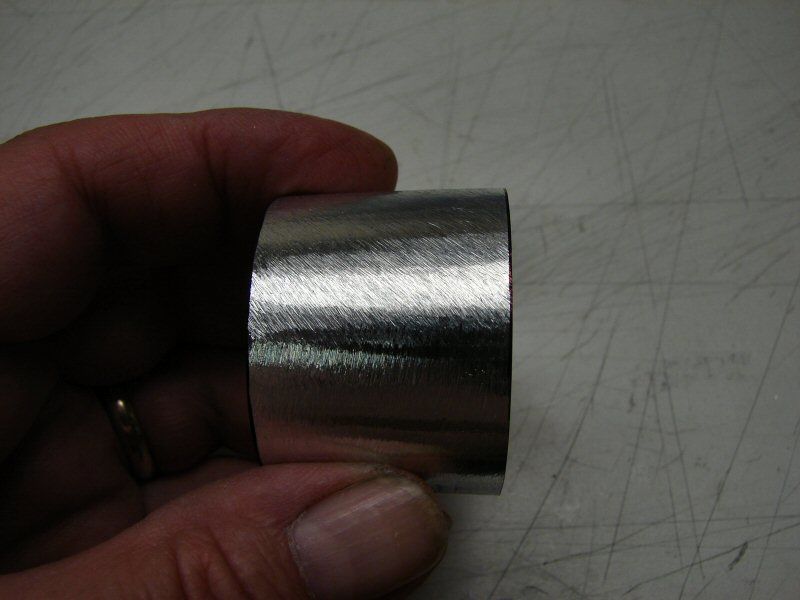
The insert is cut down, to go into the head.
The head is opened up, to take the insert.
One piece goes into the freezer and when it comes out, the other piece gets heated with a torch.
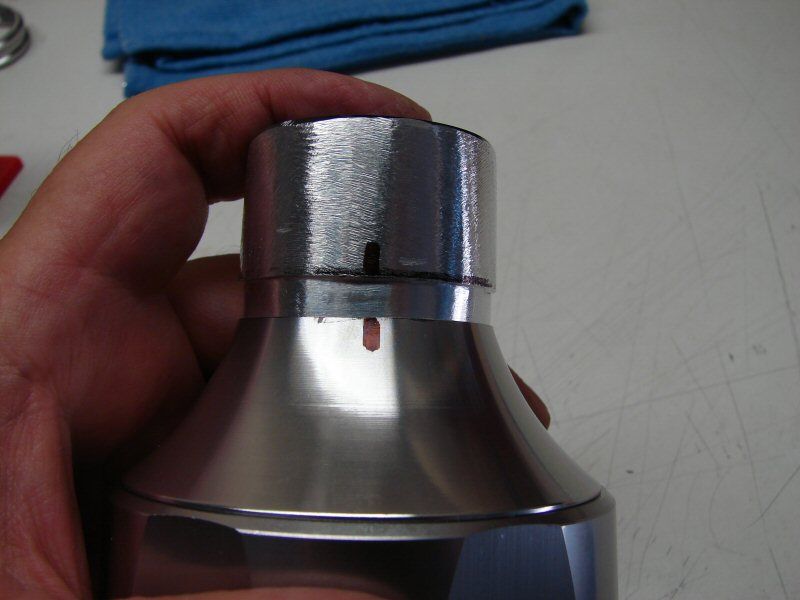
It works. Not very pretty at all and not perfectly straight, but it works. I'll figure out something for the cosmetic end of it. On to the rest of the build...
------------------------------------------------------------------------------------------------------------
I'm working on a couple little things right now. It's going to be 99 degrees today and 100 tomorrow, so I'm not going to be doing much. I figured it might cool off a little in September....... maybe October.
I'm going to be using three of the "105C" drivers in parallel, but I want them to lay flat in the Maglite tube, so I can heatsink them easier. You can't fit three 17mm drivers in a maglite tube...
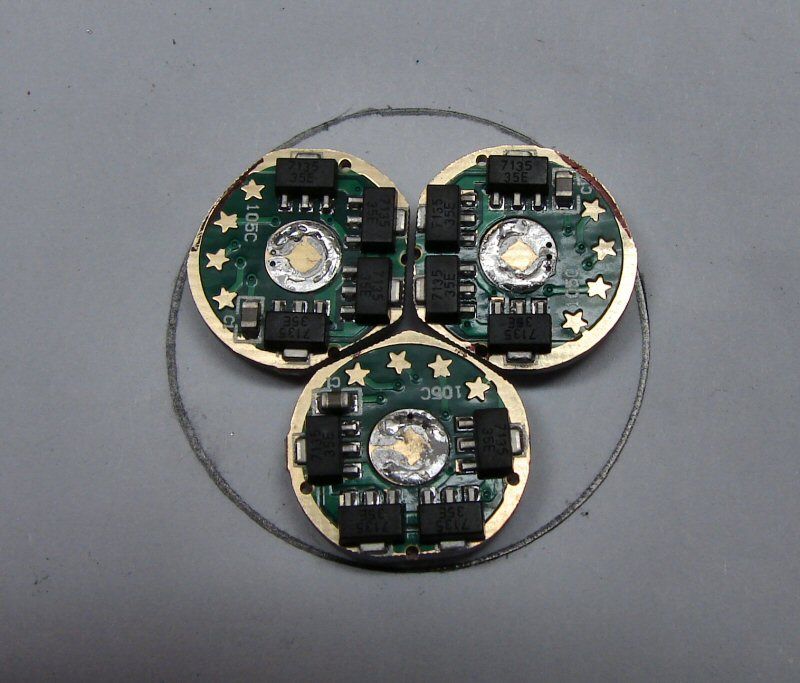
Well, I guess you can. They fit, I tested them out. Yes you have to do some filing, to remove material, but it can be done. It's all in where you file and how much. One of these will be Master and the others Slave, but in parallel output to the SST-90, so I can get the amps needed. I will add one 7135 chip to each driver. Might as well push the SST-90 a little...
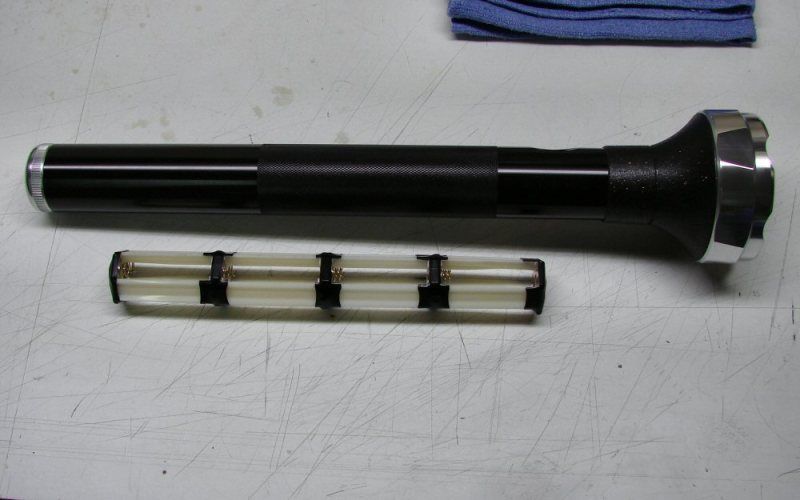
I'm also working on the battery holders. Remember, I'm using four of the 3XAA holders, to get 4S/3P.
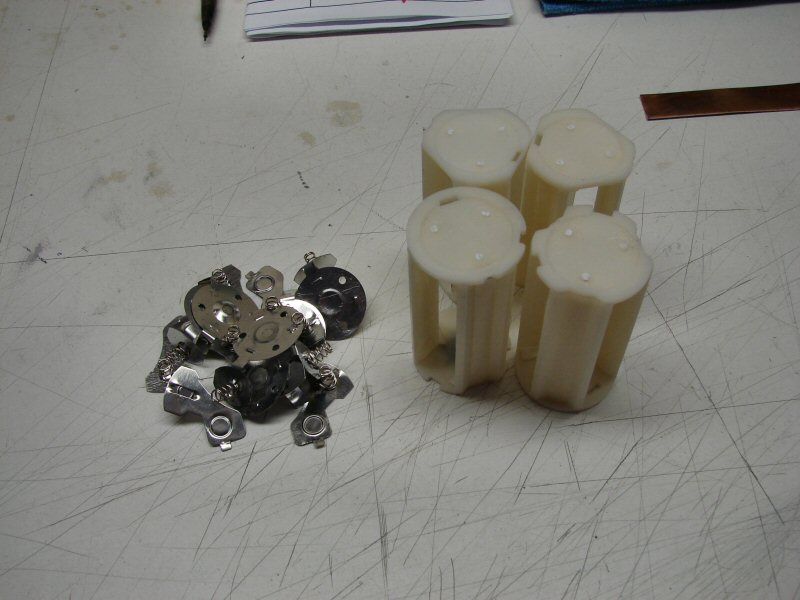
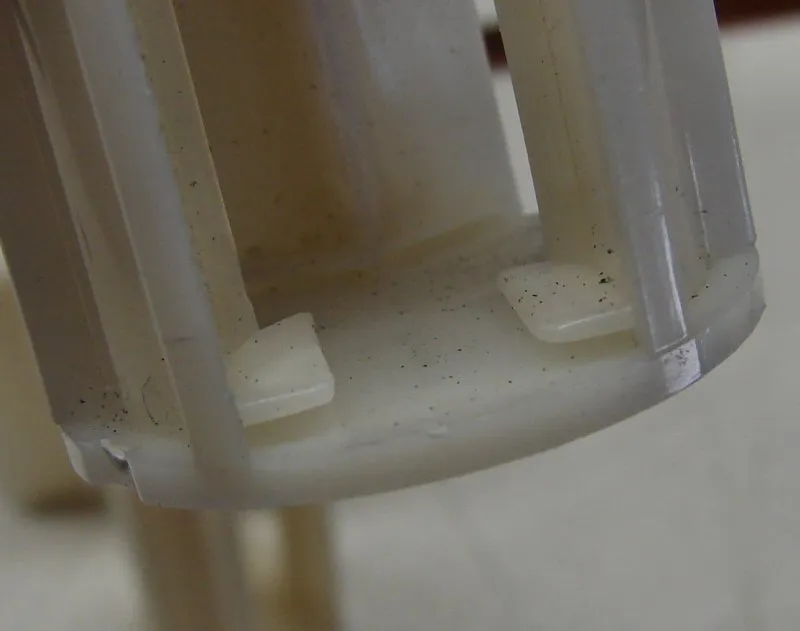
Here, I have removed all of the stock metal plates.
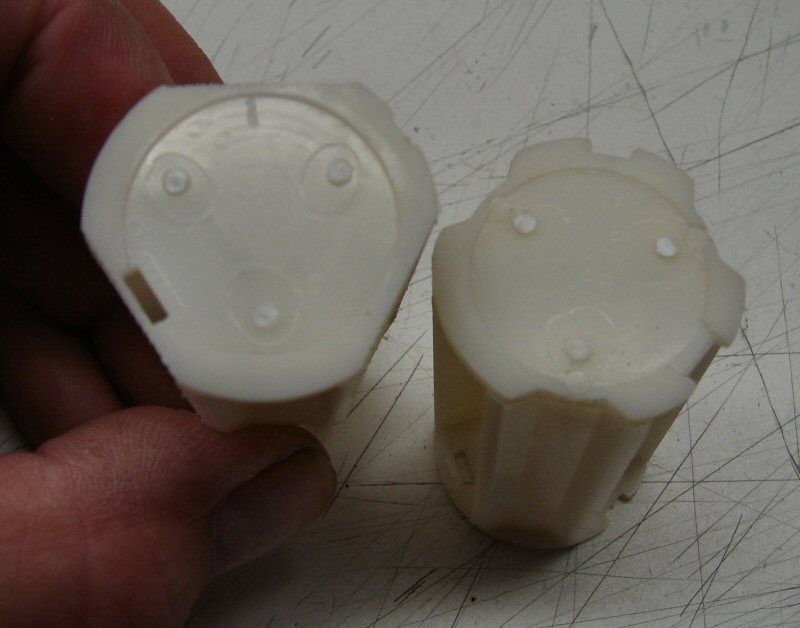
You can see the stock holder and the modified one. I file the round edge flat where the three openings are. I'm doing that with these holders, to make it easier to replace the metal tabs. Since this is series/parallel, I don't have to do anything fancy. Just three stacks of four batteries.
The holders have tabs that hold the stock clips in and it works great for the copper too. I just cut to fit the width and it holds the cpper in place.
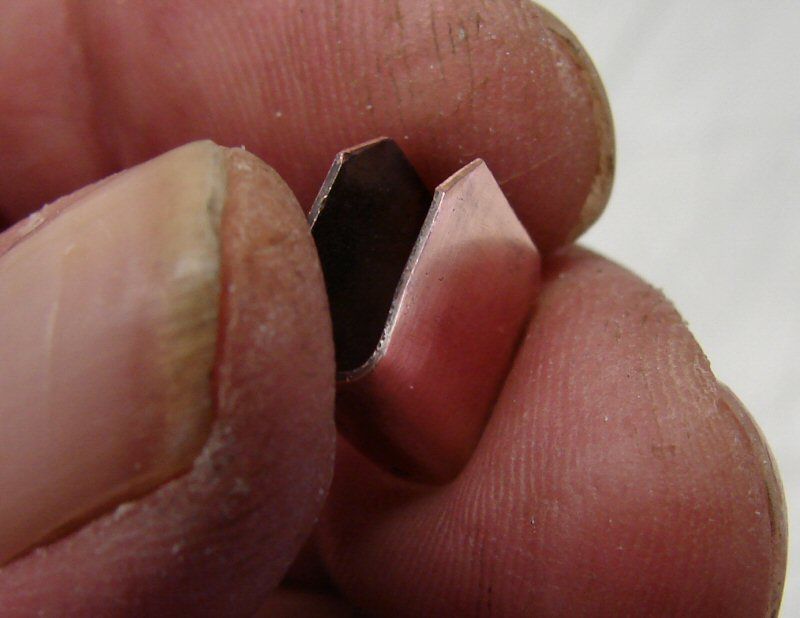
These are the copper clips I'm making. They just slide over two holders together. It's a lot faster and easier doing series/parallel. The top and bottom plates will join all three stacks, to make the parallel part of this holder.
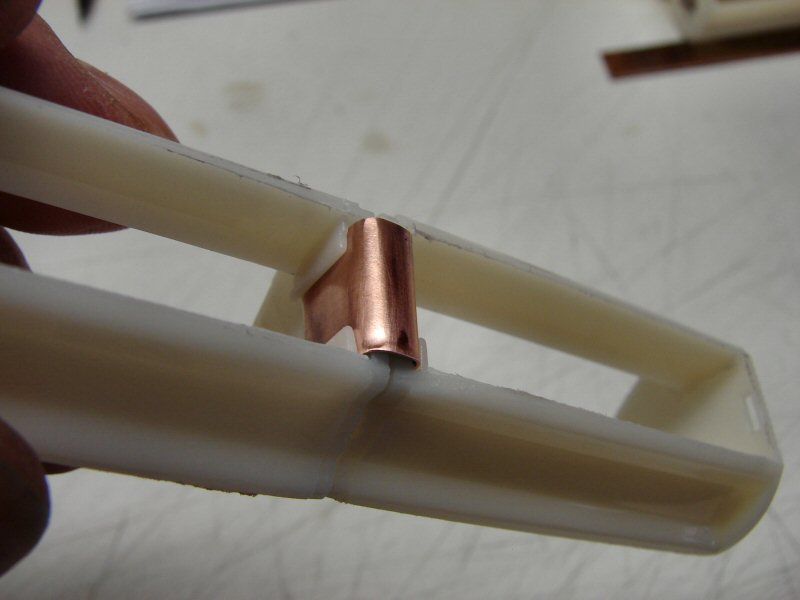
Here's the clip in place. Once all of the clips are in, I can use some thin pieces of battery shrink tubing, to cover the copper. I'm just in the begining stages, but I figured I would put up what I had for now.
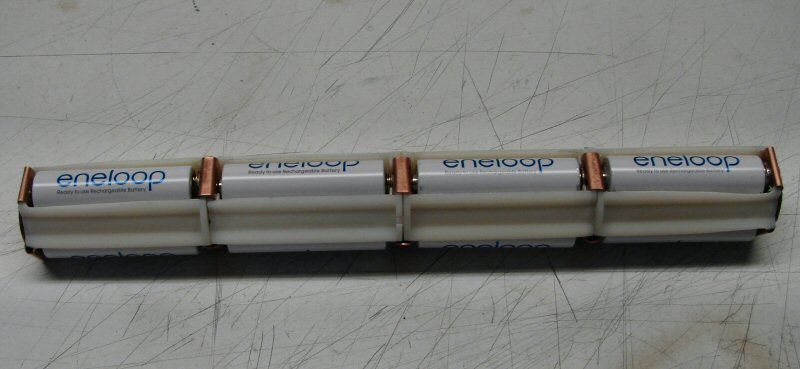
Battery holder is finished. 5.19v with month old eneloops. (they have been sitting a month after charge).
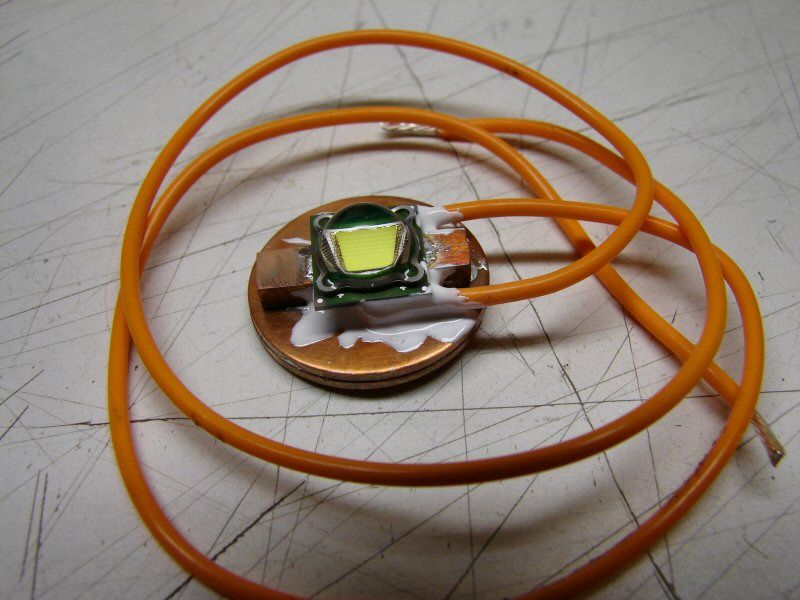
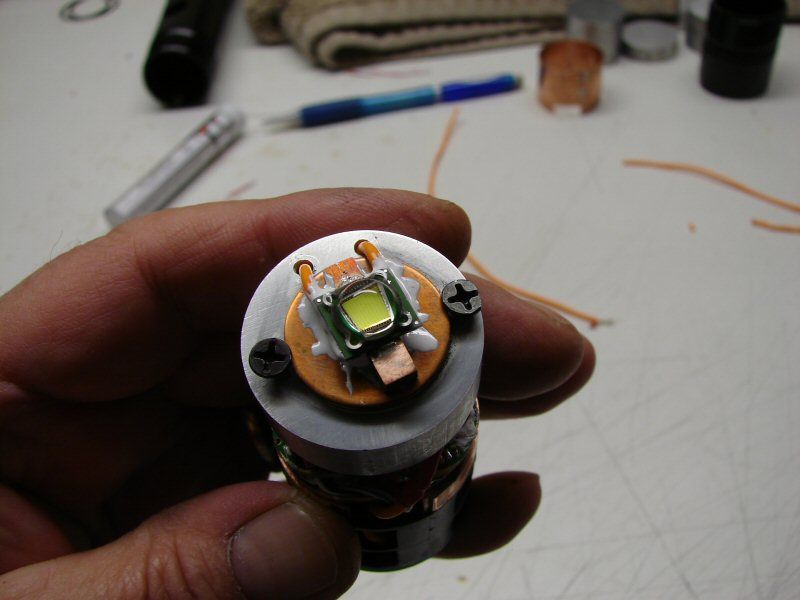
SST-90 soldered to the copper star (sort of a star anyhow.)
-----------------------------------------------------------------------------------------------------------
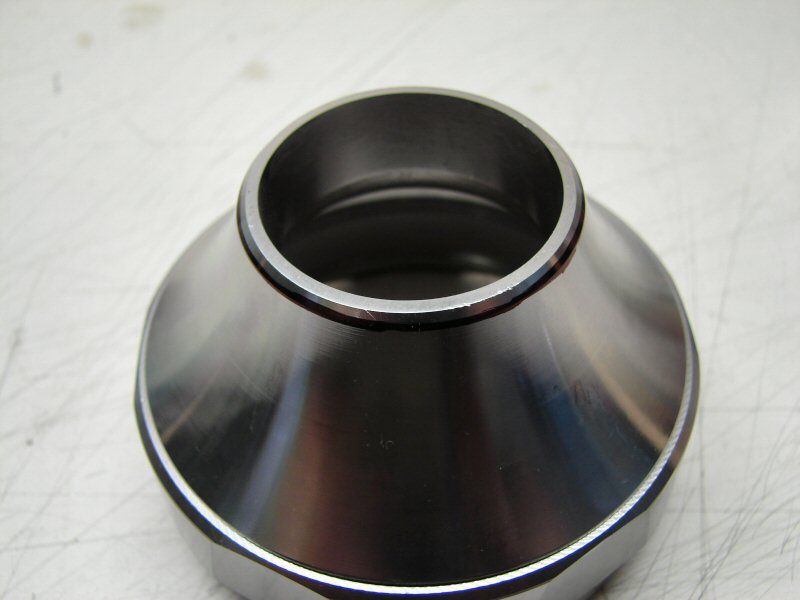
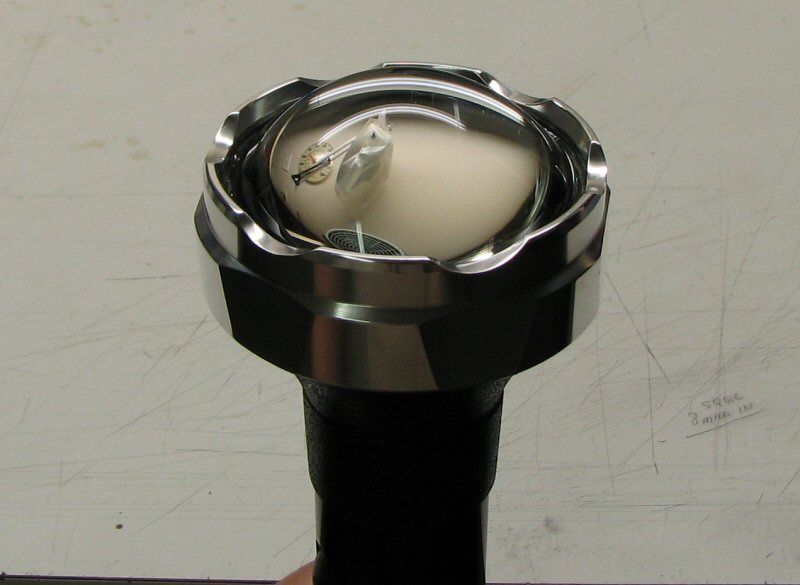
Remember how bad the head looked after I put the two pieces together?
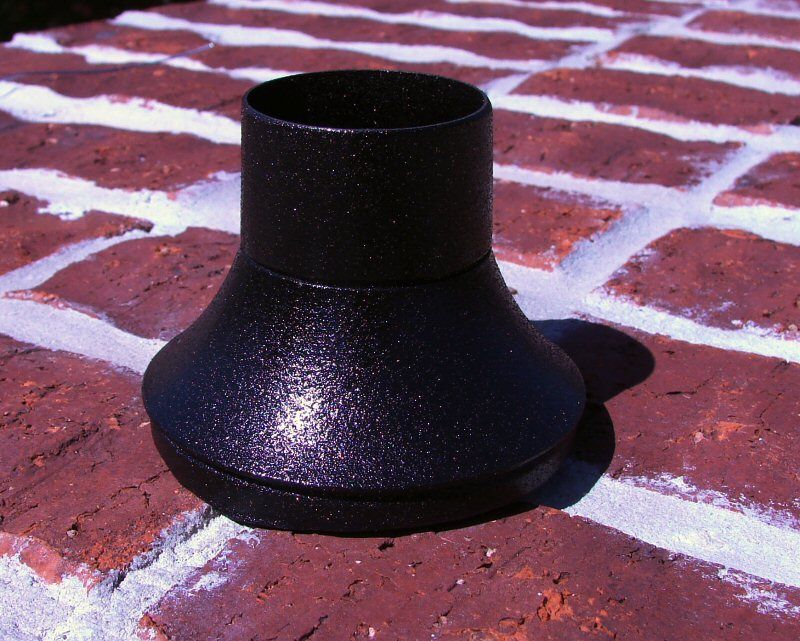
I think they will look better now, once the light is complete. The bezel and tail cap will be polished, to offset the paint.
-----------------------------------------------------------------------------------------
------------------------------------------------------------------------------------------------------------------
I did a little more today. It's slow going since it's so darned hot still, but slowly it comes together.
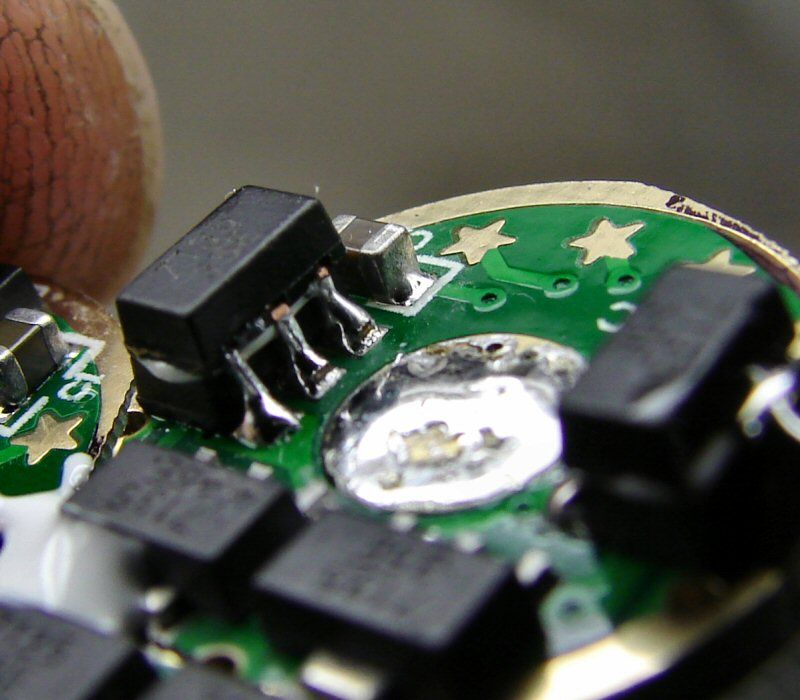
I added a total of four extra chips to the drivers. It should be close to 9800ma. Yes, close to 10amp. Man oh man, those pins are Hard to solder! I'm going to have to find a young apprentice that doesn't shake. LOL
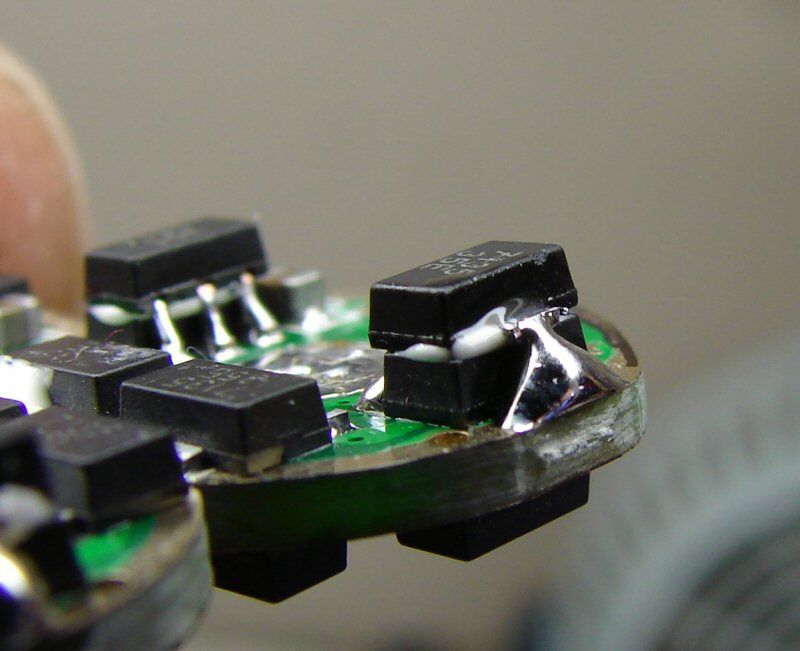
I bent the three pins down on each extra chip and used AA to glue them on. Then I ran some solder on the pins and on the back side, I just globbed some solder to the back contacts.
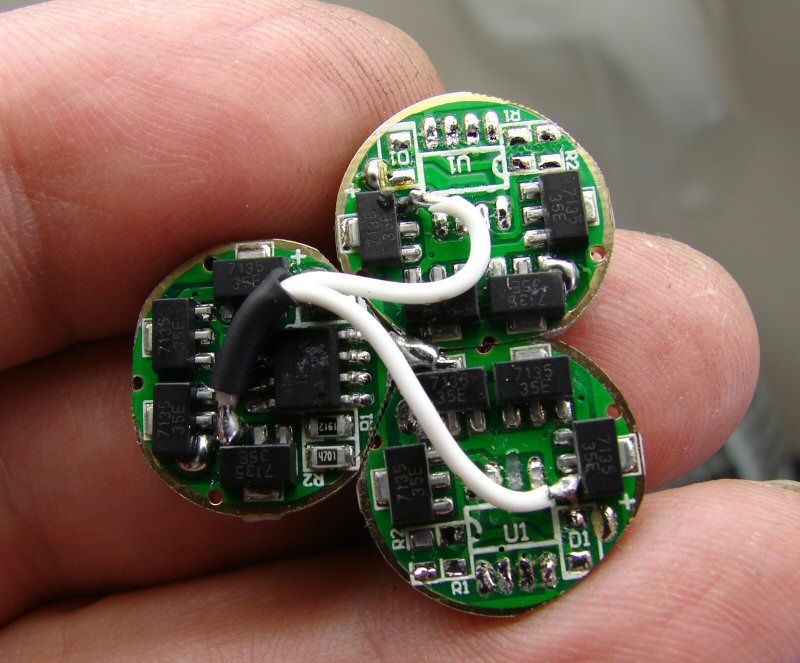
The driver on the left is the master and the other two are slaves. I removed the controllers and resistors from the slave boards, per TechJunkie. More about that later.
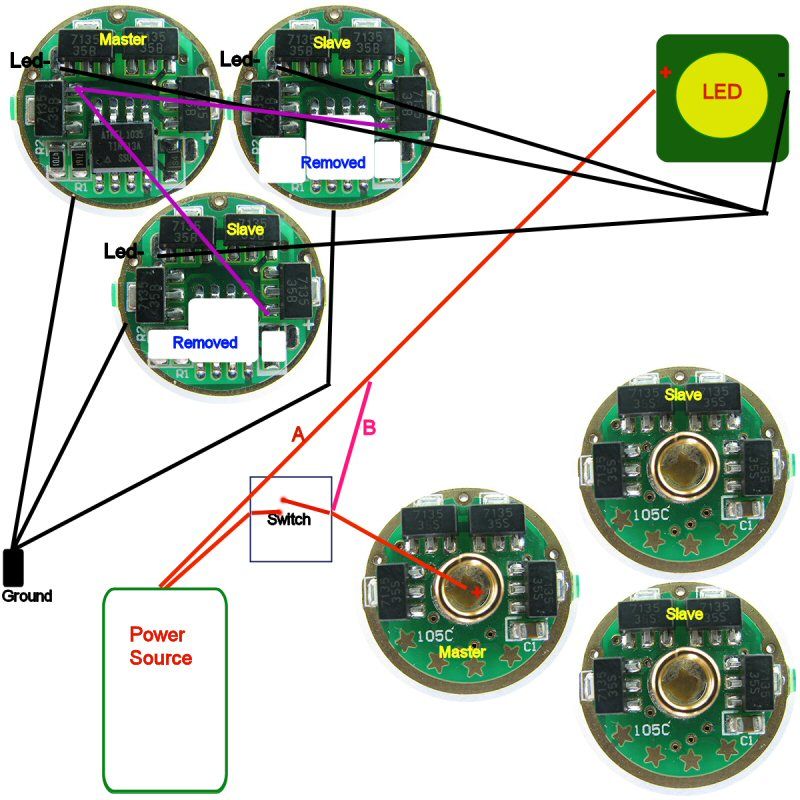
Here's the wiring diagram. If not for TechJunkie and other intelligent members here, this old fool would never get a light wired. I still don't understand how it works. I only know TJ shows me how to wire it and that's the way I wire it.
In this configuration, positive from the power source (batteries) comes into the switch and goes thru the switch to the positive on the master driver (shown in the lower right of the diagram).
Then there is a decision (the "A" "B" decision). Shown here are two ways of wiring positive to the LED.
**One way is to run positive direct to the LED, before the switch. The switch still controls the drivers, but at a lower amp draw, so the switch does not see the full 10 amps.
**The Other Way "B" is to run the positive to the LED after the switch, which means the switch takes all the amperage to the LED. If you do not have a good 10A switch, then the "A" route is best. If you are using a tail cap switch, then there's no way to avoid the full 10A thru the switch, since it's in the tail cap and in the negative path. (that is not shown in the drawing).
Negative (ground), is run from the body of the light, to the outer ring of all three drivers.
Looking at the upper left region of the drawing, you will see the purple lines. Here the master board supplies the two slaves, by adding the wires shown in purple. This way, the master controls all the boards via the controller on the master board.
LED- Is run from all three drivers, to the LED. That's how the LED is regulated by the sum of all three boards in parallel. Parallel increases the amperage, not the voltage, so we maintain correct voltage, but still give almost 10A to the LED.
I hope this is more understandable to you than it is to me, but if I fu screwed it up, hopefully TJ will chime in and correct me.
---------------------------------------------------------------------------------------------
Finally got the whole thing wired up. Part of the problem is that there's only 40mm depth in a maglite body, above the switch. Part of the problem is that the way I did the head, it leaves the lens too close to the led. The rest of it is just my inability to keep things tucked in properly in a small space, resulting in a very small heat sink that will be too small for any real use of the SST-90 for any length of time. Also, it won't be a flood to throw, since with that huge lens, you need about 60mm of adjustment from square die, to full flood and there's only about 20mm of adjustment in the Maglite And the head will have to be screwed up to where the O ring will show, to get a square die. Overall, I'm not the least bit impressed.
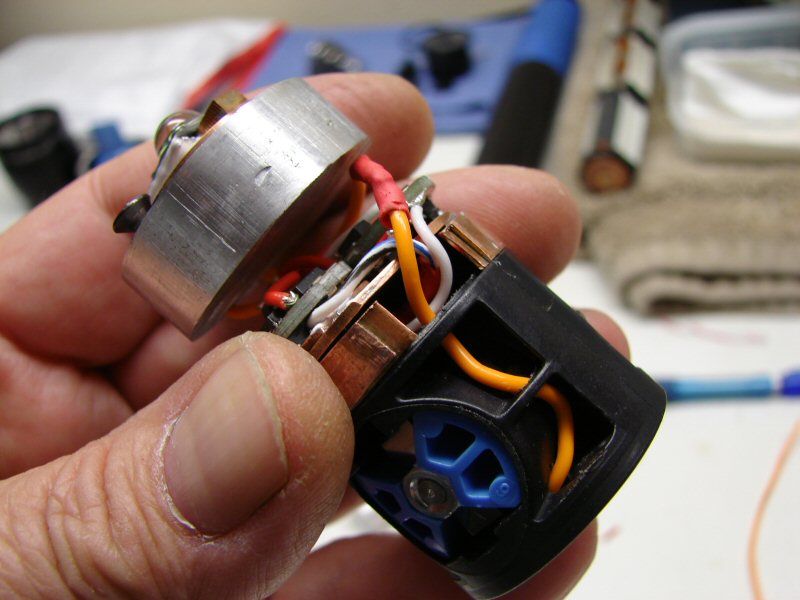
I wired this thing, so that the Positive from the battery goes straight to the LED and the positive from the switch goes to the master driver. There's a lot of wires in there and I'm not a master, so it's sloppy.
I also made an outer sleeve of copper sheet that encapsulates the whole heatsink/driver area. I don't have a photo of that. Anyhow, I slid (pushed) it all in the tube and tightened down the screw in the switch, for a good negative contact.
I decided to start out with only 9 batteries and 3 dummies. I was concerned about using 12 batteries, from other comments about heat. Well I put the pack in and turned in the tail cap. The light came on. Uhhhhh, wait a minute, the switch is off, why did it come on? I can't turn it off unless I unscrew the tail cap.
I'm not the brightest bulb sometimes... I ended up putting all 12 batteries in. Now it works. With only 9 batteries (3s/3p), the drivers were going to direct drive immediately, bypassing them and the switch. With 12 batteries it works as advertised.
I do not have any beam shots. I will not have any till the week-end. I can tell you that when I went outside facing my white garage door and turned the light on, I blinded myself just looking at the garage door. I'm serious! When I turned it off again, all I could see was a bright square, even when I closed my eyes. That lasted 3-4 minutes. This thing is BRIGHT! I walked out around the house and shined the light on the trees at the end of the pond. Birds flew away and I could hear the people in the apartments on the other side of the trees talking about the bright light.
I have a bunch of stuff to do before Saturday night, but as long as it isn't raining, I will be out shining at that high rise by where I work. Then I will have some beam shots for you.
-------------------------------------------------------------------------------------------
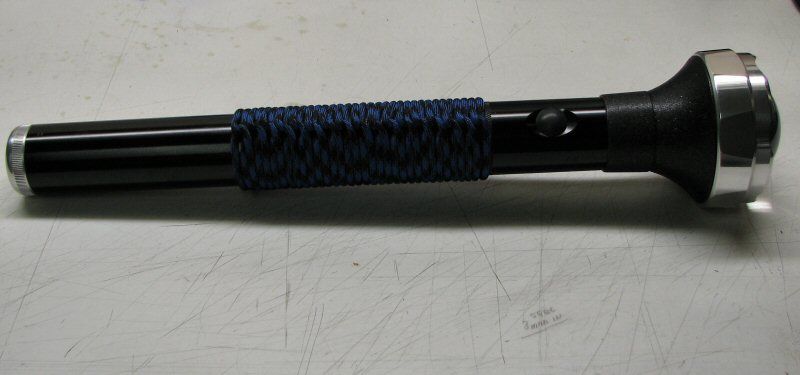
Here's the finished light:
There are a couple teaser beam shots in POST #35