Sweet idea with that heat sink. Good job. I admire how fast you work despite taking care of the house and the missus and negotiating the heat too. Wish I had some of that tenacity O-L.
You are such an inspiration! Love that batteryholder.
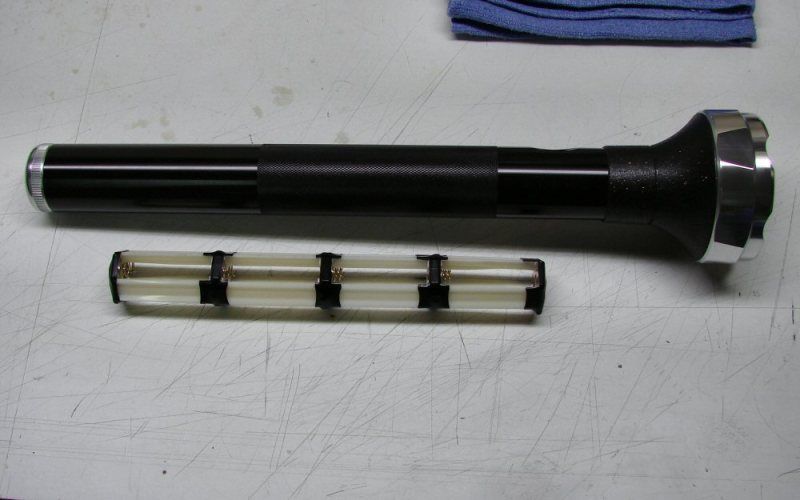
Ive used 2x4 and 2x3 AA Eneloop for SST90 but it never got me real 9A. 3x3 should do better.
Justin, wonder where you got the SST90? I wish I had the $ and time to play with it like you do. Right now I’m just learning and hoping to “play” with all the knowledge you and others provide some day.
This is how the light will look. I don't plan on a lot of embellishments. The only other thing I have to do to the body is the 550P treatment. I think it will look good with a Pa____rd w__p.
I'm waiting now for an Aluminum Heat sink. If I'm lucky, I might get the led/sink/drivers ready for testing this week end. Then I have to check focus distance and put the lens in permanently. After that it's the final touches, so by the end of next week, I might be able to do beam shots. I will do them at work, but I have to to do them on the week end, when I'm off. I have about 6 targets to use, from 300 yards, to 1.2 miles. No, I don't believe it will go that far, but that's a good target. It's a high rise on a hill and I'm on a hill at work.
Serious shower power. Great thread.
Aw man! This rocks!
Great stuff so far, O-L! Really like what you did with the host. Looking forward to you wrapping it up and turning it on. 8)
More photos, including a wiring diagram, in the first post.
great job on the soldering and wiring diagram. BTW, you don’t have to solder both the centre leg and the back leg of the AMC chips as they’re electrically identical.
Easiest way for me to understand the Master-Slave thing is this. The AMC chips are simple current sinks - switch ’em on and they pass whatever their rated current is, from the LED to the battery. To switch them on, they need a certain voltage on their Vdd pin (either the left or right front pin, I can never remember), 3V or thereabouts I think. So, simple single mode boards just have a diode or resistor between the B+ and the Vdd pin whereas multi-mode boards have an MCU that switches that pin on and off very quickly (PWM) to control the amount of current sunk through the chip over a certain time.
So, what you’re doing with the Master-Slave set up is making a couple of single mode boards (the Slaves), then wiring their Vdd traces to the Vdd trace on the Master board, et voila, mahoosive multi-mode current! Another way of doing it would be to just start with single mode boards as Slaves to begin with, but I don’t think you can get them in 8xAMC formats (only 4x boards as far as I’m aware).
Hope that wasn’t condescending, it was quite a revelation for me when I figured it out!
1 question. Will you be making some to sell?
Not condescending at all.
I soldered the back, just for stabilization and for another heat path.
I have found that Arctic Alumina does not like heat! What the heck is that? AA is supposed to be good for heat, but I'll tell you what, I have had many instances where I soldered something like these chips and the chip came loose from the AA. I've seen it on led stars too, when soldering the wires on. I am not very happy about AA and if it is the best of the bunch, I can see why stars should always be screwed down instead of using thermal compound.
Sorry, had to rant....... just had to.
You mean drivers or lights?
If it's drivers, no, I would not be making any for sale. It's too much stress, LOL.
Seriously, for me, it's very hard to do these, so I try to do them only when I have to.
What do the hardcore computer people use on their heat sinks ??
They use thermal grease, not adhesive and they use all different types of clamping methods, to hold the heat sinks on. They don’t use adhesive because they can’t take if off easily and because clamping or hold downs are the only real way to hold two pieces together. We just don’t have that kind of room in a flashlight.
AA needs pressure and a lot of it to work properly as it’s not an adhesive - alumina adhesive would be what you’re after AA on newegg Plain AA works fine on CPU heatsinks as the clips/clamps/screws provide an enormous amount of pressure, but wouldn’t be any good for a component left floating around ![]()
I’ve always screwed my LEDs down on all of my builds, although I tend to have more room to play with. You can get sweet little allen cap screws with 4#40 threads that fit within the holes on the star, those might help. I have a draw full of them (scavenged off an old microscope filter wheel) if you want any - I’d have to build 20 or 30 lights to use all of them, which, you know might happen {tick, twitch}
I have 3mm screws. I just hate to do it. It's such a PITA. I will be using screws on the SST-90 instead of AA.
AA is good to 150c, but unfortunately, that is lower than the 185c-190c of 60/40 solder. No wonder it never works. So, that means solder before, glue after. Another PITA.
I think maybe it's just the 100+ degrees every day that's a PITA and it makes everything else seem to be. 
I dunno, it only adds 10-15min to my builds. Mark, punch, drill, tap, blast with compressed air and you’re done. 100% reproducible top notch thermal junction everytime plus replacing the LEDs with the next model out is a piece of cake.
Epoxy sort of has a “memory” for the highest temp that it has seen. Heat it above that and it softens. There is (somewhere) an article on boat repair on the Gouegon.com web site that talks about it. Gouegon makes the West Marine epoxies.
Real high temp epoxies have to be baked to set the epoxy and get the high temp capability.
Blown away again. How do you get your soldering so neat? Lots of practice and ability I suppose. If I did what you have done with those drivers there is a 100% chance that they would never work again. The close up picture's aren't bad either.