Thank you. :bigsmile: This stuff is addictive though. I may go buy another light just to try the flame treatment on the tube again.
I really want to get some of the heat resistive putty that car body restorers use, I wonder if it’d allow a full flame job from head to tailcap?
I baked mine FandyFire C8 directly above fire ![]()

here with friend’s UltraFire C2 ![]()

Welcome to BLF, MaofKO! Nice bake job, hadn't seen the wood-fired version before. 
Great job. I like the golden brown color. We need a barbecue version :)
Could be my imagination but that wood-fired C8 has a very rustic look to it. More so than regular oven-fired torches. Anyone else imagining the same?
Yes it is exactly as rust, here is another, bigger photo ![]()

Nice, you got a good fade from bezel to tail with hanging it, and from the colour I’d say you got it hot enough, your not far off gold on the bezel. 8)
You guys finally got me to try it. I am baking one of my older and not important lights. It’s a Rominsen 2 AA that I wouldn’t mind if it got messed up. Very easy to take apart and I’m pretty sure it is just type 2 so it will be a good test. It’s in the oven right now.
Just got done. Turned out great. I love burnt orange.
Pics or it didn’t happen! 
I love this baking thing-thanks to you guys I found yet another reason why budget lights kick da booday! ![]()

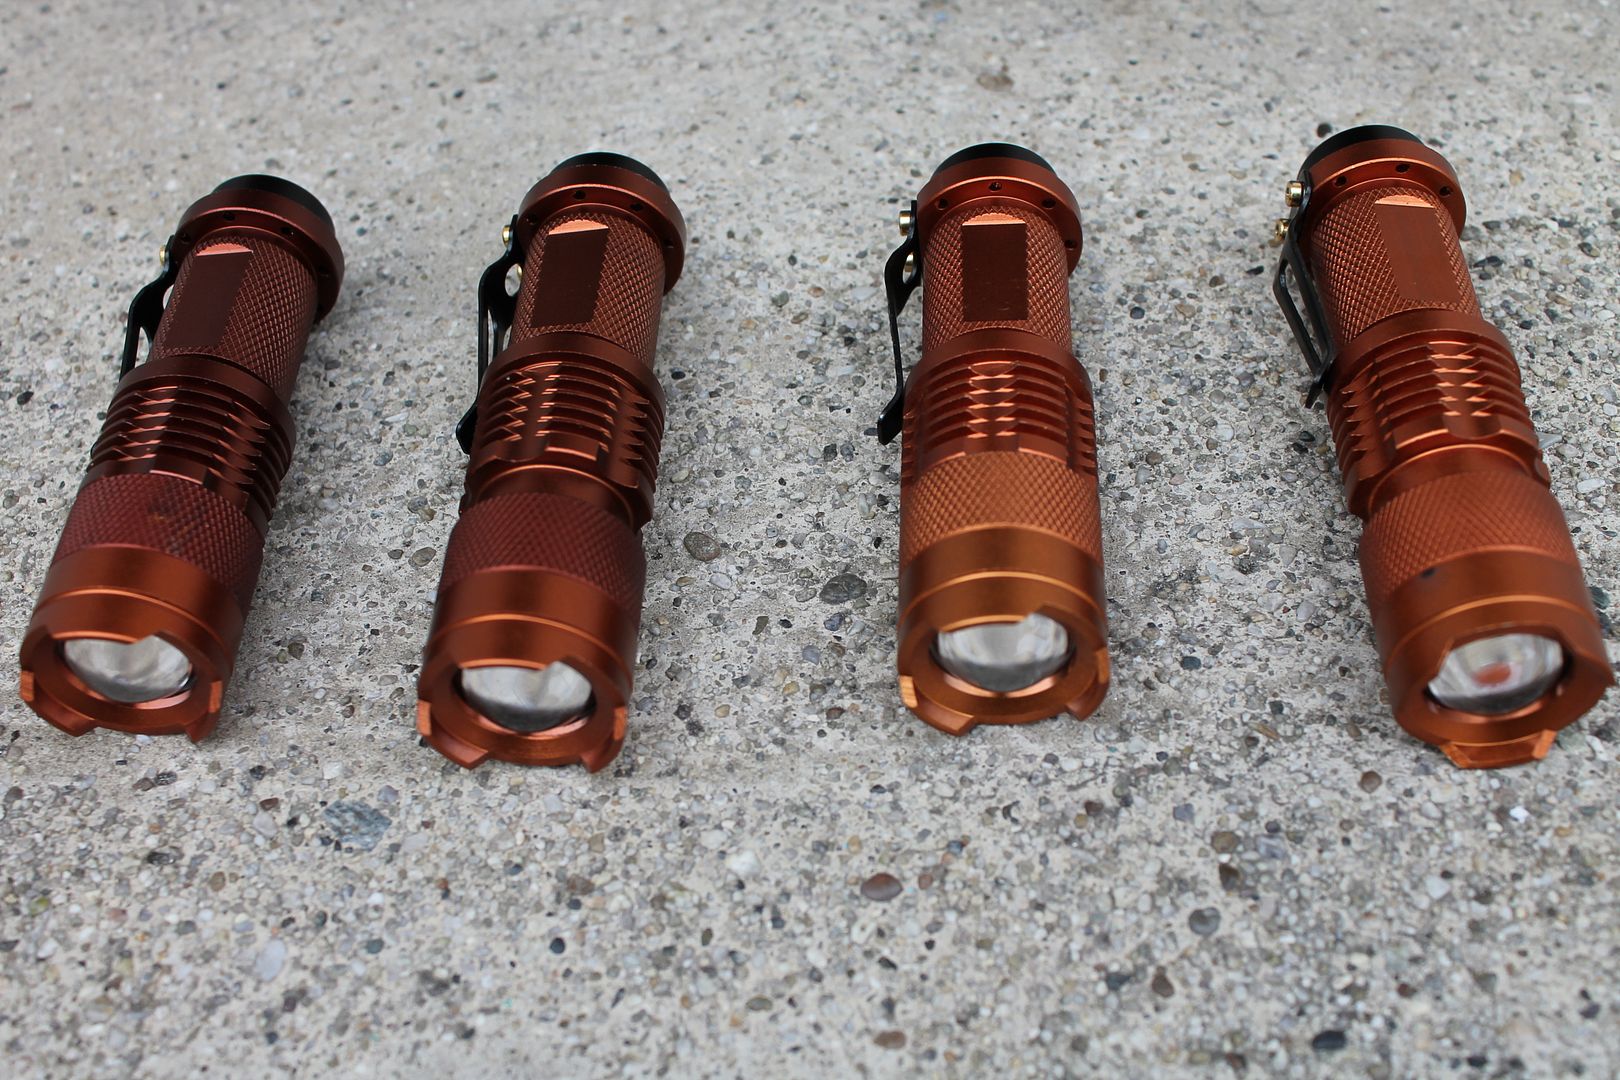
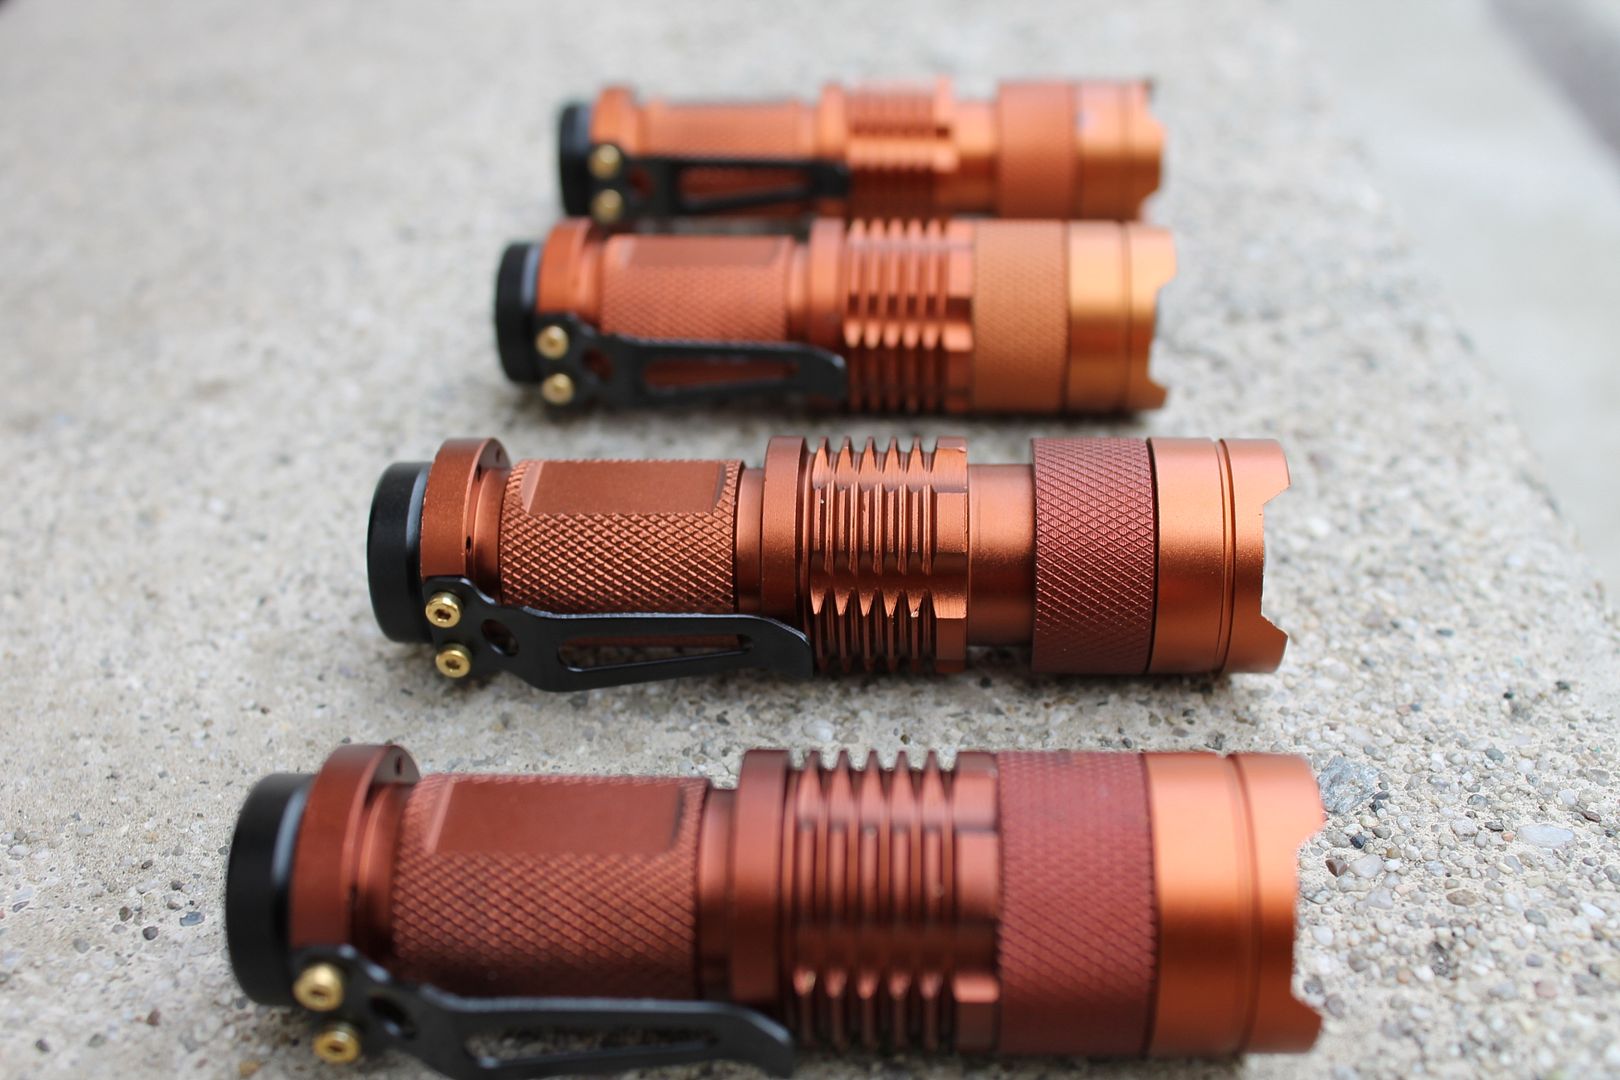
Amazing lights. These are the sipik 68 clones from bbqbuy on amazon. 3 mode. I kept the oven on for about an hour-2 on the left (2nd pic) were about 20-30 minutes and the 2 right were about an hour. Thanks for the tips guys!
Oh, and some people on another forum were asking about disassembling the normal Sipik. I read here someone boiled the bezel-do you recommend? I thought that sounded risky…Or should they use a heat gun?
Anyone try using a fryer yet? Or maybe quenching in old motor oil? I’m just wondering if it would pick up carbon and have an effect on the final finish. Just a thought.
Also, has anyone figured out a way to keep some parts very cool while heating others, to achieve a more distinctive difference than the regular fade?
These look awesome. I’m still waiting on my first project or two to arrive, so I’m looking around to see what I can do to make it “my own.”
I harbour the belief that body builders putty may allow the destinct design. It’s a putty used to control heat to prevent panel distortion whilst welding. I’ve just not got hold of some to try it yet, or know how to use it - internal or external.
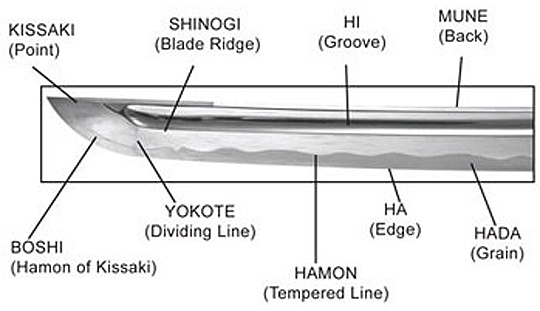
I was thinking of a clay, like the ones some swordmakers use when going for a differential tempering on the blade (think of the jagged appearance of a katana blade). I don’t know if it’s the same type of stuff, but I know that a good, high-temperature clay can be made just from kitty litter.
I forget what the clay is called, but it’s used in most litters, and is the only ingredient in the really cheap litters. Just grind it up really well, mix with water, and apply. Some people use it to make their first forge. I really think it has potential. If I had a bag o’ lights, I’d be willing to be the guinea pig. As it stands, however, I’m still waiting for my first ones to arrive.
PS: Here’s an image of the type of blade I was talking about.
It sounds like similar stuff, as I understand this putty, it acts almost like a fire break, trapping the heat, but I need to look into it. There’s a well known British body repair suppliers named frost, I believe they keep this stuff in.
This is the stuff, £40 is a bit steep, I’ll have to read up on it.
The problem is (as I see it) that aluminum is a good heat sink. It takes heat well and spreads it to the entire piece. While I don’t doubt it’s possible, I’m thinking it will take some combination of methods; and it will have to be pretty precise. Some kind of heat-trapping agent, a method to heat quickly, and a method to cool very quickly. If it was steel I could tell you exactly how to do it, but I am totally ignorant of working with aluminum.
Then again, maybe I’m wrong and we’re on the right track with the putty or clay routine. I think the key would be if someone can figure out the exact temperature at which the anodizing begins to change color. Then all we have to do is come up with a method for heating certain sections to that temperature (and no more) while keeping the rest of it cool — again, a balancing act. Is anyone capable of measuring the temperature of the piece while it’s being heated?
ETA: Anyone have one of those cool touch soldering irons? I’ll bet that it would work at least for creating a camo pattern…probably.
ETA (again): Or I nearly forgot about this: http://www.e-cigarette-forum.com/forum/modding-forum/367095-resistance-no-resistance-wire-welder.html Rather than using it to join wires, it could just blast an arc through a small piece of aluminum, quite possibly getting the anodizing hot enough to have the desired effect. May be controllable, to an extent. Again, at least probably good enough for a camo pattern.
ETA (final, I think): Has anyone tried brushing their light with a regular soldering iron? I would think it’s hot enough to change the color, at least if you move back and forth or stay on one spot. I would think the pattern would be more controllable than an open flame or oven.
Ops, why did I read this post? A c8 is heating now…
Boris, the clay used in kitty litter is kaolin (also the active ingredient for Kaopectate), which comes from the coastal plain states in the SE United States among other places. A technique many have used in place of the oven is to use a gas torch to selectively heat parts of the light.
My first thought. Who thought up this "Baking Lights"
What a crazy idea ........ BUT ....... the results are simply amazing.
Those are BEAUTIFUL. The color is very different, variations are very unique.
Please keep "Pushing the Envelope" and post more pics.