Which light explodes first when you turn them both on?
Well, the HD2010 doesn't work (awaiting modding), so I'd say the ZY-T08 would burn a hole right through the HD2010.
-Garry
Ah, good size reference—totally manageable.
that way from what I gather the biggest difference which is in the tubes is compared. If ya can’t stack em’ then side by side will do. And while you’re at it a head-on reflector comparison would be just capital. I can’t think of any other menial PITA tasks at the moment to burden ya with. ![]()
LOL!!
I agree with the pic recommendations! ;)
Ok, I’ve not had chance to put thoughts to electron yet, unfortunately real life got in the way.
Anyway, I picked up my zy-t08 this morning, first bug bear, I got stung with customs, £3.21 in vat, then £8 in handling charges……I’m currently considering picking up where Guy Fawkes left off in that respect.
I’d charged a pair of cells last night, incase the mystery package was the small sun so at 7.30 I was at the post office, cash and card in hand, ready to grab package and get on with work. Package open, cells in, yep it works, not as intense as I’d of liked, but hey, suns been up an hour, give it a chance.
Later on in the day, I had time to strip the tail cover off and take some readings.
First issue, two of the cap head screws are almost round, cheap crap stainless screws. Got them out, the switch board is held in with two counter sunk Philips screws, they don’t need to be counter sunk, the board isn’t and ones looking like it was knocked in at 45 degrees with a hammer……with a sinking feeling, I apply the leads to the switch :-
1.92a high
0.92a medium
0.44a low
The clamp meter confirms its under driven, hunted blf for viffers mod, then popped the board out for a look. At this point you can guess how pd I was to discover the board wedged with a piece of thick paper, without it, its a p* fit.
The light looks nice, it feels good in the hand and I’m impressed with the job it does with these limitations in mind, I’d just hoped for so much more. My thoughts at the moment are redrill and tap the tailcover screws m3 and fit some decent screws, and wire a 0 - 0.5ohm pot across the sense resistors, there’s plenty of space in the driver cavity to hot glue the pot in place, then I can dial in the current before finally soldering the board down.
I like it, it just could have been much better with a little care on final assembly.
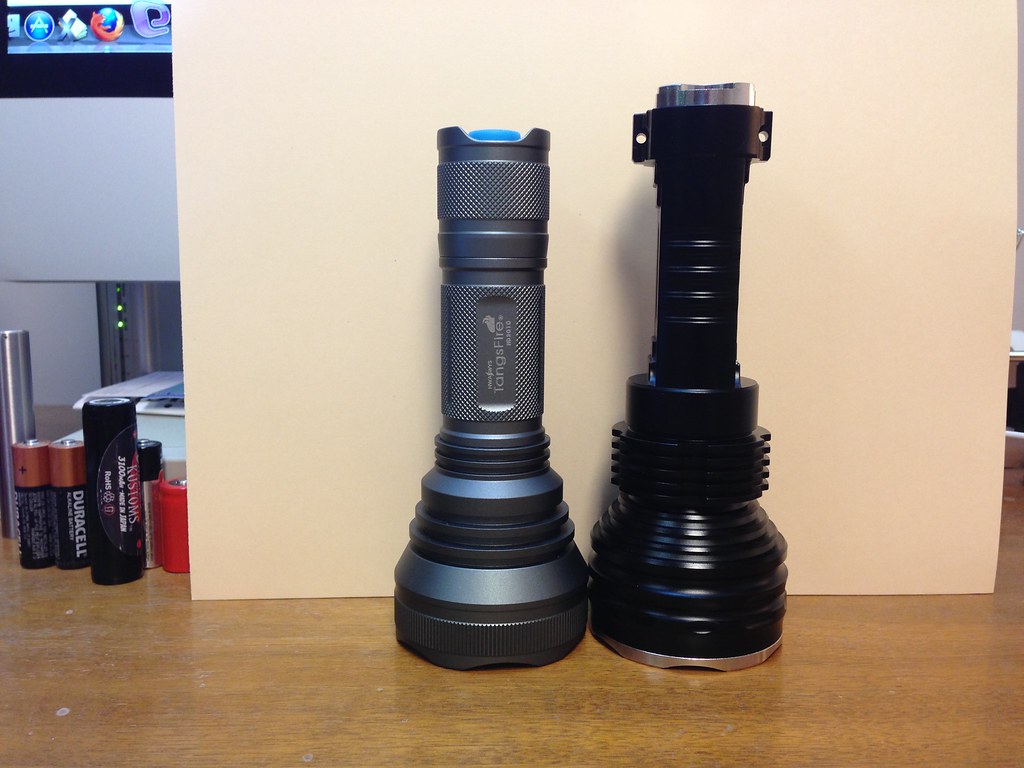
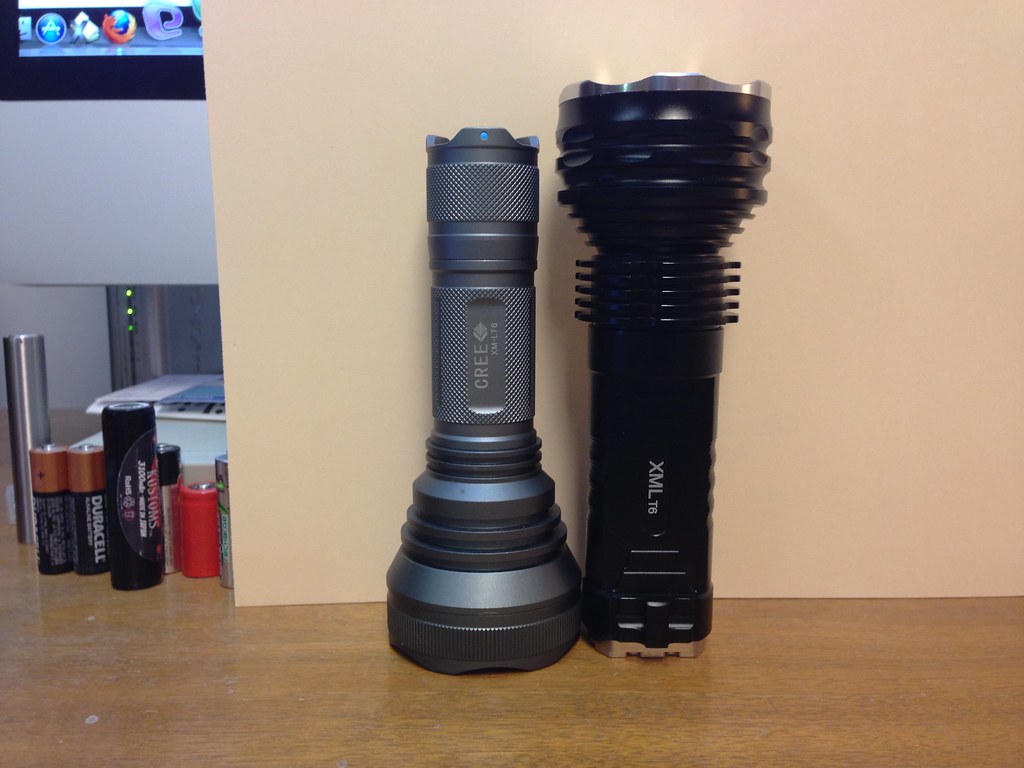
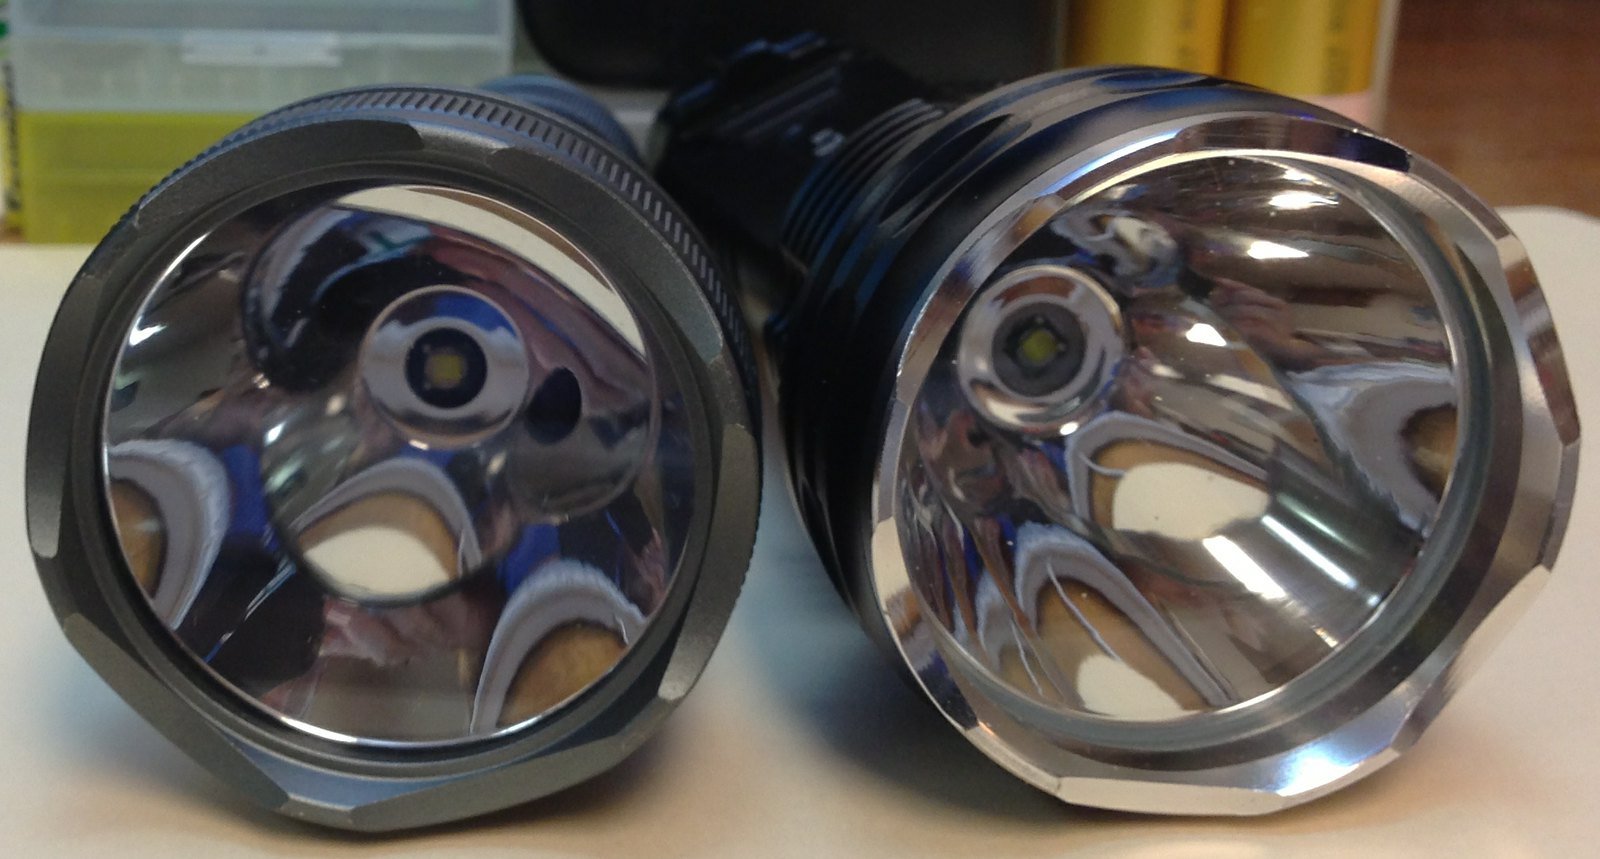
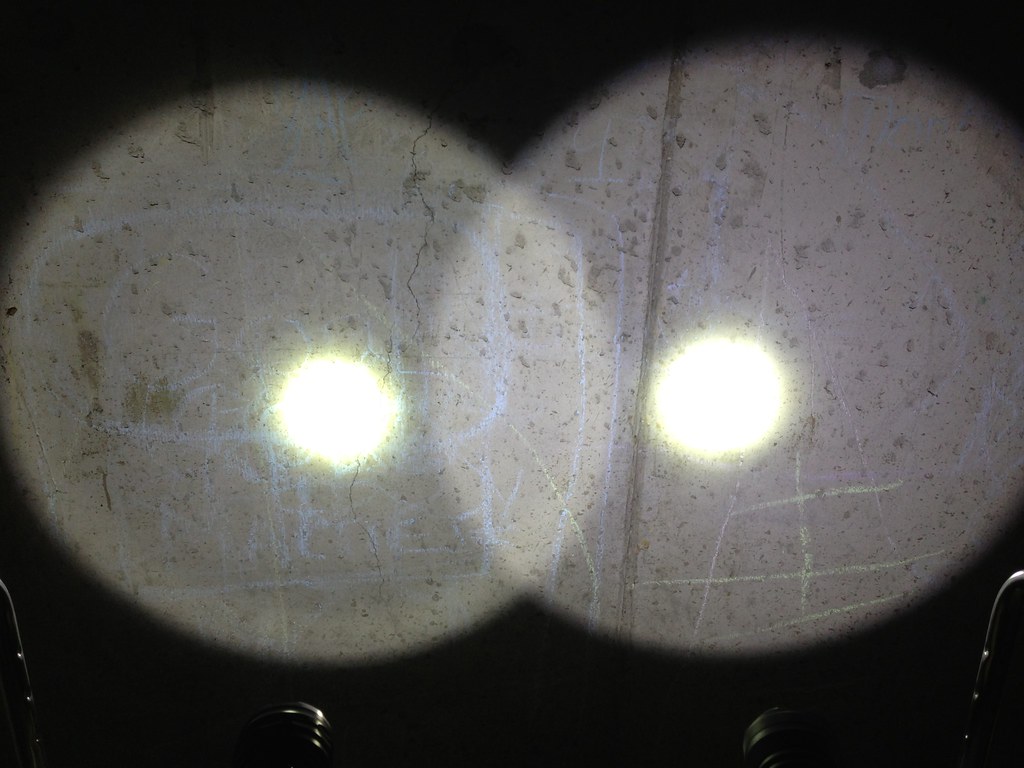
Here's some more shots to give you an idea on dimensions of the light.
First up is the side-by-side with the ZY-T08 showing the thin side:
Next two shots are side-by-side showing ZY-T08 with batteries in parallel:

Last shot is showing the business ends side-by-side. Same diameter, but the ZY-T08 is just slightly deeper:
Finally, a really bad 'grey wall' beam shot; ZY-T08 on the left, HD2010 on the right. The Small Sun's hot spot is just slightly smaller and ever so slightly more intense; The flood/spill area of the HD2010 is slightly larger and brighter. You can also detect a slight tint difference - HD2010 is cooler.
Did you get yours from DX or MF? Crossing my fingers here 'cause I just ordered it from DX two days ago.
Manafont, quick delivery but I suspect all these hosts are uf-v60 rejects tbh.
Sorry to hear that yours is driven even worse than the "normal" 2.4A. If you see the same value sense resistors, how can it be driven any less than others with the same value resistors? I don't get it. What about cleaning threads and contact points?
At least I can tell you that you won't be disappointed at all once you've cranked up the amps!
-Garry
Some comments on Turbo…
I got well over 3A on full batteries measuring without the tailcap. Just head and batteries…
BUT: I sometimes got just 2.00A on High when cycling through modes :
Most of the time I got the 2.5A-3A or something like that.
Garry: try to check if your PCB is clean and pill PROPERLY screwed down. Body / tail connection has to be clean also.
Next I will try to measure through tail switch.
Thanks very much! Frontpage’d and Sticky’d.
>>>>try to check if your PCB is clean and pill PROPERLY screwed down.
Man, you were right. I just checked and my pill was totally wobbly and backed out like 1/16th of inch. Surprised it worked as well as it did.
Hard to get the pill in tight because mine did not have any front notches to insert hemostats to get leverage for a tight seat. I used the the two holes in the PCB to insert hemostats and get leverage, but didn’t want to turn too tight in case the PCB suddenly broke free. Still, 100 times better than when it arrived.
HD2010 still looks appreciably brighter though ![]()
The lack of QC in these lights never ceases to amaze me.
So you can't get a consistent High level either? Current on High seems to change when you cycle modes and come back to it?
How are you tightening the pill - from the backside (driver side)? I can't get the head of mine unscrewed (to get to the emitter). My PCB seems very clean as well as the tail/switch area. I can check again when I have time, but I hate to remove that tail again (afraid to strip threads/screw heads).
-Garry
Any idea of tailcap currents? How much higher it rose?
-Garry
>>>>>Any idea of tailcap currents? How much higher it rose?
My tailcap screws look like they were put in at angles by a retarded monkey. I’m afraid to touch the thing lest the screws never go back in again. Is there anyway to do a tailcap test without removing the switch housing?
Oh, I’m impressed with with the visible output with one arm tied behind its back, in fighting trim it should be amazing. The low current could be down to a poor earth path, remember the paper spacer, but I can’t solder it down till I’ve added and dialed in a pot. I’m going to find my maplin catalogue tonight and see what pots are available, I’m hoping for a 0 - 0.5ohm one.
Damn that restarted monkey! He did the same to one of my screws too! Using an Allen wrench, I was able straighten it out and screw it deep enough so the flashlight can tail stand. That one screw isnt tight, but at least it’s flush.
I think I get pretty consistent "Turbo" but just an occasional "High". Weird...
I took out the tail switch assembly. Hexagonal screws were easy to take out. 2 screws inside: I would recommend using right driver size, press down HARD, turn gently.
Measured the amperage shorting 1 pcs of Xtar 2600mAh through Switch PCB screw hole in body:
Steady 3.3A on both holes. In repetitive fashion, always the same.
Bridging the Switch (when OFF) with DMM, I got also steady 3.3A all the time.
Thing to think:
My Other Smallsun, ZY-T13 has brighter hotspot (confirmed by wife ;) ) and to my eye, gives more light OTF measured by ceiling bounce.
...but it takes just 1.08A when measured with 2 x Xtar 2600mAh :~
What is this???
Can some professional measure the resistance for that bare switch component, please?
Can there be any other bottleneck or reason??
IMO, 2.2A vs. 3.3A should be "pretty obvious" or at least pretty close to each other?
Granted, the ZY-T08 has a plastic reflector which also looks a bit of lesser quality...
Forgot to say I liberally flushed PCB and body screw holes with CRC precision cleaner for electronics.
No idea if it helped but that over-the-switch value was measured after this.
So, I assume there should be good connection from switch PCB -> Body.