I have to go out for a few hours. Let's all get back to this tonight and see if we can all help get your light shining bright.
As Tom mentioned, you should stop using those batteries, they'll never work in that light. I know we are all on a budget, but care must be taking when purchasing batteries for these high power lights. Perhaps the flashlight could be considered budget. However, budget batteries will only cost you more money in the long run, or something much worse.
I'm using the TF 5000 26650's in mine (from FastTech), still relatively cheap but more power - this light w/updated driver needs Power. It's saying Feed Me! Richie makes a good point - this is a high powered light, you need batteries to match that. With multi cells in series like this light, they should be protected and with good power. I wouldn't suggest using 18650's in it, but if you have to, something like KeepPowers would do well. Wait until Richie checks back though, maybe more views as well.
Same here, I use the Fasttech TF Flame 26650 in high powered lights too. I will note that they are not 5000mAh, actual capacity is 4000mAh.
As for the charger, you have some options out there.
Good 18650 cells could do just fine too, and will keep things a bit lighter. Since the 26650s mentioned are about $16/pair, they may be the best value for this beast of a light. You would need two pairs, so $32, plus a charger. The ML-102 from Fasttech works (just barely) and at $7 it keeps you just under $40 for the power source.
A nice 26650 charger is available from I-O and the price is real nice too.
I have the ML-102 but not the I-O one so I cannot speak to the quality of it.
Haha, ok… I guess the first step would be to retire those 18650 flames…. and get something more decent without completely killing the bank…….
I guess my current plan would be to get a set of 26650 TF flames combined with a Xstar SP2 charger. I have a habit of charging batteries overnight and unplugging in the morning…. thus… I MUST have protected cells + a charger that will shut off. I’m currently using a xstar WP2 II charger and am happy with it.
With the ugpraded drivers, will the 26650 TF flames have trouble with shutting off during high draw applications?
My J18 is doing just about 5,000 lumens measured on 3 TF 26650's. On 2 TF 26650's, the driver takes less power. So, I don't see a problem with them in either configuration. I don't recall what the amps tailcap measurement was though.
OK back home now and managed to snap a few pictures… let’s see if this will help.
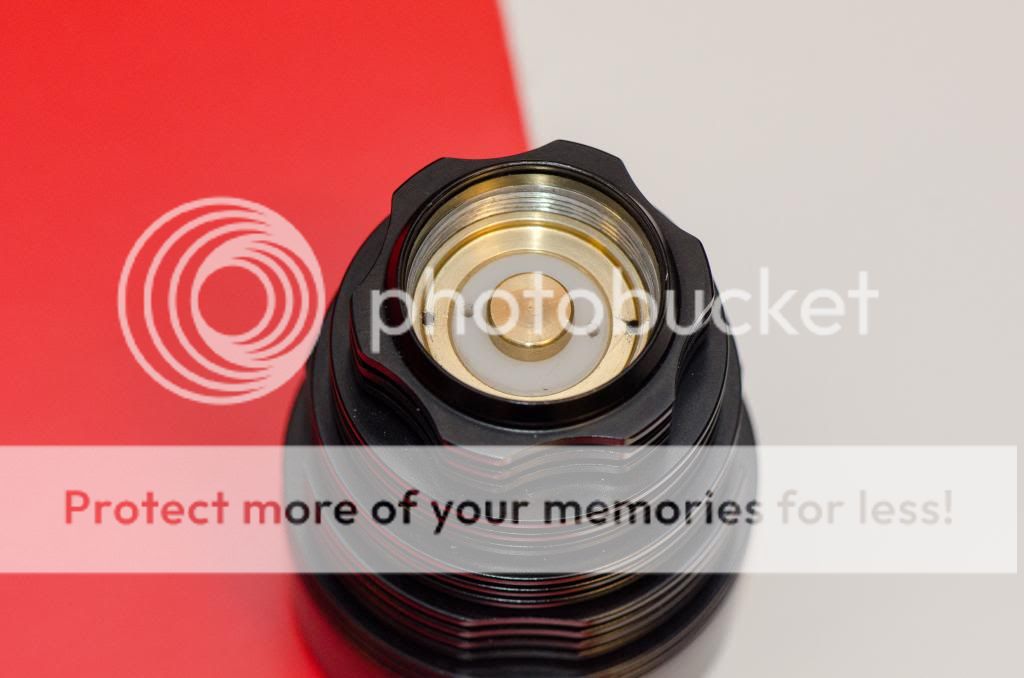
First picture is of the head, fully put together
This is the KD driver, sitting in the flashlight.
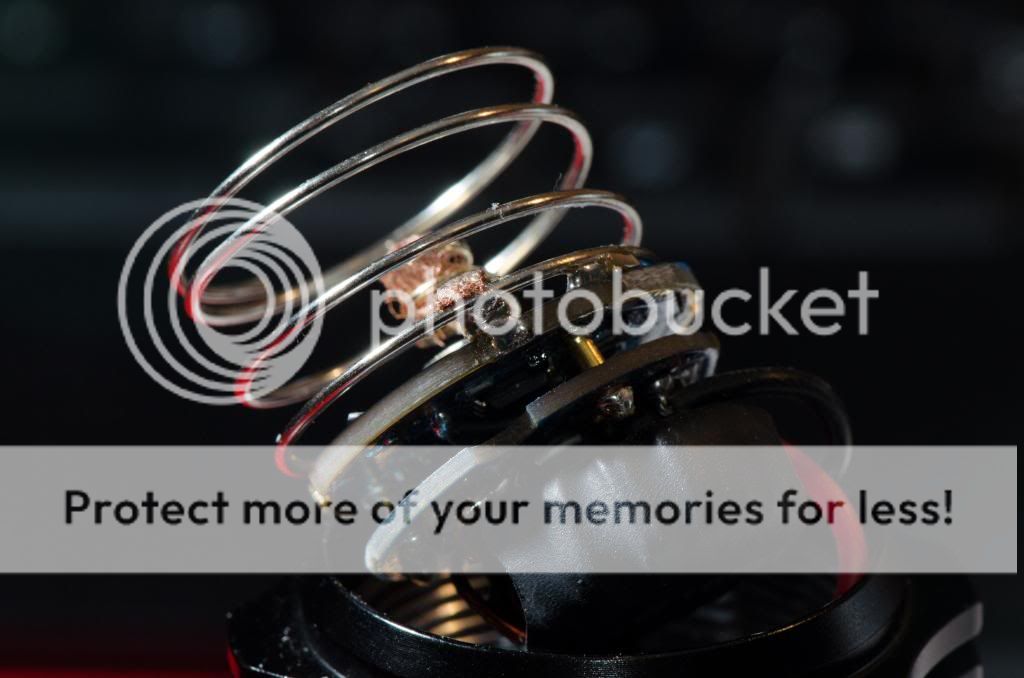
This is the springs attached to the driver.
I soldered the center spring to the centre gold pad. I soldered the big outside spring to two of the 4 outside contact pads.
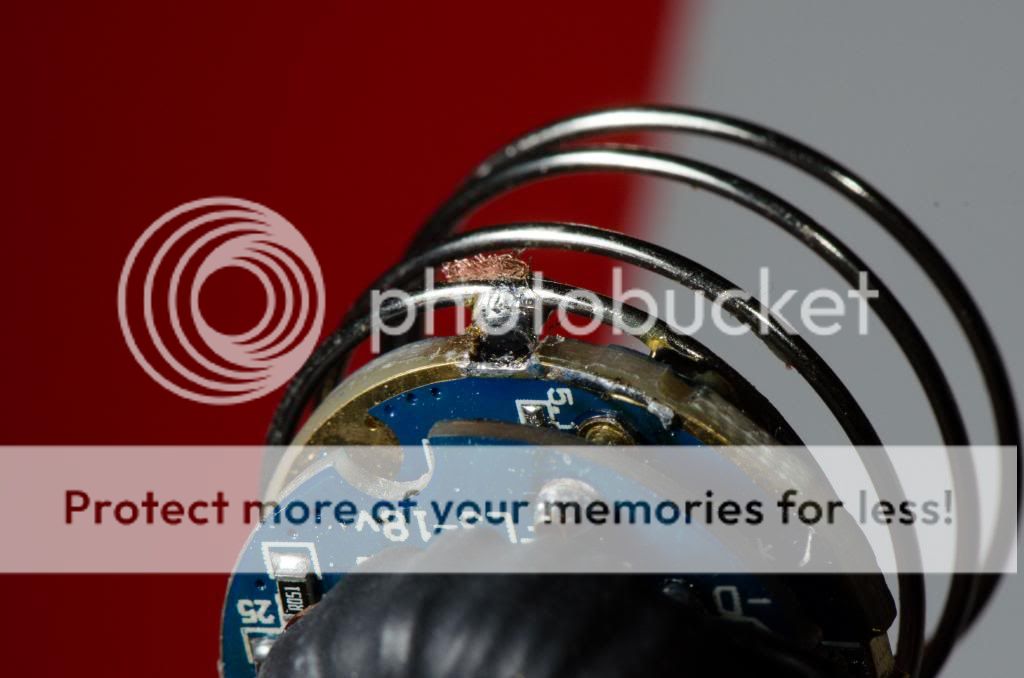
When it did not work, I was not sure if the contact was on the BOTTOM of the driver so… looked at the bottom of the driver. Found a link that went to the stop, and soldered a little bit of copper braid down to that point.
Another shot of that “connection” I made to the bottom ring of the driver
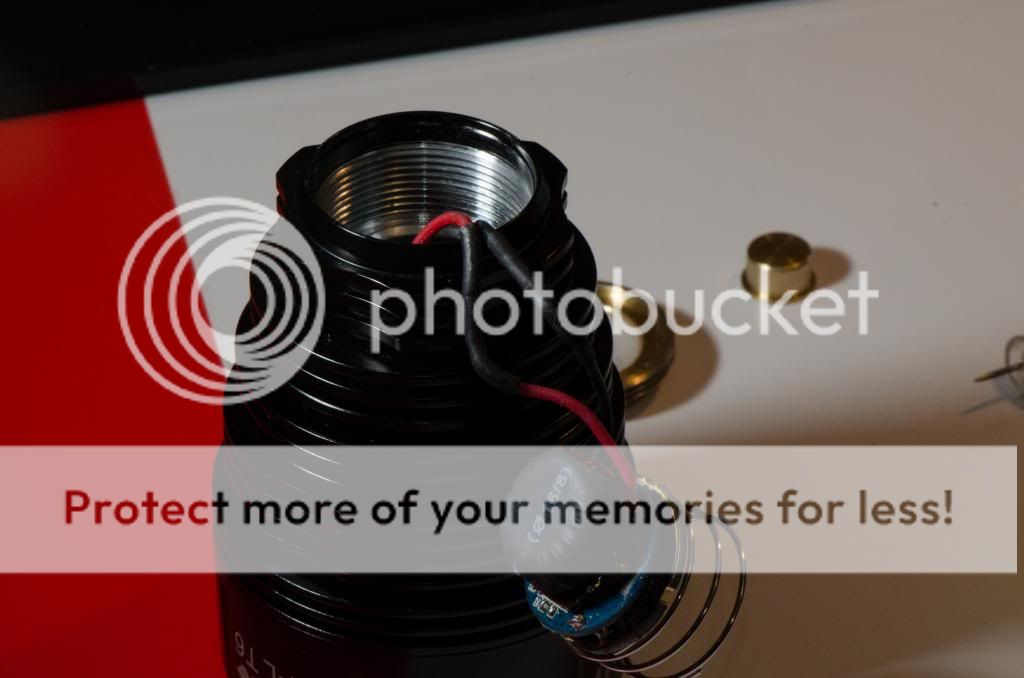
Final shot of the driver connected to the flashlight.
One final question. I looked on fastech and they have
TrustFire 26650 3.7V “5000mAh” Rechargeable Li-ion Batteries (2-Pack)
but when ordering, it gives me a drop down option for the
TrustFire 26650 3.7V 4000mAh Protected Rechargeable Li-ion Batteries (2-Pack)
Get the ones with the red/gold trim, labeled at 5000, but actual capacity they state is 4000 mah. The 4000 labeld ones I've never seen/heard of before. Both are protected.
The photos look good. The only thing to be careful about is the amount of copper wire on the +B spring. I’ve found if that spring becomes to tight or firm, it can put dents in the top of the battery. If you see this happening, I’d desolder that spring and simply replace it with a new one. It can also cause the batteries to not fit correctly too when trying to screw the tail cap down. So please be aware of these things.
Thanks Richie086, On the B+ spring I only soldered the copper onto the driver. the braid is just wrapped on the end of the spring (where the cap sits). I did it this way so the spring still “works” and is not rock hard
I guess the next thing to try is the batteries. I ordered a new set of 26650 TF flames off fastech and a new sp2 charger off ailexpress…. should be here in a few week. Hopefully that will fix everything… Fingers Crossed
I will keep everybody posted… and THANK YOU everybody that helped.
I got the trustfire flames 26650 today…. they where showing about 3.7 - 3.8v when I got them (sorry, I have a really old analogue meter which is not very accurate). Popped them into the flash light and … um… NOTHING… DOH…
As I don’t have my sp2 charger yet, I stuck the 26650’s into my WP2 II charger (one at a time) set at 1A charge…. with 2 full batteries…. NOTHING….
the 3rd battery is now charging… I will try again tomorrow when the last battery is full and see if there is any improvements… sigh.
Nope, the light does not work… with any batteries…. quick summary of what has happened.
I had some 18650 flames (3000 mah)… it worked… for about a week…. then the light got really dim. I mean…. maybe 400lm OTF on high… my el-cheapo single T6 light could easily outshine it….
This prompted me to think, the driver burned out (a few cases of this on BLF)…. so I ordered the customer programmed IO driver.
got that installed (as per pictures above)… and the light would not turn on…… if I have all the lights off in the room… and I bypassed the switch… I might get a very very very faint flash.
Figured it was the protection circuit in the TF flames (18650) not giving the light enough current… so … ordered some 26650 flames…
which brings me to today…… got 2 cells charged as of now and it won’t turn on at all… not even a flash. I tried by-passing the tail cap and still no luck at all…… I will have the 3rd cell charged by tomorrow morning (using a xstar wp2 charger which is not really setup to charge 26650’s… this is taking forever… LOL).
so… as i stand… I have a $150 beating stick… for “just in case” I get attacked…
I Think TomE ordered the driver from I-O and Jonney_boy got his driver from KD. is that rhight?? I ordered one from I-O but it has not arrived yet. Mine was just about as bright as my SKR but now does not turn on at all.
I opened up my J18, noticed that there is a spring soldered onto the driver. I see IO’s driver, there is no spring there…So should i buy new spring & solder onto the new driver or i re-use the spring on the original driver? No harm using the original spring right?
Also, what is the size (diameter) of o-ring to buy, to fit the rear tail cap there? there are 2 gaps there; and what is the size of the “press to on light that rubber”? (Dunno what it is called.)
**Erm, by any chance, anyone know TF-100; is the LEDs also in series? Cos thinking to get driver for both lights.
I got everything charged up now and…. nothing won’t turn on at all.
As for the spring, I just re-used the original spring and added some copper braid. I tried to order some AA springs and C cell springs and both didn’t come in the size that would have worked…
The next then I am wondering is if the factory (or IO ) got the wire colours backwards. I mean… I connected red to red and black to black………. maybe I should try connecting it the other way around What happens if you drive led’s backwards?
Yikes! Let me check my J18 tonight - I know I definitely went red-red, black-black but thought there was "+" and "-" labeled somewhere. I assume you tried jumpering around the tailcap to eliminate any possible problem there.
You can reuse the spring if you like, but try and be careful when desoldering it and then soldering it to the replacement driver. If you get them to hot, you can anneal them (melt them) rendering it useless. If you’re going to perform these types of mods, it’s a good idea to get some spare springs from either IOS or Fastech in various sizes and keep in a spare parts bin.
I don’t have a J18, so you’d have to wait for someone else to chime in and answer your other questions.
Johnny, had some time to look at my J18 and refresh my memory on this... For the center spring, I used a good qual silver tinned spring, little over-sized from stock but works well, but of course you could xfer the stock spring. If you notice, the stock driver has a really wide ground contact on the spring side - this I think is for proper contact for the brass retainer ring assembly. The new IO driver (or KD) doesn't have anything near that wide - it just has 4 contact pads (see the IO product pages for a photo of what I'm talking about). That big spring, that it looks like you soldered, I ignored but still use it. Once the retaining ring is screwed down, the retaining ring itself makes contact on the board. So, I widened the contact pads by adding small pieces of copper tape next to 2 of the pads, and soldering them to the adjoining pads. Now, I can't recall if this actually fixed the problem or not.
So what you can do to test this is with the batt tubes removed, stack 2 batts on the driver spring, and use a jumper wire (I use 12 gauge stranded wire) to go from the batt neg down to one of those contact pads on the driver. I just did this myself and it lights up the light, so should work. Your mod of soldering that big spring may be doing the same thing, I'm not sure, but I took a different approach of making sure the brass retaining ring makes strong contact with those pads on the driver.
Tom, thanks for taking the time to pull apart your light to help….
I gave it another try tonight… I removed the large spring, soldered some copper tape to one of the pads, stacked 2 batteries together like you said on the center spring and put the copper tape straight to the battery negative… the light gave me a quick flash… then nothing…
ended up removing the spring, soldering all 4 pads together, and reassembling… nothing…….
One thing I did notice…
18650’s… if I put the batteries into the flash light and jump with a screw/clip at the end to bypass the tail cap… I get a small spark… If I use the 22650’s… I get a bigger spark… so the driver is trying to pull power…. just not driving the lights.
At this point, i’m starting to wonder if I
a) got a dud driver.
b) got a huge dud light.
c) really suck at modding lights… hahaha…