Uniquefire UF-T20 mod: 3.05A xpg2-3C dedomed on Sinkpad

Hey its E1320! How you doing?

Im with you on that nightcrawl do the same thing to a C10. I personally like the C10 better, in the looks and it performs better then in the xre (green) department.

Put it in Tom! Interested in whats the difference in dome and no dome!

thanks for posting this. I’ve been considering almost the exact same mod. I already did the sinkpad soldered to brass pill with a green xpe, but for the next one I’m going with white, but haven’t decided which emitter.

I think I’d prefer xpg2, but I might do xml2 with everything else the same (though I prefer 5000k) so we can compare numbers.

Haven't been camping with it yet, just annoyed some neighbours by searchlighting the little square I live in. I have a reflector based budget thrower build (49mm reflector, dedomed xpg2, 2A) that throws 70 klux, and I don't like the spill much because everything in close proximity is lighted up as well and so distracts from what you want to light up in the distance. This one effectively has no spill at all. And I can also hearthily recommend a neutral tinted led for a thrower like this, very nice in the outdoors.

But to directly answer the question: o yes, those photons get there alright! Huge fun!

Simply amazing results! I can't help but think that it would be even better if the LED was not dedomed. Dedoming works great on a reflectored light because it's the spread of unfocused light from the LED hitting the reflector that helps focus and throw the light down range. In an aspheric light you want the light from the LED focused into the center of the lens, not the walls of the head. Leaving the dome on the LED should focus more of the light into the center of the lens than the same LED without a dome.

I had an XR-E ftt light that I accidentally dedomed and it ruined the output in comparison to when it still had the dome.

Now I wonder where can I get XPG2?

My plan is 3.85A Nanjg, custom programmed, domed, so we'll see if I can make 100 kcd w/domed but at higher amps with the XP-G2. My usual C8 builds are 3.85A with copper discs added, so think it will be ok for the T20 (my builds are typically pushing it ). At those high amps, I've found the Pana PD 2900 is excellent to get full amps for 3.85A with XM-L2/SinkPAD combos, and the Samsung INR 1500 I got from FT is actually a little better.

I used to think the same thing (de-dome for reflectors but not aspheric), but DrJones’ post about this topic claims that throw is increased for aspherics, too.

I dedomed an xml2 for my 7g5v2 and that made a huge increase w/ the aspheric lens.

I get 180k lux @ 1m (measured at 13ft). It has slightly higher current than stock because I upgraded driver wires, and I am using a copper sinkpad. When it was in stock config my measurements were slightly lower than selfbuilt’s numbers for the 7g5v2.

Really?? Do you have a link to that post? I’d love to hear what he wrote about that. I think it’s awesome that it increased output on your 7G5v2. Sure doesn’t make sense on the surface but I’d love to be wrong about it. I may have to arrange for the same mod on my UF-T20. :bigsmile:

20mm pads have been ordered. My already xp-g2 modded T20 will be getting copper and 2.8a in the near future!

Thanks for the detailed post and awesome mod!

Mike

Wow. The XP-G2 continues to impress me with its flexibility. djozz, I think you’ve even usurped the DEFT-edc for size/throw.

last paragraph of first post for a direct comment Flashlight Optics - Dome, Dedoming and Throw

it didn’t make sense to me either, until I re-read his entire post a few times lol

edit: also, i might add, dedoming made the 7g5v2 reflector head somewhat useless for me. the spill is so dim that I might as well use the aspheric…

Well, that would have been nice, the DEFT-edc has about the same length, but the head diameter is 33.6mm versus 44mm for the UF-T20, the weight is 114 gram versus 174gram for the UF-T20, so it really is a bit smaller. The throw of this build is better though, the DEFT gets to 86klux, I measured 108 (I guess that if this light gets a bit better battery and used a cool white led instead of a 3C it may get to 130klux ). So I'd say it's the same league, which is already very nice for a light that has costed me 32 dollars alltogether.

Sorry, still having fun with the light . Want to share this pittoresk rainy beamshot I just made (just before going to sleep). (According to google those two tiny trees in the hotspot are 83 meters away). Good night to you all !

Crap - I gotta get this T20 mod done!

I just finished a C8 mod: XM-L2 T6 0D/SinkPAD, Nanjg 3.85A. Best #'s after doing the solder flux wick (ooops!) mod to the tailcap spring (picked up 60 lumens btw...), got 1230 @start, 1200 @30 secs on a fresh Panasonic PD. This is only 30 lumens less than a C8 XM-L2 U2 1C/SinkPAD on the same battery, same fresh state, same driver, etc. The T6 0D is clearly a bluer beam pattern though, but I've seen worse XML T6's.

Update 03/20: T20 mod Done! Upgrades: Nanjg 3.85A, 2 copper discs soldered in the pill, XP-G2/SinkPAD, sanded down to fit tight, added solder wick to both springs, replaced switch and rubber boot (blue GIT).

Before mods, stock: fresh Pana B unpro, 3.7A measured, lumens: 731 @start, 615 @30 secs, throw: 34 kcd

After mods, fresh Samsung INR 1500, 3.89A measured, lumens: 670 @start, 646 @30 secs, throw: 75 kcd

Just not sure of XP-G2's bin/tint, but not bad results. In theory, maybe would get 150 kcd dedomed, but I'm still working on a successful dedoming...

Here's some photos of the build:

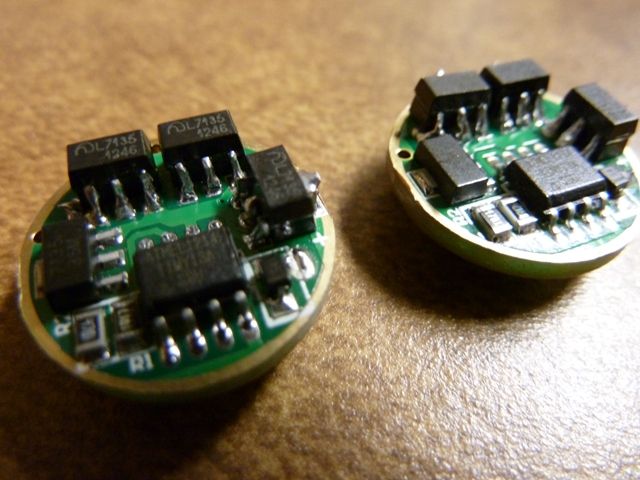
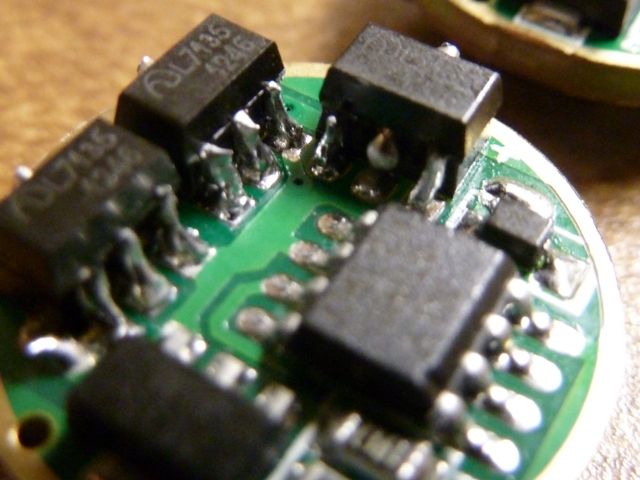
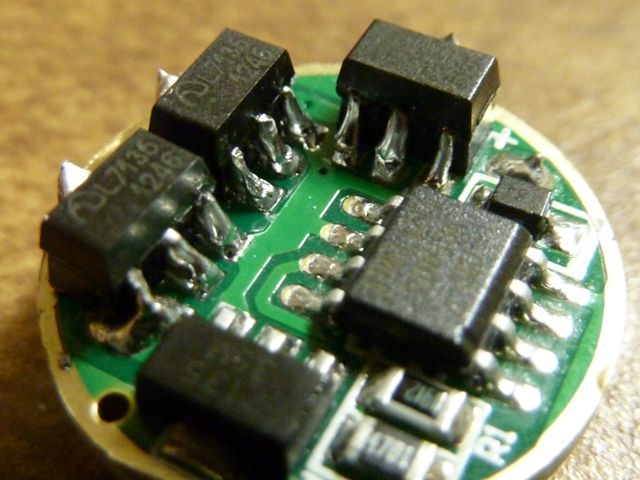
Did two 3.85A Nanjg drivers together, one a C8, other the T20:

On the left is the T20 pill orginal pill, on the right is a C8 pill all polished up:

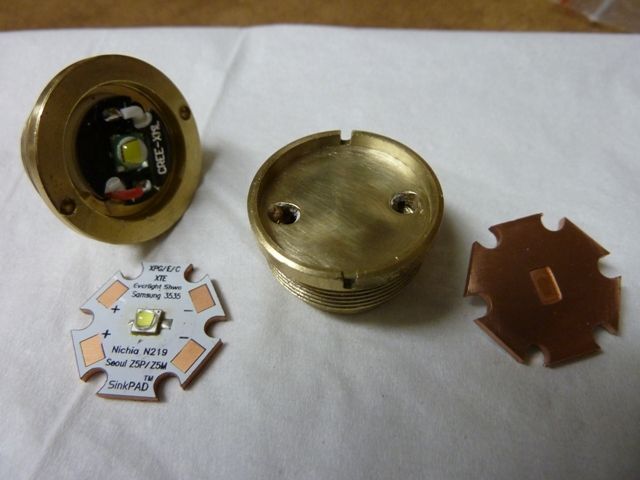
The T20 pill prep'ed and the SinkPAD all prep'ed and sanded down. For the contact surfaces, I sand starting at 220 or 400, then go all the way to 2500 grit to get them perfectly polished for a smooth contact with thermal grease:

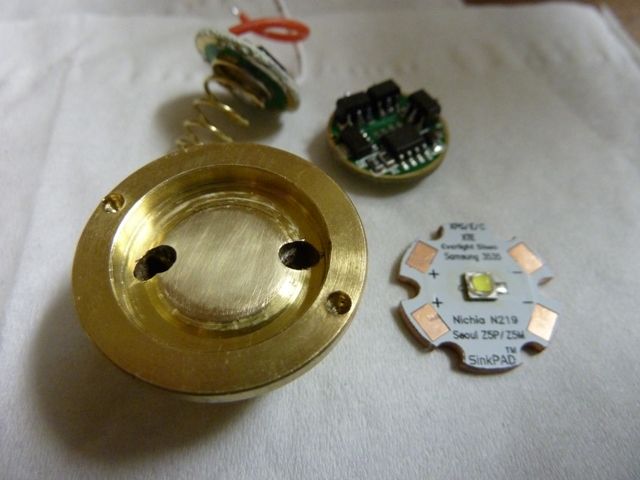
There are 2 copper discs in there, soldered in using solder paste and a torch:

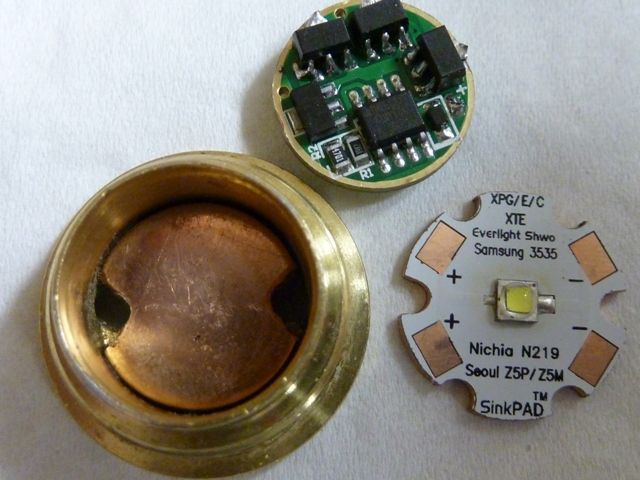
Assembled, tested. LED wires are 22 gauge, silver tinned, teflon coated.

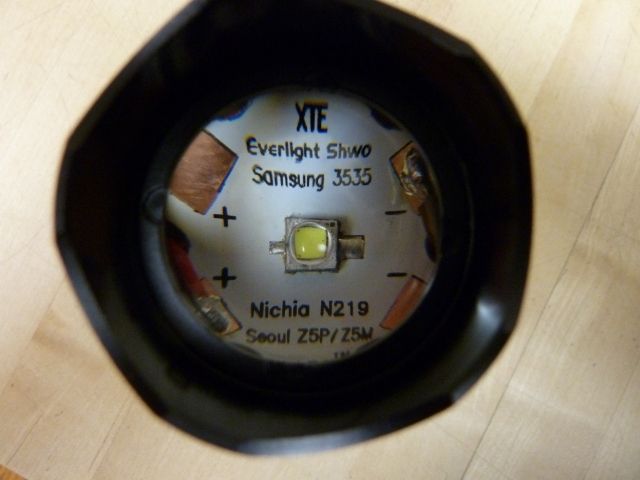
djozz - really liked your picture of this view so stole your idea and did the same shot! It is impressive showing people this direct look at the emitter and SinkPAD.

Tom,

That is some nice soldering on those nanj piggy backs. Care to put forth any tips on how you get the solder to span the gaps between the pins so neatly?

I can do it once in a while, but most often I end up using a piece of wire.

Those additional 7135’s do look great. Any soldering tips would be greatly appreciated.

Also, can you post a link as to where I can buy some copper disks?

that is some neat soldering there, impressive! Nice also to see the difference between +dome and -dome in the same flashlight, I suppose the measured lumens are done when zoomed out? And you have done the things I have neglected, like improving the conductance of the springs and improving the switch.

Thanks for the pictures too , I appreciate it when the pictures are well done .

Getting lots of practice with that soldering. Thanks all for the appreciation! Gotta get to work - will provide details and answer Q's.

Updates:

- lumens measurements, yes -- lumens measured at full flood position, sorry didn't mention that

- soldering: I have a Hakko iron, ~$90-$100 I believe, using the stock tip which is a small flat tip - don't use a pointy one -- too difficult to get heat on the legs, and keep the iron tip clean, always before use (use the wet sponge thing). I use a bent needlenose to bend over all 3 7135 legs at the same time, quick, simple, easy, works every time. For the soldering, I cheat somewhat. First apply flux to the base 7135 3 legs (use the pen type applicator) and get some on the 3 legs of the top 7135, position the top 7135 in place (no adhesive of any kind), use a tweezer in one hand to hold down the top 7135 in place, other hand is the iron with solder applied to one side of the tip - be sure to use enough, not too much - hard to describe.... Then I try to first touch the base leg then sweep up to the top leg - try to get solder on first, then use upward strokes -- too little solder on the iron result in not getting enough solder on the legs, too much solder, you may get big problems with a blob. Oh - I'm putting the driver in a table top vise and using drug store type magnifier glasses (think 2.0 or 2.5) - that's all. Once it looks good, I inspect with a 10x lighted pocket magnifier, when all done, do full continuity checks. I always solder all 3 legs, then do the back connector - for the back connector/leg, big blob of solder on the iron, tilt the vise back so gravity helps and also easier to see and work on (also tilted back slightly when doing the front 3 legs). Also in doing the back connector/leg, be sure to still use the tweezer to hold down the top 7135, and also important, do not hold the iron on the connectors - can cause the entire bottom 7135 to slide off it's pads (happened to me once or twice)! So, short contacts with the iron , stroking up/down to fill the gap. I know pics would help with this, hope everyone can follow this....

I always clean up the board with alcohol on a stiff brush afterwards (using a brush from an old electric razor) - gets rid of the flux stains, think that's why it looks so purty in the pics .

Forgot to mention: I use the iron at 750F temperature, little hot but found this to be the best for me...

Nice pics Tom! You almost hate to install that kind of work. I just like looking at it!

Nice numbers also!

Thanks for the explanation Tom E. Nice work.