Since it heats up fast, this flashlight is for short/mid-term use. Anyway, I like the look of this YinHex YH-X9.
:face_with_monocle:
Yeah, I think it an take the heat though. Especially if the thermal issues are dealt with. Once I address the thermal path with a better heatsink. I intend to run it down to low battery while in use (not tailstanding like I did above) and see just how hot it would get. With the handle, I’d have no problem letting the head get to 70C.
Holy smokes! You went completely nuts with that soldering iron! I wish I had your skills, talents and patients. You do excellent work sir! So many attention to details…
After OL’s SRK mod host results with wide angle optics, I have a very good feeling about these for their narrow angle optical efficiencies and several positive comments from MTBR members… time will tell.
Even with a hot running host, I think sinkpads will help with thermal sag. Ultimately, surface area constraints will probably define the limitations regardless of whats inside the thermal path. Will this still satisfy if each emitter were driven @2A each, or reprogram the master for 3A high and 2A medium?
Most of my high powered lights overheat when running static indoors but not outdoors. Have you taken your new beast for a walk outside yet? Just dont let it off the leash or it’ll be chasing the p60’s up the trees!
It’s –5C outside and windy; I will not have a thermal problem out there. I will be giving it a try tomorrow night anyway, just to see.
I agree, sinkpads on a better base is what I’d like to do. I have no machining ability, so it will be a challenge to make the new heatsink.
I want to reprogram for four modes:
0.05% (or whatever gives me moonlight),
20%, normal sane output
60%, long term insane output
100%, short term insane output.
I have a programmer thing that I got from Fasttech, but it still sits in the little bag. One of these days I’ll have to try it out.
Very nice relic38. Your creativity really shines through here. Thanks for sharing this with us.
Hi Relic, how I admire your level of skill ![]()
It seems Apex 5T6 doesn’t share the same driver board with YinHex, any other option to help me get rid of low PWM ?
I also willing to learn to program MCU, but I do not have any idea to start ![]() thanks ~
thanks ~
Nice thread and build.
Great work/info on checking emitter plate temp vs temp on the head.
subscribed  . This will be a beast when finished!
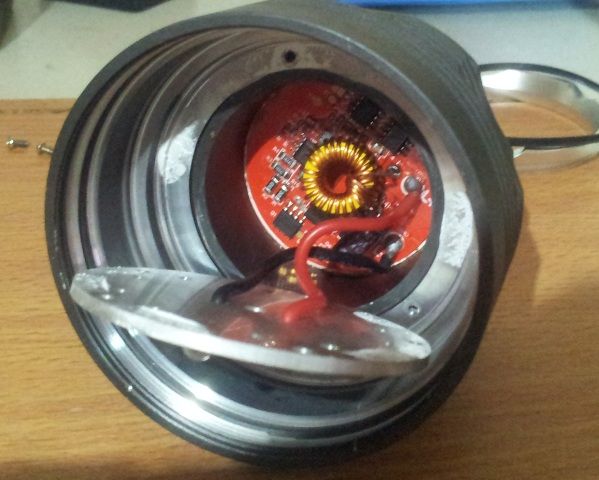
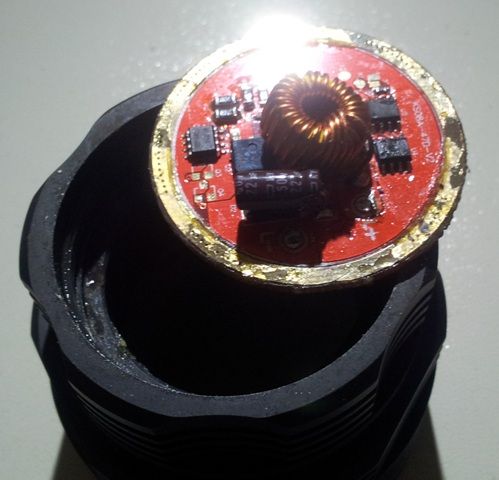
Hmm, that looks like the typical driver that’s in these lights. It has a similar design to the SRK without the separate coil per LED. I don’t know if these can be reprogrammed. You can probably adjust the current with a resistor mod. I see four resistors on the left that look suspiciously like current sense resistors. They are in a strange location though, so I’m not sure. My driver was (sort-of) glued in so it took a little persuasion to get it out. Can you get a couple of close-ups of the board, close enough to read part numbers?
On a side-note, I see they really did a nice job with the thermal contact on your LED plate; they really got that adhesive on there good :Sp
I don’t really mind output of this Apex, just the low PWM, I’m kinda sensitive to low PWM :bigsmile:
As for the heatsink compound, I dab it when the first time I opened it.
I still put a few more dabs around the rim just now when I closed it.
wow, relic, we are certainly birds of a feather - that’s a whole lot of work to do to a light. I know the feeling though - once you get the light, and think of how it COULD be done….it MUST be done lol
For the $46.00 I got one also as a host. Stripped all the components off the board and replaced everything with 5 10x7135 drivers, slaved. Cut traces and rewired LED board accordingly.
I really like the looks of this light.
Rich
I acknowledge the 1-up… 17.5A wow! I’m not sure how much brighter that would be, but wow!
Edit: OK, this is what I want to do when I get the heatsink fixed. Definitely. Got any pics?
Did you do anything on the optics side to help with the losses due to the reflector gasket and bezel?
I have a small update I hope to post tonight regarding that.
I added optical and tailcap mods to the review.
What remains is a much larger task of fixing the heatsinking problem. If all goes well there will be a solution to this soon enough ![]()
How about a good link for the lens? Only leads to a thread, couldn’t find it.
Now I have to go get some suicide blades for the X-Acto and have at the rubber. I already resoldered the switch.
I didn’t braid the springs; I use IMR’s and the thing gets hot real fast, so I don’t think I have a heat transfer problem, but the XML’s in mine are a horrible tint. Not gonna spend 50-60 for new emitters and have to reflow 5 of them!
Thanks for this! We’ve thought along the same lines.
Rich
WOW! That's a lot of work and well done. That many wires would scare me off, LOL. Great mod!
?
The lens link goes to the original post that has the link in it. It doesn’t matter though; they are all gone and the seller cannot get any more.
I strongly recommend you braid the springs; you will fall out of regulation quicker without that mod.
Thanks O-L, it has been a fun mod. I have some more to do, the most difficult for me; machining. Wires and tiny components; no problem.
After read relic38 mod on this YinHex YH-X9 & Old-Lumens on the FandyFire / SRK King king mod, that inspired me to follow the steps to mod my Apex 5T6.
Mainly because the original driver has annoying low PWM that I sensitive to.
Here goes :-
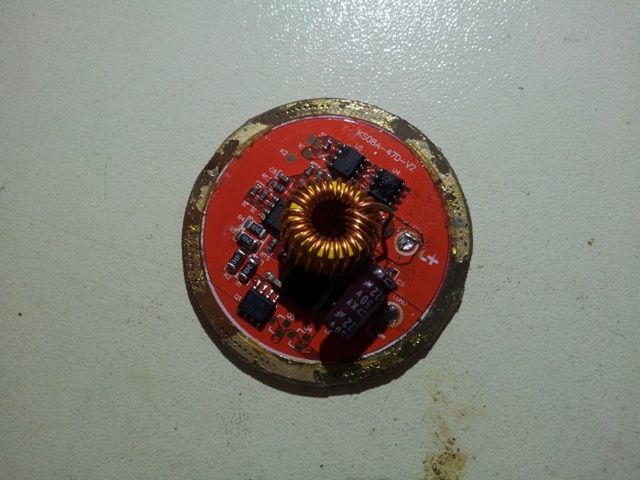
Out the driver
Before . . .
After. . . clear off the original components, wicked & clean with denatured alcohol.
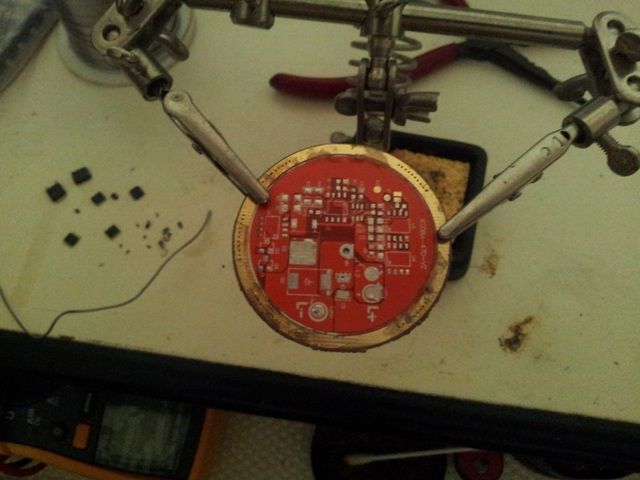
The Master & Slave
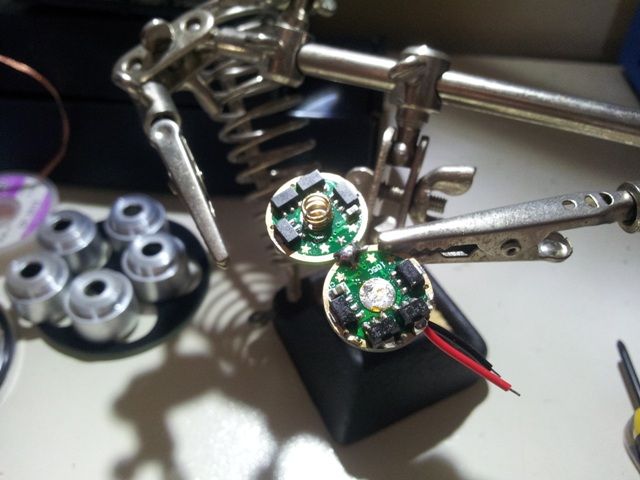
Set to three modes, typical Low, Mid & High, not really going high current drive, just a shy of twenty 7135 chips. (350mA x 20 = 7000mA, 5 LEDs in Parallel, so each get 1,400mA in theory, also my first time stacked it & worked! ![]() ) due to the limited thermal transfer path from the mcpcb to the head. I also did the added braid or wick wire to the springs.
) due to the limited thermal transfer path from the mcpcb to the head. I also did the added braid or wick wire to the springs.
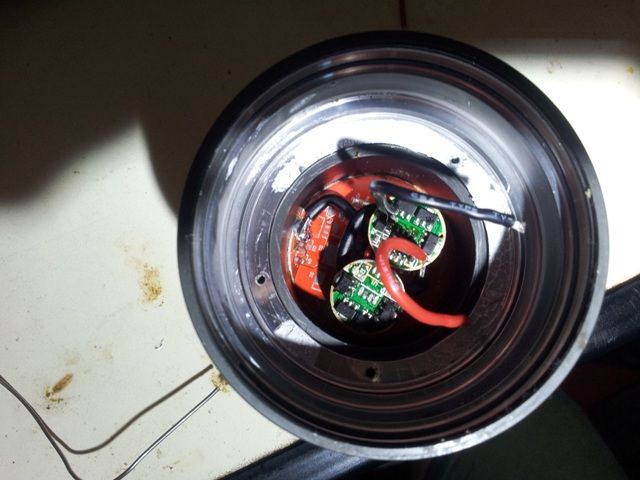
Well that just about for it, retrace the positive and negative path on the original plate, connect with big wire for current. clean off the adhesive residue on the rim where the driver sit & the driver plate, dab some Dunlop glue & put it back all together with batteries in it to add some push for the glue, test three modes runs perfectly ! Let it sit overnight babe ~ :bigsmile:
Thanks to relic38, Old-Lumens as well as other modders ! Hurray BLF ~
iron potato. Do you know how many people on this forum, if they attempted this mod would have success? Not many. Job well done.