Friday was my last day at home alone, and worked as fast as I could to finish the built, I just wanted it done.
As I had tested: the cast-inside-polyester light worked  , so there was reason to go on. I had to remove the excess polyester by sawing and sanding. i could do most of the rough work with the small bandsaw and the electric sander, but the top part with the raised bits had to be done by hand, and it gave me a little insight into what the work would have been if the original hand-build rules were to be followed in the whole build
  (I admire you hand-build guys for that). Then I hand-sanded all sides with 400 and then 800 sand paper, and polished the brass a bit with the Dremel. The Dremel was not good for polishing the polyester sides of the light. I managed to get the polyester reasonably clear by rubbing it endlessly with ordinary copier paper, I think it works by heating up and melting the top layer of the plastic by the rubbing movement .
Since animated GIF's are all the rave at the moment at BLF  , I tought myself how to make them (though they are not as neat as some others I have seen), and so you will be bothered by no less than three of them
  . Here's one, of the cutaway of the excess polyester (I was lucky, the screws came out of the polyester easily):
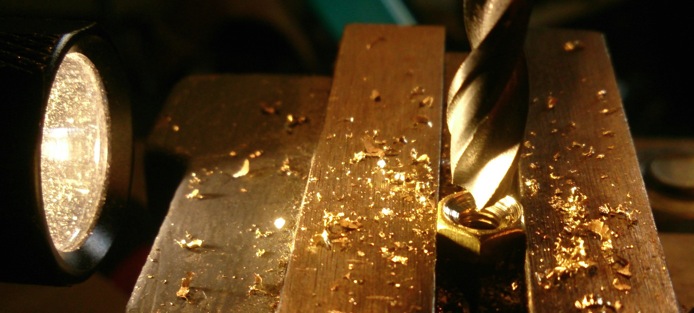
Then I made the battery connections. I used a 9V battery connector and drilled away the rivets of the connection bits:


I used small brass M2 screws to attach them to the light.
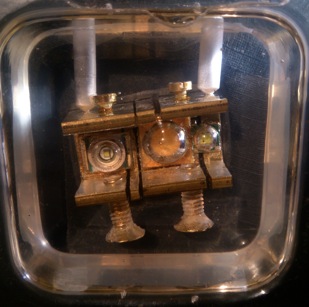
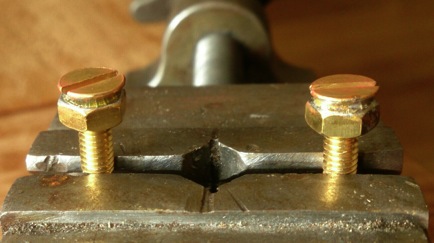
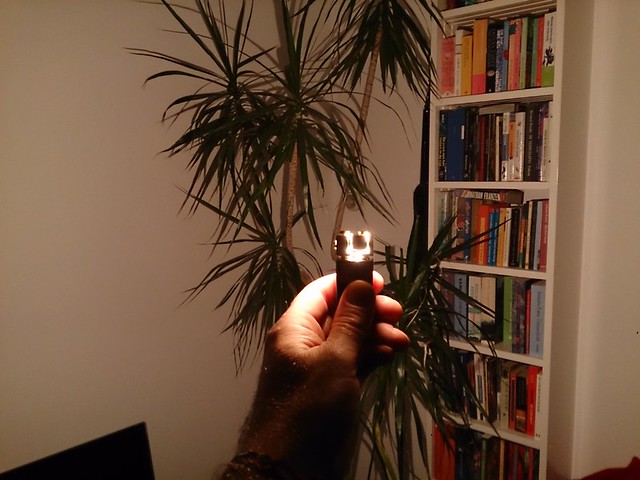
For the switch-screws I wanted flat-head brass M4 screws, I did not have any and could not easily find some, so I used conical ones and soldered a partly bored out nut onto it. Then sanded it into shape. (million dollar question: what is the flashlight in the following picture )
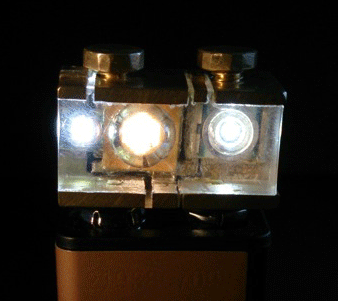
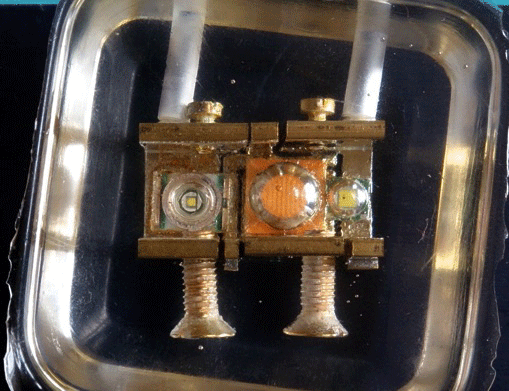
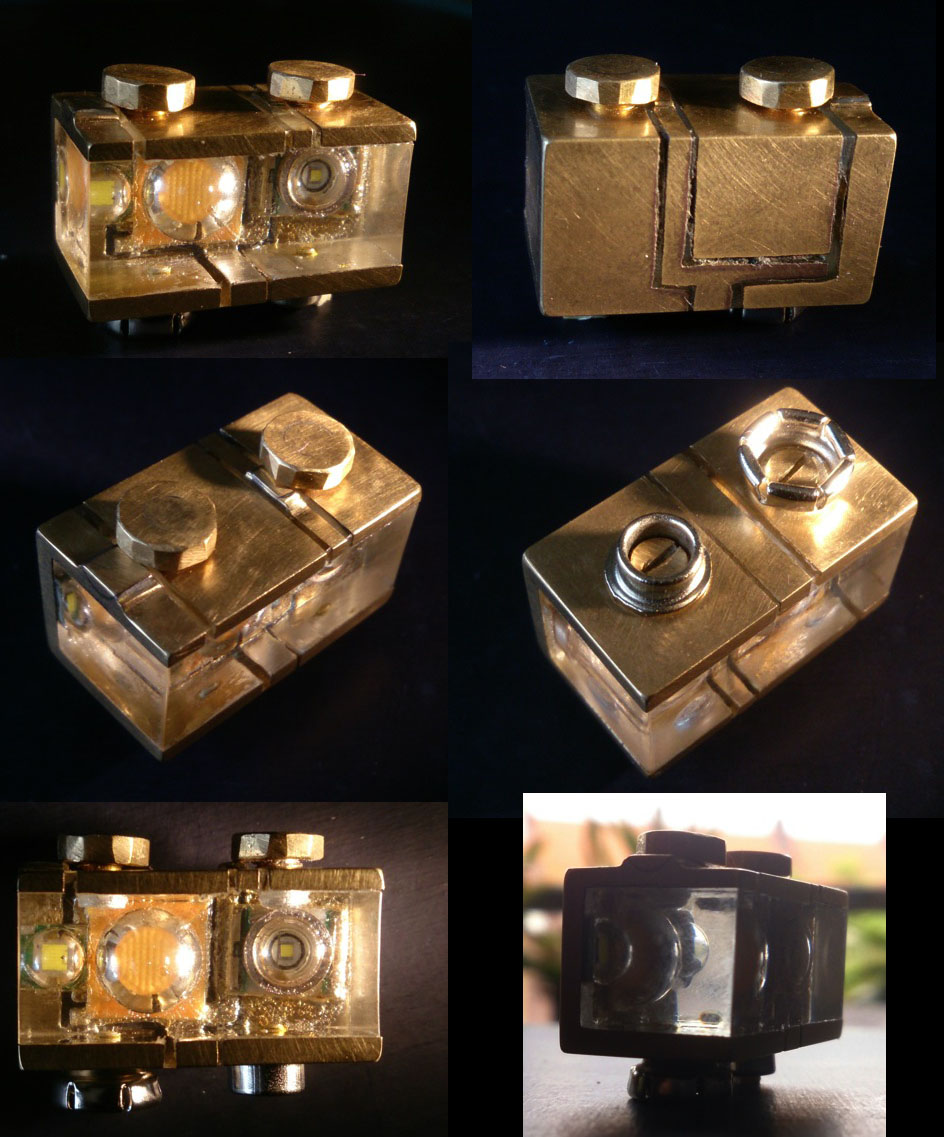
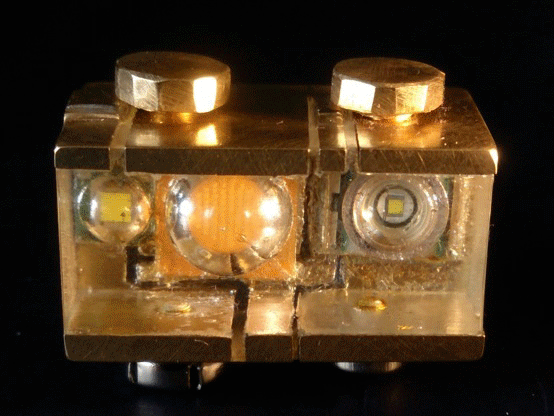
So here is the end result, a wireless  , 3-emitter, 4-mode, 9V flashlight, not as slick as planned, but I think it is charming:
joehoe, another animation :
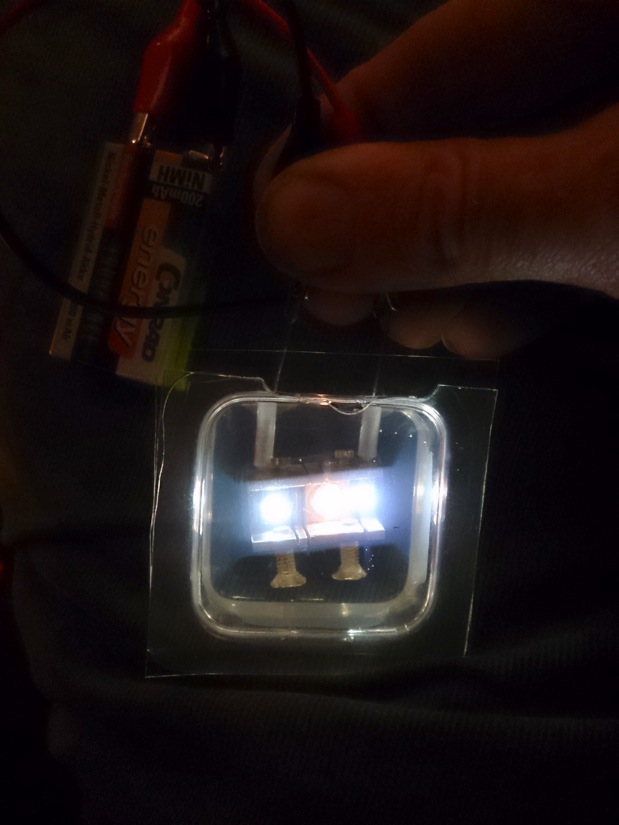
operation and currents (test batteries are a Duracell 170mAh NiMh and a Conrad Energy 200mAh NiMh, freshly charged, all currents were recorded 5 seconds after switch-on, I don't think the light would survive the usual 30 seconds, apart from the moonlight modus  , you can monitor the MT-G2 on your skin directly on the back of the emitter):
both screws loose: moonlight, all leds light up, the pretty mode), current 0.7mA with both batteries
left screw tightened, MT-G2 + XR-E light up, too hot within 20 seconds): 0.5A with Duracell, 0.7A with Conrad battery
right screw tightened, MT-G2 + XM-L light up, too hot within 20 seconds: 0.55A with Duracell, 0.8A with Conrad battery
both screws tightened, just the MT-G2 lights up, with 5s manual stepdown (IF bleeding hot, THEN loosen screws, fast): 1.7A with Duracell, 3A with Conrad battery
(The batteries drain about as fast as the light heats up whenever leaving moonlight :evil: )
I do not have a fresh 9V alkaline at the moment, I will add that later. Also I could not do output measurements because I do not have a integrating sphere, and a ceiling bounce measurement is impossible with a so broad flood (trust me, I tried, I even did an attempt to direct the light to the ceiling putting the light inside an old bicycle front lamp reflector). You can guess however that 3A through the MT-G2 will output about 2000 led-lumen (before the emitter heats up lightning-fast), so say that 50% of that actually manages to leave the light, 1000 lumens is pretty ok for this ieniemienie light .
Seemingly the light has just useless modes, with a moonlight that is 1 lumen the most, and three other modes that can't be used for more than seconds. But I found it is actually nice when it is used on empty alkalines, the direct drive MT-G2 squeezes the last bit out of them, with usable output most of the time. But let's not try to justify this light, it is built for fun .
Some beamshots, first is MT-G2+XR-E 2.5 meters from corner, second is just MT-G2 2.5 meters from corner, third is MT-G2 20cm from wall. Exposure is automatic (phone camera), the idea is that the pictures give an impression of the beam, not the brightness (but it is pretty bright alright )


The side-by-side emitters give nice shading effects in which you can also see what the difference in die size does, here's the shadow of my desk lamp, the MT-G2 plus XR-E together:
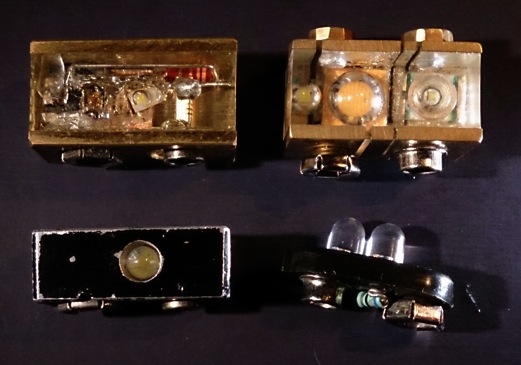
So that's it, I loved thinking about the design, and it was huge fun doing the build, and was a bit surprised that it actually worked. I can think of endless improvements on the design and how to build it now, but I doubt that I will ever actually make another one, the build was more a proof of concept than anything else. I will end with yet another animation of the light (on moonlight mode), and a gallery of the light together with some predecessors in its evolution that I build a few years ago. Thanks for reading .