What’s this!. A real life/non digital flashlight in this mod thread! Never thought I’d see the day
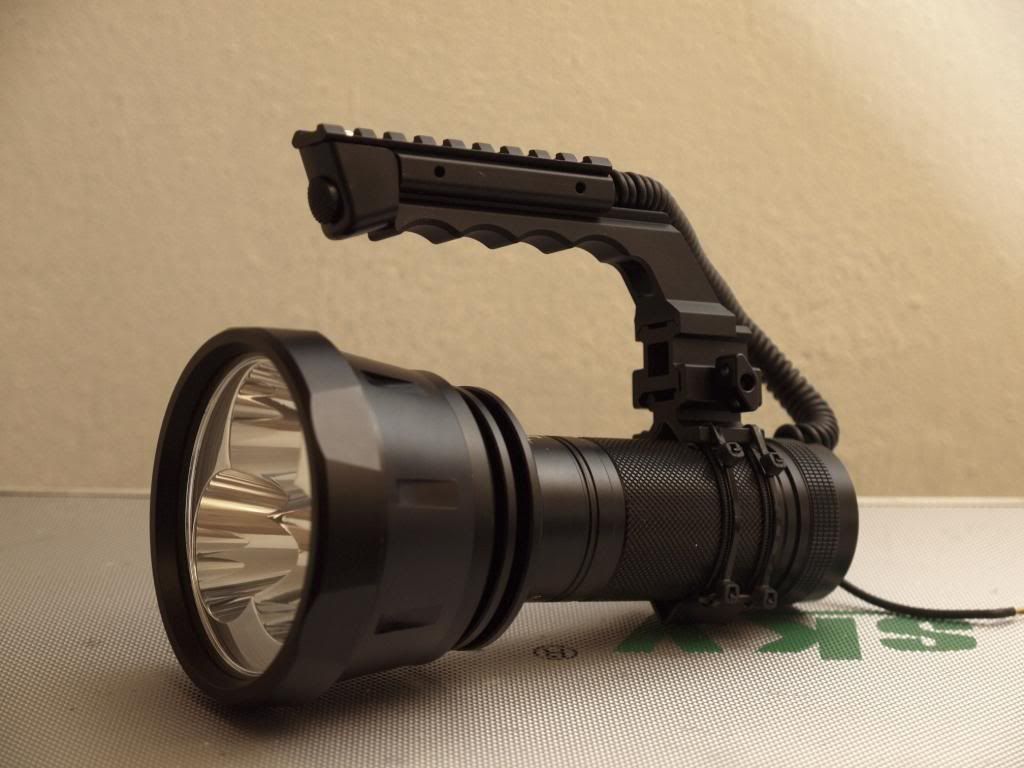
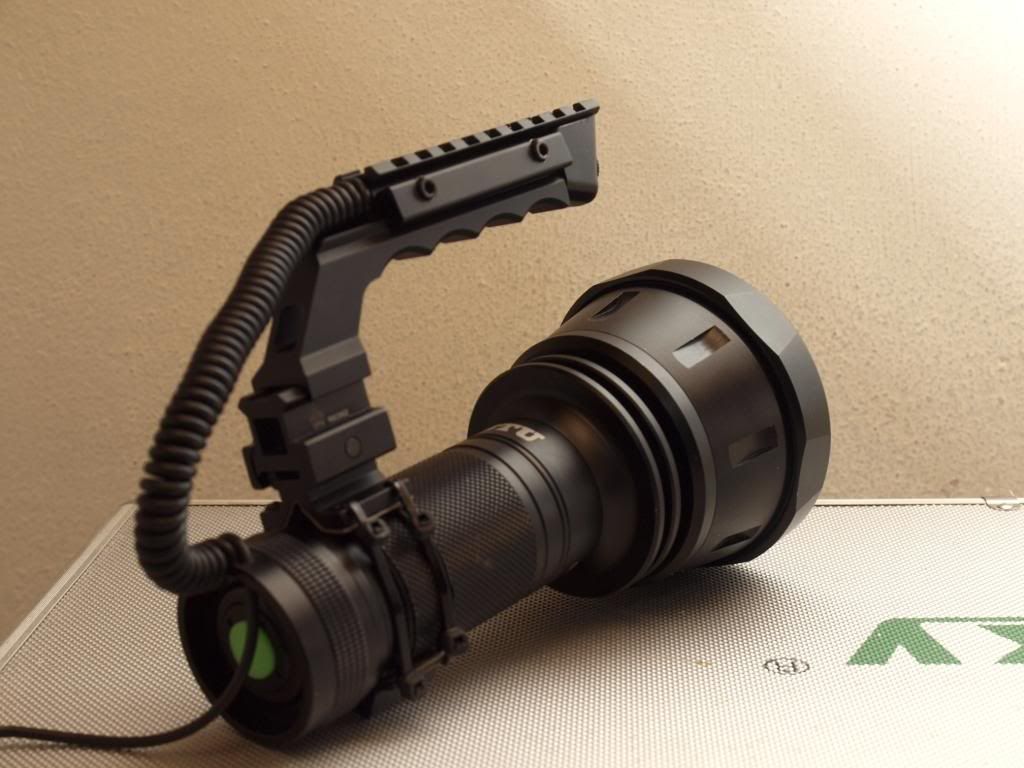
The BTU host finally arrived along with most of the parts I needed for the handle. So I got stuck into assembling the handle and finalizing the trigger switch before putting it all together. I was really keen to see if this thing would actually fit as I had anticipated.
So far so good, and thanks to the 3d model no real nasty surprises.
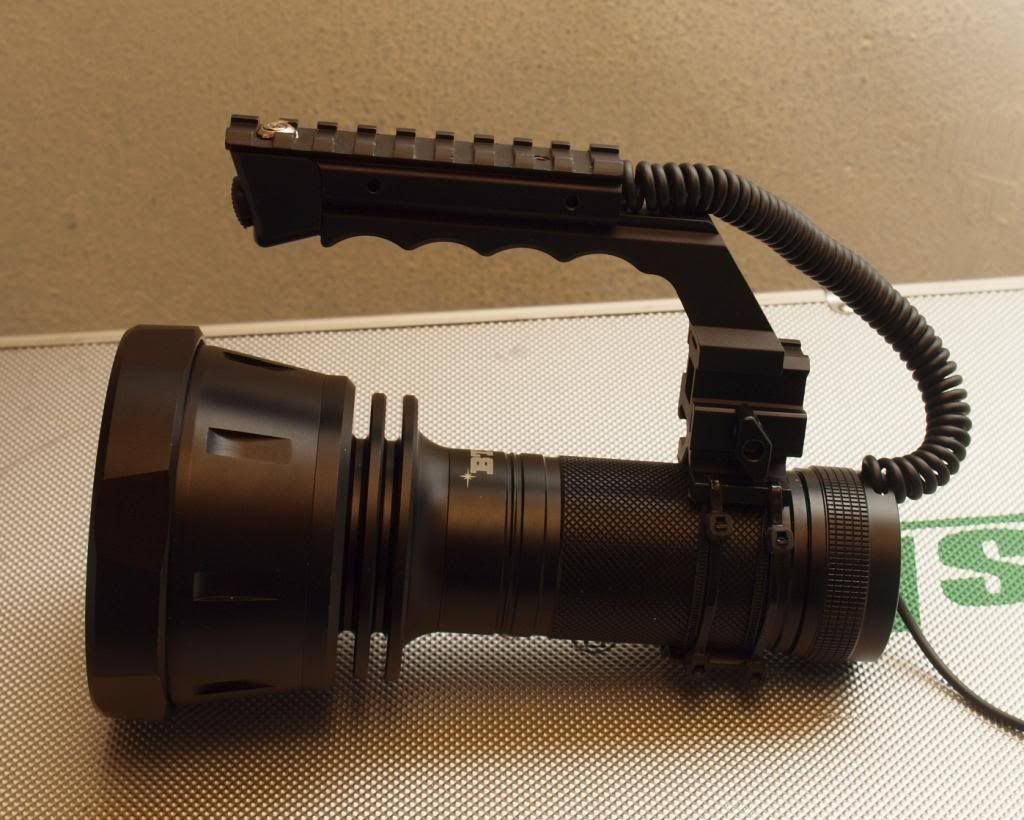
Here is where it’s at right now.
The handle is temporarily mounted to the battery tube using a two part barrel scope mount with picatinny rail top, thanks for this goes out to the inept Kaidomain shipping department who sent me this completely by mistake instead of a plastic reflector I had ordered. Thanks guys, it actually came in much handier than the reflector would have as the actual rail part that I plan to use is still in transit.
Ultimately with the proper rail in place the handle will sit about 15mm lower than it currently is but other than that it’s very close to how I want it.
I’m still debating whether to mount that handle rail to the tailcap as in my renderings or directly to the battery tube. The latter would give me more options for a secure attachment while the tailcap option would probably make boring out the tube for 4x18650 cells easier. The tailcap is even less spacious that I expected and drilling two m4 holes to mount that rail may not be possible anyway so it could be an easy choice in the end. We’ll see.
-
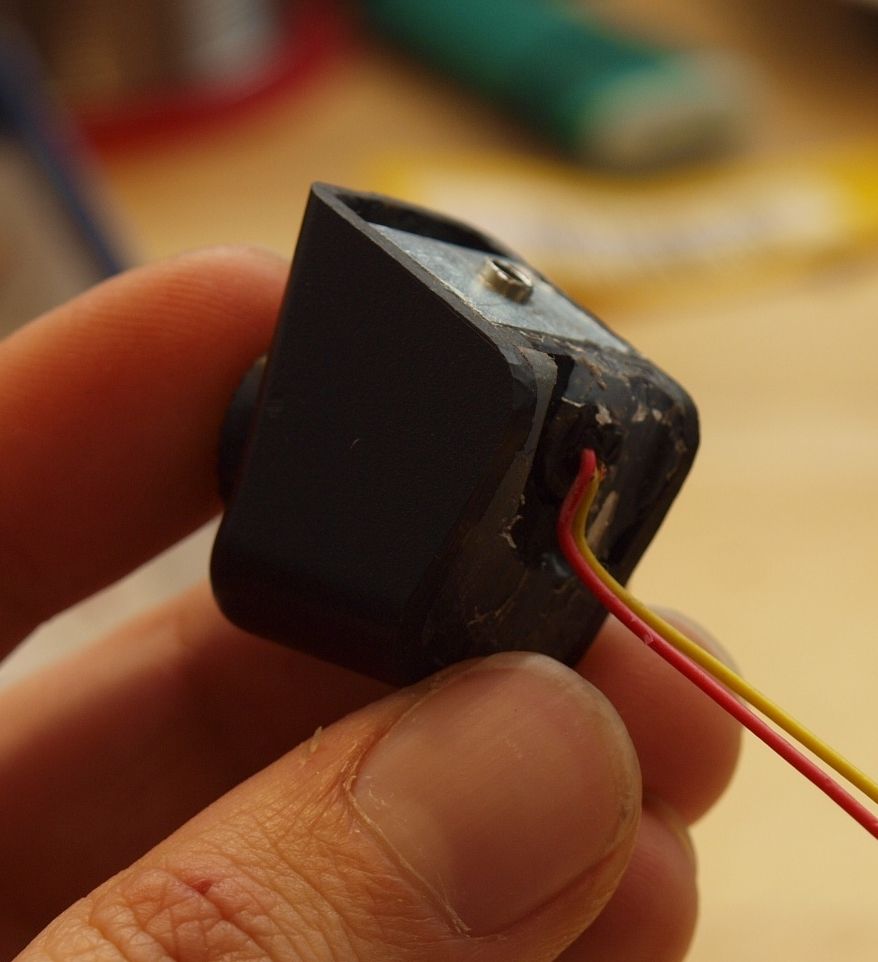
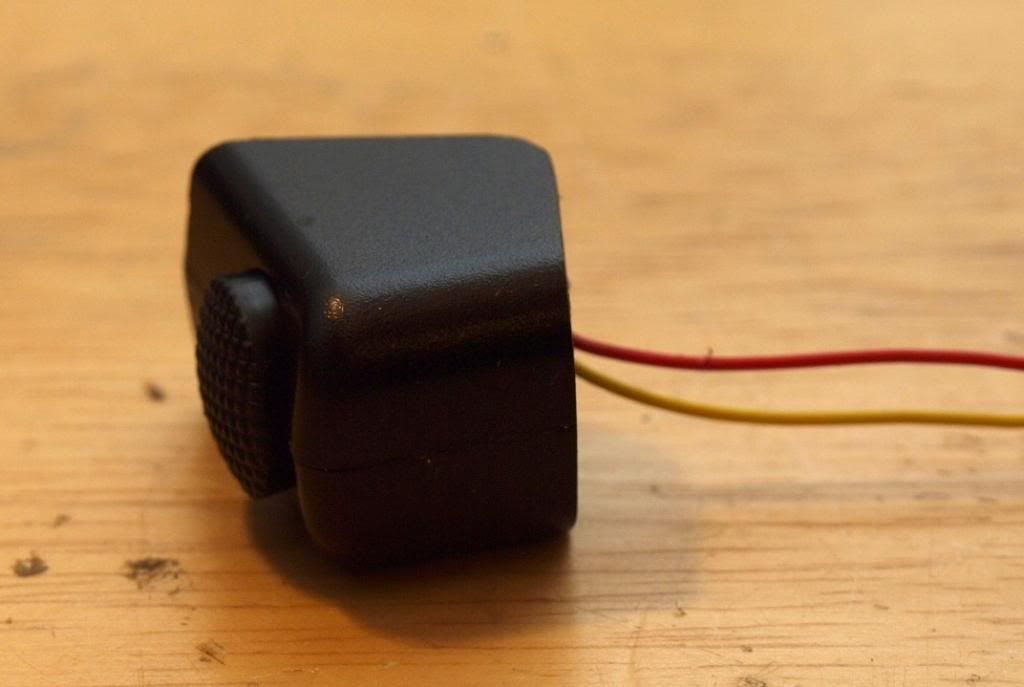
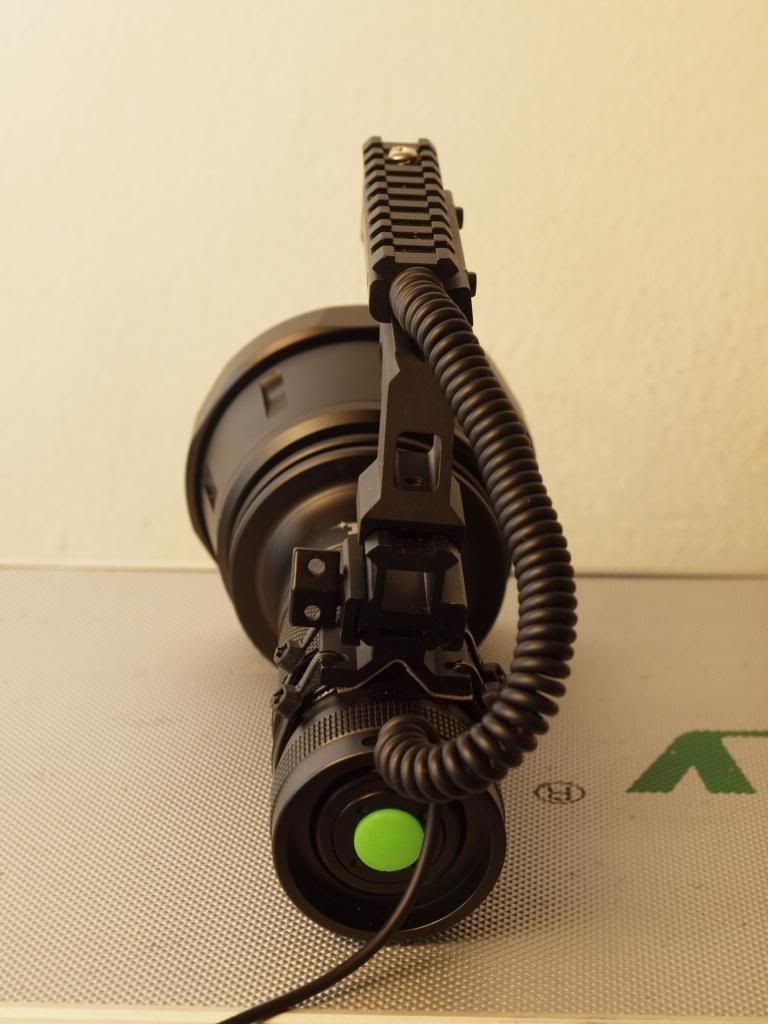
For mounting the switch I cut the case down to size, added a metal plate to the top with m3 threaded hole and drilled a countersunk hole through the top handle rail to bolt it securely into place. Sounds easy and straightforward doesn’t it. It really wasn’t and gave me all sorts of headaches but in the end I got it potted with epoxy and very securely mounted.
Works well but I really hope the switch won’t fail anytime soon because getting it back out to replace it would be a nightmare…!
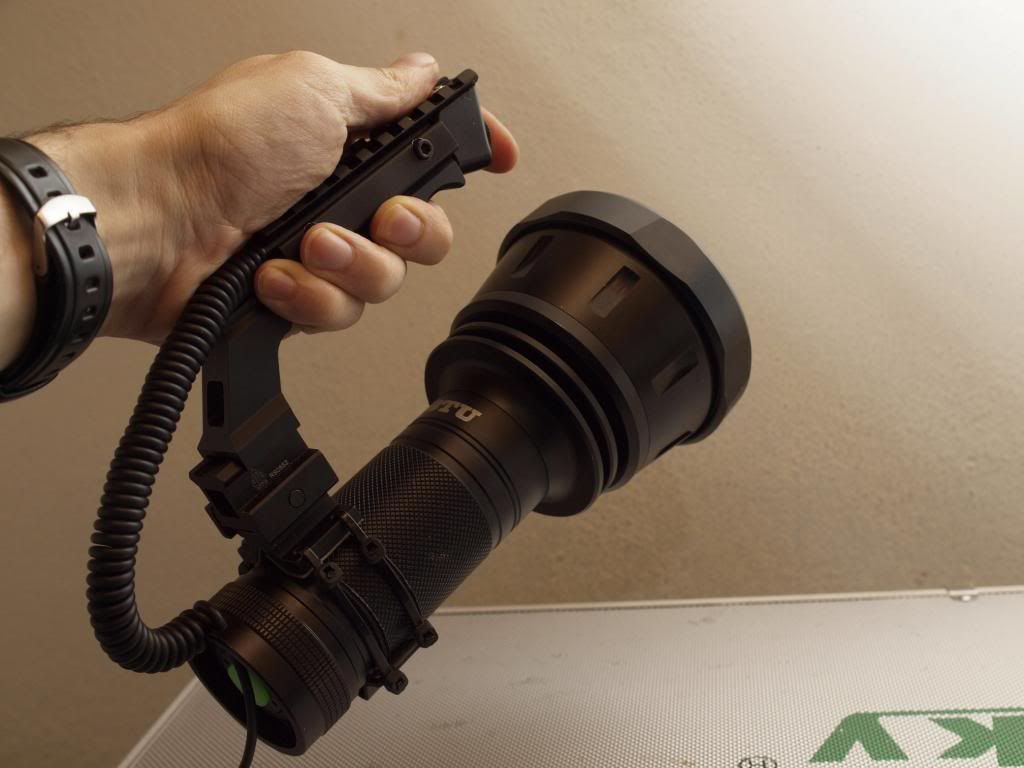
In any case the handle feels really good and offers a steady hold of the bulky light, the trigger switch is easily accessible by index finger and with this placement of the handle and the bare torch host the whole thing is also quite nicely balanced.
Really pleased with it so far and I think it looks pretty cool as well, it’s clearly cobbled together but still looks like it means business
Still lots to do before I even think about the guts of the light. Next up is the tailcap and figuring out how best to mount the XLR socket inside. Should be fun
I hope those cable ties aren't your perma solution.
Going the full nine yards, you should be able to find a way to get some short metal tube (prob around half the length of the original battery holder), thread it and mount that handle with some bolts.
There’s no problem that can’t be solved by cable ties!
The whole handle mounting is totally temporary, like I said even the rail mount I’m currently using isn’t what I will end up with. It’s just a scope mount from Kaidomain that happened to arrive in the mail by accident and I put it to use since it had a short picatinny rail on top that I could easily mount my handle riser to for testing. Works surprisingly well though and gives me a chance to try out different handle mount configurations before I commit and start drilling into the BTU.
Ultimately I will be bolting a short, relatively flat picatinny rail onto the body of the light which I will then mount the handle riser to directly. Still not sure if I will try to attach this rail further back on the tailcap as I planned in my 3d models or if I will drill the bolt holes directly into the battery tube as in the current handle configuration.
Or… as you say I could use the current scope mount, ditch the temporary zip ties and figure out a better mounting for it that would be sturdy but also non destructive to the BTU body. I was thinking along he lines of replacing the zip ties with thin metal rods with threaded ends that I would bend around the battery tube/body and bolt/tension to the scope mount plates with a set of lock nuts.
Through all the BTU threads/posts/pics every time I think to myself “that is a big light… and I need one.”
But that picture of you holding onto the handle put it more into perspective.
I did a double take and it made me remember this ridiculously large shoulder-able halogen spotlight I was given some 5-7 years ago. There isn’t really resemblance, seeing a flashlight with a handle just made me remember it.
hehe, yeah the BTU is a BIG light. It’s kind of silly really, first time I picked it up it felt like I had just grabbed a deliberately oversized prop from a movie or something. Something like Hellboy’s personal flashlight!
With a handle in this kind of “lantern” format it makes a bit more sense to me.
Now you need to mount 3 more handles to the btu and 6 or 7 rails on the bezel so you can do something truely effective. Like this, but in a flashlight:
Well, a small update in the grand scheme of things but I succeeded in flashing my first nanjg 105c driver with custom firmware today!
Took a fair bit of reading, fiddling with SOIC clips and hitting dead ends with eXtreme AVR Burner before I finally got things working with AVRDude.
I couldn’t have done it without the great wiki resources and threads offered by users of this forum so thanks a lot to all involved
Being able to flash custom firmware will be super handy in getting the precise driver modes and operation I want in this flashlight. Not to mention any other light. I’m pleased I have that hurdle crossed.
This might save someone some frustration when attempting to program atmel chips with a SOIC clip from ebay. Like this one
I had some communication issues at first and it was frustrating because I wasn’t sure if I had messed up the pinout or if it was a software issue.
Turns out it was because of the clip. The little copper tabs/pins on my clip tend to move and slide inwards if pushed, and it’s very easy to accidentally push them in when trying to make a good contact on a chip that’s soldered to the driver board. Once they’re no longer at the very tip of the clip grooves they won’t make good contact anymore and you’ll often fail to connect to the chip.
Solution that I came up with in frustration was to dab a touch of super glue into the pin guides inside the clip. First pull/push the pins forward as far at they will go and then apply a small drop of contact adhesive where you see the copper pins run inside the clip. Careful to avoid getting any on the contacts or at the back where they mate with the cable pins. I accidentally seeped some glue in to one wire contact so that one is now permanently attached…whoops
Anyway the glue holds the pins in place solidly and I can now clip on with perfect contact every time, even on tight pcbs layouts like the nanjg 101c
Looking at the clip, maybe it’s just mine but it seems these pins aren’t held in there particularly well, looks like the plastic has just been melted down around them.
So if you have this similar problem just glue the buggers down