I have the "prototype", trust me, like is too mild. ;)
MRTdiver, did you see it? Wanna see it? :)
Naaaaa, that'd spoil it.....:P
I have the "prototype", trust me, like is too mild. ;)
MRTdiver, did you see it? Wanna see it? :)
Naaaaa, that'd spoil it.....:P
At ~ 350 mA a Nichia 219 specs between 110 and 150 lumens and roughly twice that at 750 mA depending on the bin. 3 LEDs would spec at 660 to 900 lumens but since I probably got a lower bin 450-500 would be more likely. BBC500L?
Be neat if it works out like that, being as how it'll be running a 14 500 cell. But you probably won't see that OTF, maybe , we'll see huh? :)
For the record, my lightbox reads 333 at 30 seconds. Just sayin! ;)
Edit: In my experience the only cell that reliably allows 3A in that form factor is the AW IMR14500. Lesser cells won't pull it.
We’re planning for 6 chips or 2.2-2.3A and if his cells can’t supply that hell get some imr’s. I’ll test the driver with an efest 14500 first to verify it before installation. Twice the overall current with 3 times the LEDs as 261L. The lower drive current per led should increase efficiency but since the Nichia isn’t as potent as the xpg2 I don’t expect any miracles. I think it really depends on the bin of the Nichias.
RBD - I just love watching you do your thing!
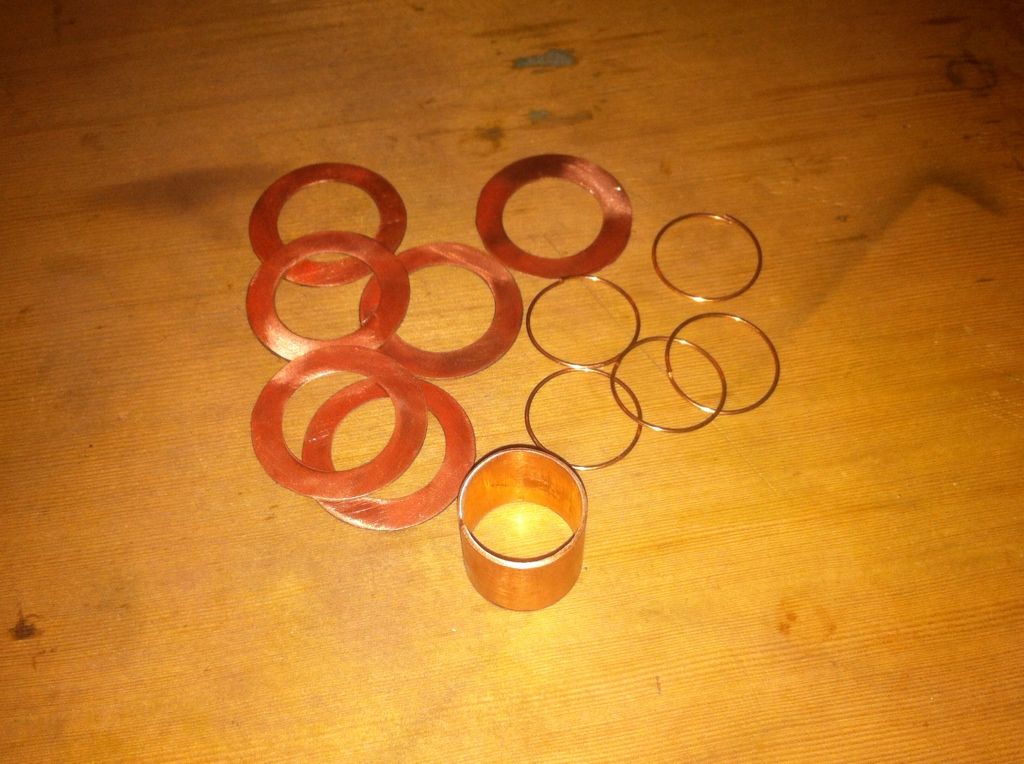
Finally got back to the shed tonight for some swearing and crying I mean sweating and grinding. When we last were all here I stopped with a slightly smaller copper cylinder and some discs. The discs I annealed on the stove top and flattened in a vise between two steel washers.
Then I took some plain awg20 copper wire and wrapped enough around some pipe for the 5 spacers that separate the discs.
Then I carefully worked it onto the cylinder to size the diameter.
Then I just cut the wire in a line down the cylinder making 5 wire rings exactly the right diameter.
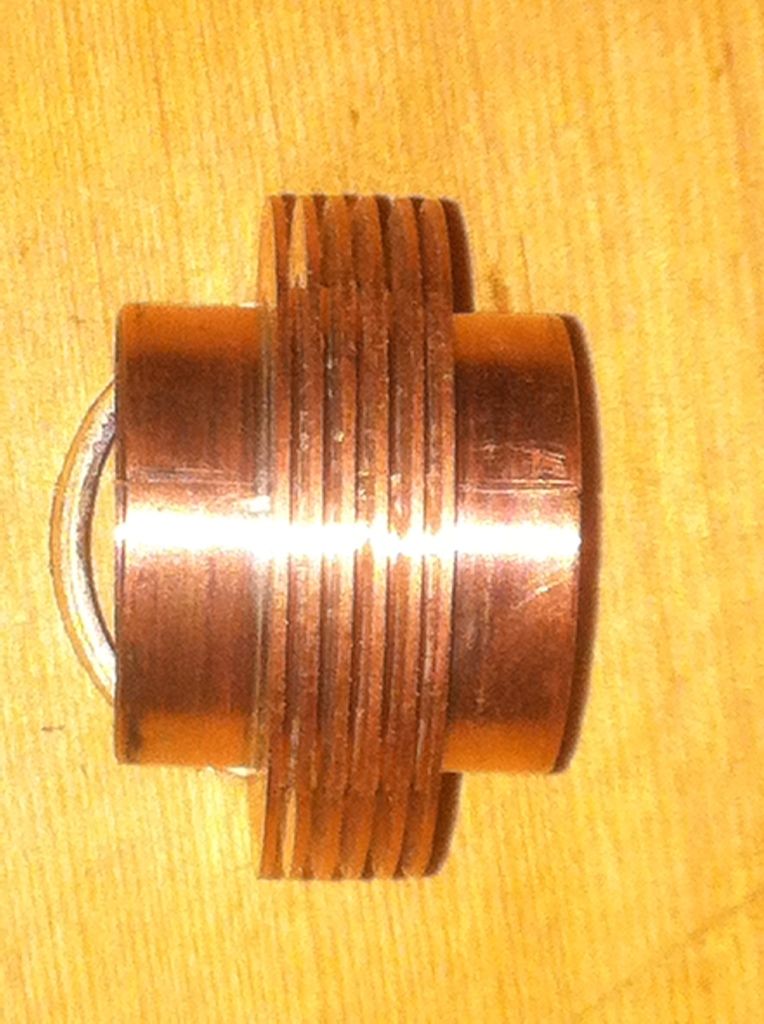
Then I fluxed the cylinder and put the discs and rings on and cooked it over a low heat and added some solder.
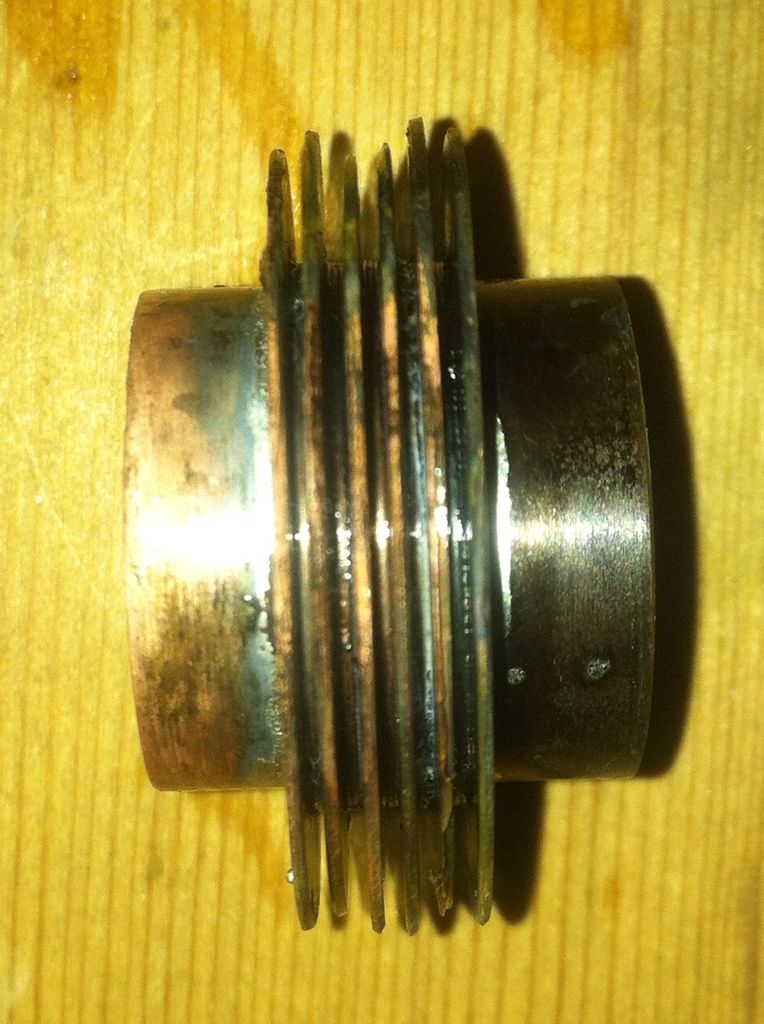
Oops! It’s crooked. !#%. I had to clean it up, reflux, and reflow it a couple of times before I was happy with it.
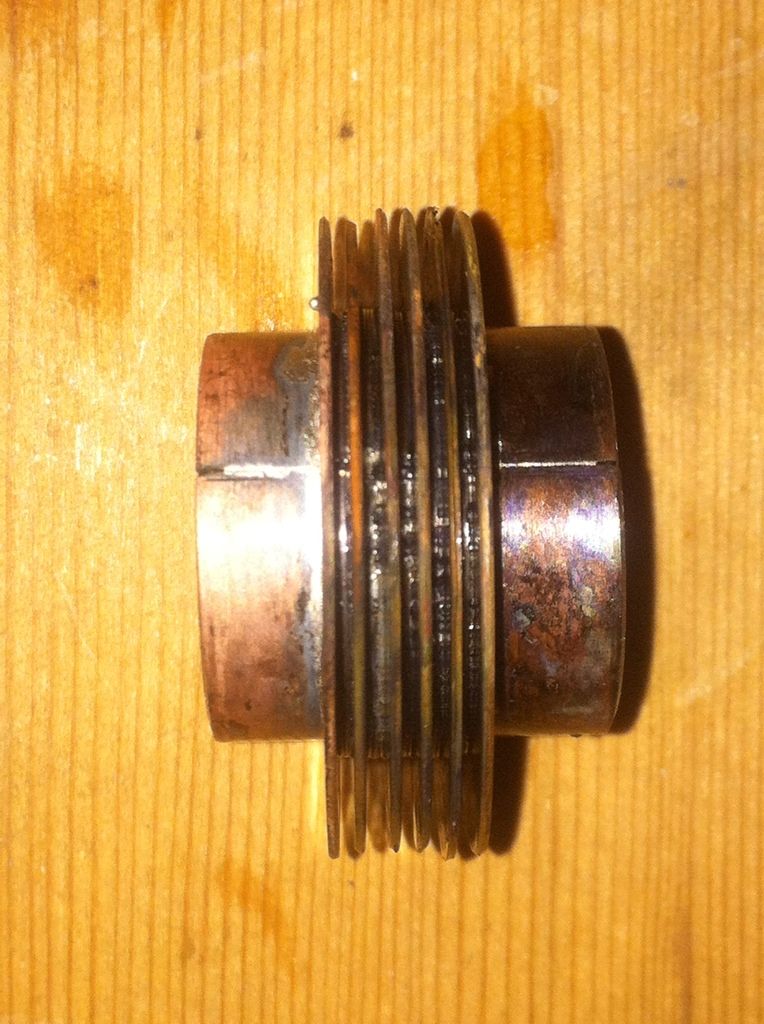
A little preliminary clean up then it’s off to the drill press.
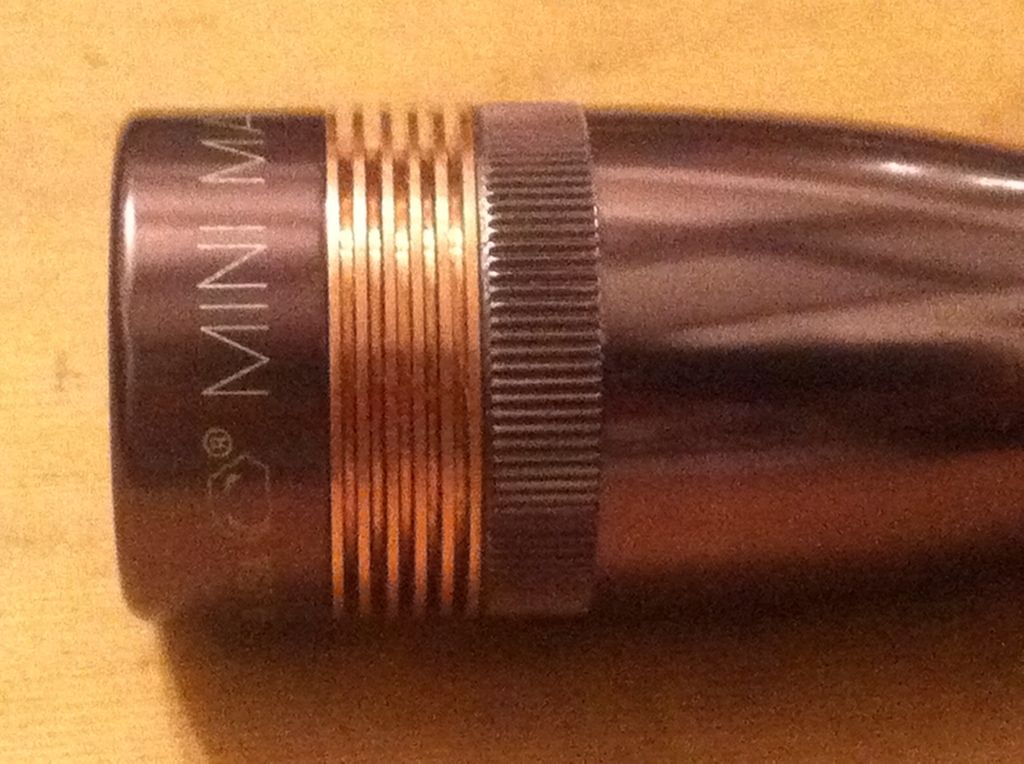
And here’s how it looked after about an hour and a half of sanding.
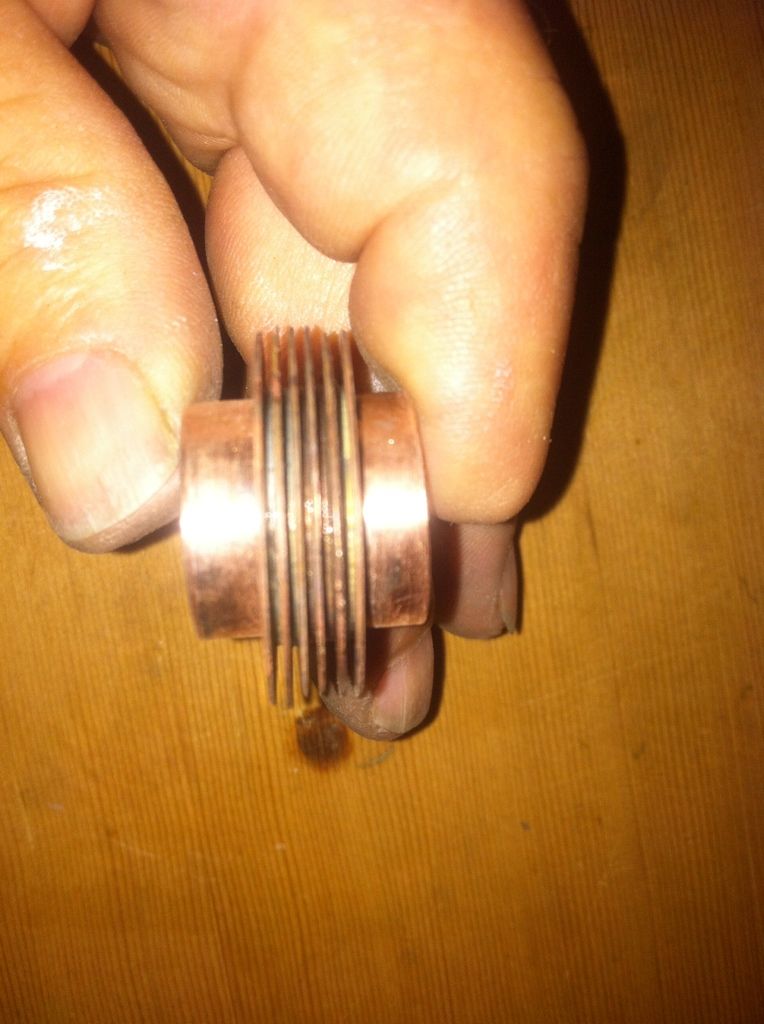
Right now it’s still a few millimeters larger than the Minimag head and I think I’ll leave it the way. Next episode I’ll bore out the head and cut it to allow the fins to sit between the bezel and the head grip.
update
Upon further consideration MRTdiver decided it would be better to have the fins flush with the rest of the head and aestheticly I agree so I chucked it back in the drill press and sanded it down until it was ~.2mm over the head Dia. With the fabrication done on the pill and driver I went ahead and epoxied it into the head with JB weld. Can’t make it bigger now.
This was the best of about a dozen pics and I give up.
Coming to a theater near you. :bigsmile:
Simply orsm Rufusbduck. Seriously I have no idea how you guys do these amazing things until you explain it in pictures. The light OL is building I was stuck at getting the reflector to fit in the head as I could not hold it in the lathe. It wasn’t until a member here posted pictures on using a drill press as a mill/lathe that it all twigged. Thanks. ![]()
Awesome work Rufusbduck. Its always amazing seeing what some people can do with just common tools and their hands. Simply amazing work, I am impressed. ![]()
That’s it, I’m packing up my gear and heading over to your shed! Photo documentary and video light modding 101! ![]()
As always, beautifully excellent work there Scott! And as always, the extra mile has been run, surpassed, and fine tuned.
Steve said it well. ORSM!
Qlite driver and triple optics arrived yesterday(thanks Dale for the heads up about RMM). Still waiting on noctogon triples from IOS. Cat’s away this weekend so should get more done soon. Future mod updates will have link to post # updated in the op title
Shame you didn’t pick up a couple extra Noc Trip’s while you were at it, got mine today with some Panny PF’s for the M8. ![]()
I ordered 4 from IOS and RMM is out of stock so its wait or use an Alu pcb.
How close is IOS? I just got one from RMM today. Need it?
I ordered them 2 weeks ago but they sometimes take awhile. I’ll need it soon so if you send me one I can replace it when they come in. boring the head tonight and making the pill tomorrow. After that it will be several days before I can get back to it. Enough time for it to get here(yours or theirs). You would have my undying gratitude ( well, lasting as long as my short term memory anyway).
I’ll pack it up tonight and get it to you first thing in the morning. (Or ASAP, Ice being the determining factor) Want the little cross-over’s too? I’ll pack em.
Great. If the jumpers are packed, fine. If not I can live without them.
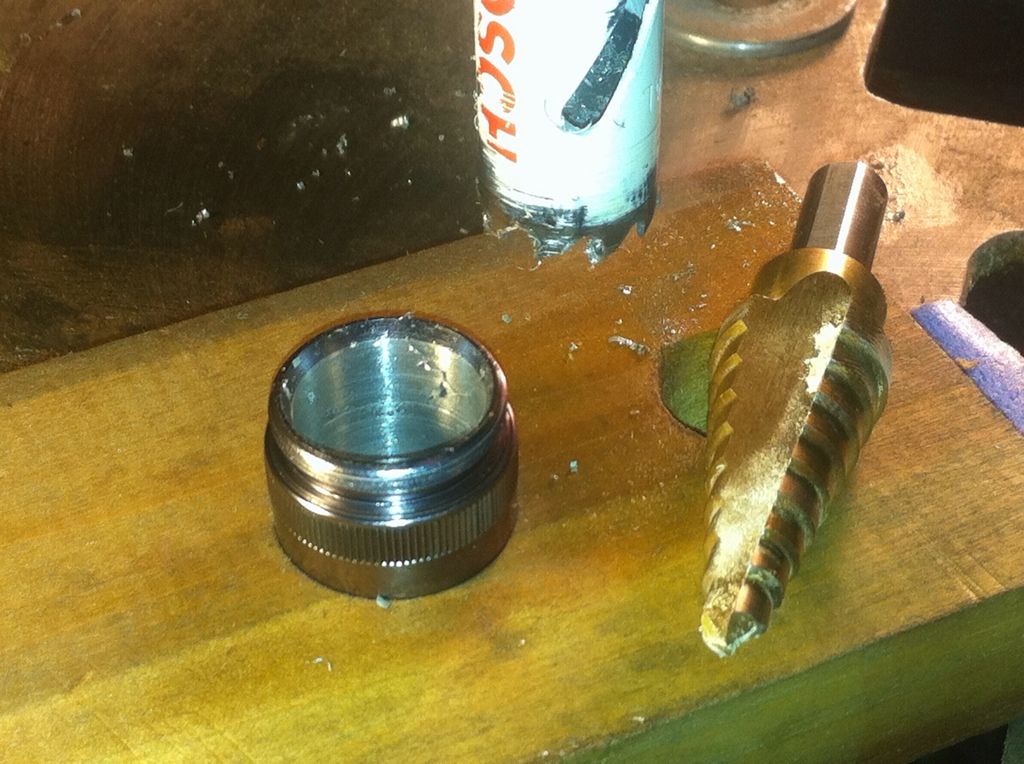
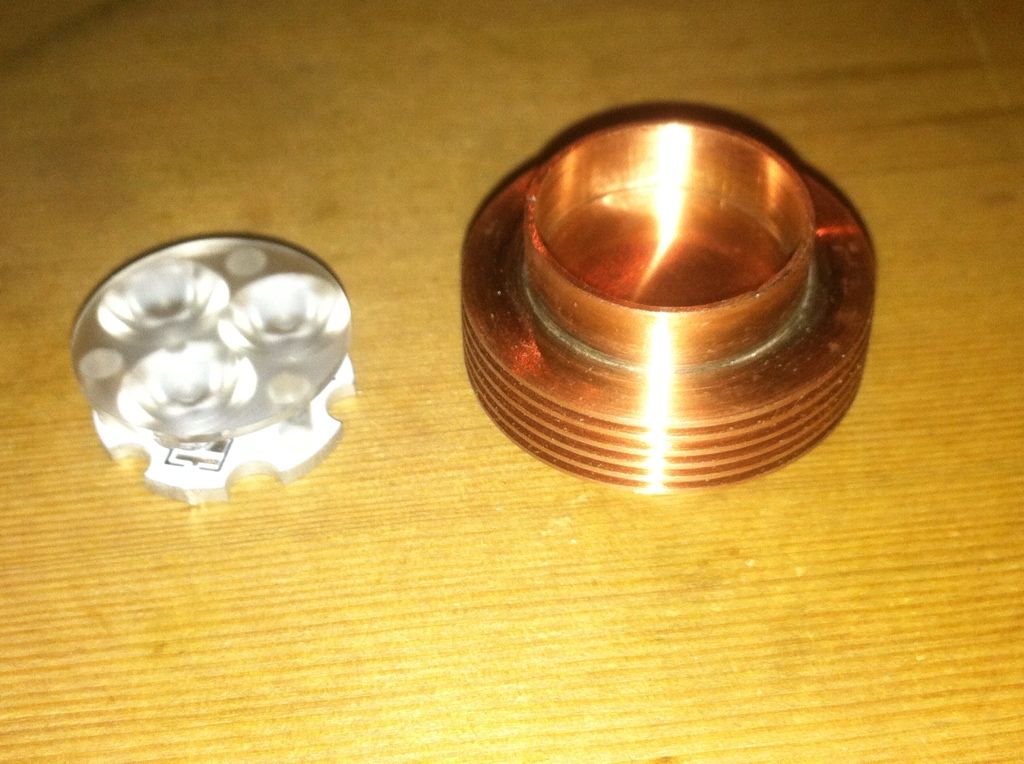
I stayed up late last night to bore the head, cut it, and hone the inside to fit the fin section. It starts on the drill press with the head pressed into a block of wood. Using first a step drill and then a 3/4” hole saw to widen and deepen the bore.
Last time I cut the the head freehand with a thincut dremel blade. This time I took a page from OL and used the same blade but in the drill press instead.
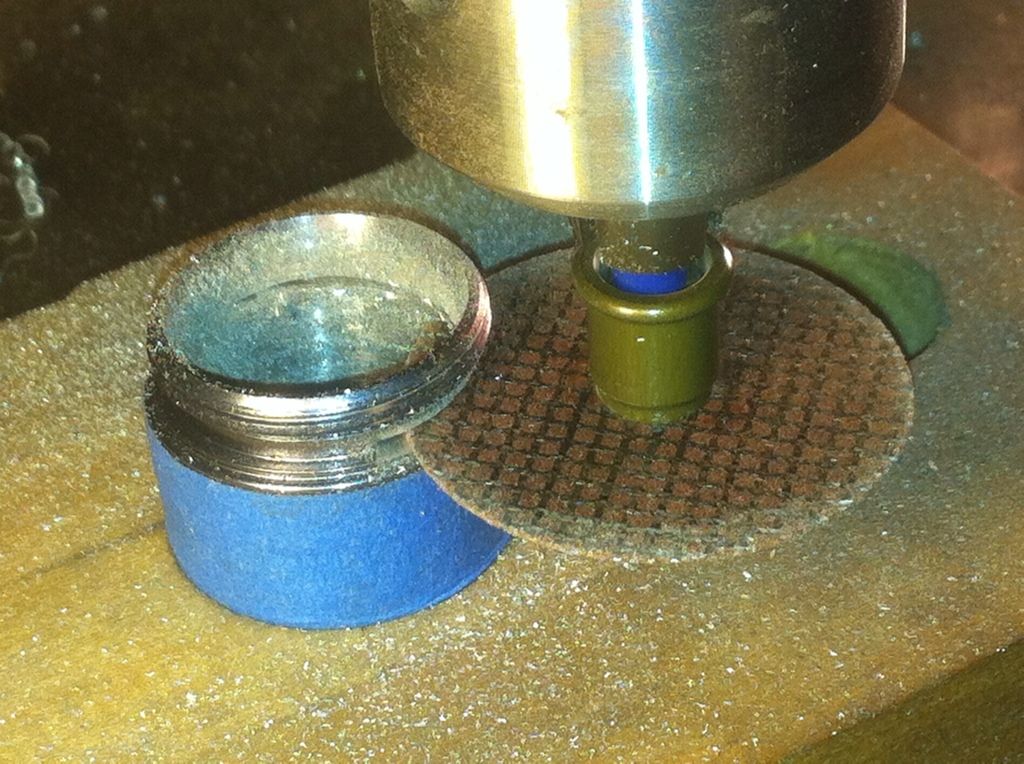
After that it was just a matter of spinning some wet/dry sand paper in the two pieces to get the ID from 19mm out to 19.4mm when the parts would slip over the fins without too much play.
The fit is nice with very little play but room for some epoxy. The parts don’t get glued until the pill is done with led and driver both installed.
To that end I stayed up even later and made the pill. The copper on 1” fittings is much thicker than the copper sheet I have(1mm instead of .5mm) so I’ll use a piece of that(annealed and flattened) along with 1/2” pipe and 1/2” coupler. Here I’ve already soldered the thicker flat piece to the 1/2” pipe and filed it flush.
Next I press these two parts together and solder them as well.

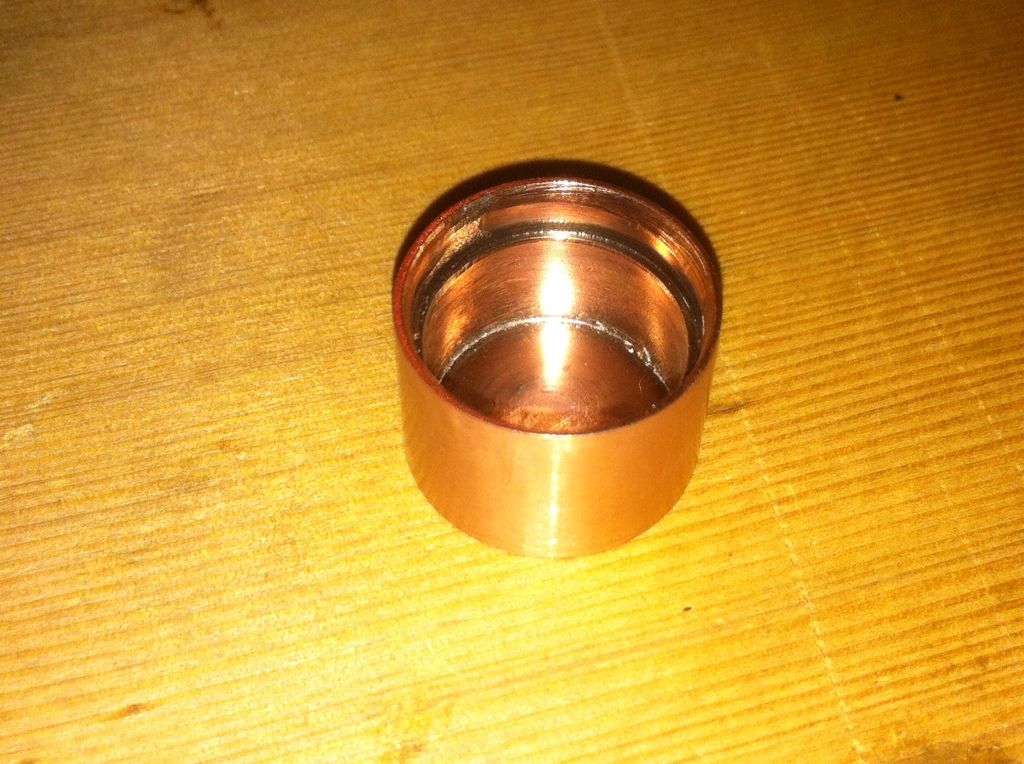
Now to test the fit in the fin section.
This is a very snug press fit. Not quite requiring a vise but not at all loose. With the copper noctogon soldered to the top it should have good heat transfer to the fins. About 7 hrs work in this post including photos.
Thanks for the detailed pictures. I could follow what was happening with what little grey power I have left. I could also well believe 14 hours if you had said that. I would have taken 30 and theres not a hope it would look like the perfection you have created. Nice work indeed.
Beautiful craftmanship! Love that attention to detail! Thank you for sharing :-)