well, if you can make your own tool for making reflector i’m pretty sure that you have more than one plan for polishing it ![]()
What is your ID at the top? Do you think it’s better configured for an XM-L, XPG, or would it work well with the MT-G2? Let’s go with an XM-L in the HD2010. Flexibility there. Make the outer diameter whatever you wish, length (top to bottom) is 38-39mm or 1.5 inches. A 5/16” opening (8.5ish mm.) works well. The OD of the current reflector is 58mm but it wouldn’t matter if there were empty space between the reflector and head, the lens would press it down onto the star/centering ring anyway. As long as it fits between the contacts of a 20mm board at the bottom we’re good, and even then if it were wider I can use insulators for that as well.
My HD2010 is now pulling 6.07A and making 1421 lumens OTF at 30 sec. Lux calculates to 222Kcd for 942M throw. Wonder what your reflector would do here?
I’m game if you are!
That looks elegant!
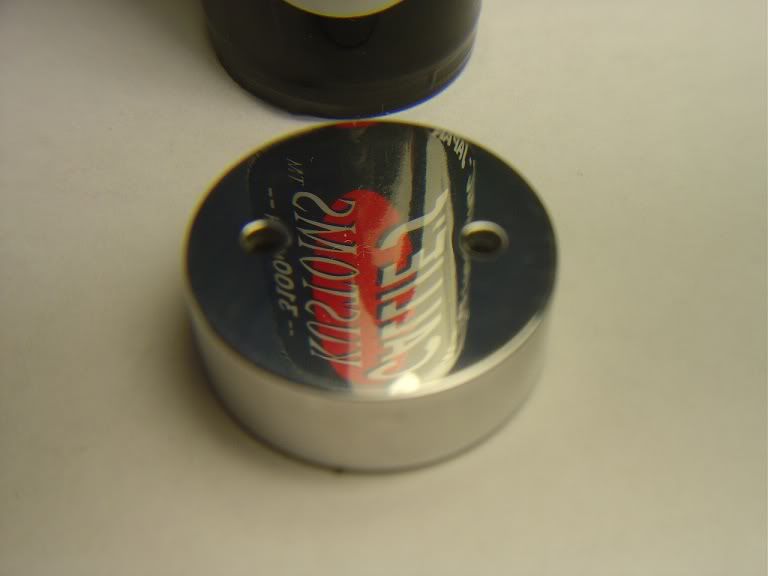
DBCstm, I'm going to make a second one since I drilled the first one too deep. Height will be the only problem. This is an inch high. I'll have to make it taller than the parabolic portion and bevel the remaining material to get to 1.5 inches. Not a big deal.
Here its what I'll make unless you say differently:
OD = 58MM
Hole for LED = 5/16"
Total height = 1.5"
Small shoulder on bottom to clear contacts = 1mm.
I will bevel the remaining height from where the parabolic ends at some angle...30' 45 or whatever you think you want. I'm not going to ask for this back so ask for what you want in case you might want to put it in a light. I can even put a clear powder coat on it.
Buck
To better fit your reflector, we’ll use the Raysoon F13. It’s reflector is 1 1/32” tall. 1 11/32” inside the reflective area at the top, total diameter at top is 1 7/16 with a lip (5/64” thick if you care to duplicate it), 1 3/8” behind the lip (this 1 3/8” fit’s inside the head, the lip portion fits on top and presses into the lens, you could leave it an overall 1 3/8” diameter and not worry about the lip). 9/32” opening for the emitter with a 17/32” shoulder. This should be pretty close to what you’ve got, save a lot of work. ![]()
This light uses a 26650 cell, is hosting an XM-L2 T6 3C emitter and is driven at 5A for 1080 OTF lumens on a Powerizer cell. It’s got a fairly large hot spot with the now customary shoulder at the emitter in the reflector. I’m hoping a straight parabolic curve without that shoulder will give a better, tighter hot spot. I will run lux tests and get the current reflectors numbers on kcd and throw for comparison, as well as get some preliminary beamshots worked out for side by side style results. ![]()
I don’t know about a powder coat, seems to me that would be counter-productive. I have had excellent polishing results using Mother’s Billet Metal Polish, so if it’s raw aluminum I can always polish it.
This is really fantastic! I really appreciate it Buck, will do everything within my powers to document it to it’s fullest extent.
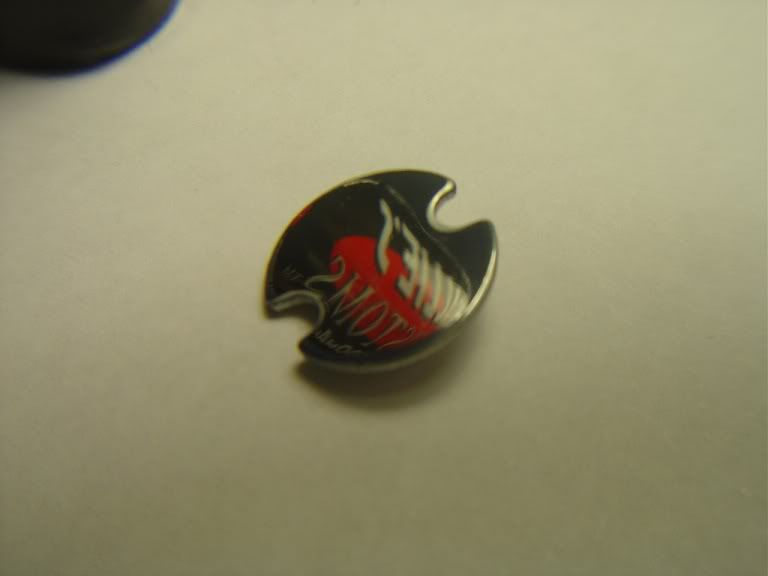
The baked Raysoon F13

Pardon me for interrupting, but wouldn’t you want the paraboloid to extend to the edges of the head? What would the bevel do?
I’d be interested in a relatively deeper P60 reflector, cut for XM-L, as well as a relatively shallower one for the same drop-in…
No, I’m not asking. I know what tooling that would require & can’t afford to fund it.
But you seem to be in a position to illustrate the beam differences in scaling your paraboloid to fit a certain size lens, but taking a different “cut”.
EDIT: I found a picture which illustrates (if you cut both lines at the x axis line) what I’m trying to say:

But you probably already know all that, & have worked on it already…
I’ll go back to reading now…
Dim
I have always used Mothers Mag & Aluminum Polish for great results. Probably Close to the same stuff DBCstm is using. Makes for quick work when the piece is chucked up in the lathe spinning at 1200 rpm.
DBC, I'll work on it tomorrow and let you know how it goes. I still have a little bit of honing to do on the bit yet.
Dimbo, I do want the parabola to extend to the top of the head but my reflector was only designed to be 1" in height. The light he previously mentioned needed 1.5 inches in height. The extra half inch would have to be occupied by something and in this case I would just machine some of that spacer at some angle.
I have thought of doing different both deeper and shallower reflectors. This one is at y = .875x^2. Believe it or not I just graphed it on an online graphing tool and liked it's shape for a one inch(height) reflector. I could make the equation whatever I want times the x^2 and machine it. I will likely do so if this experiment pans out well enough. It is quite a bit of work though. Especially if I ruin every other one I make  . If I get that far, I will probably solicit recommendations from you guys.
I don’t know what you could sell em for, but that HD2010 reflector has about 25 orders looking for it as we speak. Ryan started looking for it as did Bill, I have asked Calvin at IS into the search, which is proving elusive.
It would be nice to have a rough cut bit and a finishing bit, so you would’nt have to do the roughing out with a finely honed bit. Just sayin…
Thank you very much for giving me this opportunity, I really do appreciate it!
007, is the Mag and Aluminum polish in a squeeze bottle? The Billet Metal polish is a paste in a can.
Billet Metal Polish is designed as the next step after Mag and Aluminum Polish
… as I am!
I recall some other members here having some argument over the dimensions of a parabola…
Here are two, superimposed, such that if you cut them both at the x axis, they will be the same “width” along the x axis, but their depths will be significantly different:
I think this could be adapted… If you want your OAL to be 1.5”, and your “mouth” to be some nominal diameter, couldn’t you just scale one to fit? I know that means another huge pile of expensive steel curly-cues and am still not asking…
But I think you are on to something we all NEED in the most desperate of ways. IMNERHO, of course!
Imagine “a shallow paraboloid” for ? more flood? Or a “deep” paraboloid (I’m thinking of the “deep” and “shallow” C8 reflectors too…) for more throw?
And would a shallow, floody reflector in a P60 give you room for more thermal mass…???
Or maybe a properly “curvy” paraboloid could correct those awful, ridiculous Cree color rings…???
Sorry… Starting to drool…
Back to reading.
In a small metal red and white can.
Machining no problem, but this is where it fly’s right over my head. ![]()
I went to the Mother’s home page and found that the Mag and Aluminum polish has harsher cleaners in it. For a yet finer finish, the next step is Billet Metal Polish. Supposedly that’s the ultimate step, and I have to say, it’s pretty miraculous!
Good info there DBCstm. I may have to get some to finish off the finish. It always gave me good results in a short amount of time. I didn’t look at it under a magnifying glass though. Thanks for the heads up. Where did you get yours at?
I wonder how it would compare to the jeweler’s rouge I use (for more than just jewelry, but on cloth wheels on the Dremel)? It comes in several “grits” (not gritty!!) denoted by color.
Even the finest jeweler’s rouge won’t get an optical-grade mirror finish.
At least not in my hands! ![]()
All the reflectors I’ve bought seem to have a wet looking finish, even the OP ones. It’s tough to get there with just polish. OTOH, maybe a fine “scratch” would just be like “Ultra OP”… ![]()
I’ll go back to lurking, since I really do want to see this!!
Pretty sure at WalMart, or Advance Auto or something. Mine is pretty old. lol
Felt wheels for dremel leave scratches. I use the paper backside of 1000 grit wet/dry sandpaper for the polish. Yep, flip the sandpaper over and use the paper backing! It’s harder than the cloth and doesn’t leave the scratches that even an old 100% cotton T shirt will leave. ![]() Another gunsmithing trick.
Another gunsmithing trick. ![]()
Edit: Mine’s actually old enough that it says Mother’s Incredible Billet Metal Polish on the can. Oops! Never mind! That’s still what it says! lol
This is a 1 AA mini mag pill I used the Mag & Aluminum Polish on, that’s all I used. Well besides the 1000 grit sand paper that I used right before the Mothers.
.
.
The led Board lapped.
.
.
And here’s what it went into.
.
m!
Spoken like someone with access to machine tools!!
It’s really as simple as it looks, IFF you can cut tool steel to a continuous curved shape, then flute it, cut chip-clearing gullets, and harden it… (I wondered why the OP blue Tempered & didn’t stop at quench Hardening. Then I realized you’re just using it to cut Aluminum, so it probably doesn’t matter.)
If your lathe is CNC, your troubles are over! Just chuck up a piece of round stock the size of your lens opening & upload a Parabola. Suppose it’s the Blue one in the picture above… I believe it’s described by the formula in blue. Whatever program you’re using to support your CNC probably has a “Draw me a Parabola” macro already built in…
OTOH, if you can cut a parabola in tool steel without CNC…
That would be something!