First - A little music
So, I have two LED Maglites, wait... I had two LED Maglites. I got them when Lowe's had their BF sale. I was going to use one for a failed mod, so I decided to use both of them at the same time. Then the problems began...
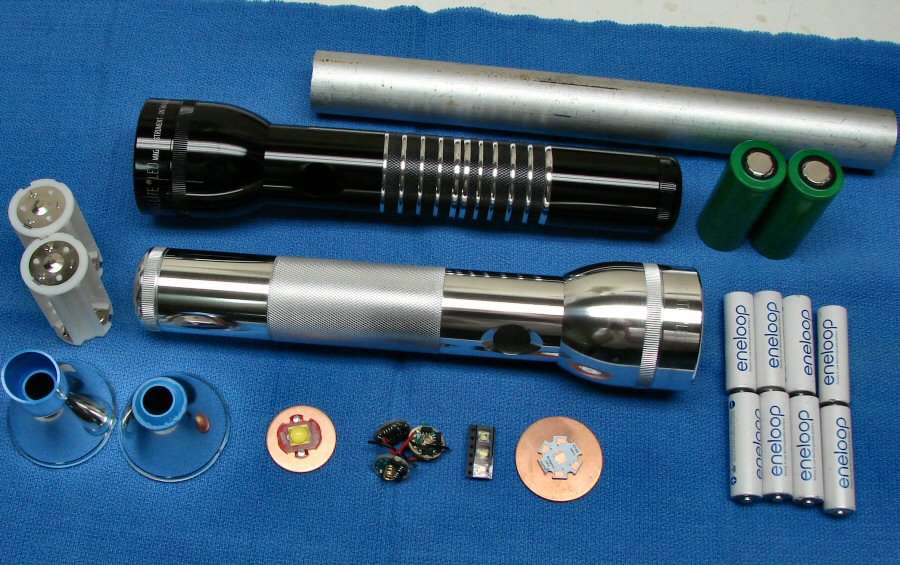
Here you can see a Black Maglite and a Red body, Black head Maglite, Ummm, guess you can't see the red and black any more, huh.
I screwed up one of the bodies and I happened to have a red Incan body, so I stripped the LED head/bezel and the Incan body/tail cap. Now it's a polished Maglite.
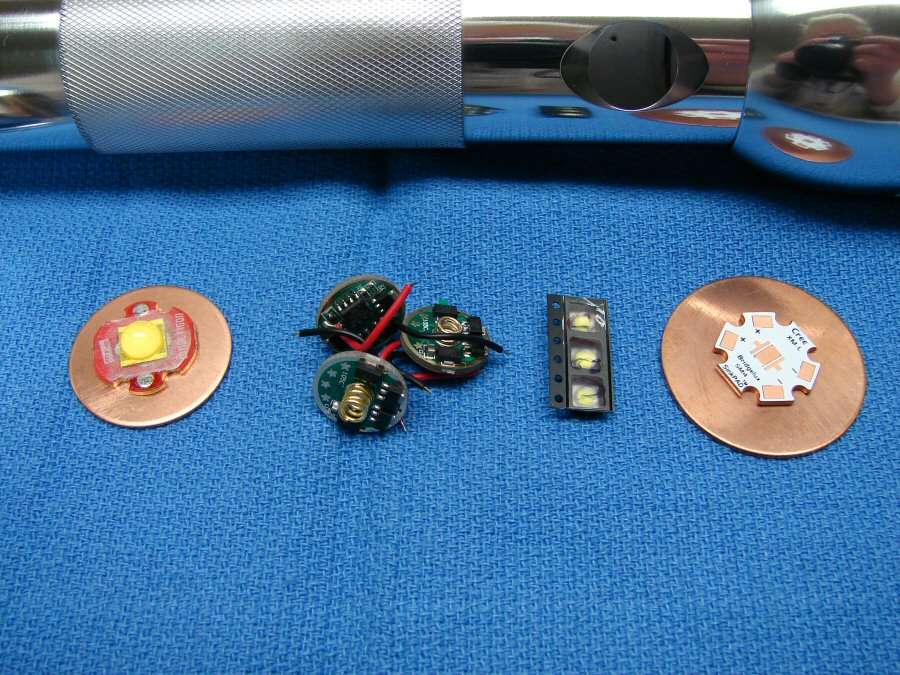
You can also see some other things lying around. There are battery holders, reflectors, LEDs, some copper, some Aluminum rod stock and drivers.
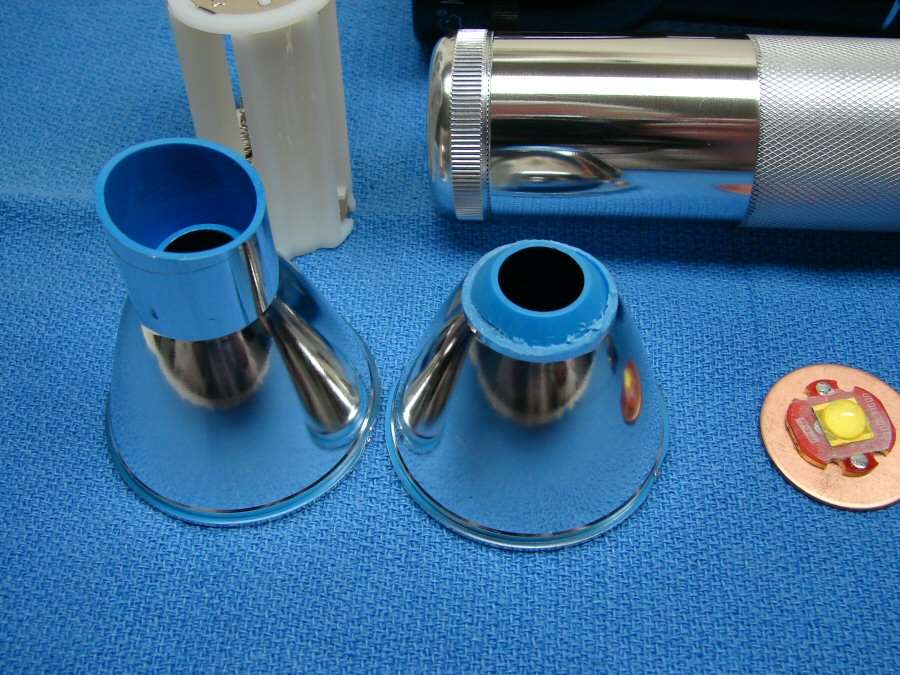
I plan on using the stock LED reflectors. I have cut one and I need to do the other.
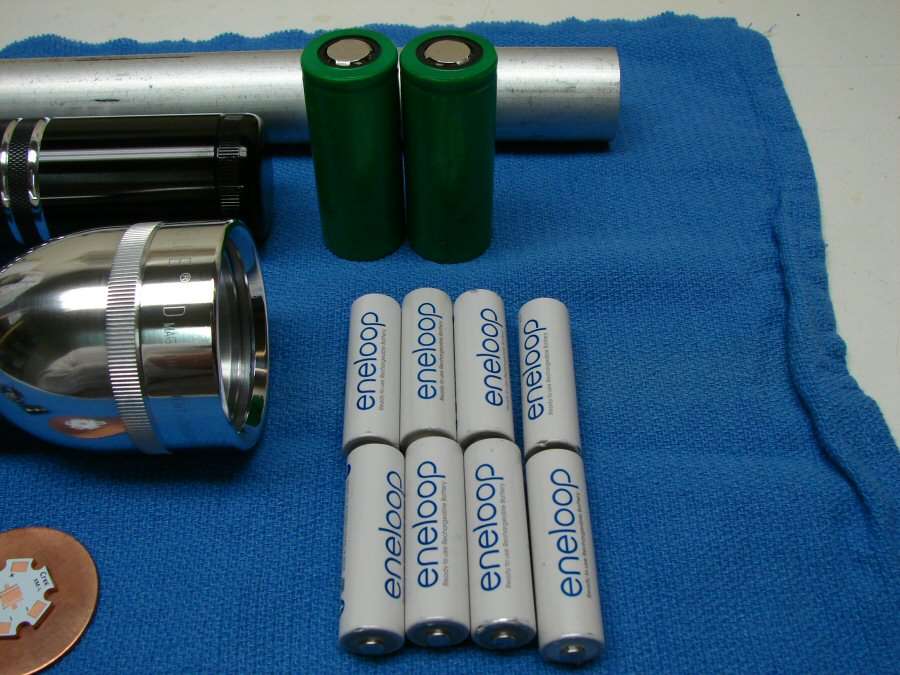
One light will use 2x26650 batteries and the other will use 5xEneloops. I know, there's 8 there, but that's just to throw you off track.
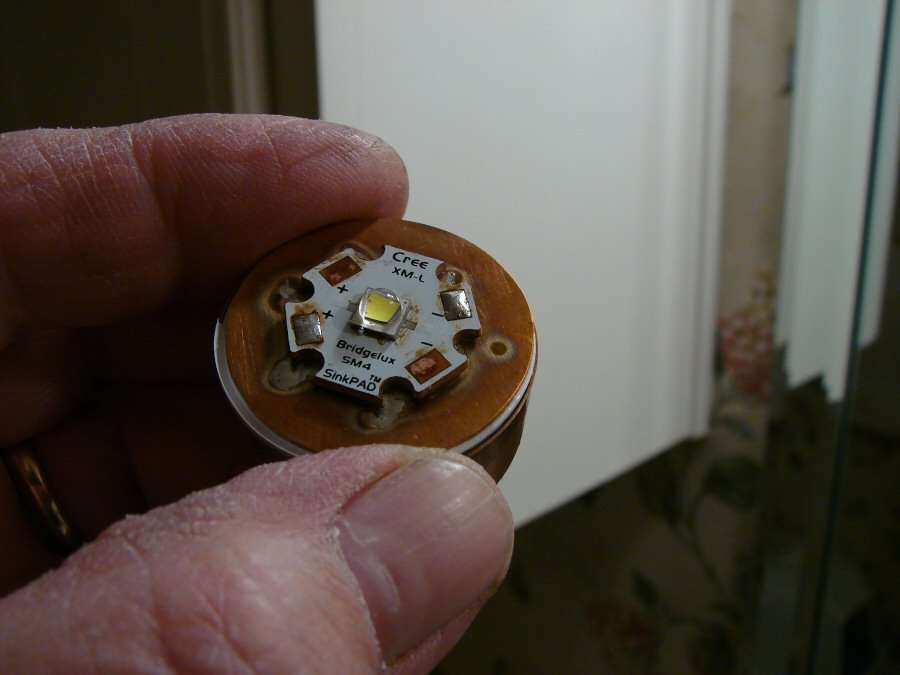
One light will use an MT-G2 5000k at about 6 amps and the other will use an XM-L2 U2 1D at about 6 amps.
I have a lot of work to do yet. I need to cut heat sinks, get the leds soldered on stars with copper behind them. make locating rings, mod the battery holders for the Eneloops and so much more.

Just to give you an idea of the hand labor in these, the 11 rings filed by hand, on the Black Mag, took two days.
More when I get more.....
------------------------------------------------------------------------------------------
1-7-2014
It's Cold! Look, I know it's not cold to y'all, but for East Texas standards, it's Cold! 30 degrees inside the garage and dropping. Good thing I am doing this at work.
I have not gotten much done, since I can't spend the hours on it right now, but here's what I have.
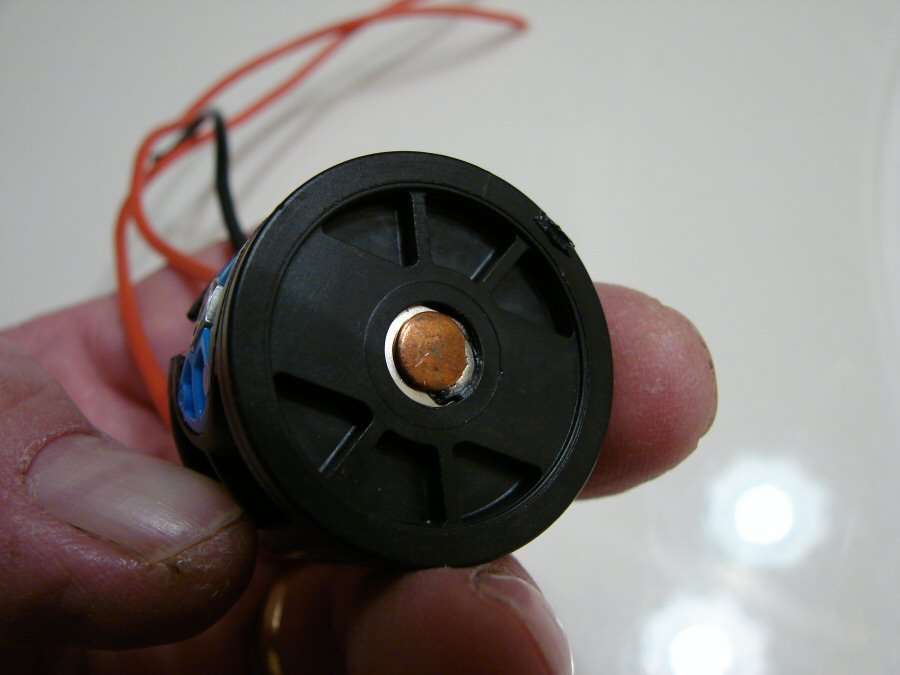
The switch for the Black Mag has been reworked. I added a copper nub on the battery side.
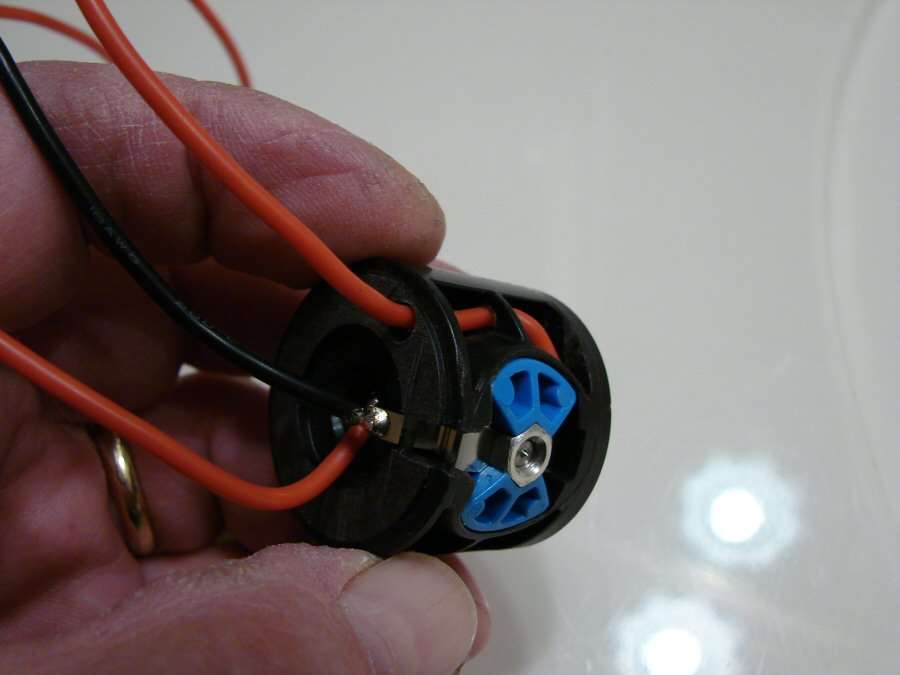
I ran a positive right off the back side of the battery contact and I will wire direct to the led. The switch wires will just go to the driver.
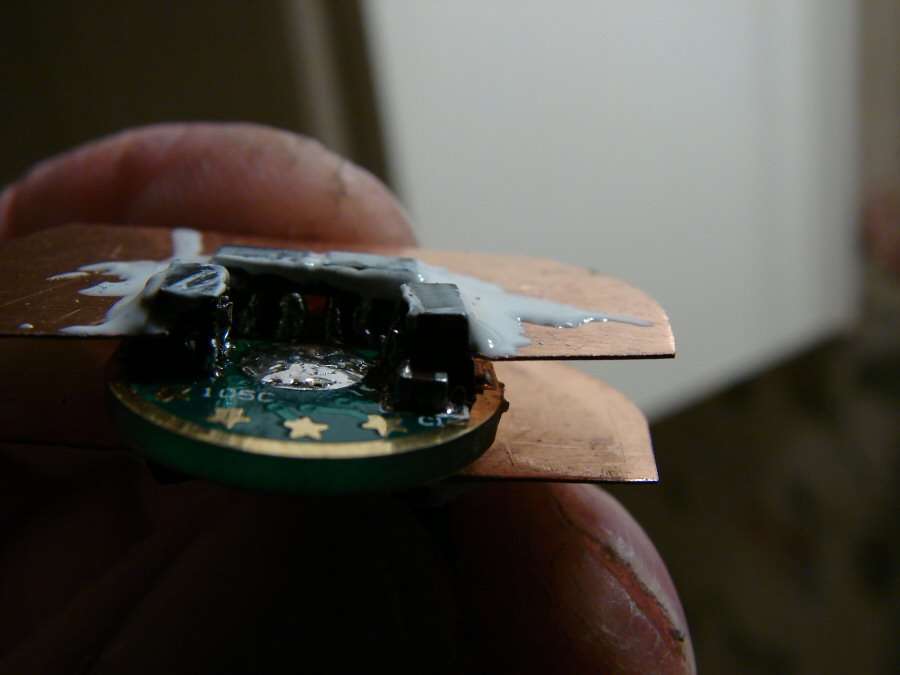
I'm using a NANJG from KD and it has 16 chips on it. I wanted some heat sinking, so I added copper sheet to it. I cut the copper so that it sits in between the two levels of chips and I soldered the chips with the copper in place. They are not soldered to the chips, just sandwiched in. I used AA to keep them in place and they will touch the body of the light, to help with heat transfer. It was a Royal pain in the arse doing it this way.
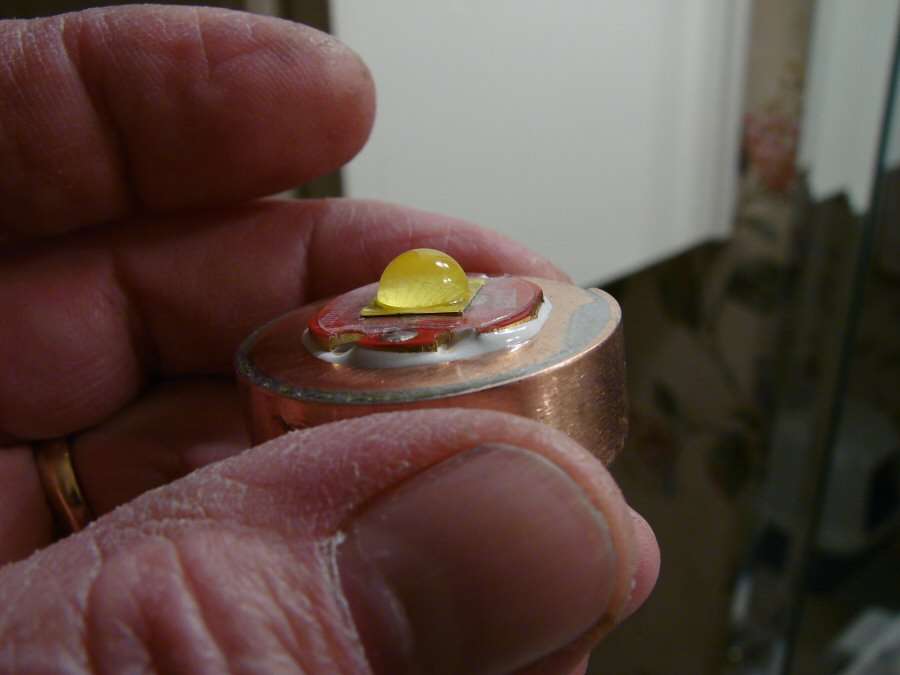
The heat sinks for the leds are done. Still need to be drilled for wires. Copper sleeves and aluminum centers. The biggest reason I used Arctic Alumina for the MT-G2 led is because of the copper wrapped heat sink. With more than one solder joint, it would be hard to solder the star without ruining the joints in the heat sink. It seems like a lot of AA, but it was compressed so that there is just a thin film between the star and heat sink. The extra around the edges hurts nothing.
That's it for now. I have to make a sleeve for 26650s in the Black Mag and then I can assemble and test it. The Polished Mag needs more work, because I have to make up a 4S/2P battery holder for it.
-----------------------------------------------------------------------------------------------------------------
1-8-14

The Black Mag is finished. You already saw the components and the rest was just soldering a couple wires and stuffing it all in the body.
I cut grooves on the head with a file. Those were the hardest ones I ever did, because of them being cut on an angled surface.
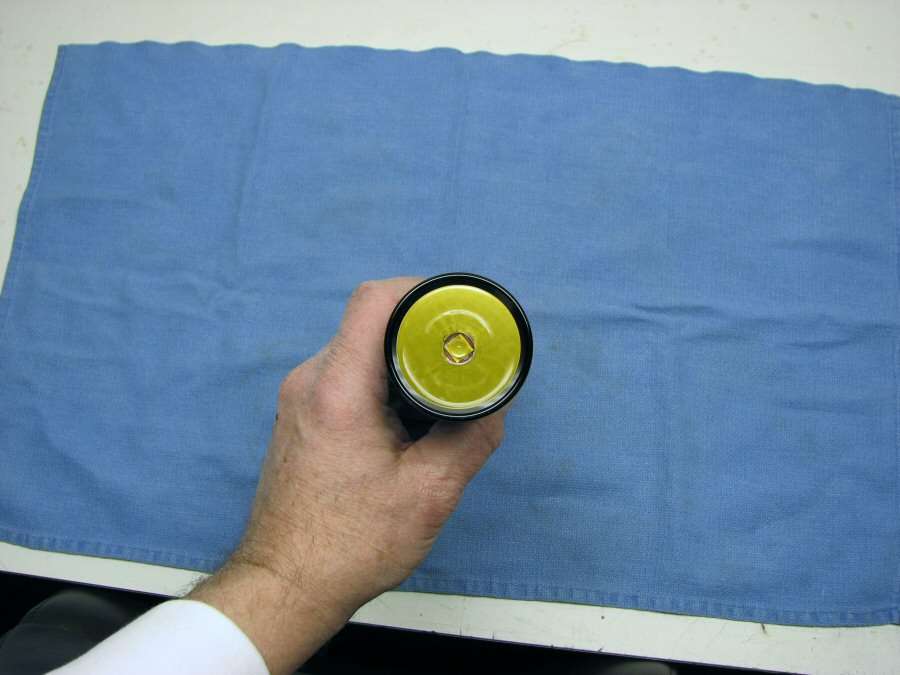
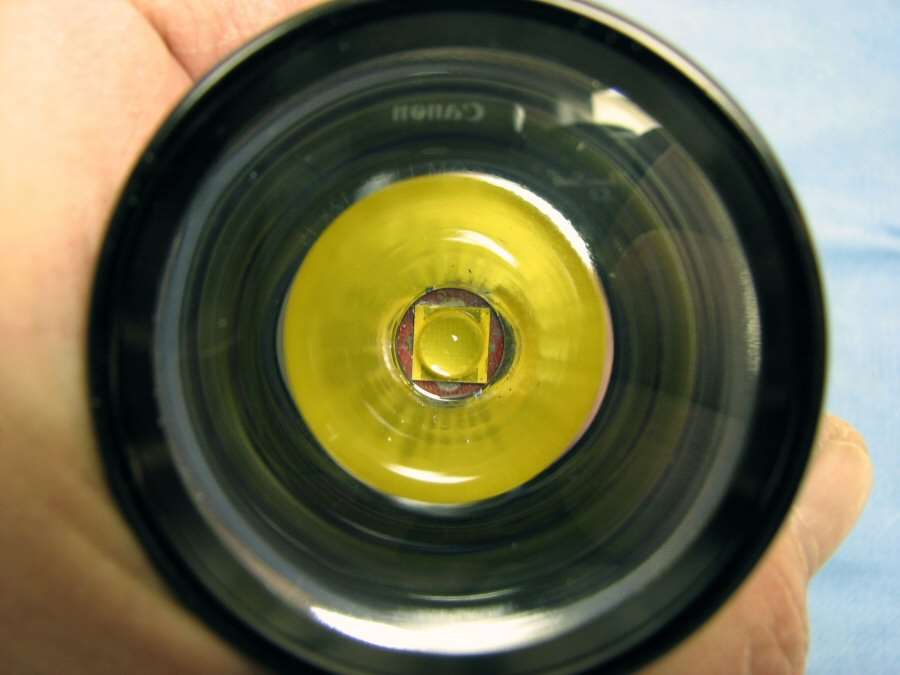
The stock Mag LED reflector is a perfect fit around the led base. These MT-G2 leds need the reflectors set down past the die face, touching the star, to get the best overall beam. I have tried several reflectors and they all need to be set down on the star, to get a good clean hot spot.

Tail cap mod.

PVC battery sleeve.
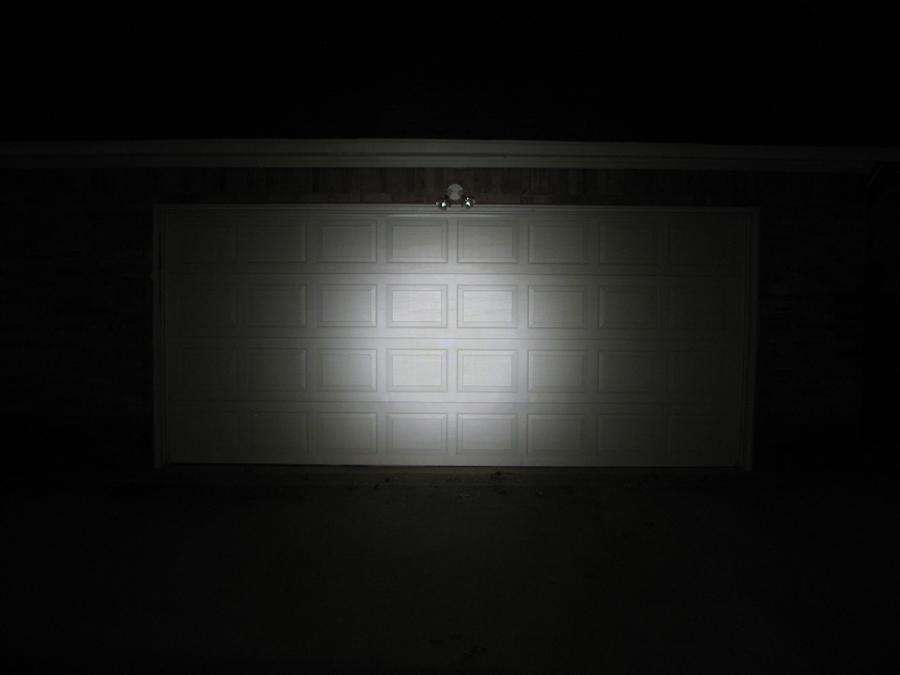
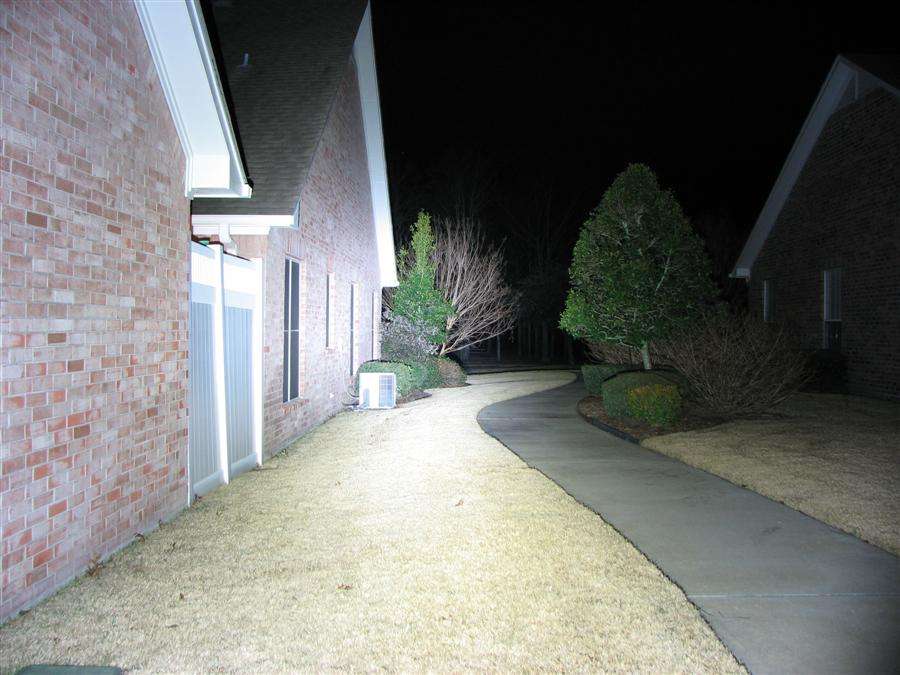
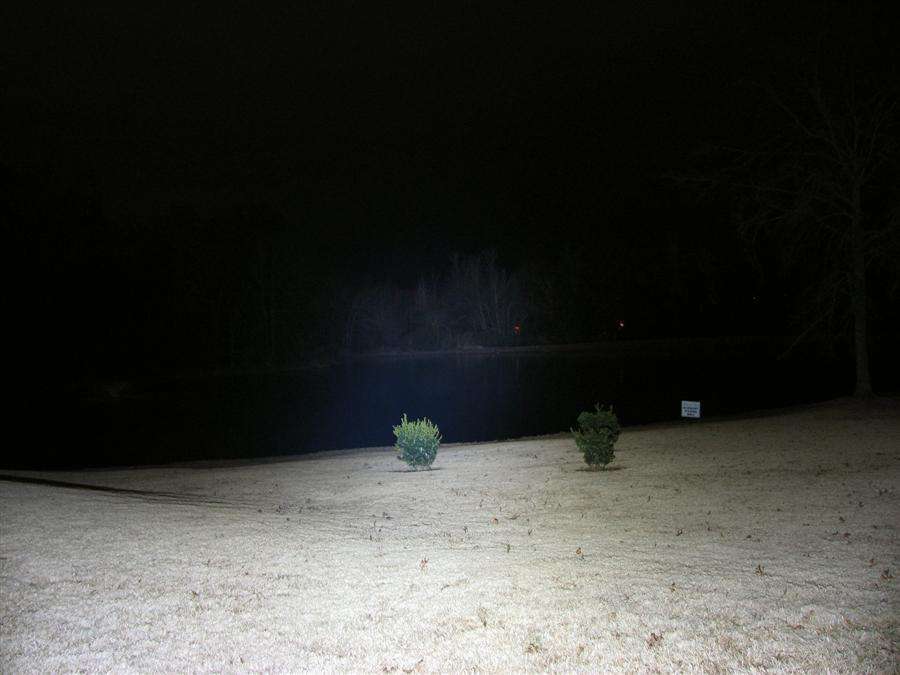
Beam Shots
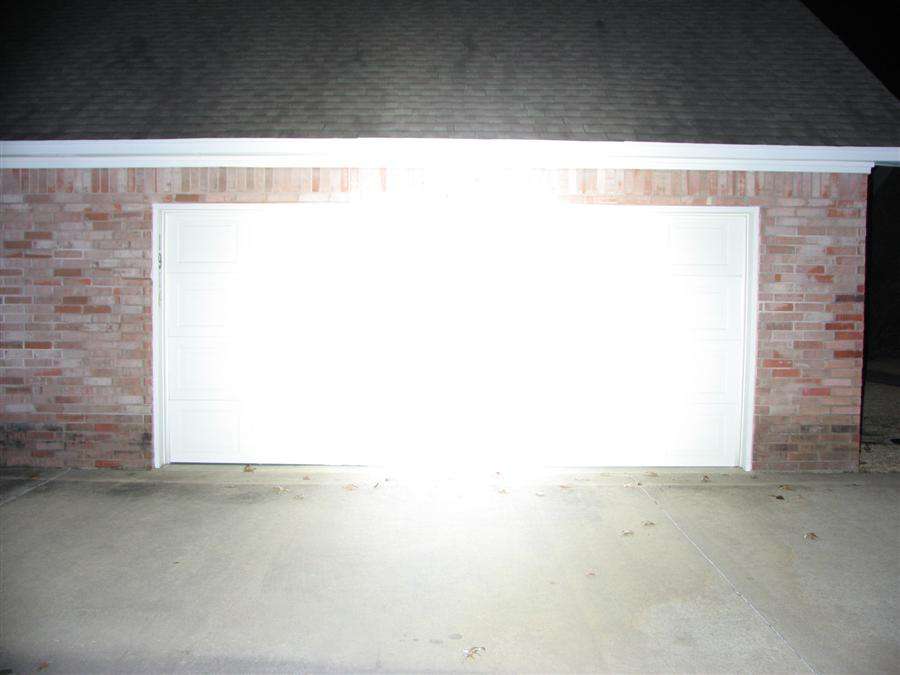
High

Medium
Low

Notice that by 100 yards or so, the spot has gotten too big and it's all flood at that range. MT-G2 is for an awesome single led light, but not at a distance.
Amp Draws:
High - 6 amps
Medium - 2 amps
Low - hardly readable. This is the low-low driver from KD, so low is about 50mA
Lux at one meter was 34,000
That's it for the black one. It's on to the polished one. I marked the concrete where my tripod was at the different positions, so hopefully, when I take photos of the XM-L2, I can do some mouse overs.
---------------------------------------------------------------------------------------------
I've been working on the polished light and I have some stills, but I thought I would throw up this video about the battery holder. I will add stills for it and the rest of the build, in a couple days.
http://www.youtube.com/embed/ucIlpjA01_U
Whatever you do, don't make a battery holder like this.
The Polished light just died! It died a prolonged death, but it's now resting in the big flashlight graveyard, (better known as my dumpster).
The battery holder shorted out and 8 Eneloops gave 'er all they could, as in direct short. Not very pretty, but it was very smelly. It's all my fault. I know what I did wrong and it was something that I saw, but didn't remember to do before I tried out the light. The first time I put the holder in, it worked fine and it was bright as hell, with a really tight beam, but the second time, positive to ground ended up melting the holder and the switch before I could get it opened back up. I think the drivers survived and possibly the led, but the holder went bye bye, along with the switch and most likely, four Eneloops.
I then decided to just go with one 4x holder and make it a cut down. Bad luck continued and I managed to ruin the body for good, so it all went bye,bye. Many not very nice things were said, some of them I didn't know I remembered, because they were in different languages. Anyhow, the builds are done. 50% survival rate isn't too good.
 ... Well... Chilly.