[Review] DQG SPY & DQG FAIRY (CREE XP-G2 R5, 1x 10180)


DQG FAIRY
LED: CREE XP-G2 R5 (1A CW / 4C NW)
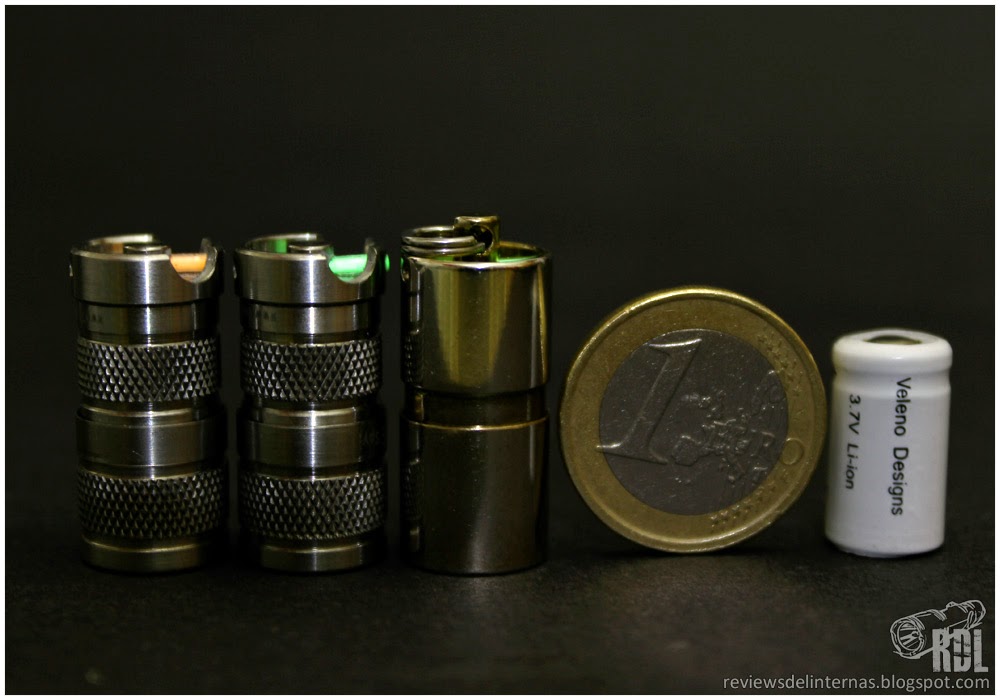
Battery: 1x 10180
Modes 2 (Low-High) No memory.
Switch: Twisty
Date: April 2014
Links:
Banggood

PRESENTATION:
As I advance in the previous review of DQG SPY, parallel with this project a second interpretation of how a 10180 flashlight could be produced by DQG was devised.
The concept of this DQG FAIRY is quite different from the Spy DQG since dispensed with the hallmarks of family TinyAAA to end in a simpler and flirty flashlight.
Some of the ideas were shuffled in principle machine it in copper and then platted in nickel with golden finish. Finally it was decided to mechanize it in brass (which is still an alloy of copper with zinc) which was originally to be gold plated nickel after machining of parts but for various problems has been left in polished brass.
The unit I am presenting is a pre-production unit (more or less finished prototype), and differs slightly from production batch that just went on sale.
First of all I will share some of the images from the first prototype development, in which you can see the changes that have gone shoves over recent months.

Initially, as I said in the review of DQG SPY, the idea was to machine and sell an extra tube for the (then) upcoming release of DQG TinyAAA Ti II. To show our idea, I made this crappy photoshop image to get an idea of how would be the possible future project.

Here you can see the first prototype of SPY / FAIRY. It’s just a sketch to test the driver but as you can see, the original design is pretty close to what has been finally the FAIRY.

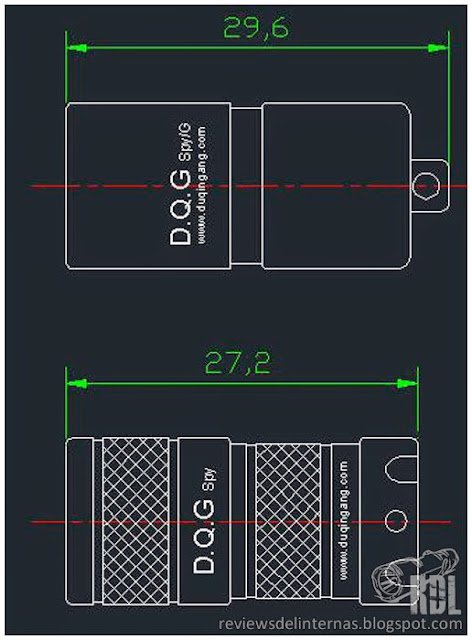
This image shows the diagram of the design of both versions separately. Curious as FAIRY name has been changed at the last moment, since initially the second option would be called DQG SPY/G.

This image is a photo of the second prototype, once platted.

EXTERIOR FINISH:
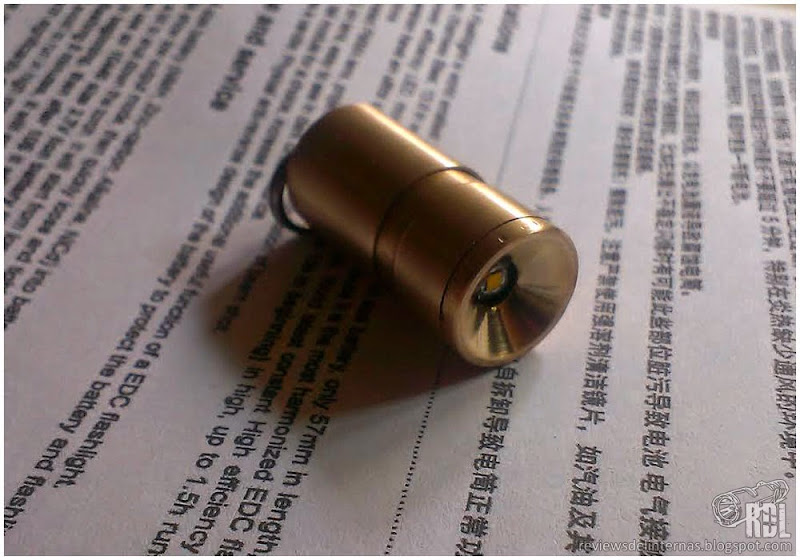
The FAIRY is very different to the SPY, and has a smooth, polished finish on its surface, without knurling areas on head or tube with a cylindrical appearance only broken in the center by a small recess at the junction between the two pieces.
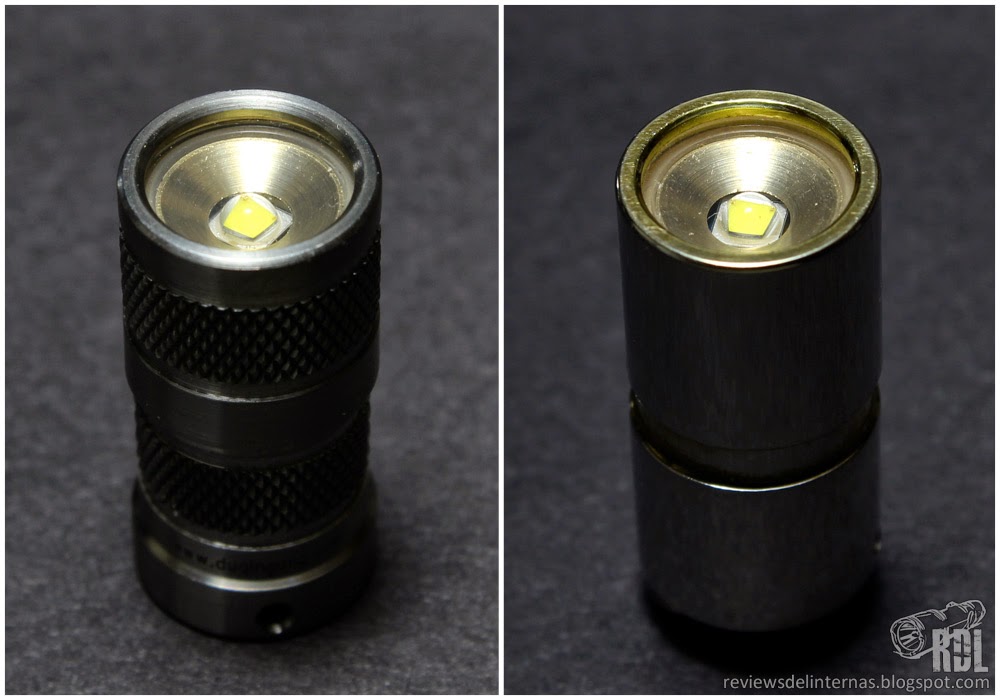
The lens is identical to that found in the SPY, the XP-G2 without reflector or TIR lens protected behind a glass lens (in this case also quartz), and surrounded by what appears to be part of the pill, also in brass.


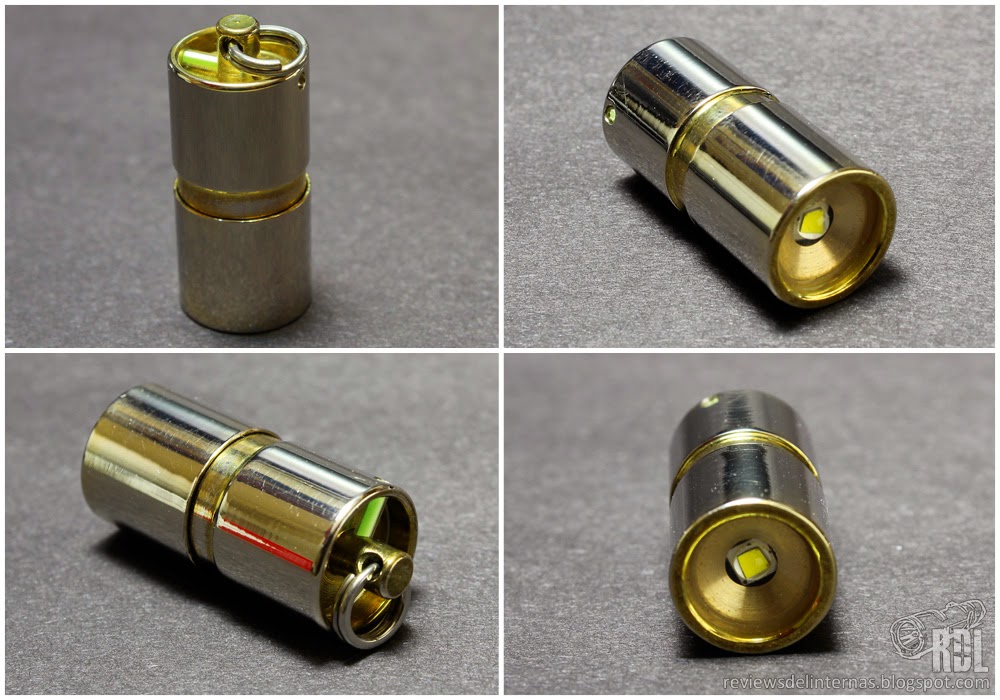
Note: Can you see how the color of this unit is a very light gold, derived from the previously mentioned problems with the nickel platting.

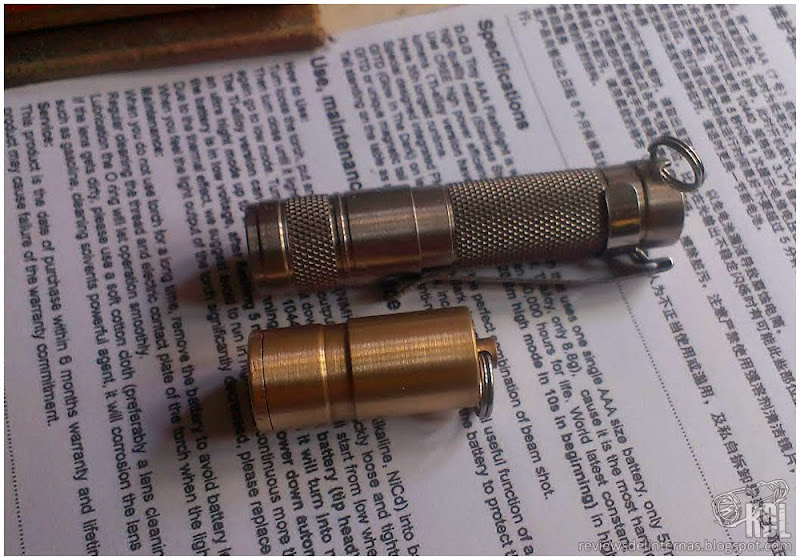
Inside we find the same driver system, protected with foam. The threads in this unit (which to be a unit pre-production I’m not sure if the final version will be the same) are somewhat different in diameter than those found in the SPY titanium, so we can use the FAIRY head in the SPY body but not the other way.
Tailcap design is also quite different, with a perforated central stud incorporating the split ring, so that its attachment point at the center and not on one side as on the SPY. Although not very stable, you can put it down to this point tailstanding.
Like SPY the FAIRY incorporates tritium vial installed in a similar way in the tailcap. In my case the vial is green.

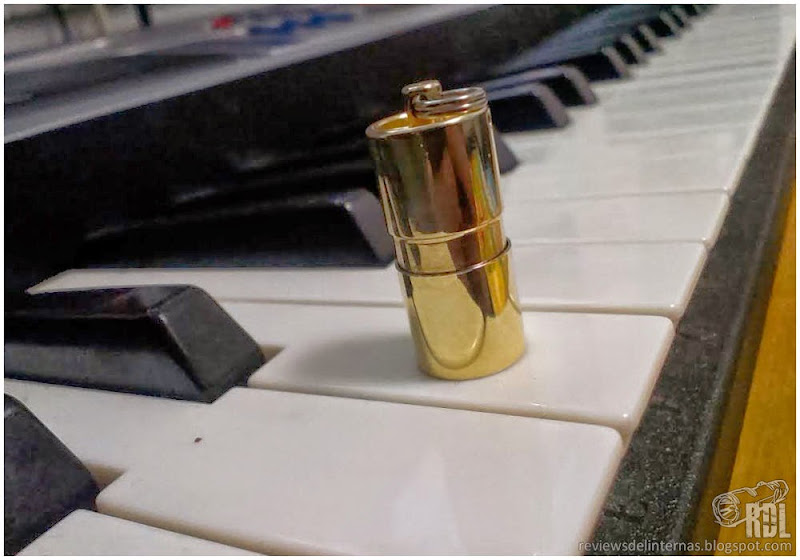
In general, FAIRY has a much more discreet and elegant finish.

User interface, performance and beam profile are identical to those just seen from the DQG SPY, although it is possible that being machined brass, count with more than his titanium sister model dissipation and is capable of giving some more light on runtime curve during the first minutes.

PERSONAL CONCLUSION:
More than a flashlight, FAIRY DQG has the appearance of a small keychain jewel, with a very distinctive and individual golden touch. I especially like they kept the tritium vial in the tailcap.

Negatives: If the SPY is already difficult to operate one-handed due size, the FAIRY is even more by the lack of knurling on its head. The nickel plated in my unit (and presumably final polished brass FAIRY) is quite slippery.

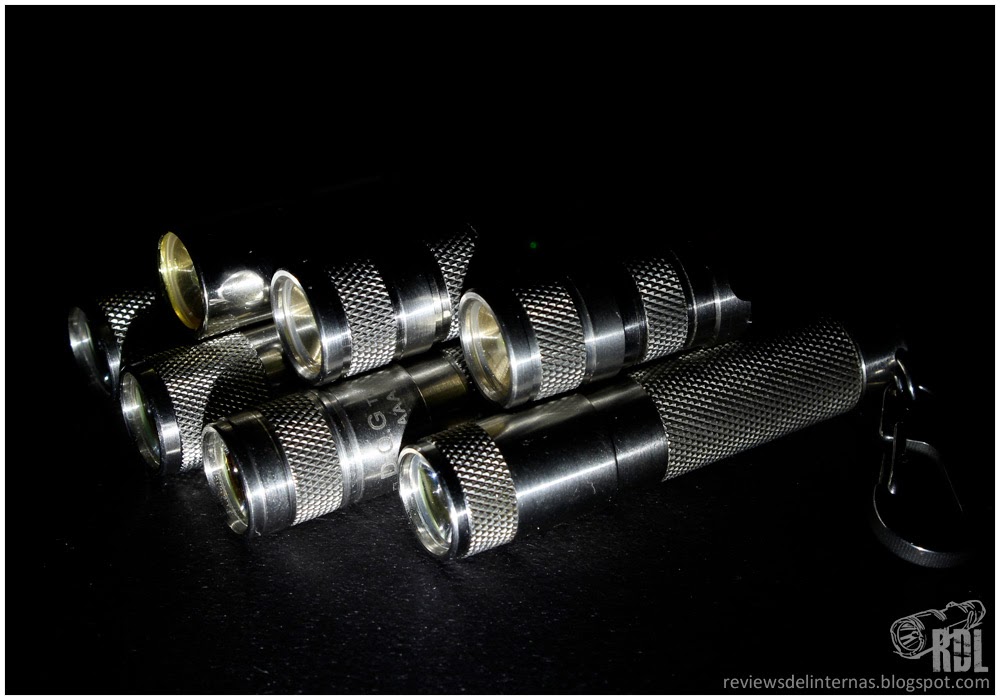
Positives: Two designs to choose from for the same Flashlight concept with identical features and performance seems like a good idea as it gives the opportunity to choose the model that we like best. Besides, this new simple and minimalist design adds a new shape to the already extensive Kaychain DQG family.

Finally, I have reserved this space to present separately for another novelty that DQG introduced along the SPY and FAIRY. This is a mini-capsules or watertight keychain containers, nicknamed PSK.

They are sold in two sizes, PSK / S (Size-B in CNQG) and PSK / M (Size-A in CNQG) .

These capsules also serves as small containers fully waterproof to carry us through our key small objects inside, such as a folded money note, a pill, a small piece … are designed so that they can also be used as spacers for the battery 10180 to fit the bay of a common charger.
The PSK / S, the smaller of the two, along with battery 10180 give us similar to a CR123 (~ 35mm) battery length, so it is ideal if you are going to charge the battery in a charger for RCR’s / 16340.
The PSK / M, being longer, will give us the ability to charge the battery in a suitable battery bay for 14500 / AA. (*)

Both containers are machined from stainless steel and have a very good exterior finish, with compatible threads and the same pitch as the DQG lights, including O-rings to ensure tightness.
Finally, the PSK / M (Size-A) has another very interesting utility, and is machined allowing hold a 10180 battery inside, so it is ideal if we want to hang it on your keychain with our SPY or FAIRY and always have an extra battery replacement. Inside there is no electrical insulator, and while the inner diameter is similar to the flashlight tube, length height is significantly higher, so there is no risk of shorting the battery, as one of the two poles is always isolated from the capsule. The battery has no lateral play, can only move up or down, so there is no serious risk of abuse the 10180 by shaking it. Still, if we prefer it safe and forget the issue, we can always place one of the SPY or FAIRY spare O-ring in the bottom, or just cut a couple of tiny pieces of padded duct tape and stick on both inner planes to avoid the movement of the battery.

(*) NOTE: As already been mentioned in the general thread on the DQG SPY, small battery 10180 has a limited capacity of about 90mAh, so we will need a charger according to this data to obtain an effective and friendly recharge capability with the small Li-Ion. In principle, it would be ideal to recharge the battery at a current equal to half of its capacity, rounding about 50mAh, but have not reported any problems slightly using higher currents. Obviously, if you do not want to invest in a specific charger for these batteries (or easily mod one of the famous USB charge controller small and cheap boards) you will have to find a charger with the lowest possible charge current.
The problem of charging such batteries at high currents (and when I say high currents I am referring to up to 250mA, please avoid charging this small cell at more than 250mA!) will result in premature deterioration of its chemical and thus its capacity. Even so, and watching the price so affordable that CNQG offers to purchase extra batteries, I would not worry much about this issue and if in the future we see that the capacity has lessen significantly, just order a couple more.

Thanks for reading! :party:

Excellent reviews. Thank you for the large effort.

Great review. I tried reading the Spanish one with the aid of google translate but this one is great.

Interchangeable heads with the AAA hey? Well, that’s two new lights on the horizon (my current DQG IV is the non lli-ion one). Does that mean that the SPY head will support 1.2V as well or just 10440 when swapped?

No, the SPY doesn’t support 1.2V battery.
I’ve been told today that the upgrade on the thread isn’t posible, as there is no room for compativility with the larger thread of the AAA version with the current SPY head size.
I’ll edit the review to delete that part. :frowning:
It is a real pity.

off-topic, but I have been interested in using 10180 li-ions as a rechargable alternative to 3xLR44 used in so many devices…

I think the max discharge rated ~200mA is a problem however, seeing that LR44 is maybe 75mA…

Any thoughts about this type of usage?

I have 5mm RGB colour fade led lamps which I think I would like to try with 10180 li-ion. They have embedded ICs and are rated to 5V so I think they would work ok, if you can remember to turn them off :bigsmile:

The DQG spy has finally motivated me to update my blog.

I think, I’ll leave the serious beamshots and runtime tests to others (like the OP), but here are few of my thoughts on the DQG spy:

Perfect reviews, fabulous pictures, and I like the most tiny flashlight in the world, small light with low capacity battery, which means I should recharge the battery frequently, the only pity.

They’re amazing lights!
I’m just wishing that DQG Fairy has more knurling on its body.

As always UPz, fabulous review and you are one of the best.

My brass Fairy arrived yesterday.The first thing I saw when I opened the package was the extra 10180 cell I had ordered and never seeing one before, I couldn’t believe how tiny the cell was. The light itself is also incredibly tiny. Pictures don’t do this thing justice as it’s so teeny, tiny you have to see it in person to appreciate just how small it is.

Of course like so many DQG lights, this Fairy light is no different than other DQG lights as it’s an O-ring eater! The O-ring installed on the light was ripped to shreds. I tried cleaning and smoothing out all the threads and installed a 2nd O-ring and with just a couple of activation’s, the 2nd O-ring was ripped to shreds. What’s up with that DQG?

I finally wrapped some Teflon tape around the threads because without the O-ring the head is too loose and the tape is working okay. You would think by now DQG could make lights that don’t rip up O-rings. I have 3 other DQG lights and all of them except one are O-rings eaters and have no O-rings in them.

On the positive side, this thing is more like a piece of jewelry than a light. The finish is beautiful with a nice semi-gloss brass finish. The Tritium vial in the tail is plenty bright and is a nice touch.

Of course this is a mule meaning there’s no beam to speak of because it doesn’t have a reflector but it puts out a nice swath of light. The high mode is pretty impressive for such a tiny thing. I like flood lights and this is a good one.

Except for the usual DQG lights hate O-rings thing, it’s a wonderful little light and well worth owning if not just for the “WOW, that’s so tiny!” factor and along with the Spy, it’s probably one of the best key chain lights out there.

Oh yeah, I also wanted wanted to say that at $20.00 less than the Spy, I think this is the real bargain of the two.

:slight_smile:

for what it’s worth, I haven’t had any issues with the o-ring in my dqg spy, so far.

Great review, thanks UPz, I thoroughly enjoyed it.

Amazing how small these things are now. 130lm OTF from something this tiny is remarkable. And then when you stop showing off and need the runtime, there’s 4hrs of it on low. Excellent design! I might really get this someday.

What are you guys using for chargers for the 10180?

For charger the 10180, I use these two :

- USB charger veleno Design (12$ plus shipping) http://www.velenodesigns.com/?page_id=15

  • Cottonpickers Charger. There is a guy on the CPF, he can customize it, I asked a 60mA charge. 17$

That’s good advice Trevi_Lux especially with Cottonpicker. He’s one of the best. I’ve been using his standard 100mA charger and it works great with the 10180 cell.

> machined brass

Can you identify the alloy used? The supplier should be able to tell you.

This (first few hits) will explain why it’s important to know the alloy:
https://www.google.com/search?q=brass+alloy+lead+surface

(briefly — because not everyone is as informed or as careful as possible, people should know this: in machining, the lead globules smear into a film on the surface of the metal, so the same issues as handling lead metal are a concern for machinists and customers)

How much lead are we talking about? Like lead paint exposure levels? Is there a test without going full chemical analysis? edit: looks like there are a few DIY methods.

Does anyone know what size o-rings the DQG Spy takes? I’m not sure how to measure them. Mine is eating o-rings right now, so would like to get a bunch more.