CREE Q5 300LM LED 3 Mode Zoomable Headlight - Mod to XM-L2 NW Mule

This "Cree Q5 300LM LED 3 Mode Zoomable Headlight" bought on Ebay has been on my todo list since about October.Previous discussion on this headlamp is found in this thread starting at post#37 and also recently reviewed by RaceR86 here. I figured it would be a quick and easy driver, emitter, and glass lens swap so I decided to "just do it". I'm happy to report that all went pretty well (hey, when you don't burn up the driver, it has the modes you intend, and the LED lights up the first attempt, that's a good feeling!).

Here is a quick build post on the mod:

Here is a pic of the light which comes with three diffusers:

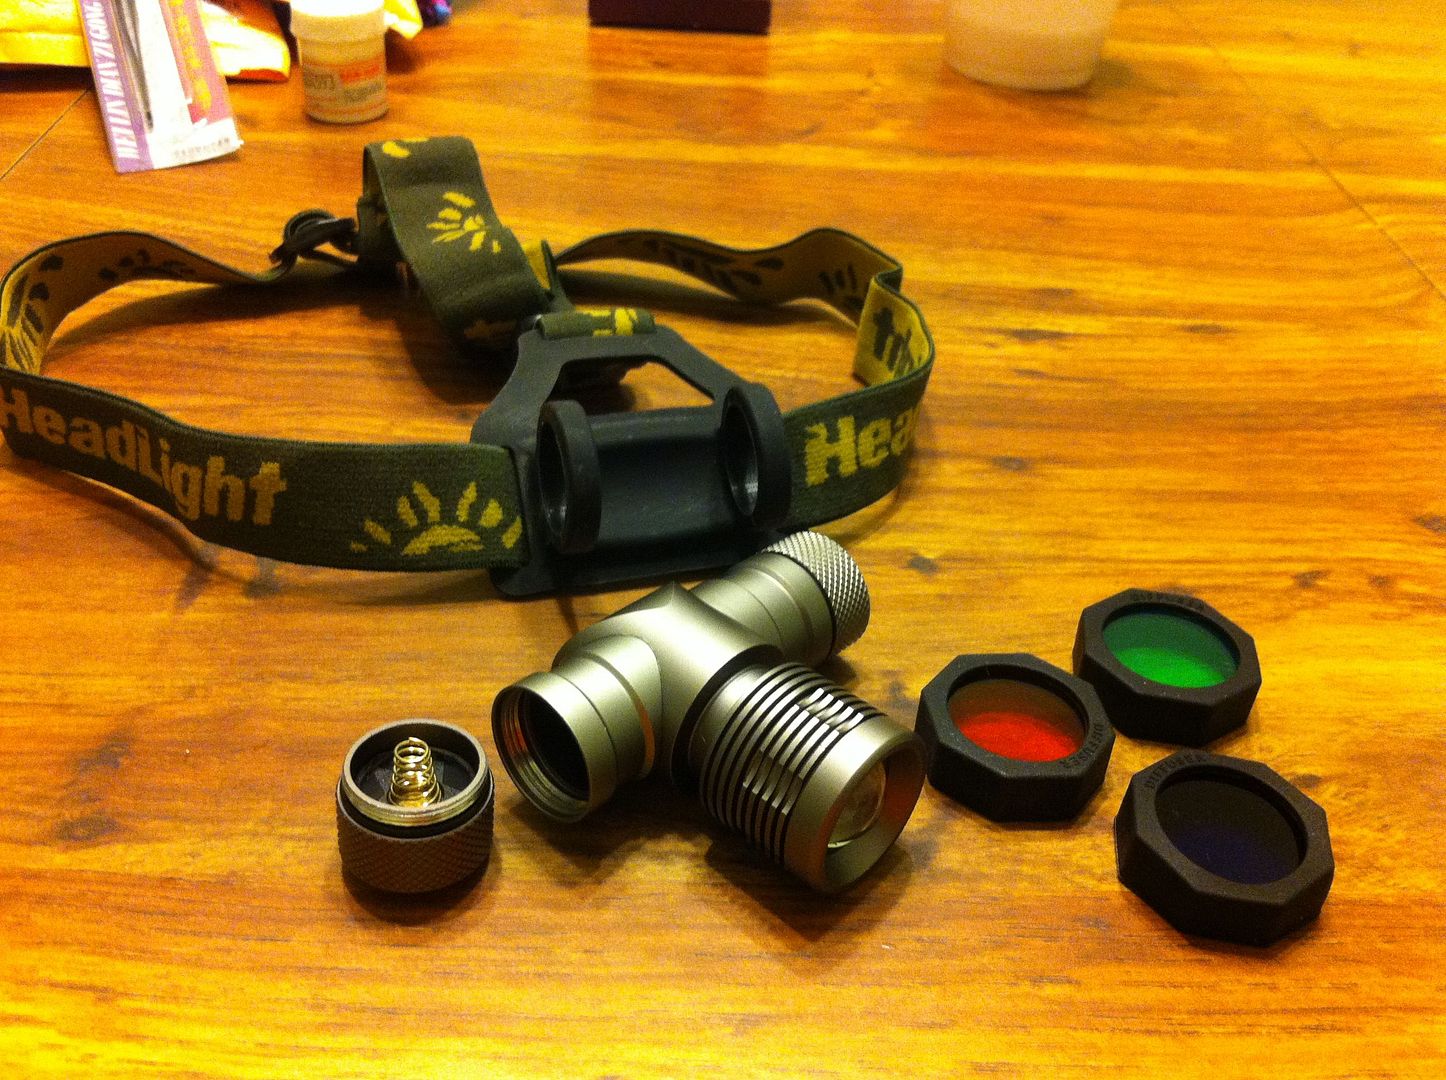
I'm pretty sure the stock convex lens is plastic, the zoom mechanism slides a little too freely, but overall it has a decent feel. It is Hi-Med-Strobe in stock form, and I didn't even check stock current draw.

Here is a shot looking down into the battery tube where the positive end makes contact:


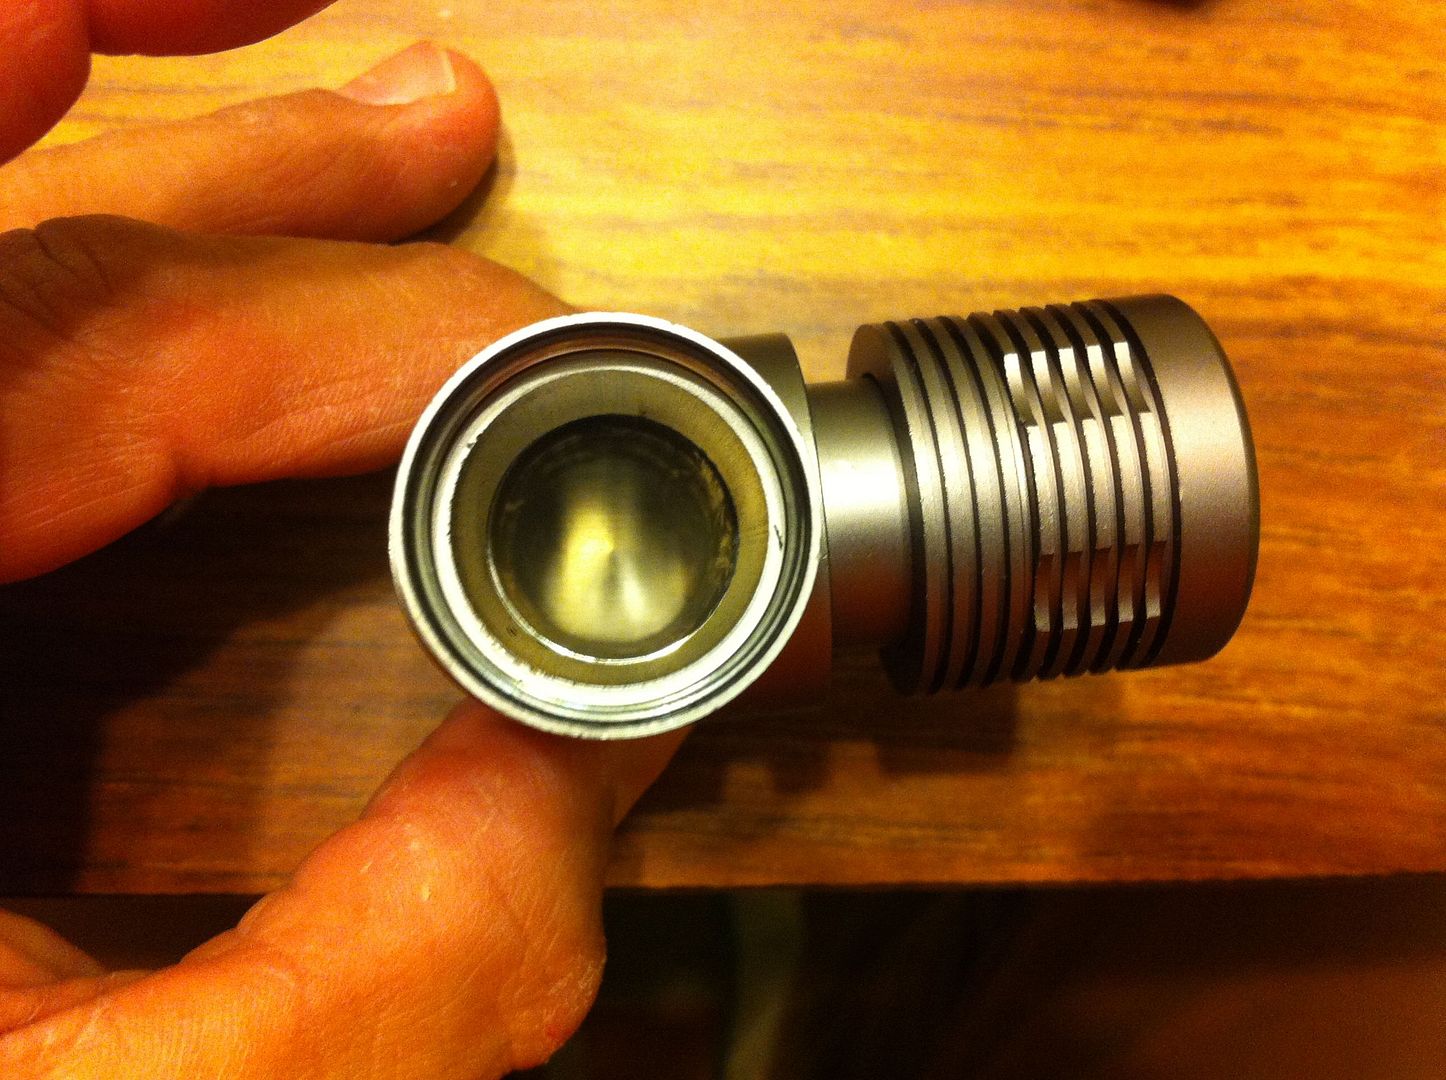
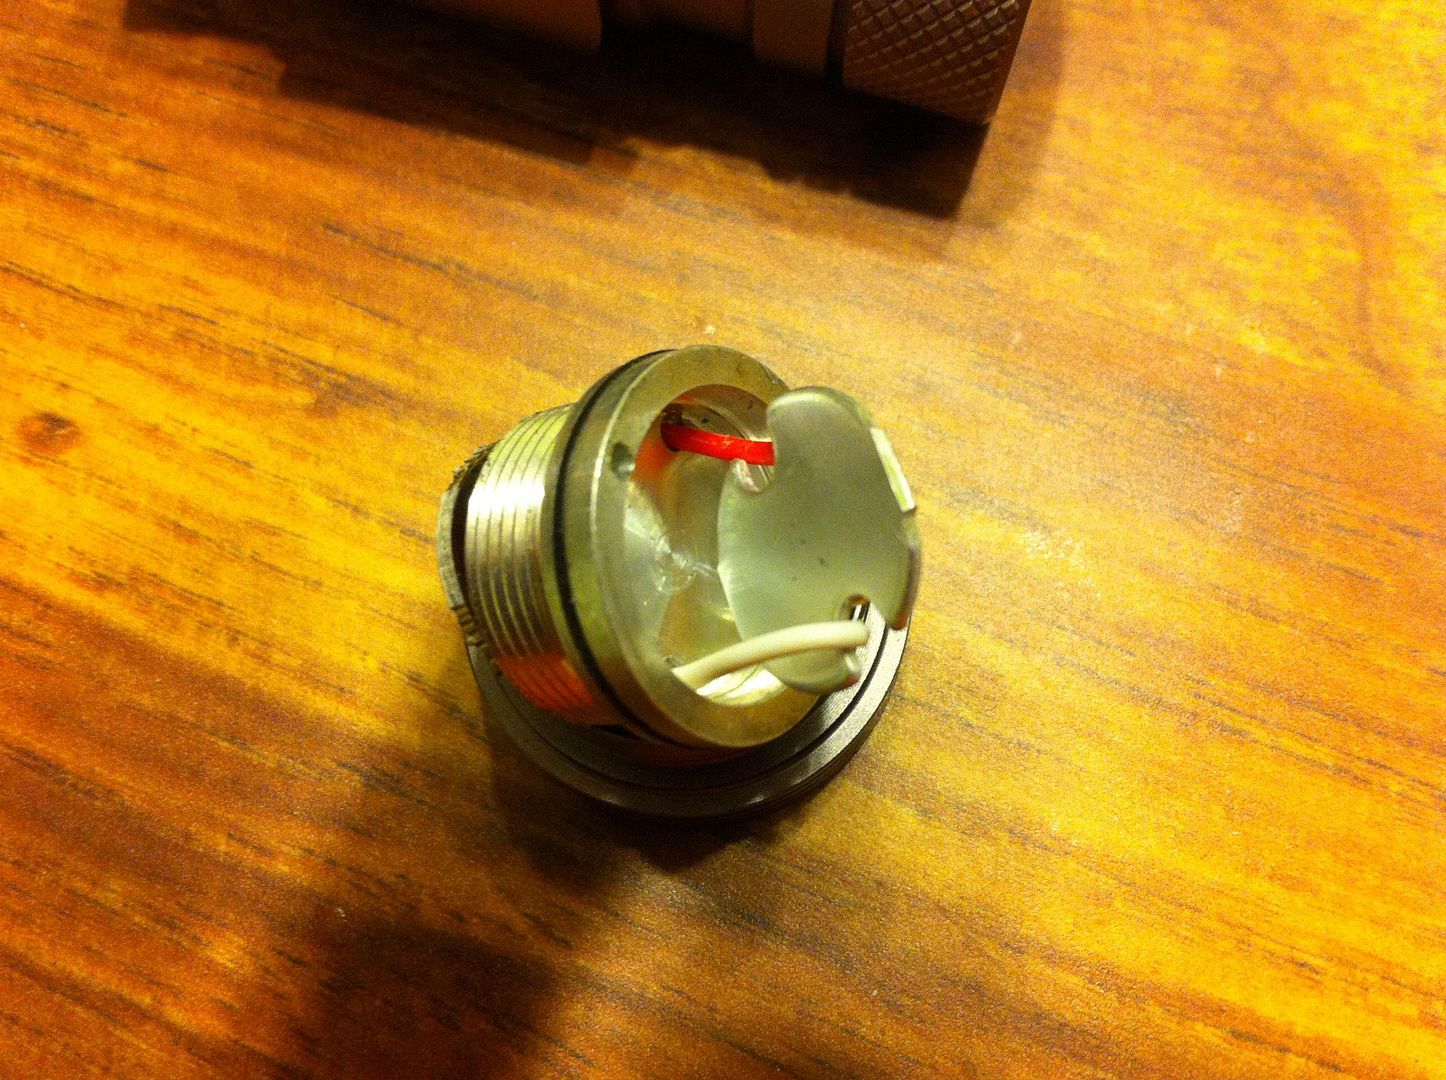
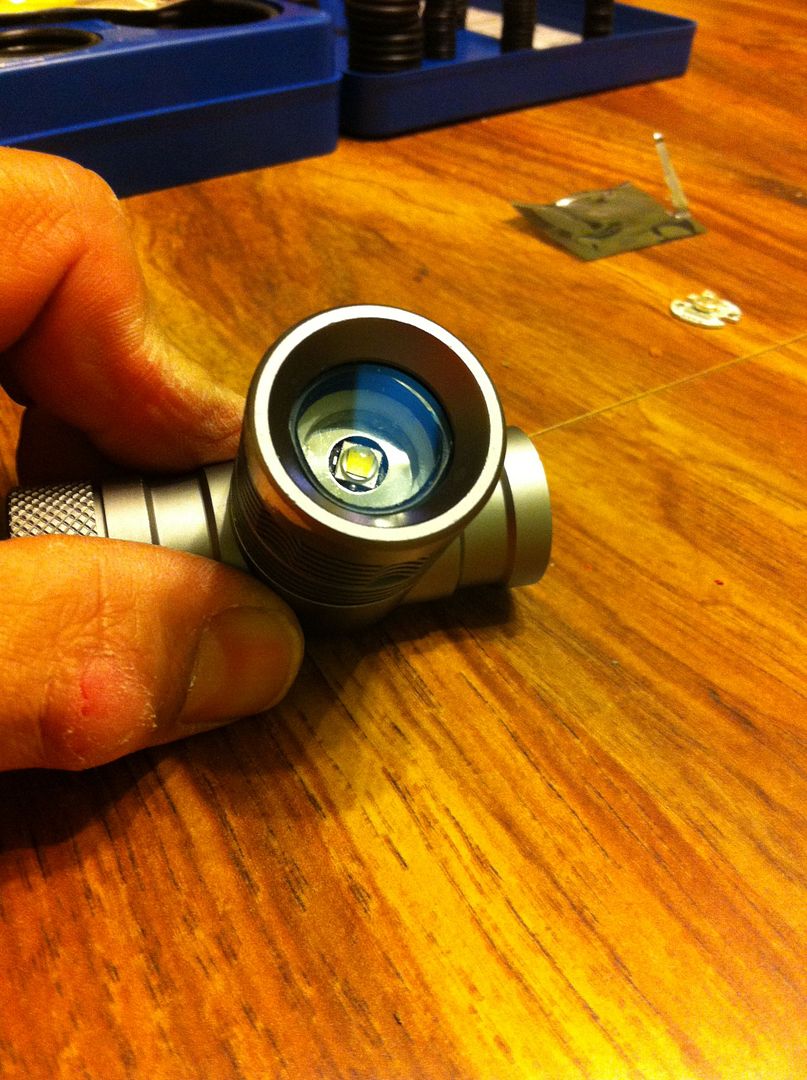
Lens removed showing pill with plastic press-fit retainer:


Pill removed showing contact springs for positive and negative:

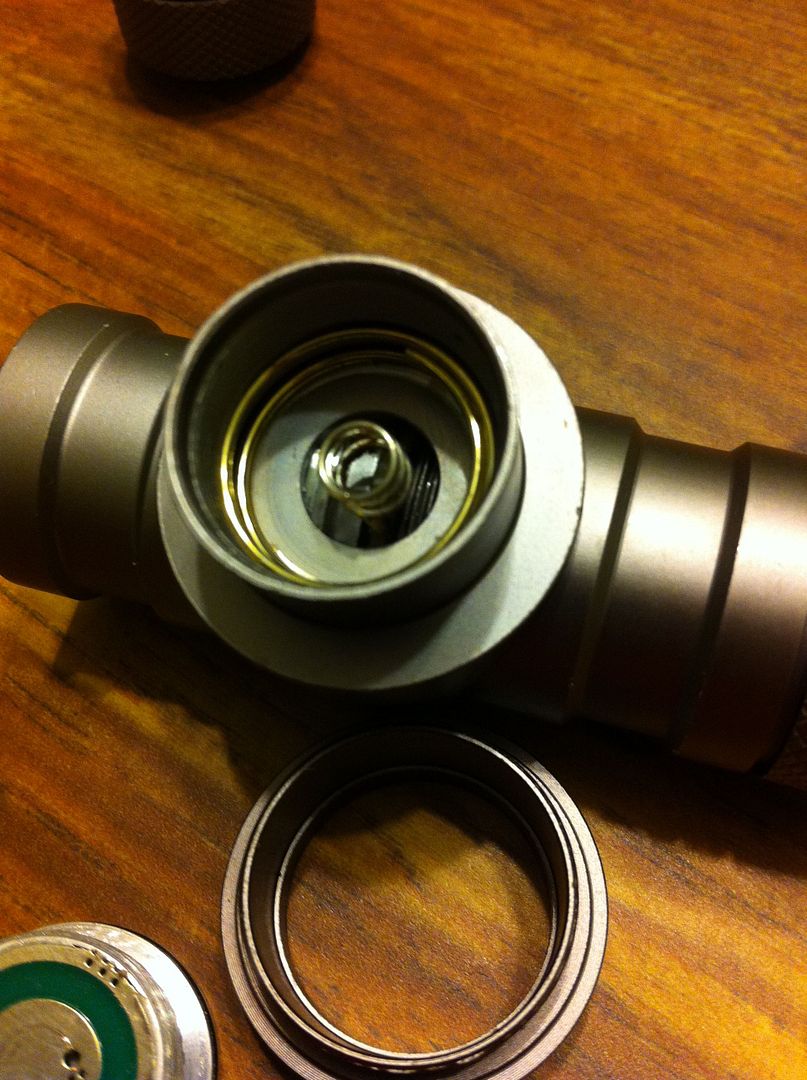
That positive spring is a little weak, so I suggest not touching it. I thought I had bent it to the point where it was going to break at one point.


Photo of press-fit stock driver removed:


Showing the solid pill without any drop of thermal paste/compound:


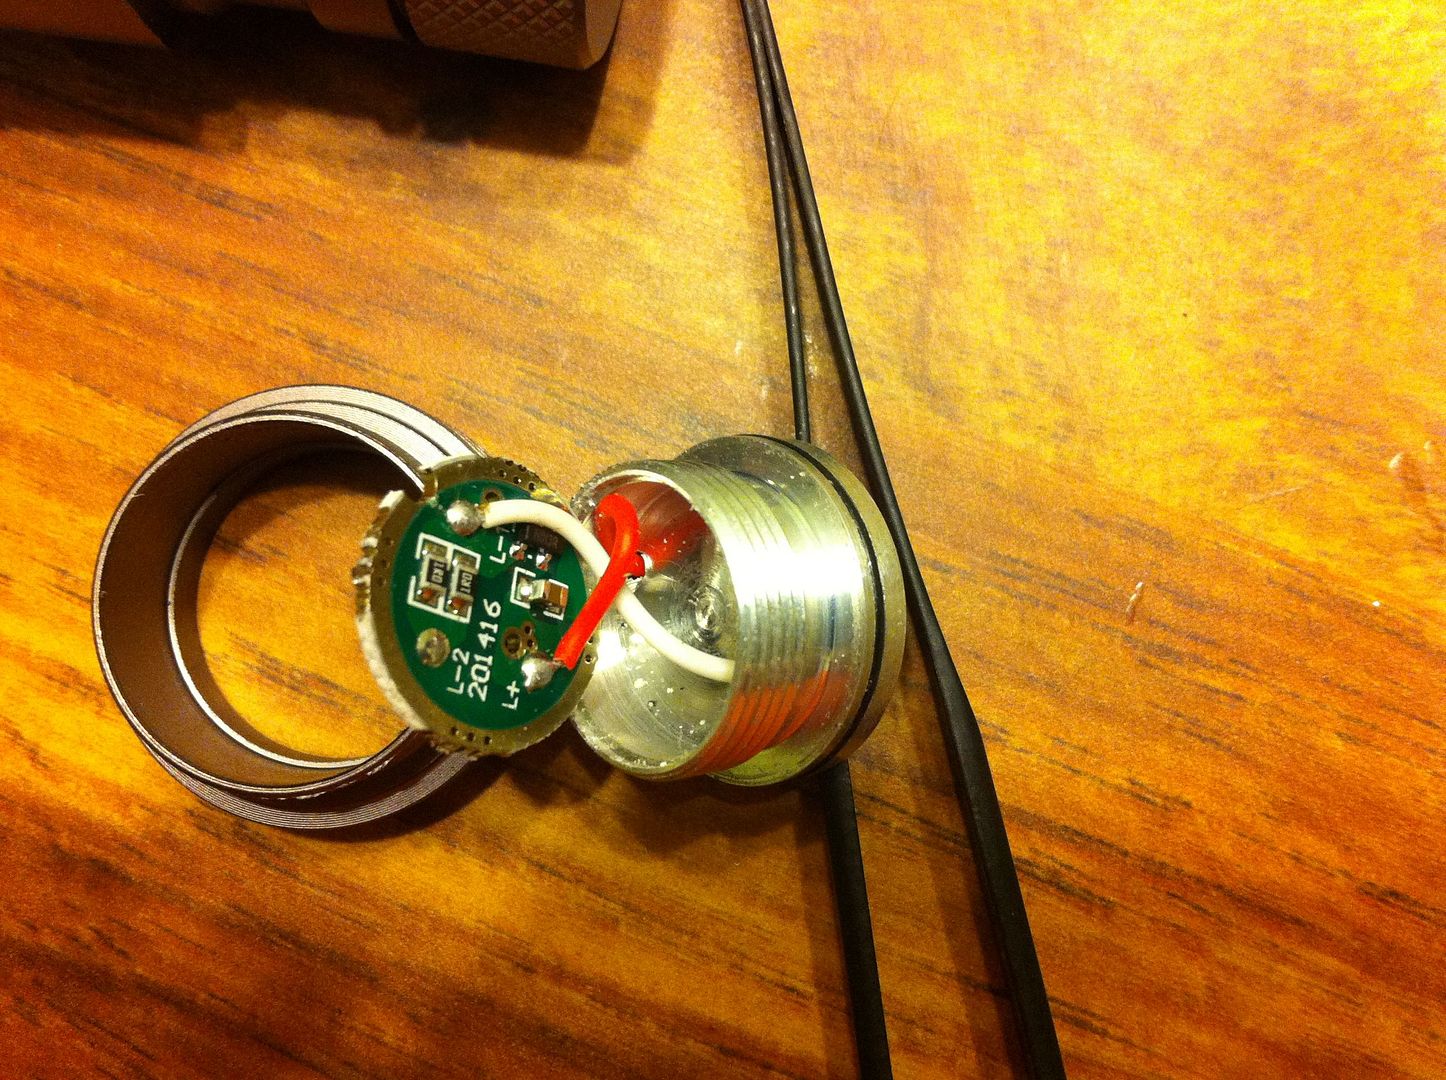
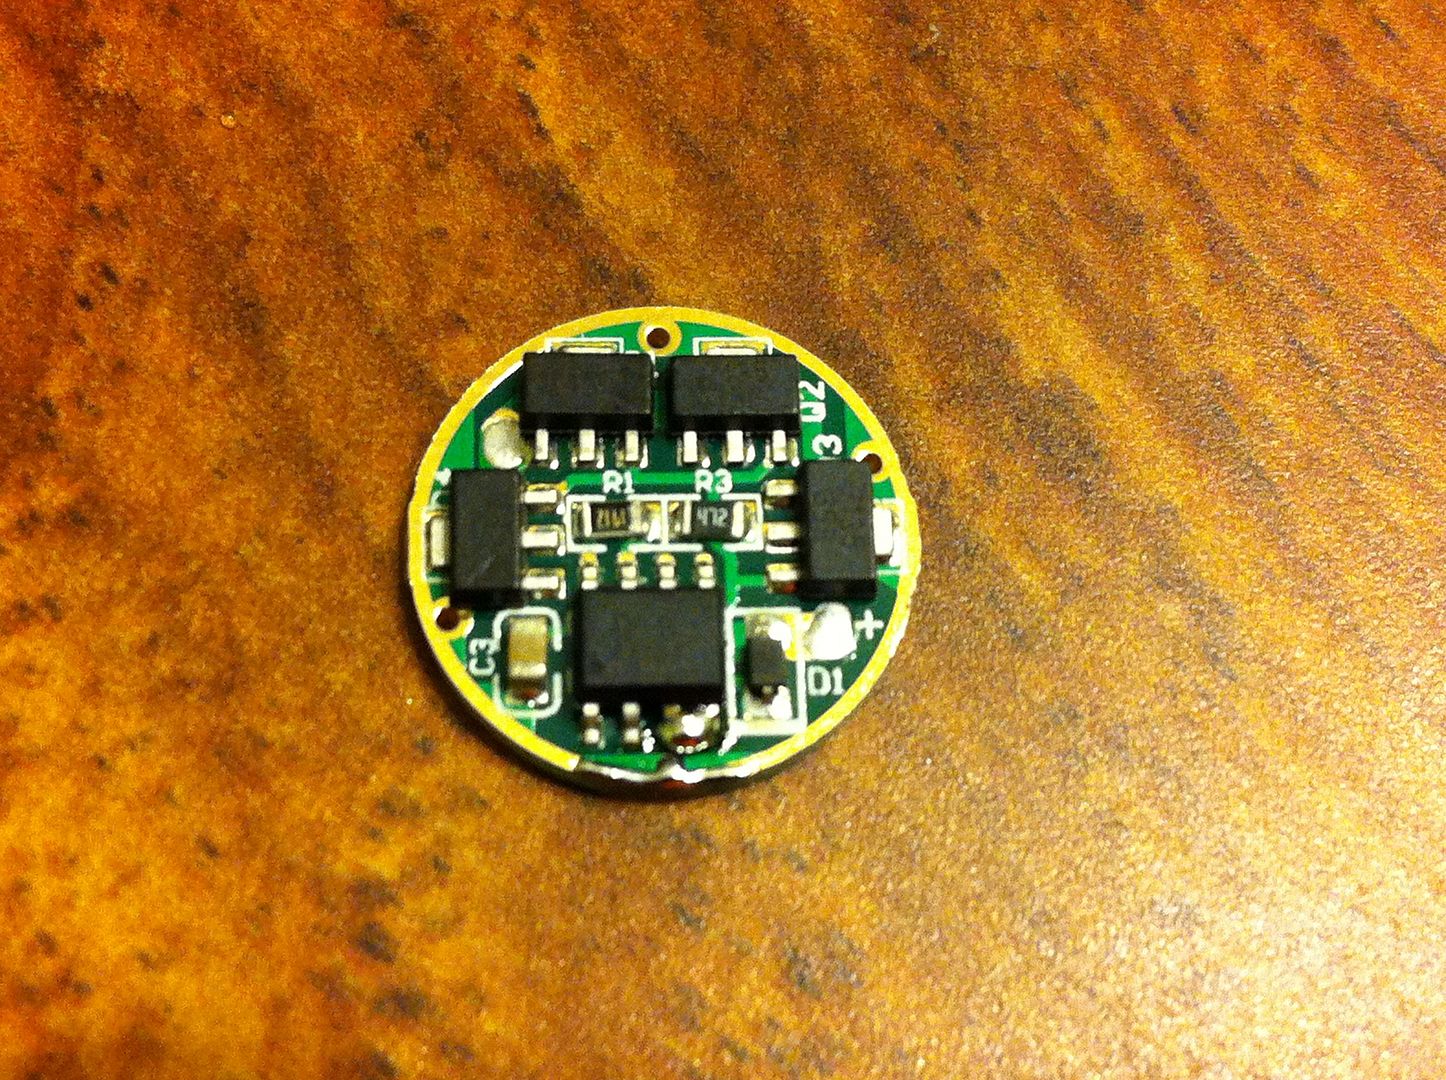
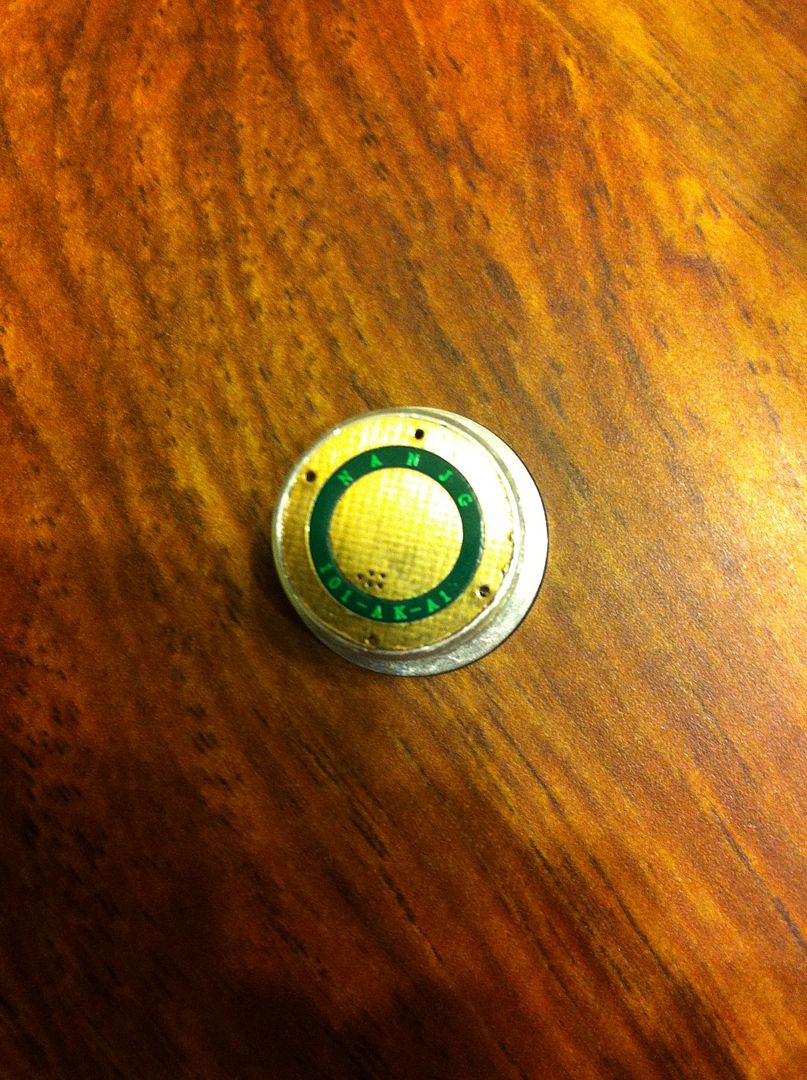
First order of business was to take a Nanjg 1.4A 101-AK-A1 4xAMC7135 driver and convert it to 3 mode (H-M-L) by adding a solder blob across the two pins of the mirocontroller as shown in the following pic (and at link above):


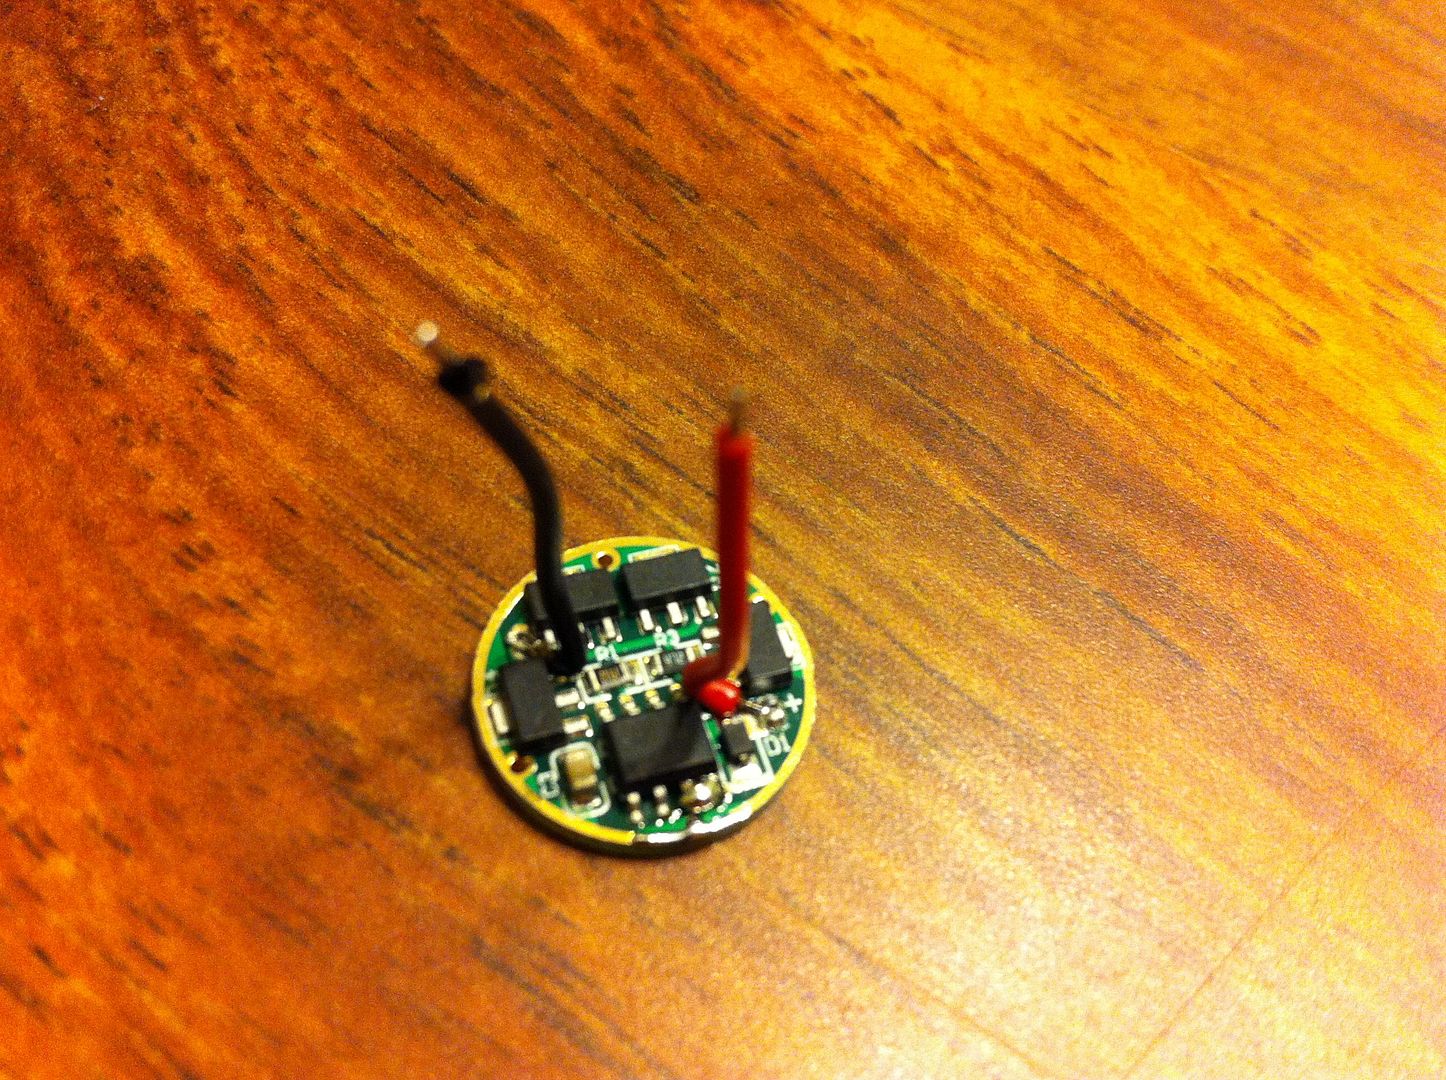
Now wired up and ready:


Placed an XM-L2 T5 5B1 NW emitter with Fujik on the pill and wired it up (fought with cheap wires - ugh! Had to redo wiring because the positive wiring kept melting and would have shorted to the pill/emitter). - No pics shown. I'm only driving it at 1.4A max, so I was not concerned about ridiculous overkill extreme heatsinking techniques or using a copper mounted emitter.

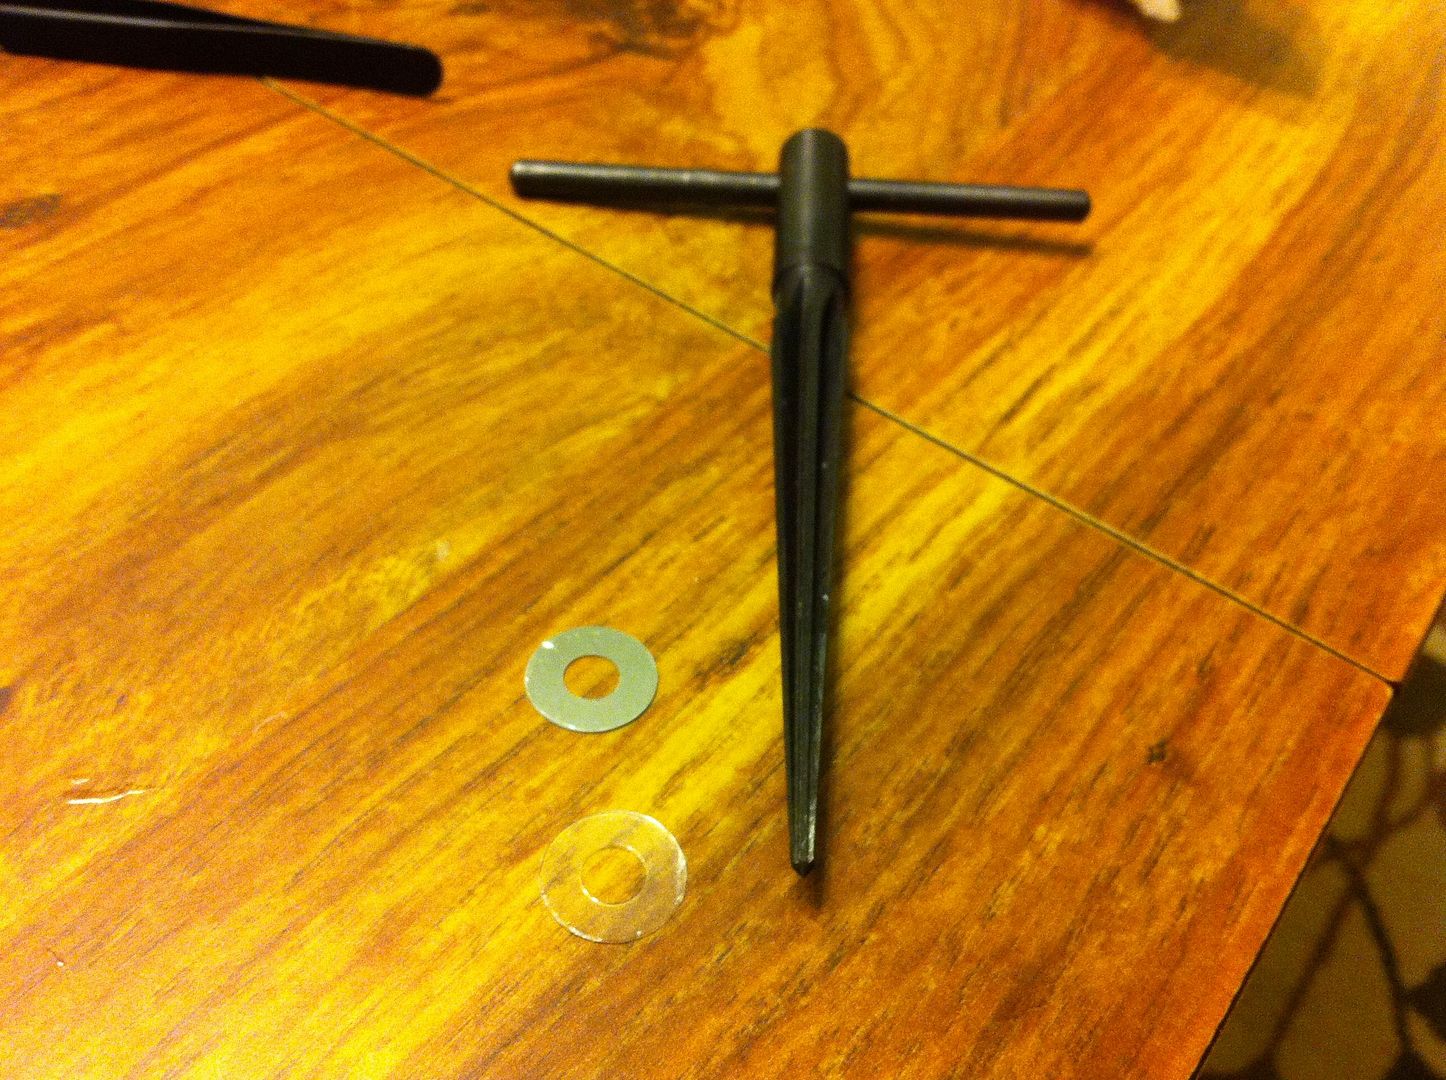
The stock insulation pieces (and an aluminum washer) had to be reamed out a little bigger to clear the XM-L2 pad:


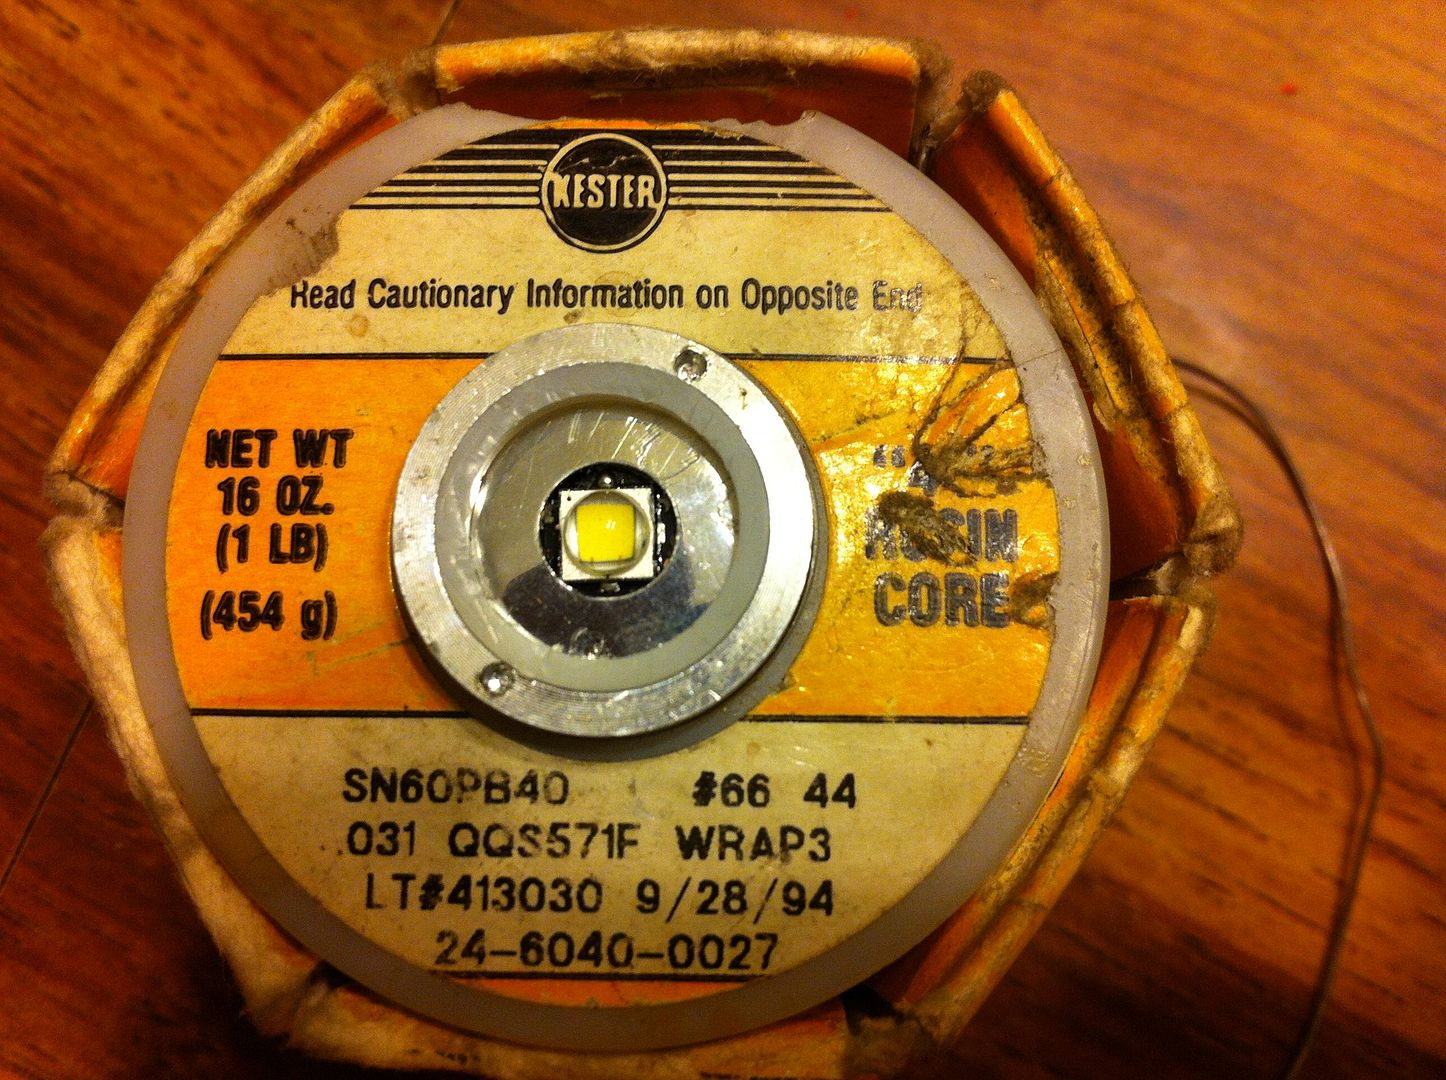
Here's the pill ready for action (fit's nicely in my solder spool - BTW, notice the date? I've had that a long time!)"


Shot of the new driver press-fit in:


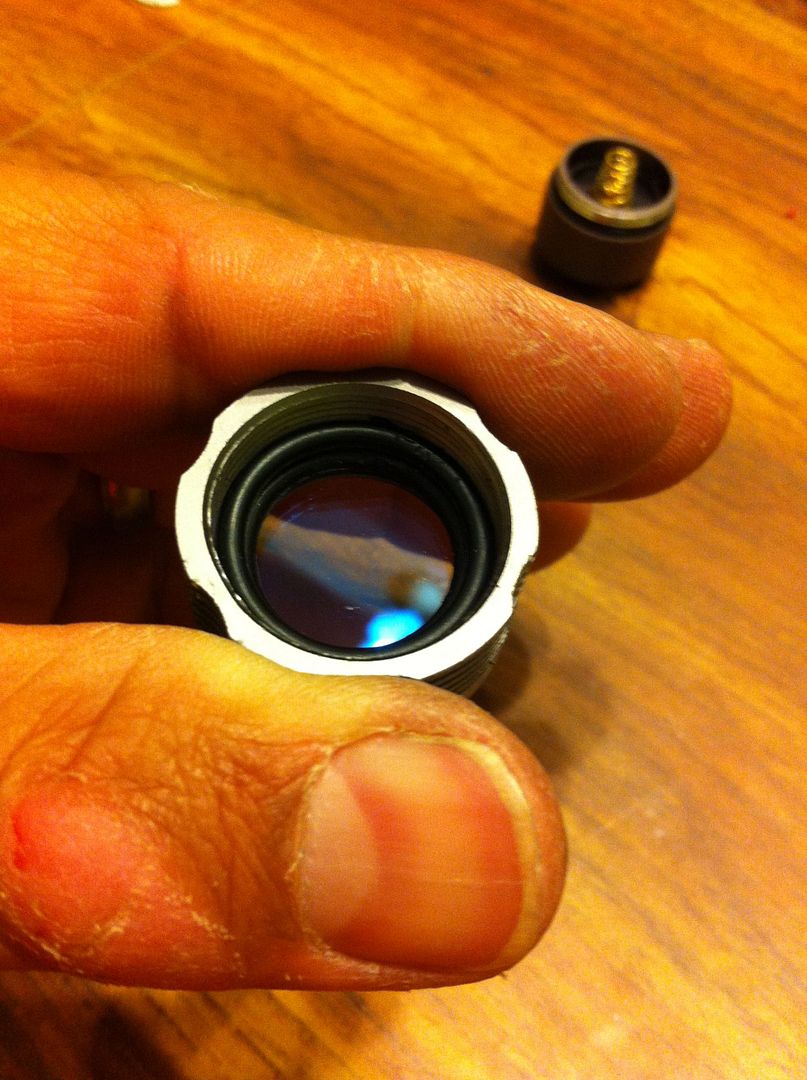
New 21mm AR coated glass lens from KD installed (BTW - the KD 22mm AR lens is too big to fit) using two thick o-rings, rear view:
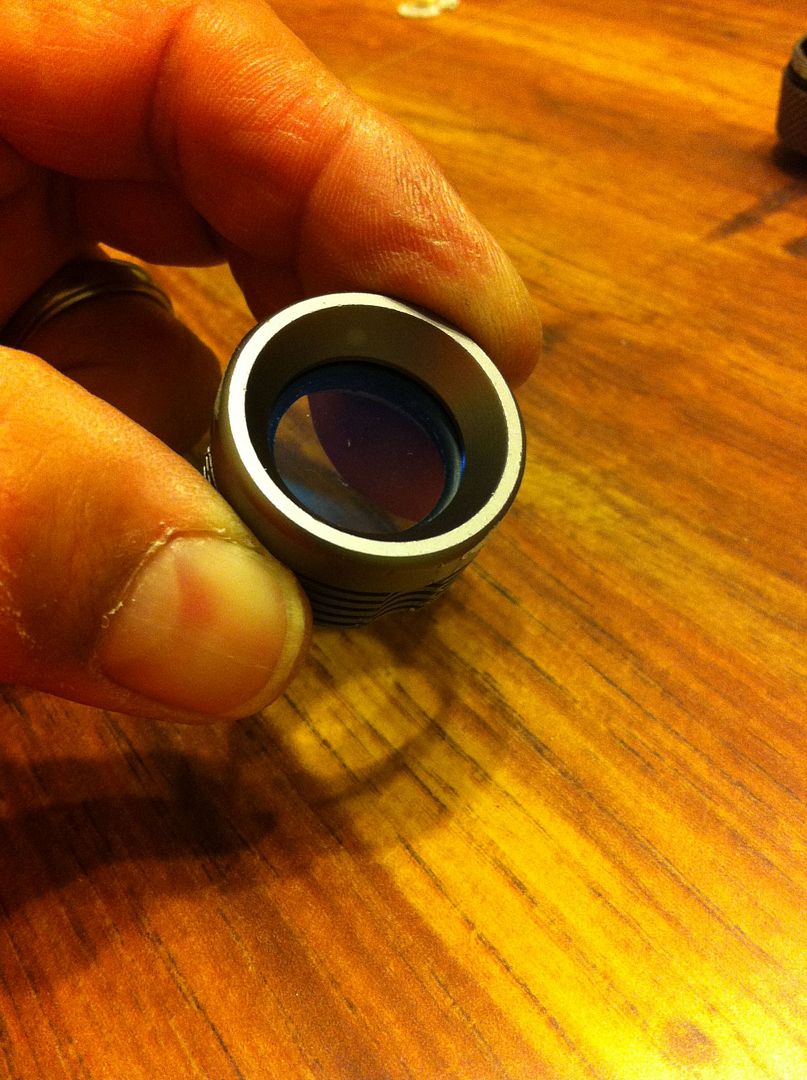

Front view:


Now the finished light:


Sorry I don't have beamshots, but this baby is wide wide even flood! Great for closeup work! Good spread of modes too. At a distance of 12 feet back from a wall, the beam measures 21 feet wide, no rings. My large o-rings may even be restricting a little light. Tailcap current draw measured: Hi - 1.39A, M - 0.43A, L - 0.07A. The driver also has low voltage protection.

Tip if you choose to do this mod. The original lens is press-fit (possibly glued) in place. Do not try to unscrew the very front bezel! (I gouged mine up - should have tried pressing it out to begin with, as it came out pretty easy.) The whole mod is really easy to do and will only cost you roughly $9.50 for the light, $3.50 for the driver, and $4.50 for the emitter, and $2.25 for the AR lens for a total of $19.75 (depending on where you purchase these items of course).

So far I am very happy with this mod as it will be a very useful goto headlight! Medium is plenty of light and should give excellent runtime! On high it still throws out light far enough to see about 50 feet I'd guess. This is my first experience with the 5B1 tint and I think it's tough to compare to other lights with this one being a mule. It's definitely NW, but the jury is out in comparing it to a 4C tint.

-Garry


Great mod!

also not a bad looking head lamp. thanks for sharing.

Nice mod Garry, you improved the stock light a lot with it, headlamps make good mule lights.

It looks like it is a nice host for all types of mods, my personal mod with this light would be leaving the zoom lens in, and use a Nichia 219B '92CRI' in it, with a qlite driver with 6 chips.

Sorry, couldn`t stop myself..just had to find something cheaper... for anybody who likes to save 45 cents ;)

here on ebay $9

every penny counts :D

Thanks guys. Forgot to mention that the zoom mechanism still moves slightly (but doesn't affect the beam too much). I'm thinking to glue the zoom mech. in the "flood" position at some point.

-Garry

I linked the seller I bought from. The seller was nice during correspondence, but I didn't get a tracking number and it took forever to get it (I had thought it was lost). There also used to be some US based sellers with it, but I didn't see any just now.

-Garry

I like this headlamp.
It’s been on my wishlist for a couple of months now… :slight_smile:

Ga dr voor Jerommel!

pull the trigger!

Nice break down and mod. Thanks for the link to that AR lens too.

Do you think one of those short reflectors from an 18650 tube light might be able to fit with the bezel "zoomed" out?

Maybe. There is a little bit of a "step" in diameter from the middle of the zoom area down into the where the glass sits. If I remember correctly, the 22mm AR lens would fit in through the middle but not down into the lens area. BUT, then you have the the backside of the zoom part which fits inside that +/-22mm area so I guess that brings your diameter down to about 19mm??? As far as reflector depth that may fit, I'm guessing about 15mm from lens to the plastic retainer. There would be another 2 to 3mm depth from top of plastic retainer down to the emitter (bottom of dome).

I see now that my pictures do not clearly show the two parts to the zoom mechanism. Take a look at the pic showing the stock driver; that piece behind the driver is the "back" part of the zoom mechanism which threads inside the outer front part. The front part is shown well in the pic where I am showing the AR coated lens installed with the two o-rings (rear view).

Maybe that info helps? I could tear it down and get you more precise measurements, but that would be awhile. I have a pretty busy weekend ahead.

-Garry

Oh, I should also add that the headstrap on this light is MUCH more comfortable than any other Chinese headlamp! My other ones fit like they are intended for small children rather than adults (and I don't have a big head - my wife sometimes tells me I do, but that's another story :) ). Plenty of room for adjustment on this one and I do like the addition of the strap up over the top of your head as opposed to the ones without (like the Ultrafire UF-H3b headlamp strap).

-Garry

So, it’s not too heavy on the front?
I mean, compared to headlamps with battery pack on the back of your head, this could be a drawback.

Thanks Garry. Thanks for the offer, but no tear down needed. Knowing me, I'll probably buy one irregardless. I only have about 3 real headlamps (not counting el cheapo's) and they are very different from that one. That means I pretty much have to buy one, right?

I like it when mods go smoothly.

It's usually not the case for me.

Nice job, Gary!

I wouldn't say it's heavy. You definitely feel it's there, but it's not bad at all. I just put it on and shook my head up and down and it didn't bother me (nor did it give me a black eye) nor did it rotate in the holder - which by the way also works nicely. It's not extremely tight to rotate the light up or down but also not loose enough to allow the light to move up or down while being knocked around (within reason). One thing I don't like about my UF-H3b is that it is so darn tight in the strap and so darn difficult to rotate the light.

This light, with a battery installed, will also "tailstand" (won't without battery, but why would you care) on the end without the switch.

-Garry

(Glad nobody came around the corner of my cubicle at work seeing me "headbanging" with a headlamp on my head! That might have made for an interesting situation! :) )

Garrybunk wrote:

. . . I just put it on and shook my head up and down . . .

Video, or it didn't happen.

Nice mod GB. 94. Such along time ago.

Ordered…
Because, well, you know, I didn’t yet have a headlamp, at least not a decent one…
I’m so broke right now…
But I might pop in a Nichia, which I’ll order soon.
I will (hopefully) improve the optics, maybe even put in a diffuser.

Well last night I finished my last touches on this headlamp. I spread some JB Weld in the zoom area and clamped the light with the head zoomed all the way back. Now it's nice and solid. I bet I also widened the flood by a few more feet (guessing about 23' wide at 12' back now).

-Garry

I just noticed that this headlamp kind of looks like it's meant to be a clone of the Spark ST6:

There are some obvious differences, but even the headband looks identical!

-Garry