Thanks Siskiyou, top notch find. 
Don't leave us in suspense, did you join? 
Thanks Siskiyou, top notch find.
Don't leave us in suspense, did you join?
Yes that is a solder blob, i put it there. I use a 100W soldering gun and get it done in 2 seconds or less so as not to heat the cell.
As far as the goop goes, I used my fingernail. ![]() If someone could come up with a scraping tool as good as a fingernail (gentile but effective) they would become rich!
If someone could come up with a scraping tool as good as a fingernail (gentile but effective) they would become rich!
BTW, I don’t bother with the burrs left behind by the spot welds. On the negative end the burrs don’t matter because it will always press up against a spring, and on the positive post, the solder blob covers them up.
Man I cant seem to get mine out of the enclosure. Any clues on how to open the damn thing without destroying the batteries?
Thanks, I’ve still got 5 extras though so I should be good for… Hopefully a while. The 2800mAh are incredible at the price everyone got them for.
Slip the end of an inch or so wide chisel into the join crack and pry it open with a twist, work along the seam, voila. Pry, no hammer. Be careful of your wrists etc. It works well, but I havent tried on the Asus packs in this thread.
Dont thank me, thank whoever came up with the idea in another laptop pull thread. If you bleed to death, blame him too.
Nope. But I did finally get my 2 packs :bigsmile:
Opened up the first one- it was really, really well sealed/glued/cemented shut. Scuffed a few wrappers, but oh well.
I’m charging one now so I can test it’s capacity, but I’m just gonna leave the rest as they are, at 3.694V, and put them in cold storage. I had just ordered a half dozen cells from Mountain Electronics, then I saw the eBay deal for the green cells and got 10 of them, then I saw this deal and got 16 more cells.
I won’t need any more 18650 cells for a long time.
For anyone who feels they missed out on this deal, the green ones from eBay are really good cells. Just gotta keep an eye on his auctions to catch a good price.
These ASUS packs are brutal. I have tried that and it is really tight. I cant get a screwdriver in the gap. I may have to dremel it, but I didn’t want to do that.
Ask your friendly local sasquash for assistance…
The area around the connector is the weakest spot. Crack it with pliers an the slip a narrow bladed screwdriver or the aforementioned chisel in the break. Pry till you have a piece you can hold on to with the pliers.
Just be careful, take your time, and smile instead of getting frustrated about how silly this is!
Whew! I got it open. Thanks guys that was a PIA!! I marred one of the batteries but I think it will be ok. Now to charge them.
wow… that was fast… only 3 days from CA to NY :heart_eyes:
Well, I ordered 6 battery packs and all were dated April 2011 Woooohooooo!!!! Deal of the decade!!! or at least of the year right?
Each and every cell measured between 3.68V-3.7V
Update: Actual assembly date from date code on batteries 2A51 is saying my cells were made
May 1st, 2010
and the actual production date (on bottom right corner of the grey sticker on the battery pack is
July-2010.
I guess the April 2011 date is when they came ready for distribution.
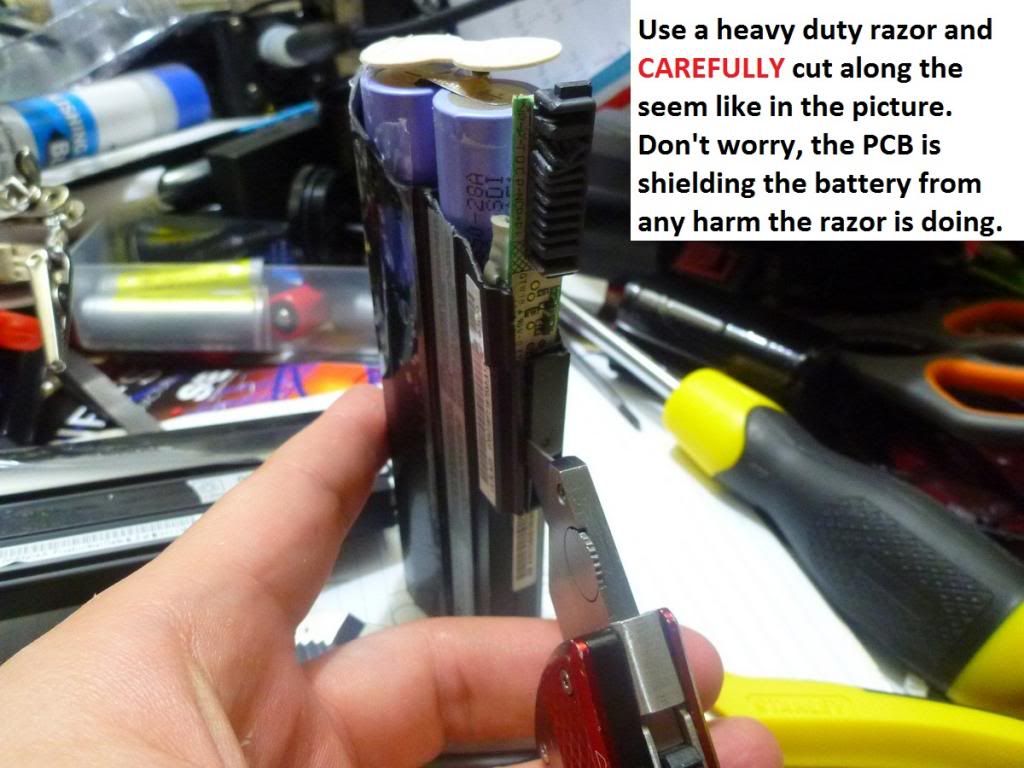
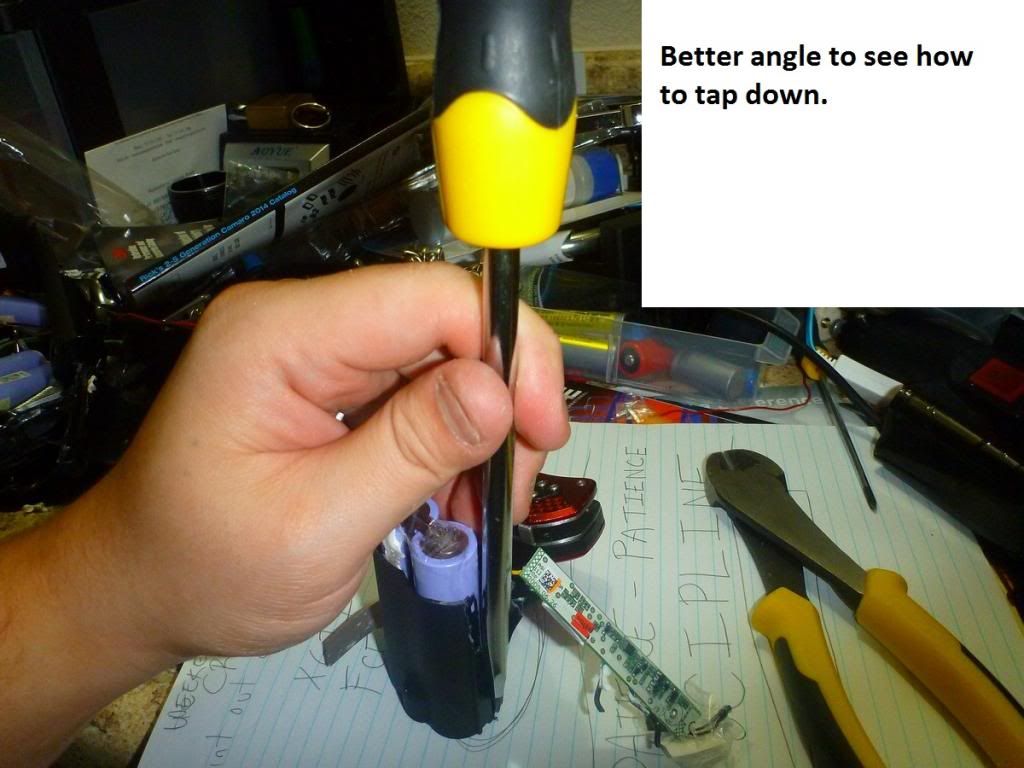
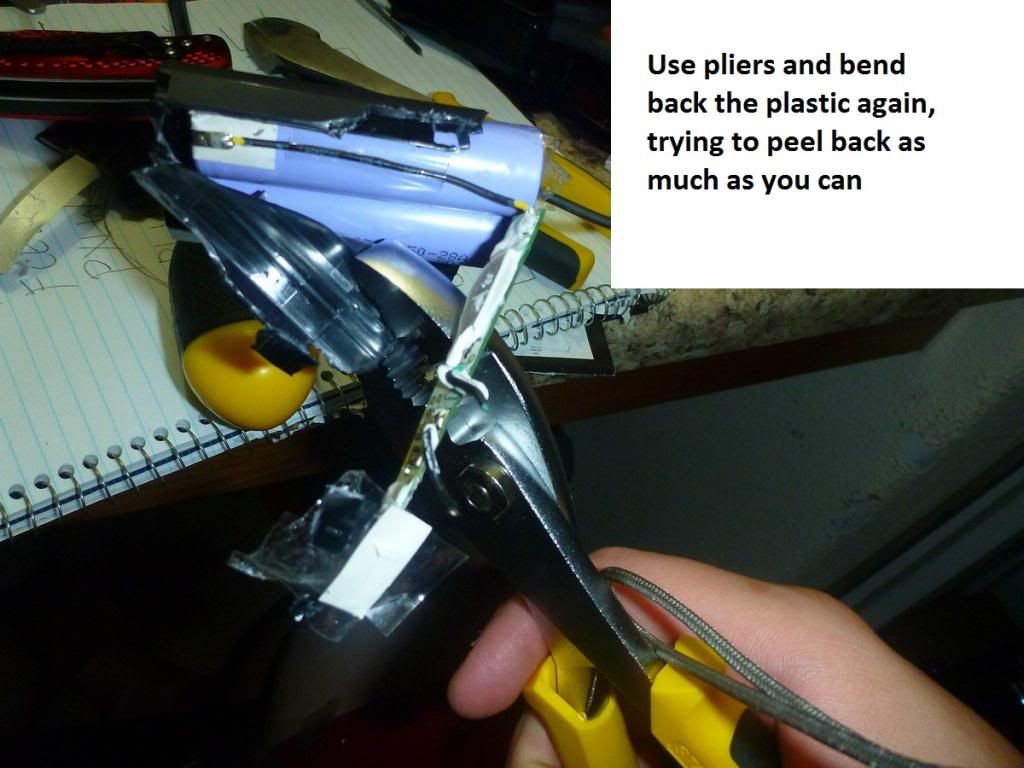
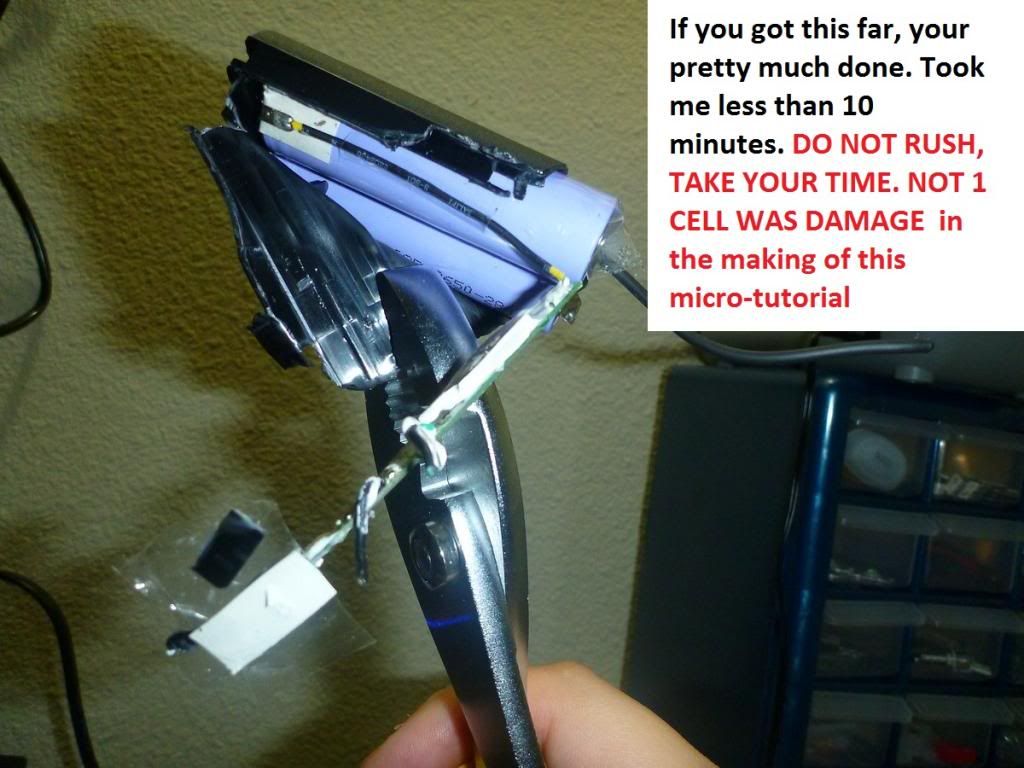
Ok after taking apart all my battery packs I have tips to expedite the process with pictures. First battery pack took about 40 minutes (this pack is very difficult to open). After devising a game plan (seeing where wires were when opening the first pack, etc...), I opened the next 5 packs each in under 10 minutes. Very fast and not 1 cell was injured! Here's the pics I took to help you guys who still haven't opened yours yet, so you can save alot of time taking these apart!
TAKE YOUR TIME!!!
WEAR GLOVES AND EYE/FACE PROTECTION!!!!
All you need are:
Heres what I did:
Step 1
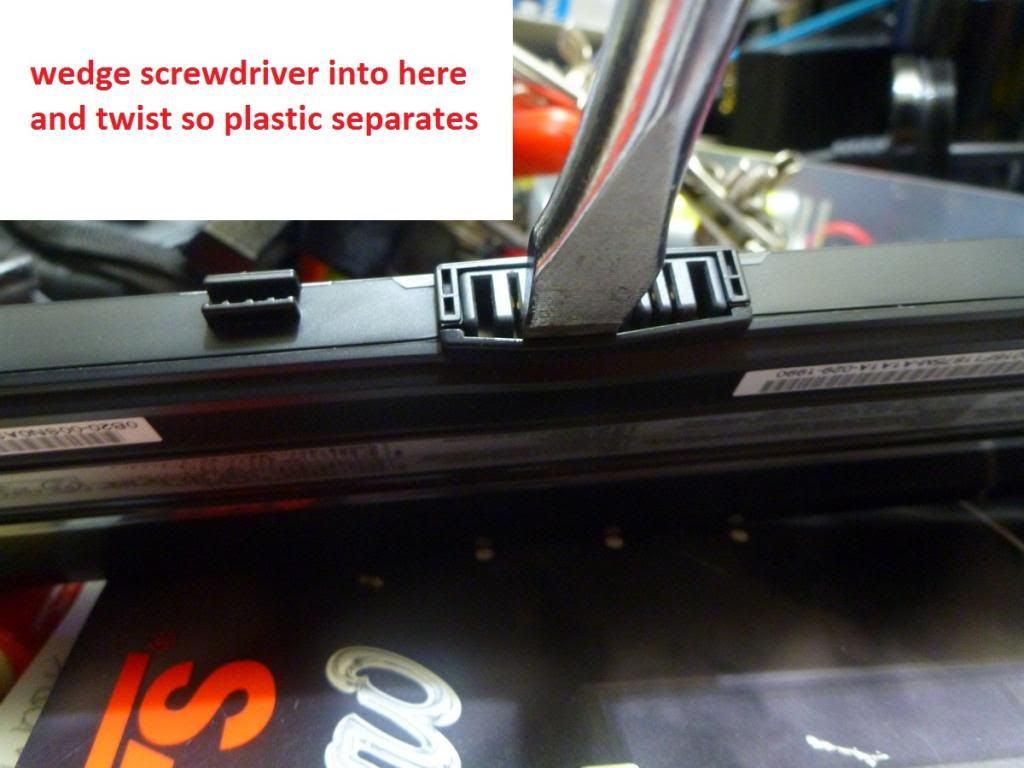
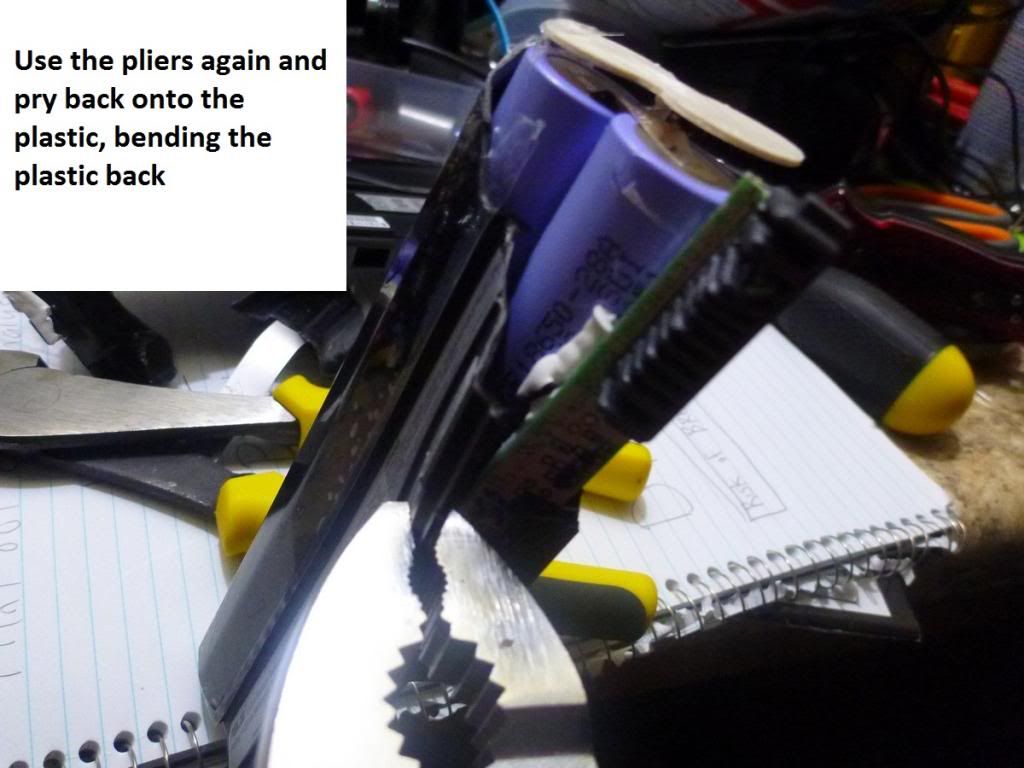
Step 2
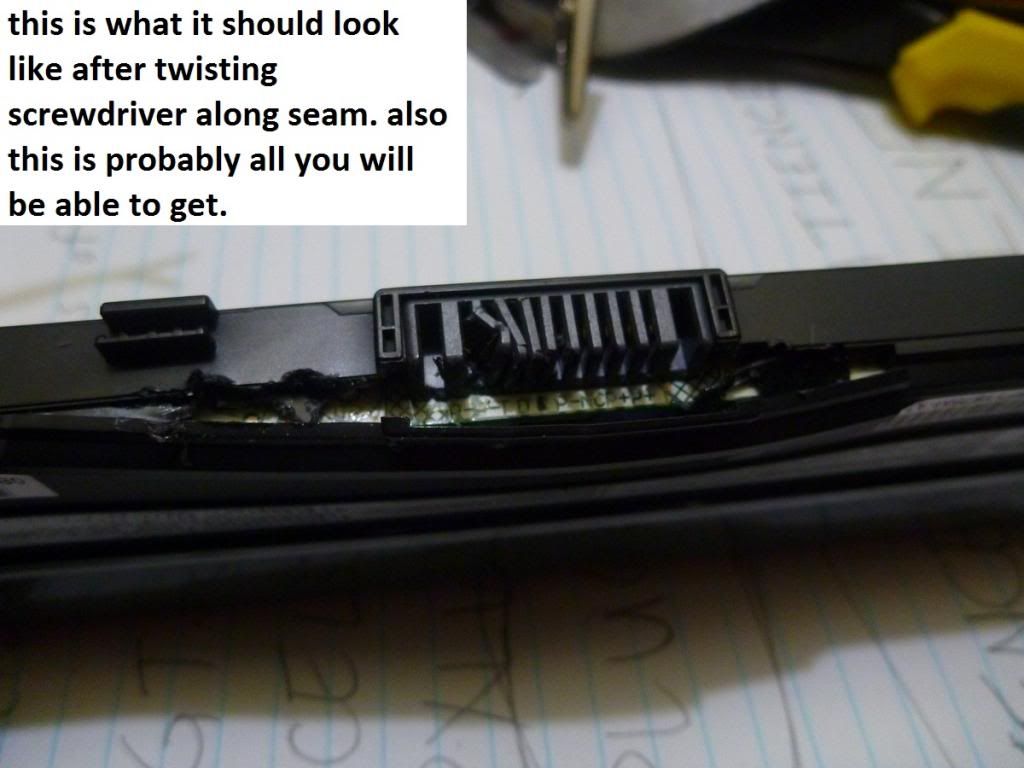
Step 3
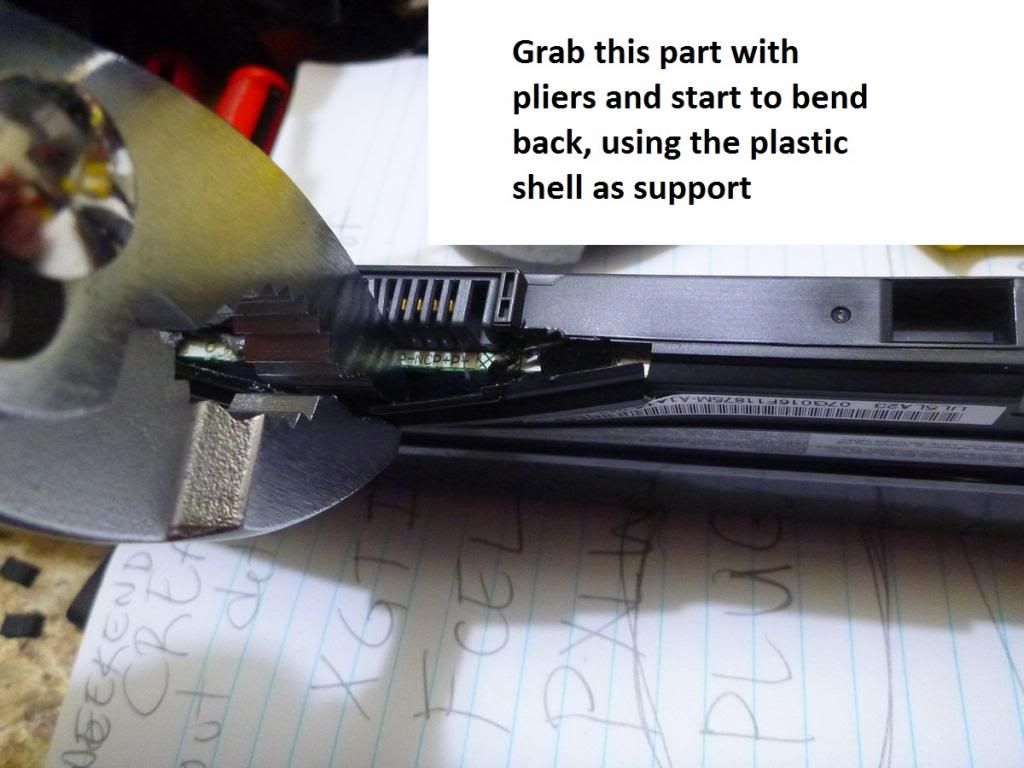
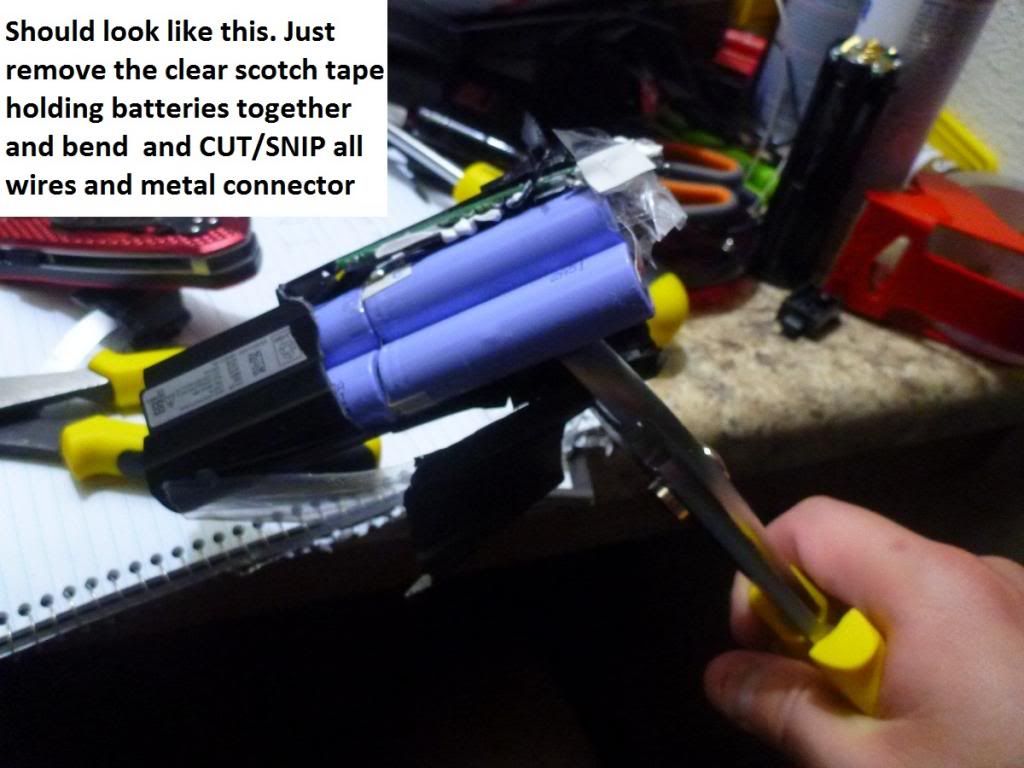
Step 4

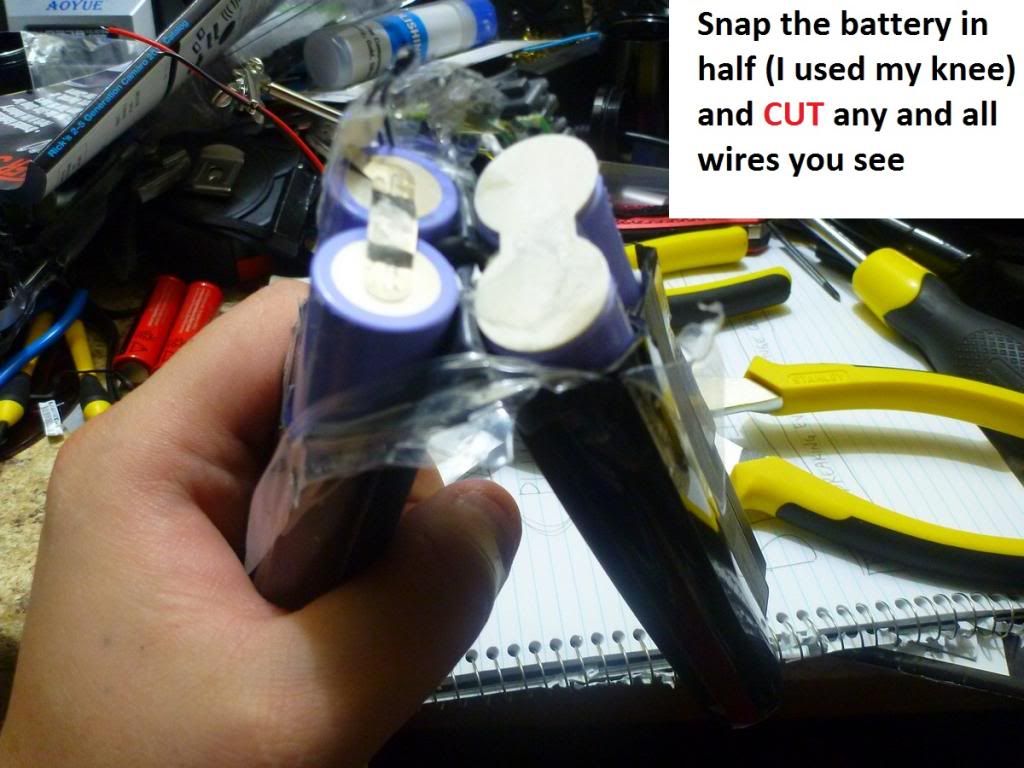
Step 5
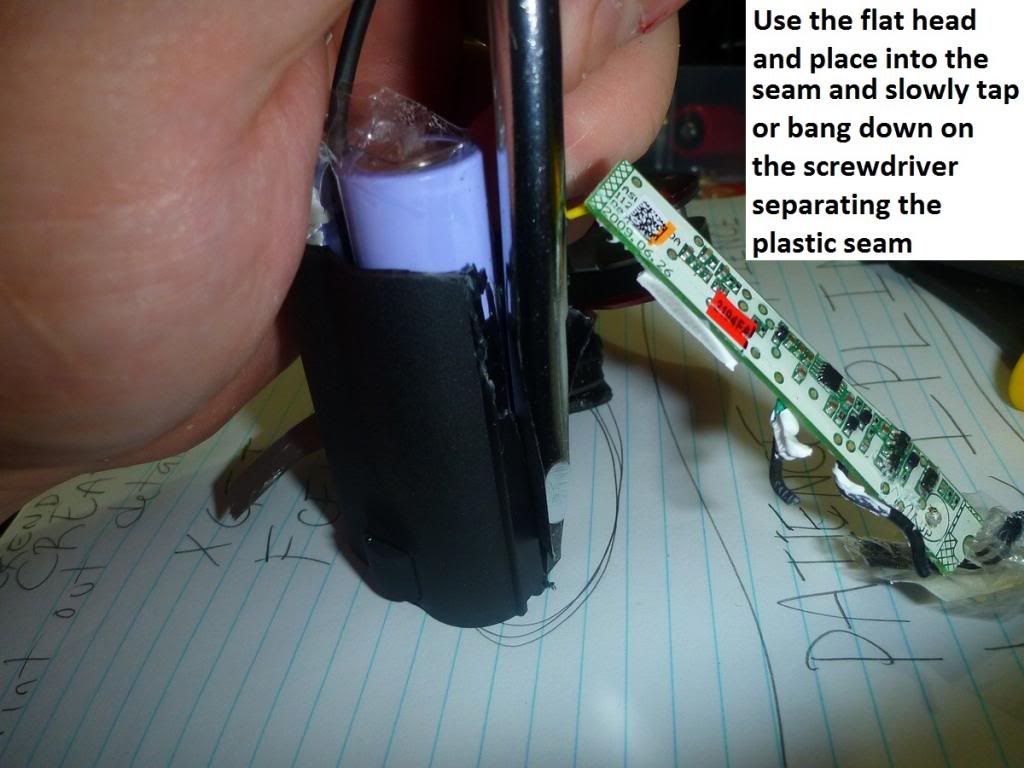
Step 6
Step 7
Step 8
Step 9
Step 10
Step 11
Step 12
Thanks for the tutorial Blfdemigod. Those packs look like a pain in the behind to open. Little worried about getting a short in that PCB though. Doesn't seem wise to touch or break any of the circuitry prior to disconnecting all the cells.
I received mine today (wow, that was fast), but haven't even taken them out of the cardboard boxes yet.
All packs dated April 2011 all cells with 3.7v . :bigsmile:

Well, using the screw driver to pry the pack didn't really touch the pcb, even though it kind of looks like it did. Just slightly inserted the screwdriver where shown and twist :)
Dremel I am guessing? Nice job btw, but I had to take my apart in the house (I use the built in computer nook area in our apartment for my workshop), with the wife and baby asleep, lol.
Good show, blfdemigod!
moT, how did you peel back the battery “cover”?
Ya nice work on that tut. That’s pretty much how I finally was able to get mine out. So they are on my i4 charging right now. ![]()
Ran the three sides around its corners on bench grinder till it started exposing gap most way around. Then went a couple shallow passes on the round side opposite the connector to give it a bend point.
Awsome Job blfdemigod with hand tools.
My first thought was hack saw it slightly in the middle and snap it in half then decided it be better to spew plastic filings all over the garage floor using the bench grinder.