I've had a few talks with light junkie over the phone, and I have to say that he is persistent. I can also tell that his experience has been extremely frustrating. Hopefully the responses here have given you some ideas, and I'm not going to try and rehash everything since I think that there has been plenty of good advice here.
I think that there is some basic soldering skill that is amiss here, but it is hard to tell what. Until that is figured out, I think you're going to continue to have a hard time. It sounds like you have the right equipment: good solder, and a good station.
When I first started, it was beneficial to watch some videos on YouTube about the fundamentals of soldering. Check out a few of these videos:
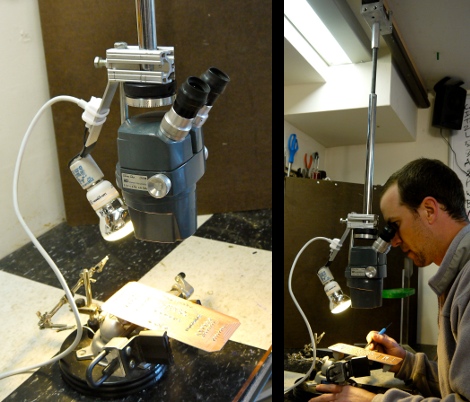
Being shaky and having poor vision definitely make things more difficult--I can't do good work without good light, especially with these tiny drivers. To help steady myself, I almost always rest my arm or elbow on a solid surface; when my arm is up in the air I have a much harder time stacking chips. That said, some of the best work I've seen on this forum was done by Old-Lumens, who isn't the smoothest or the youngest one here by a long shot.
Everyone has their own way of stacking chips, and there is definitely more than one correct way to do it, but this is what has worked best for me:
1. Bend 7135 legs. Use a square edged tool, like a set of needle nose pliers, to bend the legs down with a flat blade screwdriver. The chip package needs to be supported so it doesn't get broken when you bend the legs. If you look at the underside of the 7135, if you can see any of the black part of the case it isn't supported enough.
I solder all three legs and not the back tab, although for some the back tab is their preference. This may be easier if you have shaky hands because it lessens the chance of bridging between two close pins (if you clip off the middle pin). However, I prefer the front because sometimes the blob creates clearance issues if it gets too big.
2. Pre-tin existing 7135 legs. I've found that this helps speed things up a lot and reduces dealing with "stubborn" legs. I add some flux to the legs, then heat each one until it turns shiny and takes bit of solder.
3. Position 7135. I use the alligator clips on my helping hands to both hold the driver and secure the new chip in place. I don't use any glue, hemostats, or anything like that.
4. Solder 7135 legs.
First, I add a bit of flux to the 7135 legs.
Second, I clean my tip and add a small bit of solder onto the tip.
Third, I start by touching the tip to the pre-tinned bottom leg first, waiting until I see solder starting to take on that leg, then I drag it up onto the the upper 7135 leg, dabbing an extra bit of solder in there once things are melted if needed. The flux will make it flow right up the leg. It shouldn't take more than 1 or 2 seconds for all of this to happen if everything is right. Repeat for the other legs.
A note on heat: At no point when I'm doing this does the driver get too hot for me to touch it. If any joint is taking more than 1-3 seconds to make, something is wrong: not enough flux, not a clean tip, or incorrect tip temperature.
After doing thousands of these I can almost do them without looking now, but that is only because I have lots of positive muscle memory built up. As was mentioned, poor muscle memory can also occur through poor practice--so practice doesn't make perfect if you're practicing bad habits. It is harder to unlearn bad habits than it is to learn good habits in the first place, but it can be done.