That looks so much better than what I could come up with and would weigh a lot less as well. I love these types of builds. Looking forward to the beam shots. The problem I believe with Pp reflector was the lack of shine on the reflector itself, like a slight smokey finish to it instead of a highly polished finish.
Ah sure, but you’d be able to do a proper job with orings and everything. This type of build will only ever be splash proof at best without glueing everything permanently.
It is very nicely balanced with this setup, in stock form the courui was always a bit tail heavy, with the extension and heavy reflector it’s great!
Yes I remember you mentioning that about the reflector finish.
I’ve only see one of these and my particular sample is perfectly polished, but it does have a very slight OP patterning overall. It’s very slight but compared to the average D01 reflector it’s not quite producing as clear and crisp a reflection.
I’ve seen similar surfaces on other high end lights so I’m sure it won’t really affect the performance as much as strange matte look of the one you’re talking about.
Hopefully it’s a rare exception, cause I really like this beast and will surely make use of it in other lights going forward if this works out well.
Love your ingenuity! ![]() I have been wanting to do that to another light, do you have a pic of the parts disassembled? Do you have a direct link to the ebay sellers you used for each of your parts?
I have been wanting to do that to another light, do you have a pic of the parts disassembled? Do you have a direct link to the ebay sellers you used for each of your parts?
Thanks! Can’t wait to see those beam shots!
Thanks.
I’ll take a pic of all the dissasembled parts when I’m working on the light next. Apart from the reflector OD alteration they really do lego together perfectly.
I’ve included ebay and sources for the parts that I can verify are going to be correct. I ordered the lens hoods a while ago so those listing are no longer there.
There’s loads of sources usually for these parts and they are standardized in terms of filter sizes and threads. I won’t guarantee that they will match 100% to what I have but I don’t think you can go too far wrong with something like these.
I can tell you that both of mine say “Fotga” on the inside and share the same matt anodizing finish on the outside. Those aren’t details things usually listed on ebay though.
I suspect all the cheapest hoods on ebay in these standard sizes are going to be from the same source but I could be wrong.
This is what I was thinking to fit a bigger reflector to a smaller flashlight bezel, something similar to what you did

IIRC CPF member Download made a Stainless steel camera adaptor for the Mag a few years ago here is the link
Sure, if you combine filter adapters with hoods and filters they’re almost endlessly flexible. There’s also various hoods of different depths and types of flare. The fact that you usually have a known thread at the end of each part is very useful. Biggest problem is the vague ebay descriptions and of course the damn white writing that’s on most of the parts! ![]()
Great work, looks amazing. What would you say the total cost is without driver and led?
I think parts cost for everything (no led or driver) is under $100 including the copper pill.
how strong is this setup? I mean mechanical strength, durability, toughness, sturdiness, whatever you call it. It has a few new connections, a big reflector and the flashlight is quite heavy. How is the reflector secured and how is the 77mm hood attached to the flashlight? Can it survive a small fall or a hit?
BTW, what would be the throw with a dedomed xp-g2 running at 5 amps???
The first hood is going to be anchored by threading on the cut down bezel of the original light back onto it’s original thread. Thereby clamping the first hood firmly into place. That’s pretty bullet proof.
The rest and how it deals with a fall I wouldn’t like to say. The hoods are certainly very rigid/hard aluminium but still fairly thin. The reflector is going to be tightly held inside and pressed between the uv filter ring and the pill. I actually planned to use an o-ring in between the lens and the reflector rim but I don’t think I have the clearance spare now that it’s together.
The weakest part is probably the front lens element, it’s pretty thin glass held in a thin rigid metal ring. Any major impact there I suspect the glass is going to shatter.
In general it feels very sturdy in the hand and I’m confident it’s going to handle a few decent knocks. But I’m not going to do any drop tests on it ![]()
-
No idea on the throw, I may test a few different emitters before I stick the sbt-70 in there.
Yes please test some cree emitters for max throw in it, before you finalise it with the sbt-70, like DD a dedomed xp-g2 or a xm-l2 class emitter so we can know what kcd performance we can get with cheaper led’s.
I really like the look of it, and it was funny you mentioned that ugly white text on the converter rings, i had been searching ebay for similar part a while ago & all i found was these kind of filter adapters.
I don’t know camera equipment so i didn’t know about these plain black nice cheap lens hoods.
I was pleased as punch to see these lens hood adapters all listed out until I started searching for them on eBay. Dude, vague descriptions is a super understatement. You wouldn’t happen to remember from which venders you purchased would you, Linus?
Looks great. Can't wait to see beam shots.
Is these 86mm reflector the biggest out there for cheap or at all? Or is there something even larger hiding somewhere for reasonable money,
If we can find larger reflectors, this concept should be able to accommodate it with progressively larger lens hoods.
My favorite flashlight modder strikes again, great as always.
This looks very interesting….
I’ve modded several Courui’s for friends, & I’m sure some of them will want this treatment done to theirs when they see it.
I’m off to fleabay to get me some camera parts!
![]()
![]()
- edit -
I managed to locate all of the camera parts, including a snap-on lens cover, from the same seller, for AU$22.75.
2 more questions:
- The bezel has to be cut down- could you take a photo of what and how had to be cut?
- The lens- is it possible to use some non- glass lens that does not shatter so easily? An acrylic lens or so should not be so fragile as a glass one right?
The bezel of the courui has a single groove on the outside, you can use that as a guide for where I suggest cutting it to remove the front crenelations. A messy hacksaw job is fine as it will be hidden, just needs to leave a threaded retaining ring. A couple slots to help tighten it down will also be a good idea.
On the lens. Sure, you could try a number of other things. A second option I have been playing with is to stick a third hood stage on and use a 95mm filter step down ring to retain a matching piece of UCLp acrylic flashlight lens. That combination would be more sturdy (and doesn’t require machining the reflector OD) but it makes the light a bit bigger and longer than it needs to be. It also requires raising the emitter on a pedestal to make up the gap to the pill. Not ideal.
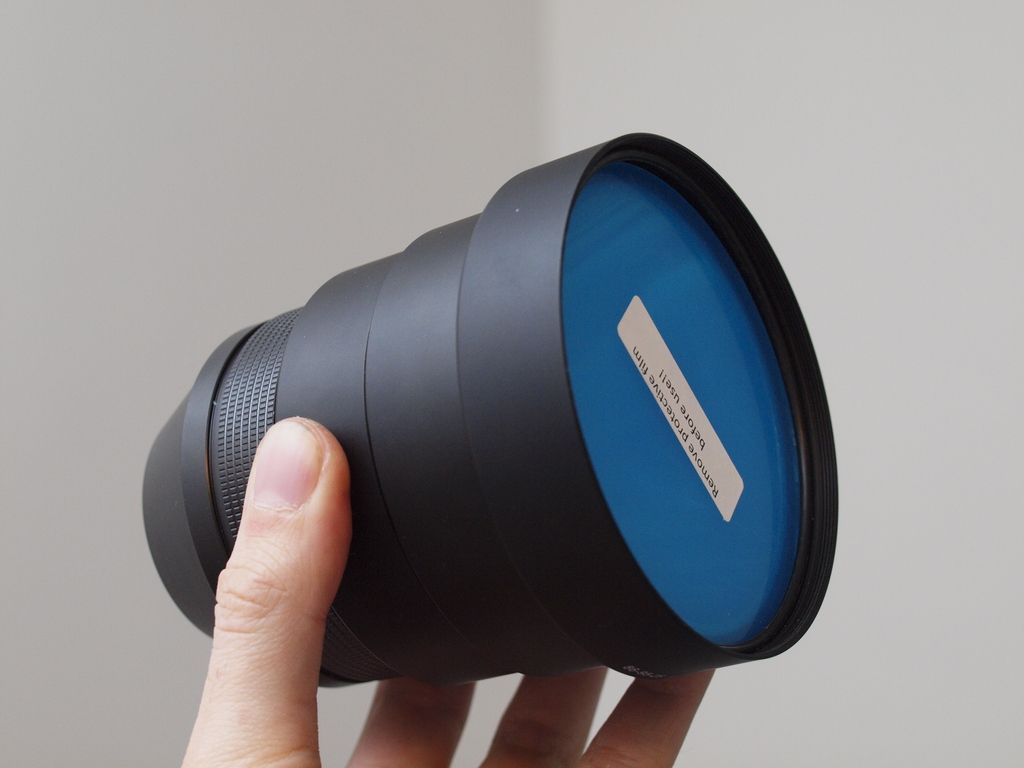
That’s without the filter ring adapter in place
The 2 hood setup is more elegant and compact so I’m going to try and make that work for myself. The tolerances are too tight to fit a thicker lens though, unless you extend the front with something slightly.
I look forward to seeing people come up with other cool approaches to this kind of thing.
how about using a custom cut AR UCLp lens from the flashightlens.com ? Cut to fit your flashlight. They say ” ALL ACRYLIC MATERIAL (IR, Acrylite, Hardcoat, and AR Acrylic) CAN BE CUSTOM CUT TO ANY SIZE OR SHAPE!! ” so it is worth a try! It would be tougher ( since this material does not shatter like glass) and you would not have to mount an extra hood to attach it.
Sure, just be aware that with the parts I listed…
Clearance required by the reflector between the lens and the top of the pcb surface (provided you’re using the stock shelf or your custom pill matches the stock shelf in elevation, which mine does) is pretty tight already so a thicker lens and the required adapter ring may not work. I’m happy with the thin UV filter configuration personally so you’d have to try something else yourself and see what works.
Even with what I’m doing I’ll probably have to keep the head of the courui unscrewed a little (clamping a larger o-ring into the gap to keep things sealed and rigid) to give me the clearance needed to focus the reflector properly, it’s a tight fit! That has benefits in that it makes the whole package look really compact and like it’s intentionally designed that way. But also makes things a bit tricky as well. I won’t know if things really line up properly until I get the centering gaskets in place and have a go at focusing up the reflector.
You have to rely on a bit of luck sometimes with this kind of modding, and if that fails you need to have an alternative approach up your sleeve ![]()