I took some of the driver assembly.
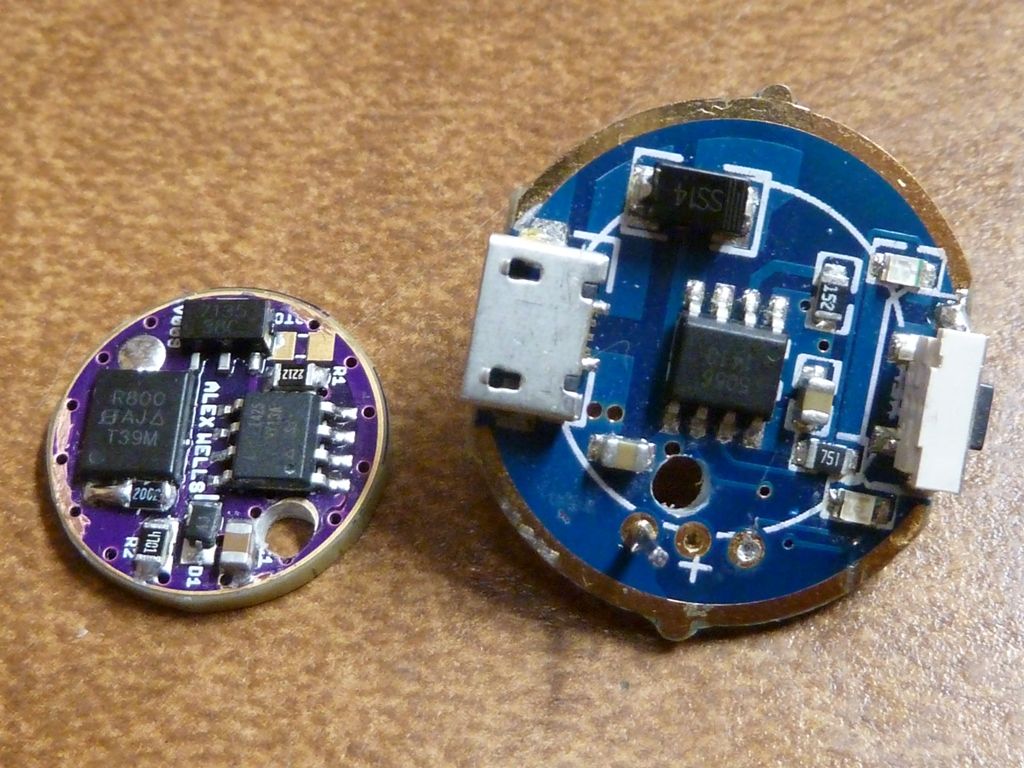
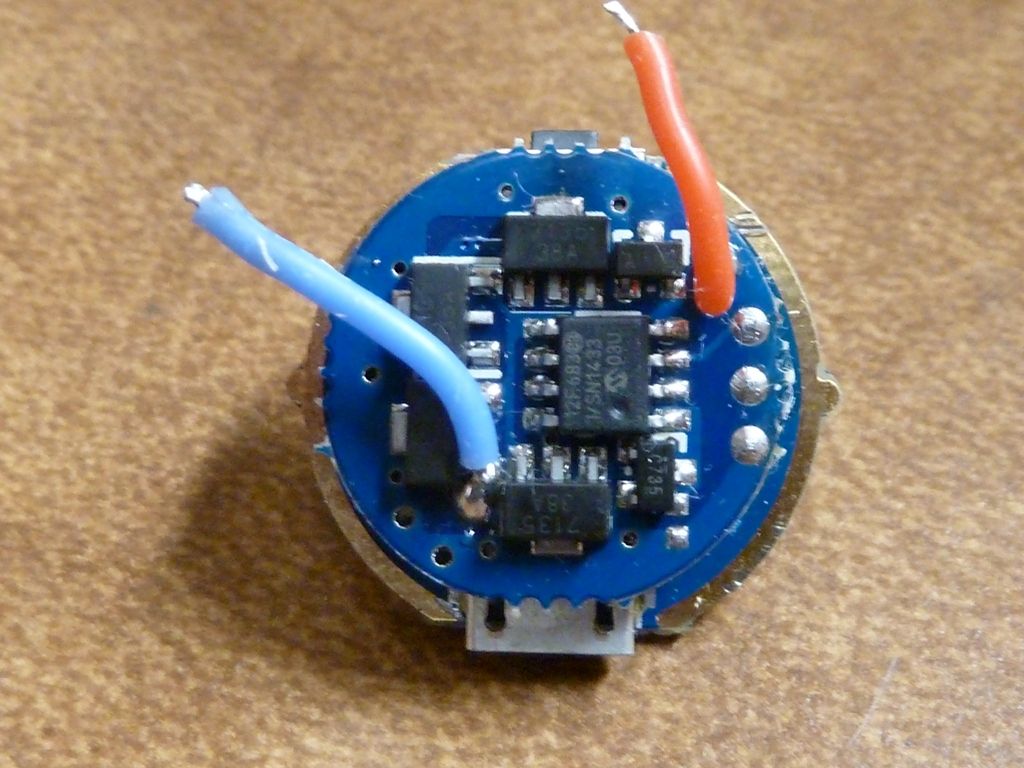
Here's the FET+1 A17HYBRID-8 v009 driver on the left all prep'd, and the base stock board that has the switch and charging circuitry on it. Notice on the FET+1, the hole is to pass the 20 AWG LED+ wire through, and I removed some of the ground plane masking to get better contact on the driver edges. On the stock board, I drilled another hole for the same 20 AWG LED+ wire, so it will connect directly to the spring. I got really close to cutting a trace (above right to the hole), but a continuity test with the DMM passed, so was ok:
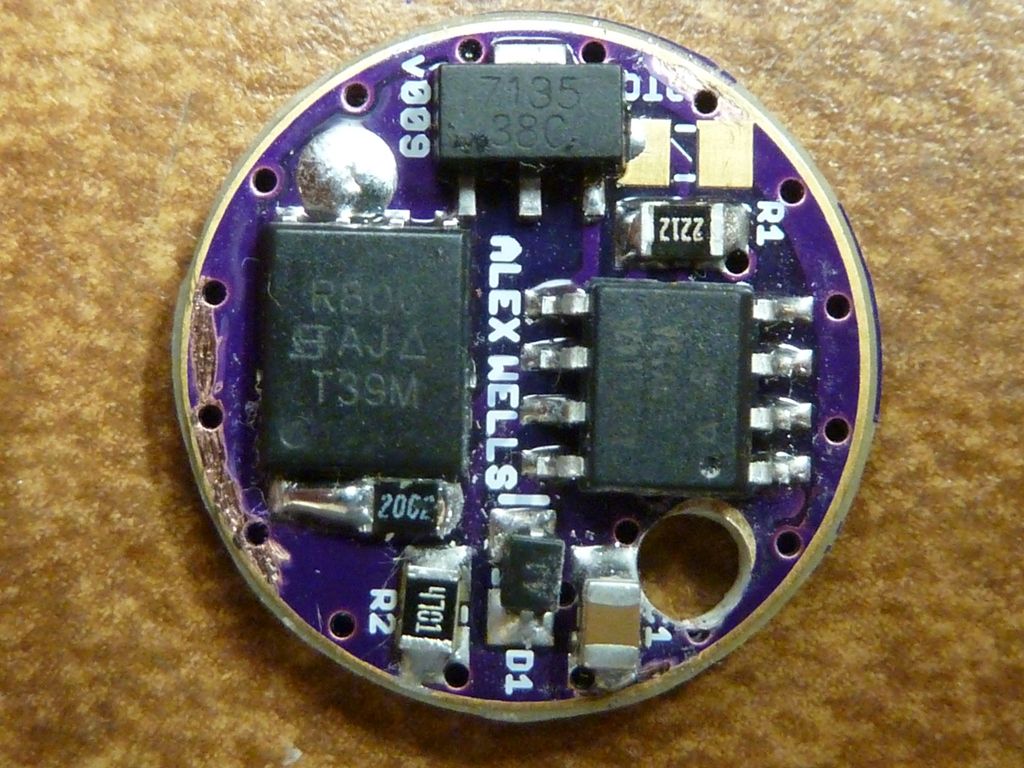
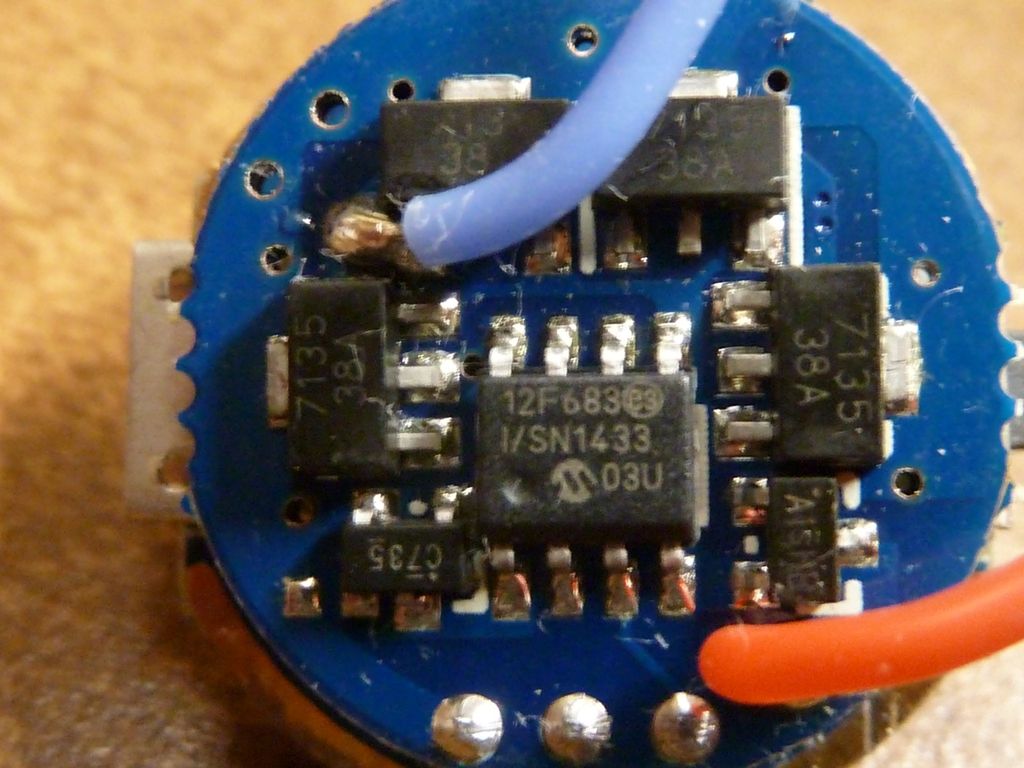
Better close-up. The 2002 (20K) resistor seems to help to cut down the flash you get in turning on to moon mode:
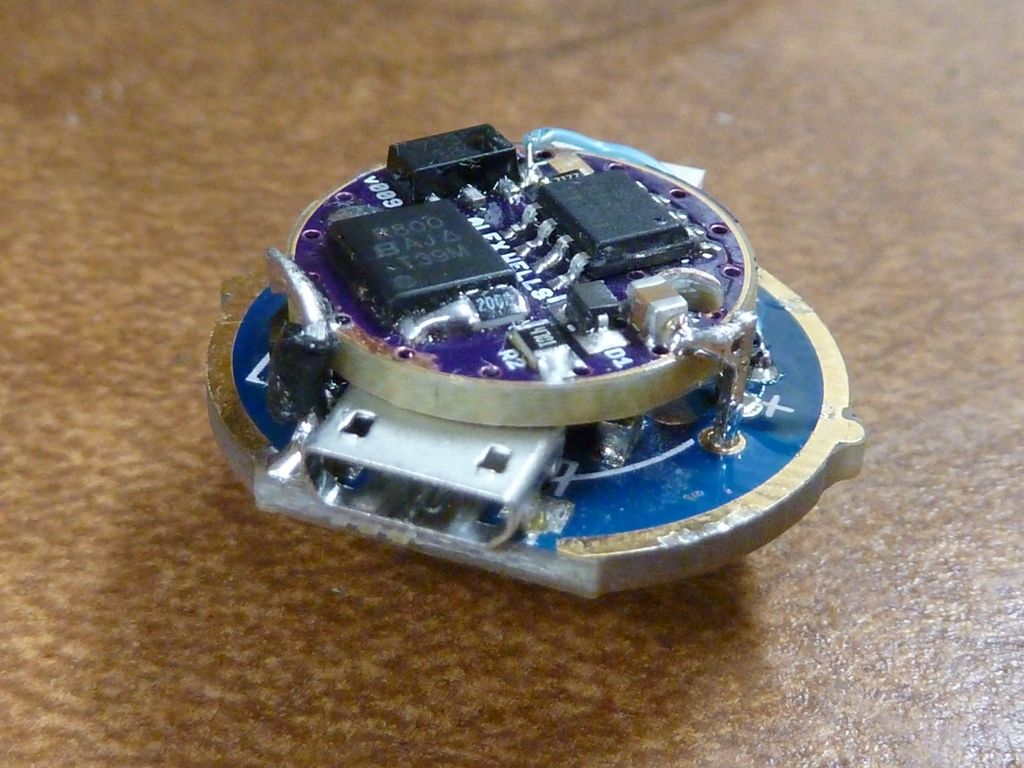
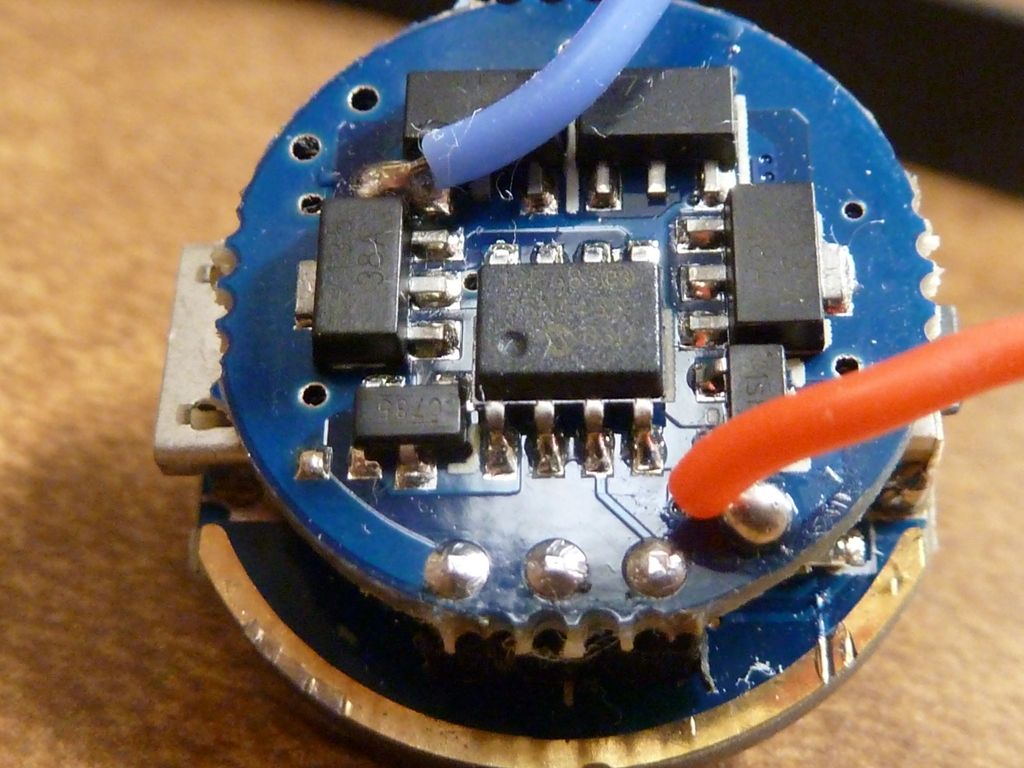
Here's a top view after assembly. The grounds has 2 pts of contact: 1) a re-used post by the cap (lower right), and 2) a 22 AWG wire in the lower left. Here, I was able to take advantage of the USB connector ground where it has clearance inside the housing. The blue wire is 30 AWG single strand wire for the switch:
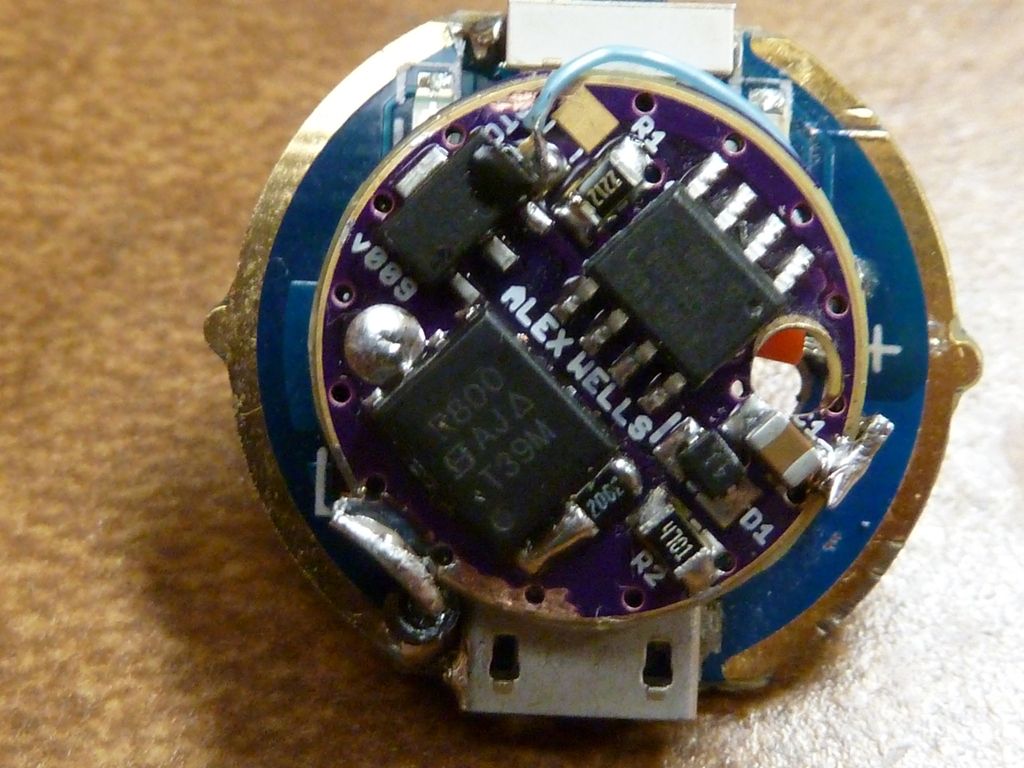
Shows the wire connections. The marked + spot on the base board has a 26 AWG wire connected to the underneath spring+ pad of the FET+1 driver - this provides power to the MCU, so no high amps needed:
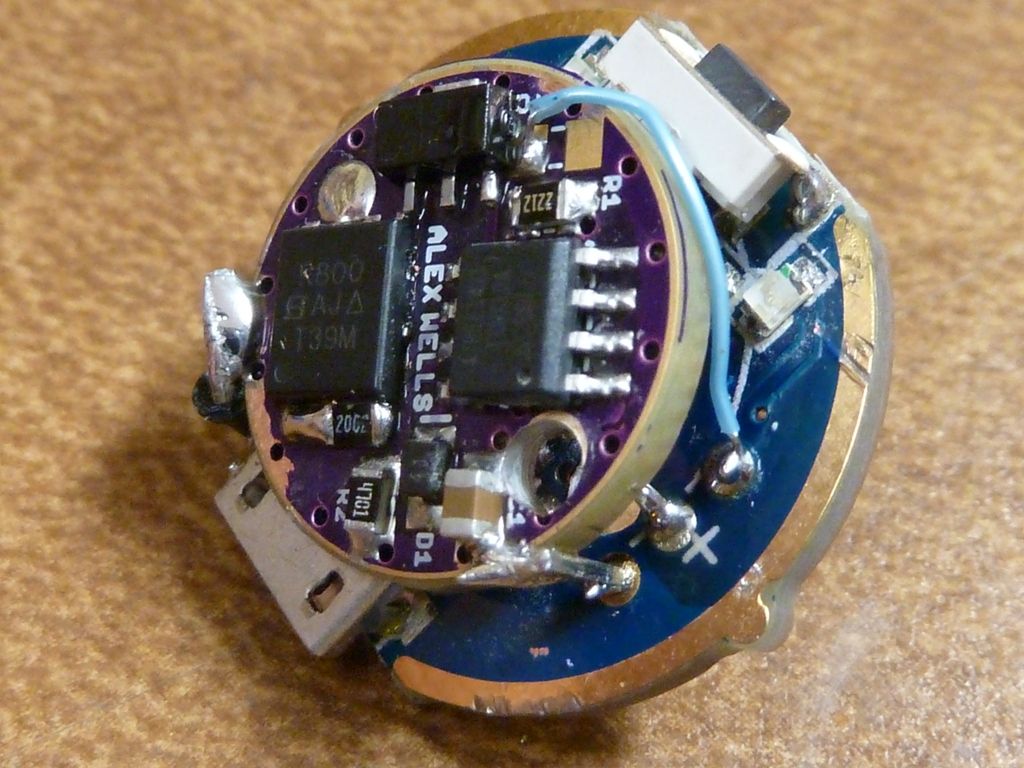
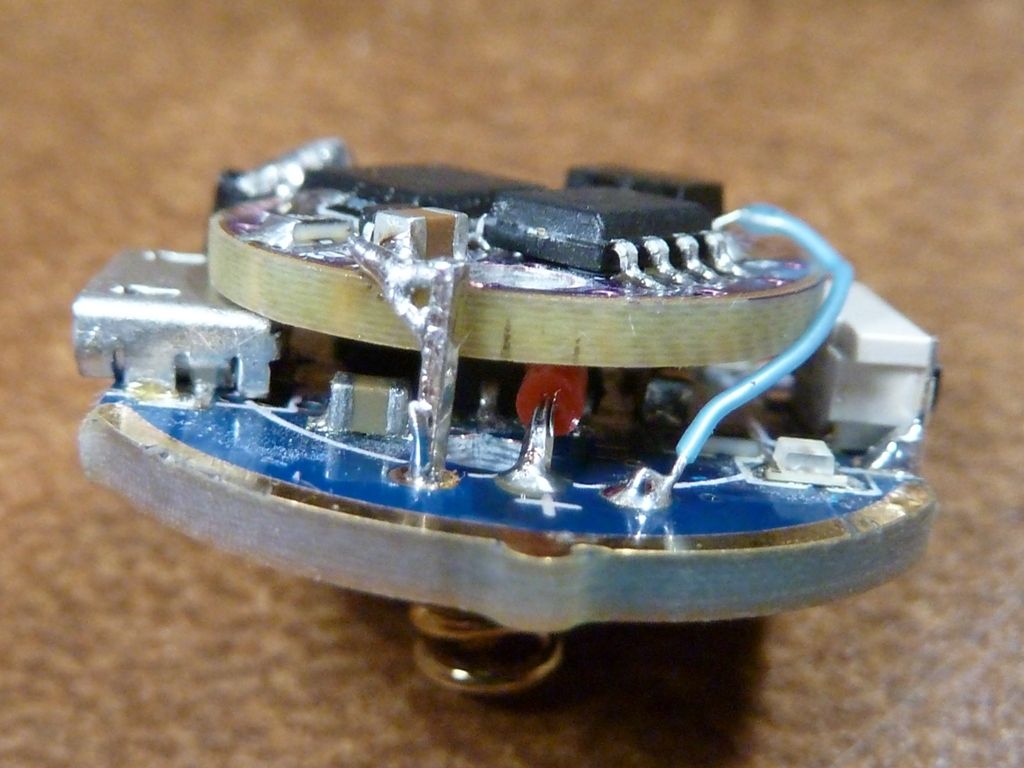
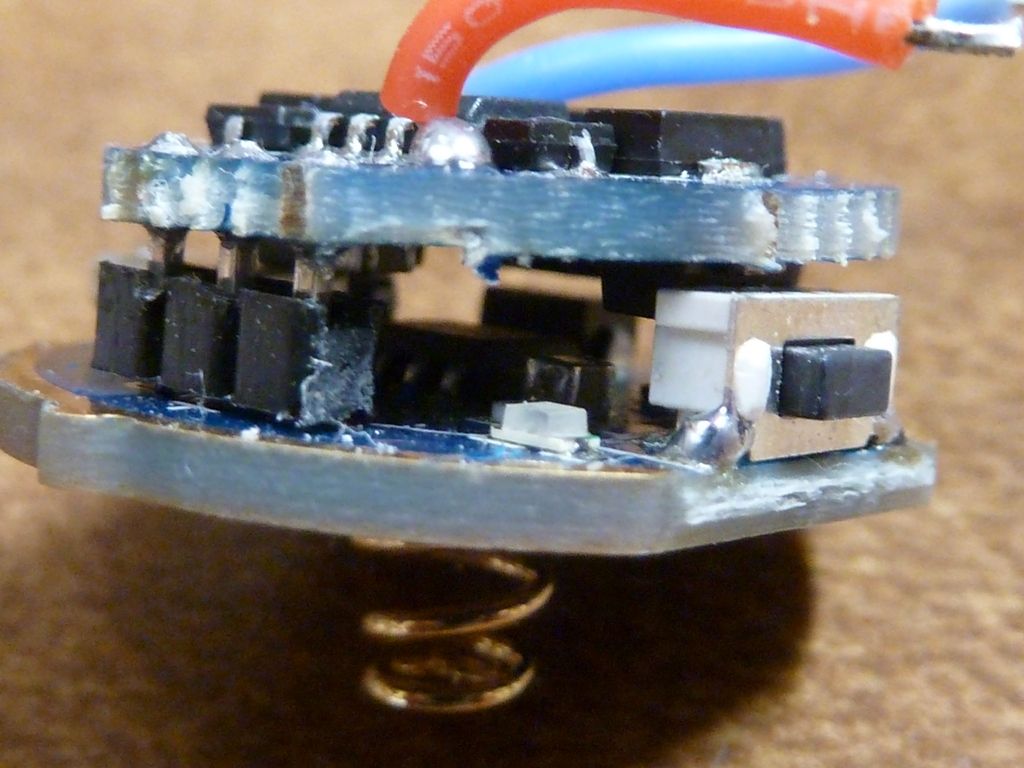
Another view:
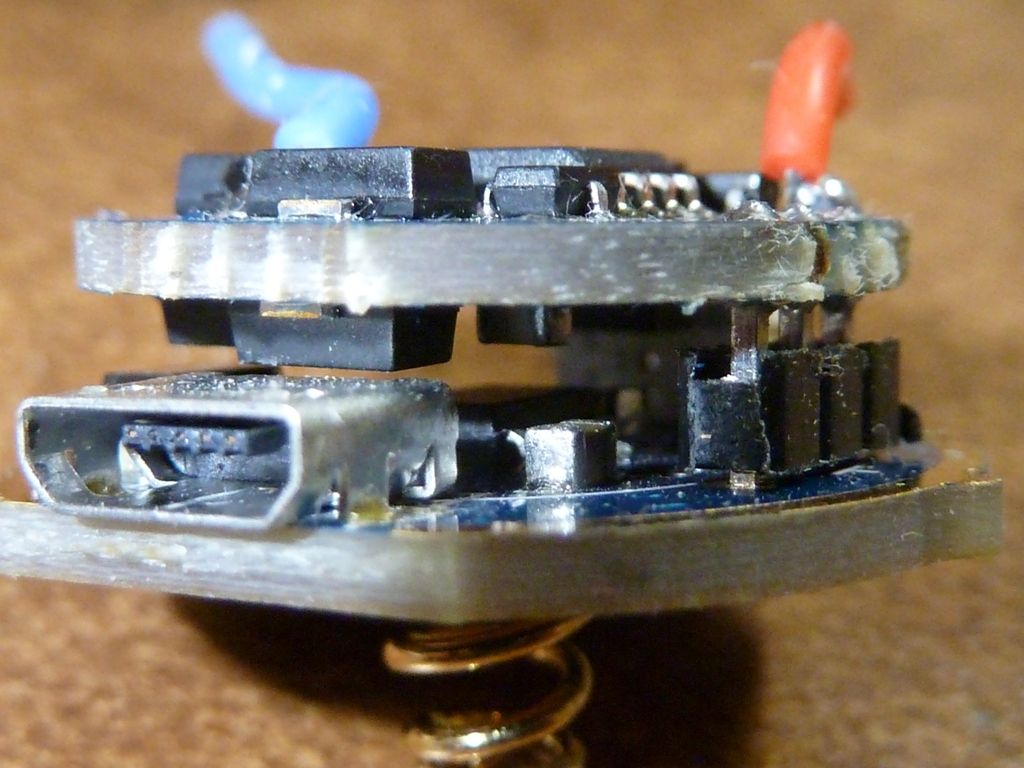
Yet another angle:
I added the LED wires after this, and the spring bypass's. I was gonna re-use the single screw for the MCPCB, but, it didn't fit well on a SinkPAD - the screw head would fall through, and make the SinkPAD go crooked. I tried a flat head brass screw, but the threads didn't match, and ended up breaking the head off. The brass screws I use can't take much force... Figured it didn't matter much, so left it as is. The X6R, like the X6's, have a pretty good fit of the reflector on the MCPCB, so wasn't too concerned about screwing it down. I really don't see any measurable results from screwed down MCPCB's, though I've done it many times. It's specially needed on zoomies with no hold down retainer, like the JAX Z1 has -- best I've ever seen in a zoomie.
With my custom firmware, the moon mode is really nice and low - I use a PWM value of 5 for only lighting up the 7135 (notice it's 380 mA). Mode 2 is 30 (only the 7135), and mode 3 is the full 7135. Mode 4 is full 7135 plus a 80 PWM value for the FET, the mode 5 is full FET only. I like this arrangement because the first 3 modes are a really nice neutral/warm tint operating on just the 7135. You do see a pretty good tint shift switching to mode 4, but I'd rather have better looking lower modes.
As I was typing this, I had the light on a wall USB charger (finally found a charger, from a old MP3 player), and it lit up RED and eventually turned BLUE, so seems to be working well! First light I modded where I could retain the stock charging circuit! Big advantage this light has for modding.
 .
.