The via would be between the wide set pin pads and close to the spring ring with a generous trace but wouldn’t be under the switch at all.
I mean it would be directly under the clicky switch body… And I don’t really understand the purpose.?
It bypasses the spring. The vias are sufficient to carry the current through the board but springs are generally poor conductors and can overheat and lose their temper in high current lights like triples. The via allows even a smaller 22-24 gauge wire to dramatically improve output and protect the spring.
I understand how a spring bypass works, I’m just not following how you want to use the hole. My initial thought was that you wanted to do a DB style pcb-bypass, but are you meaning just to stick the bare wire end into the hole to make soldering easier? If the latter is correct, here you go. It’s a 1.1mm via.

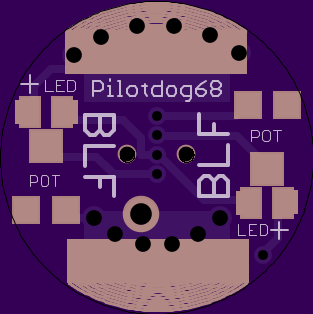
16mm Rev2 and Rev3 use the switch to go between ‘on’ and ‘off’. I’m going to do a Rev4 tomorrow that uses the switch to go between ‘low’ and ‘high’.
I’m posting this teaser now just in case pyro beats me to the punch ![]()
We tend to get the same idea at the same time.
That’s very true funny how that happens. I’m going to let you do the switch versions.
We getting an insane amount of ideas into these switch boards. Go BLF!
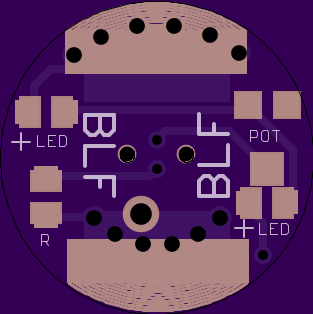
I’m going to go ahead and call this the current “Ultimate edition”. As long as you guys don’t find any errors, I’ll be ordering this board very shortly because I can’t think of anything else to add. Of course if we get the transistor idea to work that will bring a completely different level of function, but I think this one will suit my needs perfectly. It’s still not beautiful, but at least it is more balanced now.
It allows for two pots. Only one would be in use at a time, the switch would toggle between the two. So you would use the pots to set ‘high’ and ‘low’ levels at the time of assembly, then use the switch to toggle between those two levels. Or, just leave one of the pots unpopulated and that switch position becomes ‘off’. If you don’t want to use the pots, you can simply bridge the pot pads with a resistor to have essentially the same functionality. Both led’s are on the same circuit.
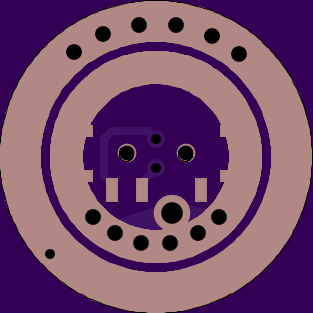
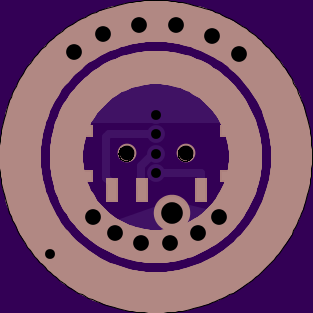
- OD of board is 15.93mm (so it should fit almost anywhere)
- Outer ground ring is 2.1mm wide
- Gap between rings is 0.93mm
- ID of spring ring is 7.4mm
- OD of spring ring is 10.8mm (1.7mm wide)
- Main power vias are 0.8mm each (1 ounce copper)
- Accessory vias are 0.5mm each
- Spring bypass via is 1.1mm
According to my measurements, as long as the pots you use only hang over the edge of their pads a tiny bit, an omten 1288 will slip in perfectly between them. Nothing bigger will fit. Everything on this pcb is packed in tight, so you will need to be careful assembling it.
I highly recommend hot-air reflowing but otherwise I recommend soldering in this order:
- slide switch
- bypass wire
- spring
- pots
- leds
- omten switch
Again, the seller I bought from no longer has them, but I believe these are the same switches.
Once you guys look it over I’ll update the OP.


I don’t see any minimum resistor being set in series. Just wondering, what happens if you set the pot to 0 ohm? With the bleeder resistor only at about 0.5k, will the tiny LED withstand the current?
Nice!
I reflow driver boards on a hotplate btw, works perfect as well.
Right, so don’t set your pots to 0! :bigsmile:
There just isn’t anywhere to put another component that I can see. If you just want the on/off function, Rev2 and Rev3 have the resistor in series with the pot.
With a bleeder of 560 Ohm, and a battery of 4.2V, even without a led the current will be 7.5mA which is fine for those tiny leds. With the led in the circuit it will be less than that.
Good info Djozz.
I’m a bit absent-minded at the moment, so if someone could check my circuit that would be great.
This is just awesome!
Making a simple part that complicated can only being done by BLF :P.
Right, don’t drink and pot! :bigsmile:
Interesting progress with the switching, one can set between glow and nightlight mode.
Maybe we can drill the tailcap and allow access to the switch from outside in future versions. That would be cool.
Whenever I grab a light to show off to muggles, it’s usually my naked S8 and it’s usually in the daytime indoors, so I want the blue tailcap to be bright enough to stand out. The rest of the time, I want it more dim and functional. That was my inspiration.
Thanks pilotdog, using a via and means less solder wicks up the wire to stiffen it when you add the spring. Also means less likely hood of bridging in this case and placement is automatic.
Good to know, RBD. So is that a good size and placement? (although I don’t know how much I could change it anyways)
Placement is great. Via is big enough for awg18 though I think the insulation of silicon wire might be to thick in that size to clear the spring. Thoughts on that? I’ve only done solder wick bypasses so far so not sure of the ideal wire size but a .8 via would still allow up to awg22 and put solder mask between the via and the spring. The problem I’ve had is the spring requires more heat to wet and sharing the same pad means the wick takes up more solder than is wanted. A via takes less space than a pad and is easier to keep discrete. I appreciate the work that goes into this and I’m making an effort to consider how this board might be used by others besides myself and not just making more work for you. Thank you.
1.1mm is the drill diameter I used for the via, but I think that’s before it gets plated. They always end up smaller when I get them from Oshpark. I understand what you’re saying about wicking, but I don’t think I can do much to get around that. Even if the pad is small enough to have solder resist between it and the spring, it’ll still be connected by the copper underneath. I would just solder the wire in its hole, then tack the spring down in the two corners furthest from the wire to avoid the wicking as much as possible. I never solder the spring all the way around, just in 2 or 3 places.
PD and pyro you guys are awesome!