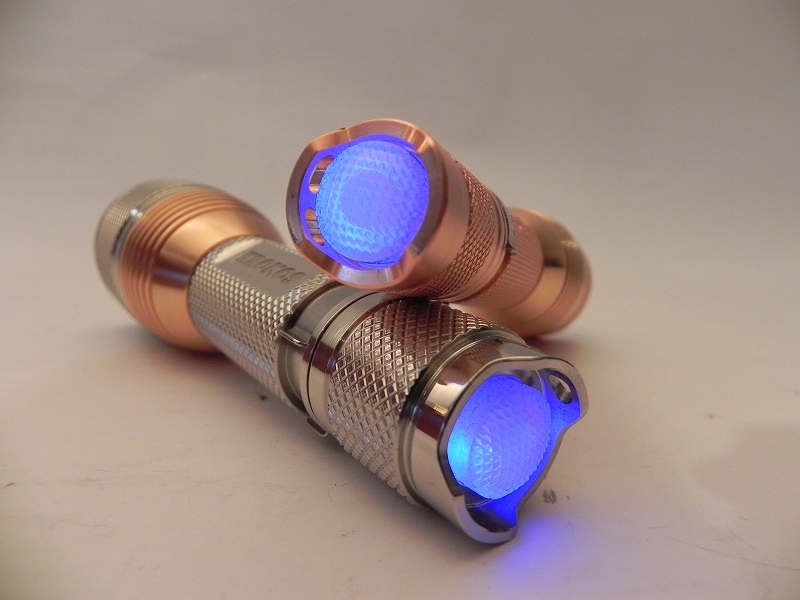
thanks Dale, nice compliment coming from you, the Ansel Adams of BLF. Just a cheap Fuji bridge camera but it has a nice 2.0 lens on it. I’ll get some more pics of these terrific lights in the daylight.
I noticed that everydaysurvivalgear is having the same problem. URGH! I was hoping that Myhken would have to wait longer before I offered my assistance.
Here’s the deal, I’ve dealt with stuck fasteners since before I can remember, and anything with threads that threads into something else is technically the same as a fastener.
1. DON’T force it. It might break free, it might just break. You don’t want that.
2. Combination of patience, lubrication, and heat. I was going to break it down into a longer list, but if you try just one of these it probably wont work. So…… here’s what I would do:
IMPORTANT: DON’T USE MORE HEAT THAN YOU NEED OR YOUR ENTIRE LIGHT WILL FALL APART!!! (Excessive? Maybe, but you think I want those PM’s?)
CAREFULLY soak the threads with WD-40 or your personal favorite, but the milder the better, it’s an electronic device with a reflector designed to reflect…light…. so….do I need to bother? It only takes a tiny bit! Don’t put the lubricant on the reflective surface. DUH!
Be patient and wait over night. You can do it. It will not kill you to wait, I promise.
Tomorrow morning, try the same amount of effort that you tried today. This will usually do it.
IF that doesn’t work, you will have to try HEAT.
People will tell you that heat only works if you know what you’re doing. That is partially true. There are certain situations where the materials involved really matter. Like, reallyyy.
I’m going out on a limb and saying this isn’t one of them. Get your oven mitts ready.
Heat up the thing you want to make bigger, aka the outer threaded portion, aka the pill area, aka the finned copper.
That means you need something that can direct heat onto something. Like, not a campfire or a clothes dryer. Something like a heat gun or a propane torch (US version of the word, what the heck do you guys in the UK call it? I must know!) I usually use MAPP gas, but I’m running out of the real stuff and I’ve heard that the replacement is inferior. Use of heat will probably affect the finish on your light, but seeing that you just want a better beam that shouldn’t matter, right? Moving on ![]()
![]()
![]()
What you need to imagine in your head while doing this is that heat makes things bigger, so the outer threads need to get hot, which will make the inner threads fit looser, and then you can twist them right out.
Note: Everything is going to get hot, just not as hot as where you direct the heat.
IMPORTANT: DON’T USE MORE HEAT THAN YOU NEED OR YOUR ENTIRE LIGHT WILL FALL APART!!! (Excessive? Maybe, but you think I want those PM’s?) It’s good practice to try a little heat and then twist. Use hand protection. Use eye protection. Use any kind of protection you can find. Don’t breath in unless you have adequate ventilation. Have a spotter. Make the spotter do it. What are friends for? Have a shovel ready. If anything goes wrong, deny deny deny.
Seriously though, good luck, be safe, don’t wreck your lights. Patience is #1.
tnx
Try hot water first. Take out the battery, make sure your o-rings are in place, dip the entire bottom of the light into very hot water until you can feel the heat in the pill, then use some of your amazing strength to unscrew the reflector.
It was not for me, but tnx for all the tips. I have nothing of the stuff you mention, so I have to buy it, and then I think I just buy a new Al set, since the price for the stuff will be more then a new set. But still, thank you.
Done that, boiling water. The whole thing got so hot that I had to use protection. Still, the reflector is stuck.
I said to use your amazing strength. Not your run of the mill stuff.
EDIT: I’m assuming that the protection you used prevented procreation, so I’m satisfied that my advice was heeded.
I think it’s safe to assume that those of us that modify cheap lights have spent far more on tools than things that produce light. LMAO.
I’m reminded of what my boss once told me, “Make the sample look barely passable. Otherwise, it will become the standard to which the client will compare the final product. Make the final product better than the sample and everyone will be happy.”
Karma (or Kamma) is not revenge, it is causes and conditions that produce results, we all have our own Karma, other folks have their Karma which will take care of itself, all we can do is to address what we are producing now, because that will be the part of the future that we can control.
Our futures catch up with us all, this is unavoidable, It is what we can do in the present that we have (some) control over. ![]()
Sorry for the (almost) rant ![]()
I have the yellow spot in my copper X5, and the reflector is stuck.
1) I'm not worried
2) I'm not going to return the light or complain
3) The emitter is fine (checked by projecting the emitter image with a projection lens), and in fact I think the yellow spot is the result of the reflector being really really good. Fine-tuning the reflector height is something I could try, but I quite dig the yellow center of the hotspot.
4) If I want that, I'm going to get the reflector out, I'll figure a way (I always do)
Hi,
the more i play with these lights the more i love the Bistro UI. Absolutly great! I set it to 5 modes + Moon and Memory. Very nice mode spacing, too.
Regards
Kenjii
Cheap IR thermometers definitely don’t give good numbers on shiny surfaces (there are IR thermometers adjustable for emissivity, pricey though)
To make the infrared thermometer useful for checking shiny surfaces, you can, as suggested above, paint them (heresy indeed)
Easier, though — put on a patch of painter’s tape (the removable stuff). It wil get just as hot as the metal surface under it.
The infrared thermometer reading the tape will give you a decent result.
I understood why years ago, but I’ve forgotten; ’oogle will remember.
Hi there,
just want to inform that set #207 of 400 in 3B arrived in Germany! ![]()
Man - what hefty and beautiful flashlights! This must be the king of the hill. The lights are in pristine condition, although they where heavily bouncing inside the box while in transit. You can clearly see the marks inside the box foam from rambling around. Luckily the lights did not touch each other, so they both are free from blemishes and simply look gorgeous! ![]() Also the LEDs are very well centered and the tint is “just right” - a punchy strong neutral with only a hint of warmth. The magical UI from toykeeper is simply fantastic and the illuminated tailcap is an eye-catcher par excellence.
Also the LEDs are very well centered and the tint is “just right” - a punchy strong neutral with only a hint of warmth. The magical UI from toykeeper is simply fantastic and the illuminated tailcap is an eye-catcher par excellence.
Now the downside:
The lights were packaged upside down! ![]() I think this is the main cause, why the lights left their places in the box. Also the packaging was “poor” to say at least. Nearly all corners are slightly “crunched” and unfortunately the long back edge of the lid got a heavy ding, nearly breaking the wood.
I think this is the main cause, why the lights left their places in the box. Also the packaging was “poor” to say at least. Nearly all corners are slightly “crunched” and unfortunately the long back edge of the lid got a heavy ding, nearly breaking the wood. ![]()
But all in all i’m very impressed and already LOOOOVE these lights!
Big THANKS to everyone involved! ![]()
Thank you for reminding me to get a bigger flashlight tool box it’s getting to full! ![]() If your going to take things apart you have to have tools Or call your mechanic,the maytag man or send your flashlight to your friendly flashlight modder.
If your going to take things apart you have to have tools Or call your mechanic,the maytag man or send your flashlight to your friendly flashlight modder.
Before you resort to boiling water or heat, I always try these gloves. I recommended them several times in other threads. Worked for me many times:

They are cheap, in my case I bought them at a local store. I even used them to break LockTite on threads in some cases.
Yes those work good for me too.
About the copper shedding heat: I think copper is used in flashlights mainly for conducting heat away (from the LED mostly and secondarily from the driver). Shedding is expected to be done through physical contact with a human hand, not through any kind of emissivity. That being the case, this flashlight was not designed for easy reading with an IR thermometer.
Edit: Also, with the same considerations in mind, I will expect the Aluminum flashlights to be not quite as good thermally. That is, unless you will be leaving them tailstanding on a table for several minutes or longer (where emissivity is to be the primary means of shedding heat). ![]()
Not sure I can personally see the appeal either. Having a short tube on a large headed torch doesn’t make it any more portable or pocket friendly (less so, as more tendency to tip if you carry it upright). All you’ll get is massively worse total runtime, likely lower PEAK output (depending on config) and certainly pathetic max output runtime.
This reminds me of an issue on another flashlight.
About a year ago I wanted to see which of my 4 HD-2010 throwers worked the best.
The brands are Fandyfire, Trustfire and Tangsfire. All of them are the older good batches with the direct drive East-092 driver, of these the Fandy had the worst indoor 5 foot white wall beam. Big ass donut hole. So I spent probably 2 yours trying different centering rings, reflector height, lenses, etc. Got it a little better but not clean like the others.
Well wouldn’t you know that “bad one of the bunch” is my best 2010 thrower when you finally get around to using for what it was meant to be, an outside flashlight.
I went back to the original spacer with the even bigger donut and the throw got even better.
Also got a Conrui Big Head flashlight from a fellow BLF member that he had been modified. Upon arrival it had bad donut hole and a couple slight rings.
Thinking WTF, that guy doesn’t know what he’s doing. Then night came, THEN I saw that sucker was dialed in for what it was made for. He had it right.
Sometimes we have to accept the fact that not all inside beams are going to be pretty.
So, point here is, that little bit of yellow that a certain member is obsessing over, is not visible at any real distance, so no big deal.
It may be less visible with reflector tweaking or it could get worse. Even worse would be to get rid of it and only then discover that you lost output of got the dreaded “Rings of Saturn”
I have one Kronos X6 that has the yellow spot, I consider it the laser center:)
Not Touching it.
P.S. To get the reflector loose, try covering the top to keep inside surface protected and blast the rim with Computer Duster spray with the can turned upside down. The cold blast may help it come free.
HTH
Keith