When I used the 604 ohm bleeder with 11K for the tail leds, the driver never switched off fully. Basically maintained mode memory. When I increased the tail led resistor to 22K, driver went back to normal.
were can we get a driver out of the manker godmes T01 to fit in the x5 or similar output driver off single aa
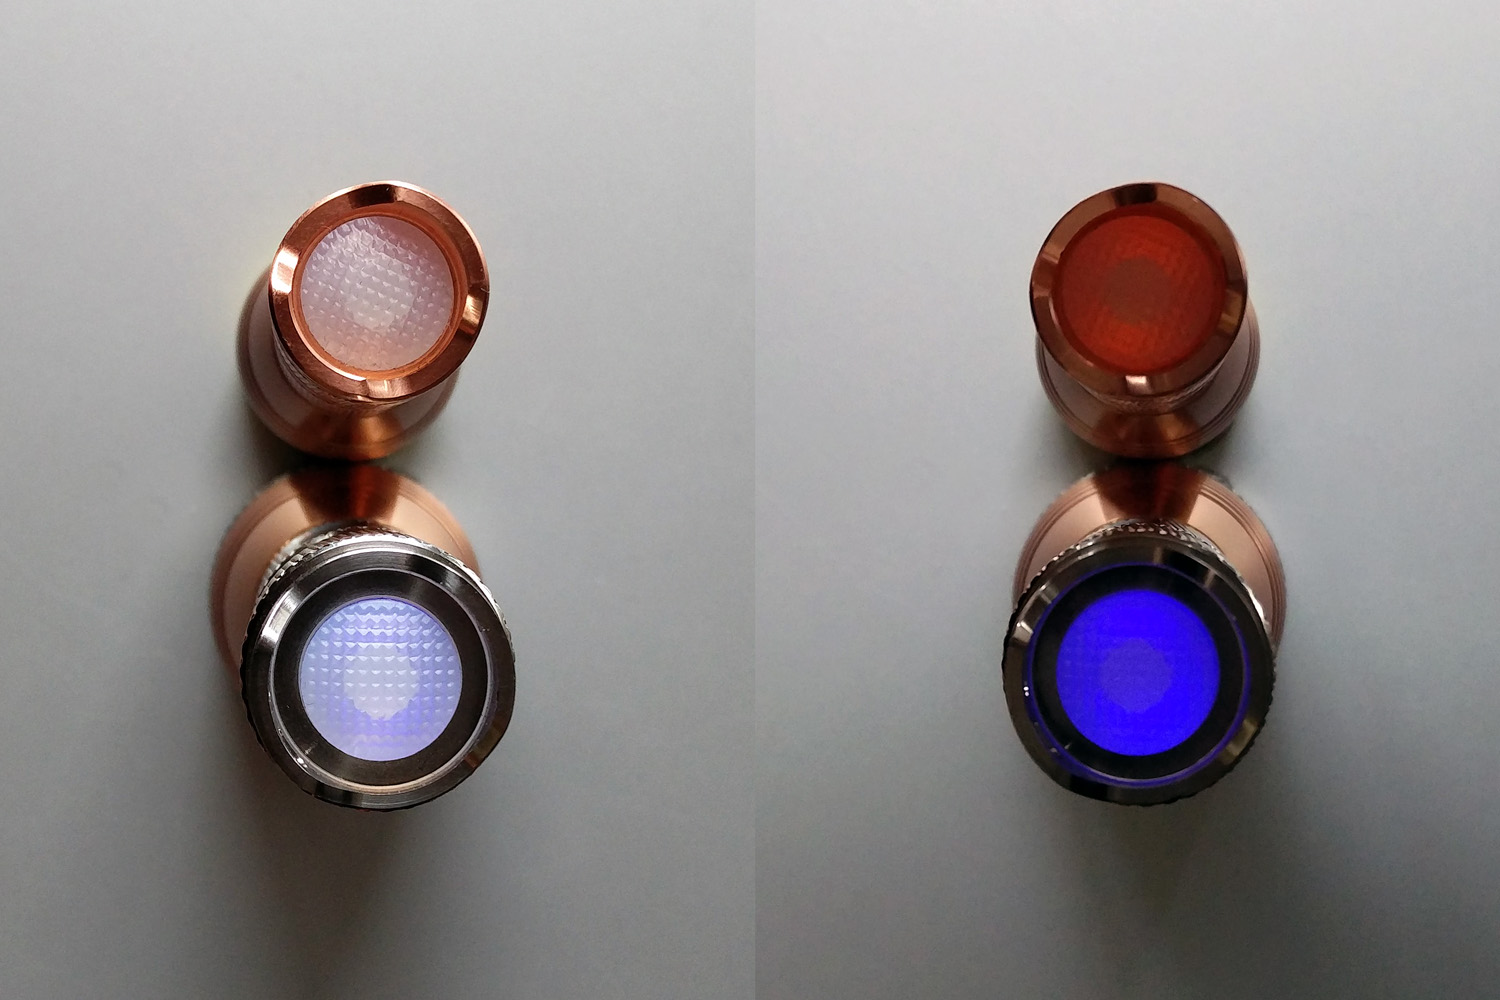
My stock resistor was 0805 size in my X6. I put in an 18k resistor in its place. Its now bright enough to be seen and doesn’t light up the room like it used to. The moded X6 on the left, the stock X5 on the right (just for comparison).
! !
!
Most of this was already covered in this thread, but I’ll paste my explanation here too so it doesn’t get lost in the other thread.
Thanks PilotDog! If I want to add an LED to the other side of the board, do I also have to add another resistor?
If Banggood/Manker used my Rev3 trace layout like they did with the prototypes, no you do not need to add a second resistor.
There’s a trace goi g under the switch to the other side, if you want to use the separate resistor pad you need to cut that trace.
I’d like to change the tailcap LED on a couple X5/X6 lights to another color and add a second LED. I’ll also switch to a 12k - 18k tailcap resistor to dim the output.
Should the replacement LEDs be of a certain Vf? I didn’t see mention of what voltage range the LEDs should be in.
Are some LED colors more/less affected by resistor values? I plan on trying green, amber, red, and white tailcap LEDs. Thanks!
Different colors have different Vf’s and also different apparent brightness due to eye/wavelength sensitivity.youll probably have to play with the resistor values if you want to use different colors but have them look the same and be the brightness you desire.
If someone out there is considering doing a little business modding tailcaps — I think a bunch of us are waiting for you.
I don’t know how well the tailcaps “lego” from one flashlight to the next (so I don’t know if it would work to do an exchange — send in one, get a modded one back promptly)
or whether each person’s tailcap would have to be modded and returned (guessing someone just picked from a bin until she got a tailcap that fit onto a tube — I’ve suspected they had fairly wide variability in the threads).
But dagnabbit, I’m never going to be able to solder at that teeny size, and I sure would like amber/yellow as a tailcap color.
Thanks for the tip, I was concerned that an incorrect Vf might alter the driver circuit.
I’ll experiment and report back.
You can have a look at Piloddogs tailcap led thread, a lot of people reported there findings in it so you can proabably reduce the trial and error to a minimum.
I will change my resistor to a lot bigger one in the next week, I am aiming for below 100uA.
Thanks to this thread, I removed the bleeder resistors and the tailcap ones on my X5’s! Thanks Werner…
I think the X5 is an awesome little light, and without the parasitic drain on the small 14500, will make for a excellent little light with decent run time on lower levels now.
Had a little time to play with my toys and the result is here…
Barely visible in daylight - just perfect.
Moved the one blue led from X5 to X6 for more even and uniform look. Both originally measured 0.6mA in tail. Now 0.16mA with blue leds and 0.24mA with amber/orange leds. Original 2kOhm resistor swapped with 10kOhm (one resistor for both leds).
Very happy with the outcome ![]()
I received my X5 a few weeks ago directly by manker (Donation to Old-Lumnens (finished) )
I really like it in general and the lighted tailcap is pretty useful. After I used the light for about 30 minutes continuously the tailcap started to behave strange. The tailcap light is now dimmer than it was before (yes, even after recharging the battery) and it flickers sometimes. I was not able to take apart the tailcap yet, since the retaining ring sits tightly.
Do you guys have any ideas what is causing this?
I’ve had that problem before, but I’m not sure exactly how I solved it. Try reseating the switch. Also try removing the retaining ring and cleaning all contact areas.
Just measured the dimensions of the blue LED on the tailcap board of my Kronos X6 and it looks like its a 1206 size LED.
The #202 resistor looks like an 0805 size but the blue LED is much larger.
Also, the pads for the LED on the other side (for those who want to add a second LED) seem too far apart to be sized for a 0805 LED.
Can anyone confirm the LED on the Manker tailcap board is indeed a 1206 size?
Thank you.
The Astrolux S41 and S41S has the same boards as the X6 and X5.
0805 LEDs will fit too.
I can’t confirm that they’re definitely 1206 size, but I can confirm they’re bigger than 0805. 1206 is a reasonable guess.
But like wieselfink said, 0805s will work. Just put a decent sized blob of solder on both pads, then use a tweezer or some other small clamping device to hold the 0805 right in the middle. Touch your iron to one of the blobs and “drag” it over to the contact on the emitter. Repeat. Done.
ok, thanks guys. Will either use my 0805s or get bigger ones. I got purple 0805 LEDs but I may get bigger green ones since green is brighter to the eyes and therefore, can possibly be run at lower current values/higher resistor values.