I got the Imalent DN11 from GearBest for the review.
The DN11 comes in a cardboard box.

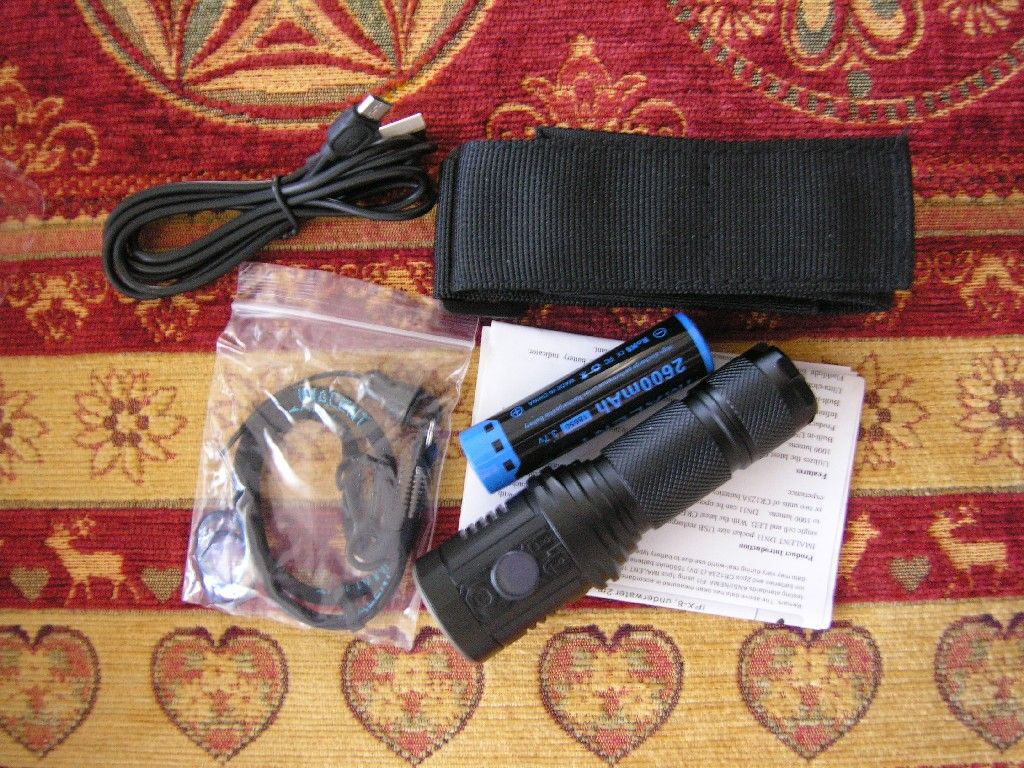
Inside to box: the light, o-rings, lanyard, micro USB cable, sheath and an 18650 2600mAh battery.

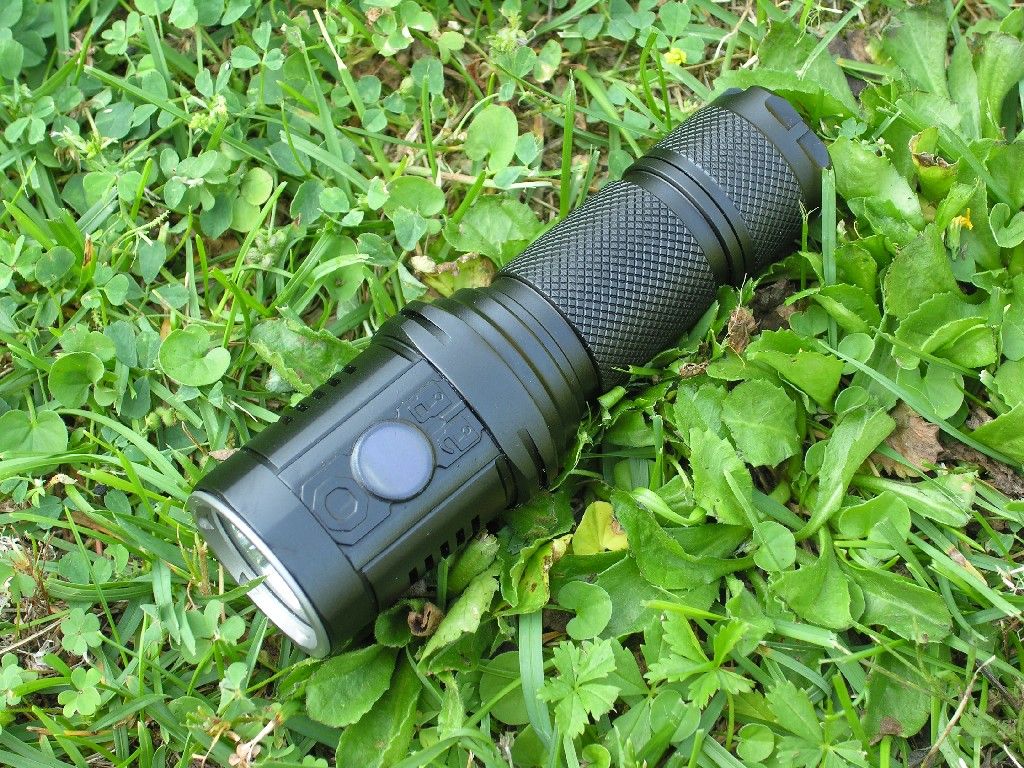
The DN11

At the positive pole of the head there is a physical protection against polarity inversion

At the tailcap a spring

The rubber cover for the micro USB port

This strange control panel with a circular thing (more on that later)


Smooth reflector with XP-L Hi CW emitter. On my sample the bezel is less than 1 mm off on one side. A very minor thing.

Flat tailcap with lanyard hole


The cordura holster with MOLLE capability

UI
The DN11 is controlled by the touch panel around the display
There are 2 areas, the one above the display, and the one below it.
To turn the light on click twice the upper part, and the light will turn on at the last used mode.
To change brightness, from 1 to 1000 lumens via 10 lumens steps, keep pressed the upper part (for increasing) or the lower part (for decreasing).
When the light is on, a single click of the upper part will turn the light off.
Basically, the DN11 has only a single mode, with customizable setting.
The light have memory, however, when you remove the battery or physically lockout the light, the memory will be lost and the light will come back on at 1000 lumens.
When the light is on, double click the upper part to go into Strobe, double click again for going through SOS and beacon. Single click to turn it off. The DN11 doesn’t have memory for the flashing modes.
Don’t get fooled by the 2 symbols on the lower part of the touch zone. There is a lock and unlock zone, but in reality they make up a single zone and there is no lock or unlock function.
The display in between the touch sensitive parts shows the output (or STROBE/SOS when you are in the flashing modes) alternating the battery voltage (remember, this is not the resting battery voltage and you will never read 4.2 volt), and some other messages (it flashes with an empty battery symbol when the battery is running low). The display has a backlight that will automatically disable after a few seconds. When the backlight is off, the numbers on the display are almost impossible to read even at daylight.
The display backlight will turn on again every time you turn on the light or when you change output or mode, or you can swipe the left lower part of the touch zone (thanks to Liber8 for pointing it out).
The display backlight will stay on when the battery is running low and the low battery symbol shows up.
To the naked eye the digits of the display looks slightly blurry (but perfectly legible), and on camera they look very blurry.


Here I tried my best with the camera to make the display look as my eyes see it.

The display will aslo help in the recharging of the light, accordin to imalent.

But in reality it does not look at all as the animation. The battery simbol is smaller and is not so easy to read the state of the battery (there are no visible separation spaces for the battery levels, when I charged it showed just the battery charging, and when I messed up and left unscrewed the tailcap there was no clear error sign, just the empty symbol being filled, then the battery is half full and gets filled, then is almost full and gest filled, then back again… al in the matters of seconds).
Battery
Here is the 2A discharge test of the free 18650 2600mAh battery you get with the DN11 run with the SKYRC MC3000.

Output and runtime
I tested the DN11 with unprotected LG MJ1 batteries.
During the testing of the DN11 I found myself in trouble when measuring the Cd of the light
I measured around 17k Cd at the max output, “1000 lumens”, but the other tested levels were impossible to read: while at the naked eye the output was perfectly fine, the sensor of the luxmeter kept showing values and I wans’t able to get a constant read (no, it was not oscillating between 10 and 10.2, but from 98 to 116 range). I tested the luxmeter with another light and it was absolutely fine.
However, the ceiling bounce test was running fine for all levels.
The explanation I came up with is that the output fluctuates in a unnoticeable amount for the eye, but visible for the instrument.
On the ceiling bounce the values were stable, this somewhat confirms the expalination (add a diffuser to every light with flickering and visible pwm, the effect will decrease, and the room of the celing bounce acts like a giant diffuser).
Output is consistent with the specifications, so no more brackets for indicating the levels.

Runtime
Sampling rate is every 6” for 1000 lumens and 750 lumens, every 90” for other levels.


Always regarding the output fluctuation: in the 1000 lumens mode and in you can see that the output is flat until the stepdown, then it “spikes”. This is noticeable also in the 750 lumens mode, and more in the 250 mode, although the sampling rate is longer.
Beamshots at 0.5 m from the wall

Unfortunately for the readers, I don’t own any stock 18650 light with the same characteristic of the DN11.
The small emitter and the smooth beam give the light a throwy pattern. Good throw, given the size of the light.
The tint may be a bit on the neutral side, even if on the pics really looks neutral.
My thoughts
The light is well built, and the holster is always nice to have. It is a pity that there is no clip for this light.
I tent to use the clip a lot, and the clip will prevent the light from rolling and will help finding the display/touch portion of the light.
The micro USB charging port is a nice feature to have.
The output are semi regulated. The fluctuating output issue is an issue only for the luxmeters. At my eyes the light runs fine.
The 2600 mAh battery looks fine to me, and it’s free.
The dimmer function has its advantages: you will always have the right mode for you, not too bright and not too dim. A rotating ring may be quicker for going from minimum to max output, but on the DN11 you also get the current output value on the display.
However, as its only mode, it means both you will have to spend some seconds going through the brightness levels. Also, if you left the light at 1000 lumens and you need 10 lumens, you will need to hide the beam while you decrease the output all the way down to 10 lumens, or you’ll get flash blinded.
For the other way, going from low output to 1000 lumens, there is a shortcut: just unscrew the tailcap or the body and screw it in place. The light will be back at 1000 lumen when you will turn it on.
The concept beyond this light, the touch interface with the display showing info, is good and I like it.
However it needs major adjustments: the display is a bit blurry, and the backlight should always stay on (since its output is not distracting and to turn it on again you have to turn off the light or change the mode); the touch panel should also be lit (because when you pick up the light when it is running you can turn it off by touching it, this happened to me; I had it turn on while I was putting it back in the holster).
I own a smartphone and a tablet and I’m not new to touch displays, but sometimes I have trouble making the display feeling a single click. I find my index finger works better than my thumb, for what it matters.
Another way of making this would be using 2 electronic switches instead of the 2 touch areas.
The display area is rather big, compared to how small the single line of digits are, and since it protrudes from the surface, I found myself trying to press it many times in the dark like an idiot.
Also, having a design that makes you exclusively take the light to accommodate the finger in the touch area (as many manufacturers do with their electronic switches), and don’t make the touch panel side identical to the micro USB charging area side.
A couple of times the display “crashed” and show random pieces of digits while the light worked fine. I untwisted the body and twisted back in place, and the light was fine after.
I don’t know if this is a problem that affects only my sample, but the design thing could be overall improved for shure IMHO.
Thanks to: AntoLed for the camera and the luxmeter.
Thanks for reading.