Just wanted to share a new light I was commissioned to build for one of our members. He wanted a micro mag but with 3-modes instead of the usual 5-modes I've been building due to a lack of 3-mode drivers that have the smooth pcb on the anode side. I had to turn down his offer until I heard that the Nanjg AK-101 could be soldered to work as 3-modes instead of 5. I contacted the potential customer and told him the deal was back on but would have to wait for me to gather the right components. I then recalled that I had a Nanjg ROHS-101-AK in my parts bin that I've had for a couple years but never used because it only put out 1050mAh (3*7135). I recalled that this driver had 3 mode groupings and a total of 16 modes that could easily be programmed on the fly. All I had to do was improve output from 3 chips to 8 to get 2.8A. The board already had an empty spot for a 4th chip so I added one then stacked a second chip onto all 4 for a total of 8 and 2.8A on high. Unfortunately I didn't take pics of the driver after adding the chips but once completed the light fired up at 2.79A on an IMR 14500. ;)
Low (10%) - Mid (35%) - High (100%) - Strobe - SOS
Low (10%) - Mid (35%) - High (100%)
Low (10%) - Mid (35%) - High (100%) - Special Police Type Strobe - Slow Strobe (3Hz) - Super Slow Strobe (1Hz) - SOS
- To switch mode, stay in any mode for no more than 2 seconds then switch off. The next time the light is turned on it will enter the next mode.
- To change mode group, stay in the LOW mode for about 4 to 5 seconds, wait for a quick flash response then switch off. The next time the light is turned on it will enter the next group of modes. If you do not turn off after the initial quick flash response, the flashlight will quickly flash once more after 2 seconds meaning that mode group switch has been cancelled.
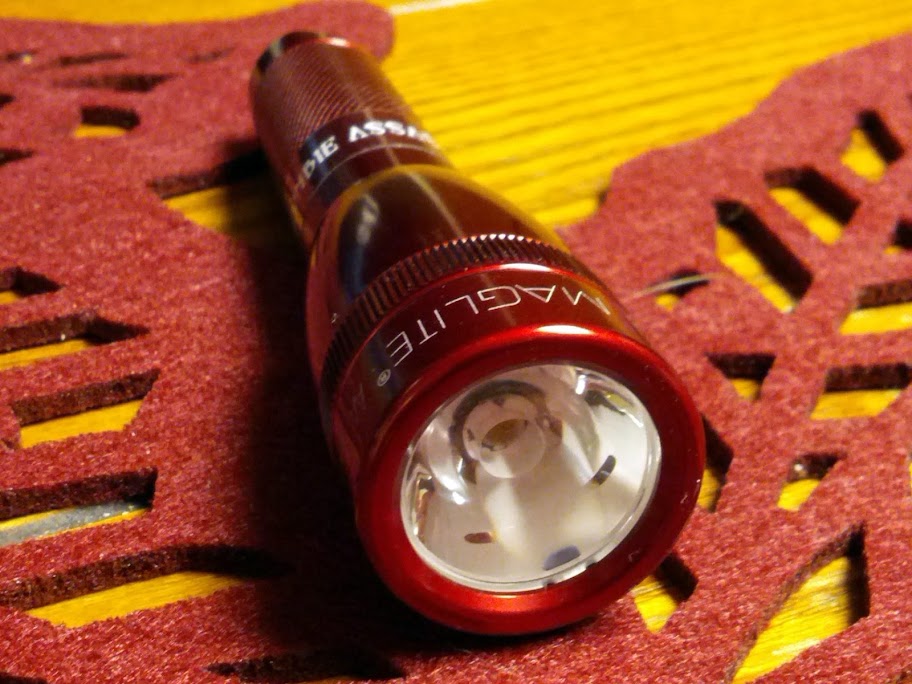
The light worked so well and was so versatile that I decided to make this torch the first in a new line called the "Zombie Assassin" (original line is "Zombie Hunter") since it can adapt to the user's needs and wants like a chameleon. The rest of the components are an XM-L T3 WW, fully potted custom pill, 22ga silicone insulated silver-plated copper wire and narrow TIR optics. Here are some pics before final assembly. Enjoy!
Thanks, guys! I'd say it amazes me what one can do with just hand tools but with Justin making the goods he does (he always amazes so I just expect it from him) I'll just have to say it amazes me what "I" can do with just hand tools.
I love that pill! Is the lower half of it hollowed out for the wires? How is the driver attached to the pill???
…I once build something similar, but the outer ring of the driver touched the pill, and because of the fact that it was a Maglite without anodisation, switching didn’t worked well… speak: it was on all the time…. S)
It seems like the bezel ring is not fully screwed on. Is that because of the optics?
The pill is hollow just enough that the stacked chips touch the top. The driver is potted into the pill using Fujik.
If you leave the anodizing in the head the ground issue does not exist. Ground is not made until the body tube makes contact with the outer ring on the driver base. Removing the anodizing makes a world of trouble.
The bezel ring does not fully seat due to the height of the internal components. If I use a modded reflector it can be made to fully seat. As it is there is no problem as the o-ring is well inside the bezel. ;)
Yes, you can do a lot with hand tools and a dremel, that sort of thing and the more practice, the easier it becomes, just like anything, but you have to have "a knack for it", common sense and a good eye too. You've obviously got all those.
I’ve got a list of mods stacking up, seeing this reminds me I have a mini mag with a cell stuck near the head, I really need to do something with it one of these days….
Cool build johnnymac I really like your lights. 8)
Outstanding build, Johnny! I really like that driver you chose... which reminds me I think I have one squirreled away in a parts bag somewhere. Then again, it doesn't have the extra chips stacked on it yet like yours.
As stated above, red is a killer color for this new model.
After discussing and deciding on the build for this light, I really had high hopes.
After using it on my one hour night/dark work out (trail jog), it exceeded expectations. High is very high (comparable to my SC600w) and medium is the perfect combination of brightness/battery life. The XM-L T3 WW gives wonderful contrast and prevents eye strain.
Unlike many of my titanium and special editions lights, the Assassin is worth every penny.