I have wanted to do another 3up for a while now, but it seems like I just never get round to do it. There's always something that I don't like about them. Series requires higher voltage, I didn't have a heat sink, I didn't like the last one, etc.
Well I broke down and decided to start one again.
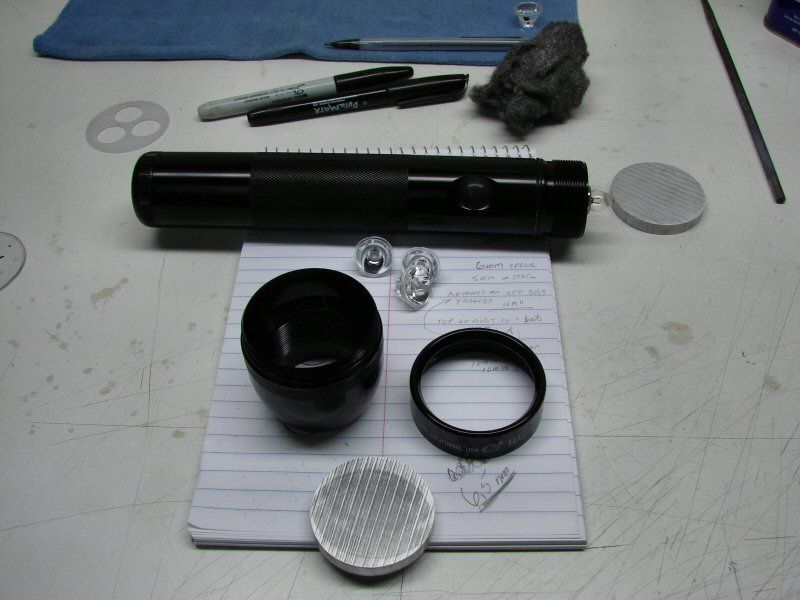
I'm concentrating on the head first. I needed a solid heat sink instead of the cobbled up one I did last time, so I went to Speedy Metals and had them slice some 1/4" thick pieces of 2" diameter aluminum. 2" is too big for the head, but at least I can cut it down to fit.
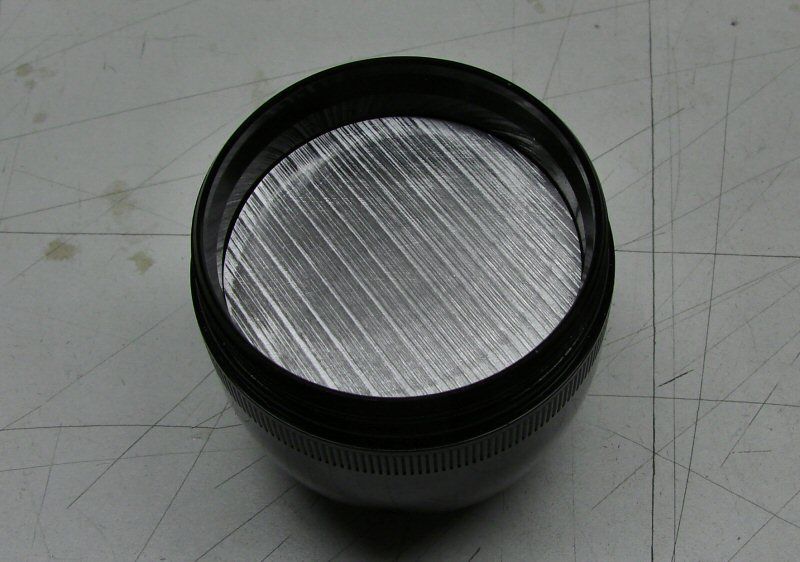
I used the dremel tool, to cut down the OD of the heat sink, so it would fit tight into the head and rest on the shelf where the threads start. I will also use a heat sink in the body tube and tie the two together.
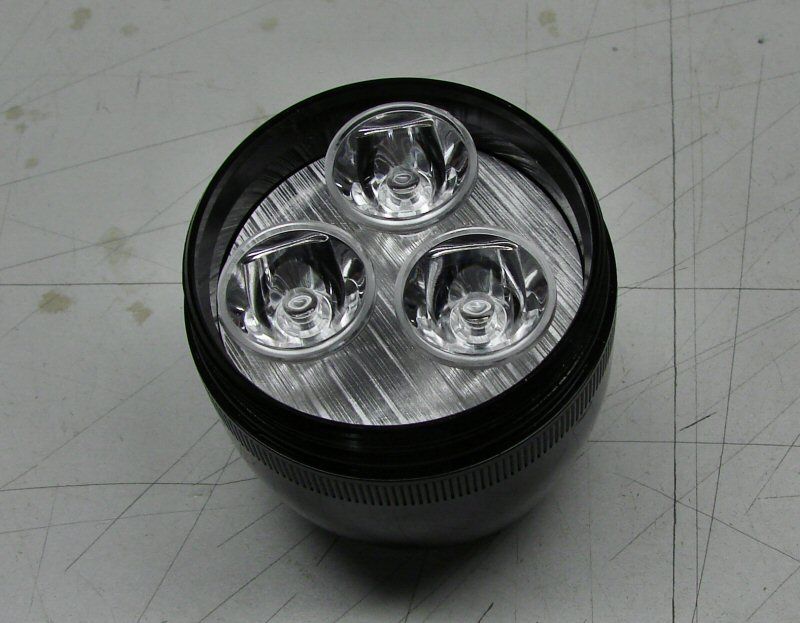
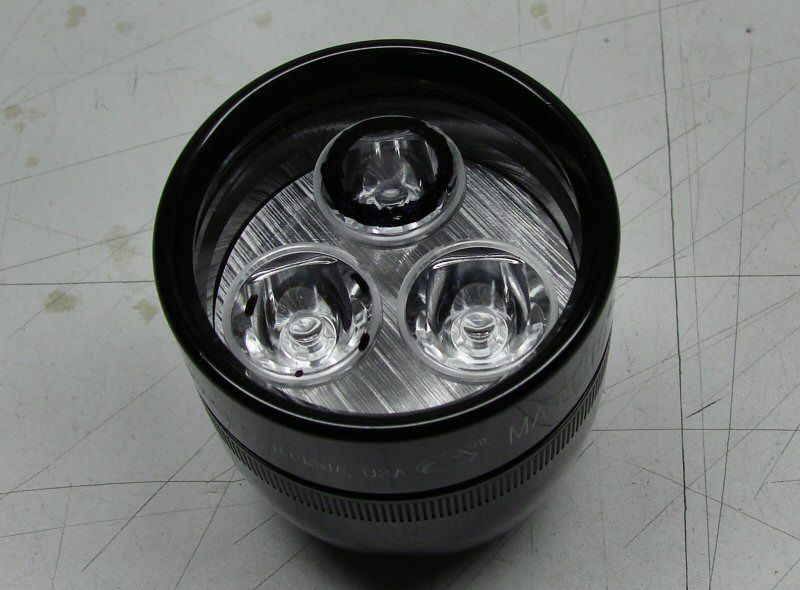
I decided on TIR optics, because I had them, simple enough... These are 30 degree TIR from CNQG. They are 20mm diameter. I just set them in the head and lined them up by hand. I want to make something to hold them in position.
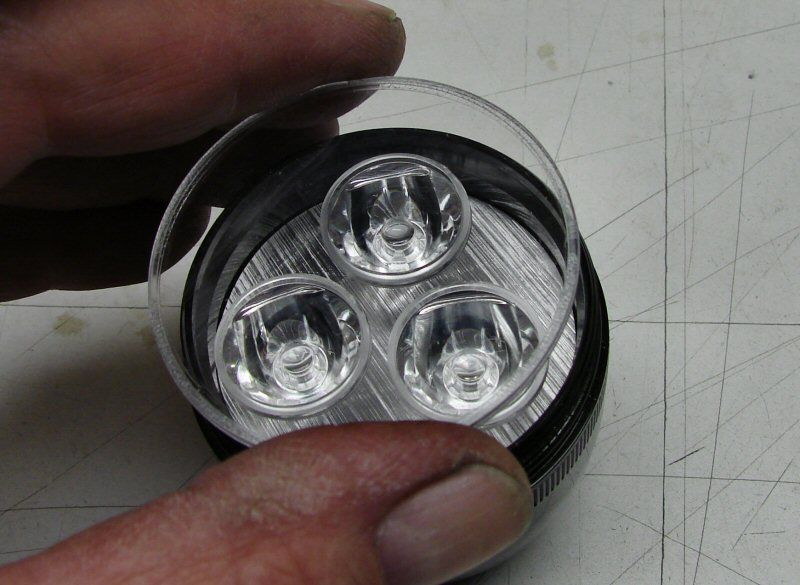
So I decided to use the stock plastic lens and see if I could make a holder out of it. I set it on the optics and screwed down the bezel, while pressing on the lens, to keep it from moving.
Once it was tightened down, I traced out the optics, keeping the trace a little small, so I don't take out too much plastic. Once I traced them out, I drilled the centers, so I could have starter holes for the Dremel and I used the dremel to open the holes up. I finished the holes with a round file. They let the optics fit in and hold them by pressing on the outer ring of the optics.
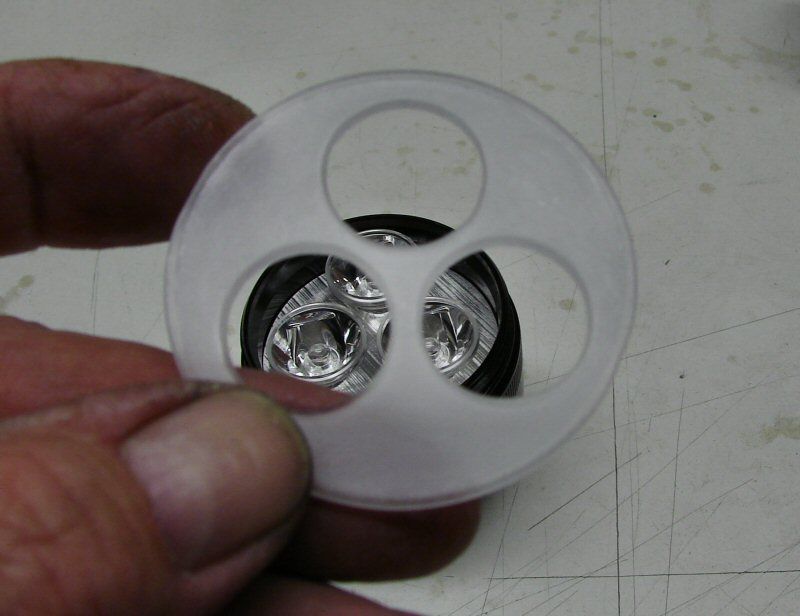
The finished holder is white. I did this by using...
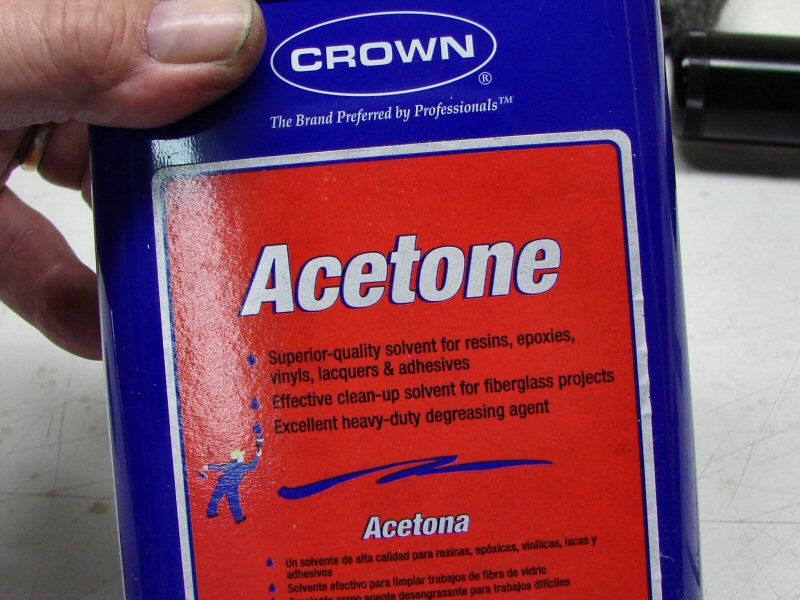
Acetone.
I used a little Acetone on a paper towel and just wiped the plastic lightly on both sides. I repeated that, till the plastic turned white and then I wiped the excess Acetone off. If you use too much it melts the plastic too fast and ruins it.
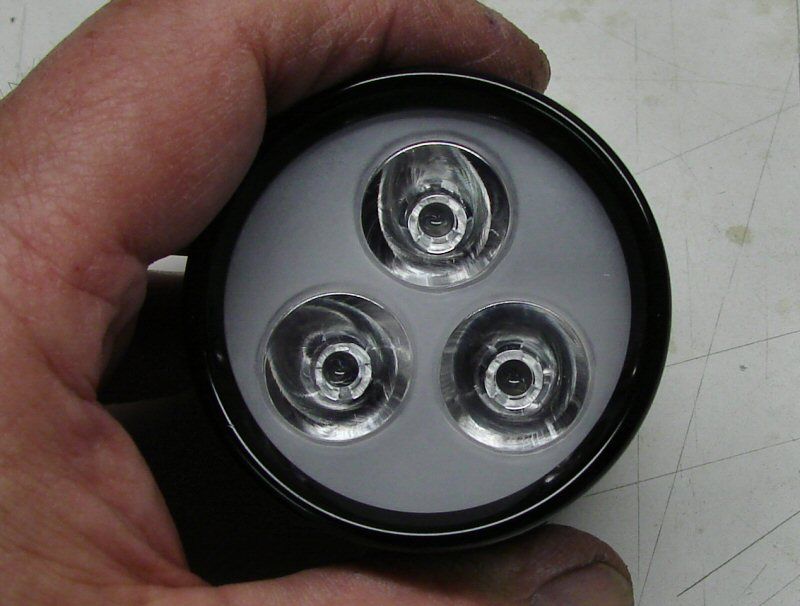
Here's the finished 3up holder and the TIR optics are now held tightly in place. I could always paint the holder another color now. The frosted surface will hold paint much better than before.
I made a little video of the process, that is a little more in depth about how to make this optic holder.

This is just the beginning and I am in no particular hurry to finish it. In fact, I don't even have leds, drivers or battery holders for it yet, so it will be quite a while till I get back at it. I am about through for this year and I am not going to rush into the new year right away. Other issues in life take priority over this stuff, so it will be hit and miss for some time.
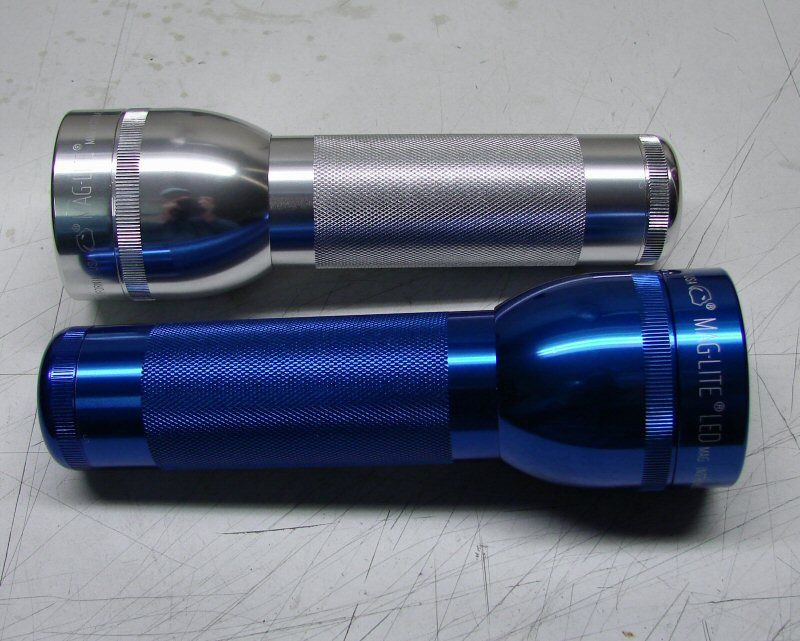
12/11/2012 - I decided to change everything up here. I got a couple 1D hosts from Chicago X today and they are so beautiful, I just can't resist, so now I will do this mod with a 1D Host and 3 Nichia 219's with 3 NANJG drivers.
I will be using a 4AA battery holder with it. More when I get more...
------------------------------------------------------------------------------------------------------
12-12-12 I haven't gotten much time to work on flashlights and as long as the cold spell is here, I won't do much more. I have gotten the heat sink together and ready to go. I also got the drivers wired and the leds reflowed.

The two piece heat sink is held together with a machine screw. I am debating if I will use a longer one. I think this one is plenty, but there's still about 30mm dead space I have to fill, if I don't make a longer one. I just don't really want to cut the 1-3/8" round stock with a hacksaw and if I do make the longer one, the light will be Very front end heavy.
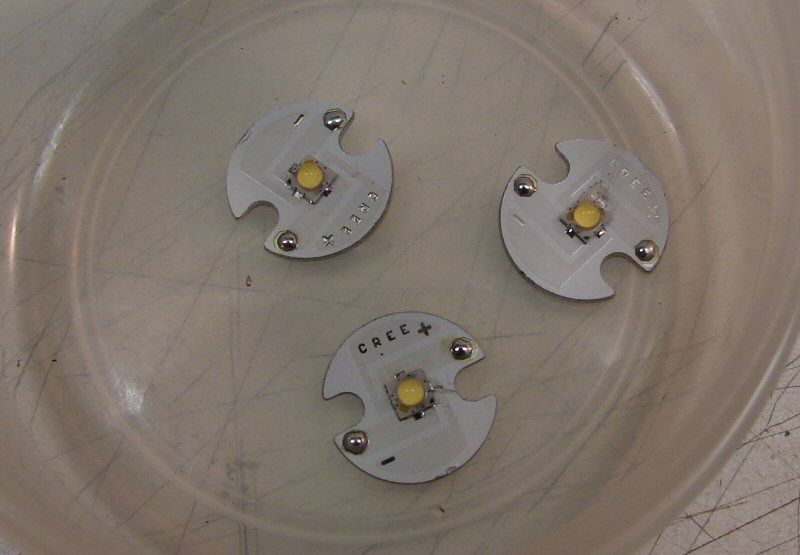
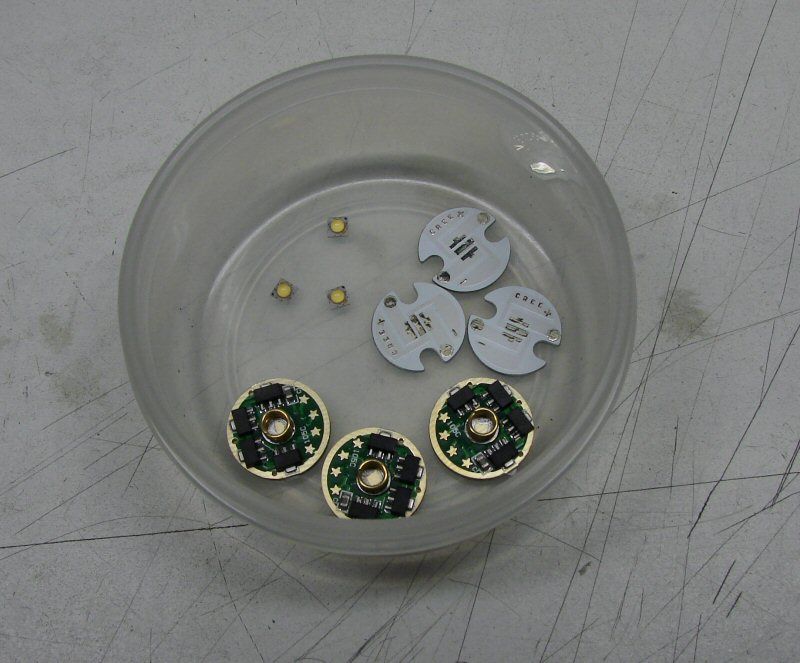
The Nichias reflowed on XP-G stars.
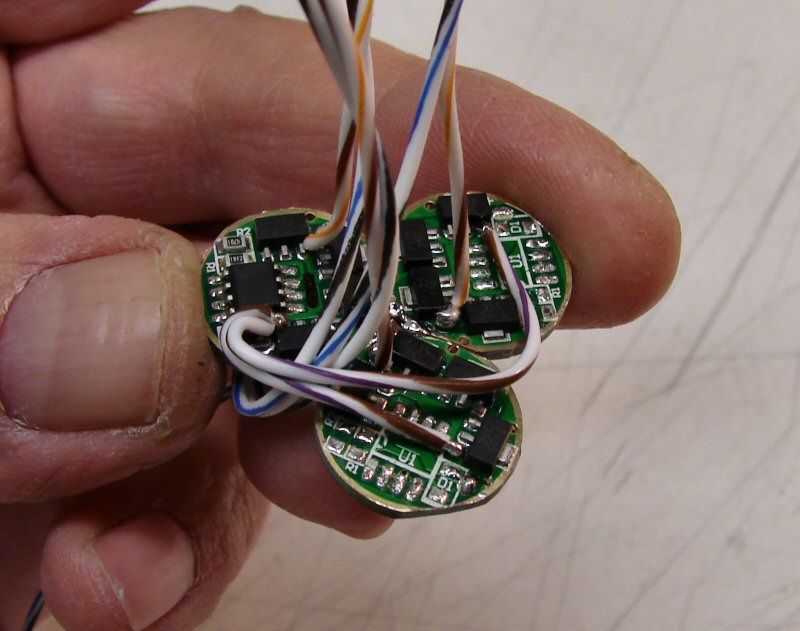
The three drivers are done master/slaves and all the wiring is ready to go. Seems funny to see all that wire for just three leds. The drivers were trimmed, so that they will lay flat inside the body tube.
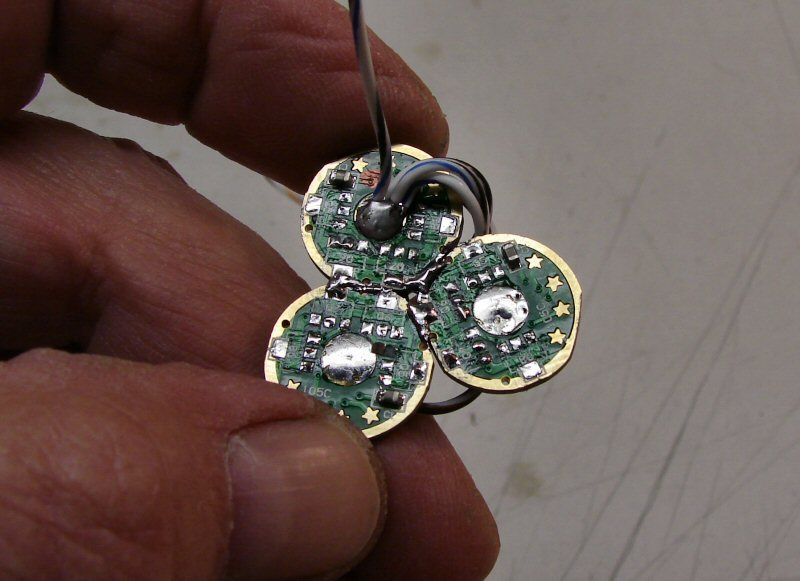
Four of rhe 7135 chips were removed from each of the drivers, so the leds will see 1400ma each. I'm not going for a monster, just a nice, fairly bright light with leds that aren't pushed to the max. I've decided that there's enough hot rodders much better than me at that kind of thing and I just want to do lights that are bright, but not pushing the limits.
Hopefully I will get more done this week-end.
------------------------------------------------------------------------------------------------------------------
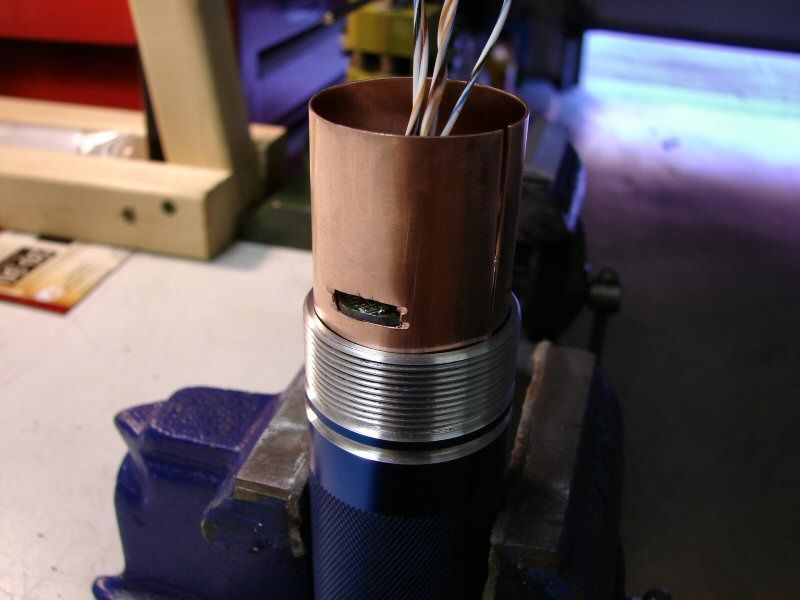
Don't really have much time today, but I did get the sleeve ready. I need to use a sleeve, because I don't have the right diameter Aluminum rod stock, so a copper sheet serves as the sleeve, but the drivers do not fit inside.
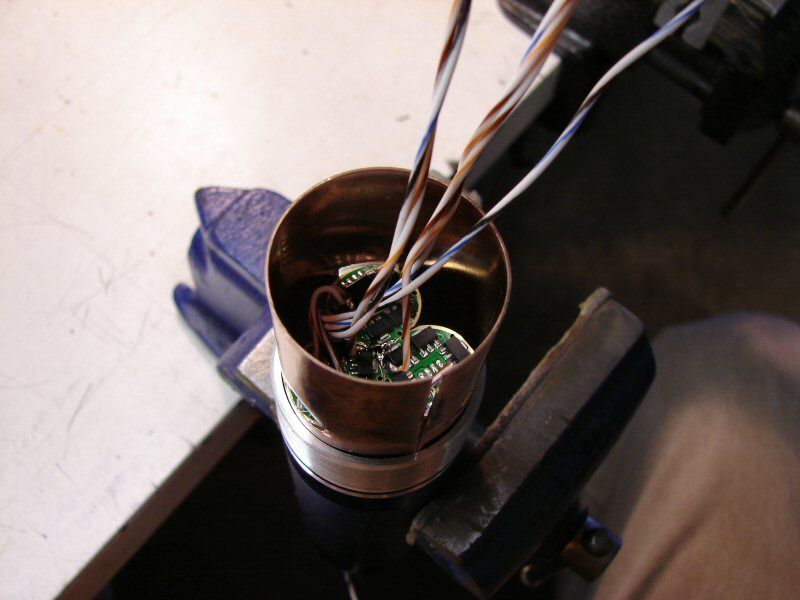
So I had to notch the sleeve in three places.
I just used a hacksaw and broke the centers out after. It works...
-------------------------------------------------------------------------------------------------------
