SOLARSTORM SP03 3*XM-L2 U2 1C (4*18650)
Flashlight provided for review by Solarstorm.hk
*As in all of my reviews, clicking on an image will open the full-res version in a new window/tab

This is the latest performance flashlight from Solarstorm and it's parent company, Black Shadow. This exact light is also sold and marketed as the Fandyfire SP03 and the two are exactly identical except for side logos. Both versions are available at Fasttech. The Solarstorm SP03 is $77.54 and the Fandyfire SP03 is $79.16 plus another 5% off by using the "BLF" code.
PROS
- Great output with excellent throw and tight hotspot.
- Above average machining and finish. Clean, square, fully anodized threads.
- Large aluminum reflector. Well polished.
- Fantastic switch feel.
- Lighted switch with low battery indicator.
- Lubricated threads.
- Excellent heat sinking and mass!
- Rock solid tail standing without handle.
CONS
- Not IPX-8 as claimed. While splash & rain proof, it is not waterproof to 2m. It leaked at the lens gasket at less 1.5 foot depth.
- End of the handle is longer than the flashlight. This causes wobbly tail standing
- The "removable" handle is red Loctite to survive a nuclear blast.
- PWM in Low & Medium modes but fairly fast. Not likely to be an issue unless you are extremely sensitive to it.
- Driver is glued in with a clear epoxy and not removable without destroying.
- Without the handle it may be a bit fat for smaller hands.
Manufacturer Specs:
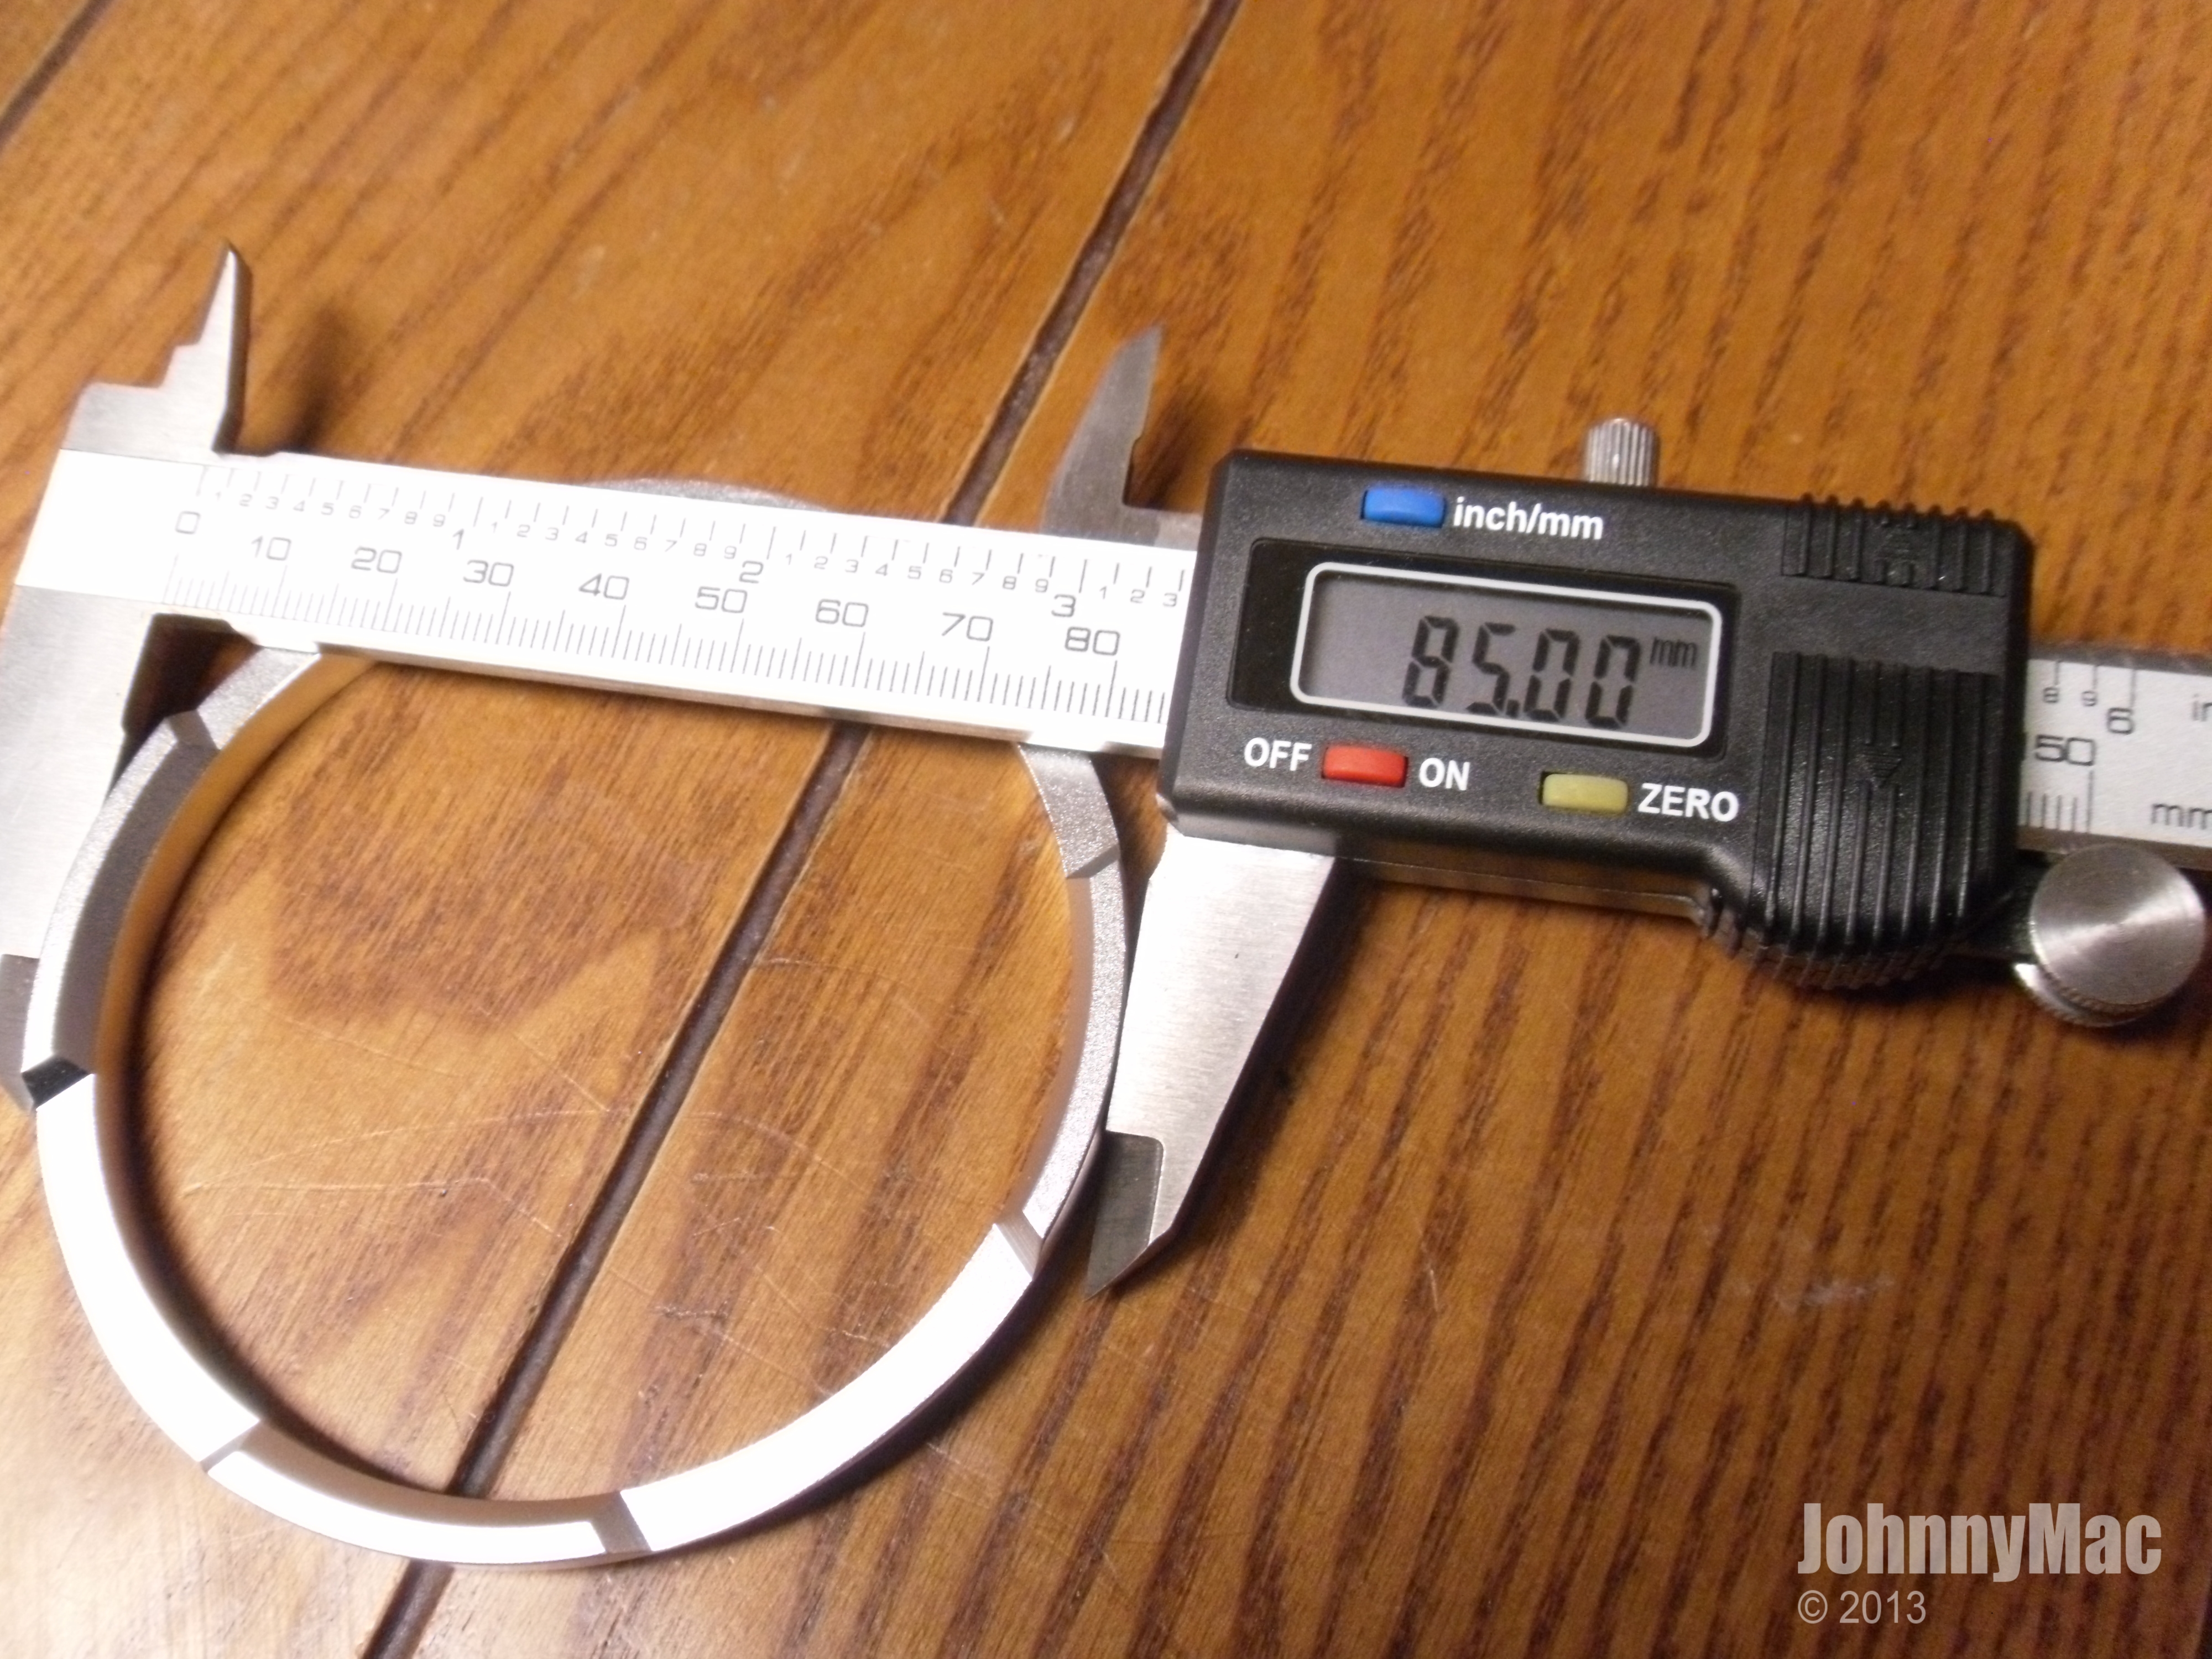
Dimensions: 85mm (HD) × 155mm (L) × 114mm (TD)
Weight: 635g (Without Battery)
LED: CREE XM-3 × L2 U2 LED
Battery: 4/18650 Battery
Circuit: Digital CC Circuit
Mode: High-Mid- low, Hidden Strobe
Dimming: Electronic Side button Switch
Lumens: 3020lums-1630lums-360lums-2930lums
Runtime: 1h35min-2h44min-6h10min-1h55min
Material: Aluminum Alloy
Lens: Impact-resistant Optical Lens
Reflector: Smooth Reflector Metal
Waterproof: IPX-8, Unable to Support Dive Use.
Head & Tail: Aluminum Alloy bezel Ring, tail standing tail cap
Mark: LED and mode are optional on your preference.
Various Physical Measurements:
Bezel diameter: 85mm
Lens diameter: 79.2mm
Lens thickness: 2.84mm
Overall reflector diameter: 77mm
Individual reflector diameter: 37.18mm
Inside head diameter: 80mm
Driver PCB diameter: 48mm
PERFORMANCE
Panasonics fully charged and loaded. OTF lumens as measured in my IS:(after 30 seconds):
High - 2193
Medium - 1161
Low - 290
Lux @ 3m = 8330
Converted to 1m = 74,969
Throw distance = 547.61 meters
For comparison using the exact batteries all taken within 15 minutes of the SP03:
Genuine SRK - 2150 OTF
Terminator U2 - 2800 OTF
Terminator T6 - 2611 OTF
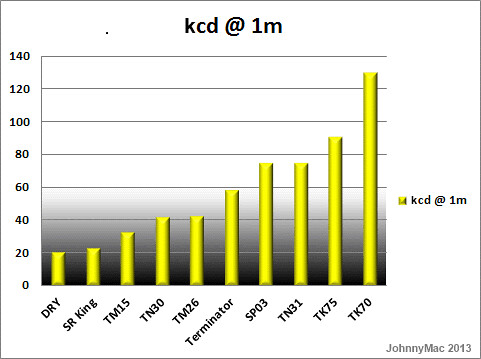
Throw on this light is really impressive for a budget light. To put it all into perspective, Thrunite rates the XM-L version of the TN31 (a dedicated thrower) at 75kcd of throw and the SP03 matches it. I recorded lux @ 3m and converted it back to 74,969cd @1m. Not too shabby for a light about $100 less than the TN31. The chart below shows the output of the SP03 compared to many popular triples and throwers.
This next chart compares the price of the SP03 to the same lights.
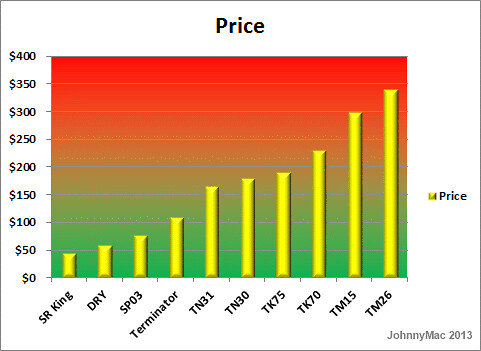
One sweet thing Excel can do is allow you to chart out performance per dollar ratio. The SP03 clearly gives the best performance per dollar. Better than popular multi-LED lights like the BST, both Fenix, the Thrunites, the DRY, and even the budget Output king, the SRK. The Nitecore lights are the worse.

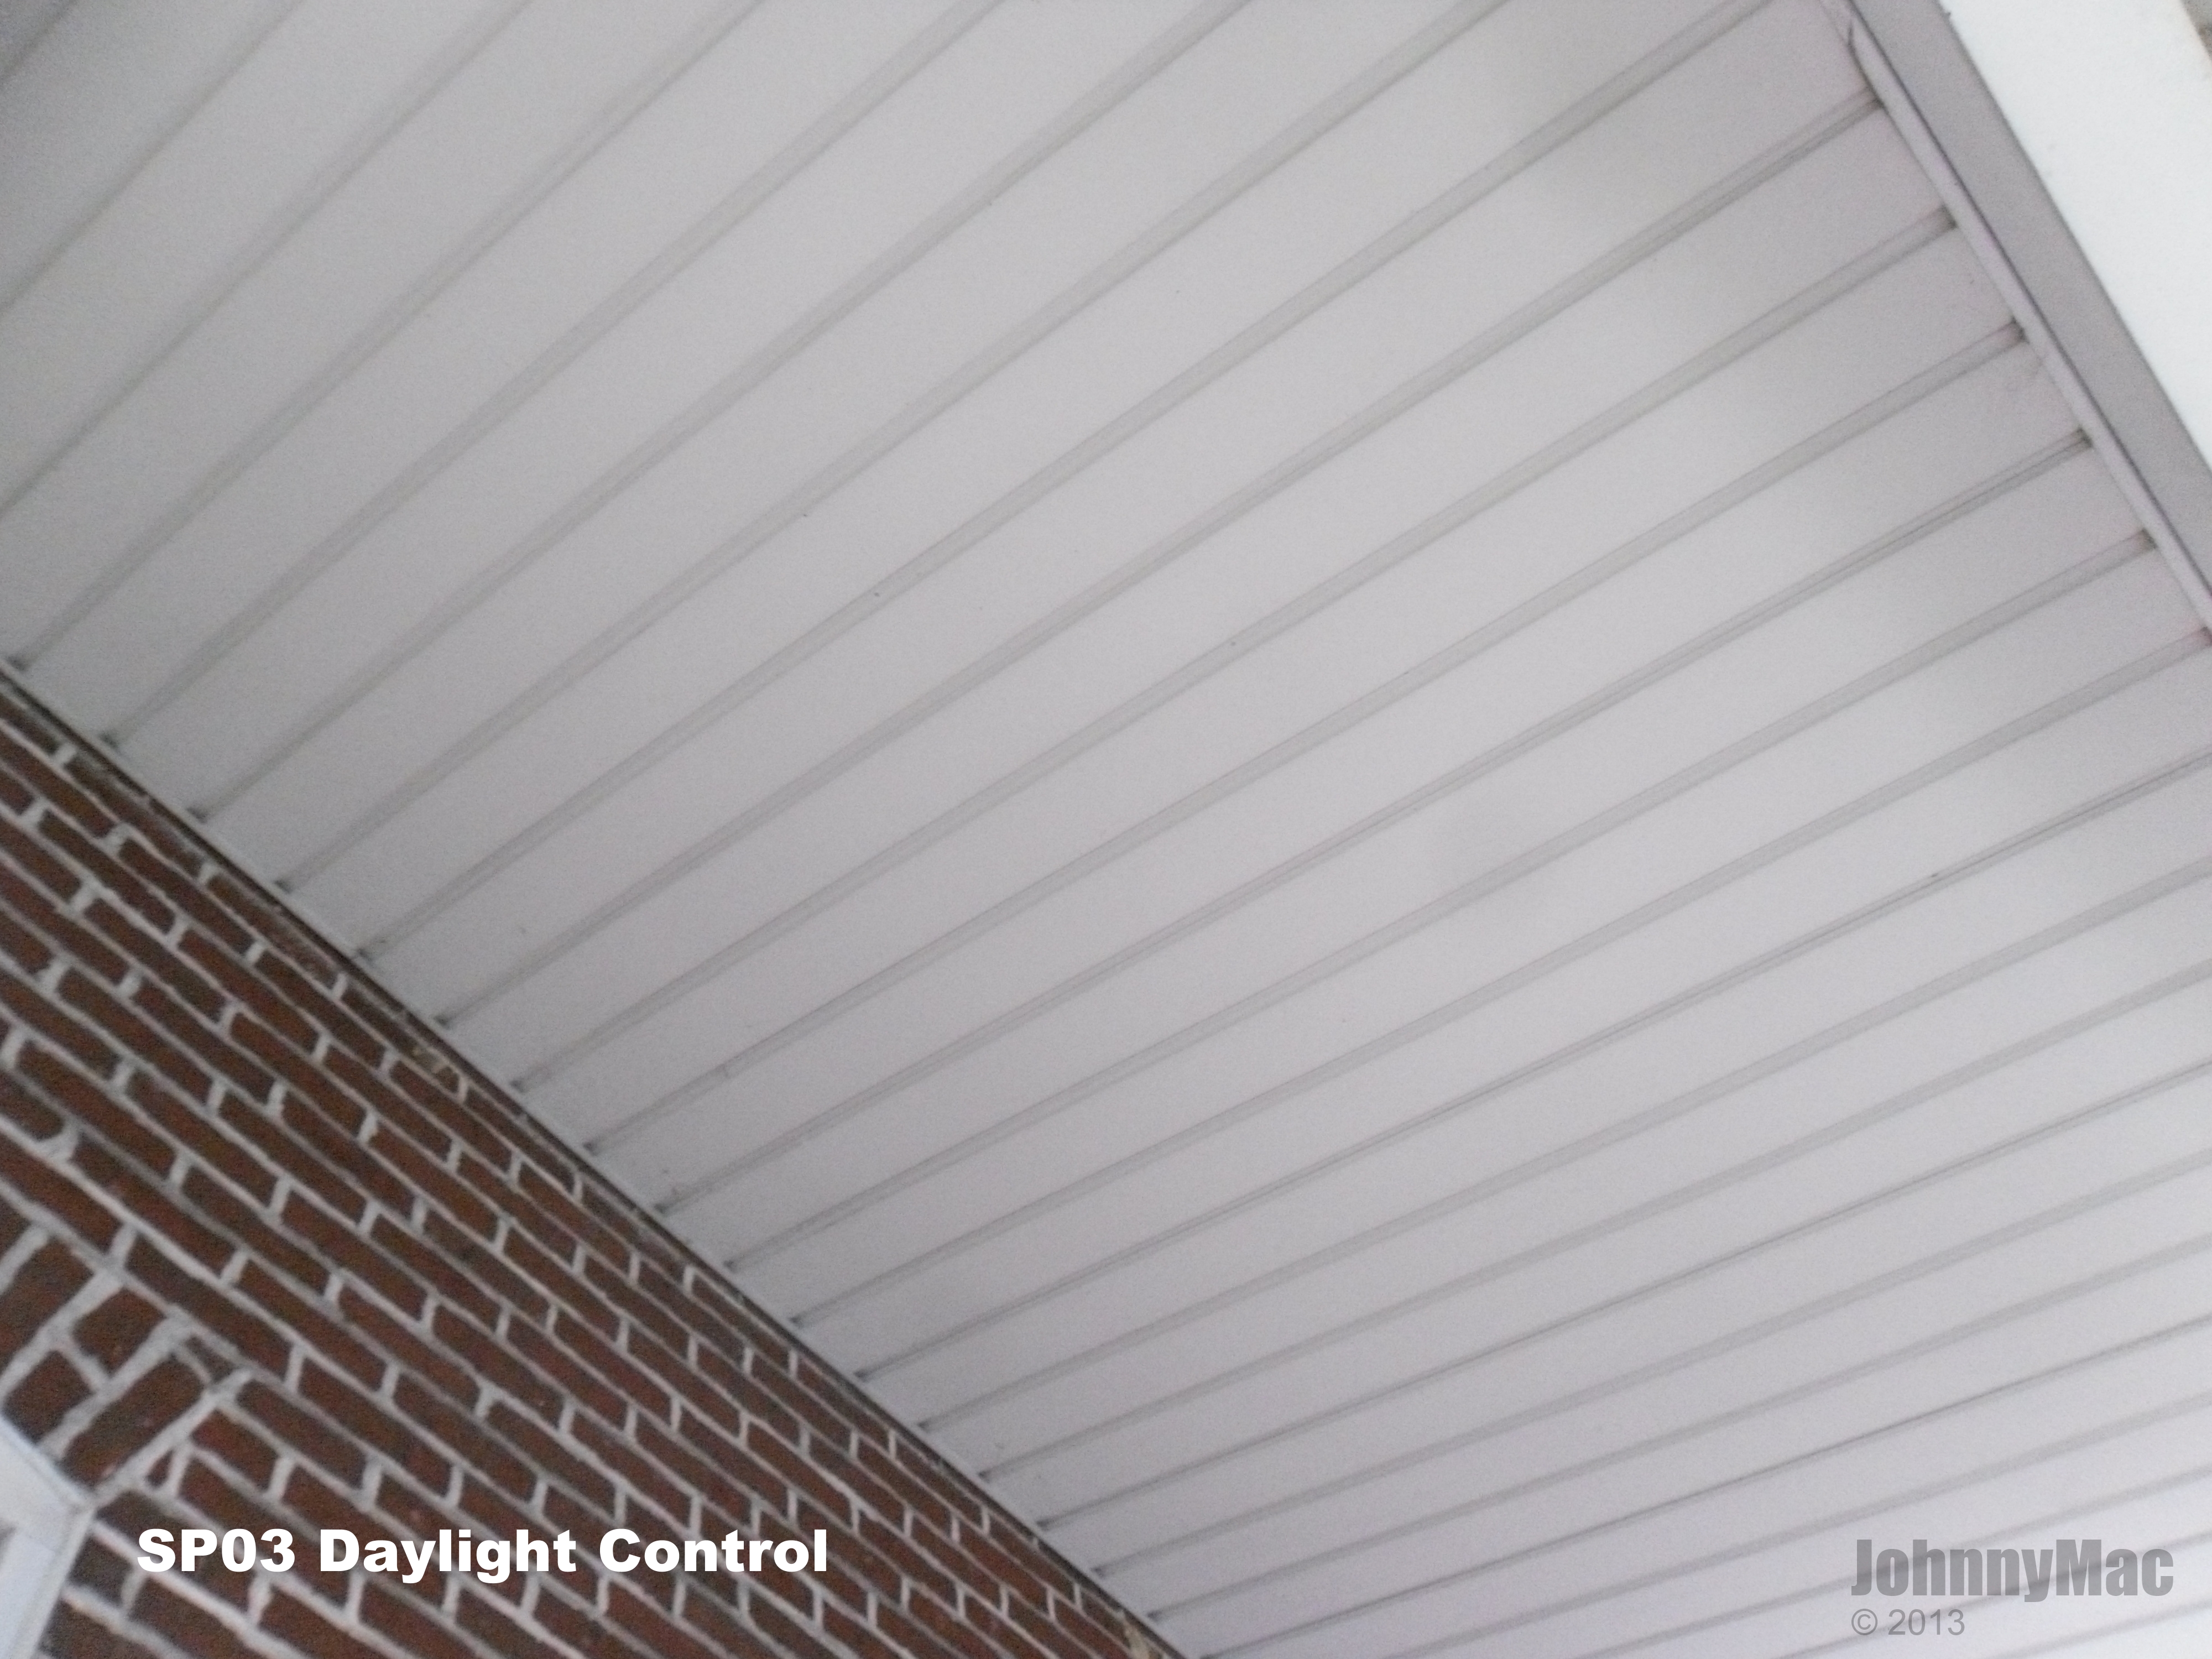
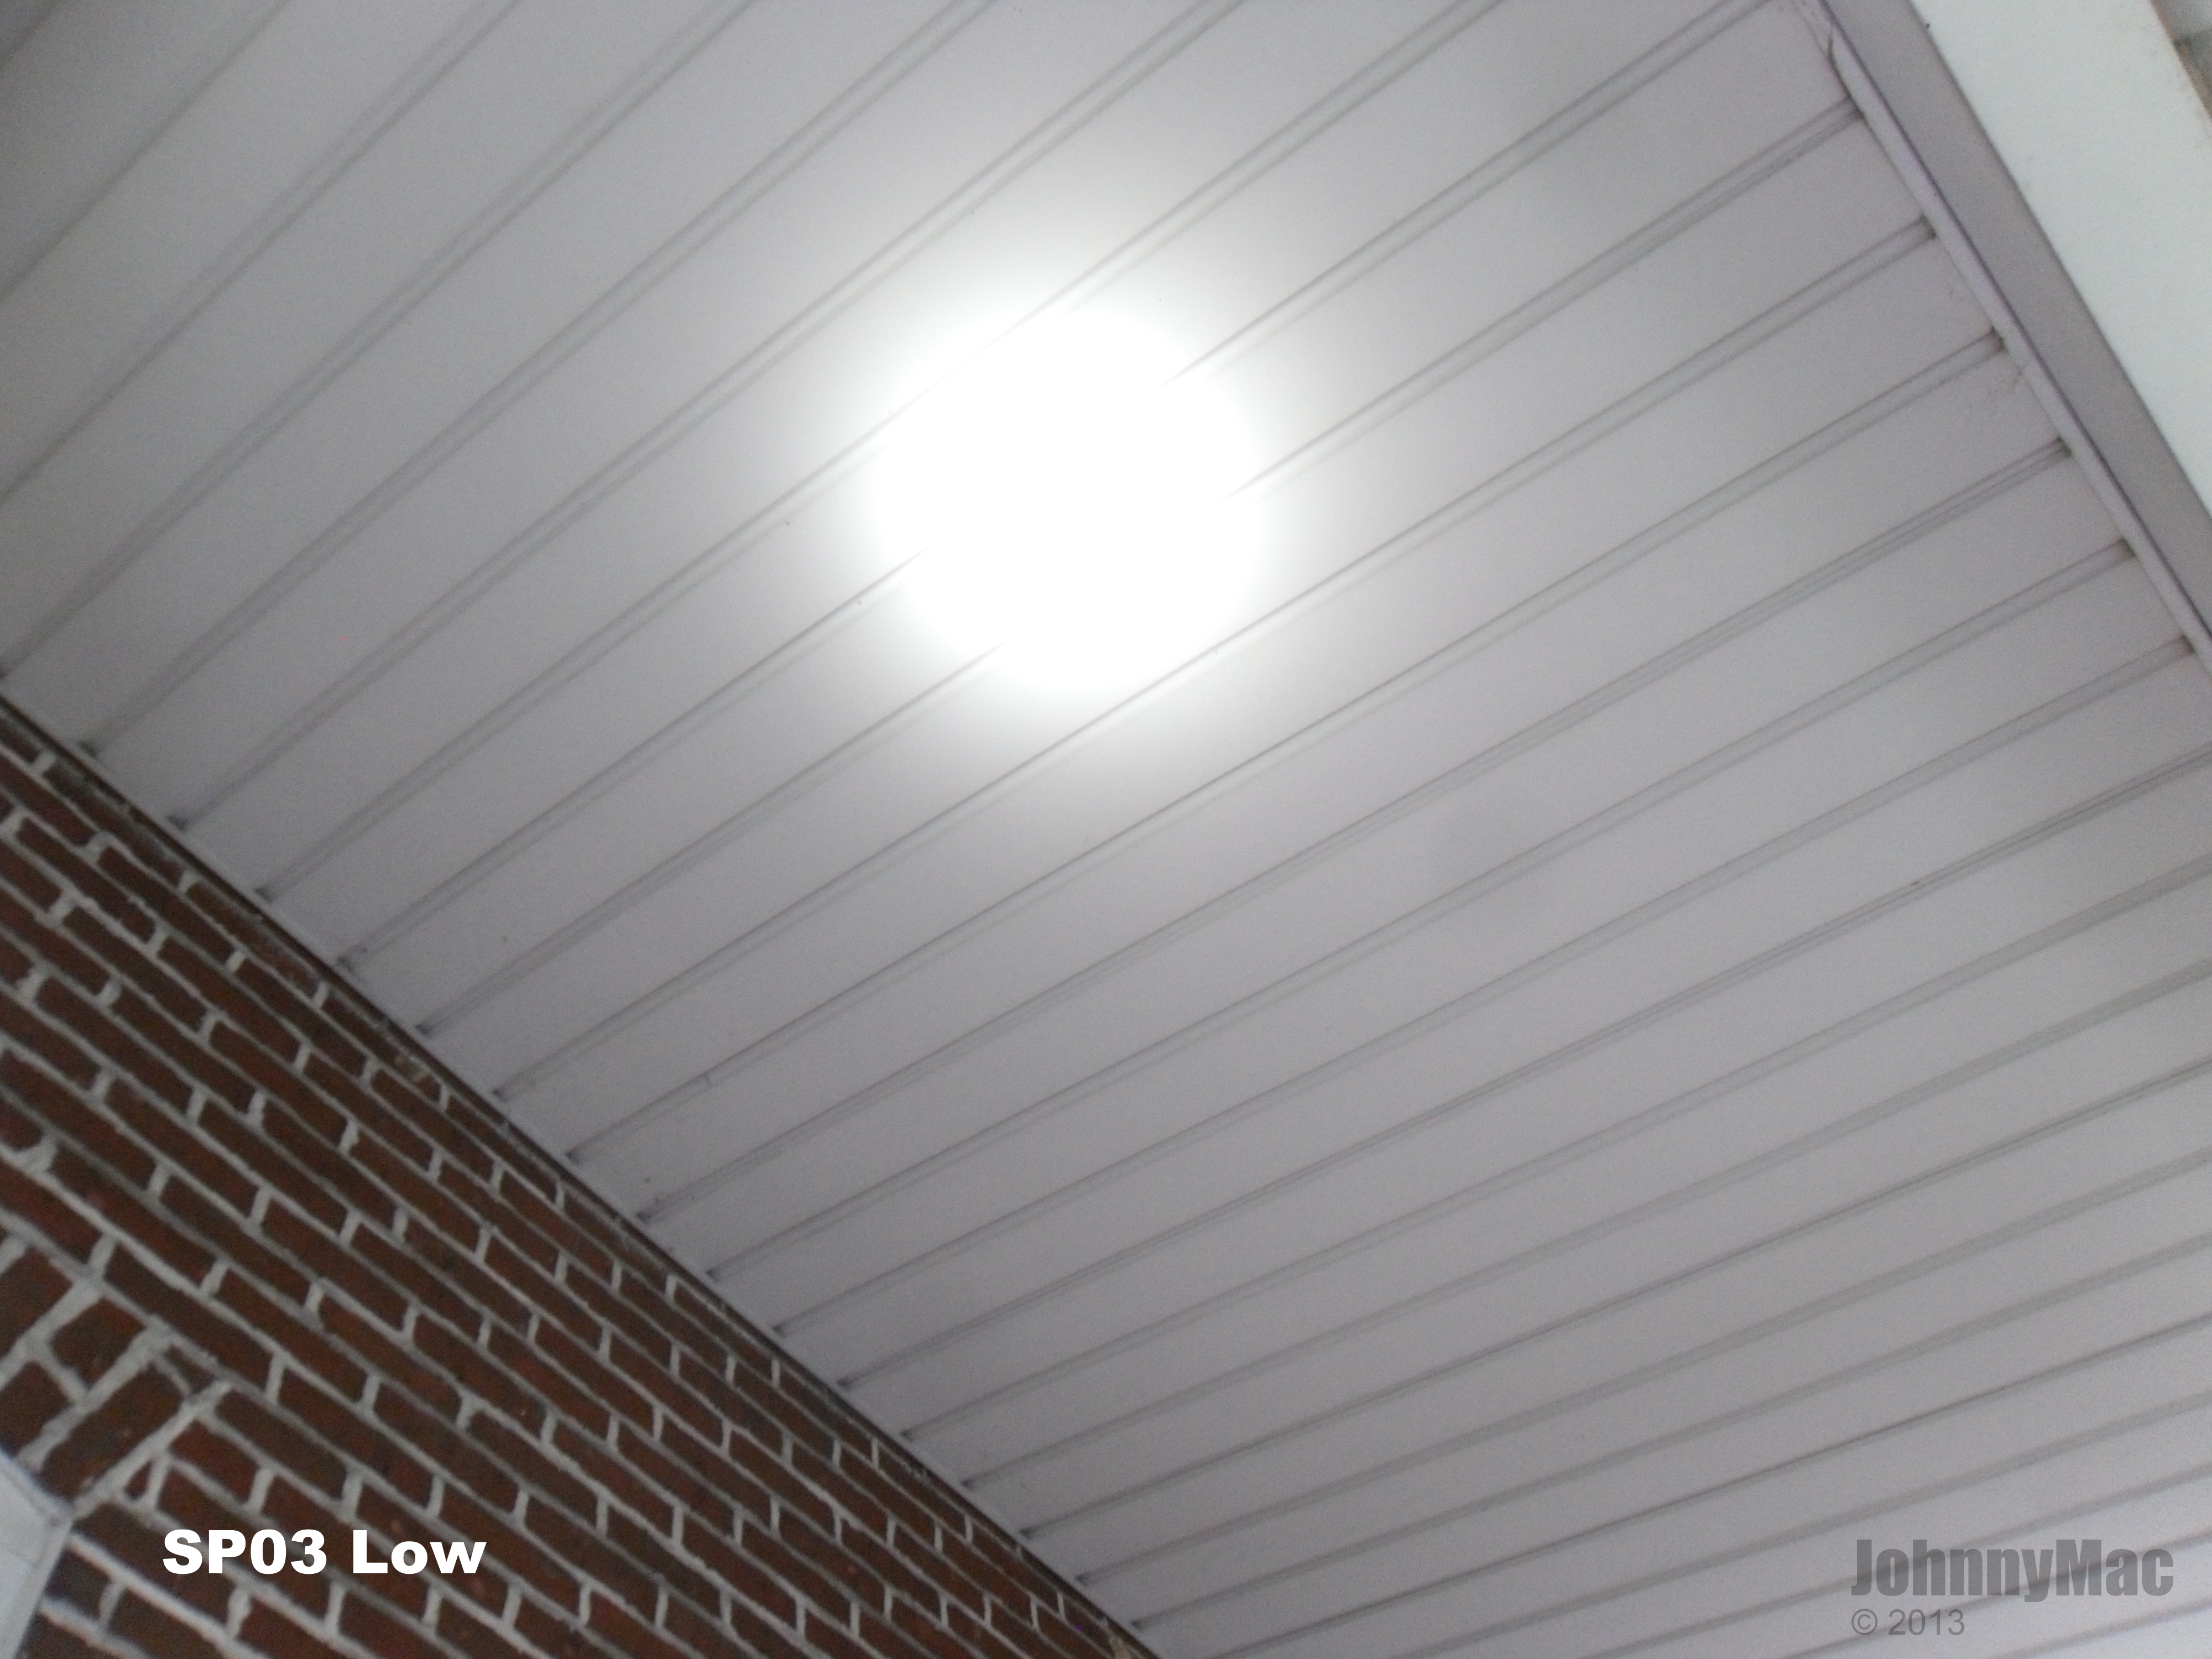
Flood is fair with a smooth, even spill with a bright, focused hotspot. There is PWM in Low and Medium modes but it's actually pretty fast and while noticeable if you are looking for it, it's WAY better than most budget lights and really not that bad. Below are some beam shots I took in broad daylight while enjoying some downtime after taking the photos for this review. Taking them in broad daylight really shows just how bright this light is. As soon as I can find a good location to take some long distance beam shots I will update the review with them.


CONSTRUCTION and DETAILS
The SP03 arrived from Solarstorm in a sturdy corrugated box with a simple but nice label.

Inside the box is the light packed in closed cell foam. Included with the light is a zip-locked bag with a nice lanyard, a spare O-ring, and a manual written in Chinese.
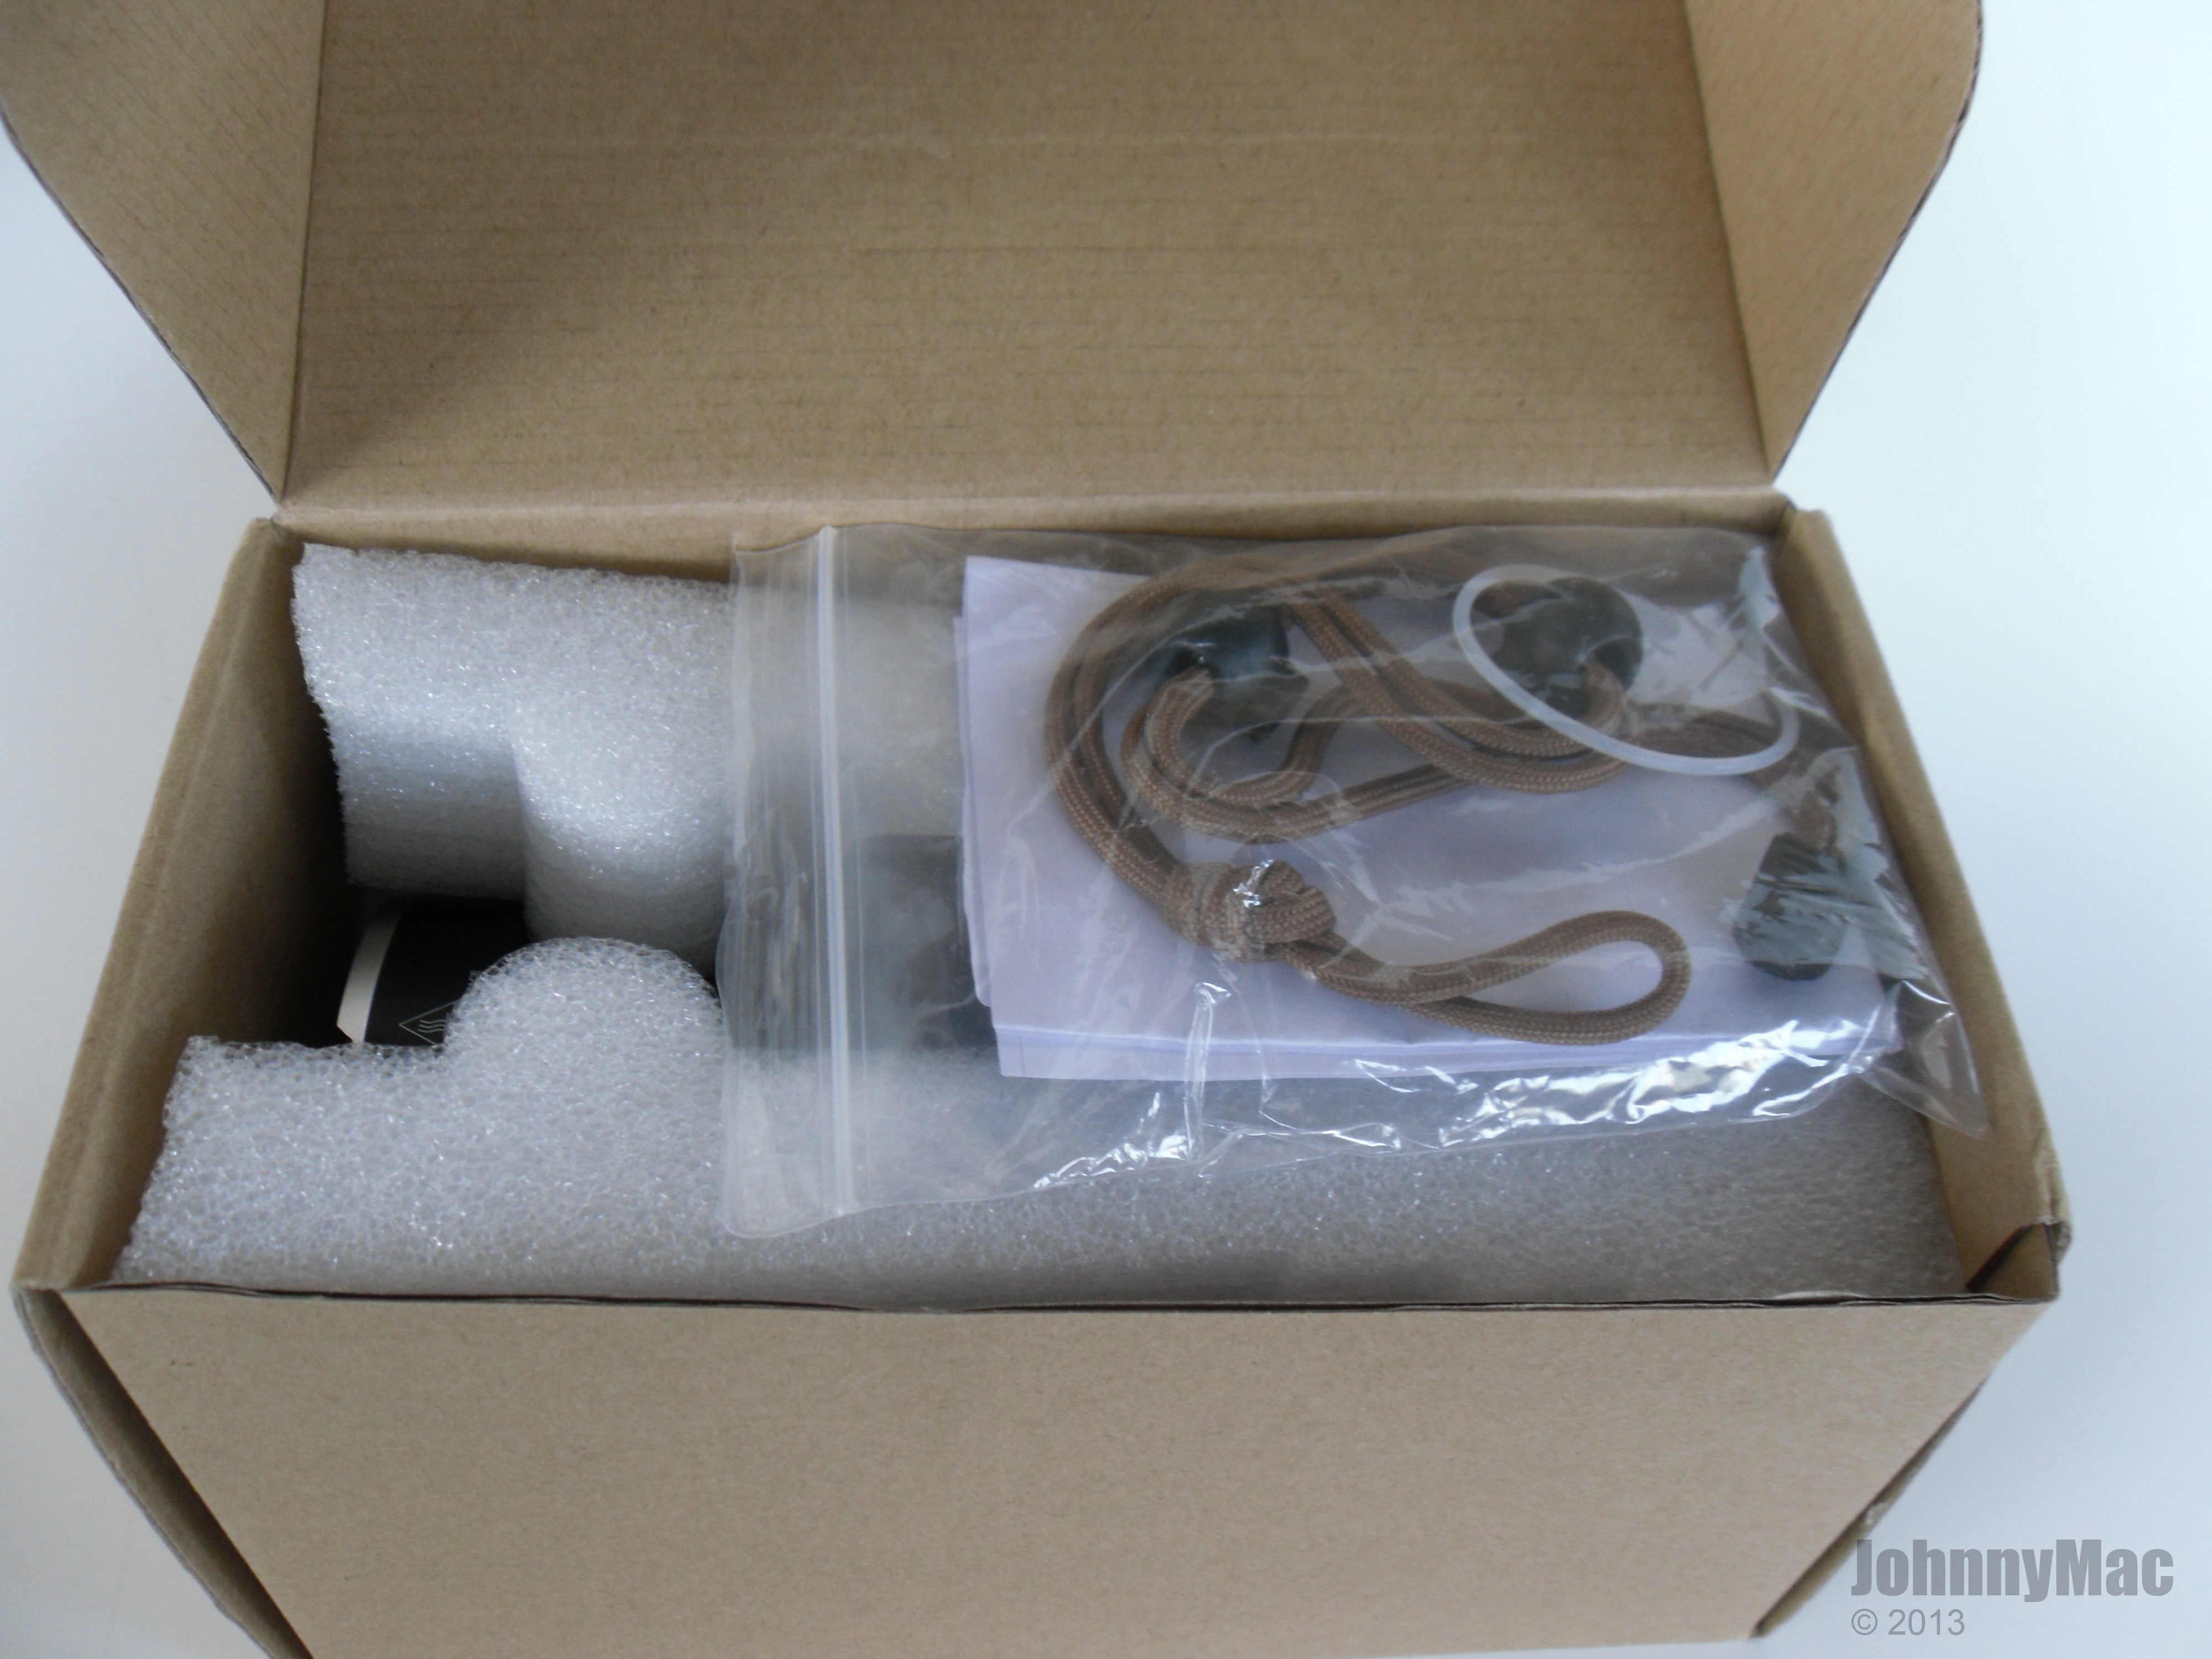
The SP03 is securely held during shipping.
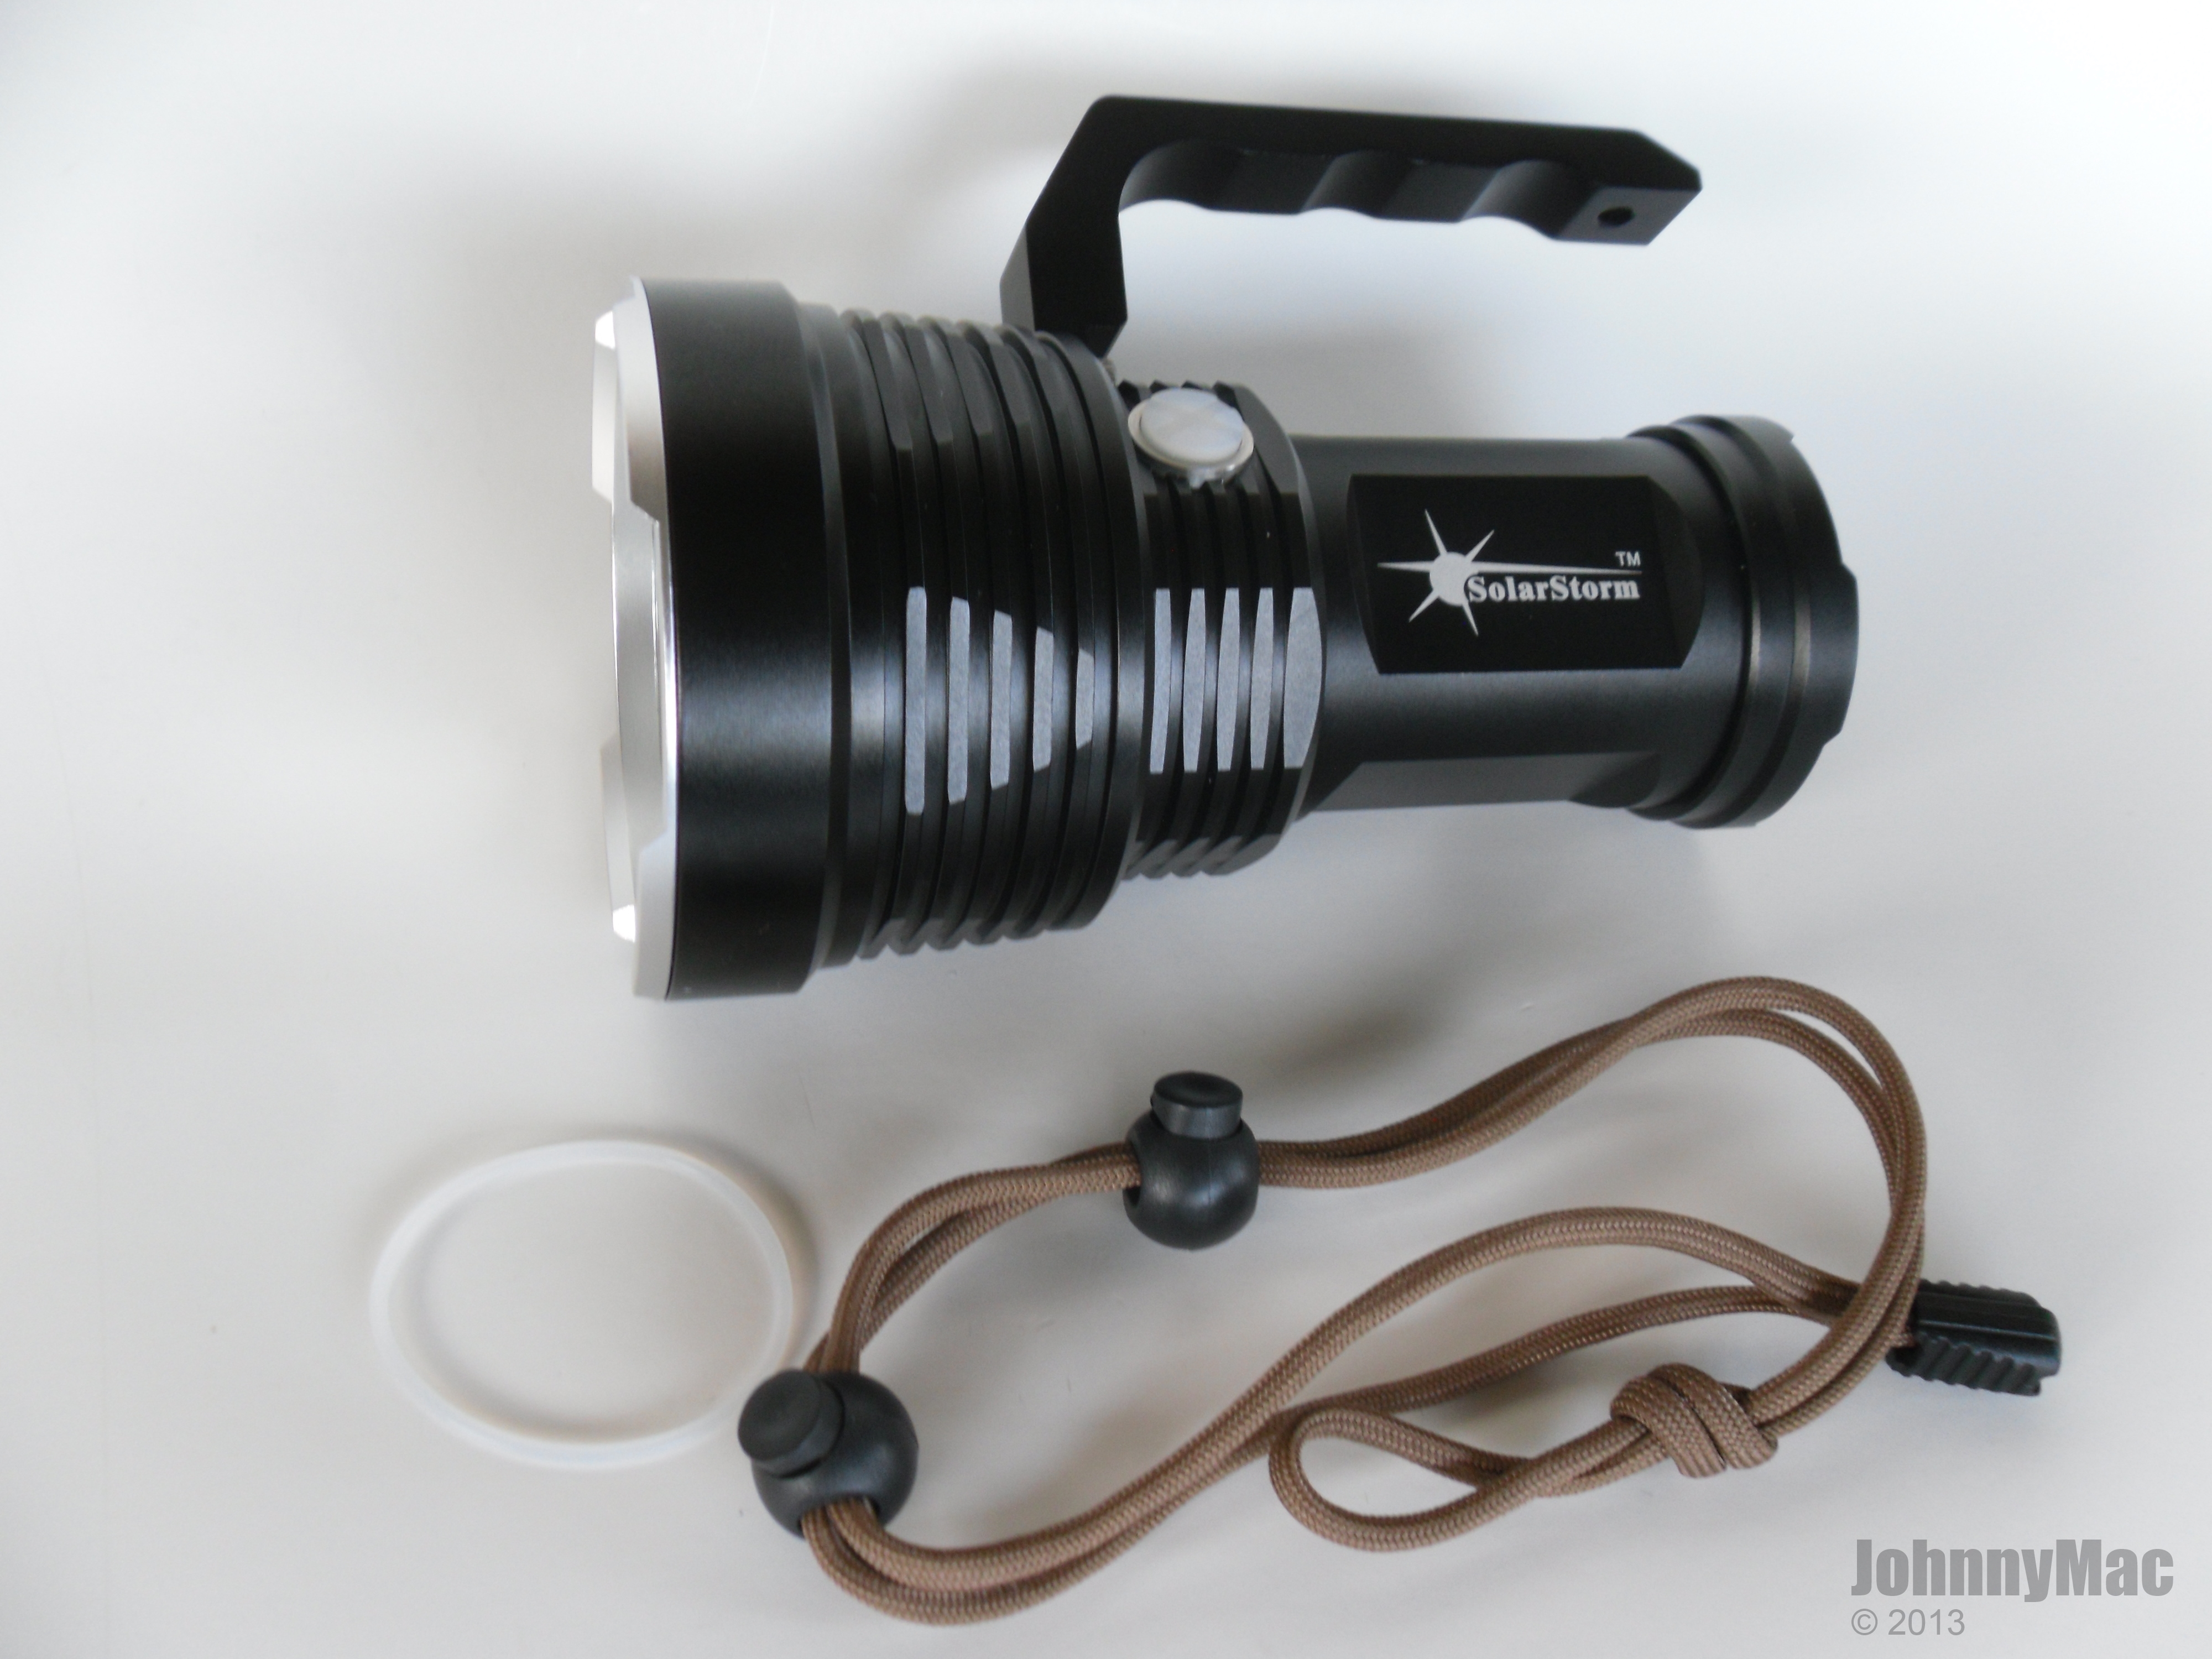
Here are the contents out of the box. This is a fine looking light!
The instructions might be great if you can read Chinese but even if you can't you can still pickup the basic gist of things like battery orientation, power lockout, and what button to press to make something happen.

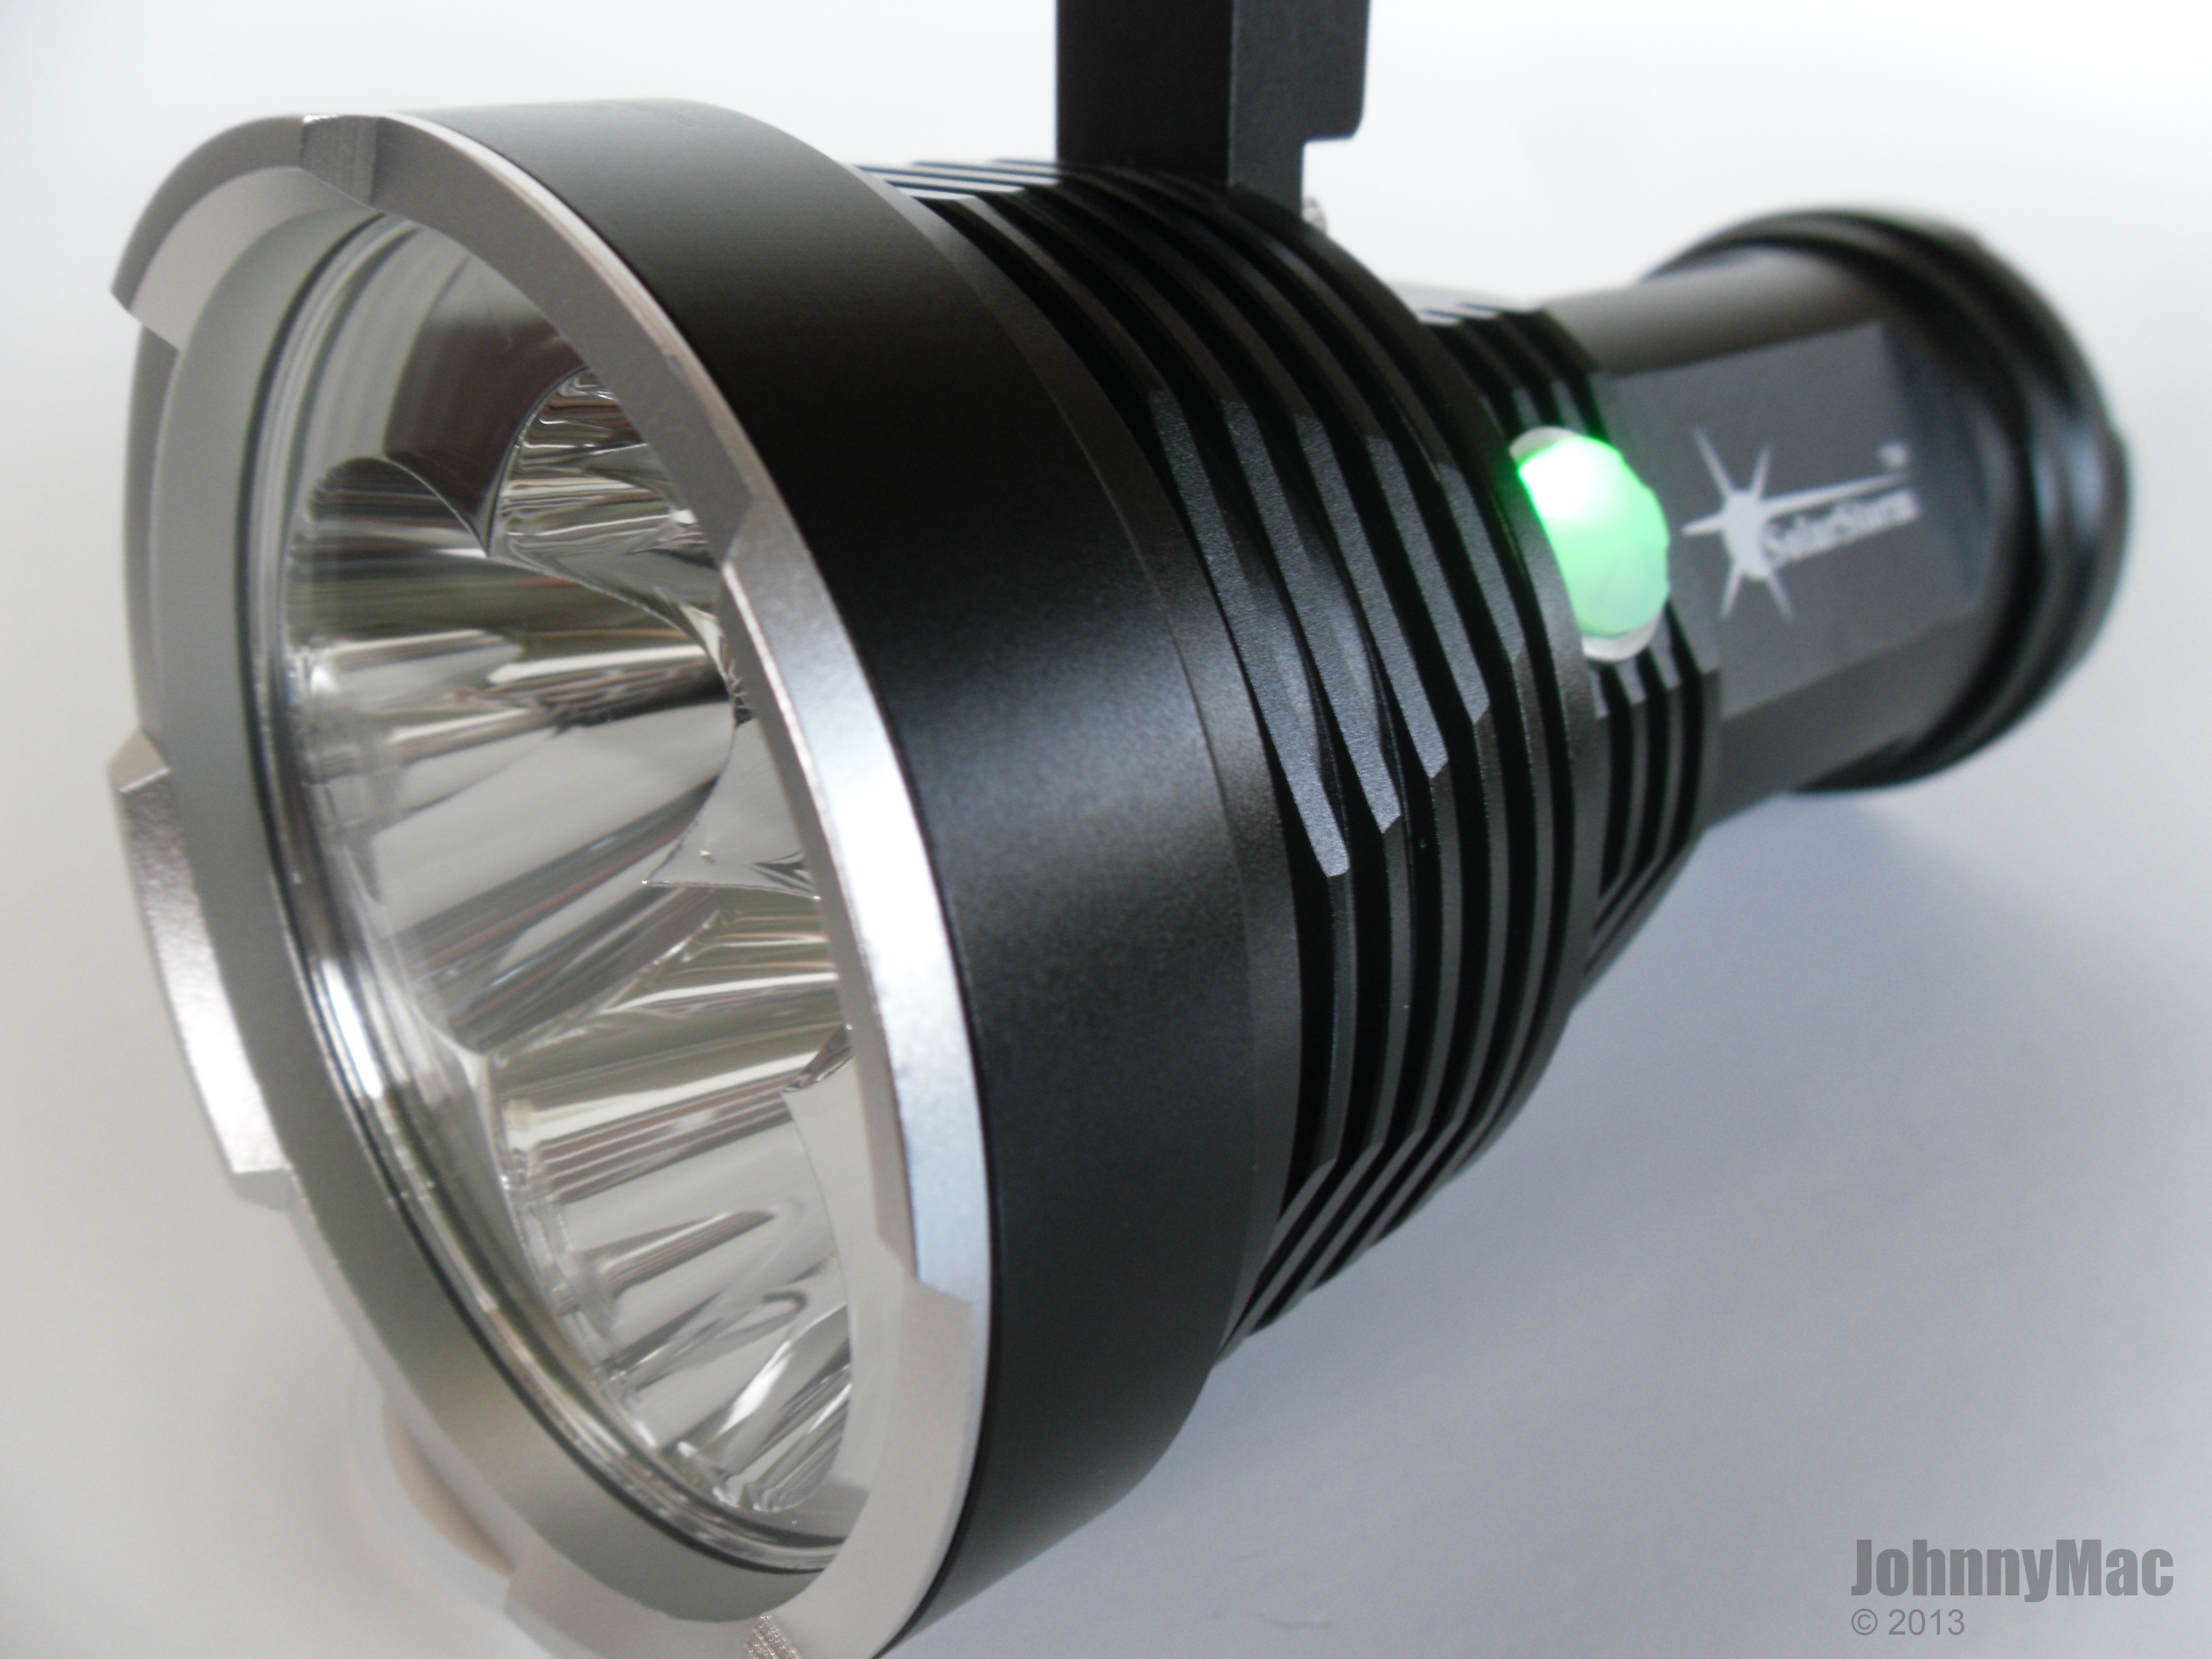
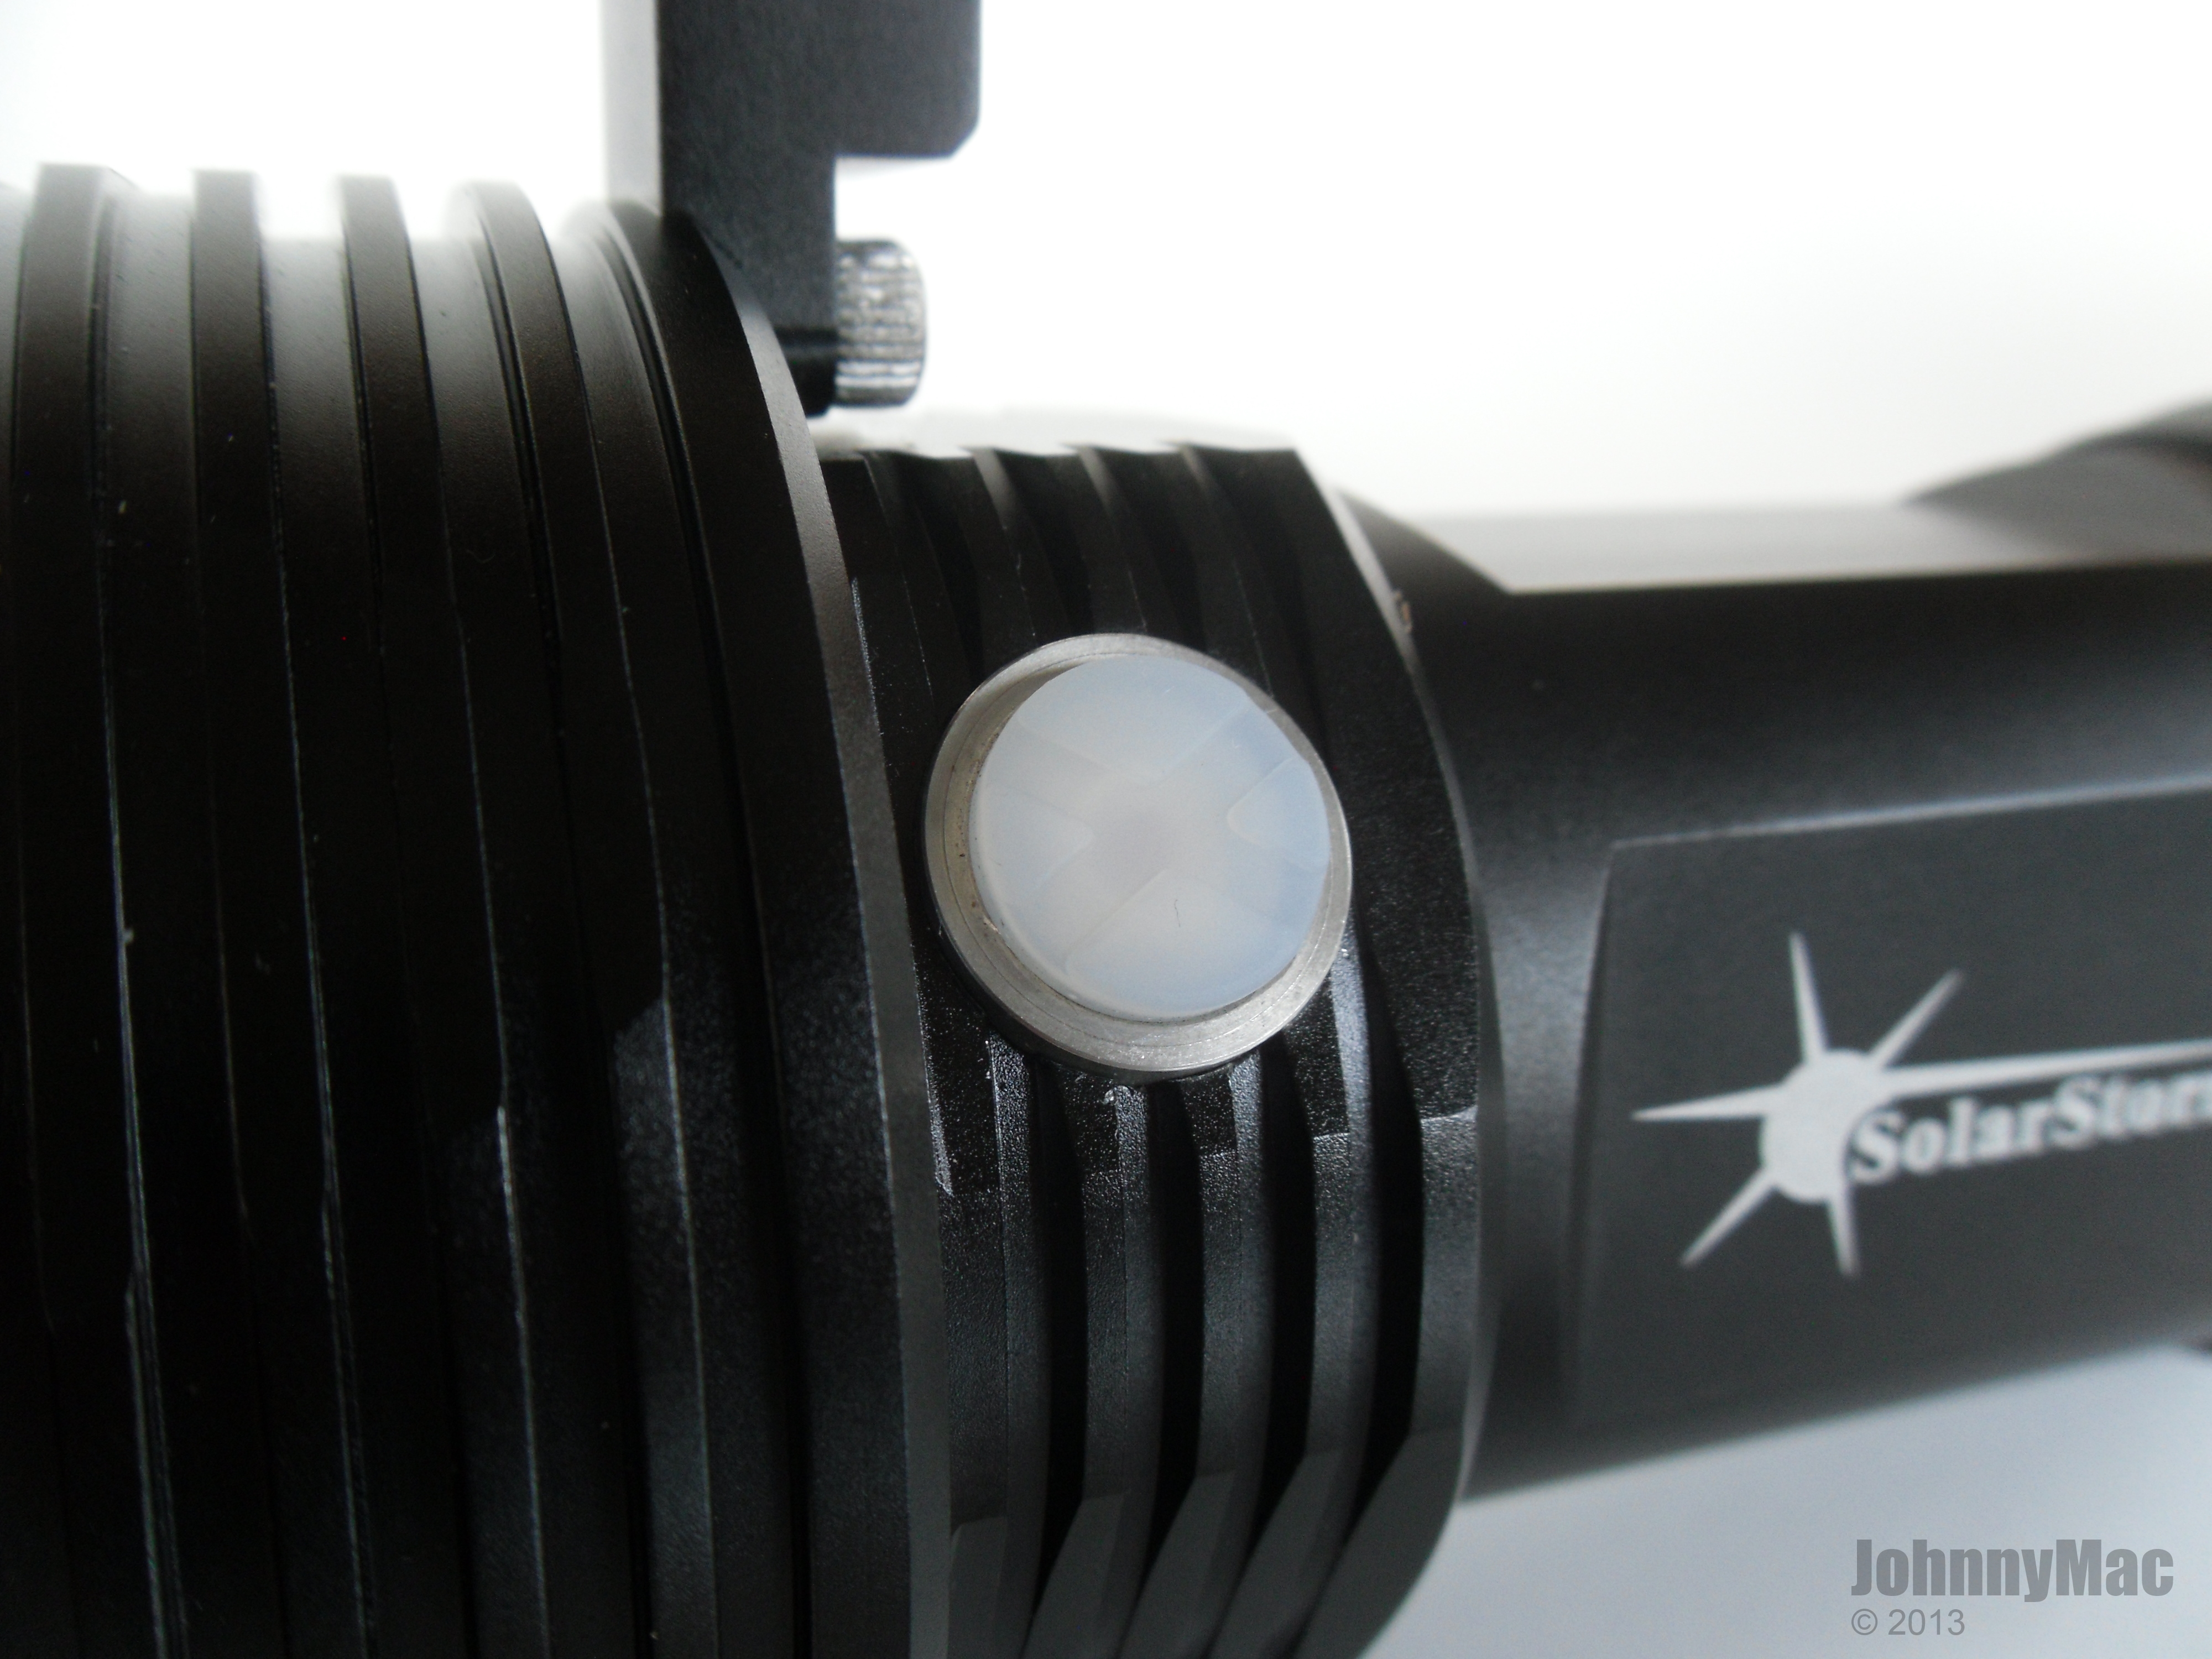
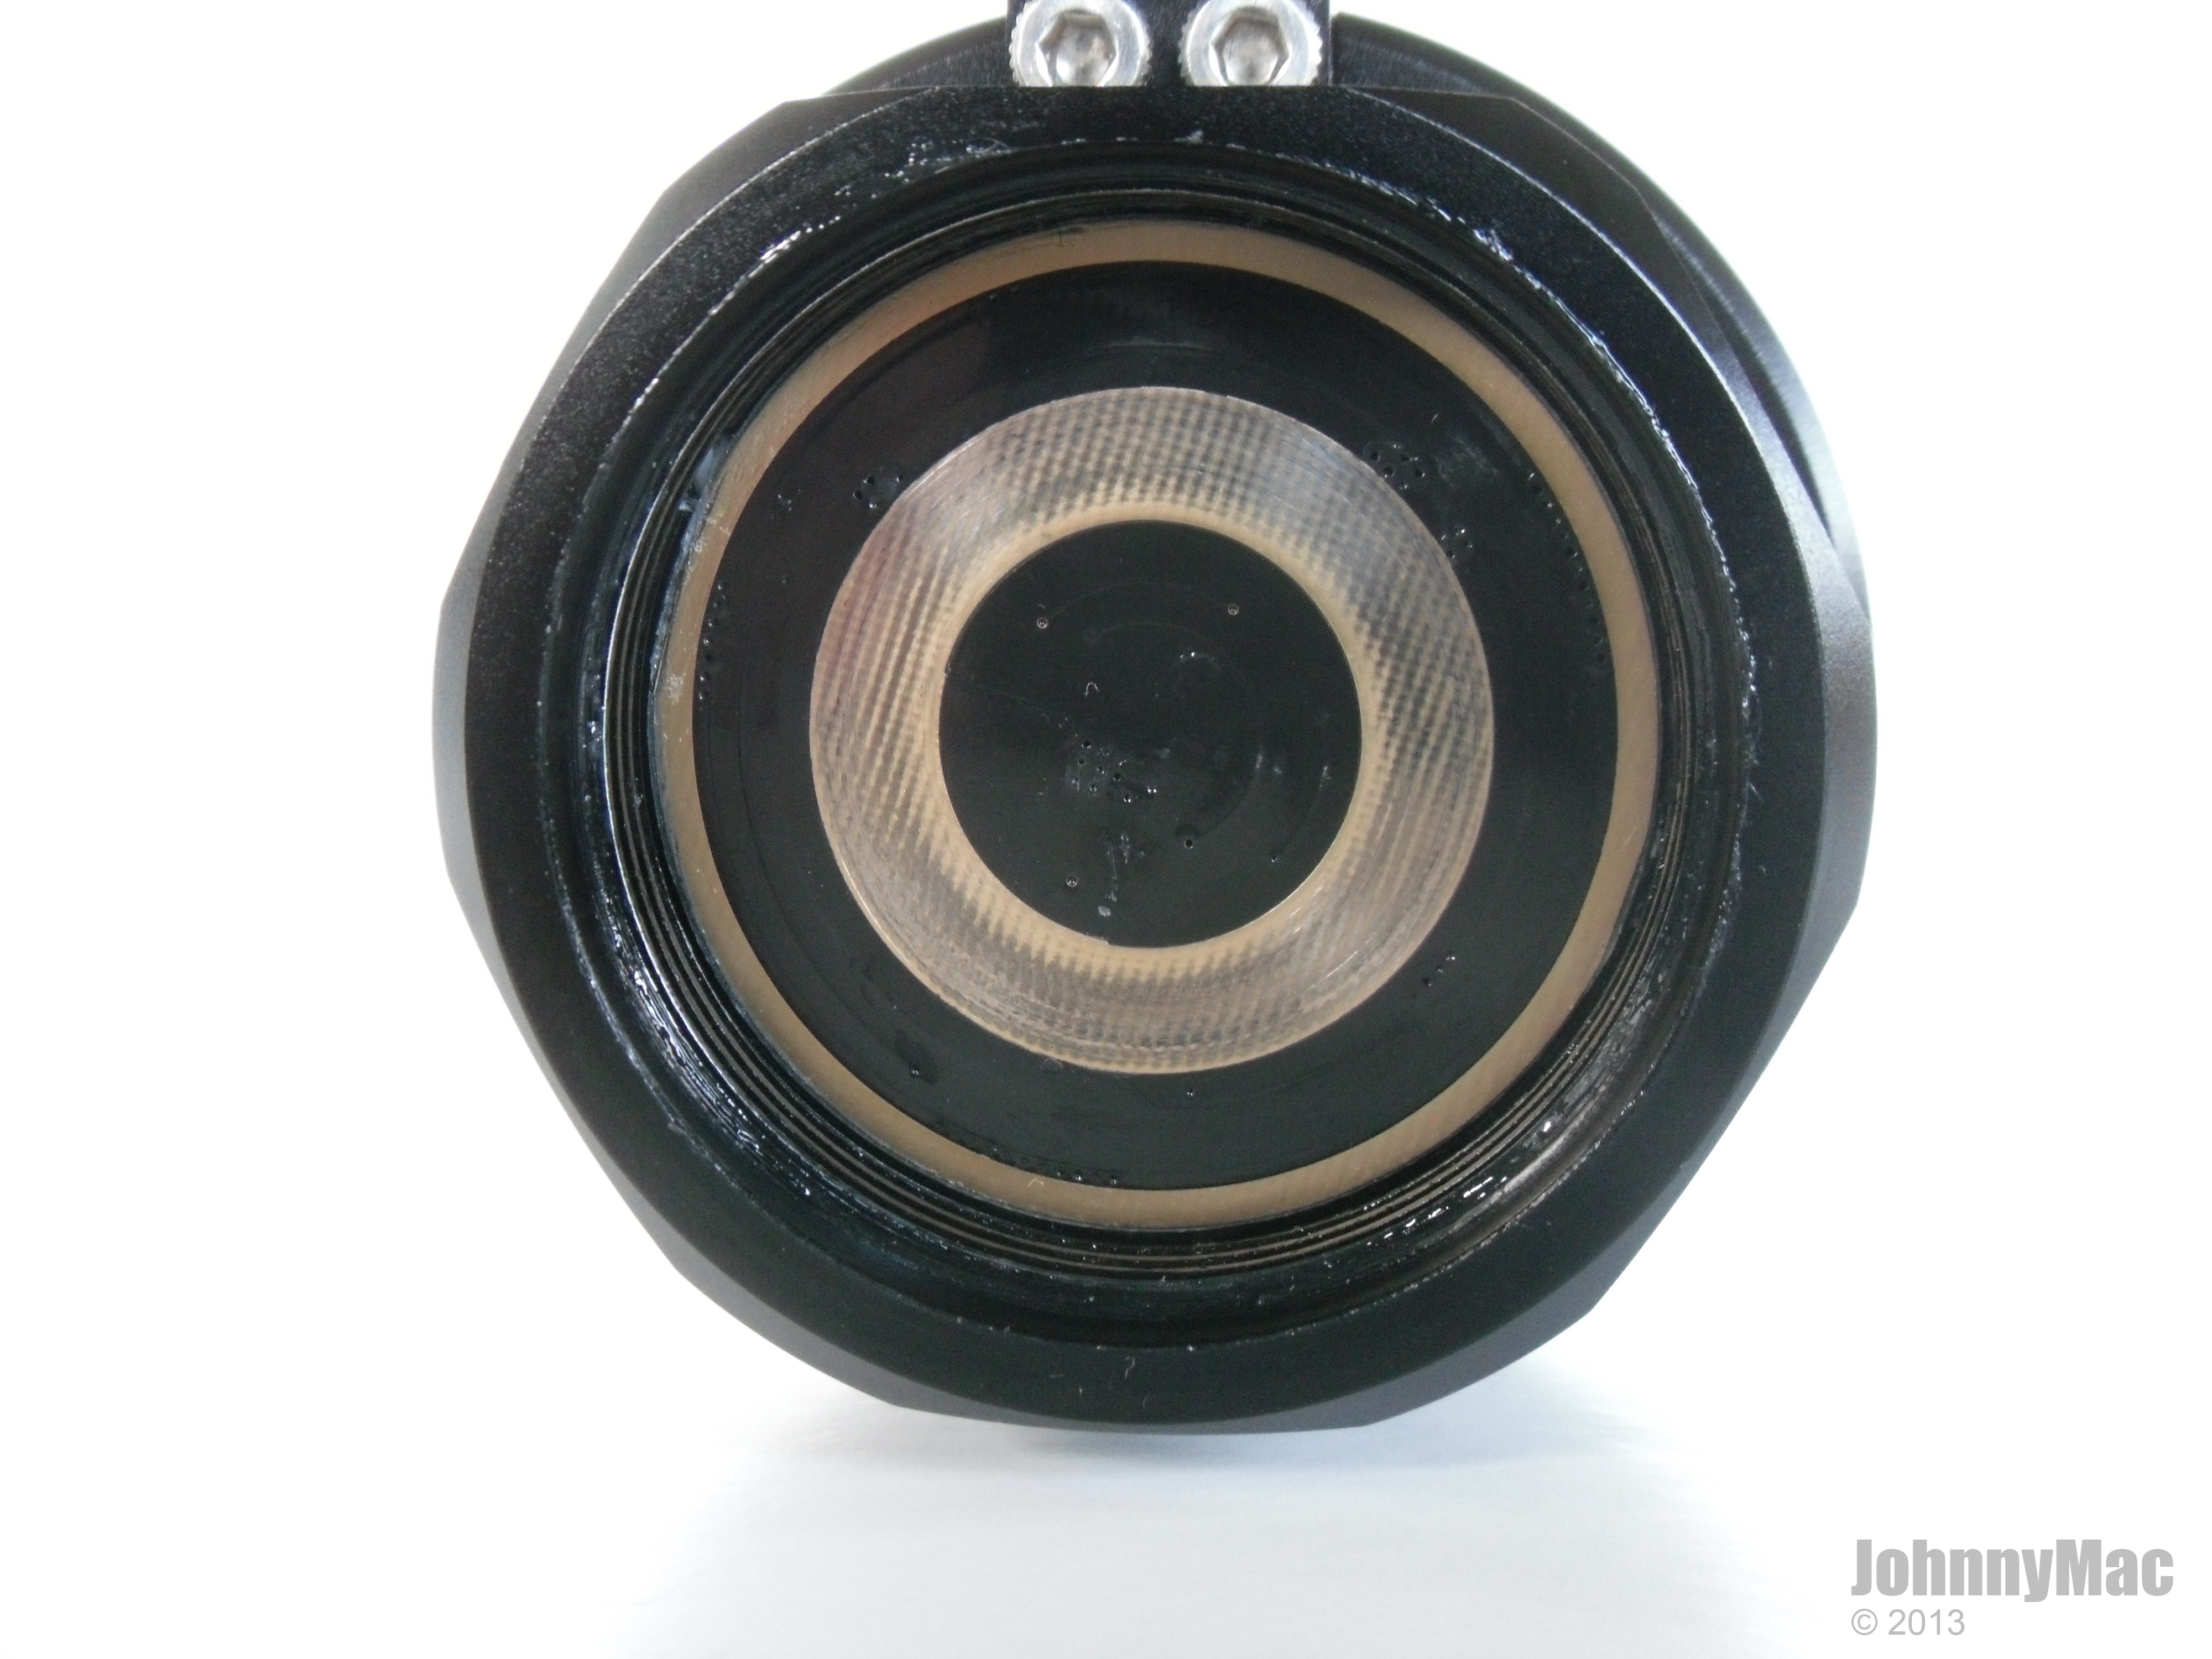
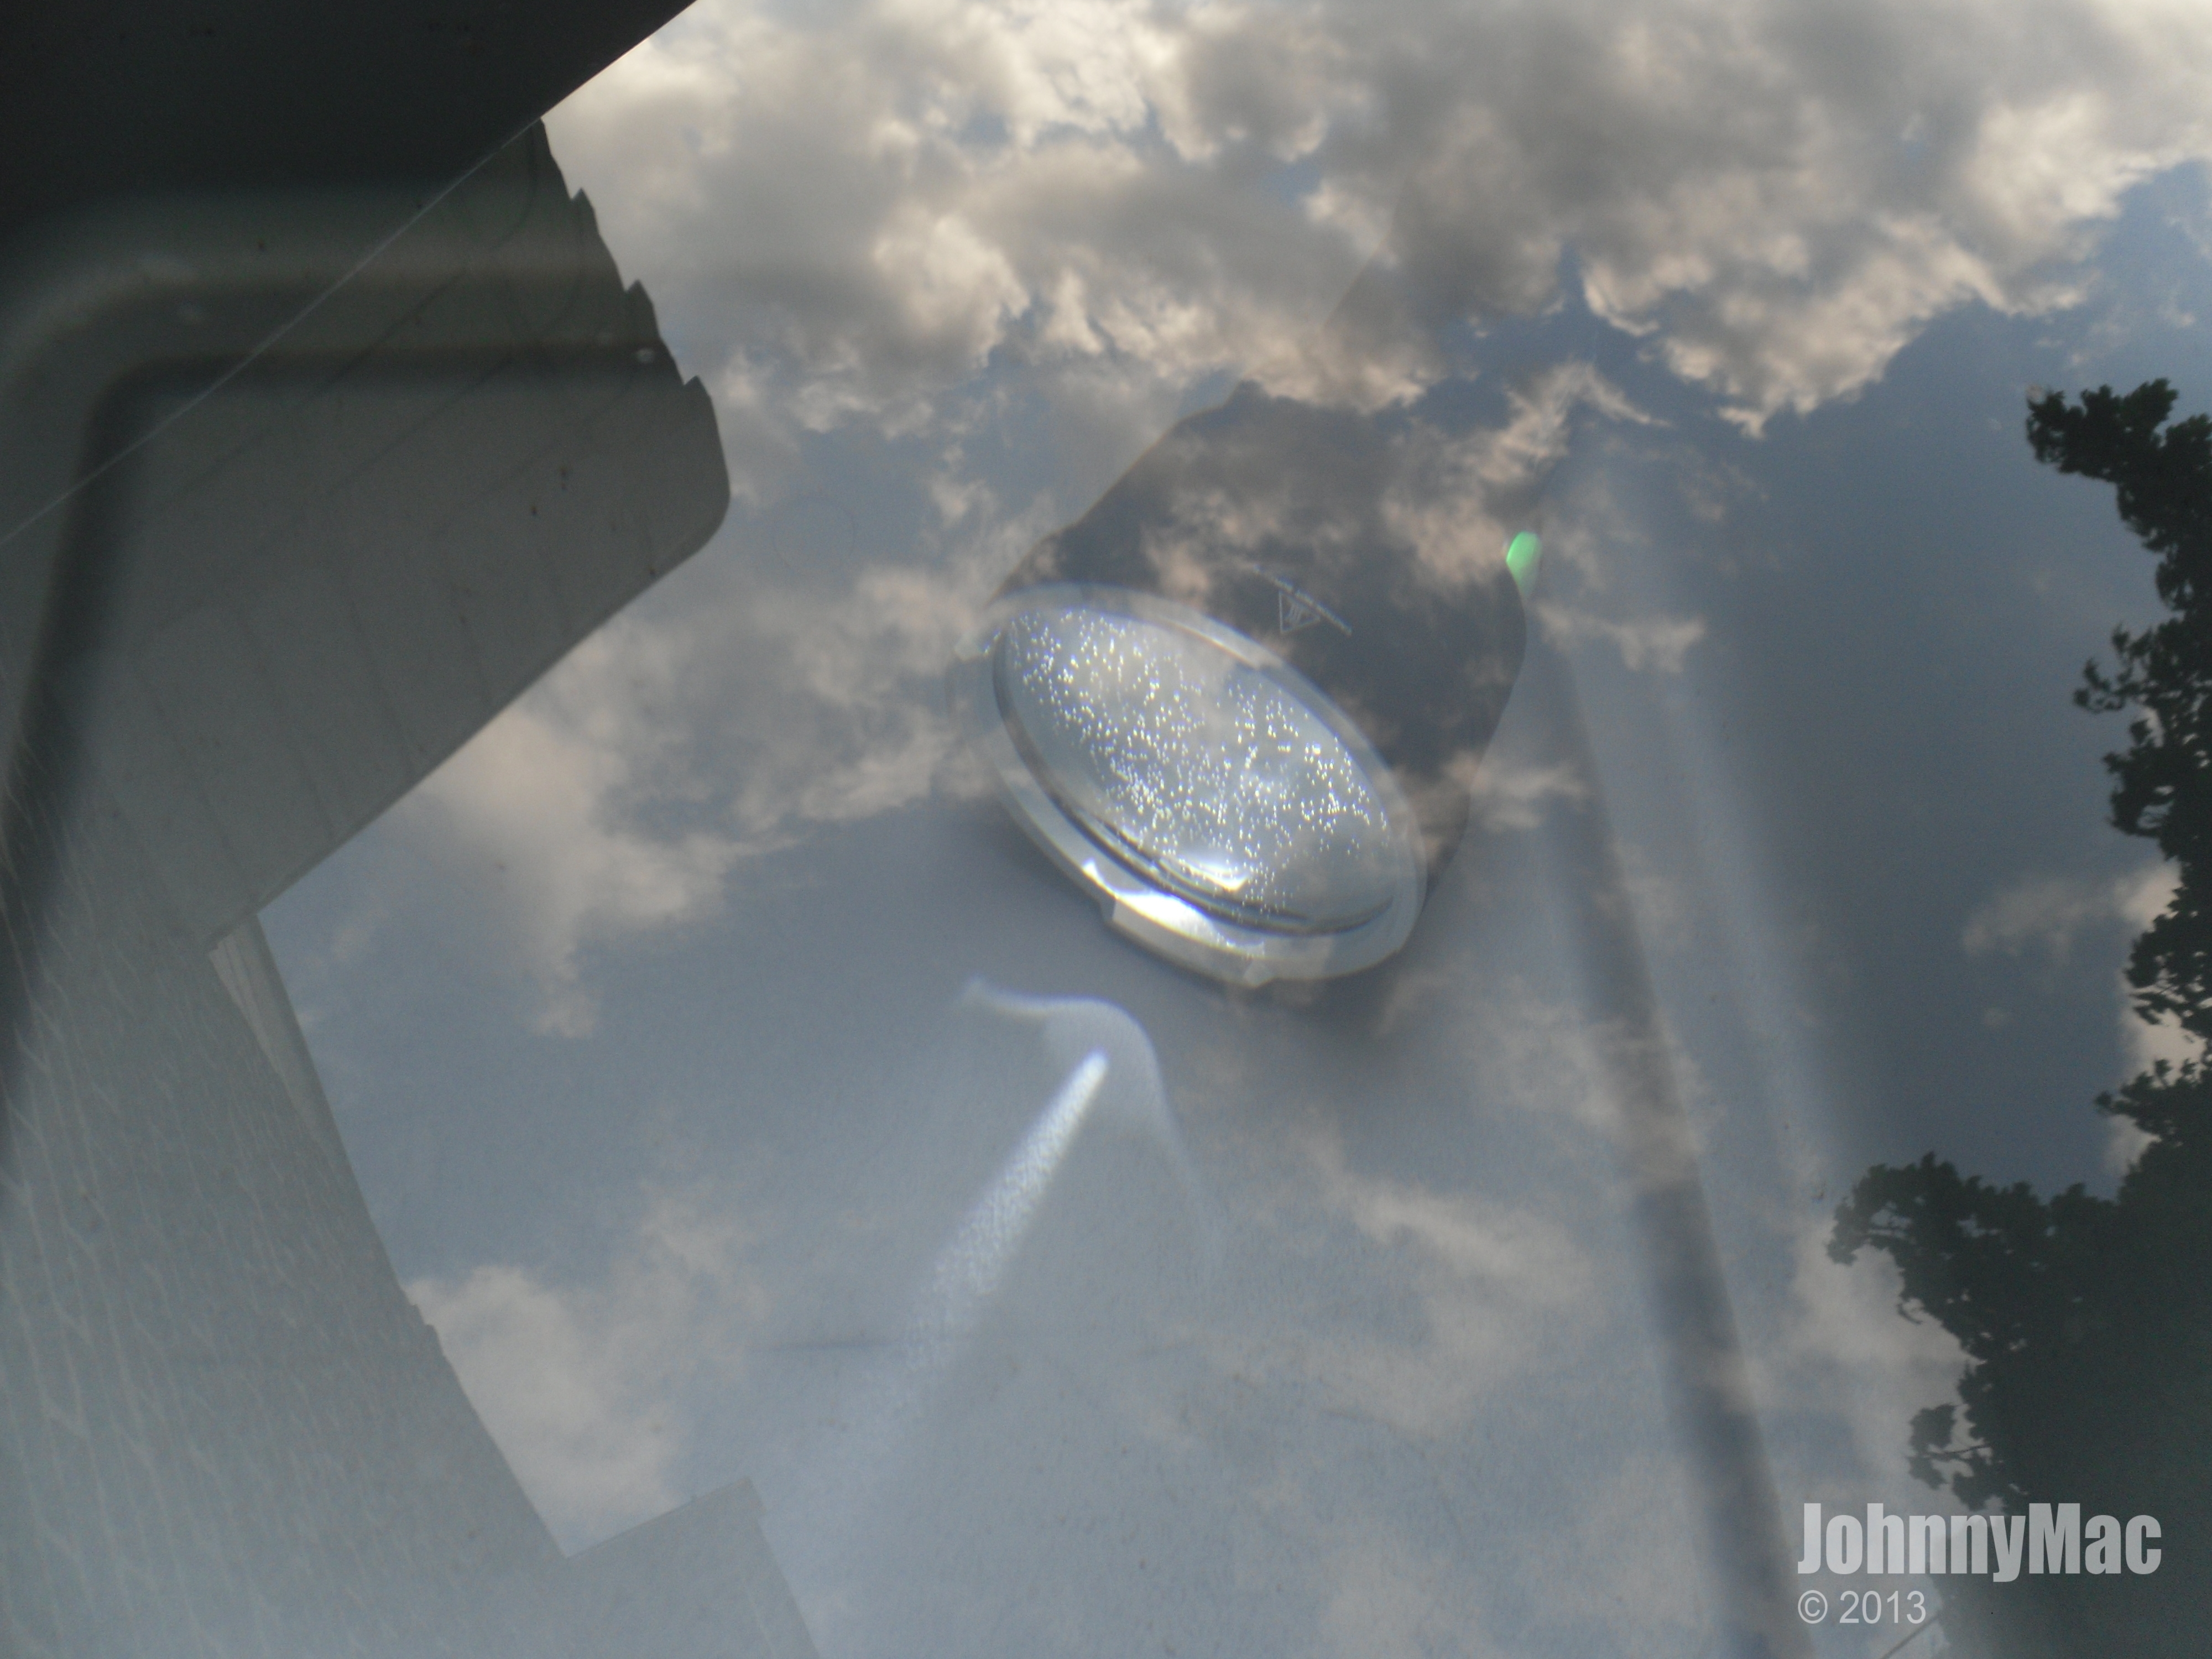
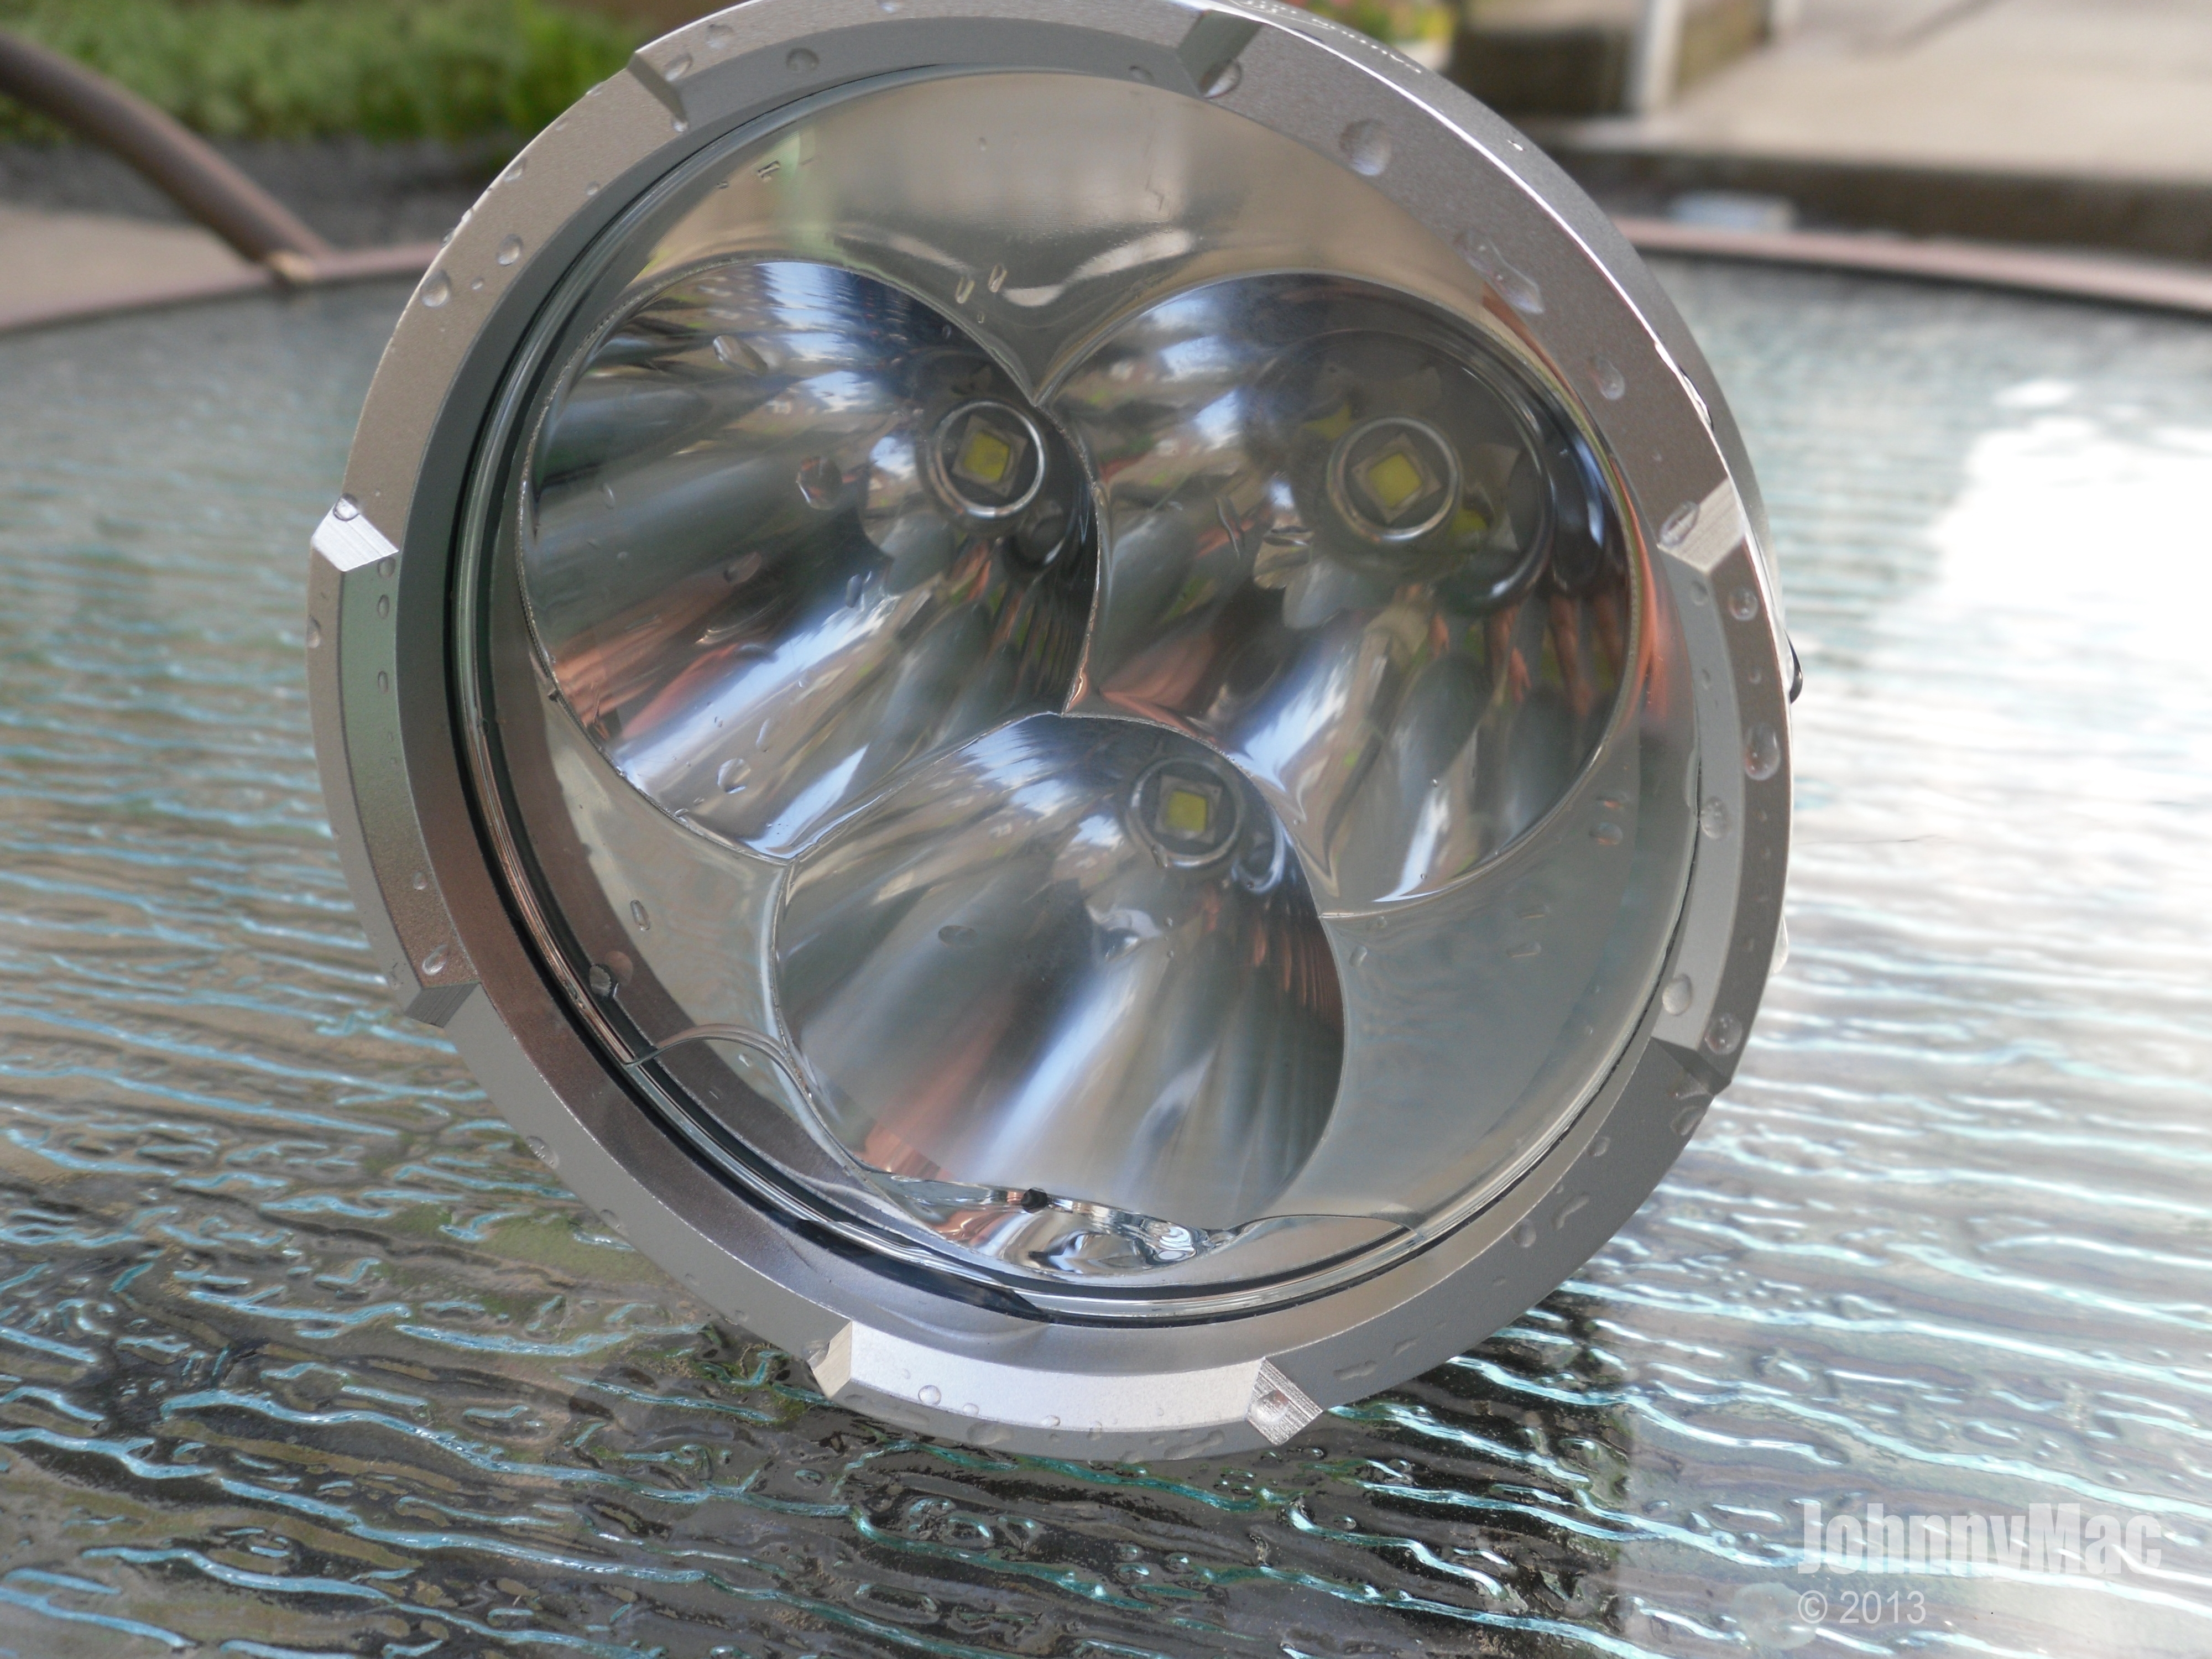
The reflector in the SP03 is pretty spectacular. My example was free of dust and nicely polished. The emitters are perfectly centered.

Cree XM-L2 emitters are deep inside 37mm individual reflectors.

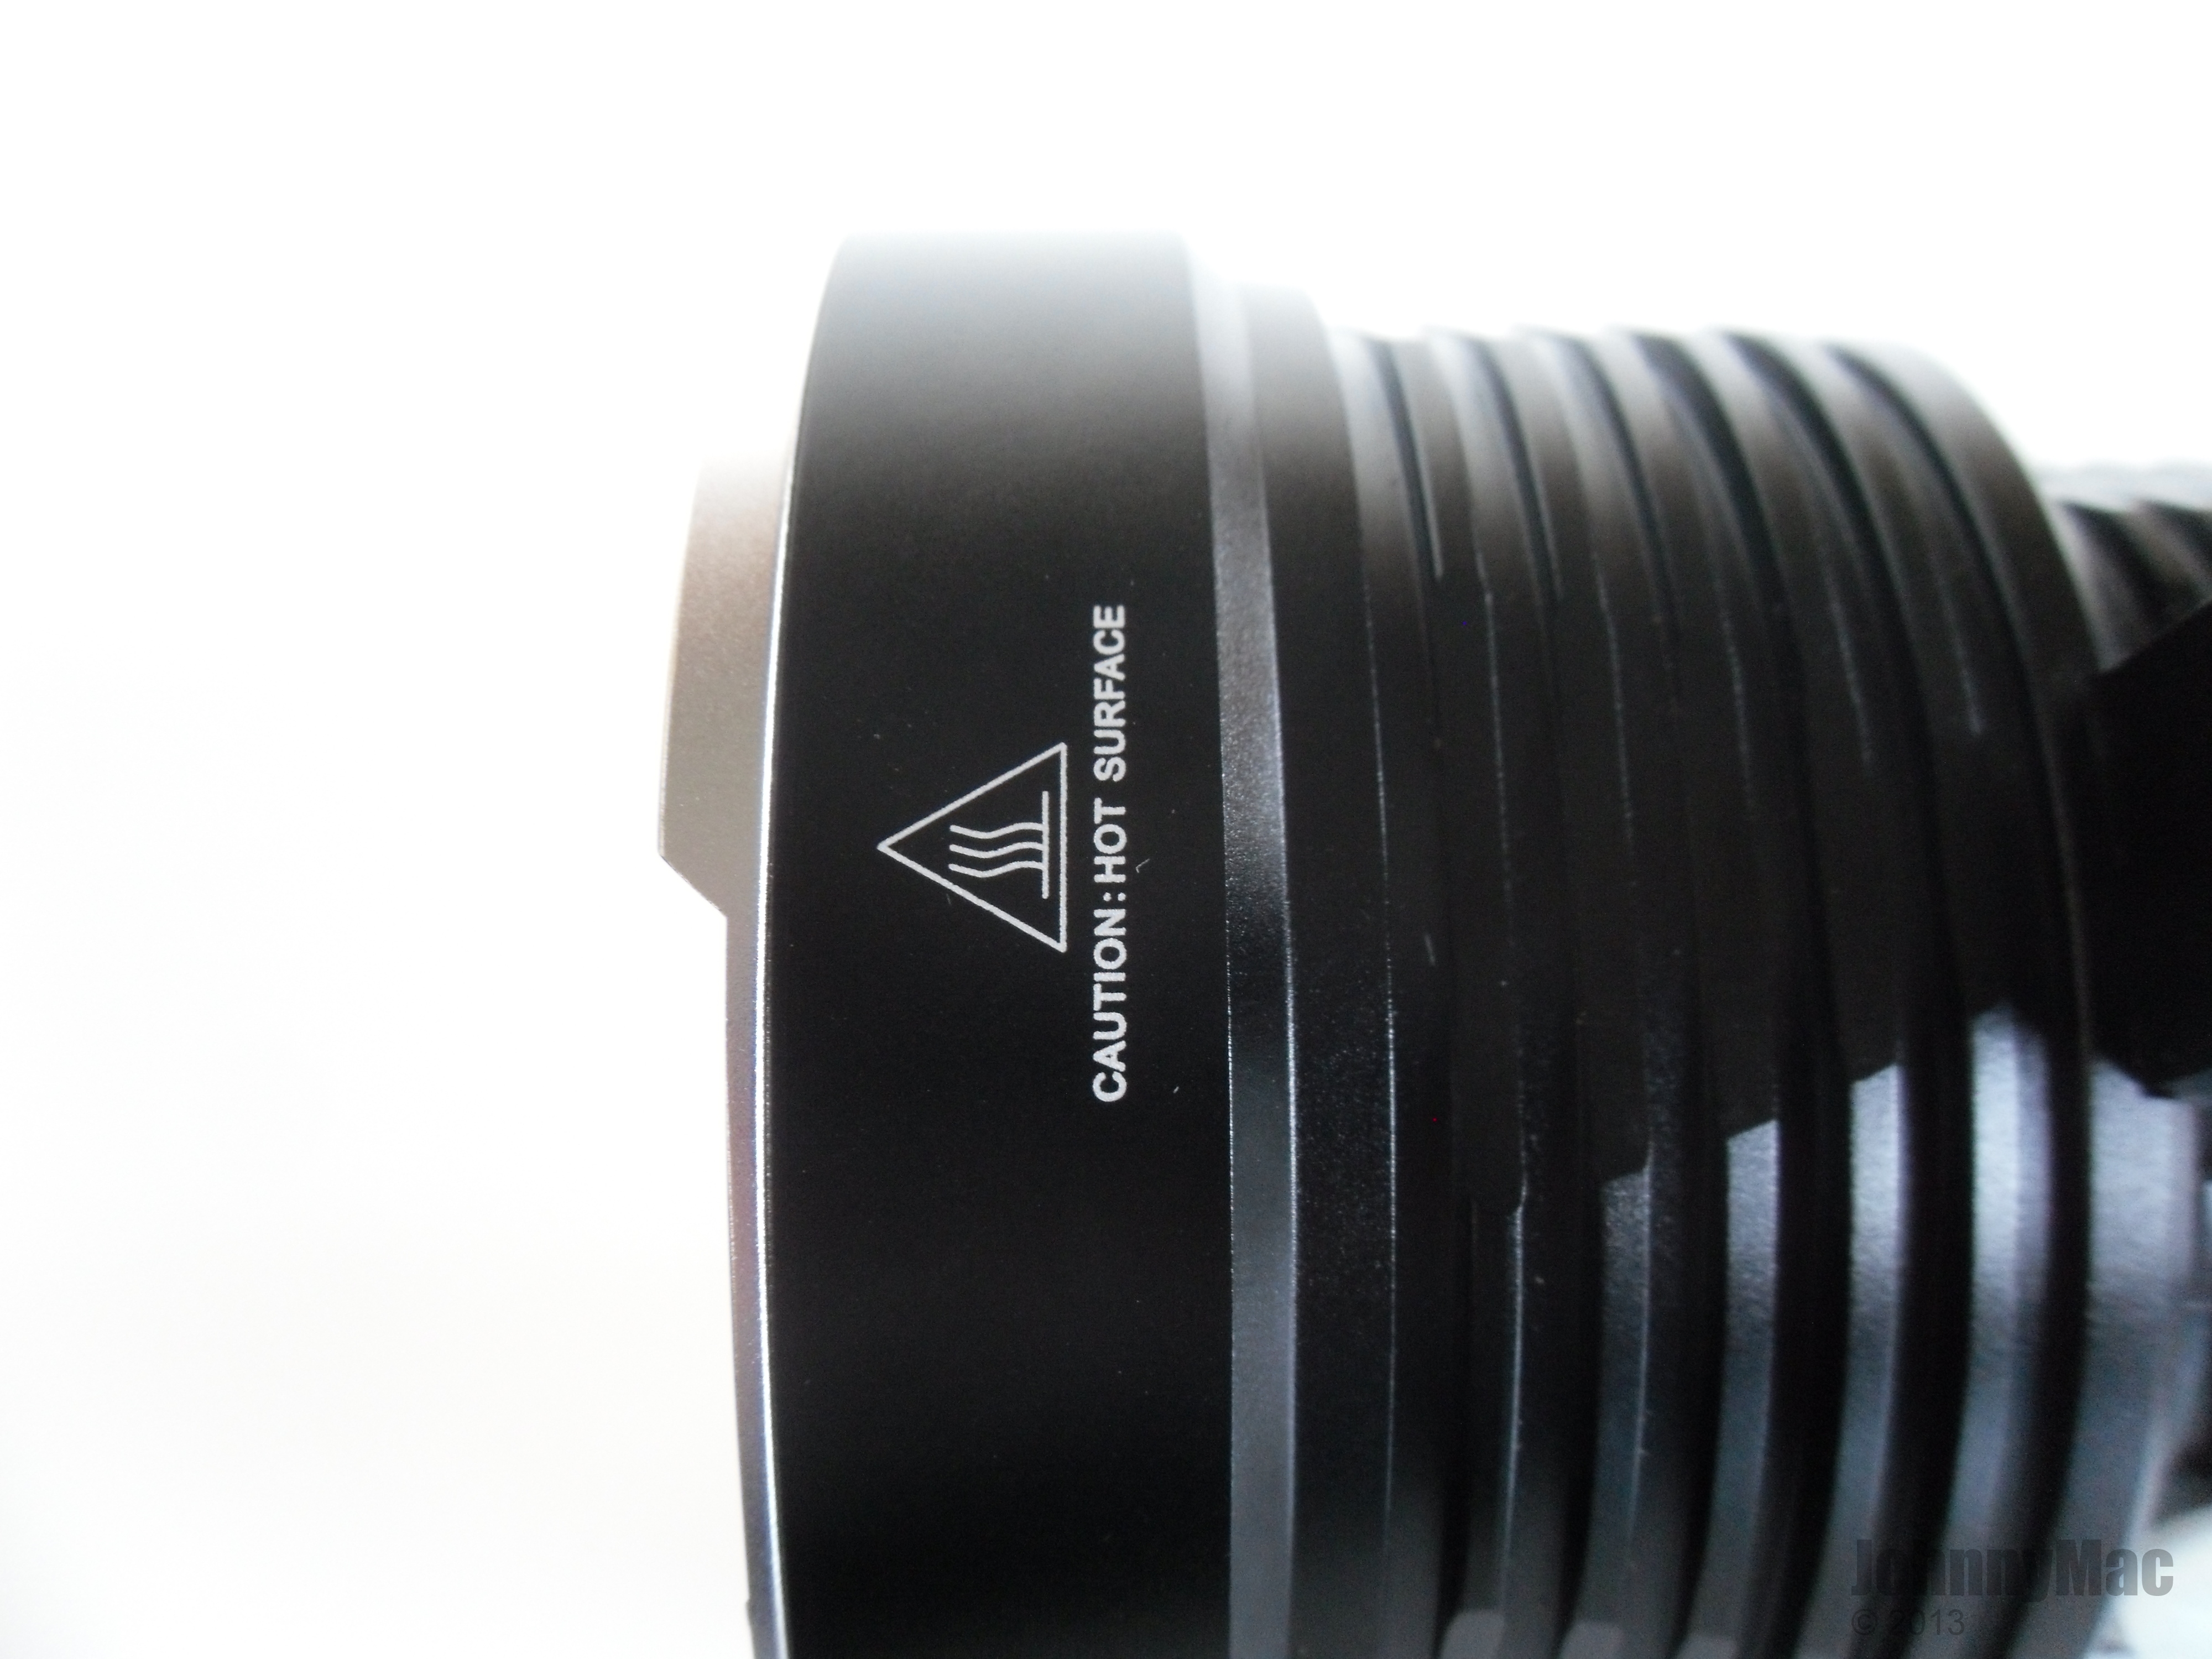
The lightly crenelated aluminum bezel surrounds the head but doesn't add a whole lot of protection. It would have been nicer if the bezel was made from stainless steel. If the light is dropped the bezel won't do much to protect the head from impact damage. As it is though, it threads smoothly and allows access to the lens and reflector. If anything, it is decently machined.
While Solarstorm doesn't claim anything about the lens other than optical grade glass, at times, when the light is on, I almost swear I see a faint purple tint on the inside of the glass. I know it's not the emitters because the spill is free of any purple or green tint. I will not claim any AR coating though since the manufacturer does not make such a claim and I can't be sure of what I'm seeing.

The lens is reasonably thick.

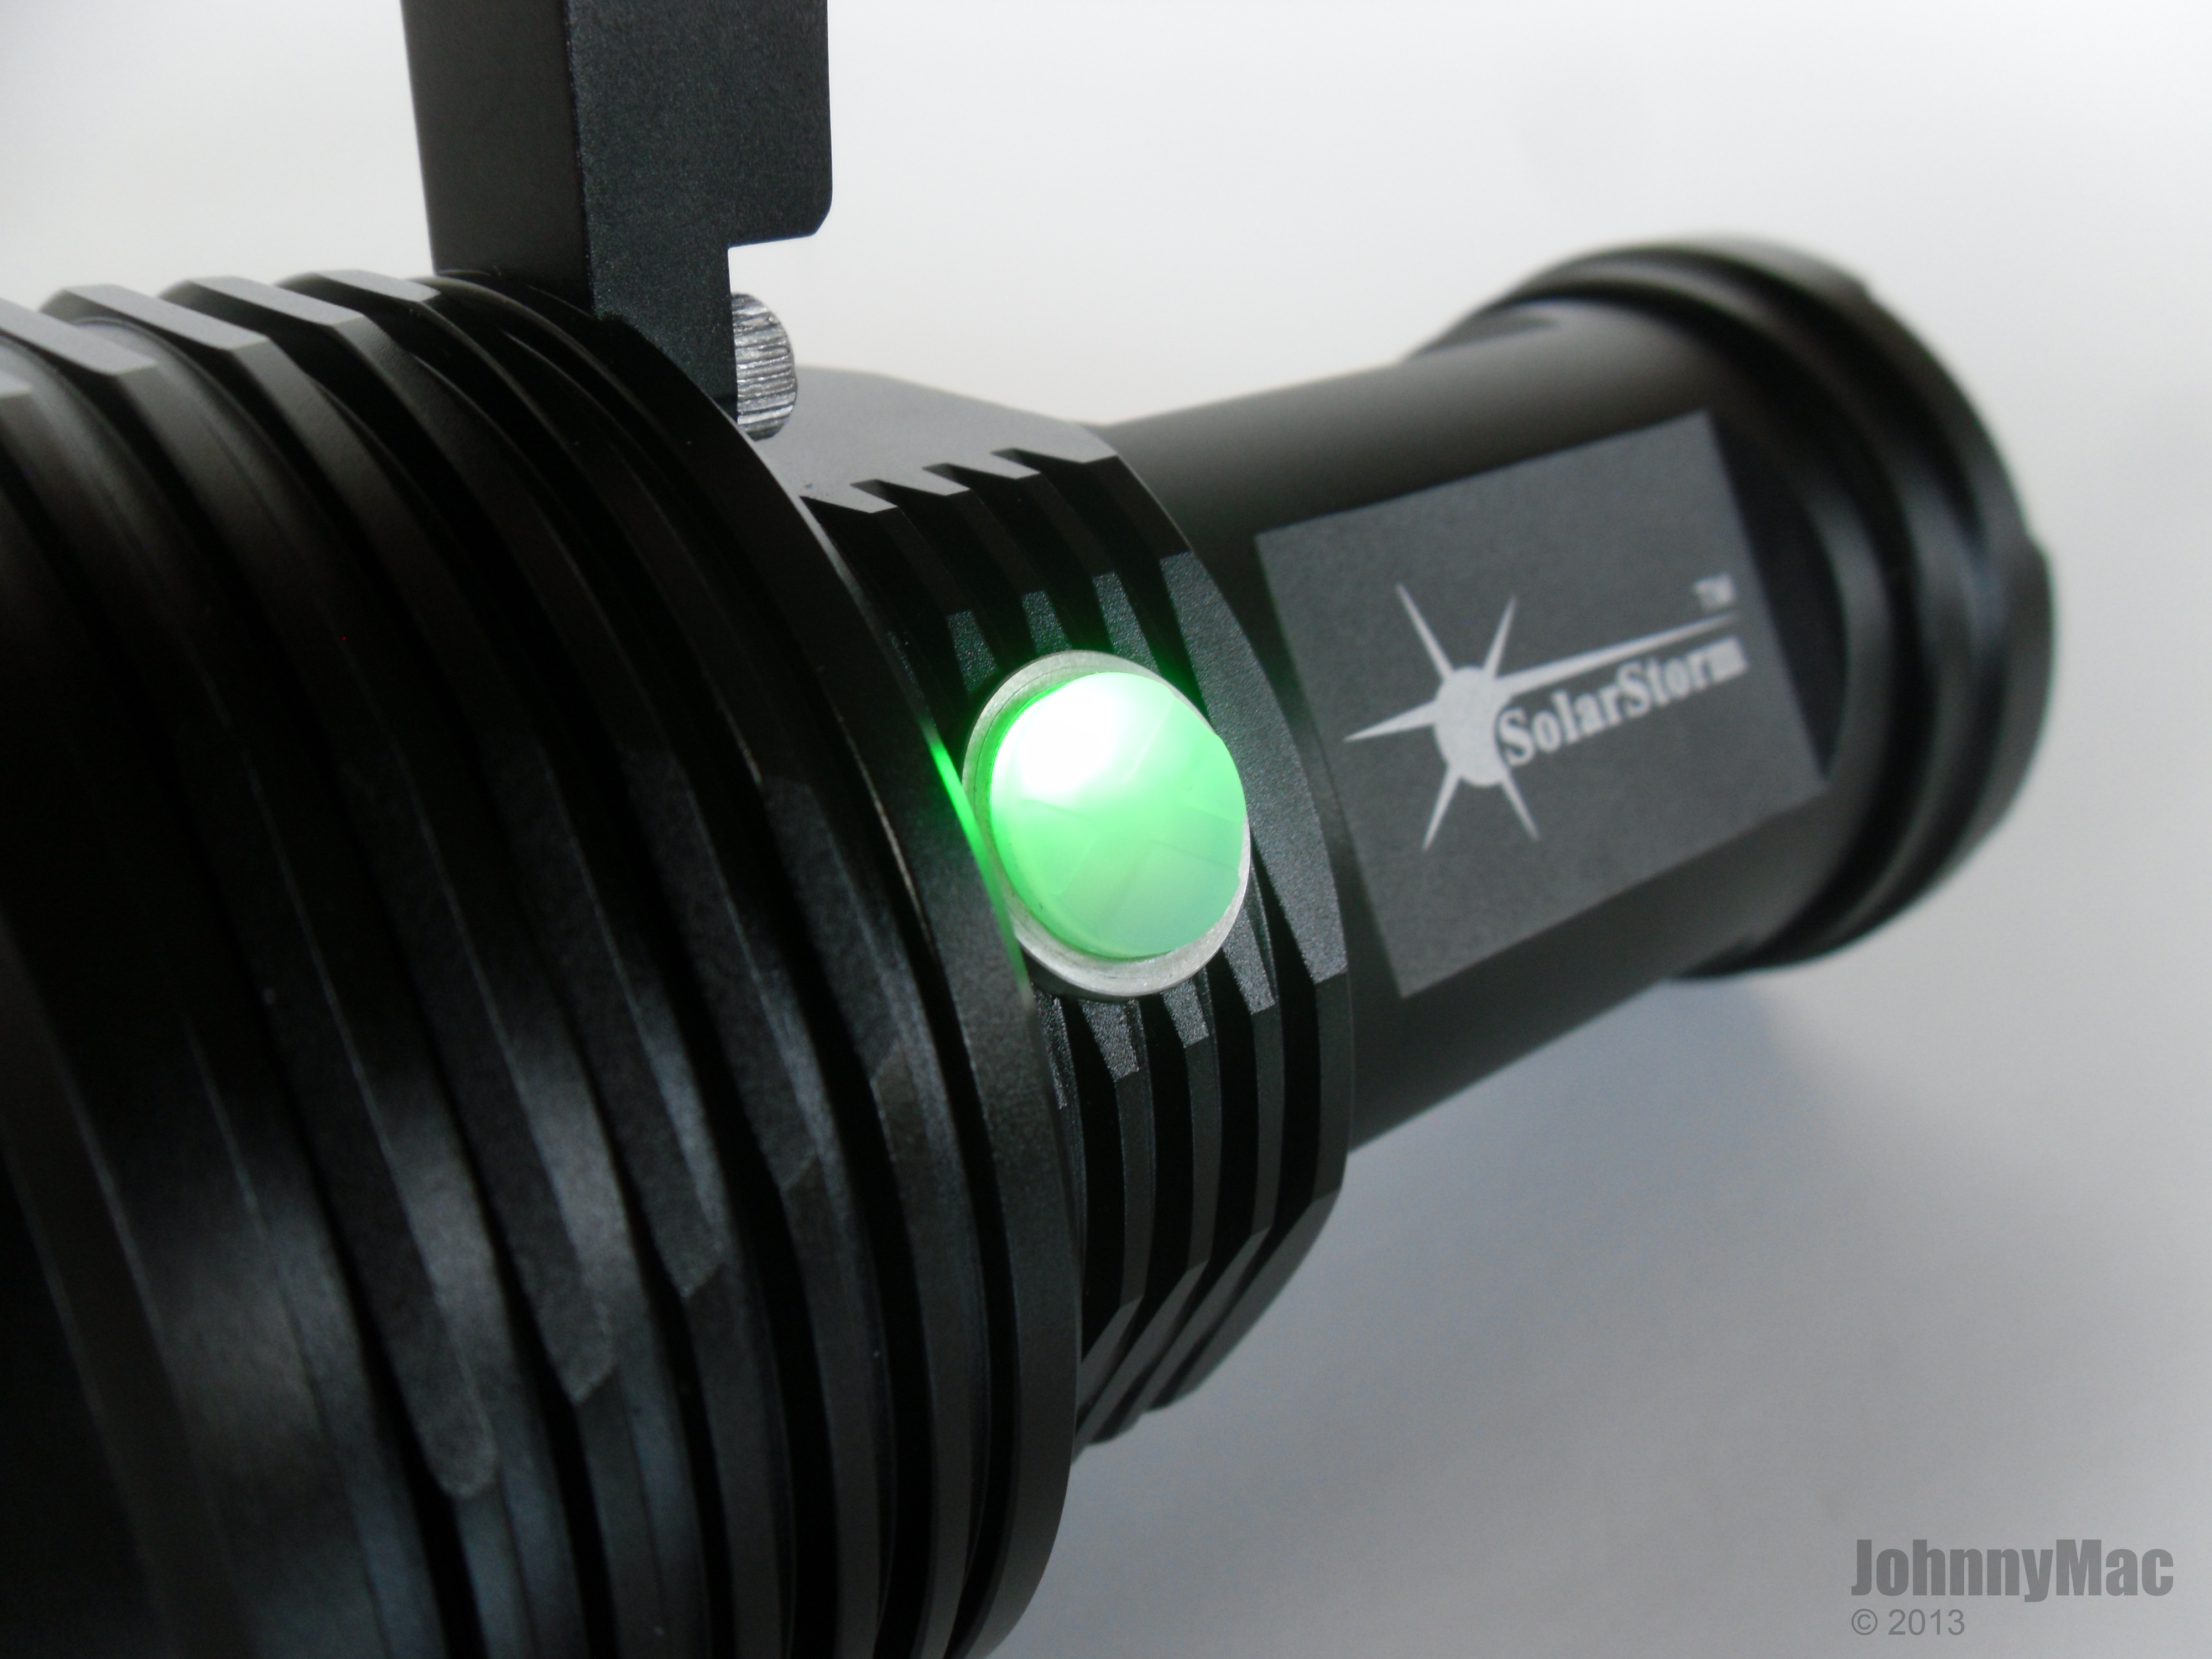
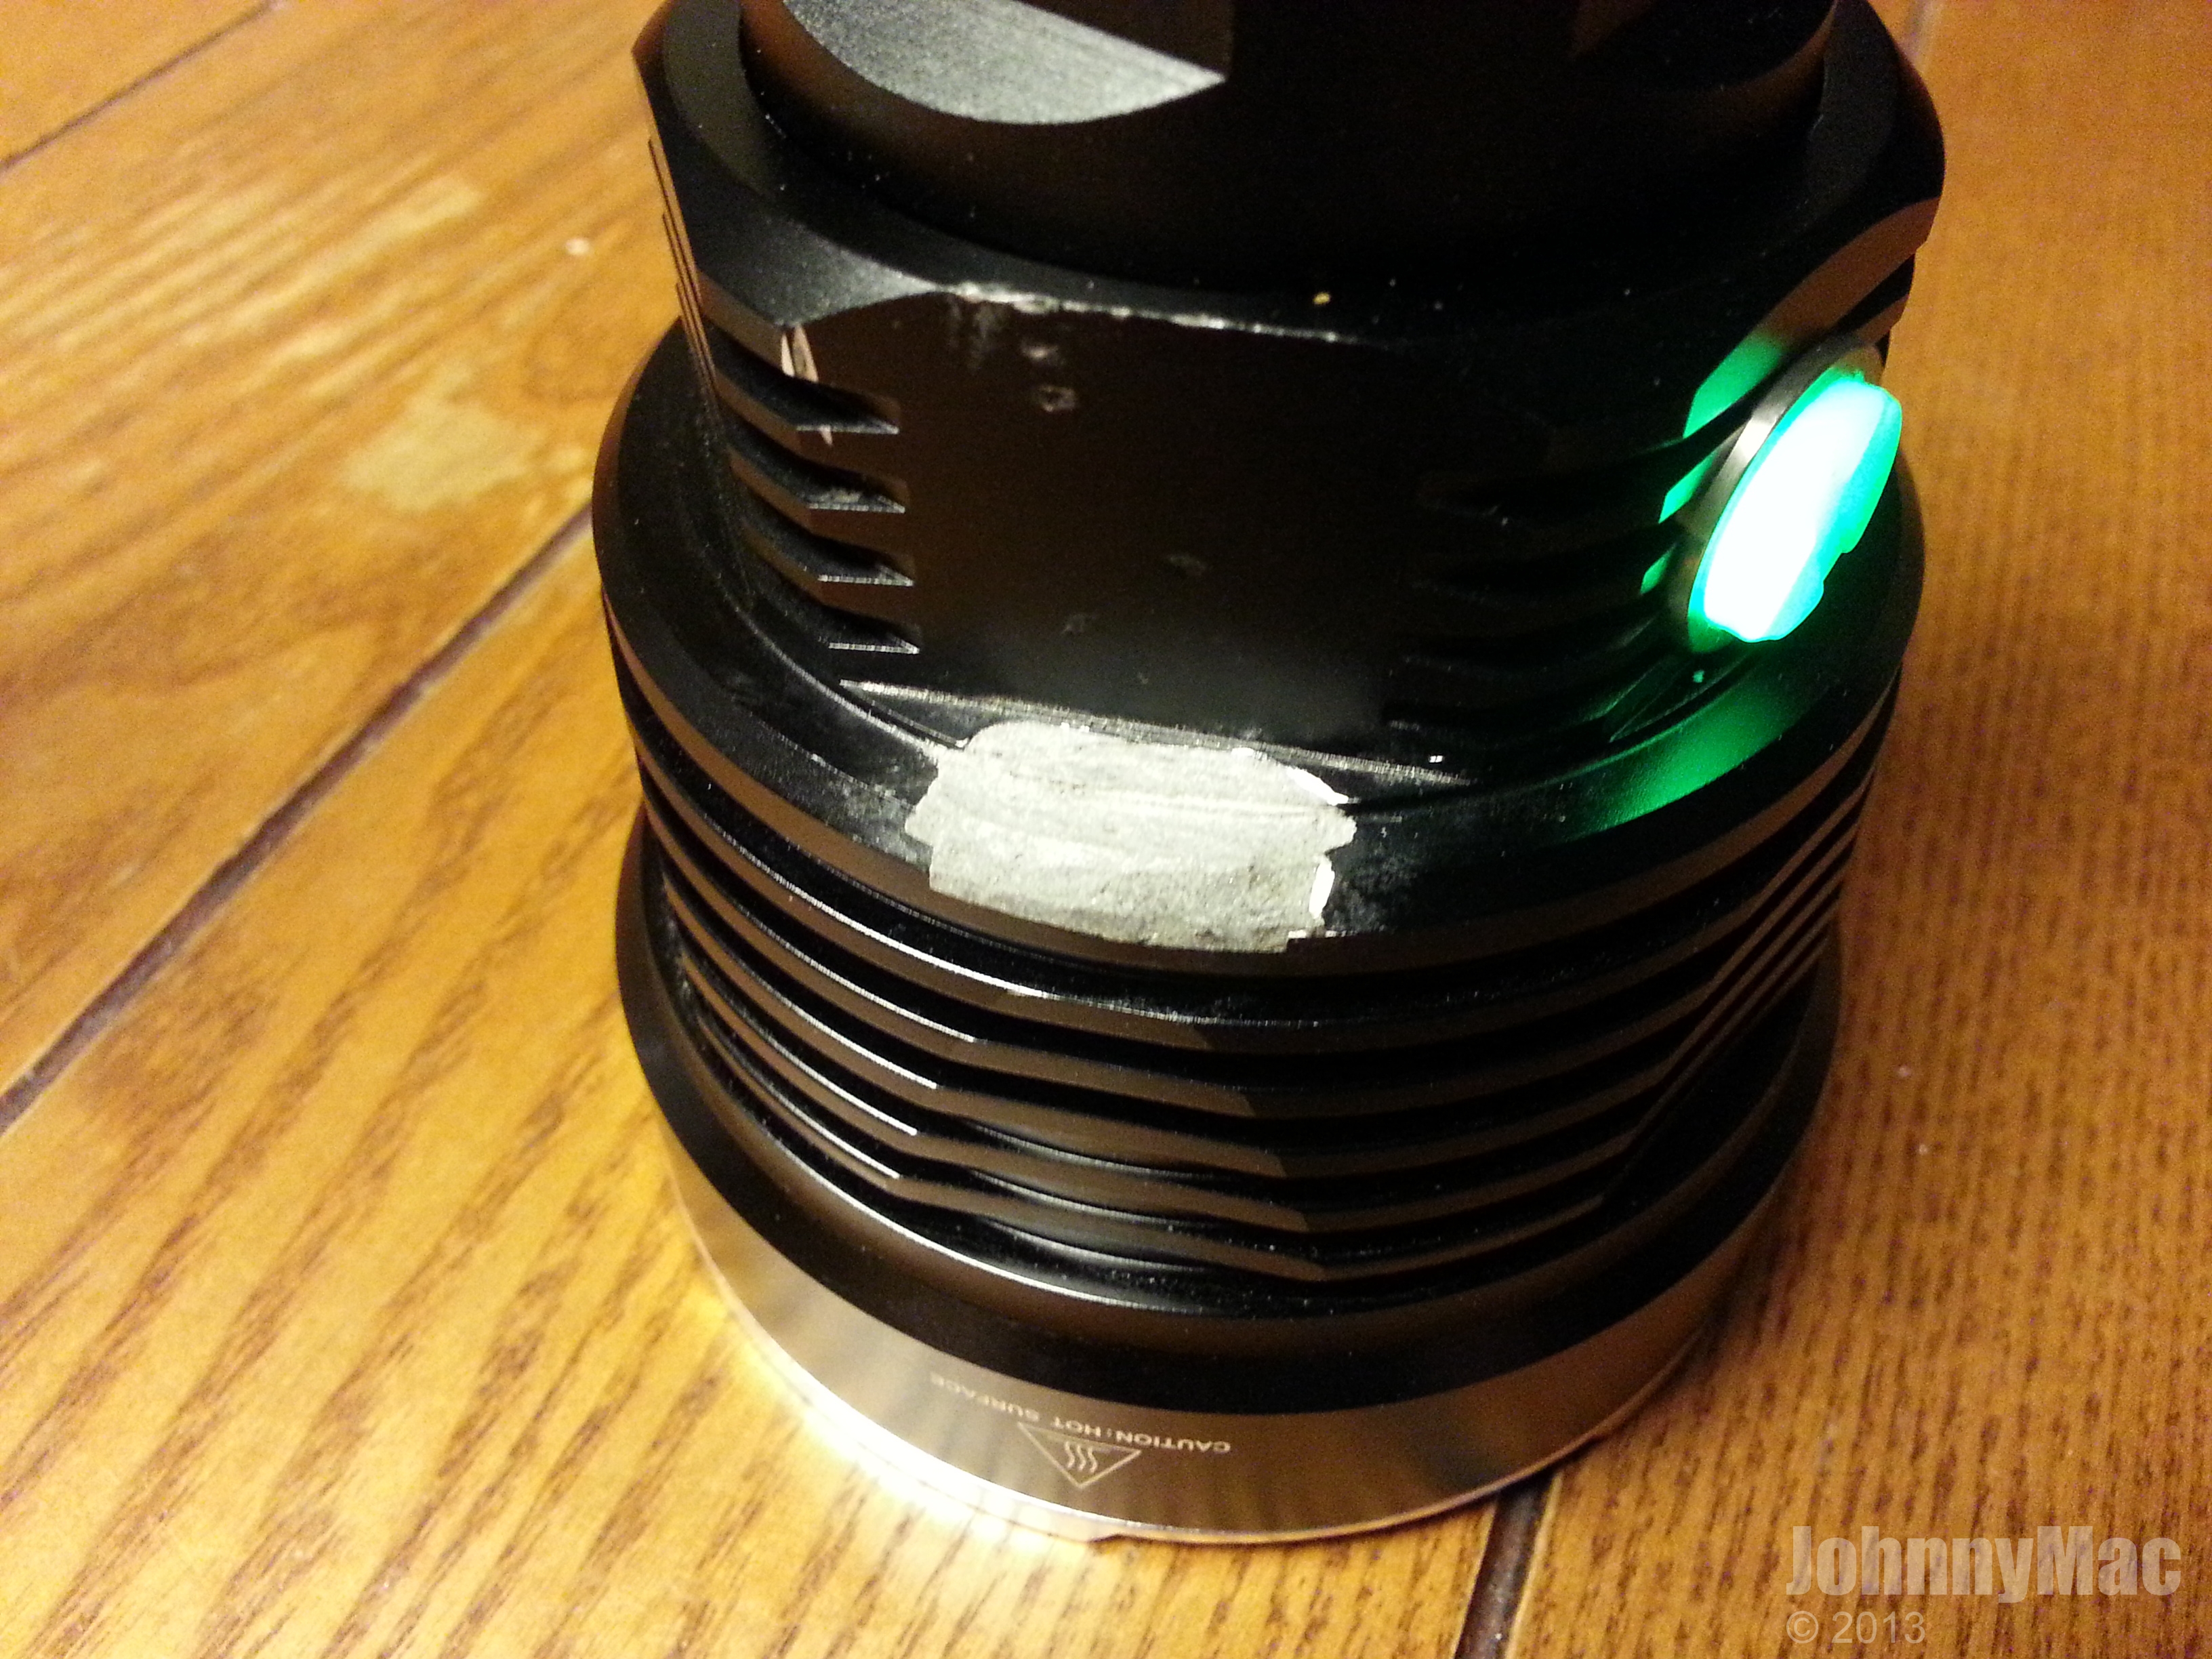
The power switch is one of the nicest in the business. It is the same as used in the Black Shadow Terminator and is stiff while providing excellent feel for the electronic switch behind it. The switch cover is translucent and under it are two LEDs, one green and one red. The green LED under the switch tells you when the light is in standby/on. If the battery level is low the light red LED will be lit to indicate time to swap or recharge the cells.
All machining is very nice. Edges are clean and defined but not sharp, the anodizing is consistent in color and thickness, and all logos and laser etching are bright, crisp and well applied.
Lots and lots of mass in the head combined with lots of fins provide the SP03 with great thermal handling. The light gets warm but never gets too hot.

Here you can see the switch lit in standby mode. Yes, only half the switch is lit. No, the entire switch will not be lit evenly. Yes, this is how it is supposed to be. The red LED is on the other half of the switch.
The SP03 tail stands well enough. It could stand exceptionally if the handle wasn't about 3mm longer than the rear of the light. More on that a little further down.
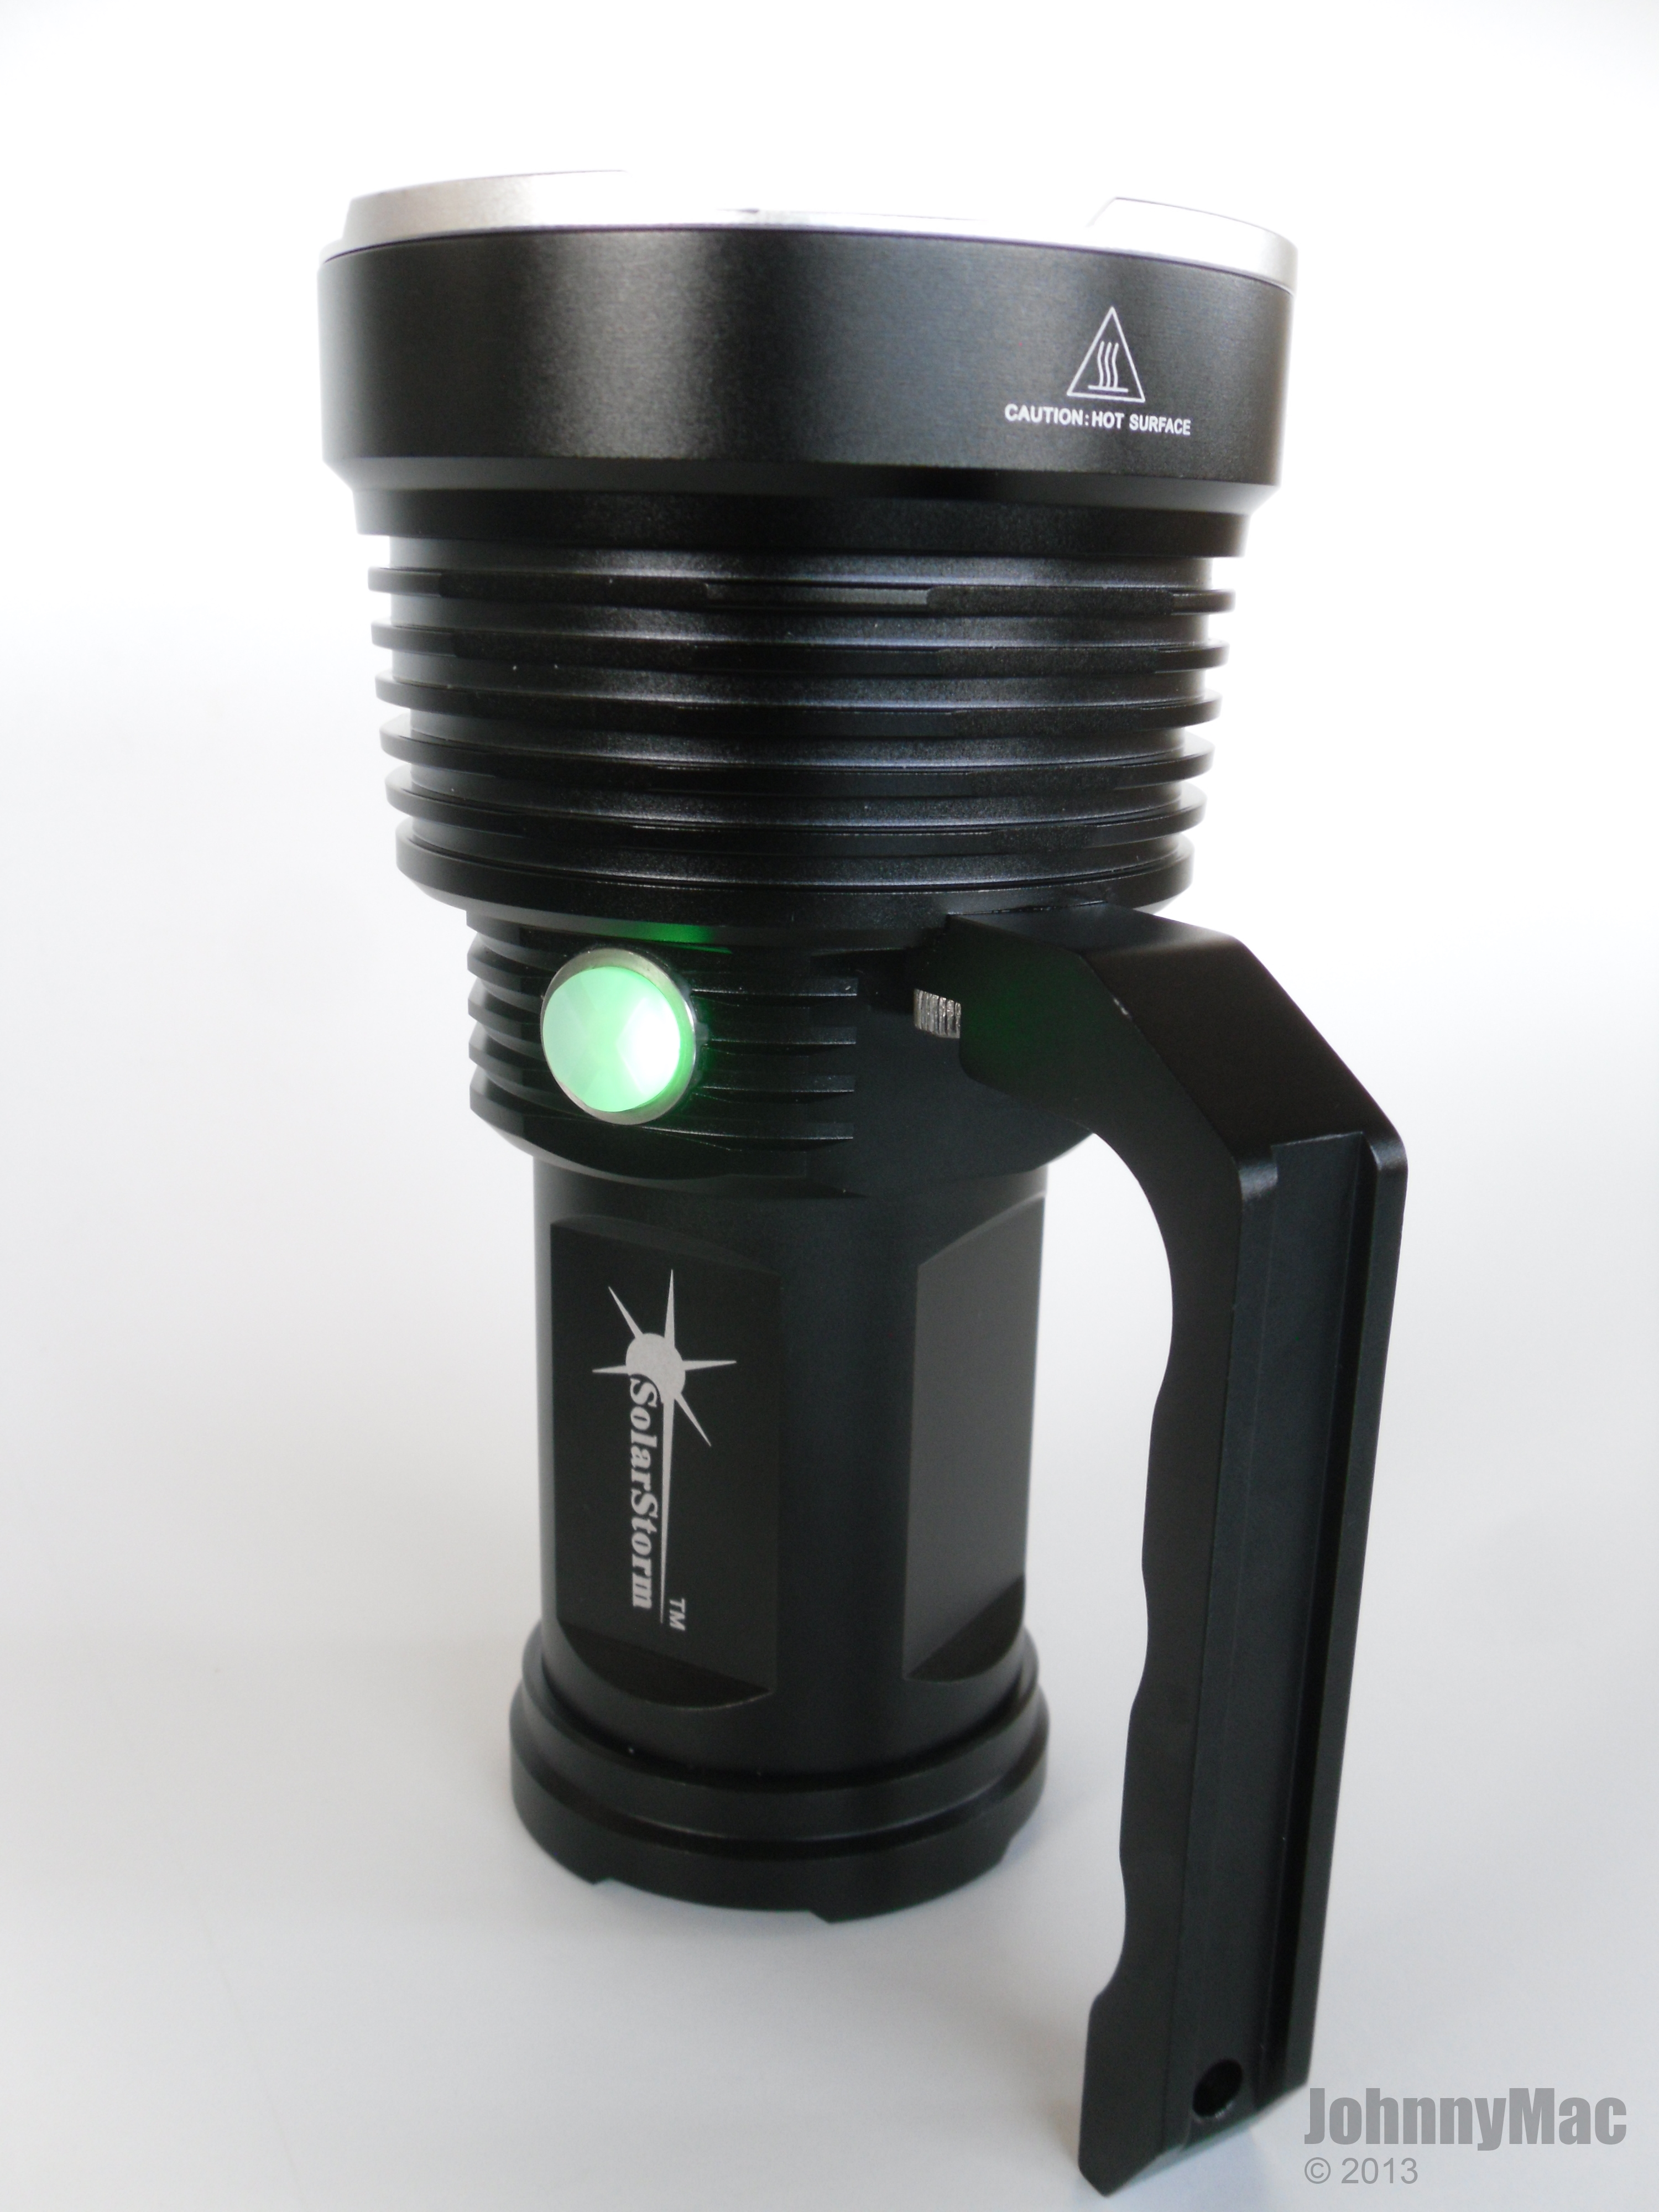
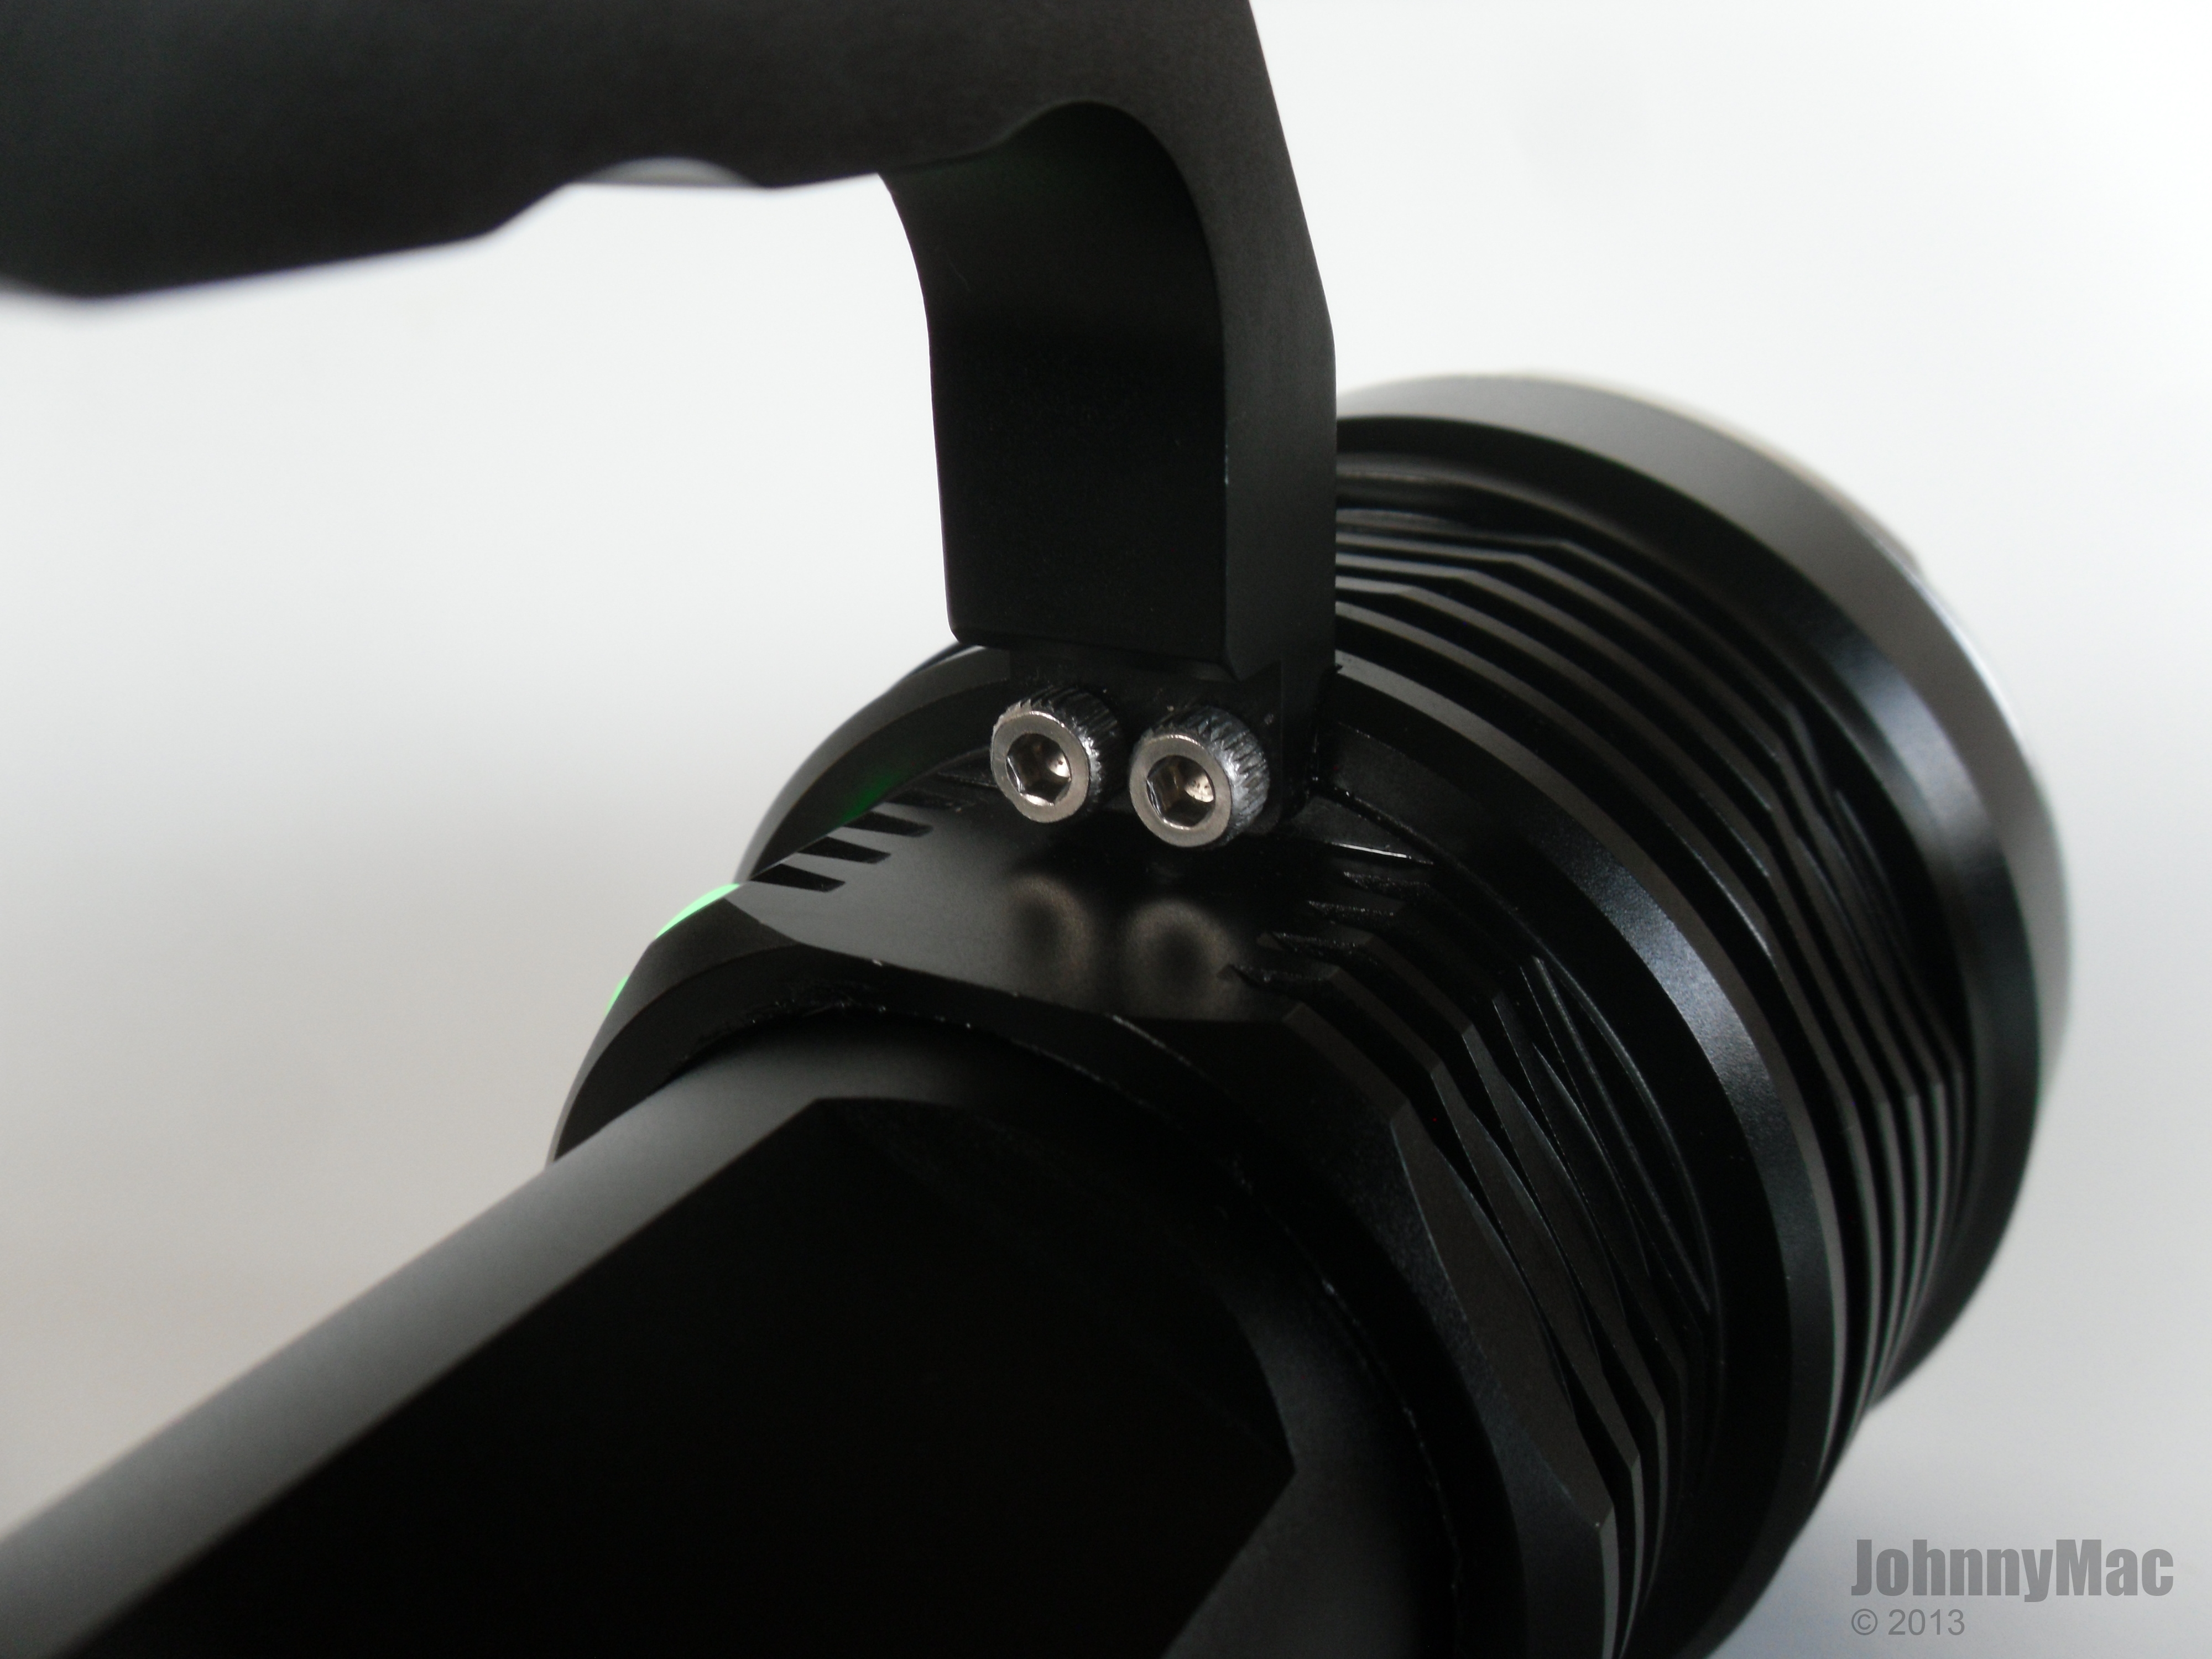
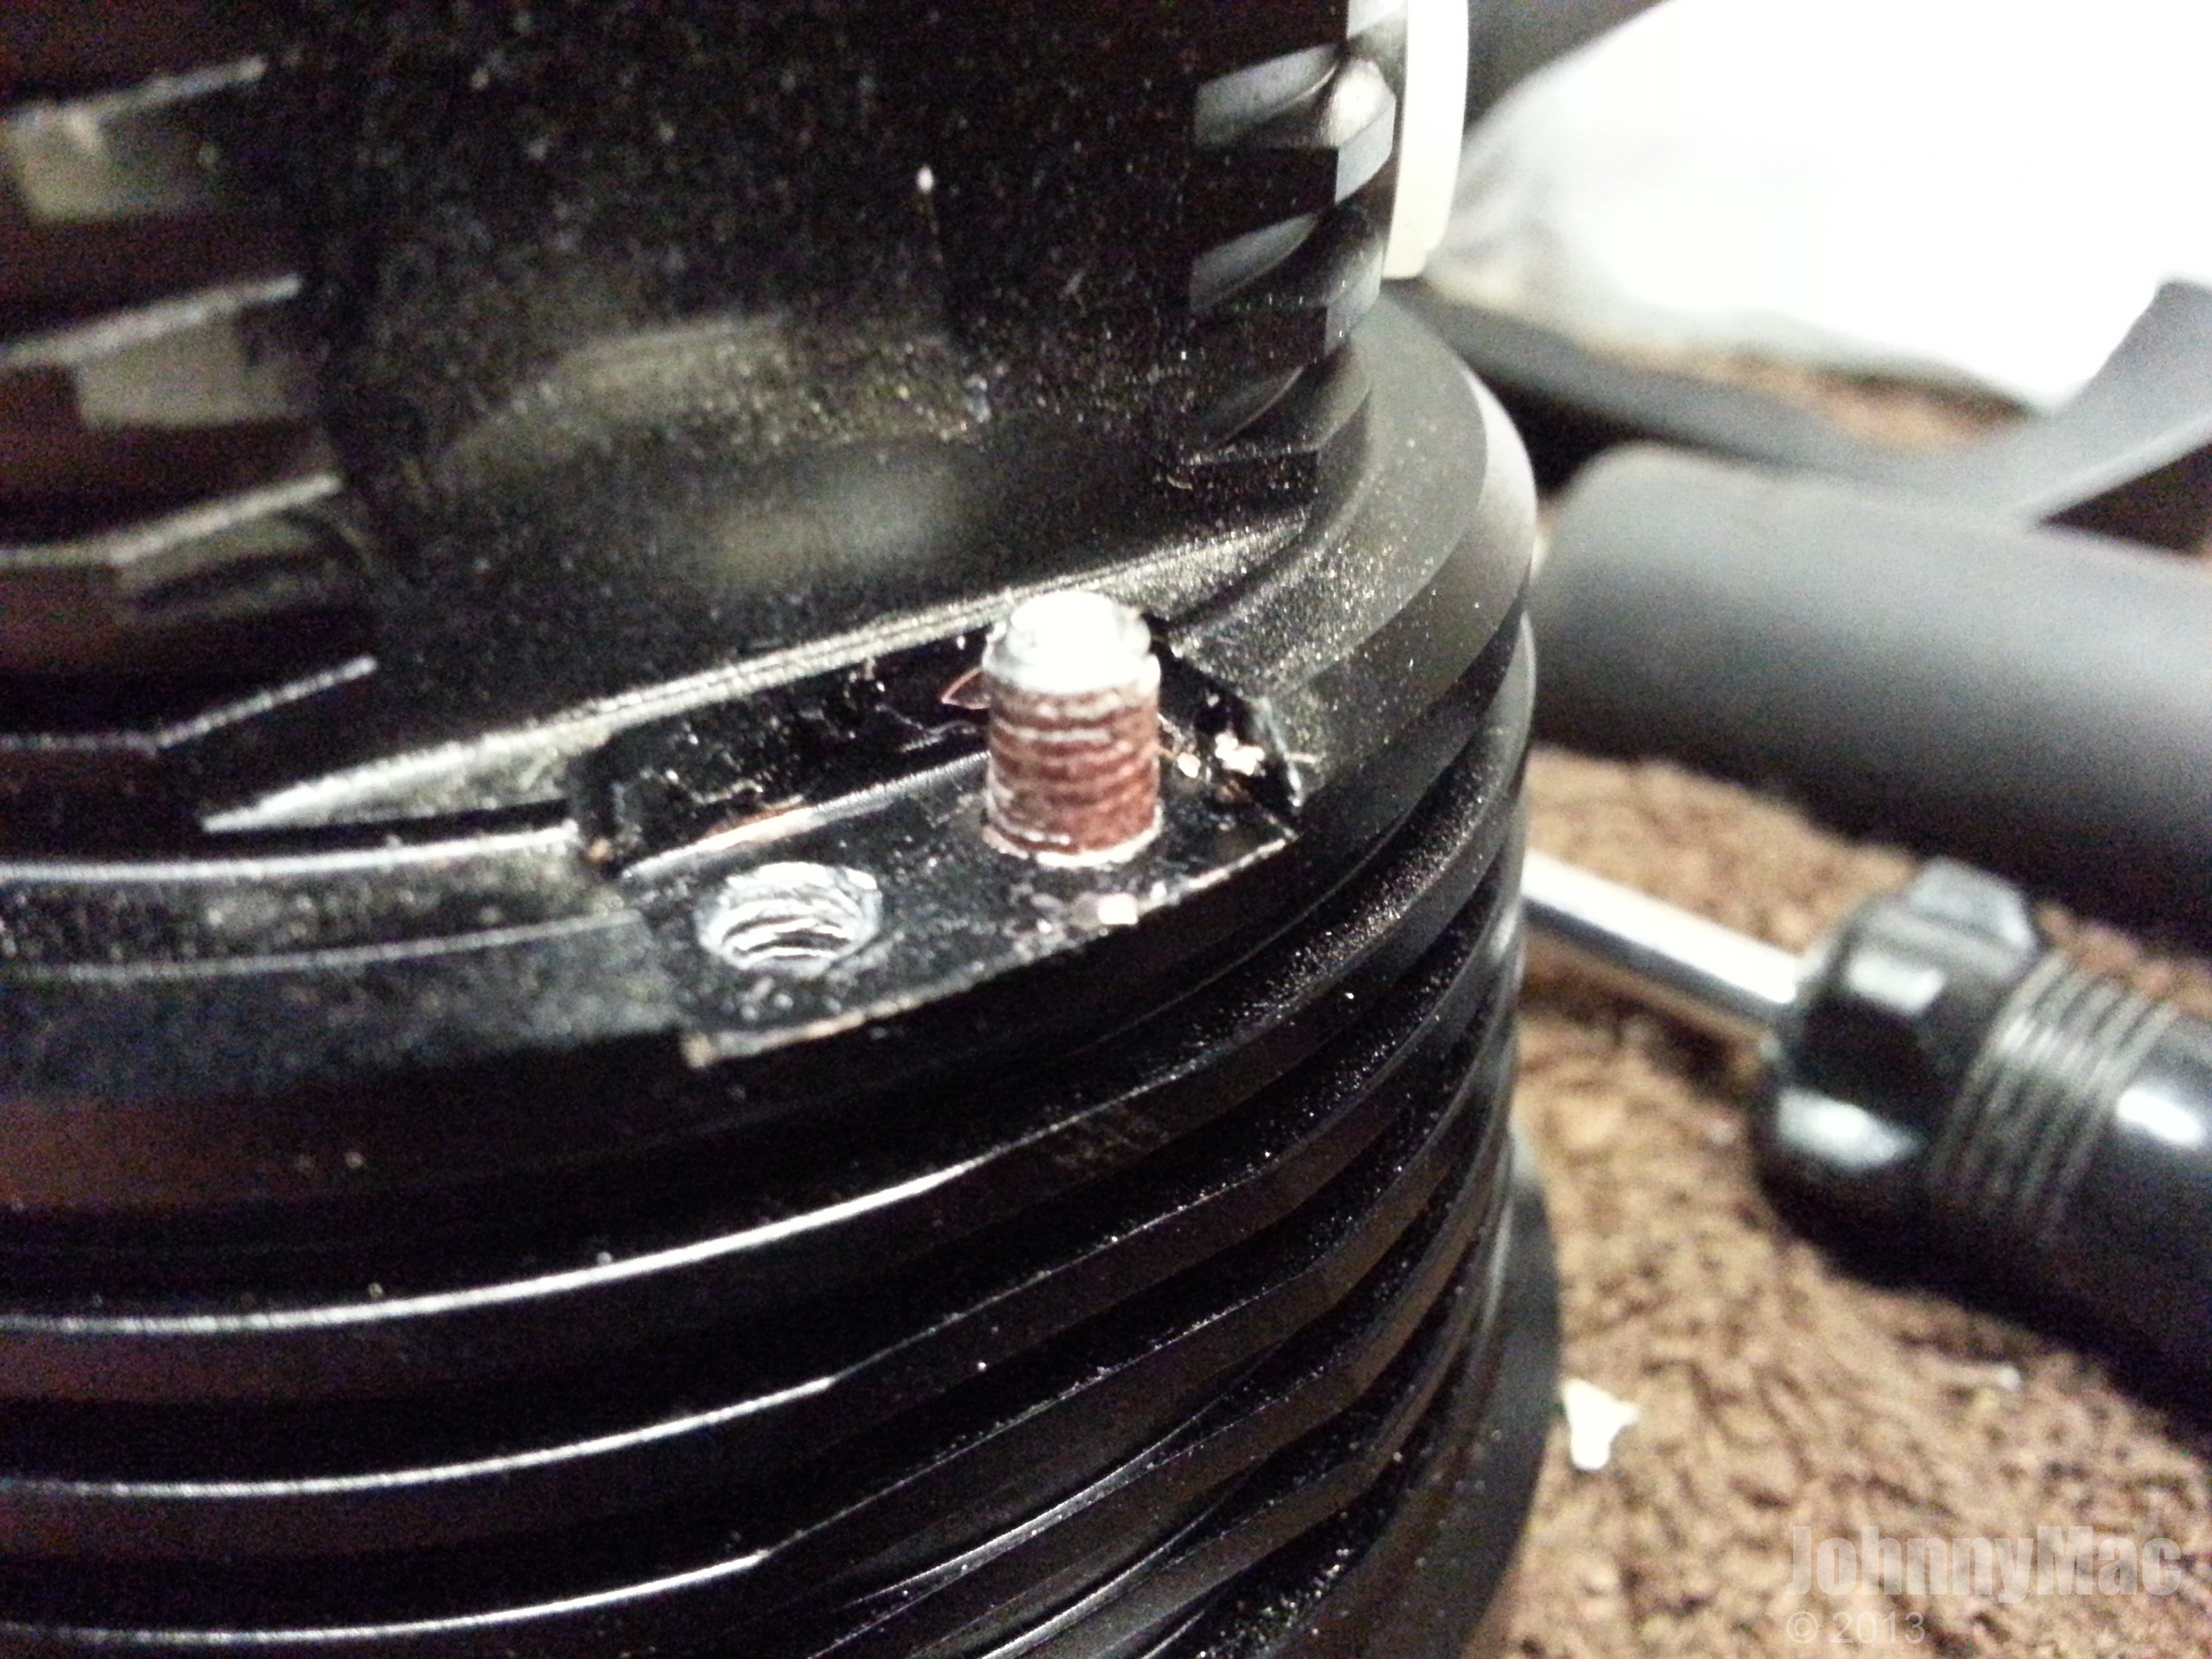
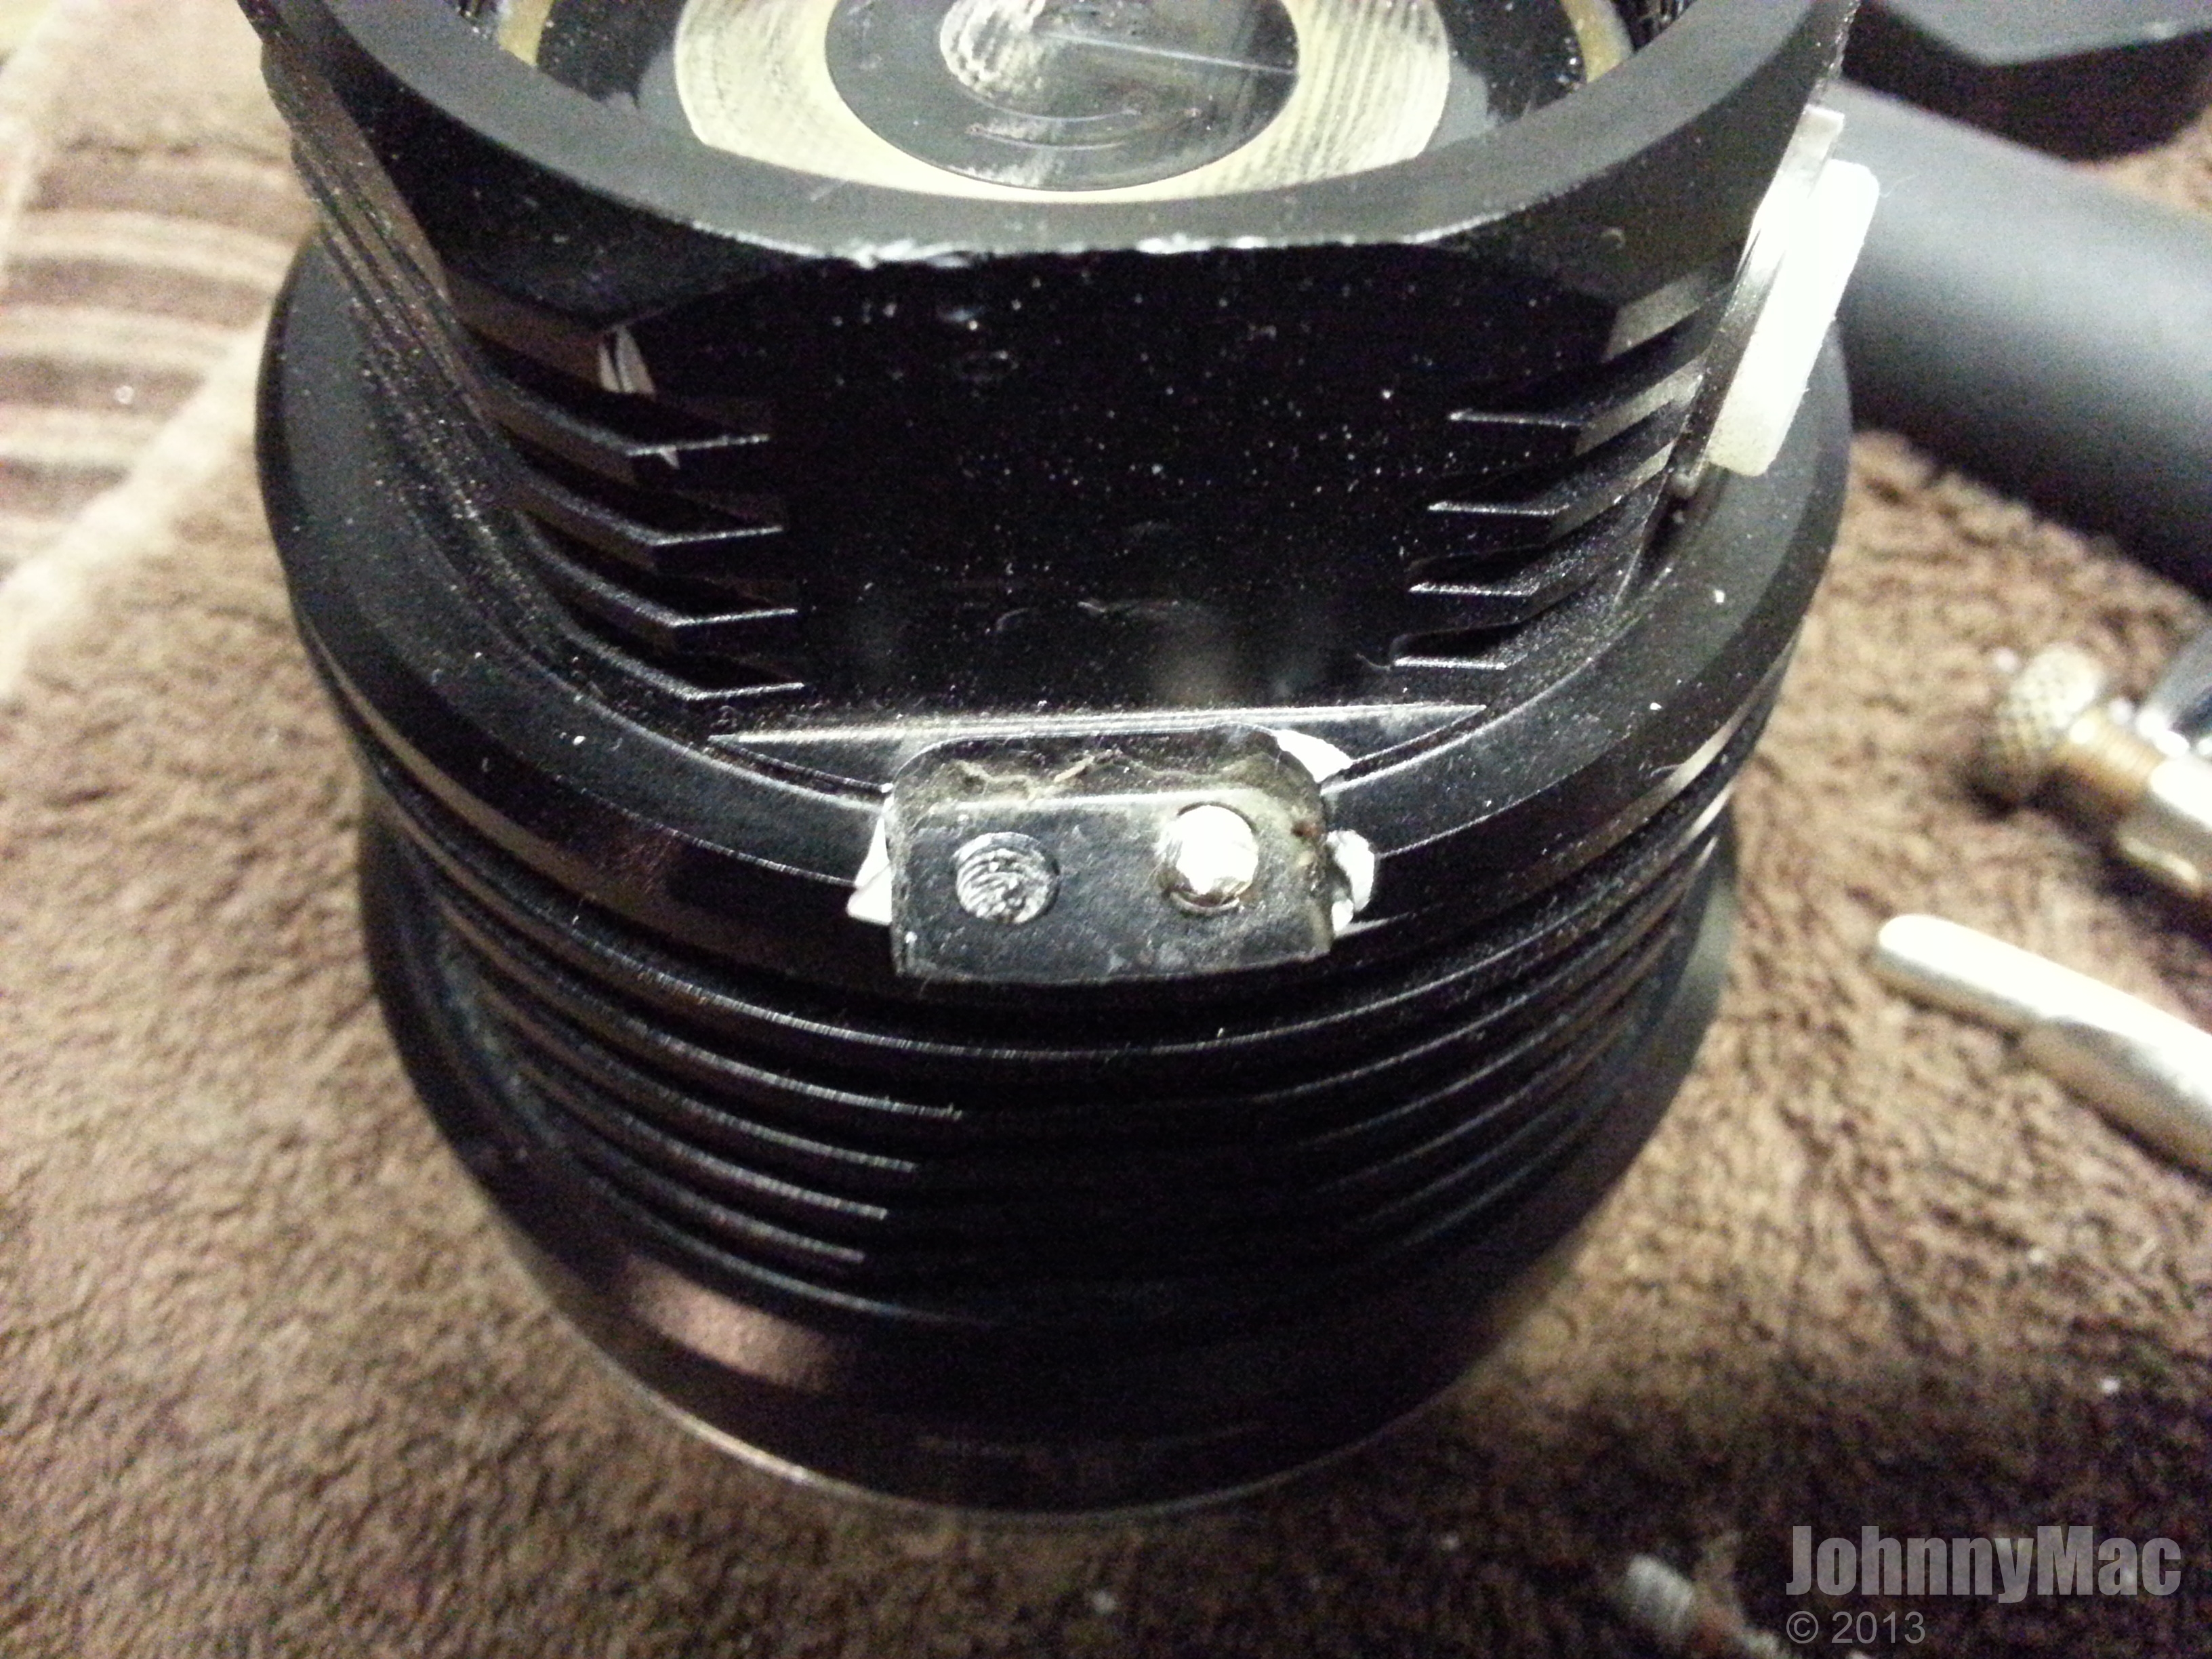
Two stainless steel bolts attach the handle to the body. When I asked the folks at Solarstorm why the handle wasn't made just 3mm shorter to allow for solid tail standing, the reply I got was that the handle itself was an afterthought by one of the engineers and that if I didn't care for it I could simply remove it.
Two problems with this. First, it tells me that while it was an afterthought, there wasn't a whole lot of thought put into it. Doesn't take a genius to attach the handle of the prototypes the first time and realize that the handle sticks out past the base of the light. Wouldn't have taken much to either measure it properly before the first mockup or to change the specs before approving the specs for production. Second, simply removing the handle? Not so much. Those stainless bolts are slathered in red Loctite and nearly impossible to remove I sheared the head off of one of the heads, stripped the hex socket in the other and had to break out the rotary tool and cutting wheel. More on that later as well.
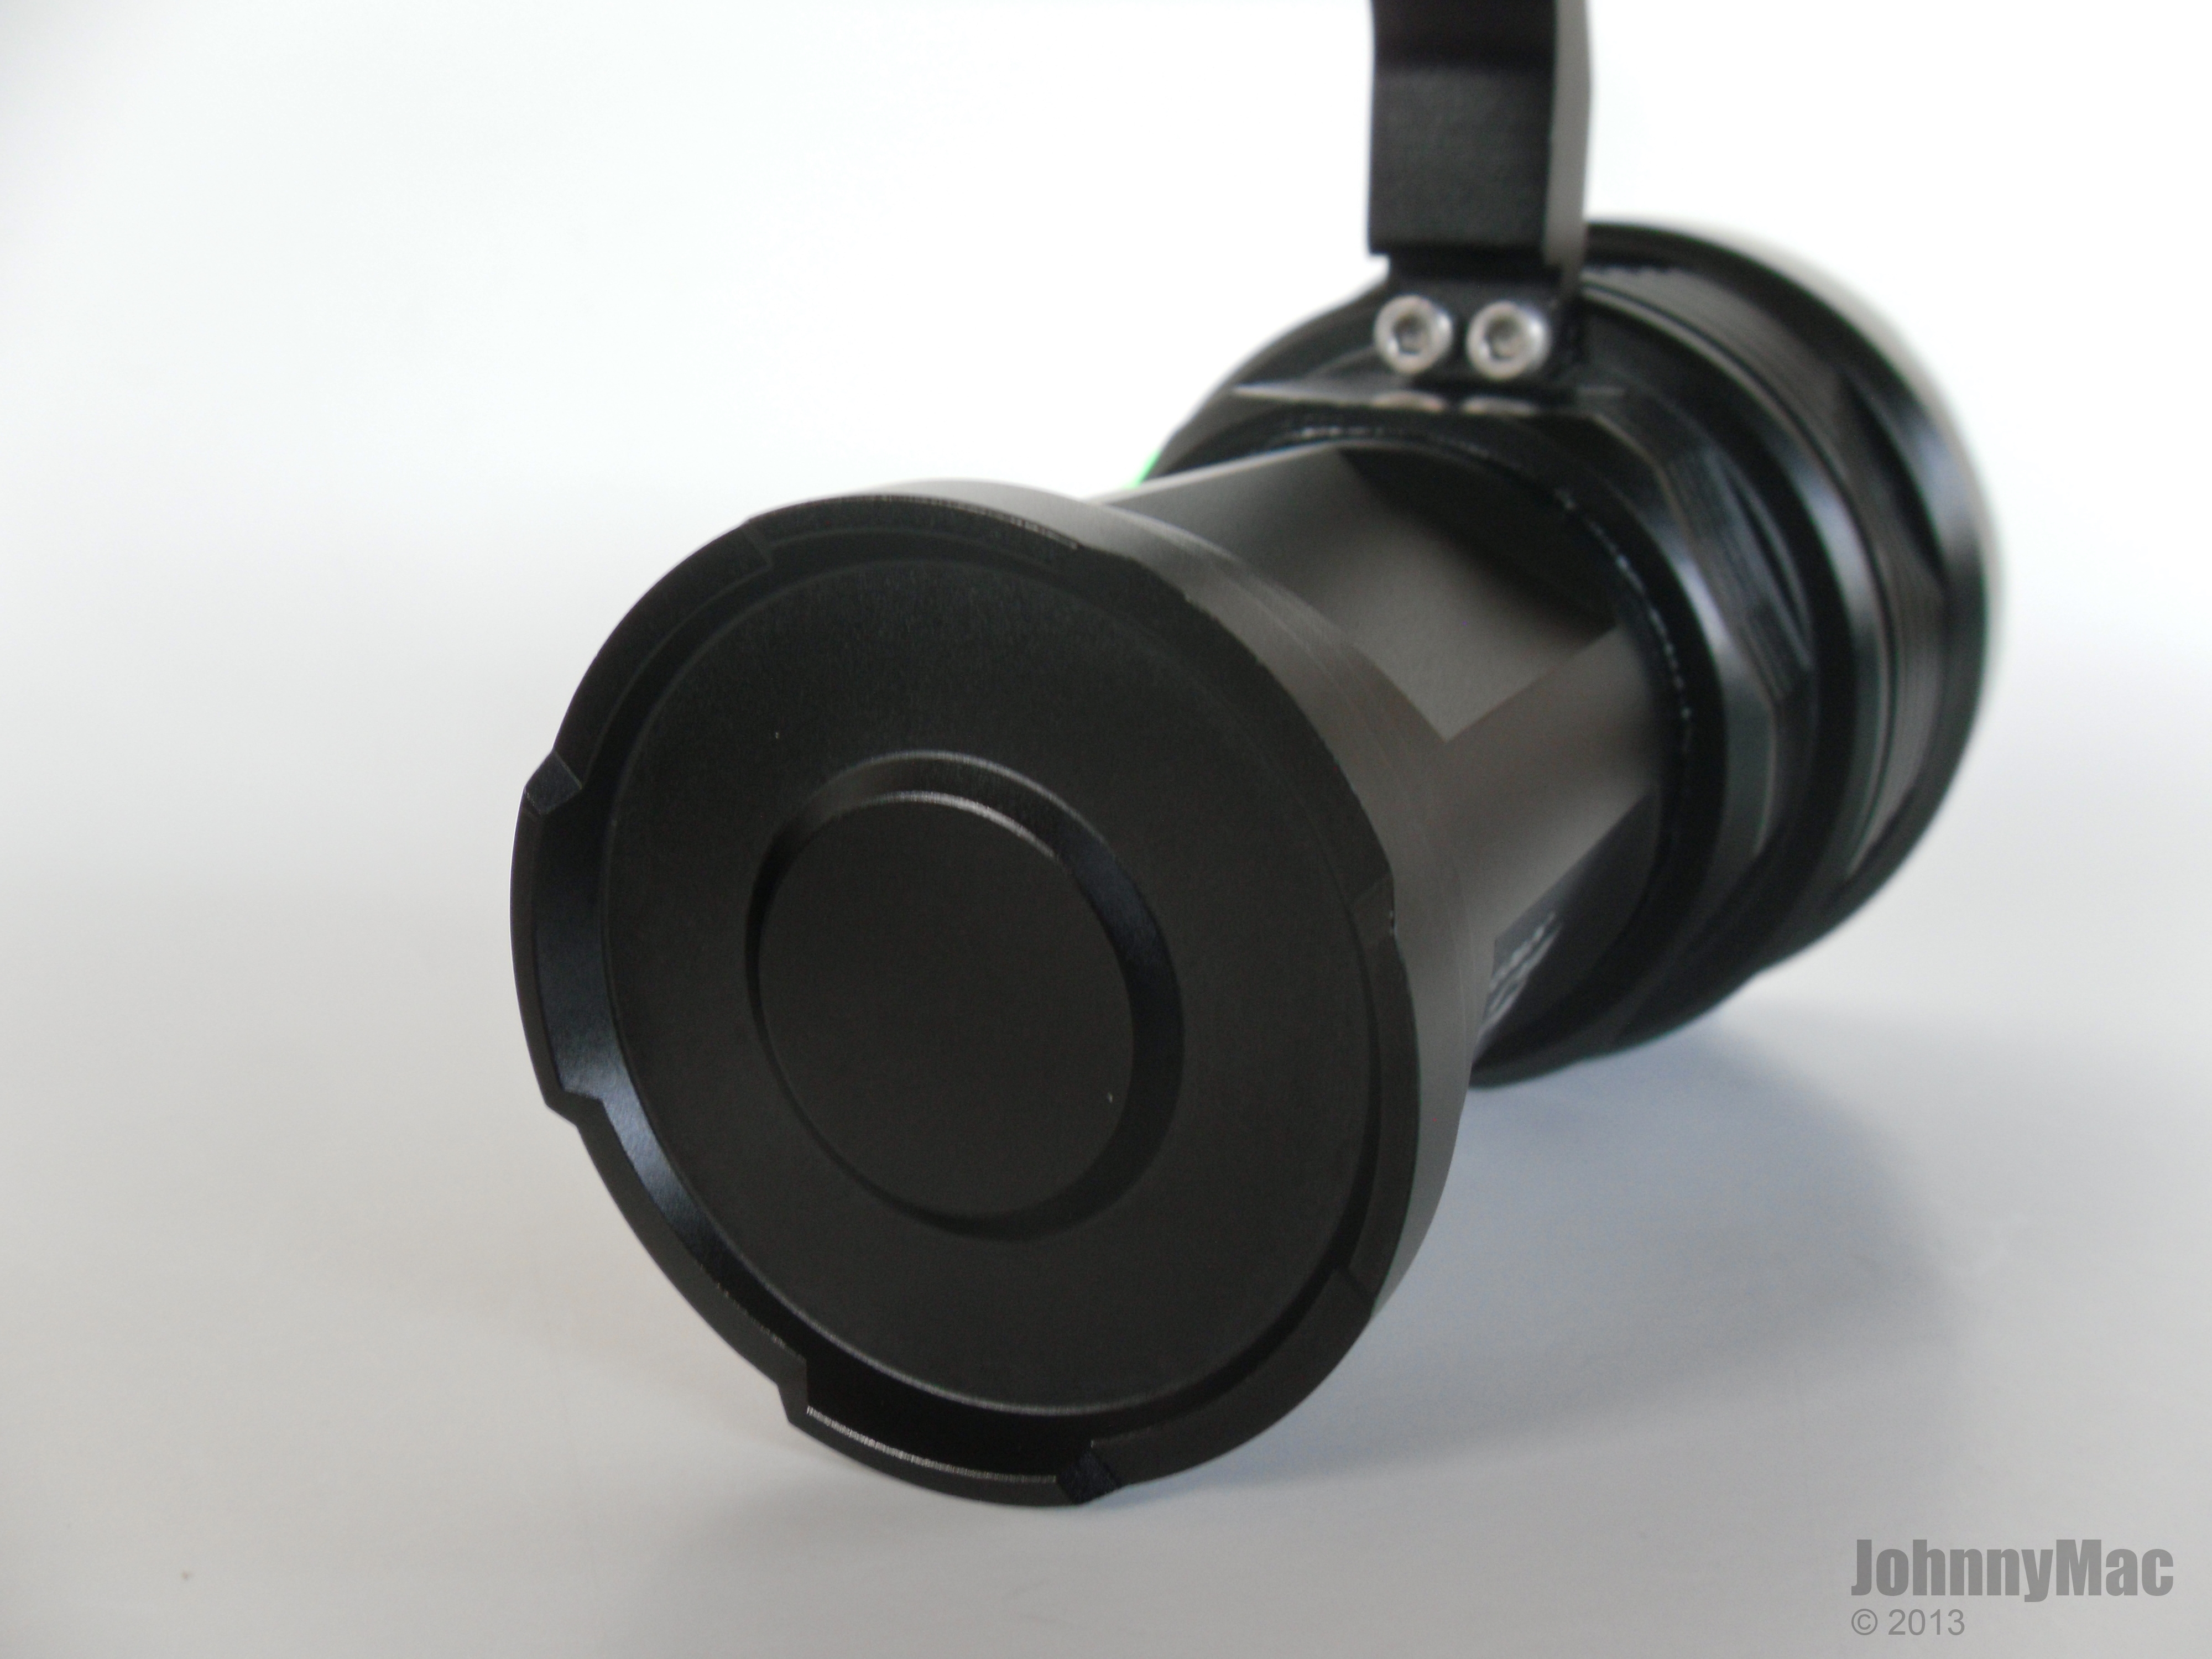
The tail is broad, lightly crenelated, and makes for a solid, stable tail stand.
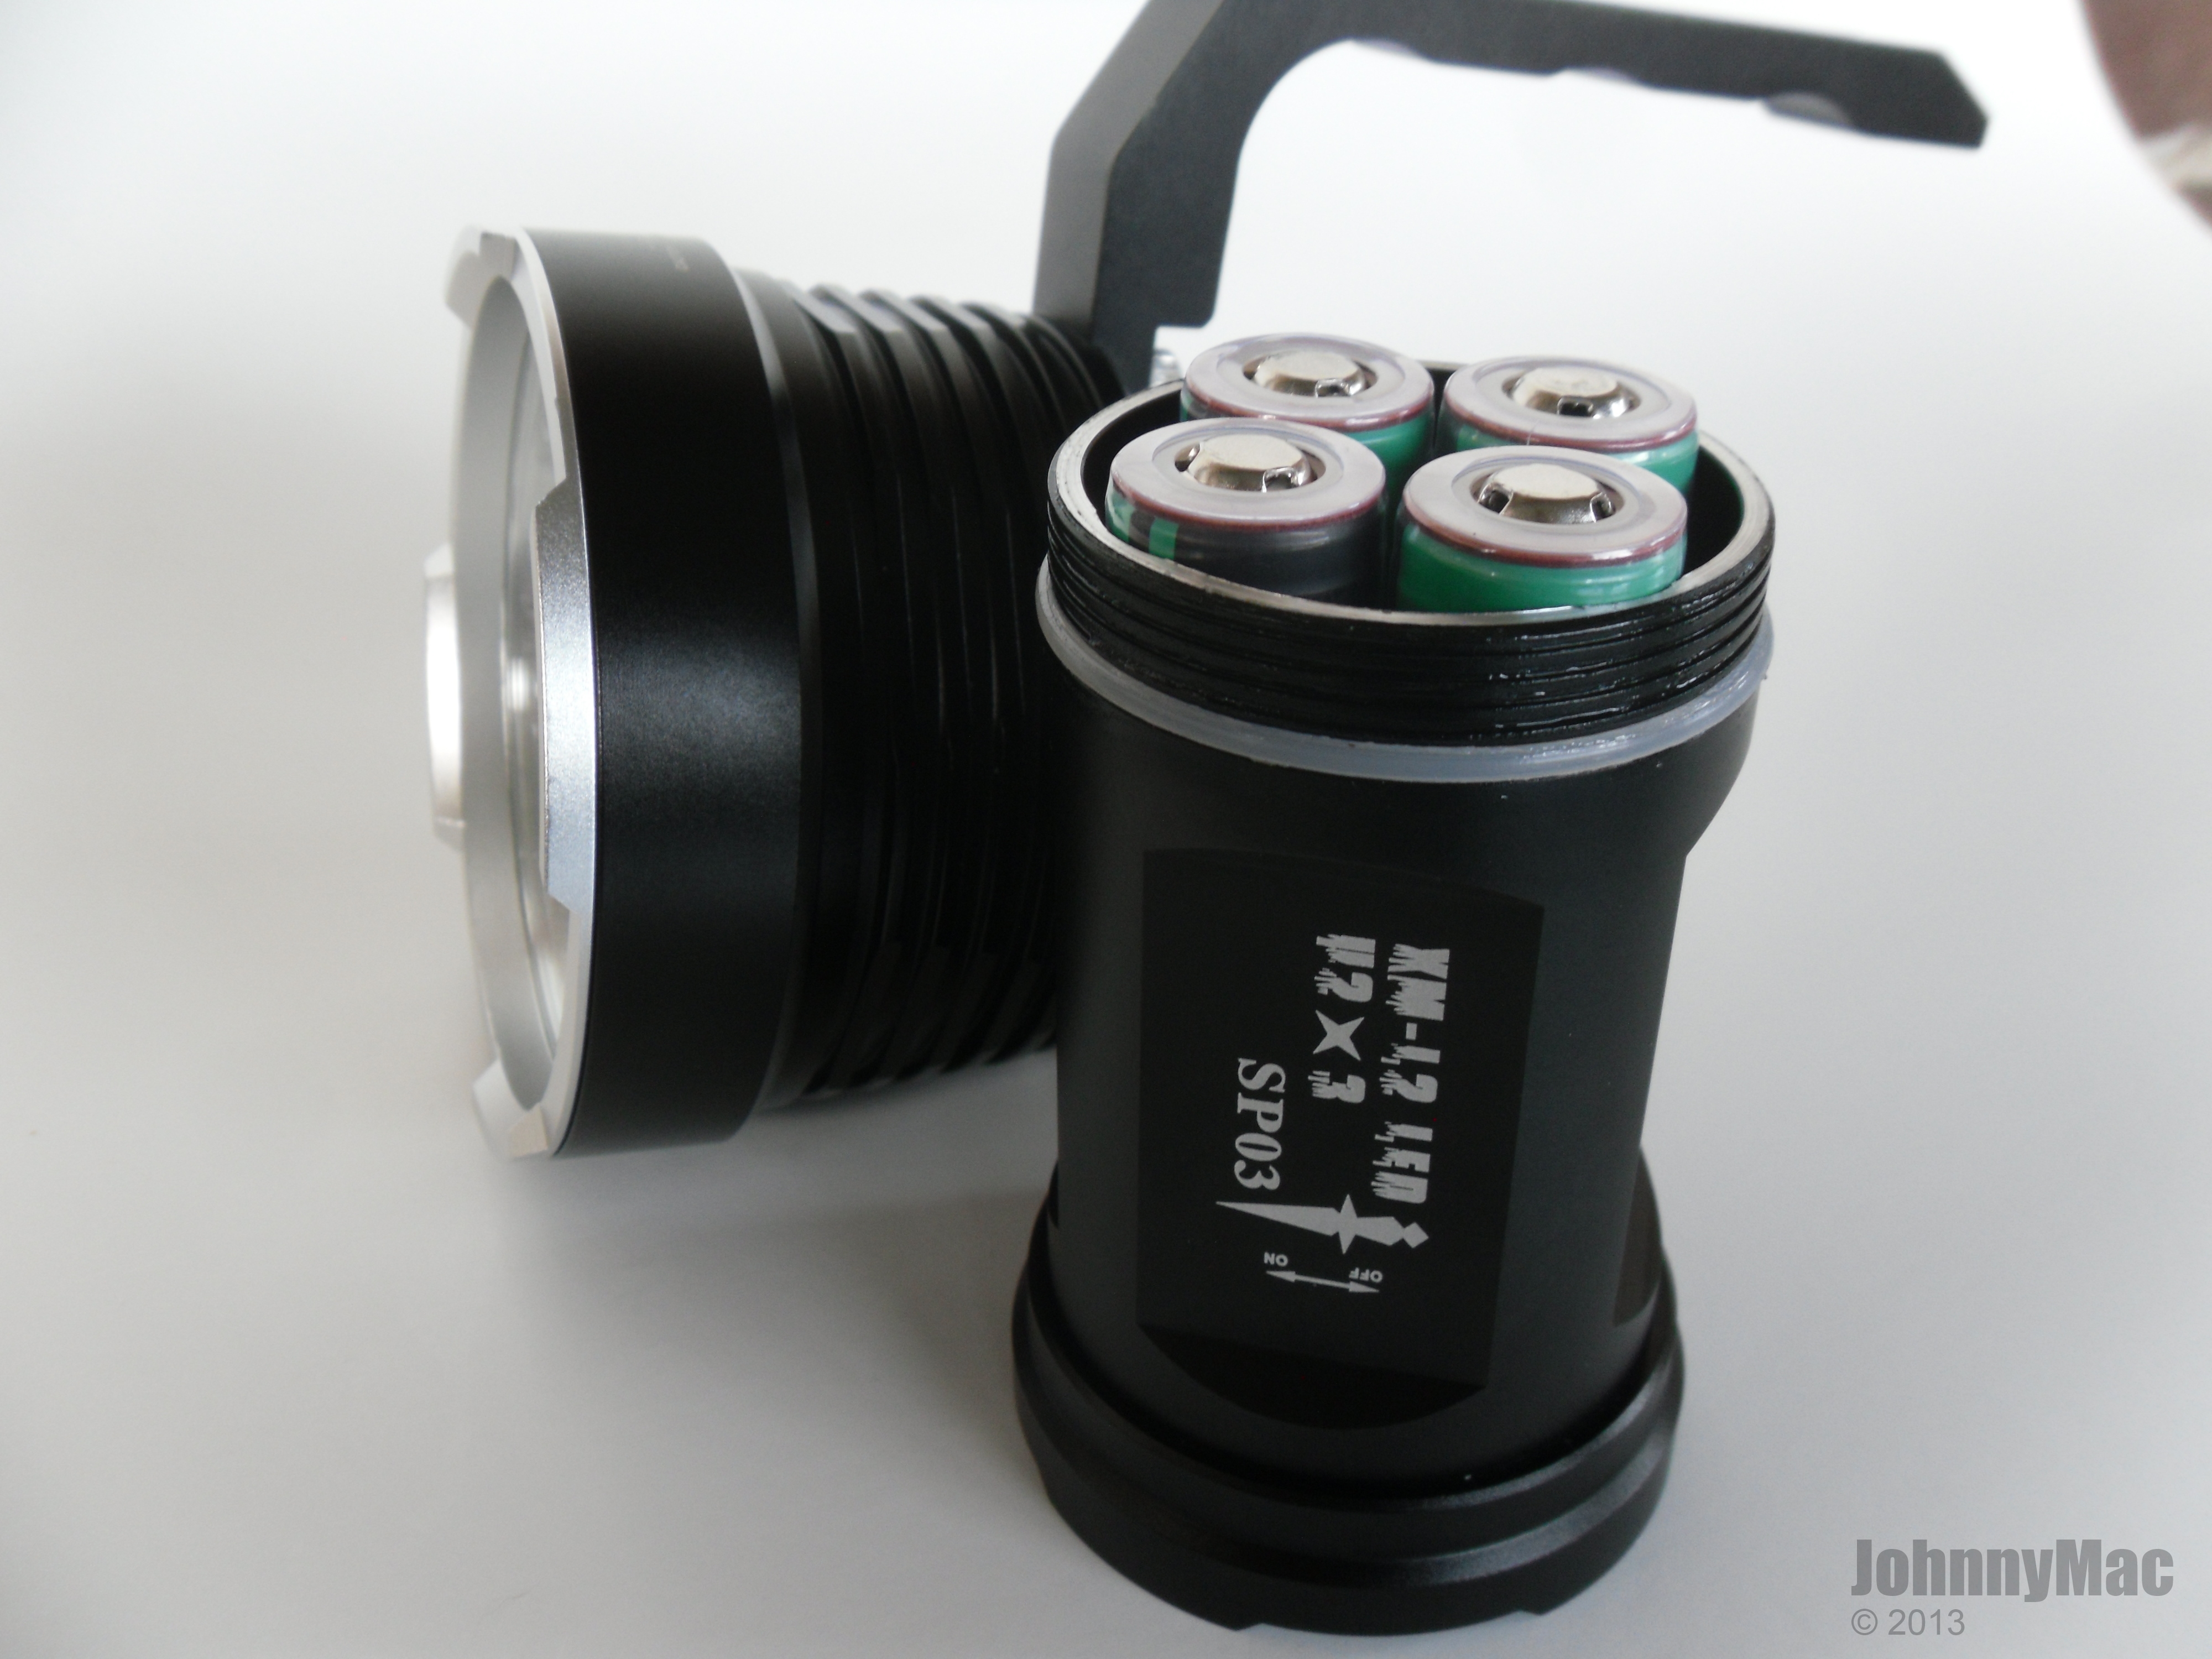
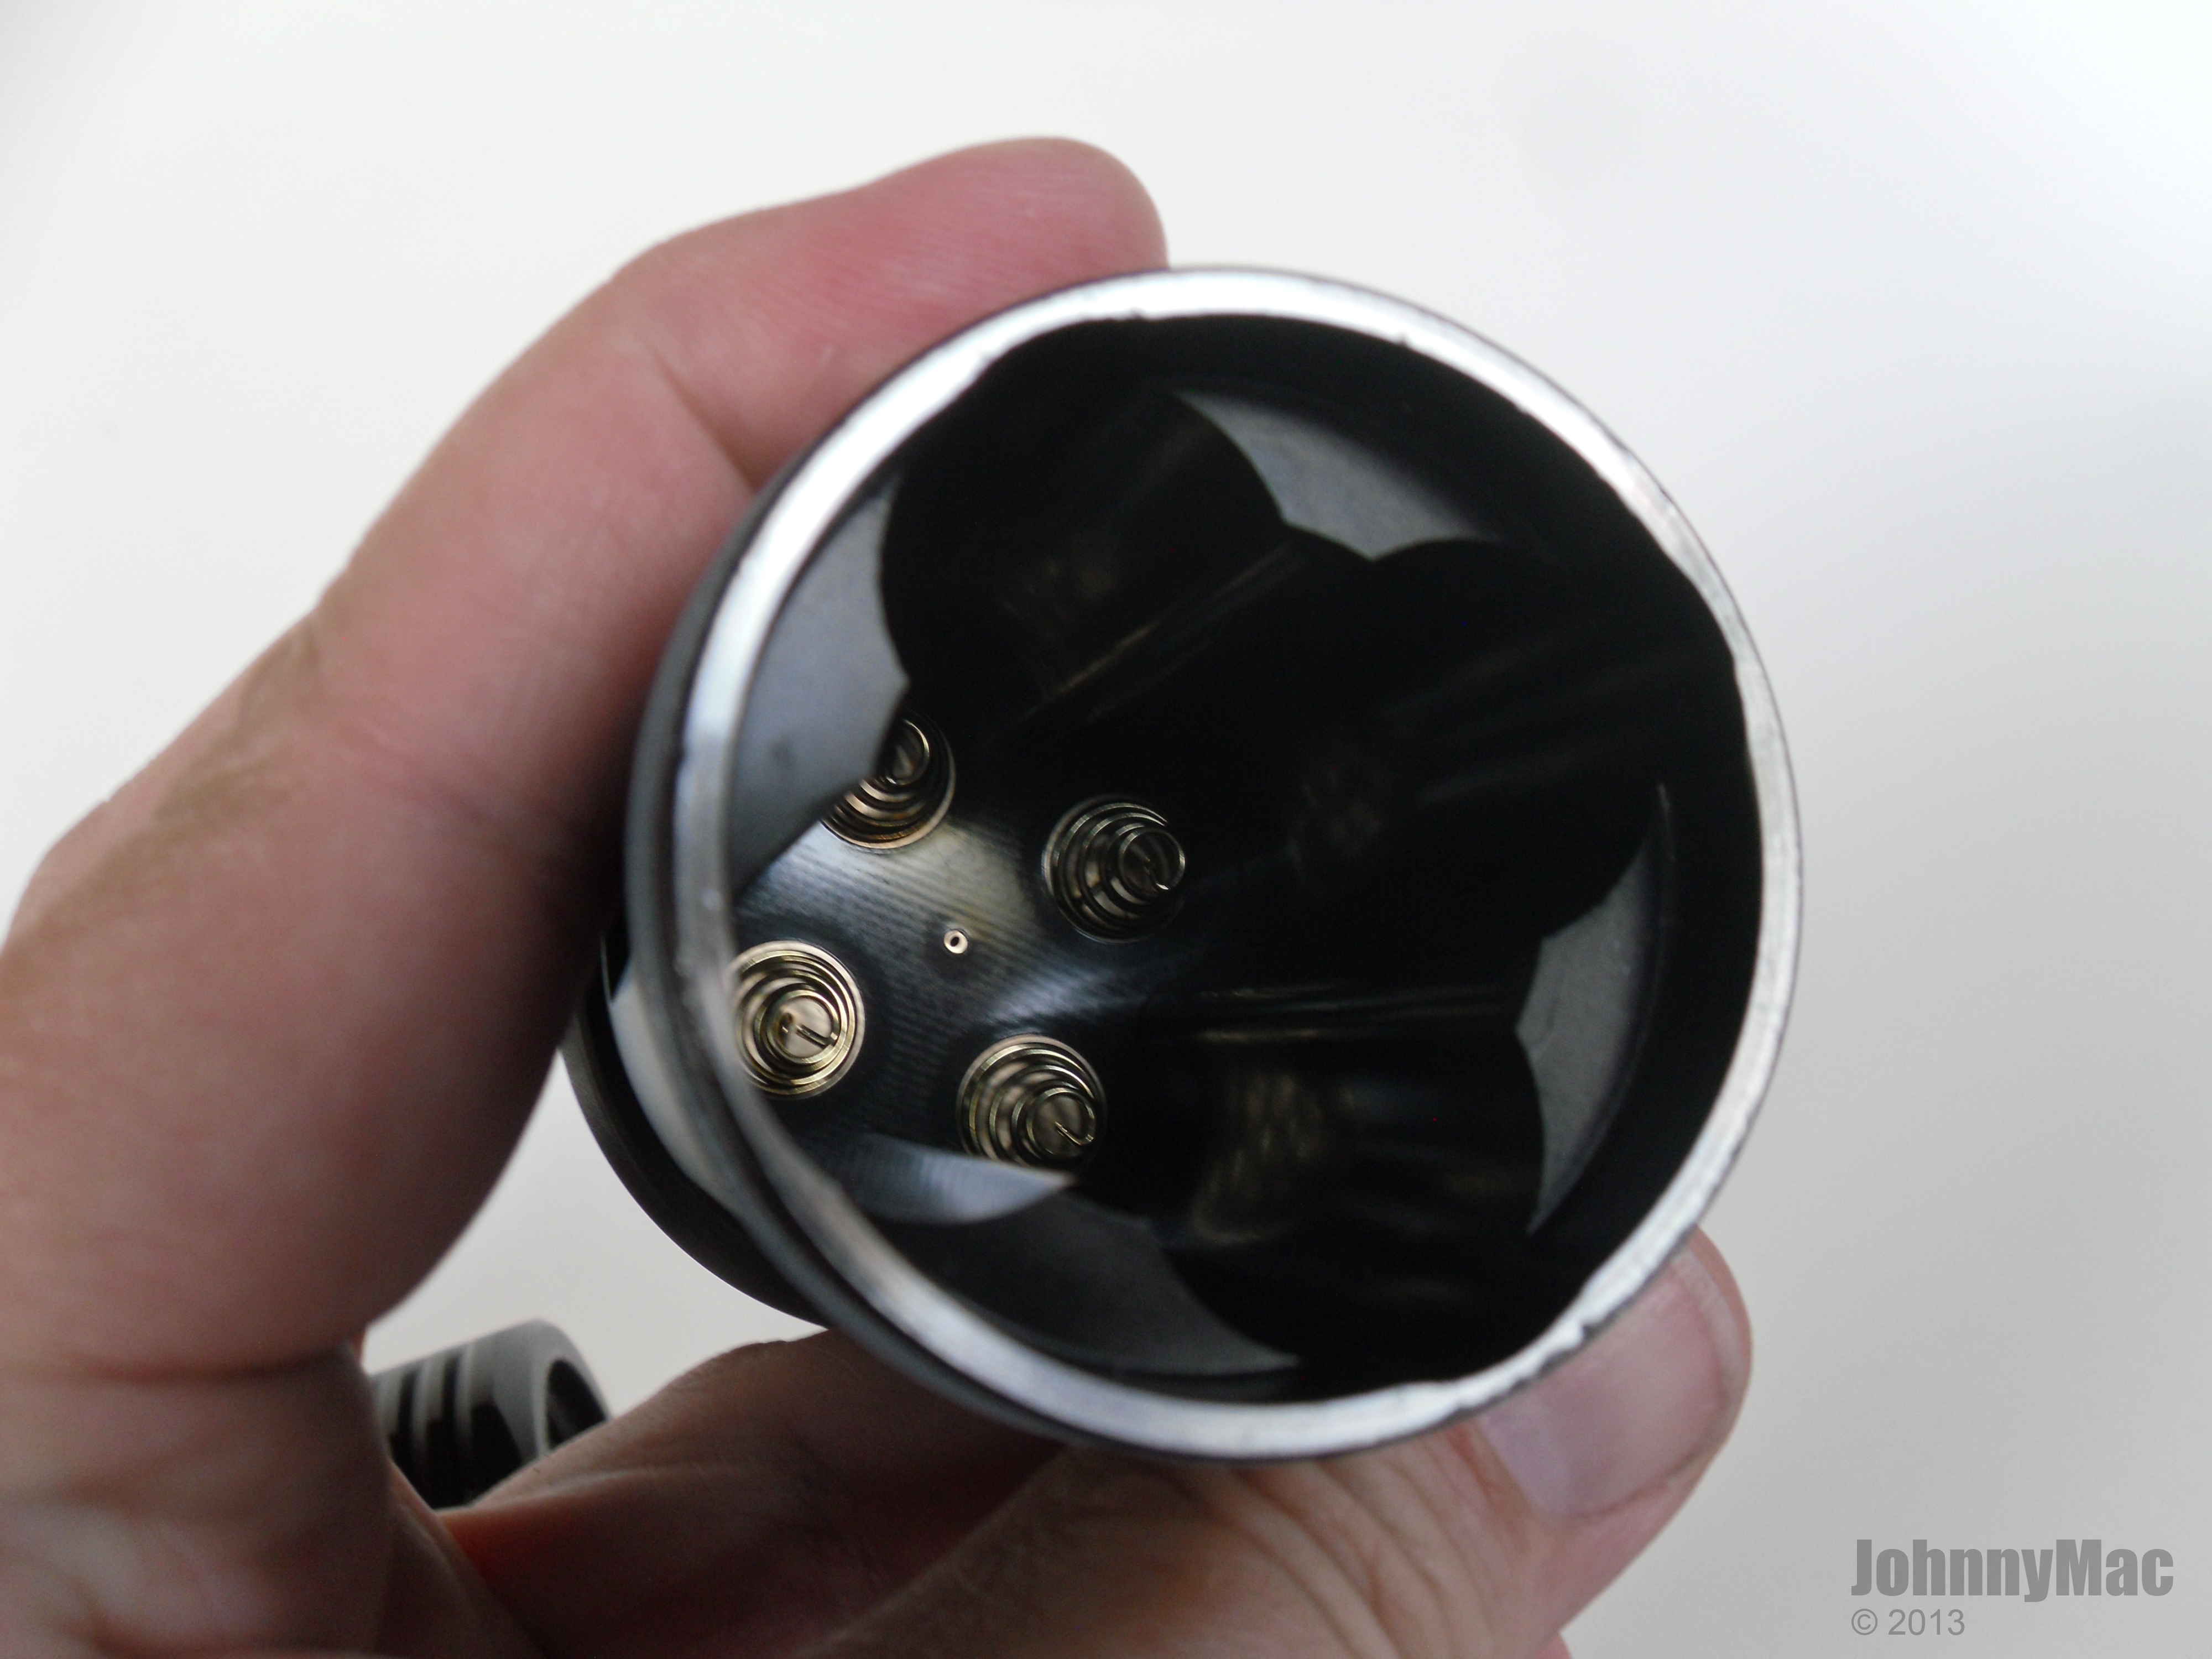
Very little cell rattle in the battery compartment/body. Both protected and unprotected cells fit but button top cells are required.
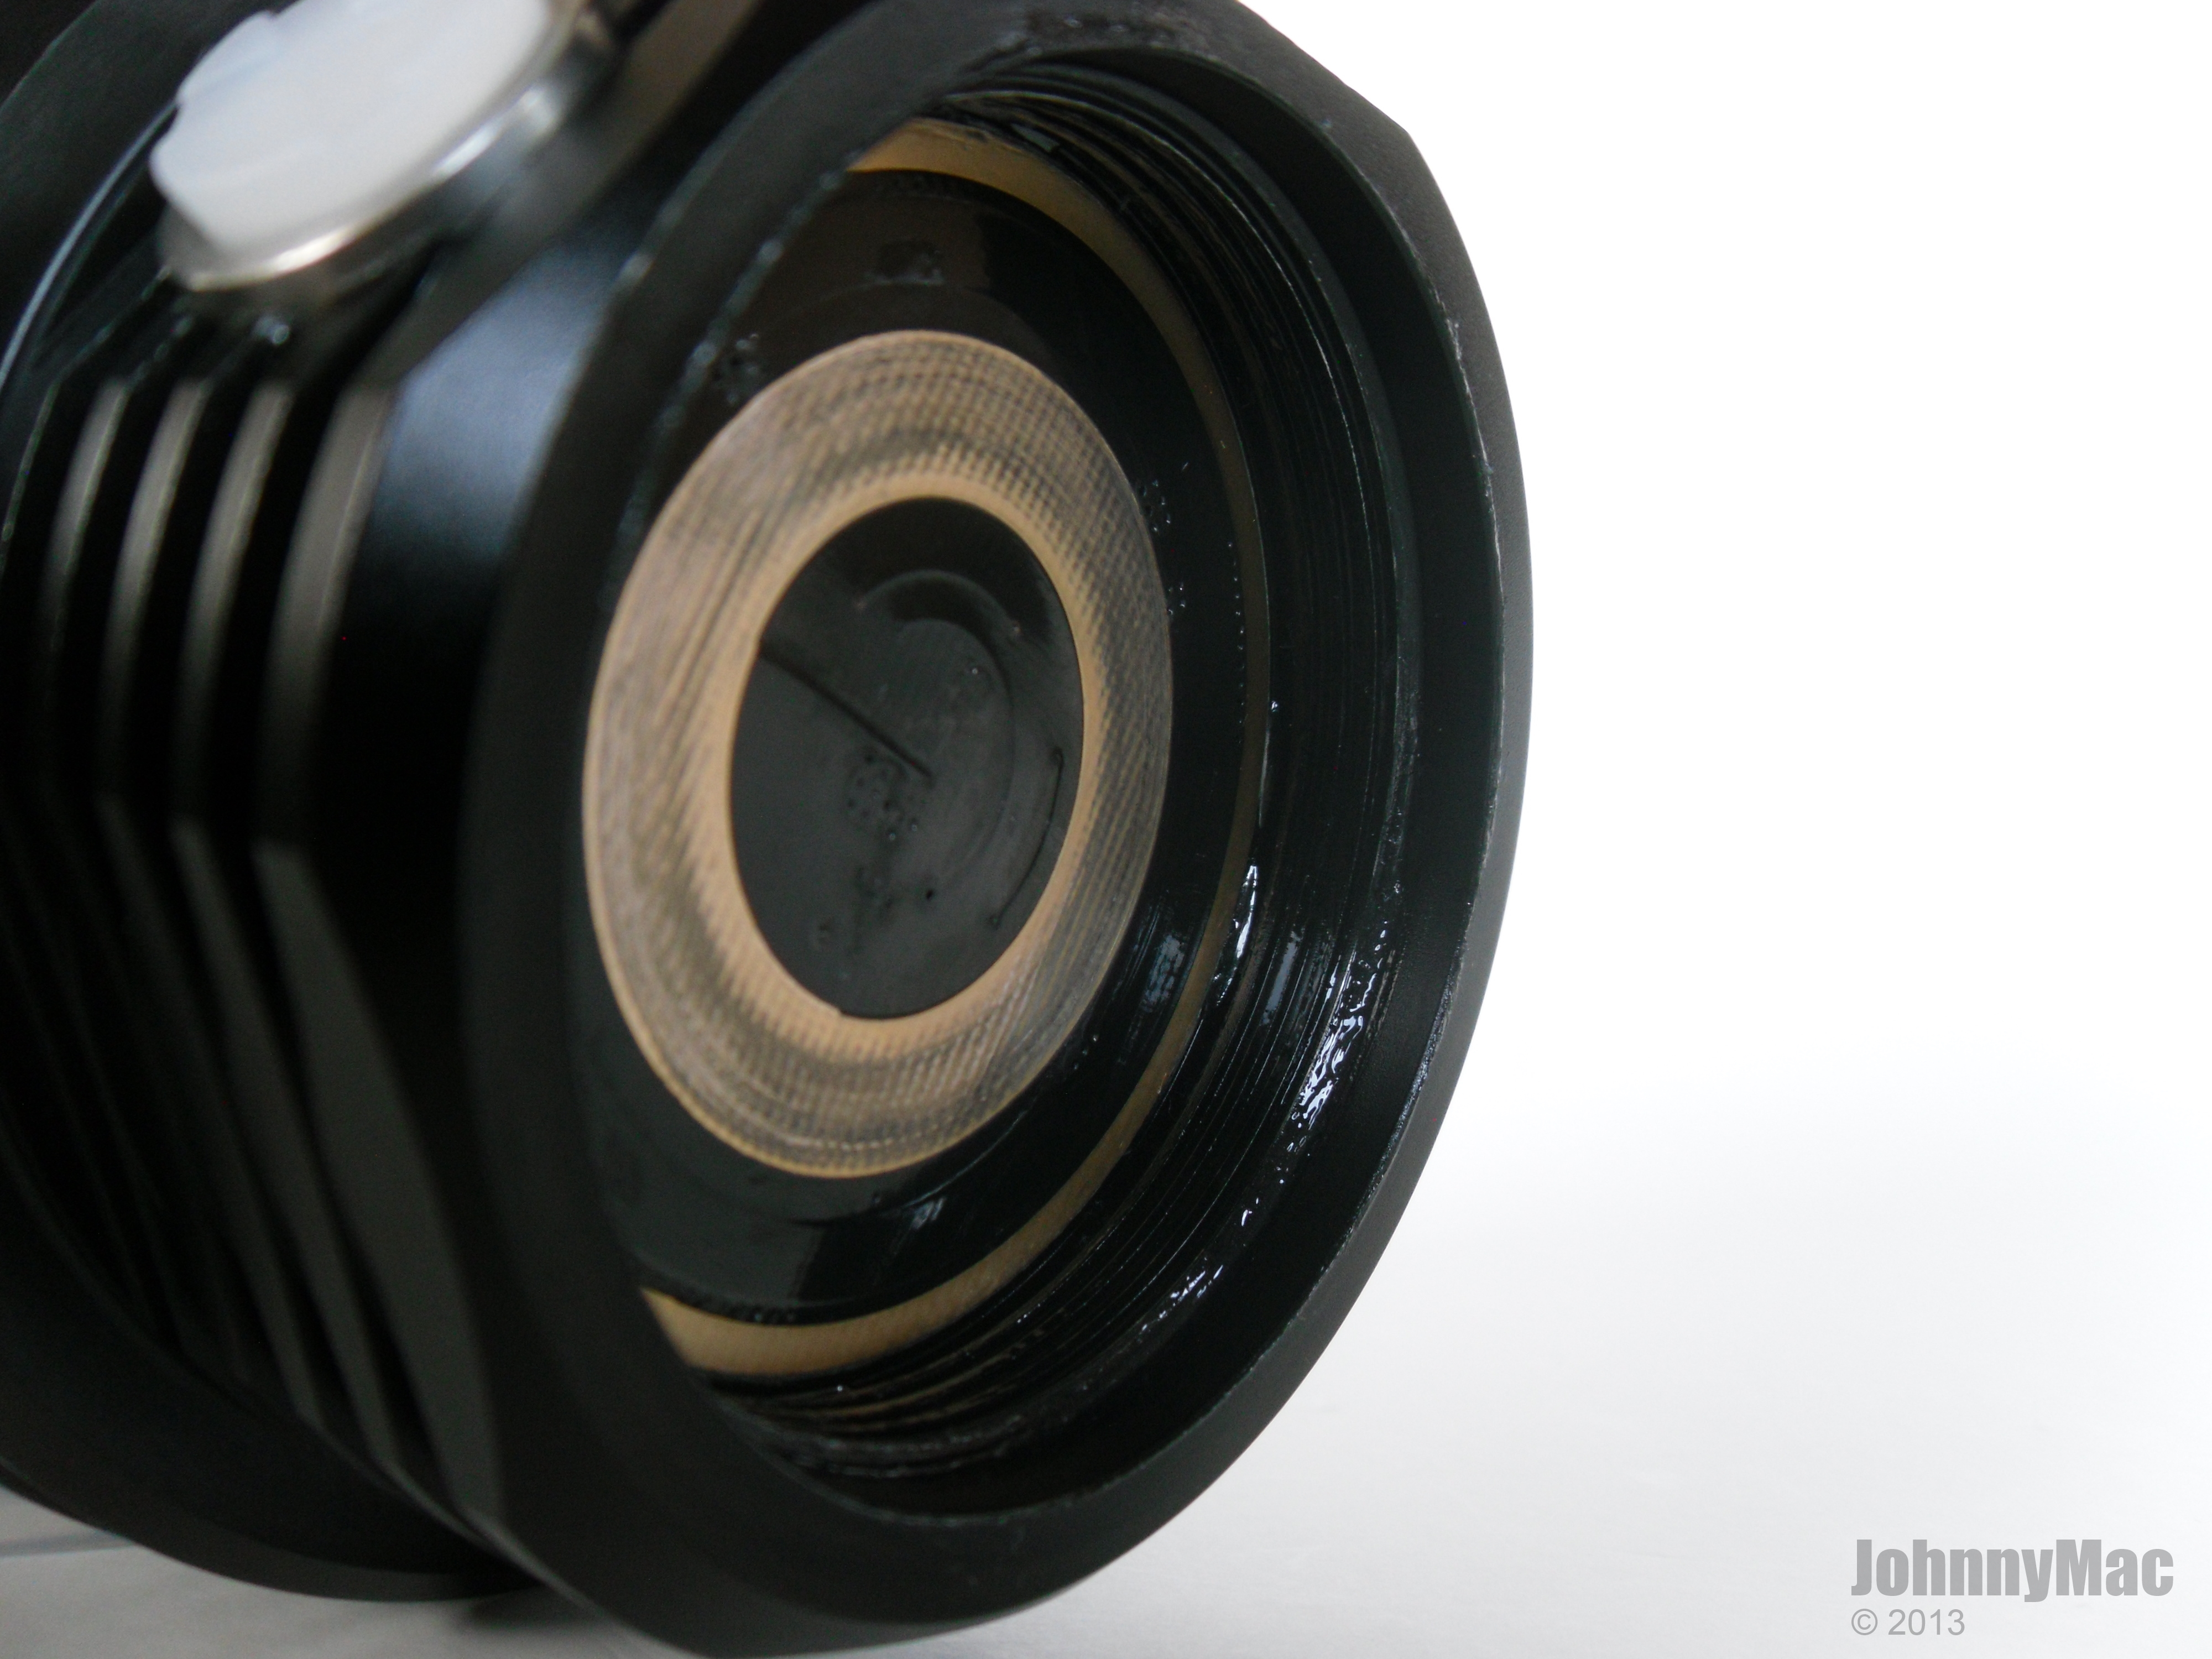
The contact ring on the driver PCB is your standard, budget plating. It would have been great if it had the thick brass contact ring that is on the Terminator. If you use laptop recovery cells you had better make sure the anode surface is smooth and well polished otherwise you will create wear on the anode contact ring of the driver. The threads were well greased with silicon grease.
The 48mm driver. Anodized threads on the body and head provide lockout for the power. This is good for preventing accidental activation and for eliminating parasitic drain when the light is not in use. My main gripe with the driver is that the manufacturer used a clear epoxy to secure the driver board in place in the head. No way to remove it without completely destroying it. If TexasPyro's new SRK driver can be made to fit I will tear out the old driver. If not I will just leave it as is since it still has great output and throw. It's just a shame because it could easily handle so much more output to the LED's. Too much unfulfilled potential. :(
Perfectly square, anodized threads and a thick O-ring provide smooth threading and a tight seal on the battery compartment.

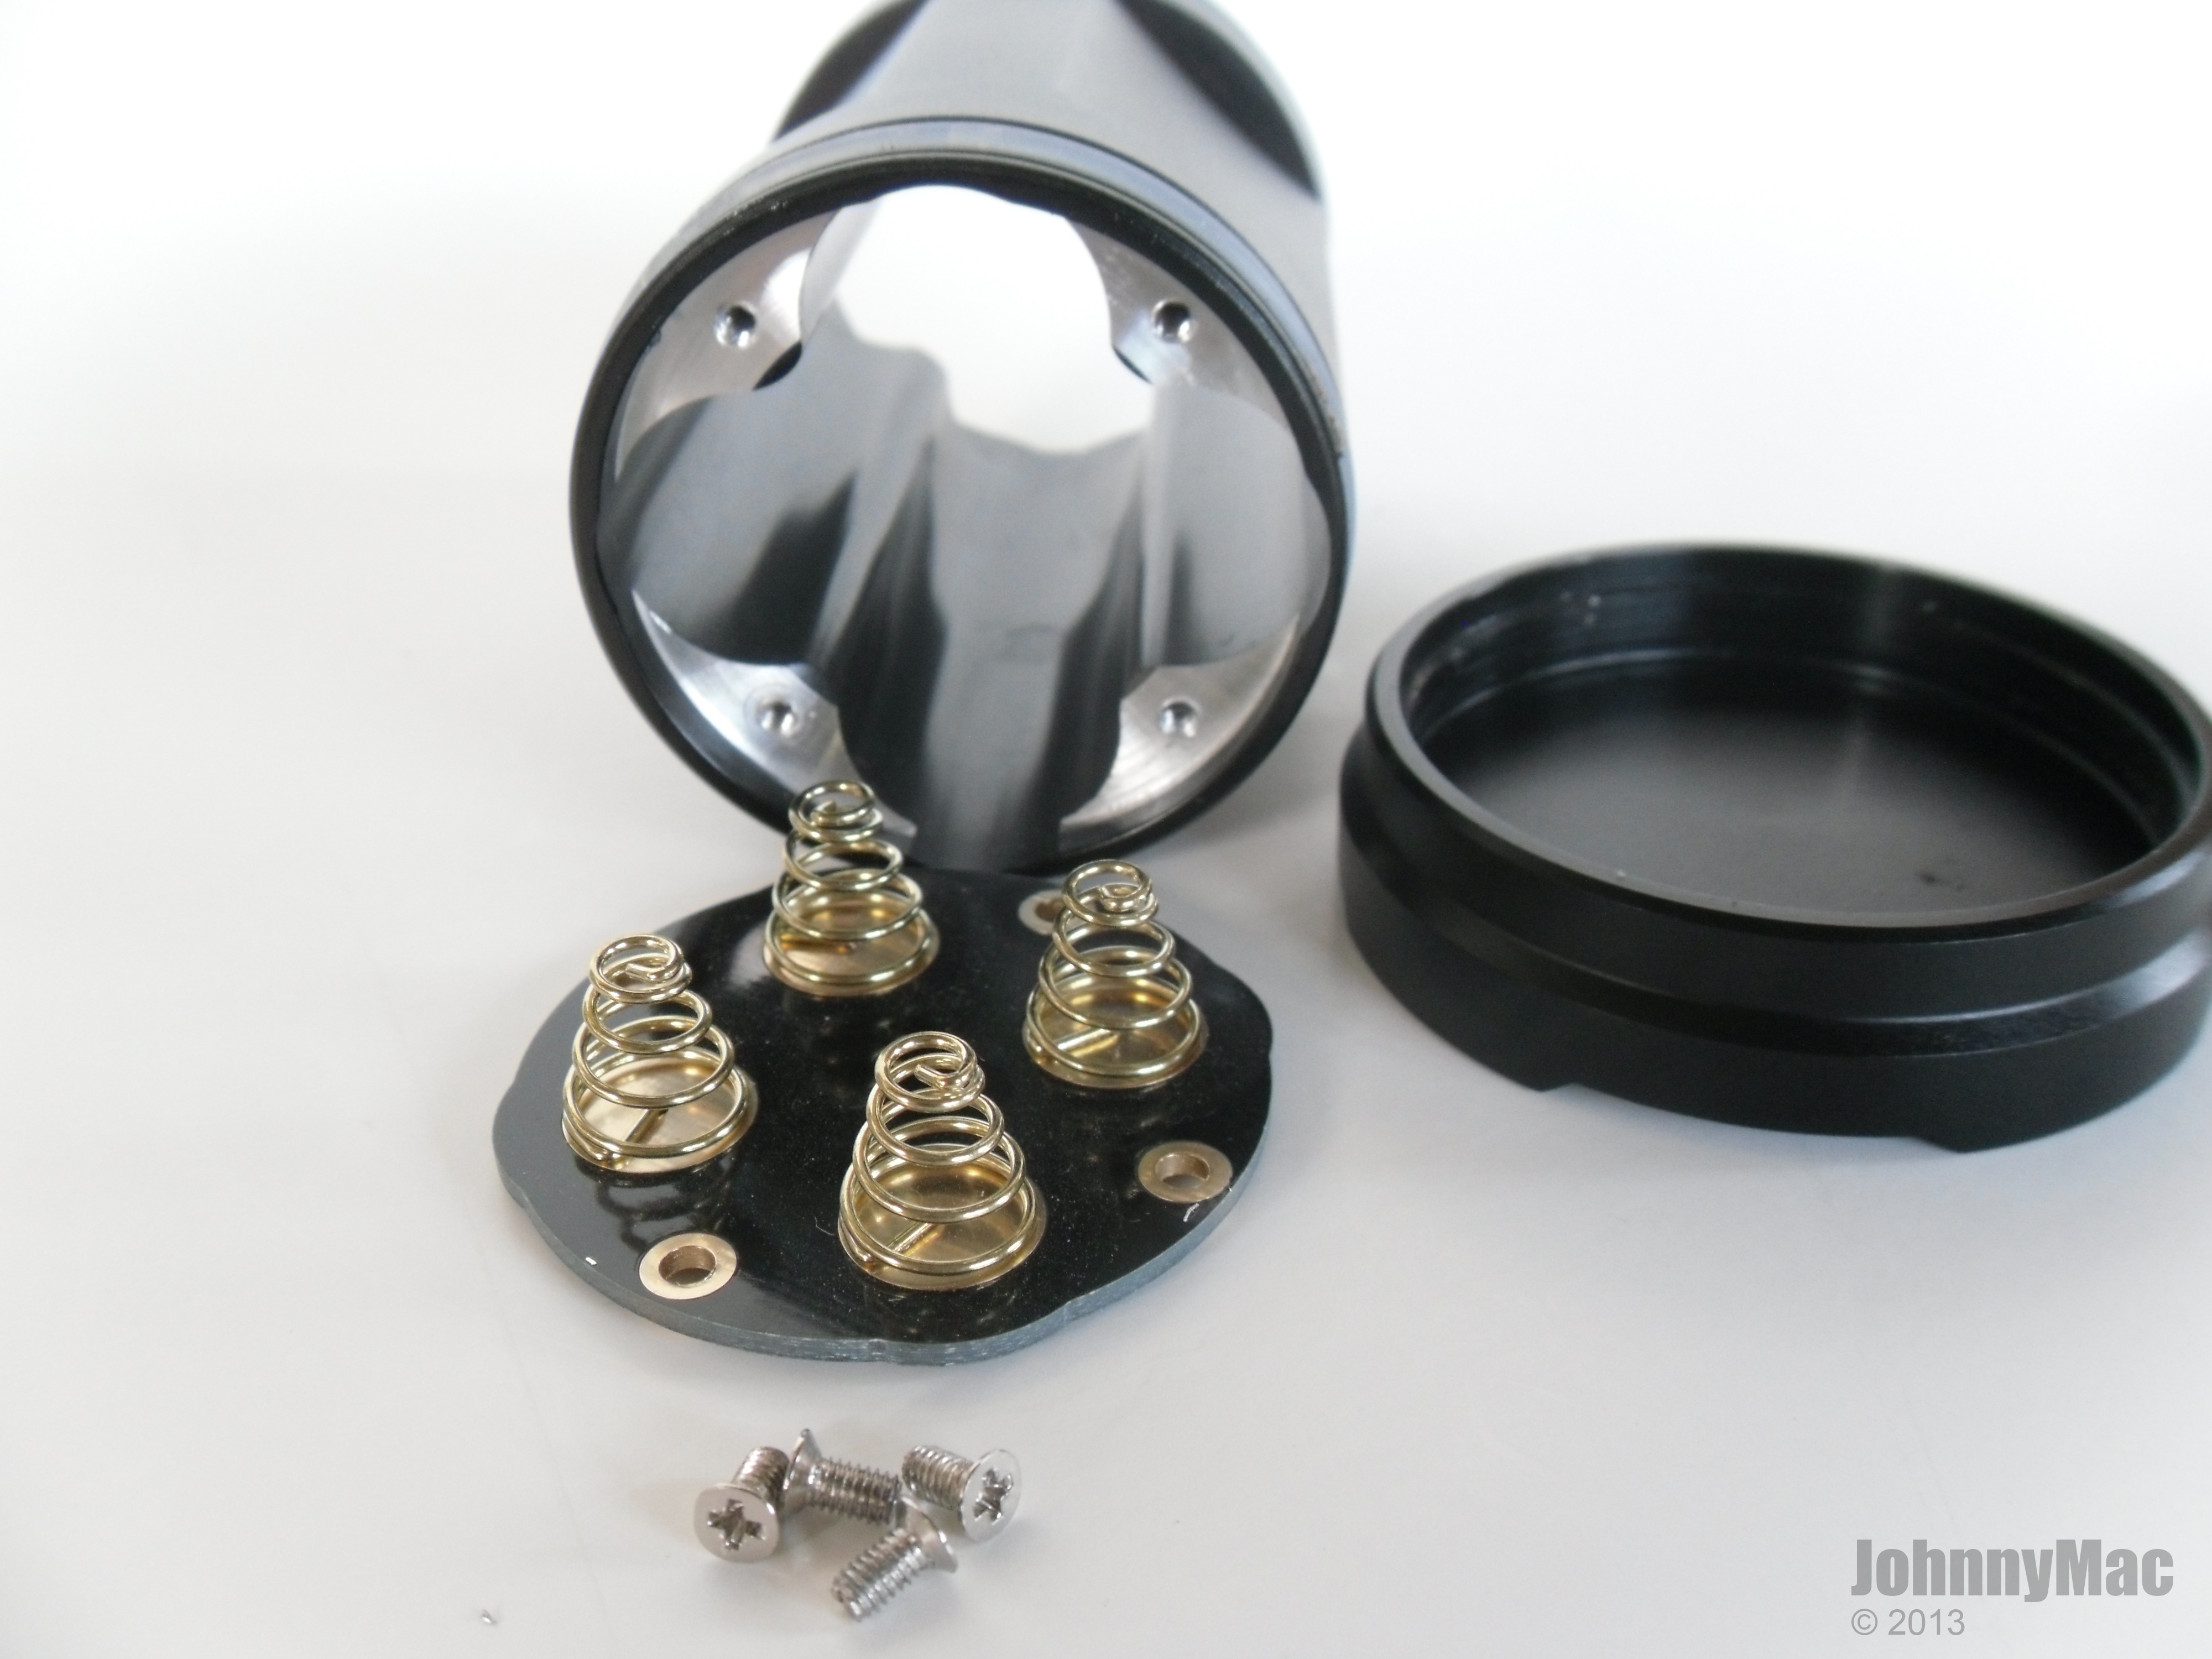
Slots for the 4 cells are nicely cut into the body. Gold colored springs provide contact with the cathode end of the cells. They are neither too thin or super thick and look adequate for the amperage required by the driver. The exposed surface at the end of the body tube transfers ground current to the outer contact ring of the driver PCB.
The end cap was, surprisingly, not soaked in Loctite and was tight but easily removed to get to the tail spring PCB. The O-ring on mine looks like it was pinched during initial assembly but it remained watertight in my submersion testing.

Here you can see cathode contact board. The traces are thick and wide and all soldering joints for the springs are really well done. The only resistance in this design, if any, would lie only in the springs themselves.
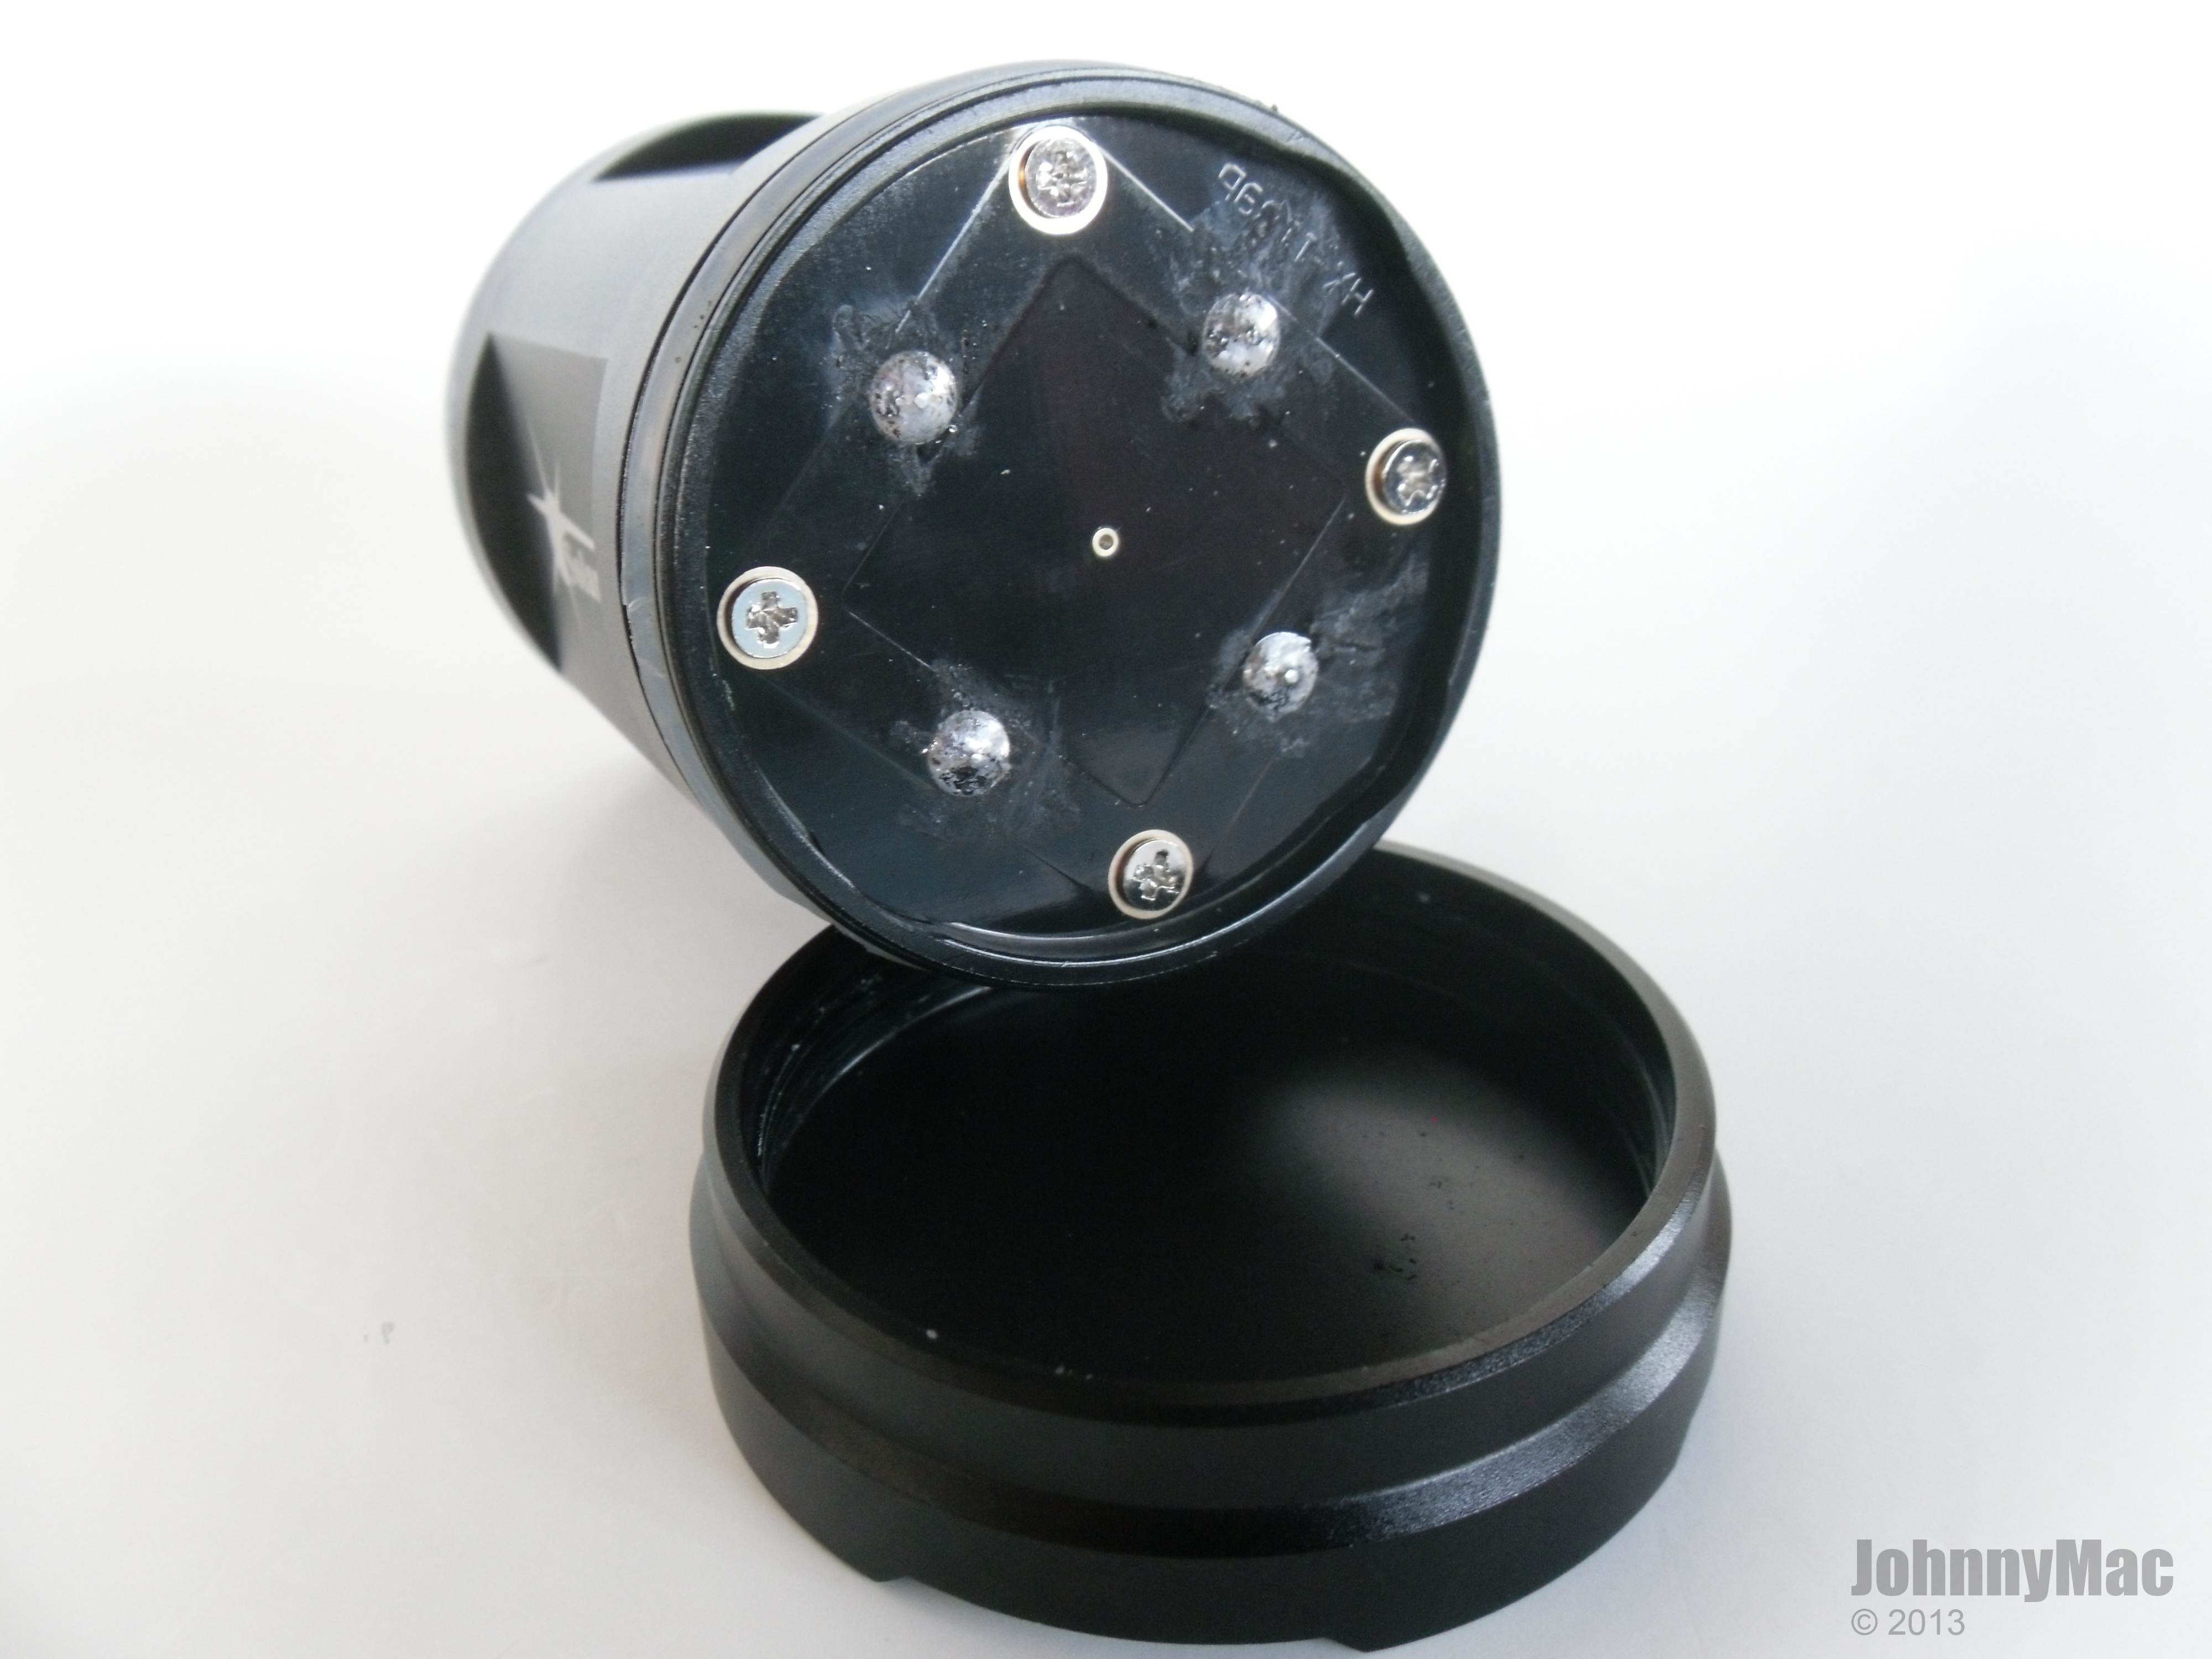
With the spring contact board removed you can see that the springs are really pretty nice. None of the screw holes were stripped and everything is solid and well put together.
The ergonomics on the SP03 are really pretty nice. I have fairly large hands and had no problem with either the handle length of switch placement.
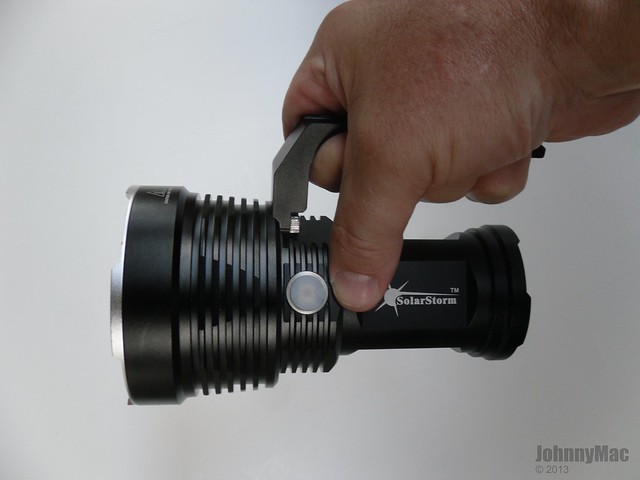
My thumb falls squarely over the switch button without stretching or looking. The crisp action of the switch is easy to work while held by the handle.

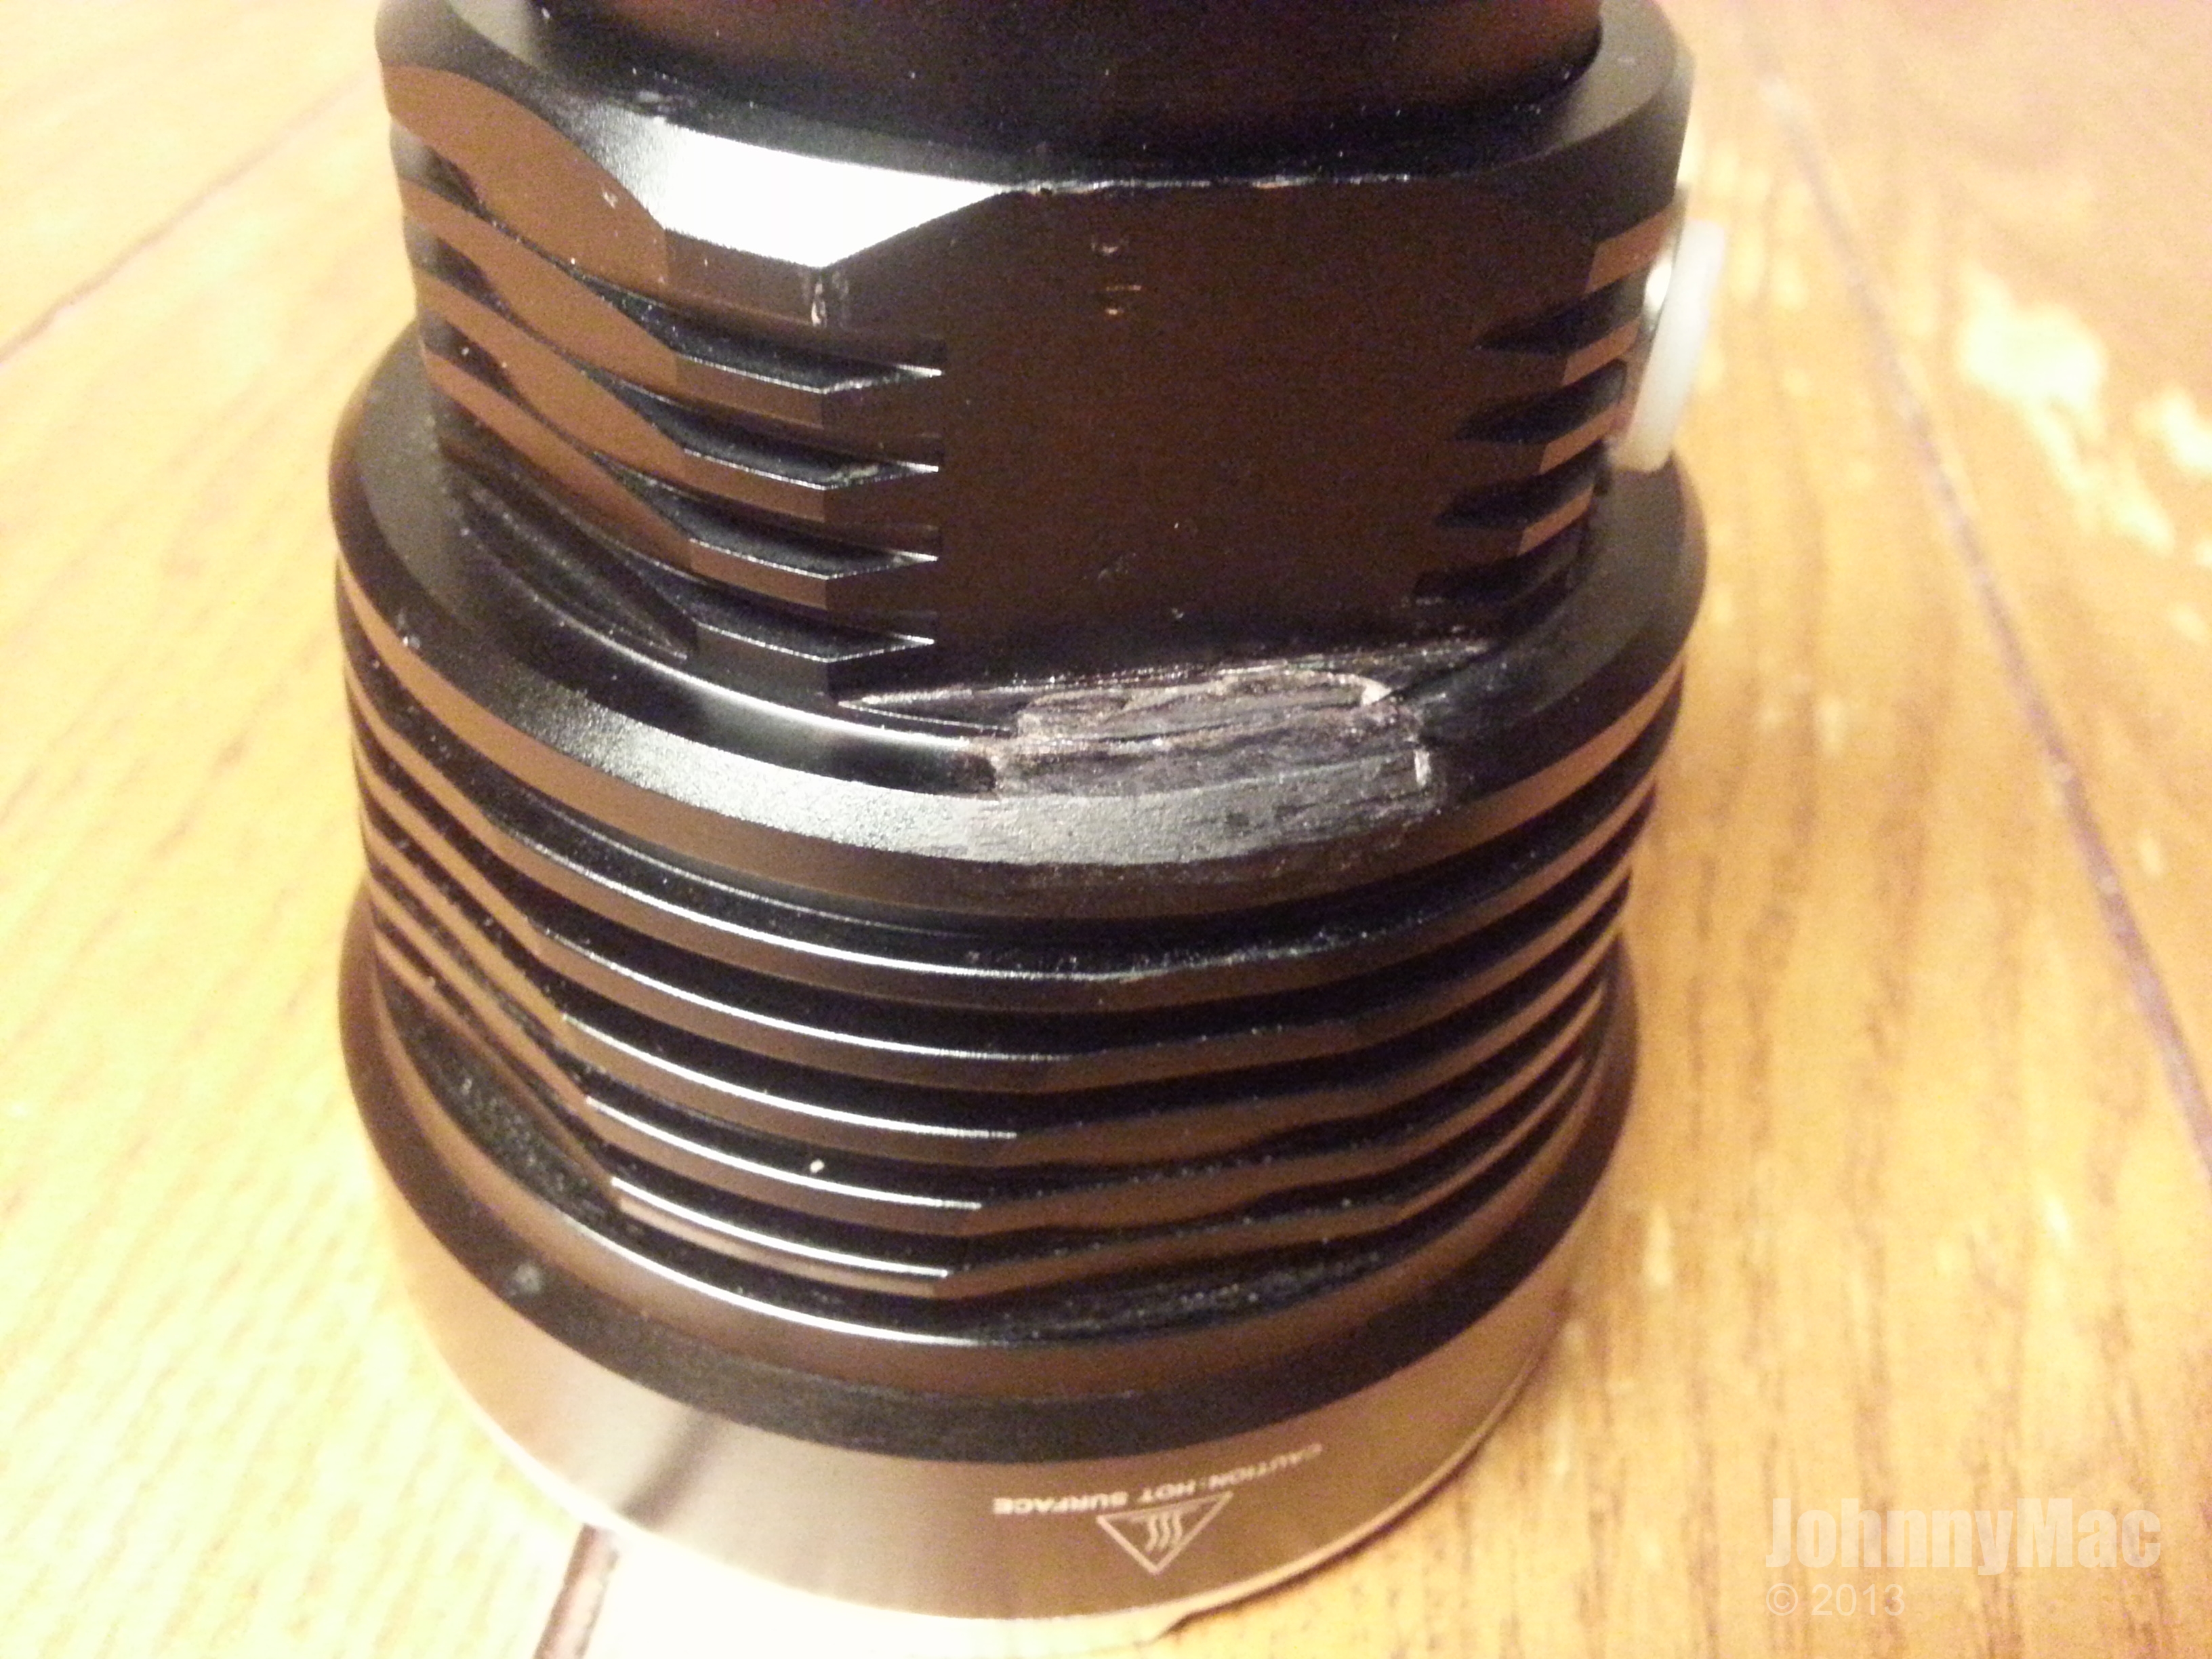
Here you can get an idea of what I meant by the handle being longer than the light itself. If you leave the handle sit outside the surface you tail stand the light on the SP03 sits super stable and solidly. If the handle is on the surface it lifts the one end of the base of the light and makes it stand wobbly.
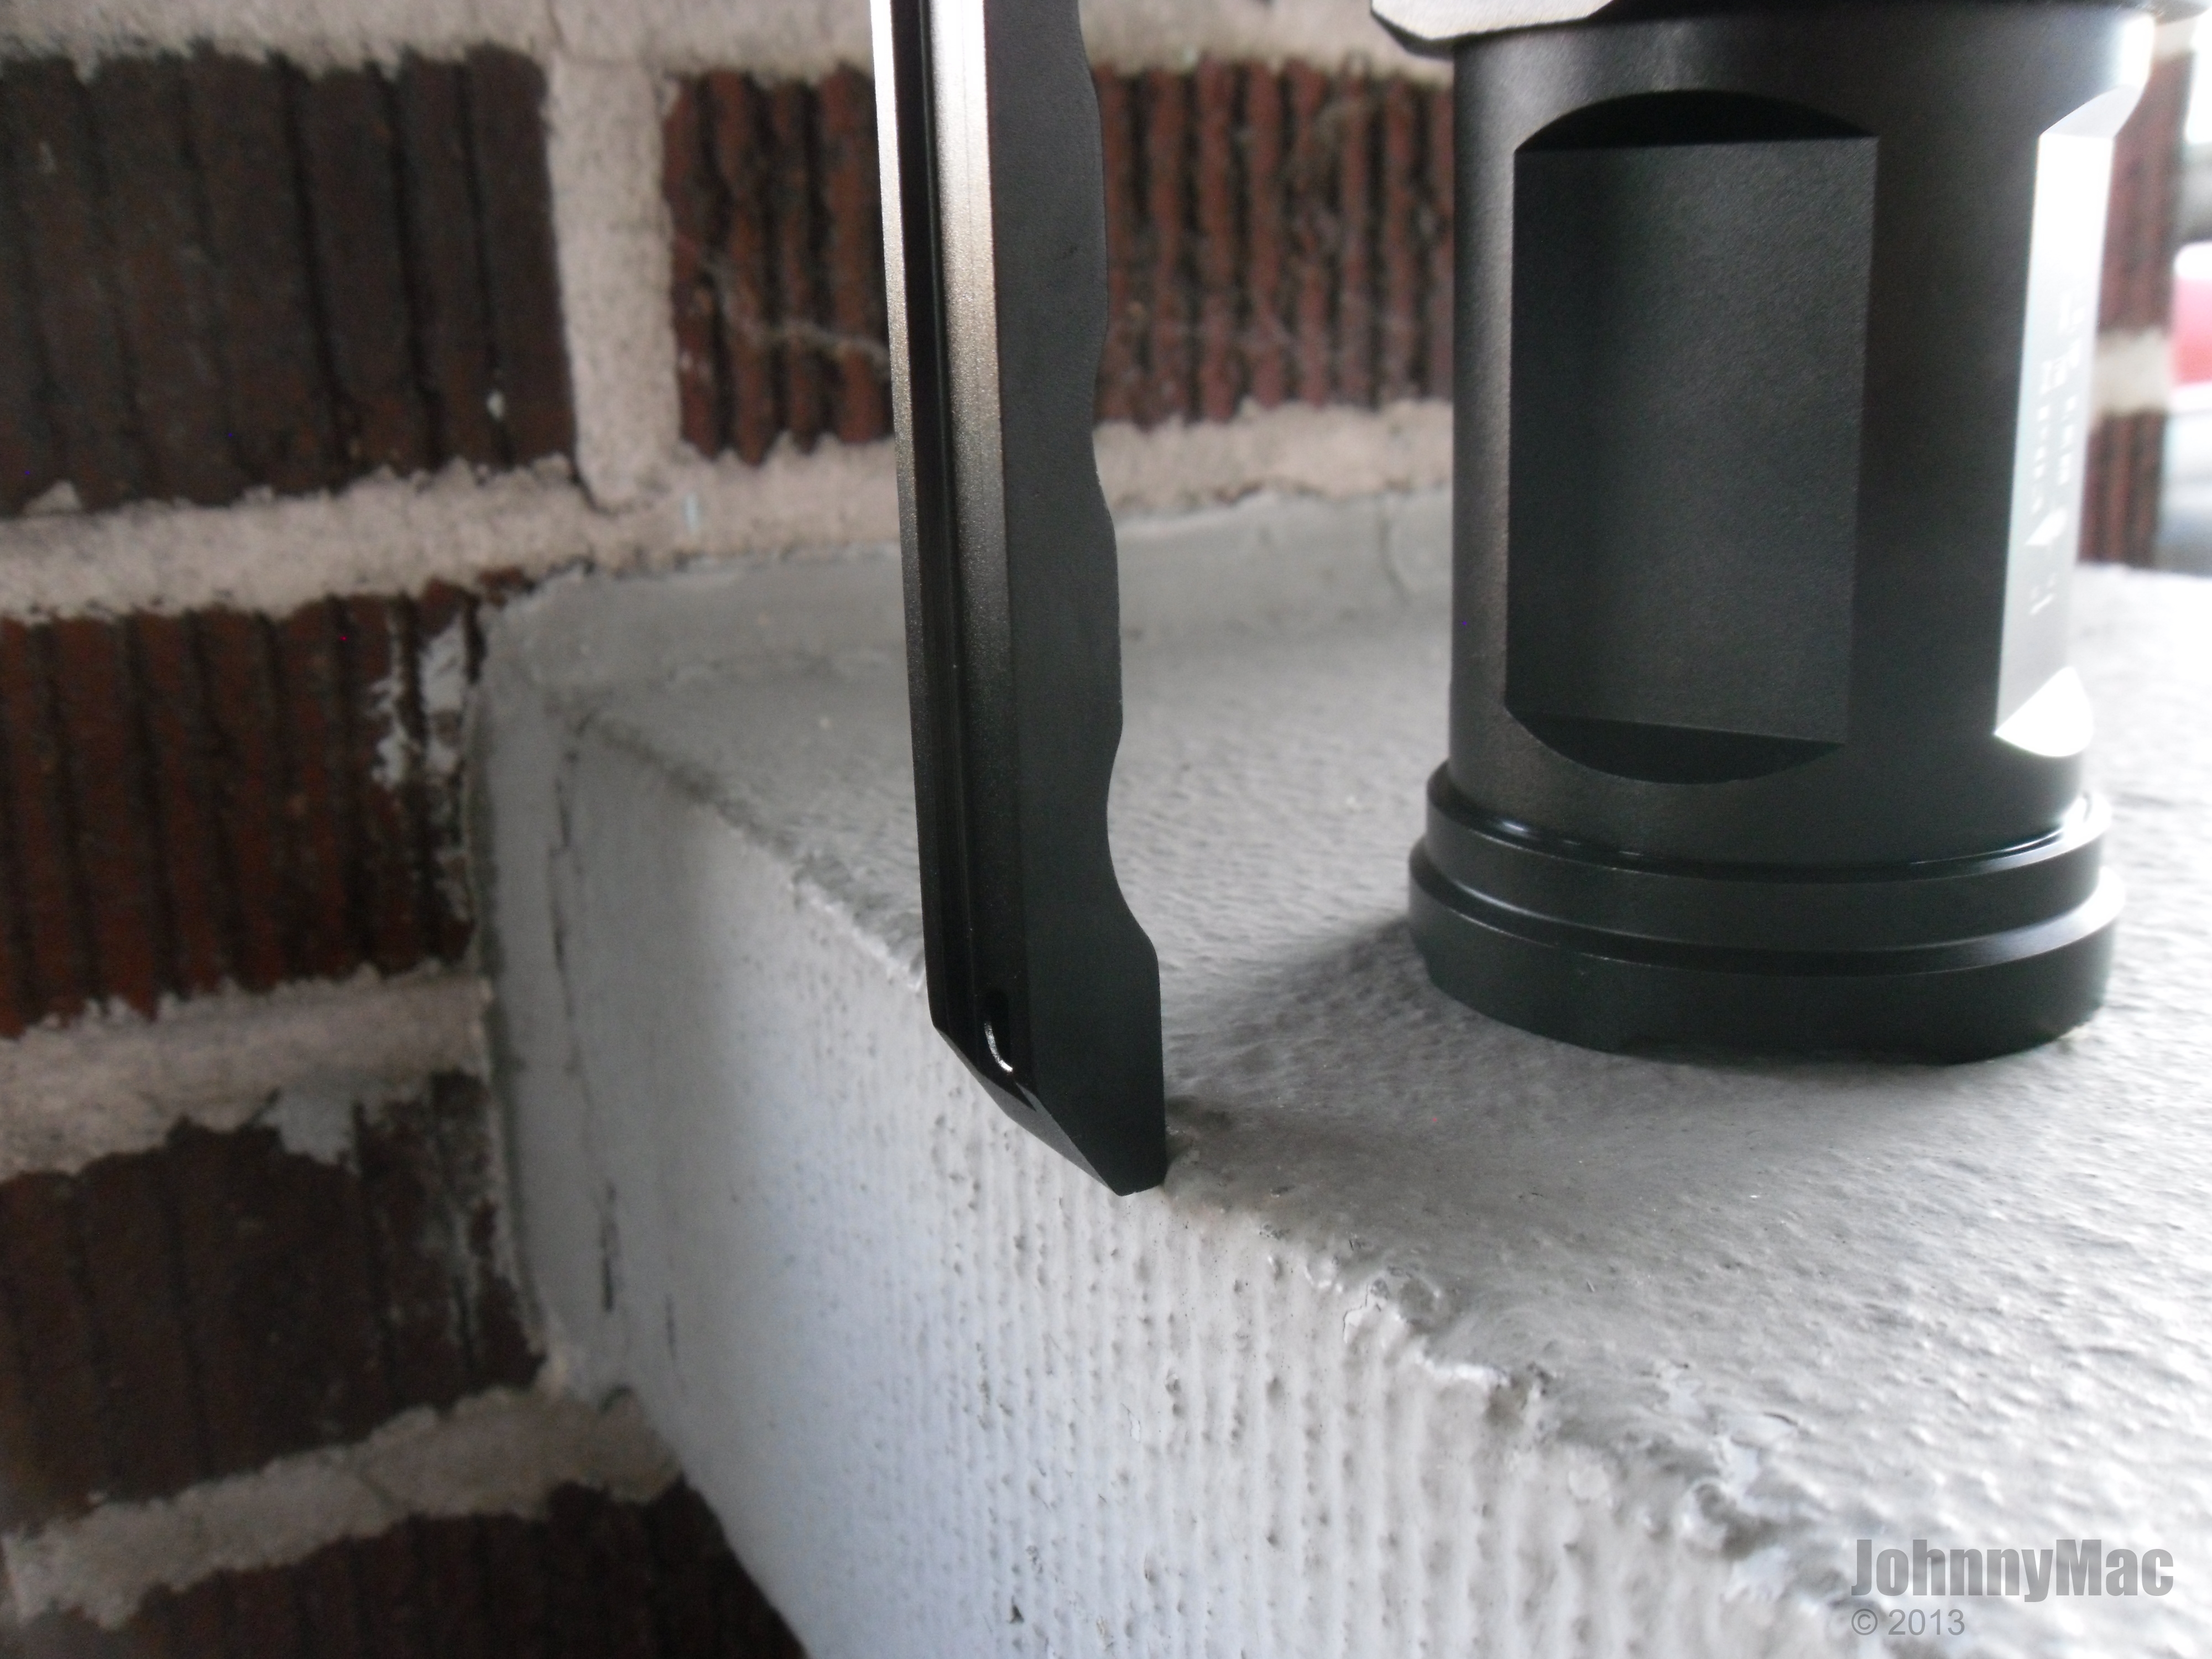
This shot will show you just how little needed to be removed from the end of the handle to allow the handle to stay on the light and not interfere with proper tail standing. It may not bother some people but I can be a bit nit-picky, especially when it wouldn't have cost any extra time or money to have made it the correct length in the first place. You could always grind it down but then you'd have a handle without any anodizing on the end that would look like you hacked it or was unfinished.

It's a fat light but still has great feel and heft in the hand.

WATERPROOFING ISSUES:
Large bin filled with water...check. Turn on the SP03 and drop it into the bucket of water...check.
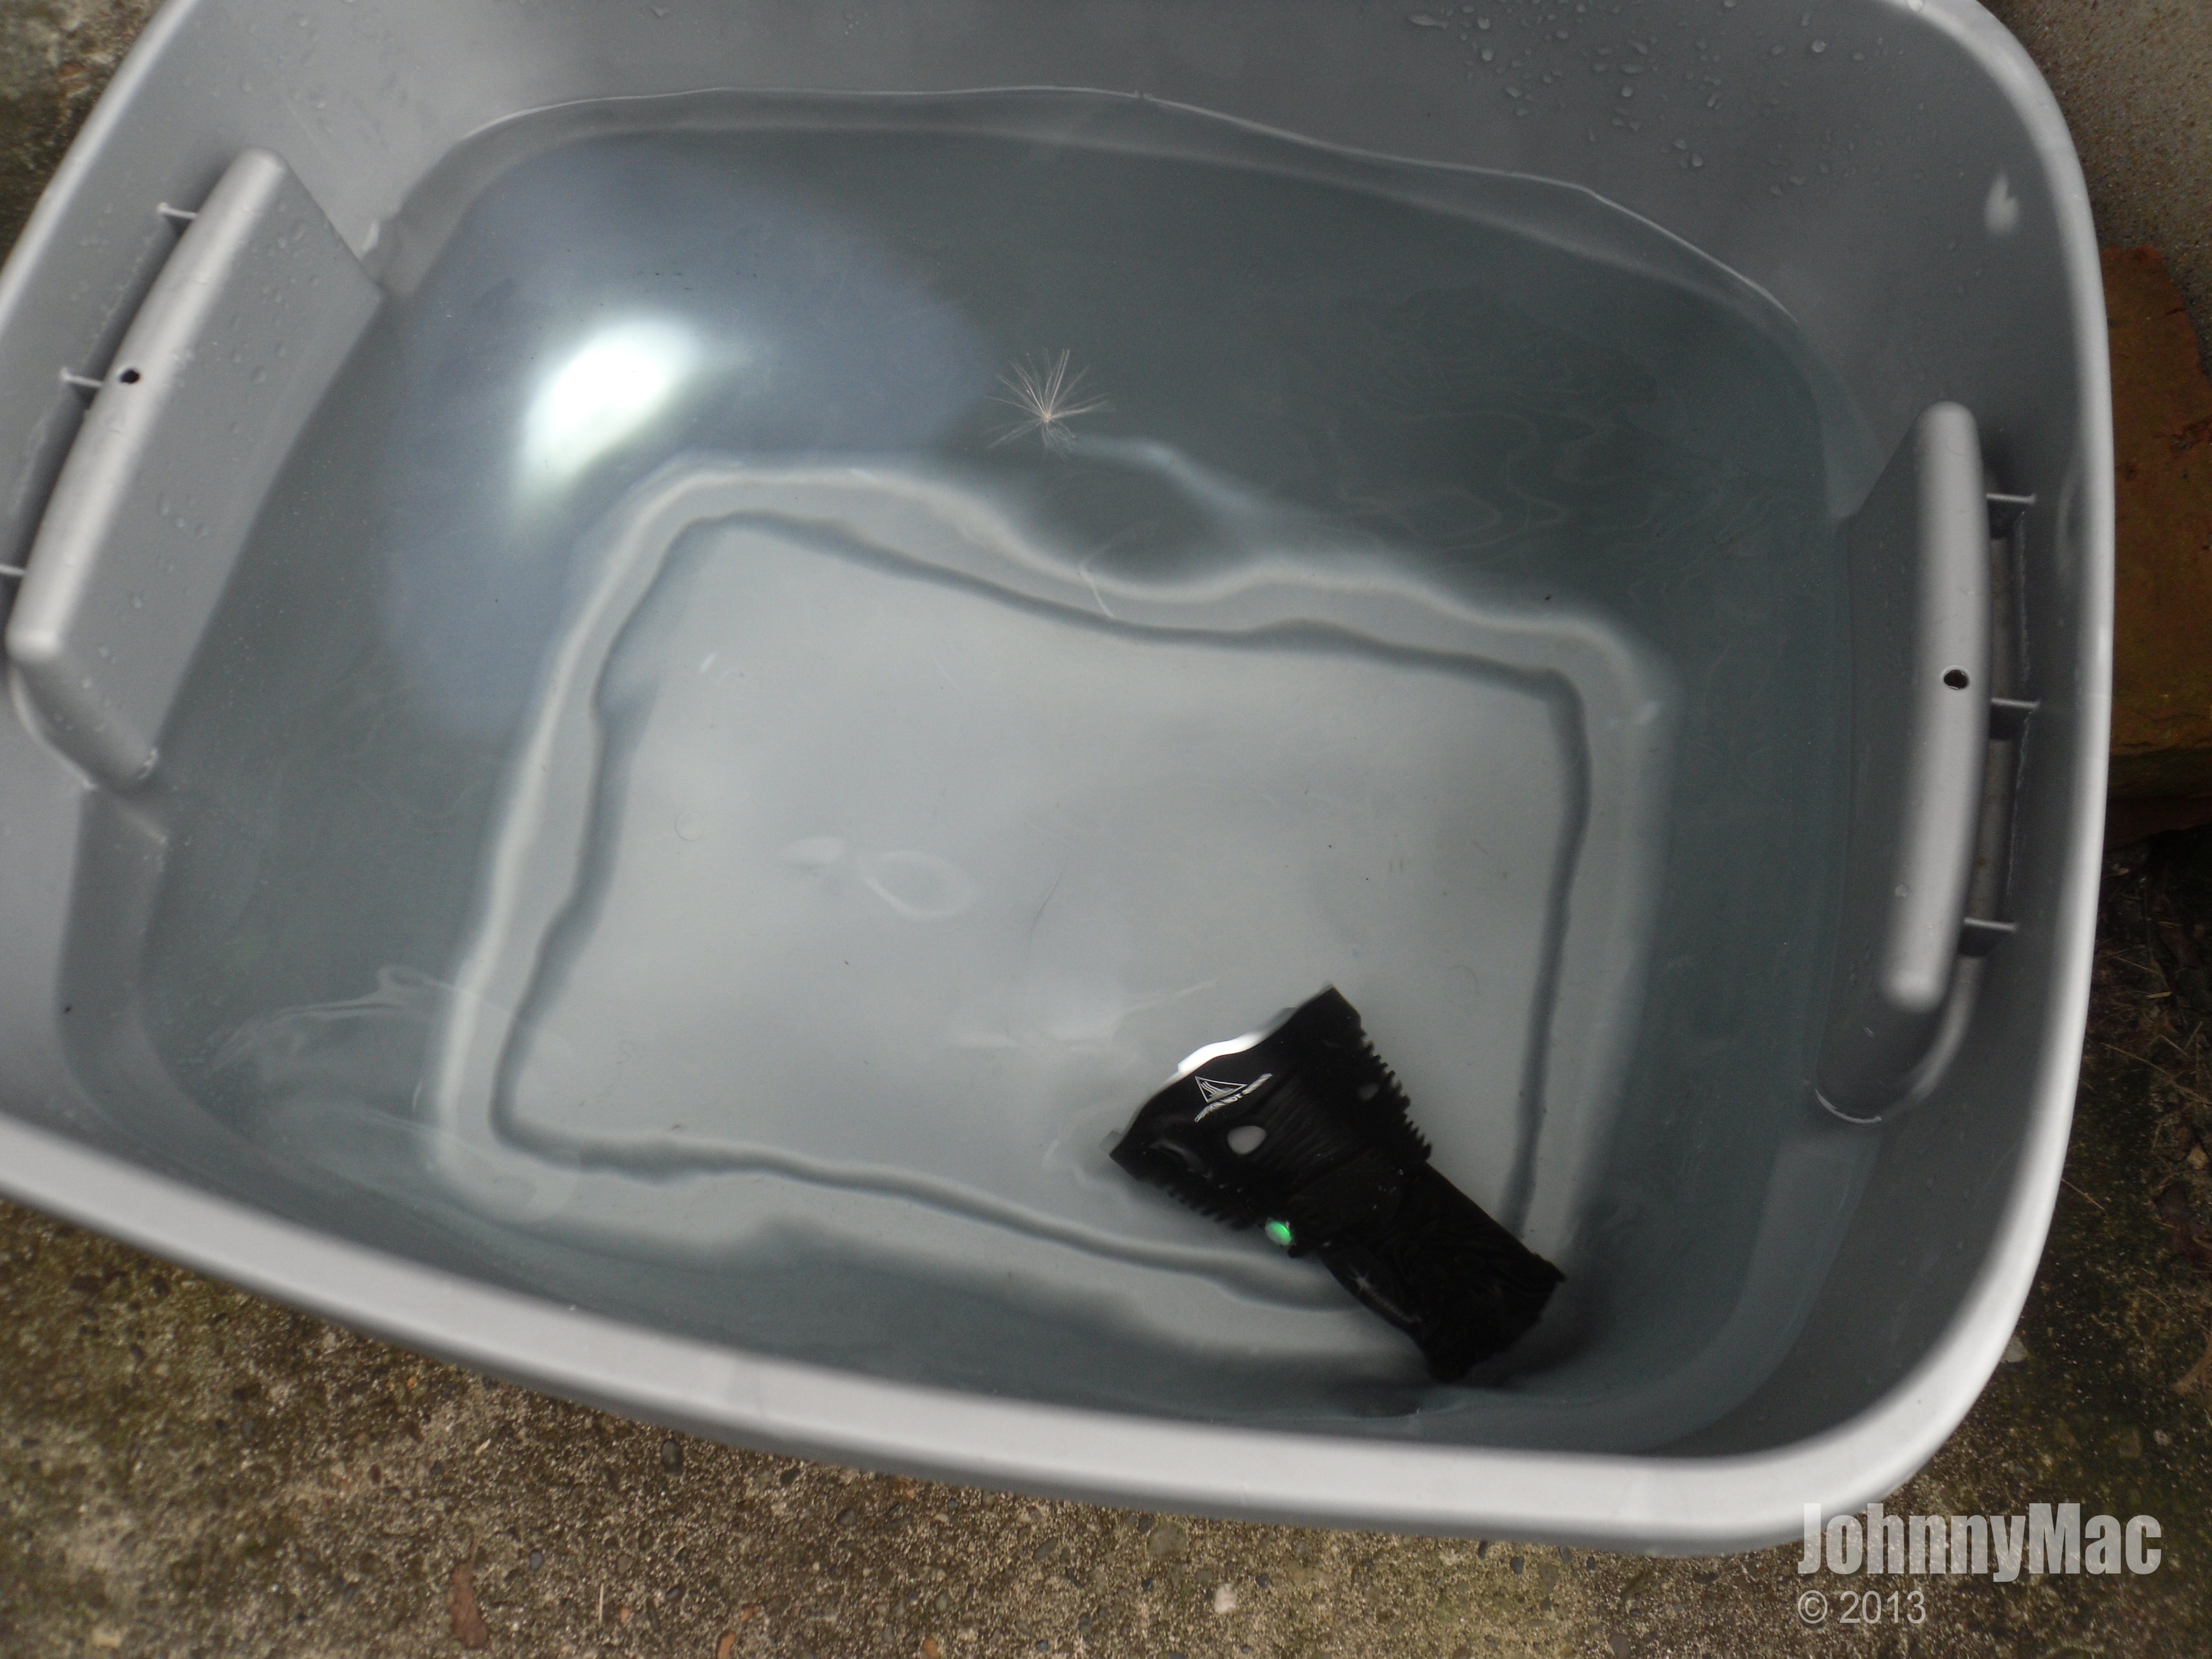
30 minutes later I came back to check on it and what do my eyes perceive? I do believe there is some water pooling in the reflector behind the lens.
Son of a gun, I was right. Well, I'll just have to dry off the outside of the light and open her up inside to see where the water came in from and what specific areas were effected.
Well, all the water you see on the table was inside the reflector housing. Looks like the O-ring was pressed into the thin gap between the reflector and the head leaving the seal between the lens and the O-ring less tight than it should have been. This is correctable by filling in the gap between the outside of the reflector and the head but you really shouldn't be forced to do that on a light rated to 2m submersion. At least I would feel perfectly safe with the SP03 in the rain or with a real quick in-and-out dunk. The remainder of the light was dry as dust inside. All the other seals, including the switch button, did their job just fine.

SIZE COMPARISONS:
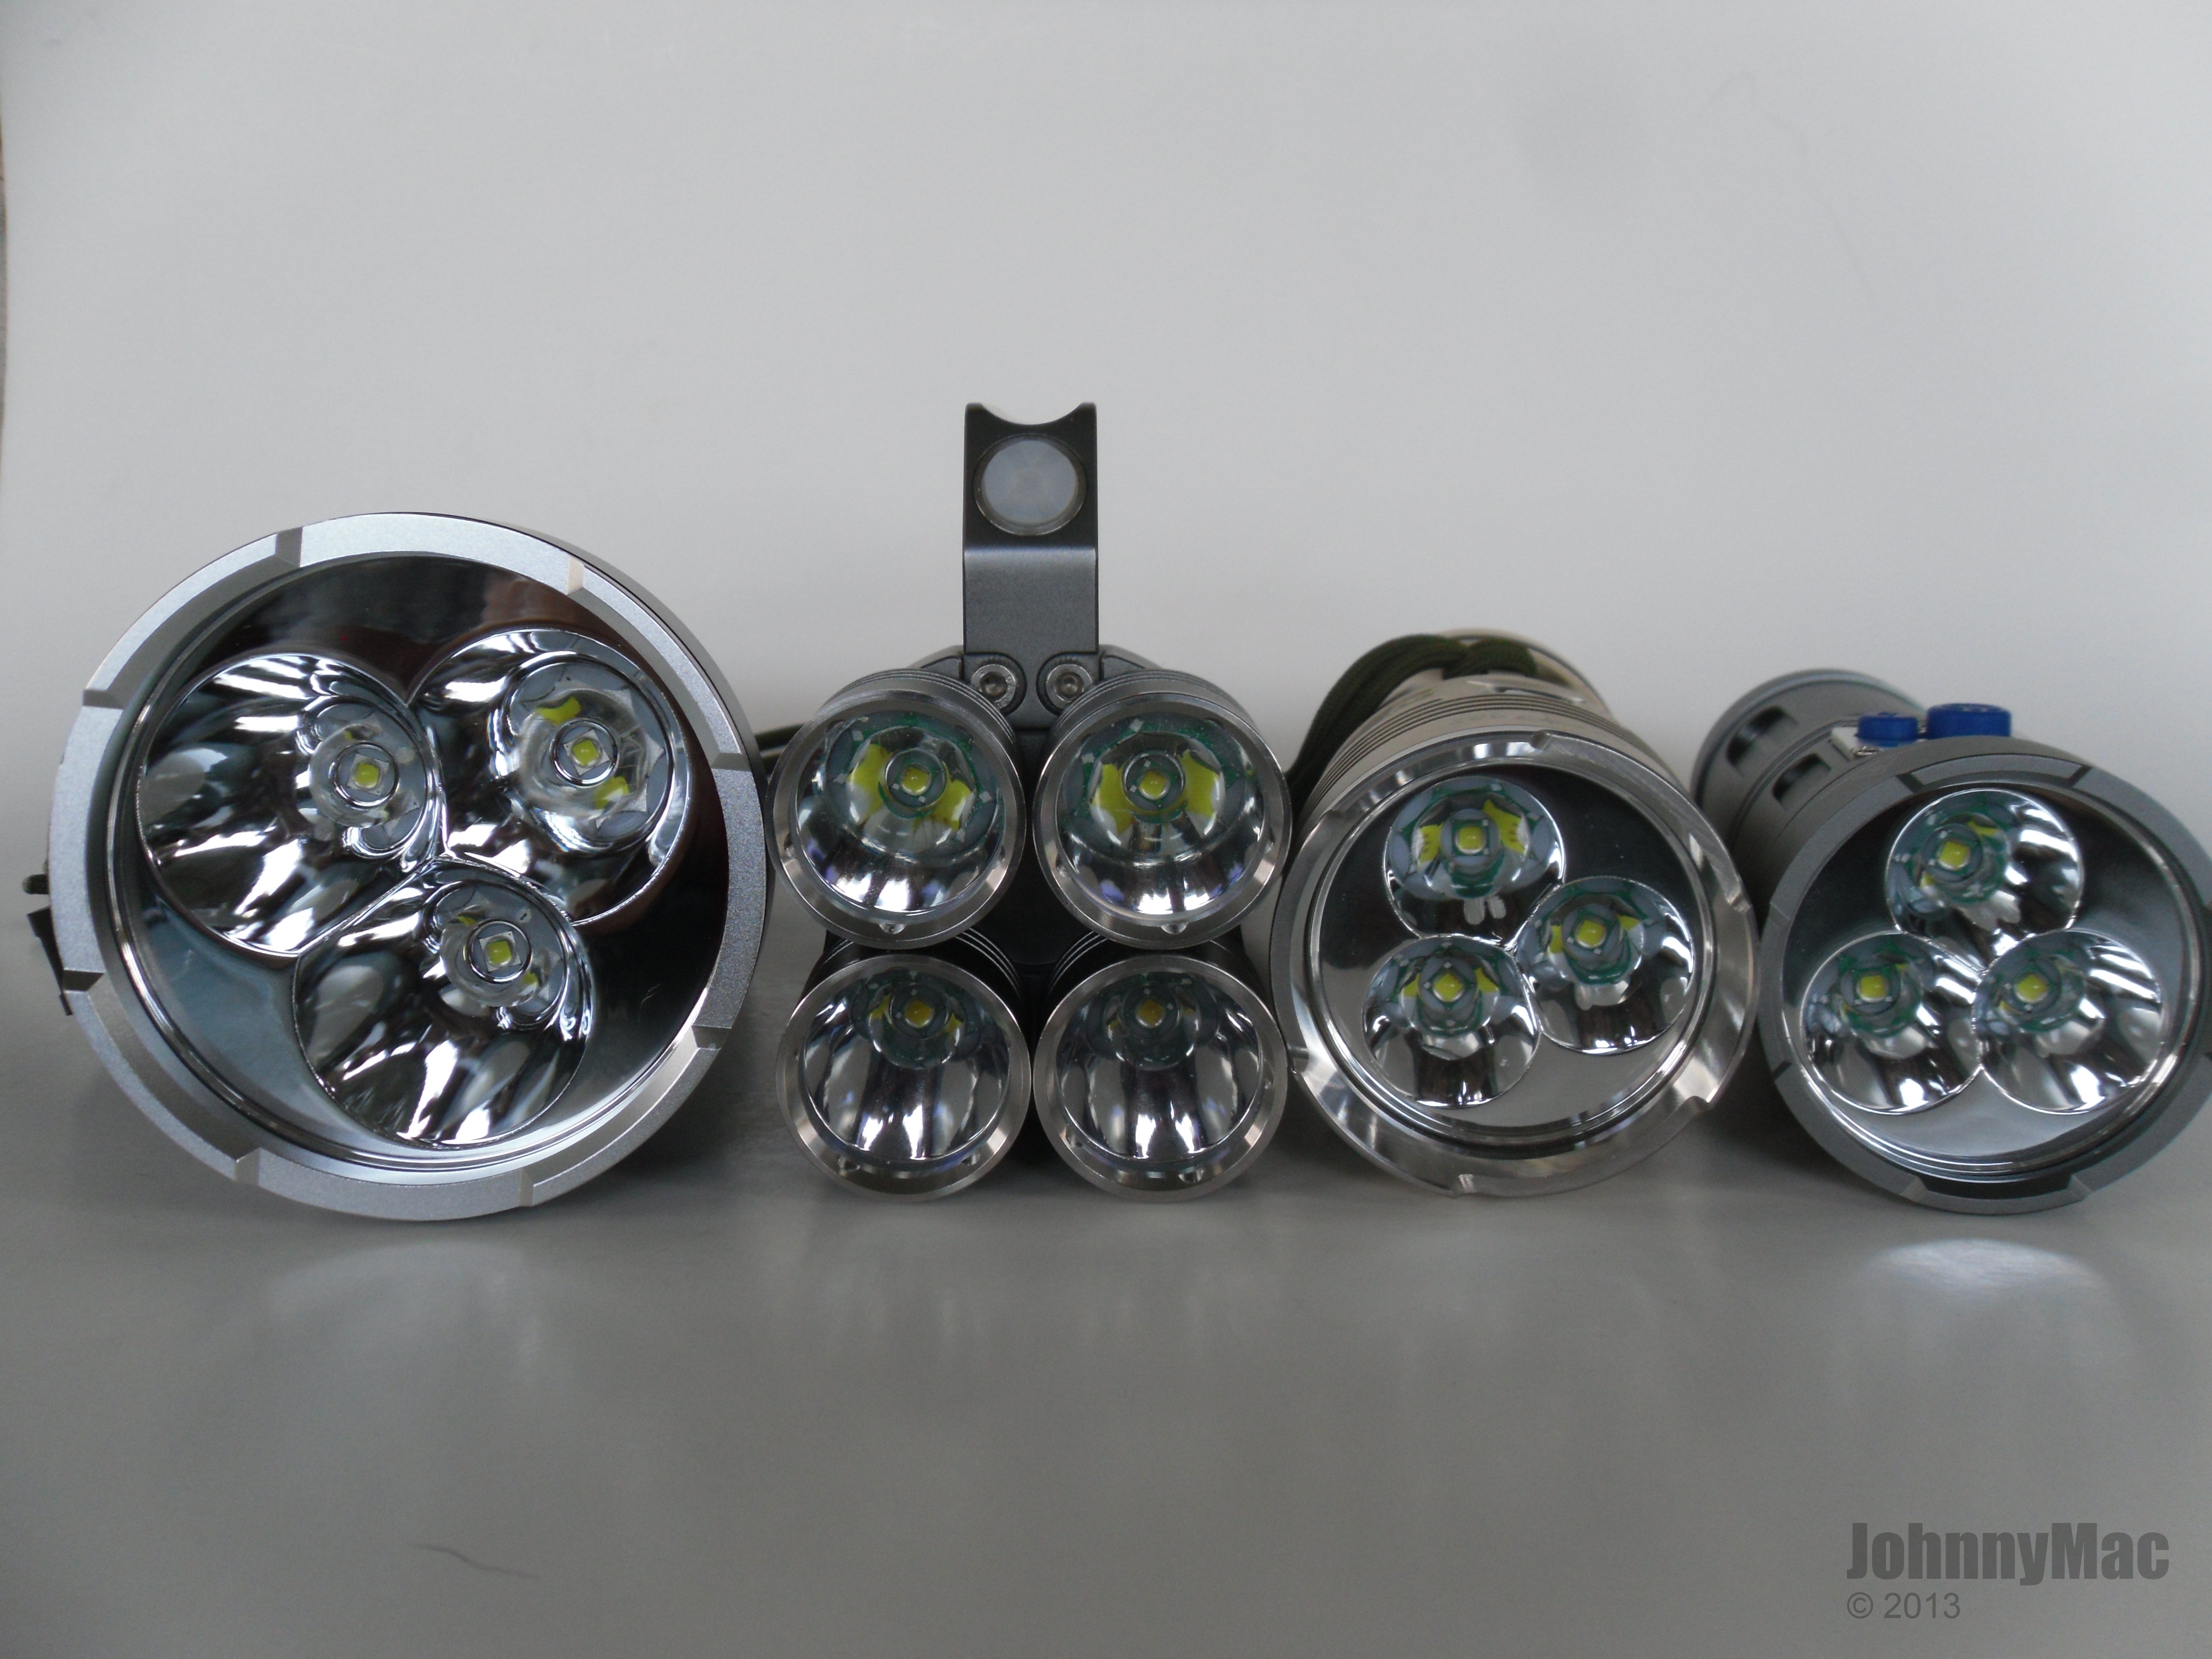
Below are a couple pics comparing the size of the SP03. I chose the following mainly because they are the only ones I have right now that have the same basic format, but also because they are well known lights and made by the same mother company. From left to right we have the Solarstorm SP03, the Black Shadow Terminator, the Original Skyray King, and the new Fandyfire/Solarstorm Warrior.
Note that the SP03 is not a heck of a lot taller than the other 3 lights but the head sure is wider. This is an extremely compact triple LED thrower! I wish I owned a BTU Shocker and a Fenix TK75 to do a size comparison with. I know the SP03 is almost tiny compared to the massive Shocker and I believe it is even more compact than a TK75. If anything they should be about the same size.

Here is a front view of the reflectors. It's pretty easy to see why the SP03's throw distance is so much greater than the others. Even the BST, which is no slouch as a thrower, looks inadequate next to the SP03.
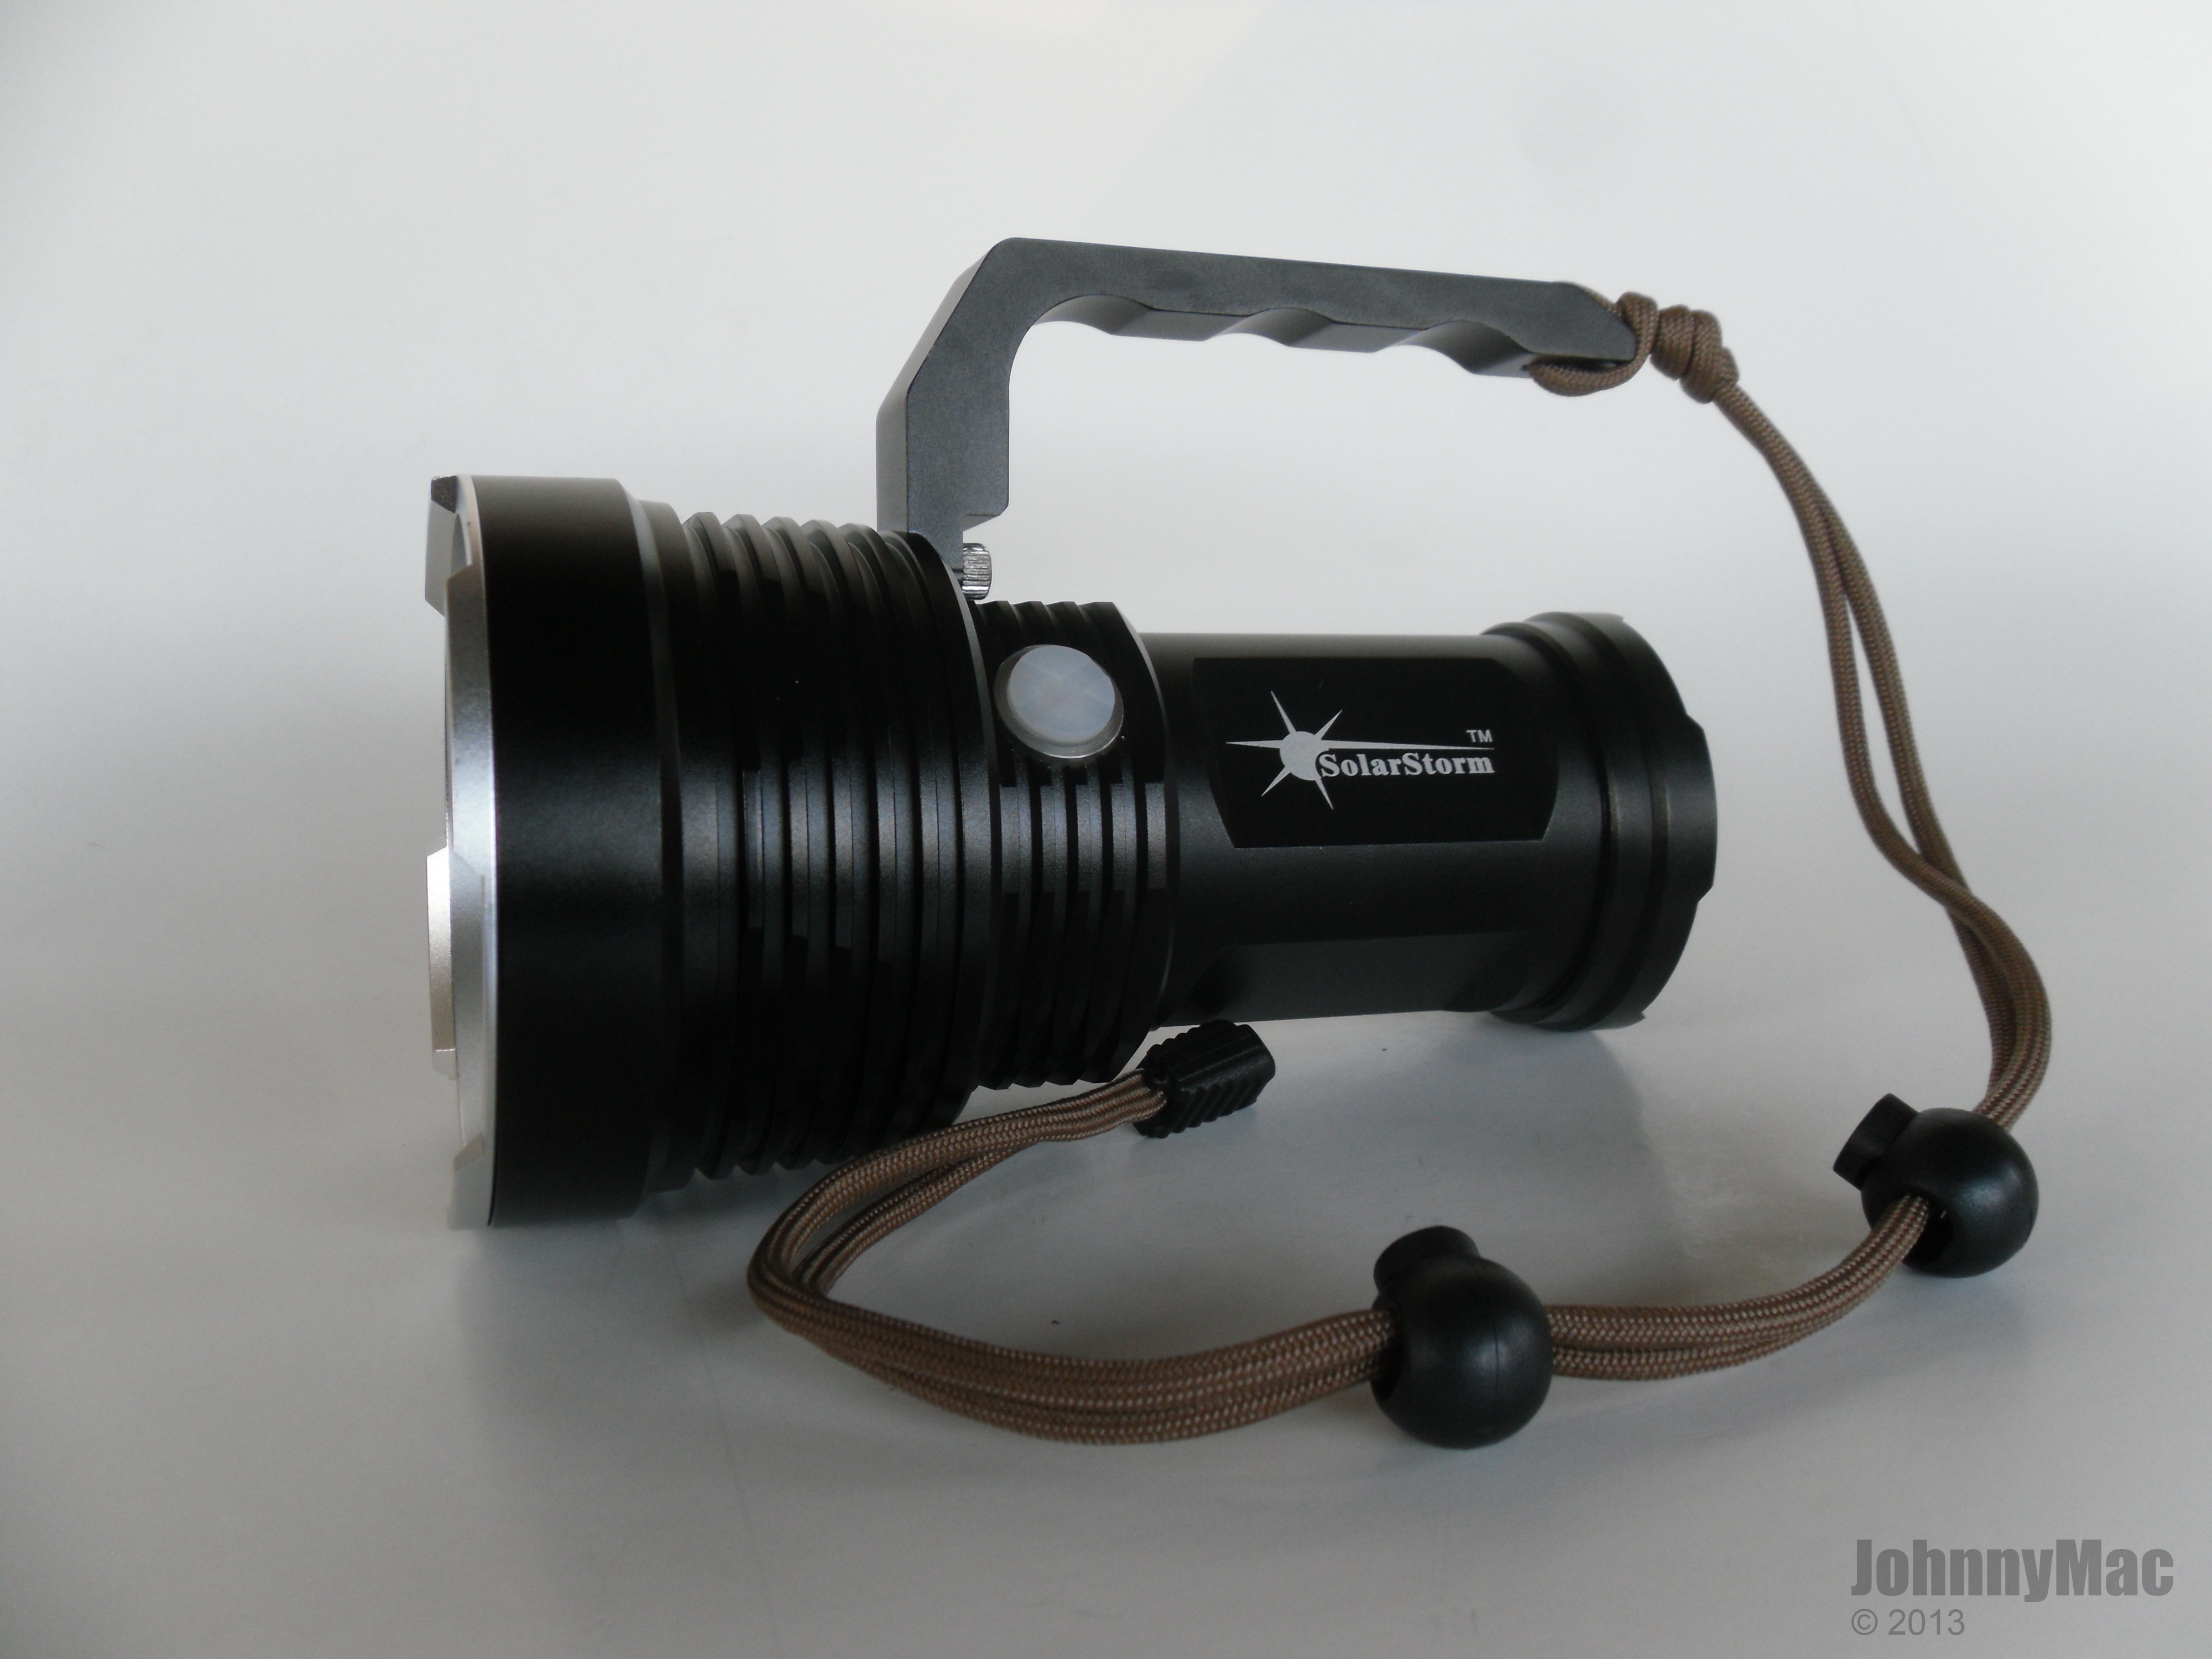
And a parting shot of the SP03 before I attempted to remove the handle for this review...
HANDLE REMOVAL aka @#$% it!!!
3mm Allen head wrench - check.
Insert into hex socket bolt - check.
Commence counter-clockwise turning - DOH!!!
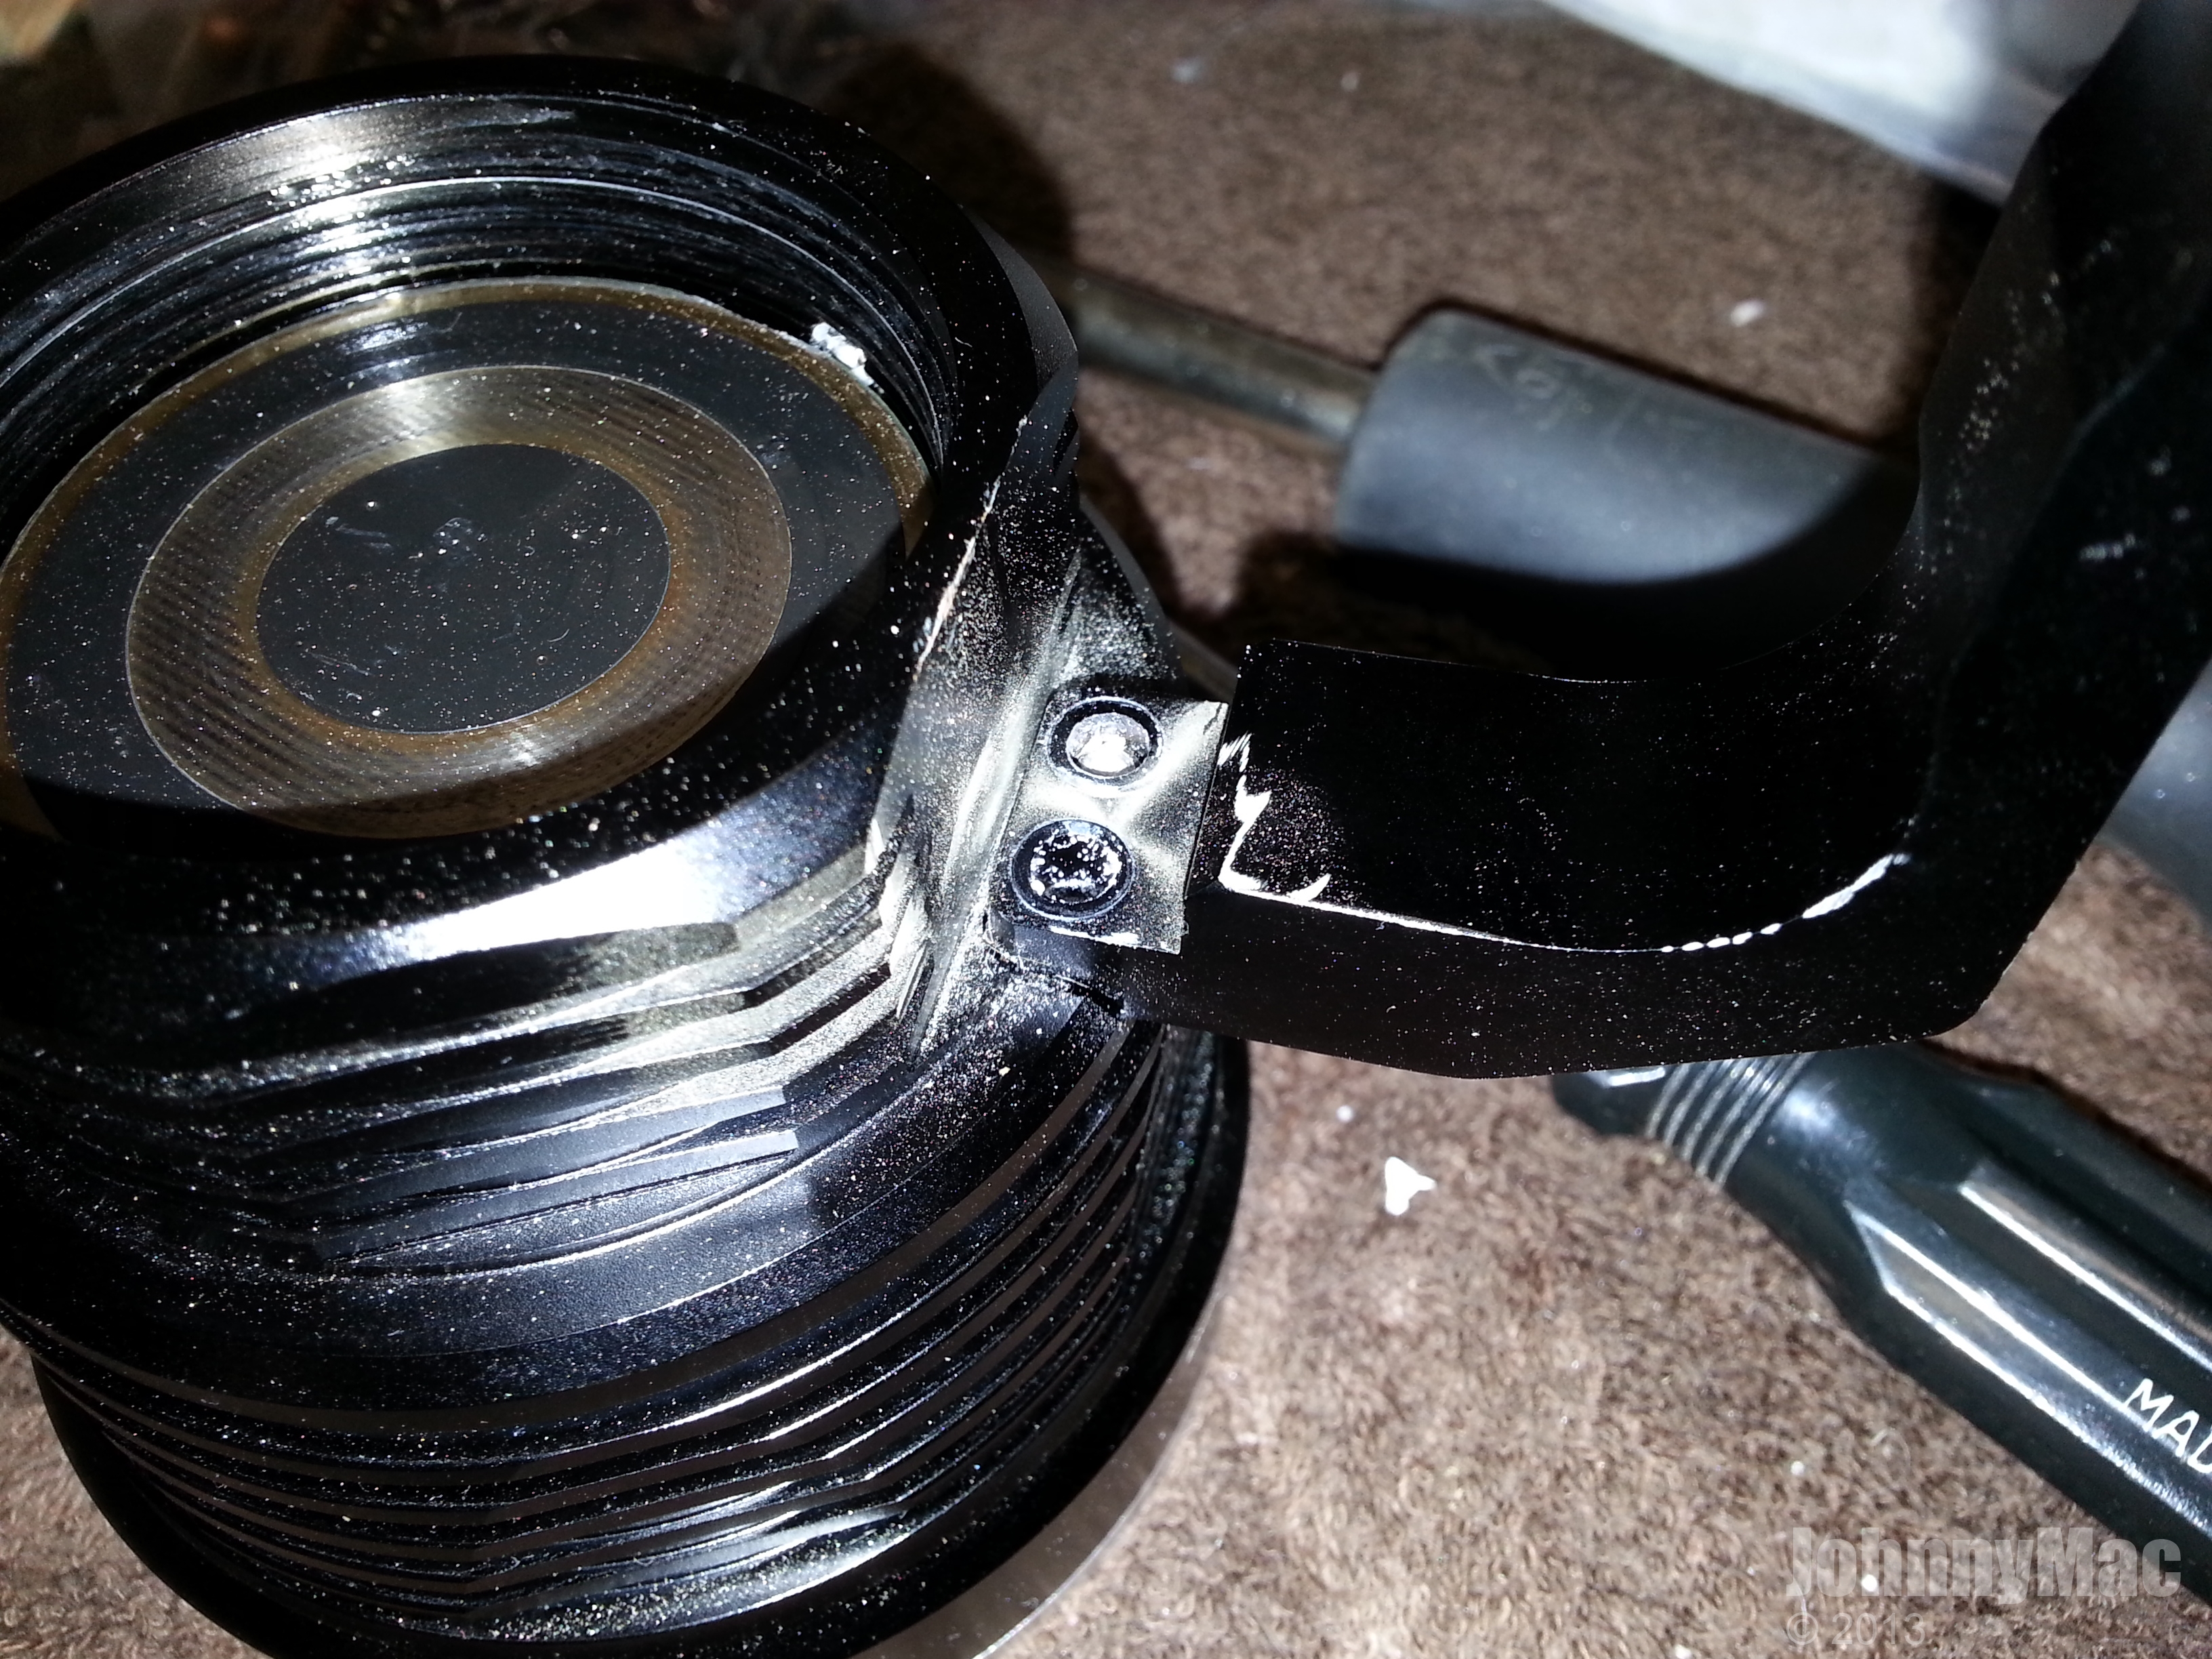
That's right, a real nightmare kicked in when I tried to remove the allen bolts attaching the handle to the body. The first bolt's hex socket stripped on my while attempting to unscrew it. The second bolt...damn! The socket shape held but when I started to crank on the allen wrench I thought I had some movement. Nope, it was just the head of the bolt shearing off just below the surface of the handle.
In order remove the bolt with the stripped head, I had to break out the rotary tool and cutting disk. After cutting a slot in the head I managed to insert a flat-bladed screwdriver and, with steady application of gobs of torque, I managed to slowly extract the bolt in one piece. I also managed to booger up the handle where the rotary tool's base made contact as well as put a few scrapes and gouges in the surrounding area of the head with the cutting disk making contact in the tight confines.
Look at all the GD red Loctite on that bolt! What the hell were they thinking???

This is what I was left with after removing the one bolt. The handle was still securely fastened to the head from all the red Loctite slathered onto the bolt with the sheared head.
After a lot of wriggling and banging on the handle I managed to free it from the Loctite bonds. That left me with what you see below. One empty hole lined with red Loctite and one broken stud coated with Loctite sticking out. No problem...I'll just crank down on what I can grab with a pair of vise-grip pliers and twist it out. HAH!
After the vise grips managed to crank down on my finger while they were cranking onto the broken stud, I had to calmly attempt to free up the pliers to free my finger resulting in a torn chunk of finger meat and some slow but steady bleeding. After repeated attempts with the vise grips (made slippery each attempt by my blood all over the handles) I decided to torch the stud to heat the Loctite. No freaking good there either. The head sucked all the heat out of the stud before I was able to twist out the stud.

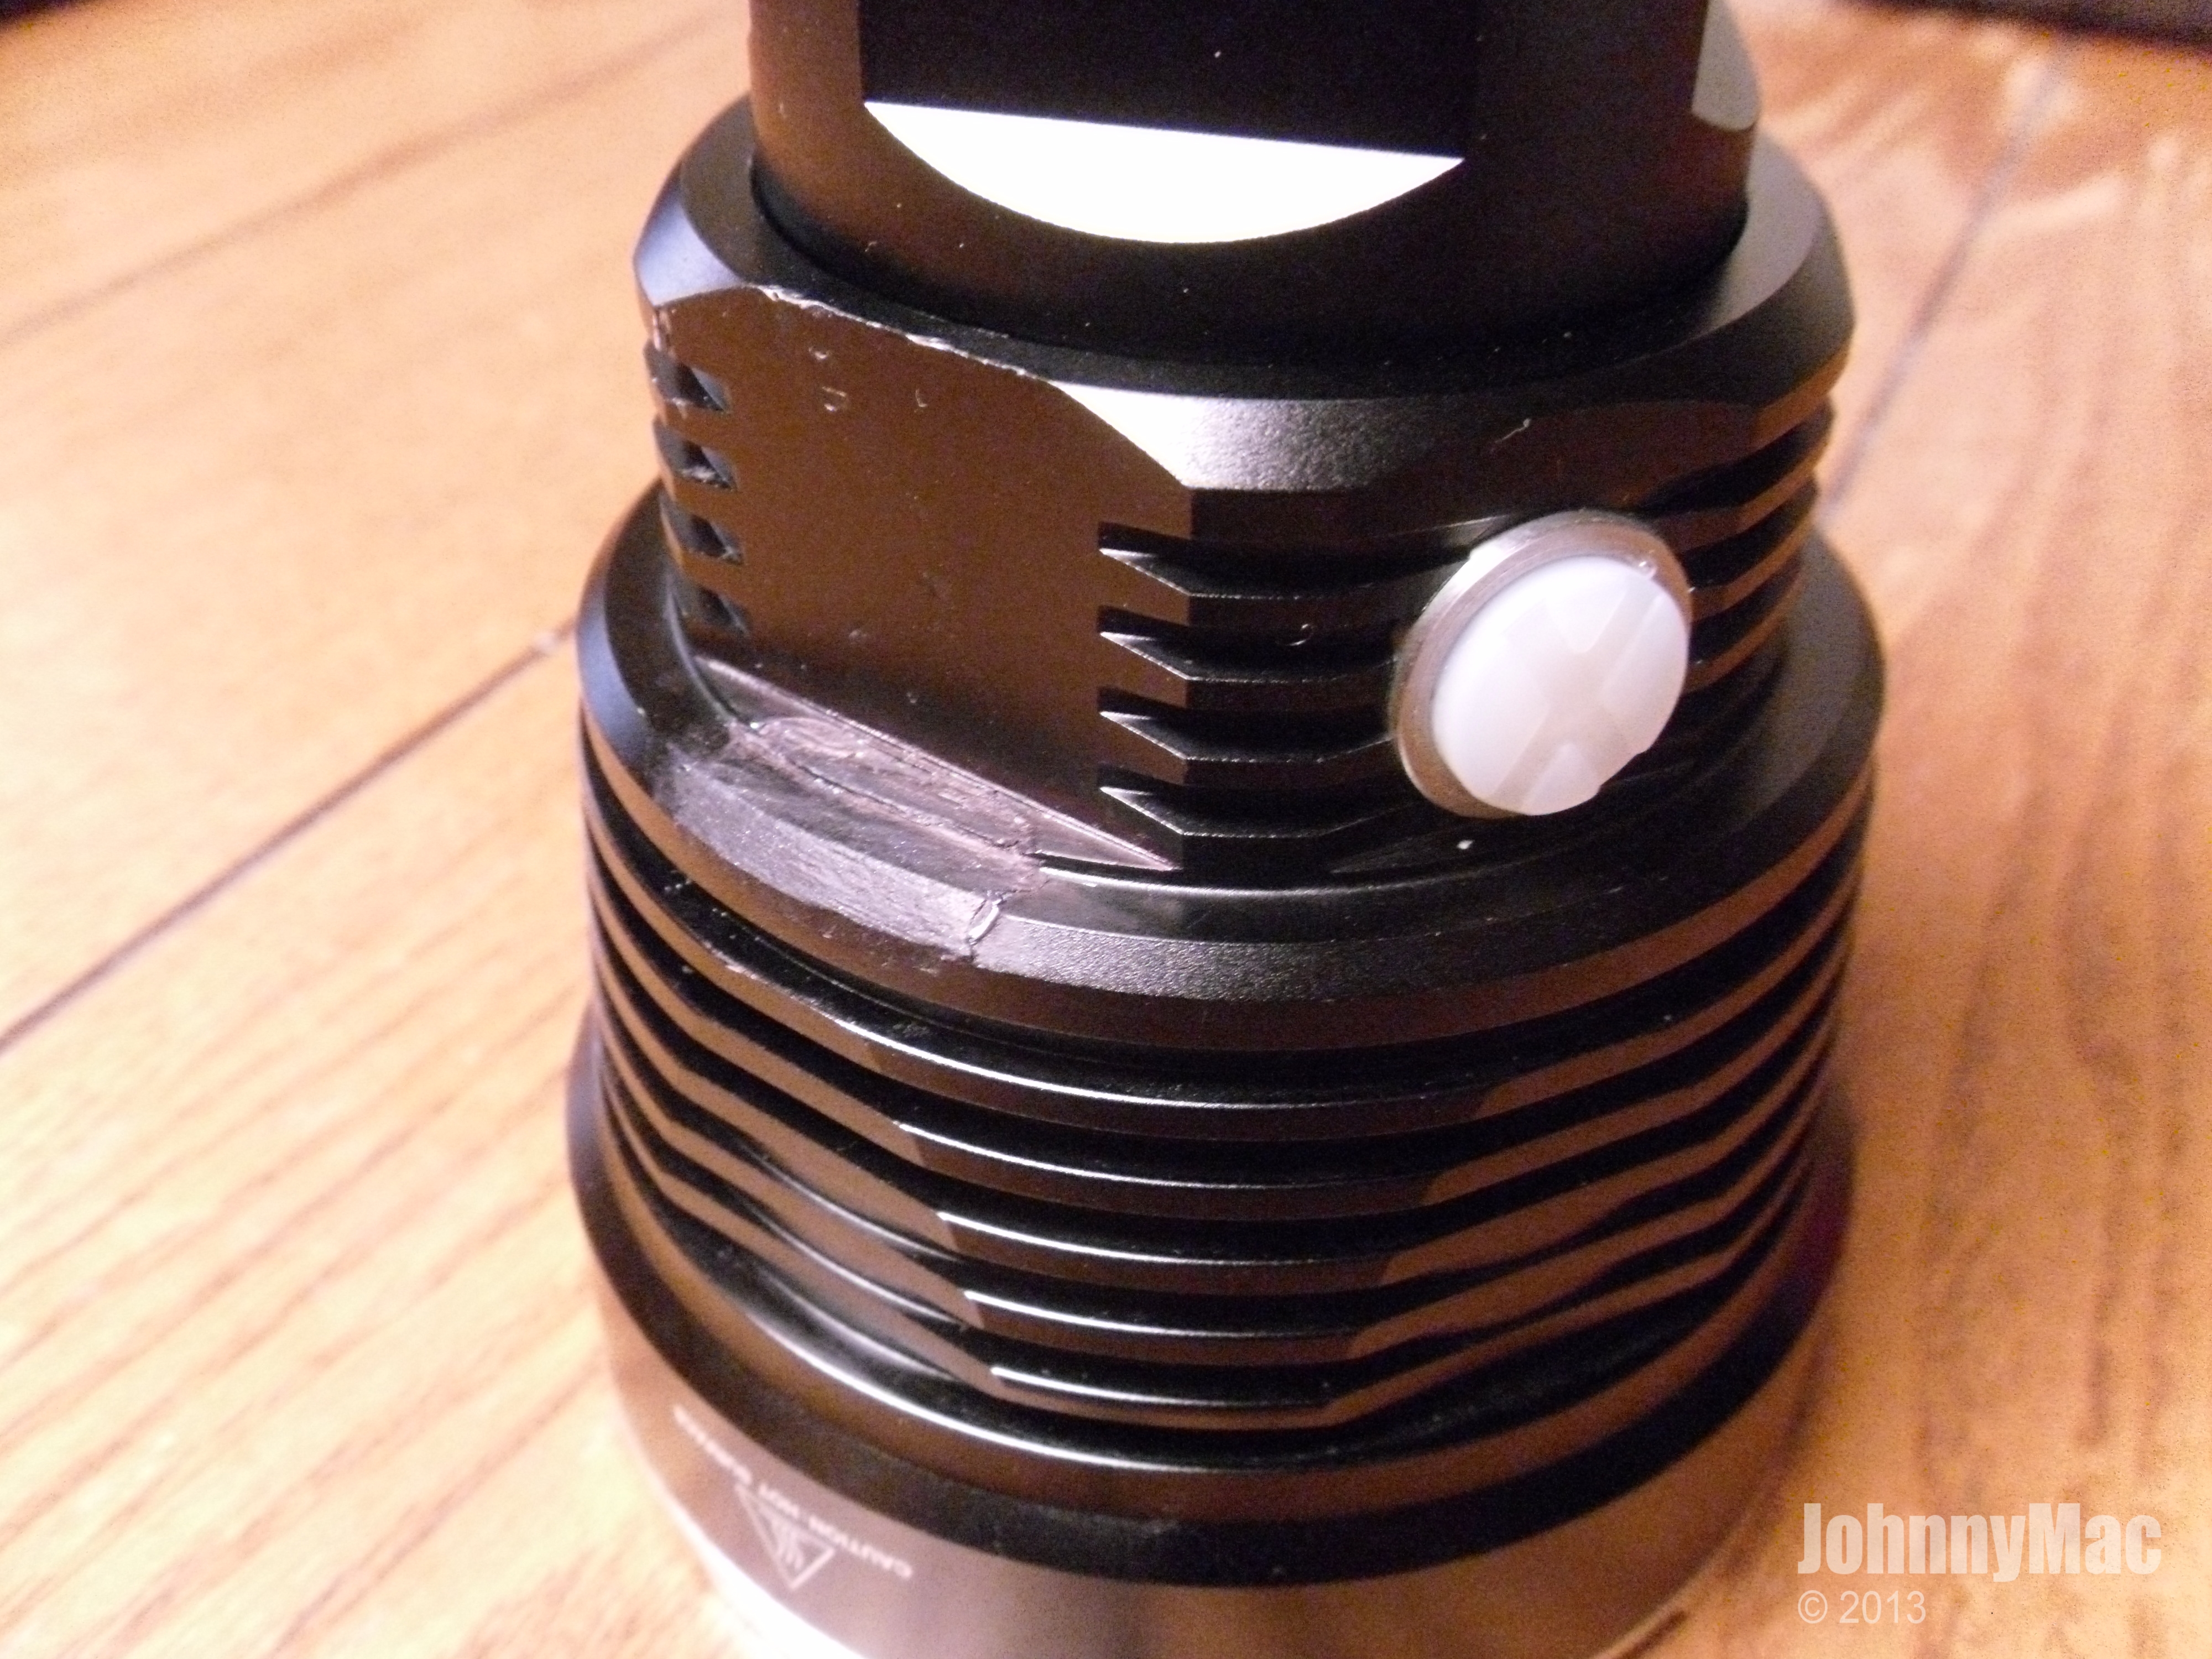
No problem though, the head is so f'd up now from the cutting disk and vise grips that I won't be reusing the handle anyway. Might as well fire up the rotary tool and cut the stud off as low as I could. Looks like it's time for some trusty JB Weld stick putty.
An initial application of JB Weld putty then some trimming with a razor knife before fully set allowed me to fill in the giant notch in the head as well as cover up the broken stud and fill in the empty stud hole.
Once set, a little more careful trimming and fine file work, some liberal application of black Sharpie and voila! It's far from perfect but it's a damned site better than it was. I had planned on a second thin application and some careful blending and shaping to get it perfect but I was so frustrated with the whole experience I quickly settled for what you see below. Word of advice...If you do attempt to remove the "easily removable" handle, don't! At the very least, use your 3mm allen wrench and if you have to apply anything more than unreasonable force to remove the bolts just stop there and learn to love the handle. Perhaps not all examples are not slathered in red Loctite like mine was. Solarstorm, if you are reading this, stop all use of Red Loctite immediately for future production!!
The light is a handful but is easily managed without the handle. The side switch makes it immensely usable and easy to operate.
CONCLUSION:
In spite of the lens O-ring leak, epoxied driver, and the Loctite slathered handle, I still give this light a strong recommendation. I have spoken with other Lumaholics who own the TK75 and/or BTU Shocker as well as the SP03 and they all say that the SP03 is about the best bang for your buck going. Sure the others will out throw it but for two or three times the investment they are just not 2-3 times better lights. If you really can't justify spending $150 or more on one of the major triples then the SP03 is a more wallet friendly triple thrower that is sure to satisfy. To put things into perspective, a good buddy of mine (most of you know who I'm talking about) with a massive collection of top end (as well as budget) lights decided to part ways with his collection with the exception of a few select lights he just didn't want to part with. He sold his BTU Shocker, his TK75, and his TK70. What big triple did he keep for himself? You guessed it, the SP03. If you are a fan of the SRK and multi-emitter lights in general then do yourself a favor and, instead of buying one or two more SRK, get yourself an SP03. I'm confident you will find it a worthy addition to your light collection. ;)
Johnny