I figured I would make a post to make it easier for owners of the Trustfire R5-A3 to find. First mod eliminate the crazy strobe mode and get a more user friendly high, medium and low light selection.
1. Disassemble the light: Remove the battery and then unscrew the bezel and remove the lens and the pill.
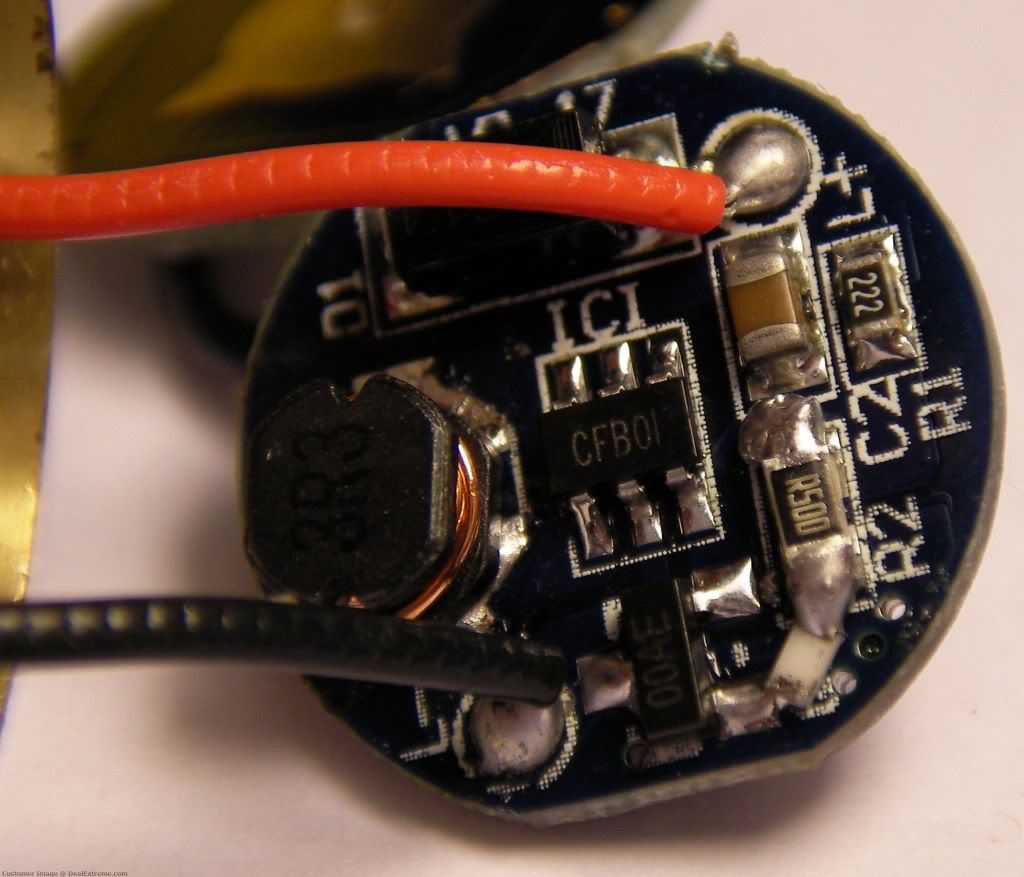
2. Disassemble the pill: Once you have the pill out you need to pry the bottom open. The bottom is attached in two places with solder to the brass ring. I used a small screwdriver prying gently until I found were the solder was attaching the bottom to the brass ring. Once you find the solder points heat them with a soldering iron while prying and if you are lucky the bottom will come apart without to much damage. Once the driver is apart carefully remove the tape from the driver board.
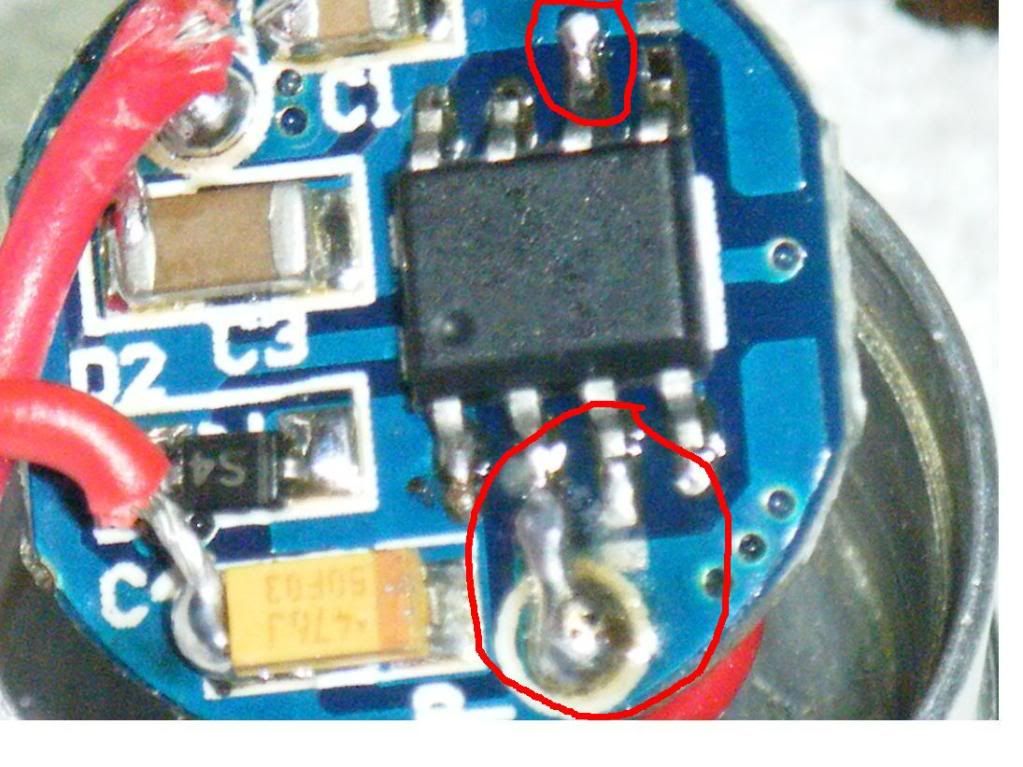
3. Change the mode setting: Now you are ready for the hard part. I used a magnifying glass to better see what I am soldering see picture below.
Before

Before
After
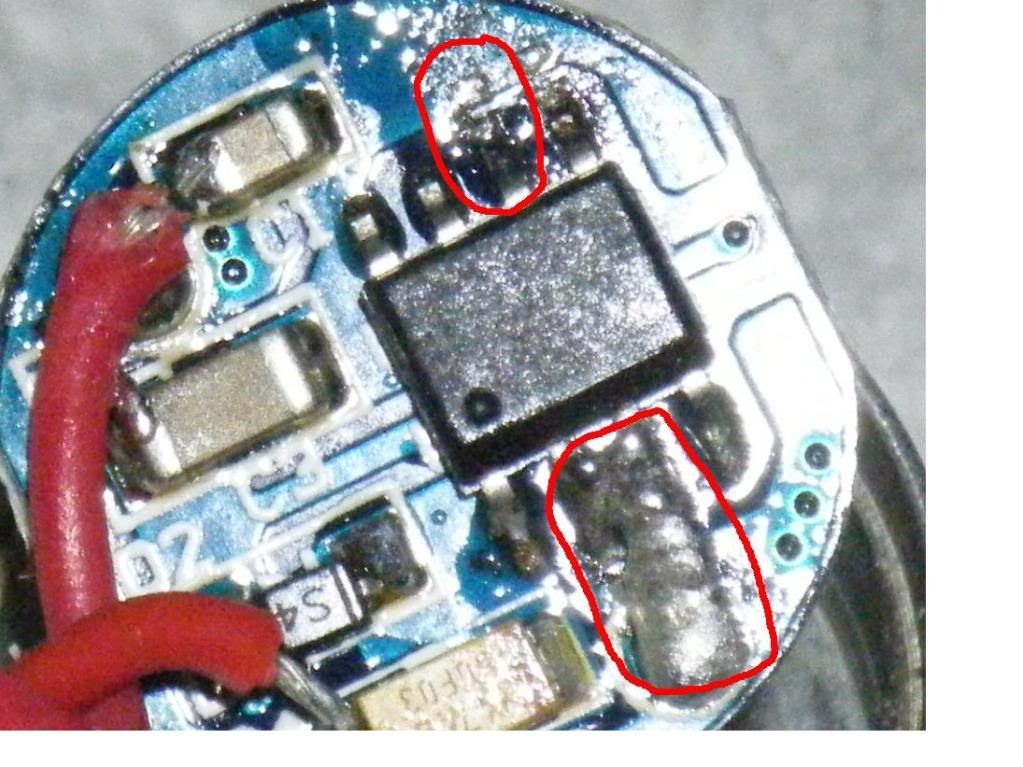
On the top right I circled a blob of solder, that needs to be removed. Heat it up and pull the solder away until the connection to the board is broken. Next step on the bottom right corner of the picture I circled an area were you need to add a small blob of solder. Once this is done you should test it out by applying power to the bottom board making sure you have three modes high, medium and low with no strobe.
4. Assemble the light: At this point you can assemble the unit by prying the brass ring out and applying solder to the two solder points on the bottom board until it is attached to the brass ring.. Then reapply the tape around the driver board and gently pushing everything back into the pill. If it all fits in then use some pliers to press the bottom board with the brass ring firmly in until it is seated flat.
Put the battery back in and the light is now completed. This is a really nice free mod with a great result.
Tail cap draw with freshly charged Trustfire flame 14500.
High 1.648 amps
Med .467 amps
Low .168 amps
This next mod requires money, you will need an XM-L on a 14mm board and some Fujik or similar adhesive.
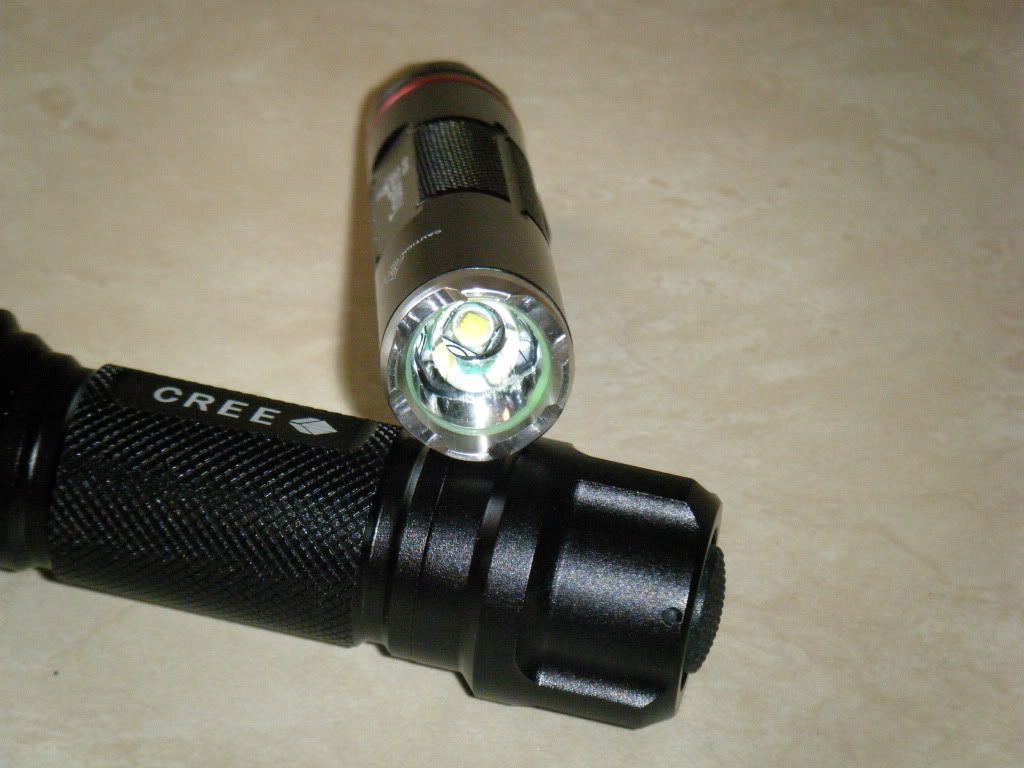
5. XM-L conversion: Before you assemble the light you might consider converting it to and XM-L. Tha actual gain in lumens isn't that great but the quality of light it puts out is dramatically improved. The light has a much bigger hot spot with the XM-L and the beam is more neutral and agreeable to my eye. This also allows you to consider a driver upgrade in the future since the XM-L is driven so conservatively. Shiningbeam has a really nice tint 14mm XM-L T6 1D emitter for $11.75.
http://www.shiningbeam.com/servlet/the-253/**NEW**-Cree-XM-dsh-L-T6/Detail
6. Change the emitter: Pry the emitter cover off with a small screwdriver or pull it up with some tweezers. Once the cover is off you can see the emitter is attached with two small phillips screws. Use a small phillips jewelers screwdriver or a small regular screwdriver to remove the screws attaching the emitter to the pill. These can be quite difficult to remove. Don't worry about destroying the screws since you will be using Fujik to glue the new emitter down. I ended up using a regular eyeglass screwdriver and destroyed the screws. Once the screws are out apply some heat to the solder points on the old emitter being careful not to ruin it, since it can be reused in other projects. Next pull enough wire through to reach the solder points on the new emitter and solder them on. Next apply liberal amount of Fujik or similar adhesive to the emitter base and press it into the pill.
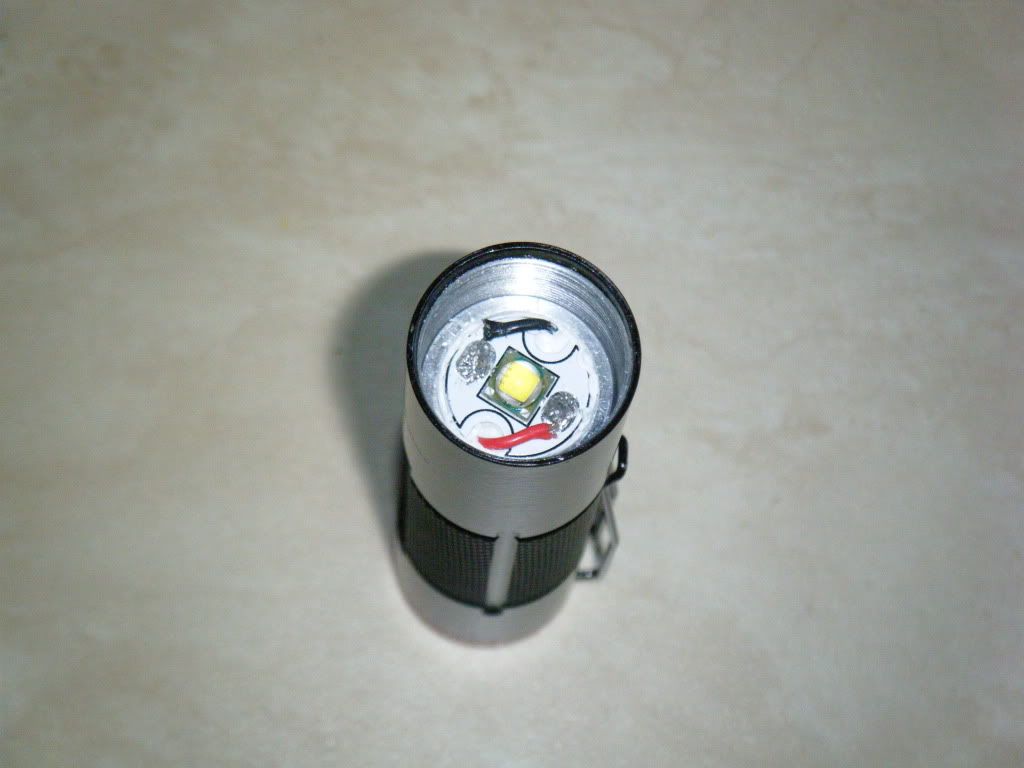
7. Reflector mod: The reflector is really soft so you have some options here. The main goal is to remove the protrusion so it is flat on the bottom and increase the size of the hole to fit around the XM-L dome better. I used a large drill bit to grind away at the protrusion on the reflector and then smoothed it out with a large flat file. The finished product should look something like this.
8. Test it out: Once the new reflector fits flush and tight install the battery and you are ready to rock.
Now you have a three mode XM-L 14500 light, pretty cool if you ask me.
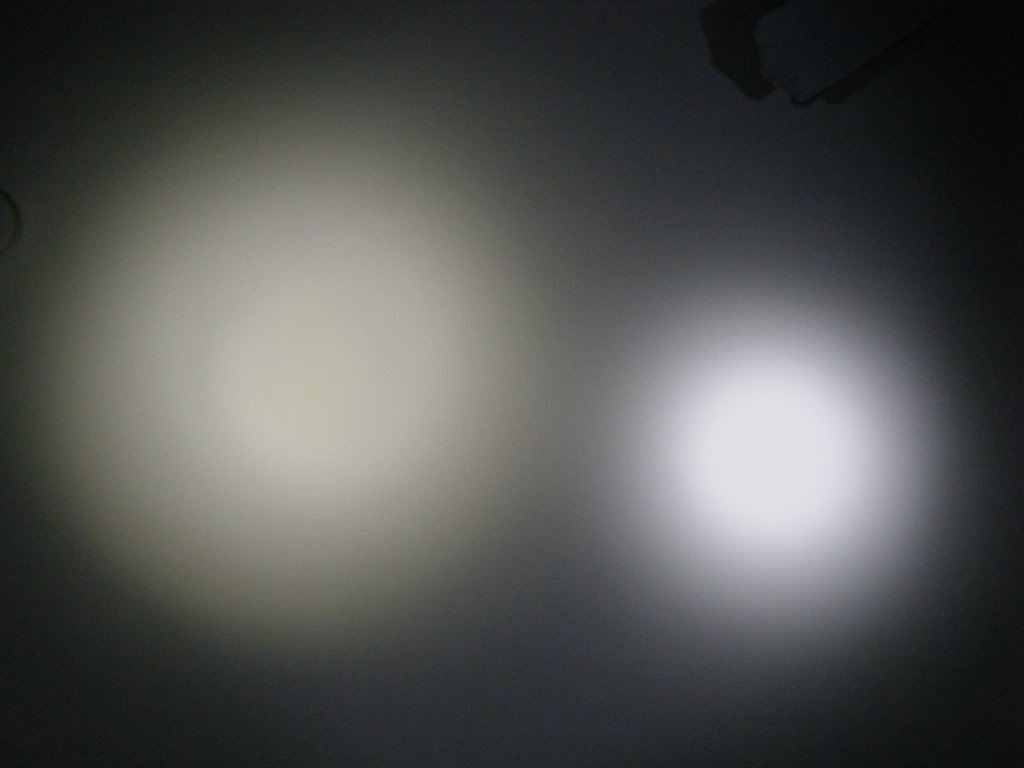
Here is a beam shot
Modified XML light on left stock emitter on right
Something weird happened to my light, for some reason it pulls more amps with the XM-L. When I went to check amperage at the tail cap with a freshly charged Trustfire flame 14500 at 4.135V I got:
1.813amps on high
.533amps on medium
.194 amps on low
Now I am completely satisfied with this light. Total investment around $25.
E
Edit: As of June 2011 KD is selling lights with the modable PIC pictured in blue above. The older style modable one from DX is the black one on the top photo. DX is currently shipping ones with a different PIC that is not modable at this time.
Edit/2: I just received a Trustfire S-A2 from DX today 11JUL11 and it has the same driver as the R5-A3 so this tutorial will work to strobe delete this light as well.


 My fingers are crossed that it will still work after all the abuse I just gave it during surgery.