So I got a new Q5 headlamp off ebay and then swapped in an xm-l2 t5-5b1 and a 105c driver 6x7135
Made a great little light. Has a nice head strap and I was into it for less than $20 all together.
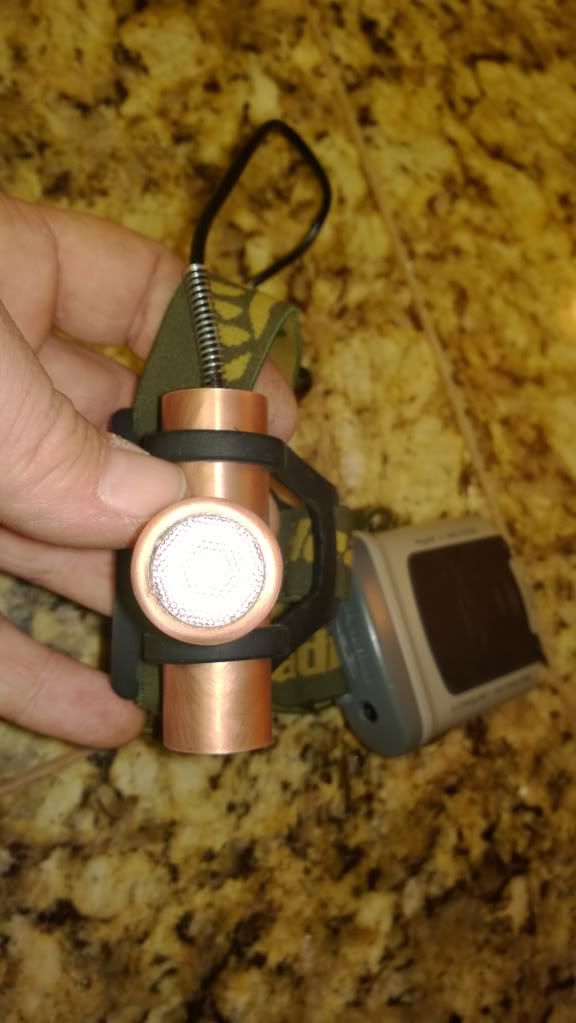
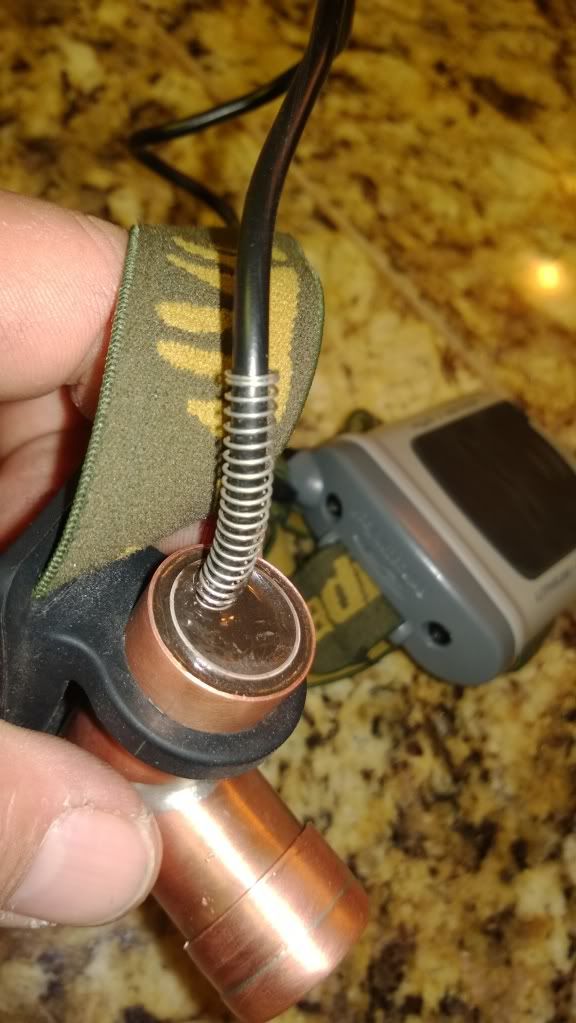
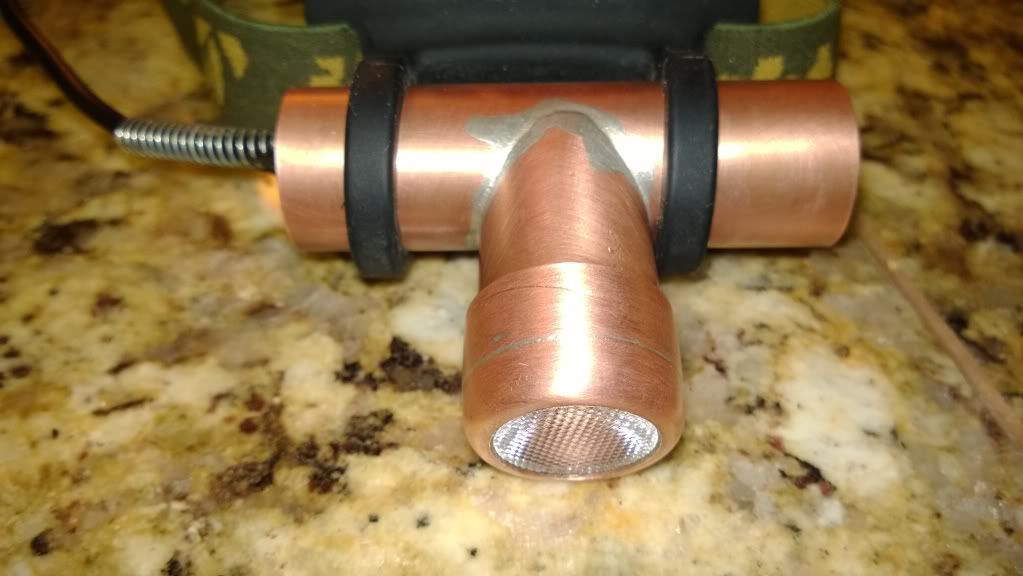
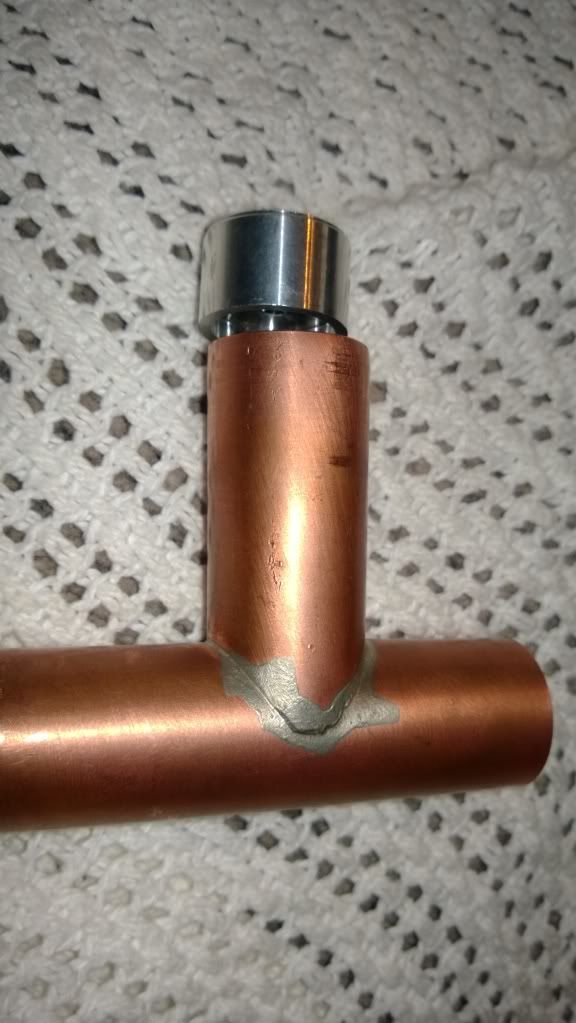
Then I decided I was not so sure I wanted a big ol 18650 sitting right on my forehead. So I was able to get my hands on a princeton tec 4aa battery case, this thing is really beautifully made. Then I was inpatient so I gutted the new q5 for the led/driver and went about building. The switch came from a dead hugsby p31 it was the perfect press fit into standard 3/4" copper pipe. I also used the pill piece for part of my strain relief. I slipped my battery wire through it and tied a knot, then I filled it up with JB weld. On the outside of this piece I embedded a spring intot he epoxy to make a strain relief for the battery cable. I cut a hole in the pip and then cut another piece to fit and soldered it in place. I used a vice to keep everything in place when I soldered this piece. I also used a vice to press in the switch assembly and wire assembly. Friend at work cut my a pill real quick. Its 6061 aluminum .5" tall and .810-.808" in diamter. He cut a driver hole at 17mm x .125" deep on the back side. I polsihed this down and the led before mating them together with thermal compound. I soldered the battery negative coming in from the pack to the tail cap pole that would normally be resting on the cell. I soldered the battery positive to the driver + no spring on the driver.
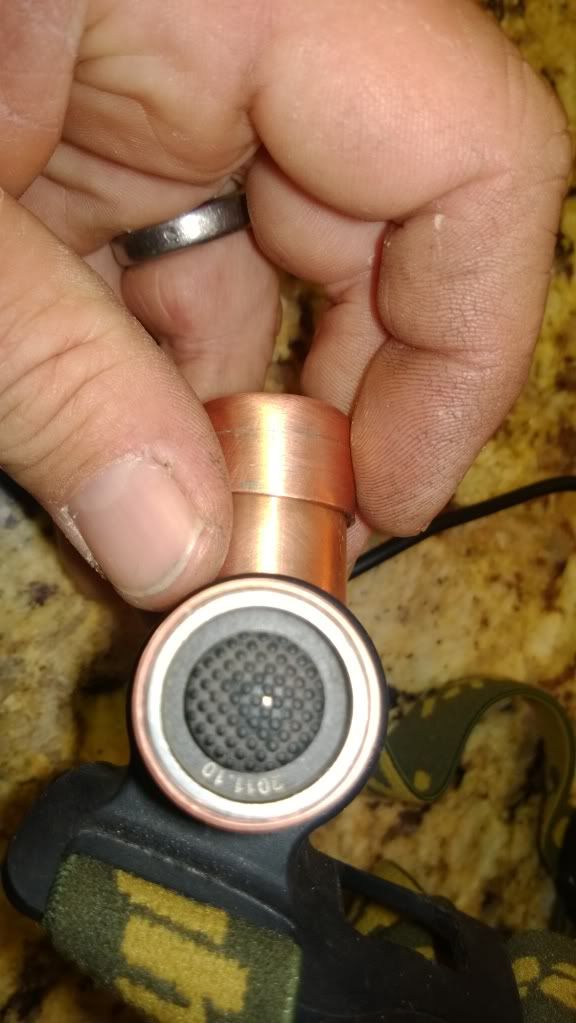
I made the bezel from a 3/4" end cap. I soldered to a piece of pipe just barely in and again my friend cut a hole from the lens I'm trying out. I then cut it off the pipe with a tubing cutter. You can see i cut it too short and had to solder on a ring to extend it. It was late and the only cap I had so I made it work. I think I might go back to the aspheric lens instead of this multi-faceted thing I have now. It seems to loose less light that way. Will keep trying to see how it goes.
I know I should have taken more pictures along the way, and from how I build the thing it would be tough to upgrade anything with out taking it apart with great force needed.
Batteries. Right now running on 4 nimh....Rayovac Platinums.....I do not know the mah's on these guys be assuming I need a set of eneloops. I think if I ran alkalines I might kill the driver.
Here are a couple of pictures. I can polish out more of the solder on the side later or maybe paint the thing. Maybe some pin striping ?
strap came from the q5 light I bought, battery case from princeton tec. Its a true frank-n-light
here i go again, picture problems not sure what is going on. the little click insert photo just does nothing after I put in the url and hit okay.
The weight is well balanced and does not bother me. I am used to sporting a Princeton Tec Corona so its not really much different from that.
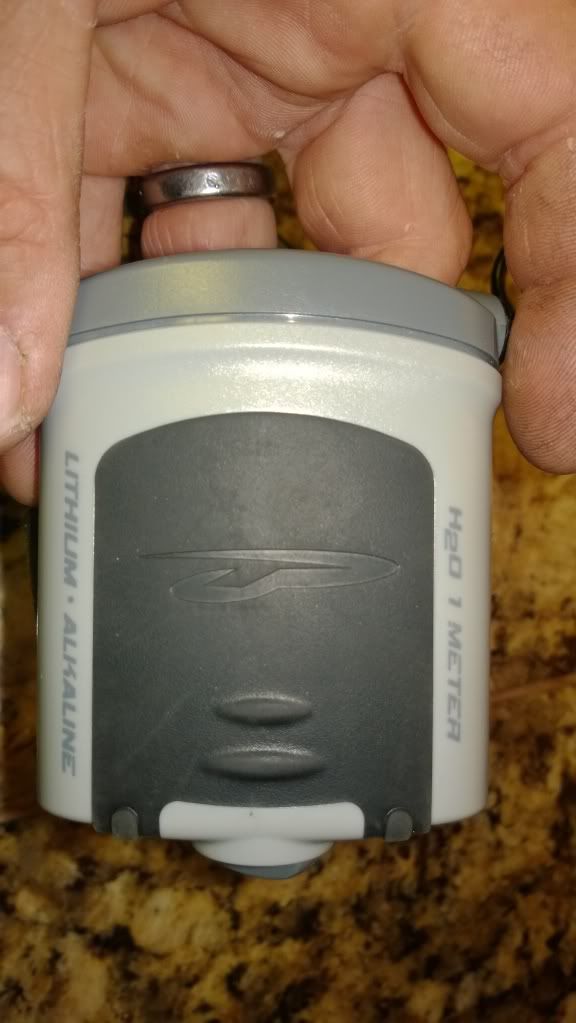
the battery carrier is really a beautiful piece. Its from A Princeton Tec Apex model. It has a 1/4 turn cam lock on the bottom the close it the lid and battery carrier slide out of the can for battery changes. I don’t have a link for one though. I got it from a friend. Its all o-ringed to be water proof to 1m. Nice hardware inside too.
I am already thinking of version 2.0.
I would solder a bar inside the main tube to mount the driver and led side by side. Then the “T” part with the lens would hardly stick out at all.
once I figure out what lens I like I will epoxy on the bezel just to make everything solid.
thanks to BLF members for all the projects they post for inspiration and encouragement.
I've been experiencing extreme slowness with posting pics lately. It's just BLF running so slow that's causing my issues. I paste in the URL and it takes forever to load the preview and fill in the H & V size info.
Just had a thought. I think the 4th battery with a Nanjg driver may be a waste as the driver is just going to burn off the excess voltage (and the 4th cell should be all excess). Now if you were running really high current I'd say the 4th would help and possibly be needed, but I think you're better suited for 3 here. Personally I would prefer to use 4AA's to 3 if it wouldn't be a waste.
with regards to garys question above, really it depends how the cells sag under load, they might just sag out of regulation on 3 cells where four keeps the voltage in above regulation for longer, you’d have to just experiment and if possible measure tge voltage under load to confirm things either way.
I do agree that I’d prefer to run four cells just for recharging if nothing else rather than having a spare cell floating around.