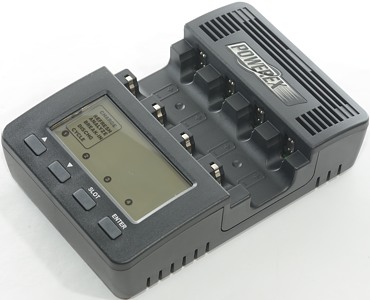
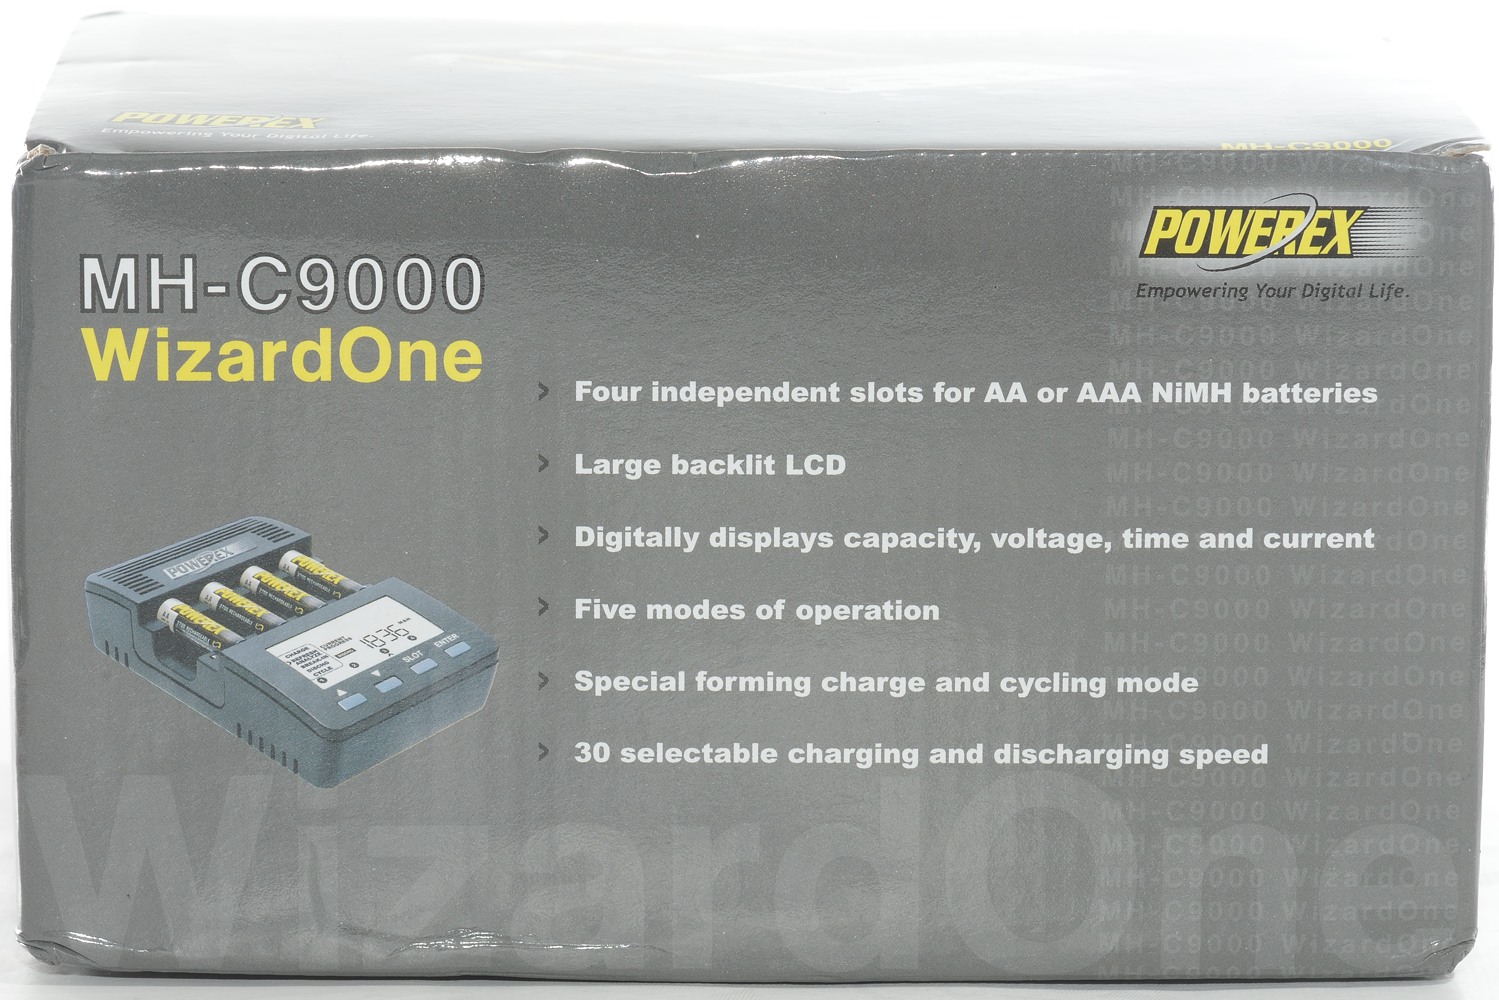
Charger Powerex MH-C9000
This charger it not a new charger, but has been on the market for many years. It has been the reference NiMH analyzing charger for many people.
I got the charger in a cardboard box.

The box contains the charger, a power supply (US plug, but universal voltage) and a instruction sheet.
The instruction sheet does a good job on explaining the charger.
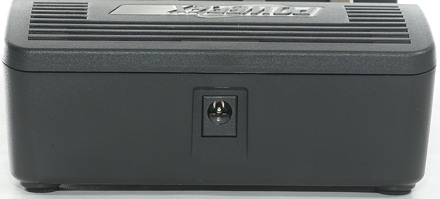
The power supply is connected to the back of the charger with a standard barrel connector. I requires 12 volt 2A.
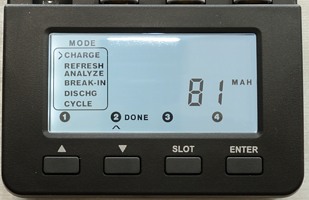
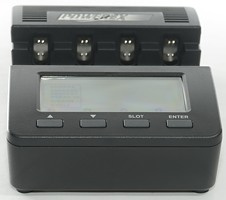
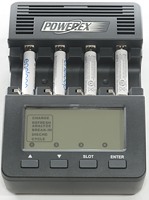
The user interface is four buttons and the display. It is only active when there is one or more batteries in the charger and then the background light on the display is on (I like this).
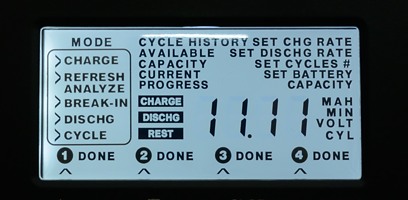
When powering the charger up all elements on the display is turned on while the numbers count from "00.00" to "99.99".
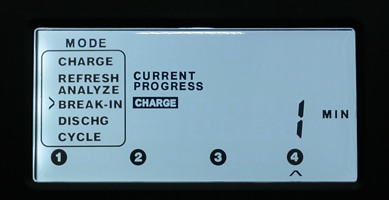
When putting a battery in the charger the "MODE" text will start flashing and the desired mode can be selected with arrow up and arrow down and confirmed with ENTER, then the current is selected, again with arrow up/down and ENTER. Depending on mode there can be from one to 3 selections. If no selection is made the charger will automatic start a charge cycle with 1A after some seconds.
The modes are:
- CHARGE: Normal charger, it is possible to select from 0.2A to 2A in 0.1A steps, default value is 1A.
- REFRESH ANALYZE: Charge, discharge, charge, both charge and discharge can be selected.
- BREAK-IN: Charge, discharge, charge in a slow cycle, the battery capacity is specifyed from 0.5Ah to 20Ah in 0.1Ah steps.
- DISCHG: Discharge the battery, rate is selected from 0.1A to 1A in 0.1A steps.
- CYCLE: Charge, discharge a number of times, both charge, discharge and cycles are specified.
The slot button is used to select what slot to view on the display. When pressed the next slot will be selected and the display will show "mAh", after a short time it will show "ma", "min", "volt" and optional "cyl", then change to the next slot and repeat.
Usual the most interesting value to check is mAh and the slot button will select that for each slot in turn.
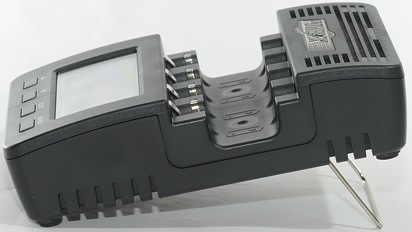
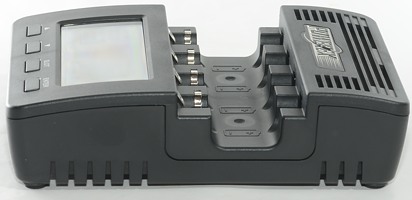
It is possible to tilt the charger for better cooling and better view of the display from a low position.
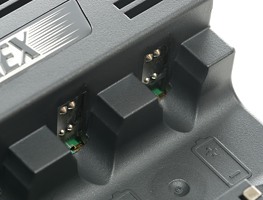
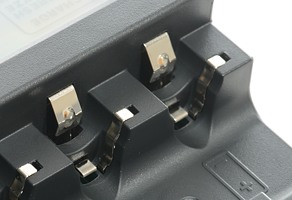
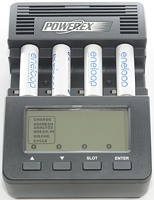
The charger has separate positions for AA and AAA batteries and a thermo sensor for each battery.
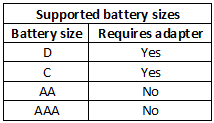
The charger is not supplied with any adapters to handle C and D cells, but it can handle up to 20Ah batteries, i.e. it will work with adapters.
Measurements
- Discharges with 0.8mA when not connected to power
- Charge will restart charging after power loss or battery insertion.
- Display light is on as long as there is a battery in the charger.
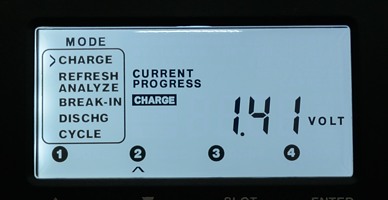
- Voltage readout matches my DMM within 0.01V using "min" on the DMM, to catch the voltage when current is off.
- Except for discharge mode, all other modes will apply trickle charge when finished.
- The charger will start, even if the battery voltage is 0 volt.
CHARGE: NiMH charge
Normal charge of a battery, the current can be select from 0.2A to 2A in 0.1A steps.
When finished the display will show the charged capacity, excluding top-off charge. This value can be below or above the actual battery capacity (NiMH batteries are usual charged with more mAh than they are rated for).
%20%231.png)
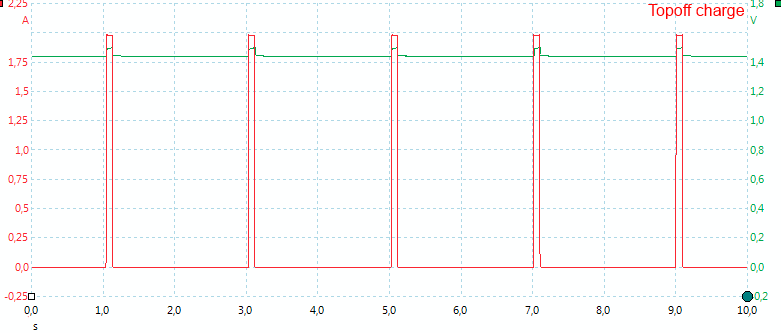
The charger uses about 2 hours to charge the battery, then it terminates on voltage and uses another two hours to top the battery, before it switches to a trickle charge. The charger will report done after the first two hours.
%20%232.png)
%20%233.png)
%20%234.png)
The 3 other slots works the same way. Notice that the temperature curve is mostly missing the typically "end of charge" increase, it only looks like there is one or two dots increase at the end of the top off charge. This makes me wonder if the batteries are completely filled or if there could be slightly more mAh in them.
%20%231.png)
Not much difference when doing a 200mA charge.
%20%231.png)
%20%231.png)
The XX and AAA eneloop does also look the same, except for the charge time.
.png)
Four batteries with 2A charge for each battery, this does generate some heat, but it looks like the termination is still done on voltage.
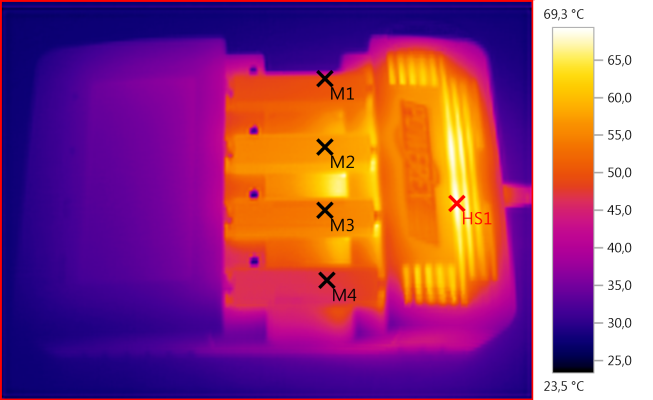
M1: 48,9°C, M2: 56,8°C, M3: 54,3°C, M4: 47,1°C, HS1: 69,3°C
It is no surprise that some chargers uses a fan. This charger has no fan and do get rather warm when charging.
.png)
The current from the power supply is also pulsing, with an average current of about 1.5A.
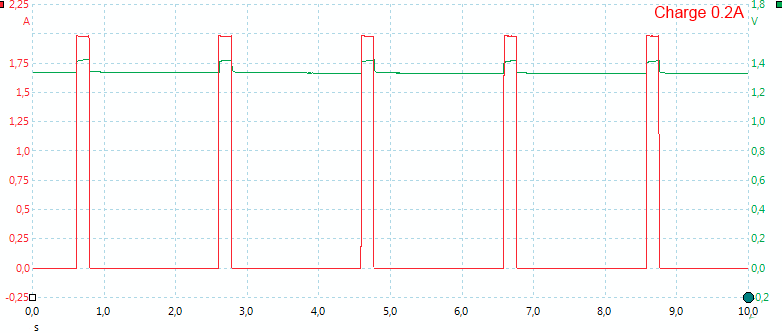
The charger uses pwm to adjust the charge current, each pulse is charging with 2A.
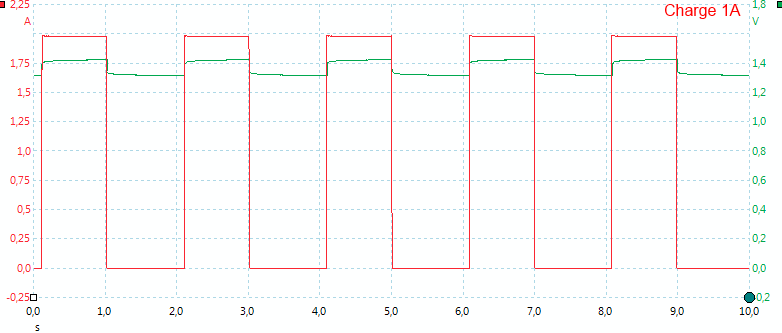
For 1A charge this means 50% duty cycle. The duty cycle is not exactly 50%, but slightly below, this means that the charge current is slightly below 1A.
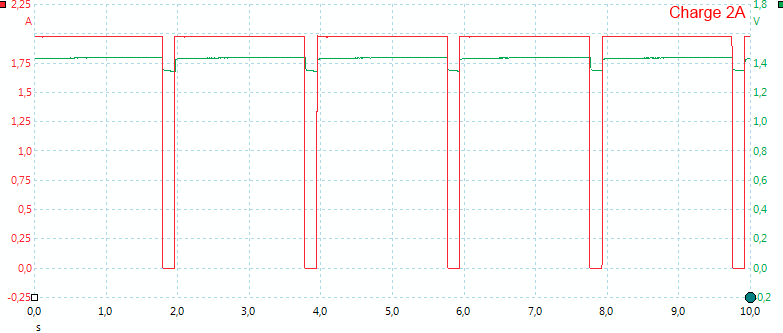
And at 2A the duty cycle is below 100% and this makes the current slight below 2A.
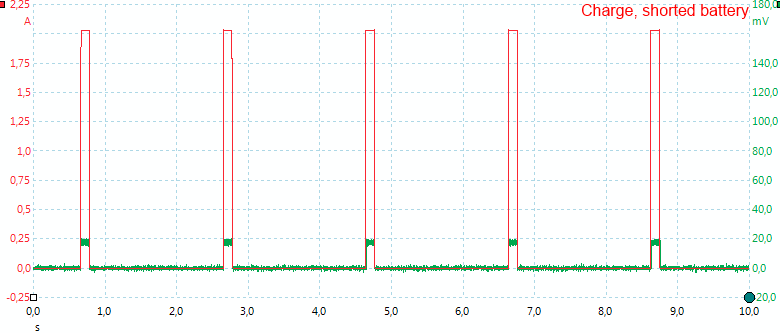
Is the 2A charge pulse current due to a specific battery voltage or is it fixed. I uses a shorted battery and tried measuring the current again. It did not change, but was still 2A. This means the charger is using some sort of "constant current" circuit, not just a resistor for the charge current. This helps to limit the maximum current pulses. This is a good way to limit maximum current in pulses.
The top off charge looks like normal charging, but the pulses is shorter, the average current is about 0.1A and is applied for about 2 hours, i.e. about 200mAh.
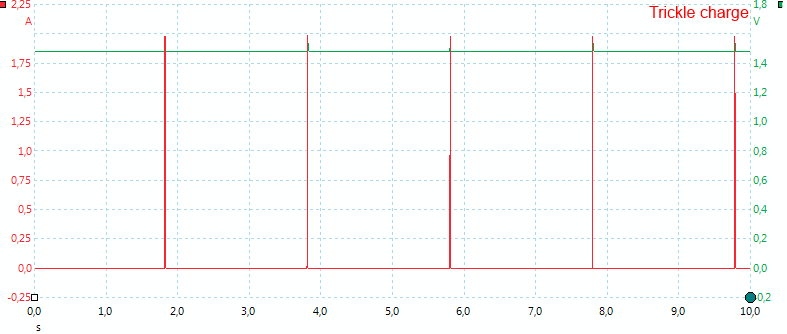
Trickle charge uses the same 2A pulses, but they are even shorter.
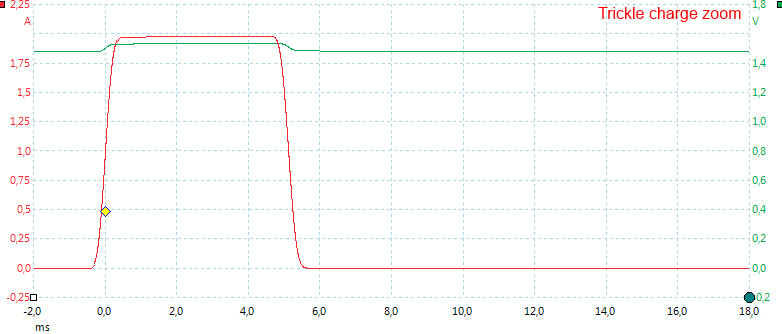
Here I have zoomed in on a single trickle charge pulse. It is about 0.005 second long with 2A current and occur every other second, this gives an average of 5mA (The datasheet for the charger says 10mA). A nice low trickle current.
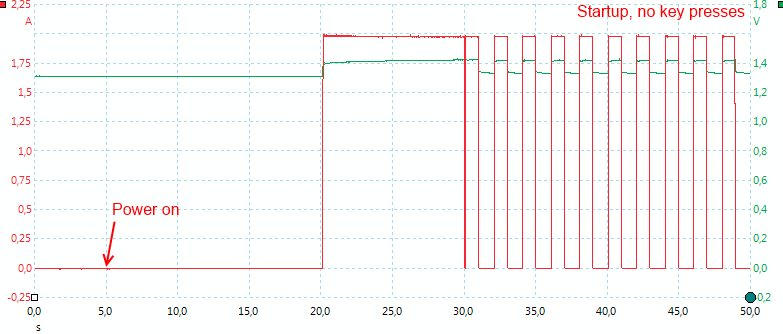
If a battery is put into the charger or it is powered on with batteries in it, it will start charging after some time.
It starts by applying a 10 second high current pulse (This is always the case when charging is started), probably to check for alkaline batteries. If it registers to high voltage after that pulse the display will show "HIGH" and the charge will terminate.
REFRESH ANALYZE: NiMH single cycle
This mode will charge the battery, then discharge and finally charge again. Both the charge and discharge rate can be selected.
When finished the display will show the discharged capacity.
%20%231.png)
As can be seen the charge cycles includes the top off charge and there is a rest after the discharge.
BREAK-IN: NiMH Slow cycle
Break-in will first charge the battery for 16 hours with 0.1C, then discharge the battery with 0.2C (This will take about 5 hours) and finally charge again with 0.1C for 16 hours. The capacity of the battery is selected from 0.5Ah to 20Ah in 0.1Ah steps. When finished the display will show discharged capacity.
This method over charges the battery, before measuring capacity, this means it will always get the highest possible value.
This method is used by IEC for measuring battery capacity.
%20%231.png)
This is a slow procedure, taking about 39 hours. In this case here I started with a full battery, but it does still get the full 16 hour charge. It can be seen on the temperature curve when the battery is full.
DISCHG:: NiMH discharge
Discharge will drain the battery, while measuring how much capacity was left in the battery. The discharge rate must be specified between 0.1A and 1A in 0.1A steps.
For measuring the full capacity of a battery the "REFRESH ANALYZE" mode will often be more useful, because it includes charging.
.png)
A 0.1A discharge does not generate any heat. The discharge was supposed to terminate at 0.9 volt, but terminates somewhere between 1.0 and 1.1 volt.
%20%231.png)
A single battery at 0.5A is also fairly cool when discharged.
.png)
But four batteries at 1A will generate some heat.
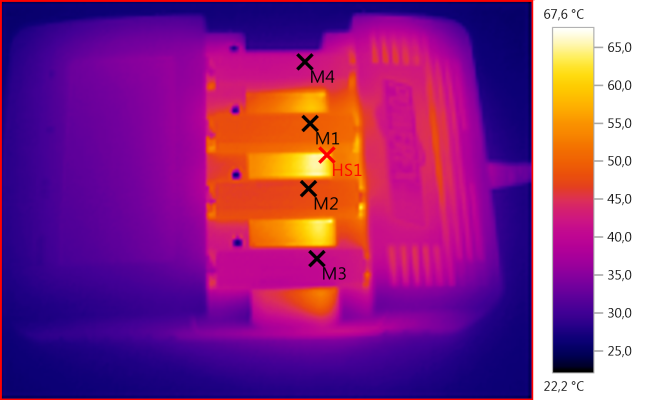
M1: 49,5°C, M2: 47,8°C, M3: 41,2°C, M4: 41,7°C, HS1: 67,6°C
Running discharge at full current on all four channels will heat the two center batteries significantly.
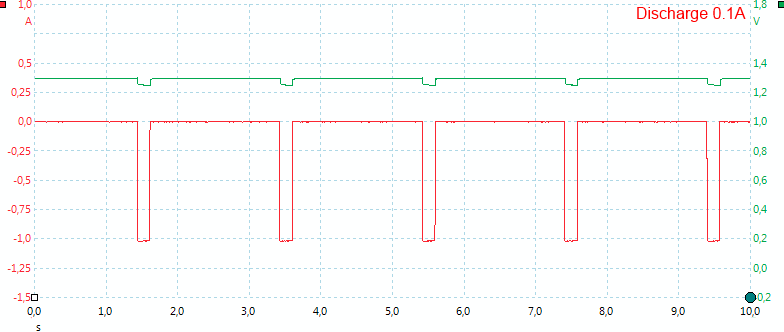
Discharge is also controlled with pwm, here is the lowest discharge current.
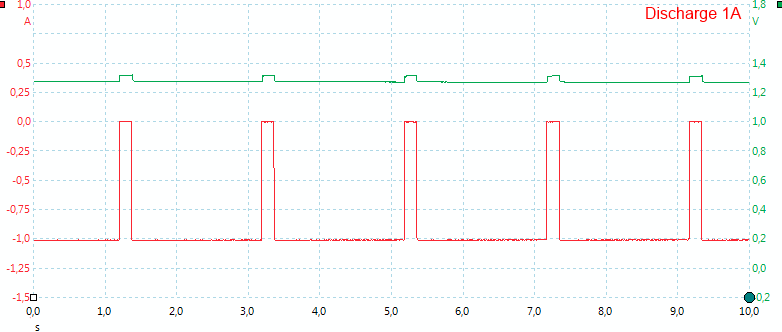
And the highest discharge current.
CYCLE: NiMH cycles
The cycle function will do repeatedly charge and discharge cycles. When finished a final charge is applied.
Both charge, discharge and number of cycles must be specified. The cycles can be between 1 and 12.
It is possible to read the capacity of all the discharges when finished: Use the arrow keys to select cycle and wait a moment before the discharge capacity is shown.
%20%231.png)
In the above curve I did two cycles (i.e. two dischargers). Charge current at 1A and discharge current at 0.5A. The charger adds top-off charge and a pause after each discharge.
Alternate test
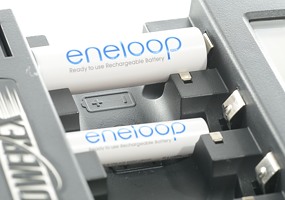
I wanted to compare the different capacity analysis methods, all the test below is done with the same eneloop AA battery and in the sequence they are listed. Between each line there is a couple of hours rest with trickle charge.

The "break in" function charges 3200mAh into the battery.
The "top-off" charges about 200mAh extra into the battery.
It looks like ordinary charge + top-off will nearly fill the battery.
Conclusion
The charger does not use -dv/dt termination, but constant voltage with a top off charge and has the temperature sensor as backup. With the top off charge it looks like the charger just fills the batteries.
The function in the charger works very well and looks like they are designed for practical usage (i.e. they always shows the discharge capacity, not the charge capacity).
The user interface on this charger is easy for normal charging of AA batteries (Just put the batteries in the charger, everything else is automatic), but for doing something more special it can require a lot of key presses for each battery.
The charger is very good for analyzing batteries, but for normal charging the batteries might not always be filled.
Notes
The charger was supplied by Danaco for review.
Here is an explanation on how I did the above charge curves: How do I test a charger
