Edit: DBC-02 became a laser… green light at around 200mW
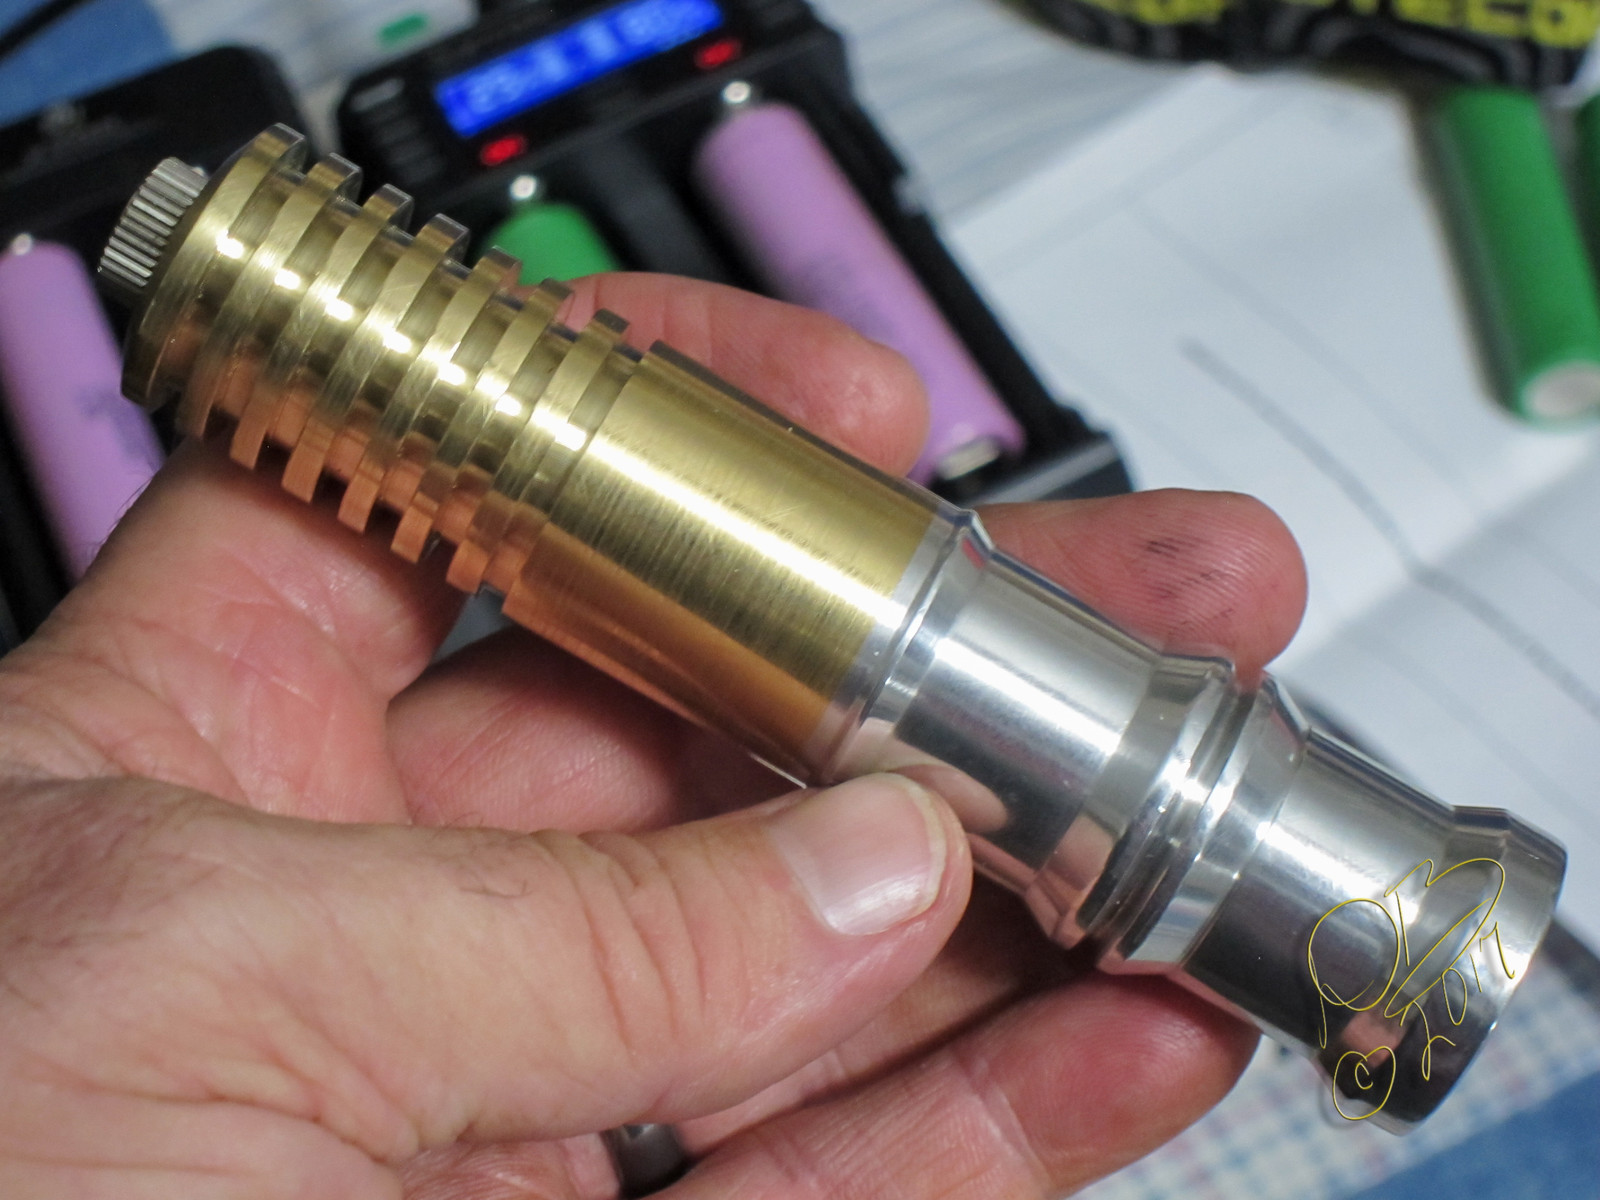
The light got rebuilt to the point it became DBC-04, and now it has an extension ring in Titanium to allow for an 18500 cell with 1000mAh capacity, which gives 14.11A at the tail to the new XP-L2 V6 1C emitters and a change back to Carclo Quad optics. This allows some 700 lumens more light, at 4122.75 lumens.
I did the cell addition/change in January of 2017, completed the emitter swap to XP-L2’s November 14, 2017.
—Hiya hiya!
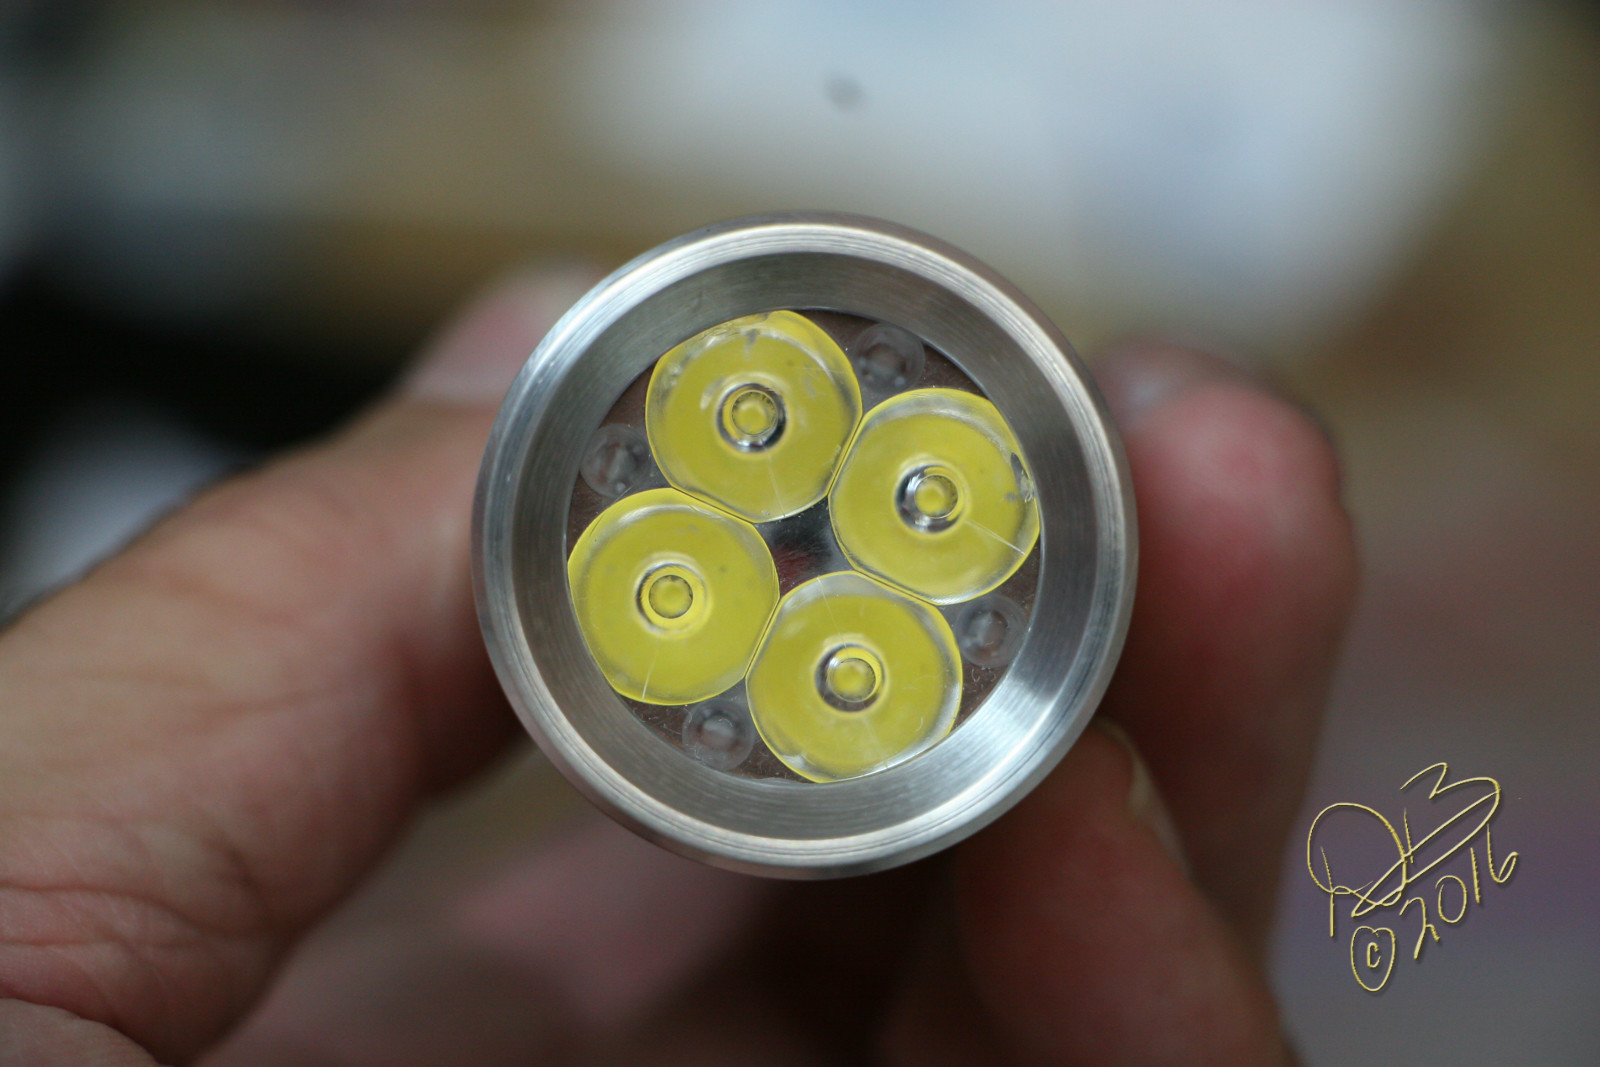
I thought I’d share my second complete scratch build on the lathe, the DBC2 Quad EDC made with Cree XP-G3 S5 3A emitters on a Cutter T-Pad copper mcpcb with Khatod spot quad optics. I made it day before yesterday kind of on a whim. Just went out to the shop with a pocket full of the components and whipped this up initially in about 6 hours. No design, no real plan, it just formed itself as I went along.
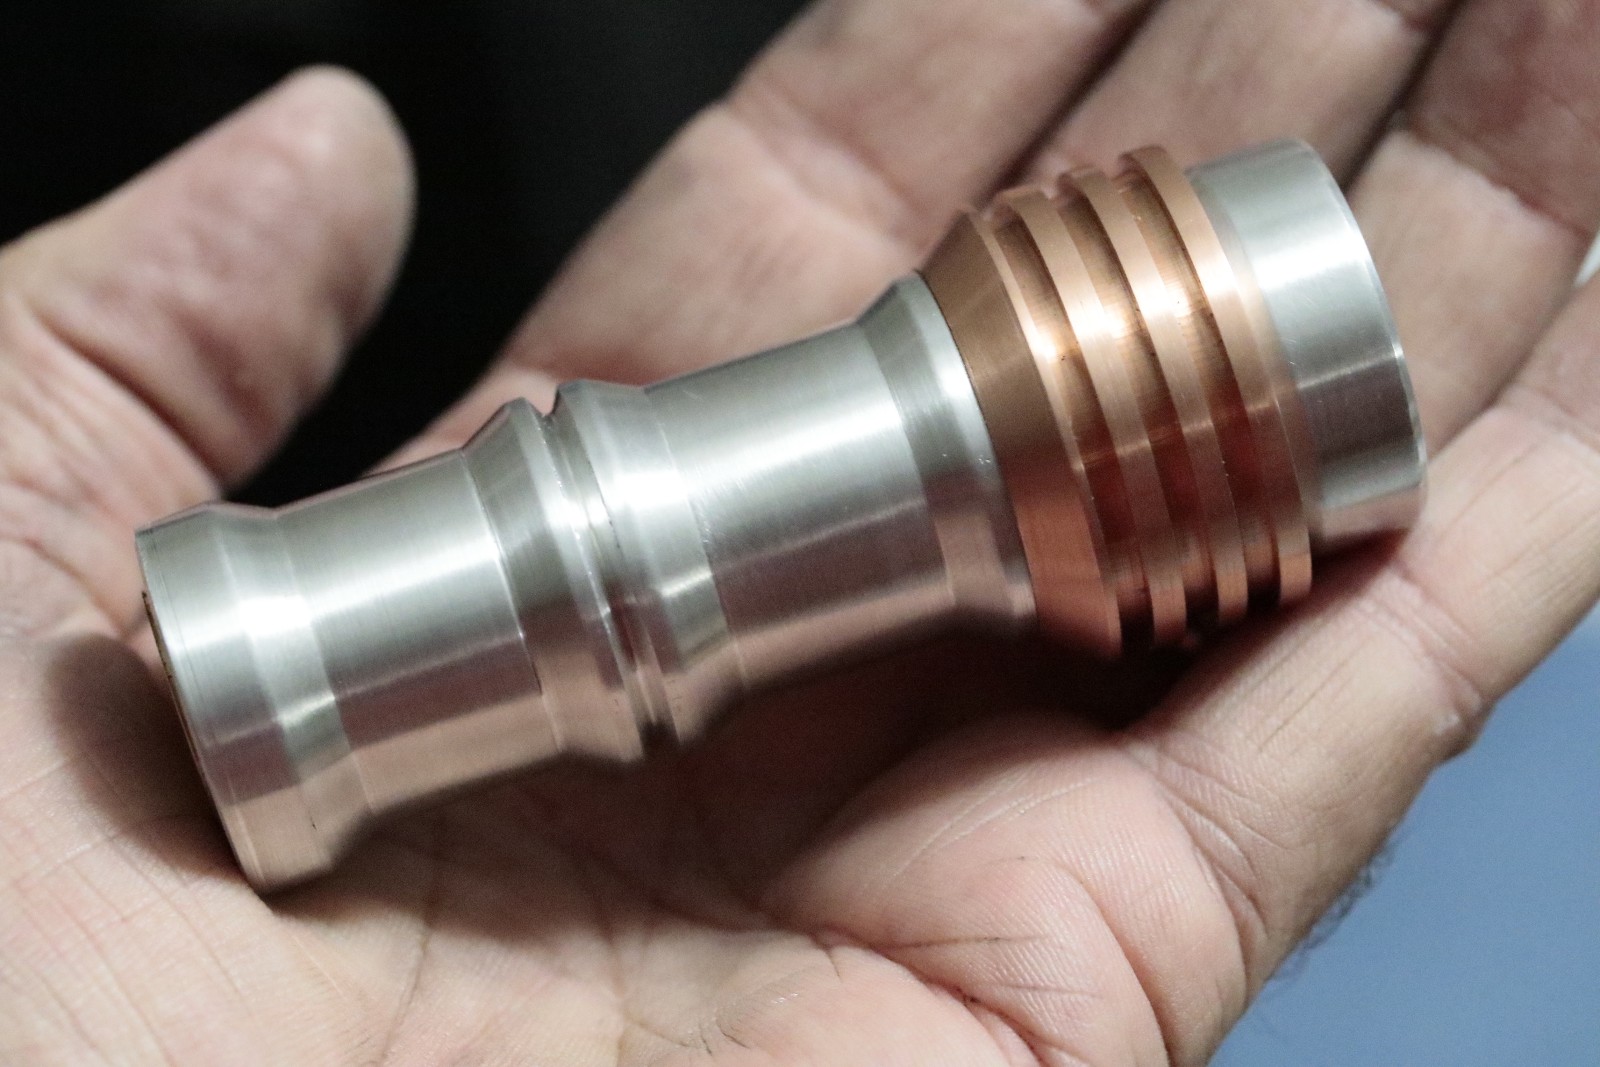
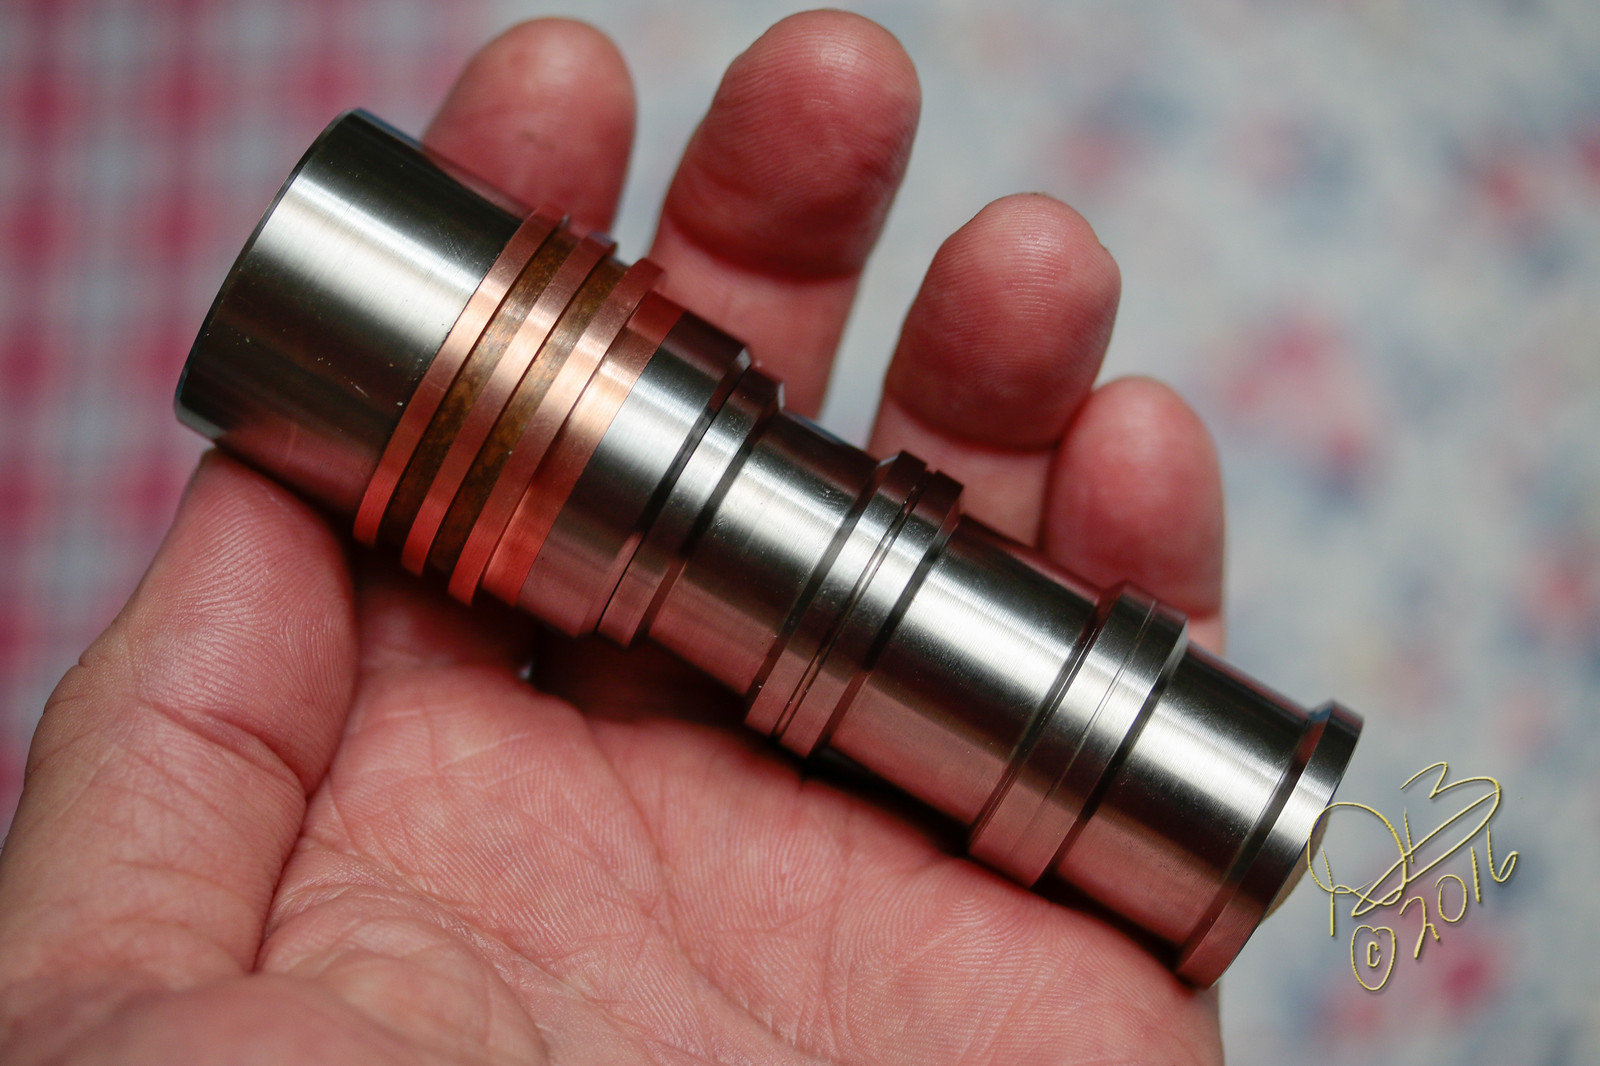
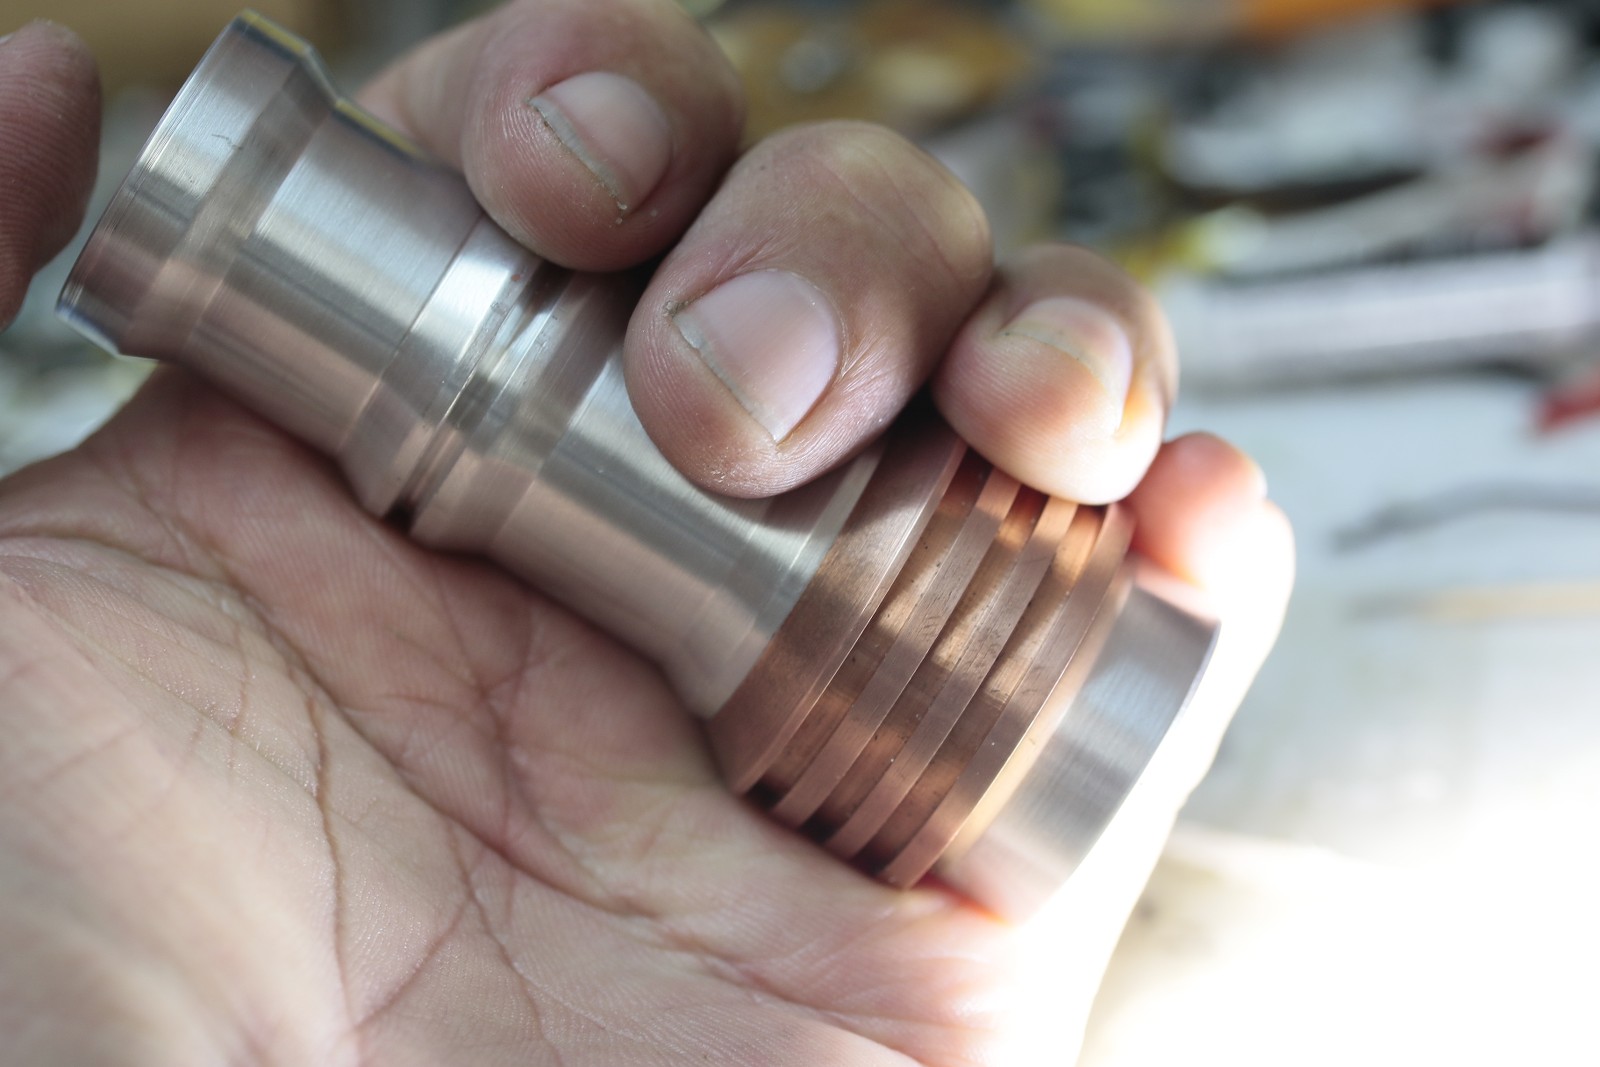
When I got started on it, I had two left over pieces of copper… one in 100% pure that was long enough but not large enough diameter, and one Tellurium Cu that was the right diameter but too short. So I made a 1” pill design with a bezel threaded onto one end and a driver cavity and battery tube threads in the other. Then finned the Tellurium and made it a slip-on. Not optimum, but it worked.
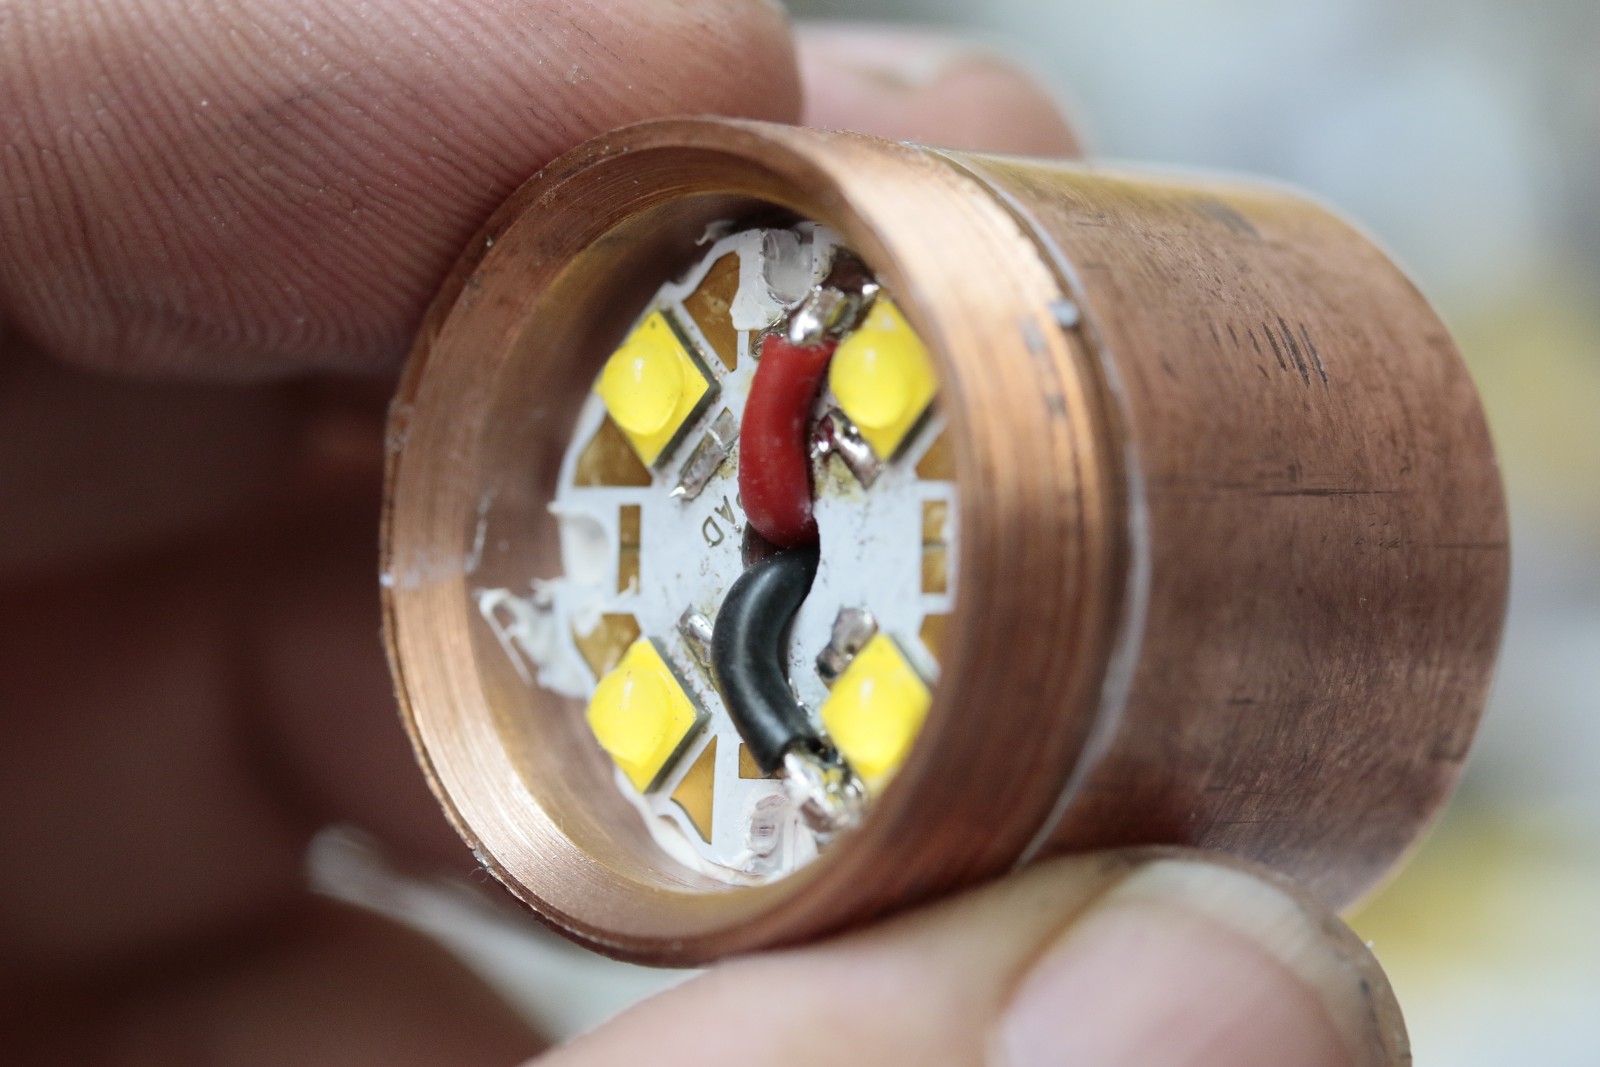
The battery tube is bored to the correct depth, then the switch is put in from the rear and held in with a brass retaining ring. All done on the fly, as it were, making it up as I went along.
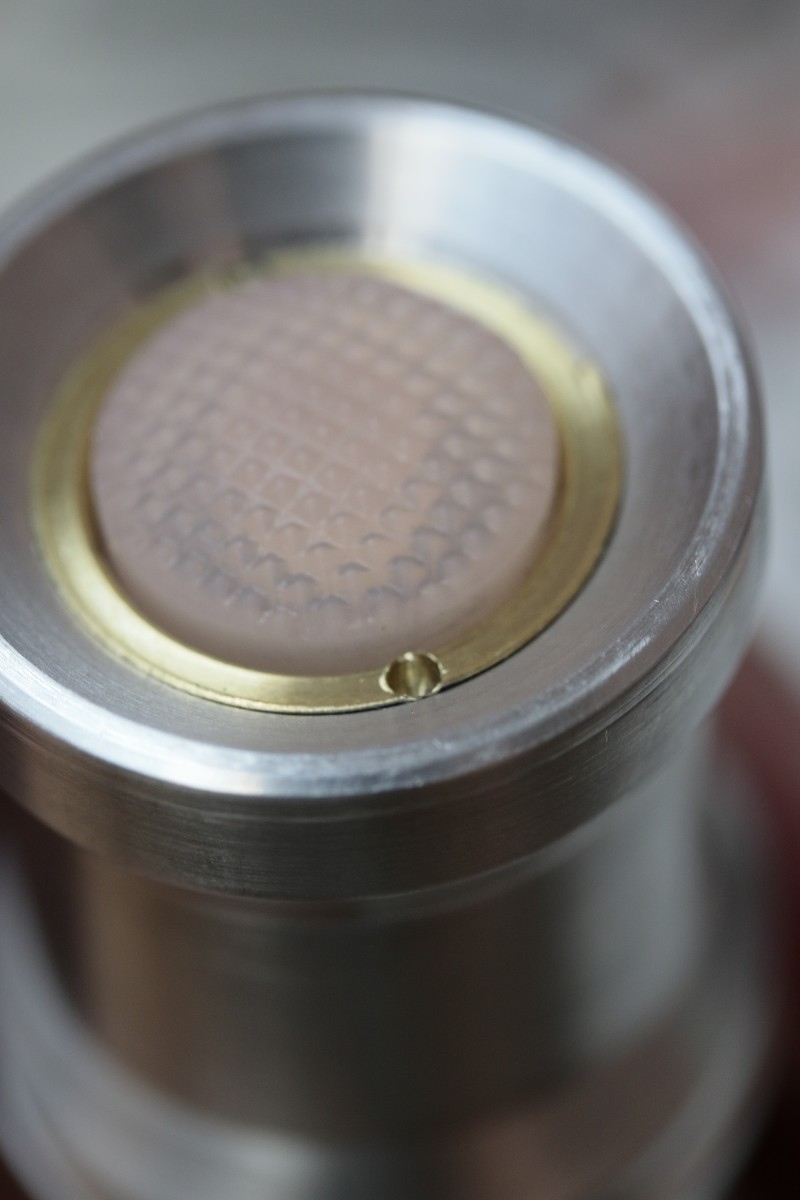
This is a pilotdog68 lighted tail cap board, with the clear acrylic cover piece and a pinkish opaque rubber boot from my X6/X5 lights. I haven’t done the lighted tail cap thing, not sure if I will on this 18350 light.
I had one of Richards ATTiny25 FET+1 drivers with no firmware flashed to it, so I put the latest Bistro firmware on it, wired up with 20ga leads and got some 2250 lumens out the front from the G3’s and a Carclo quad optic. Then I bypassed the springs and got 2515 lumens. This was playing with it yesterday, getting the brass switch ring finalized and all finished up.
The crazy thing is, I did this while coming off a double dose of the sedatives I sometimes have to take. I mostly remember doing it, but the time it took seems kinda foggy. lol Just wandered out there and did it.
Then today, I changed the game plan…
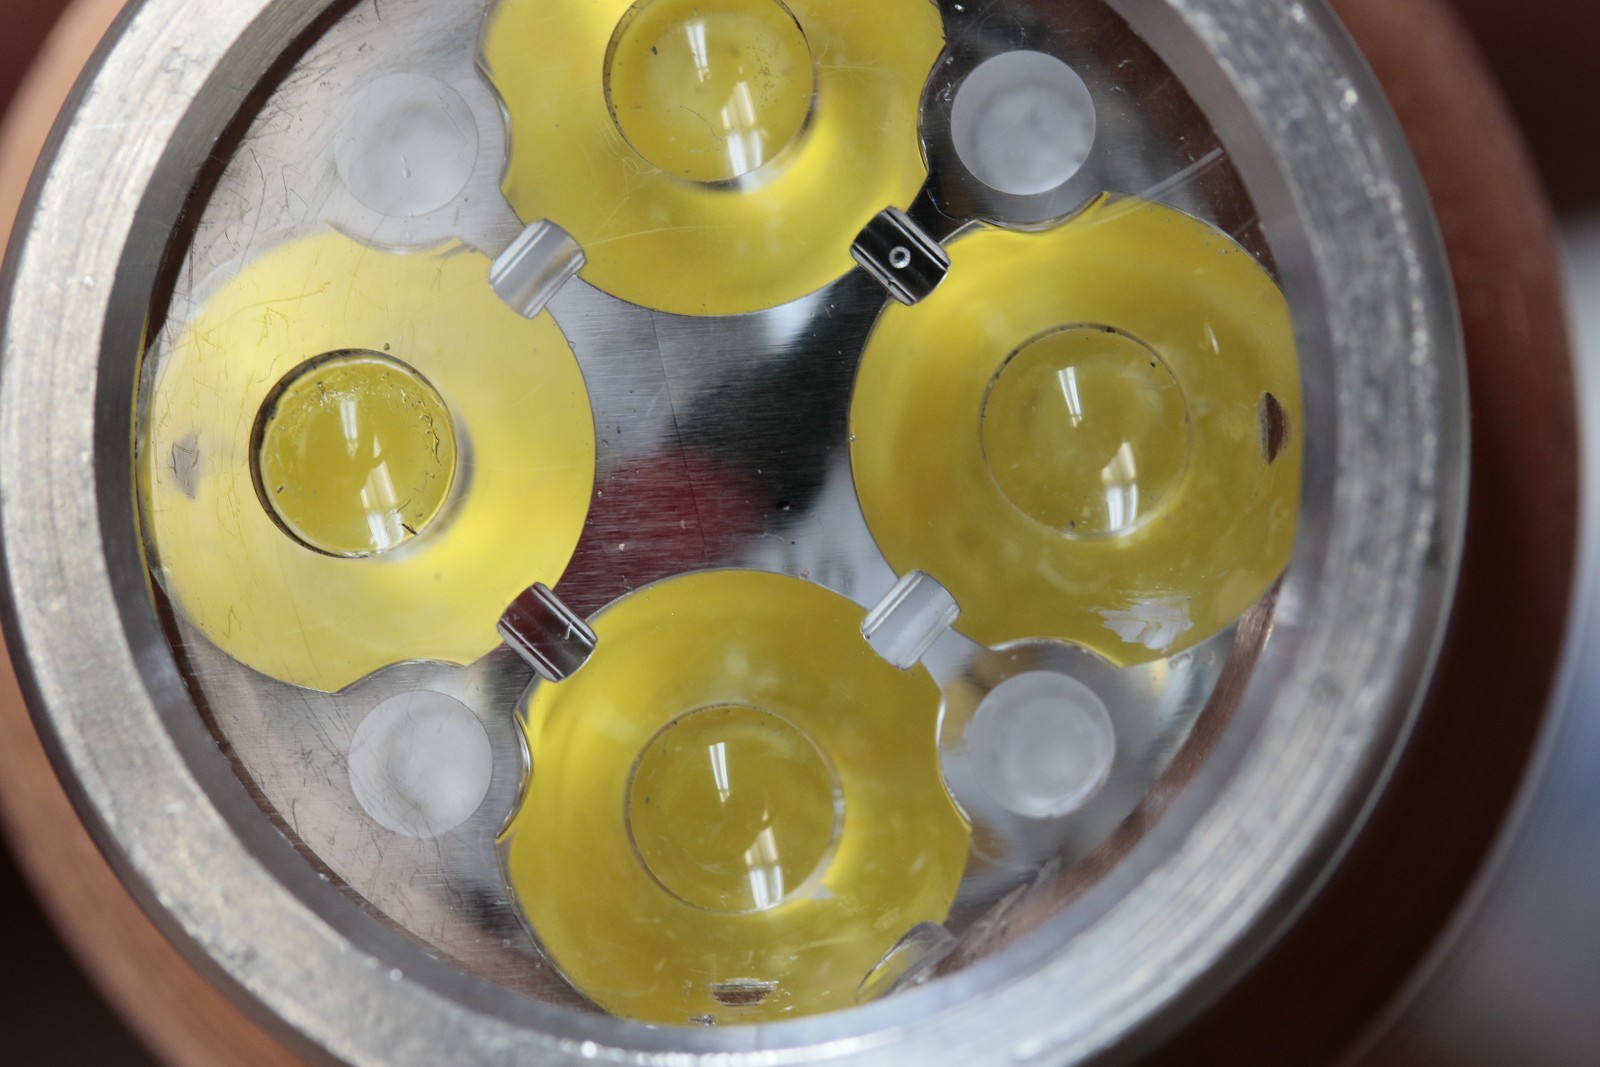
Did a bit of a redesign. Remembered I had the tighter Khatod optics so I redid the bezel and bored the pill to fit the wider optic legs and allow the taller deeper TIR’s. 2559.9 lumens now, from the XP-G3 S5 3A’s.
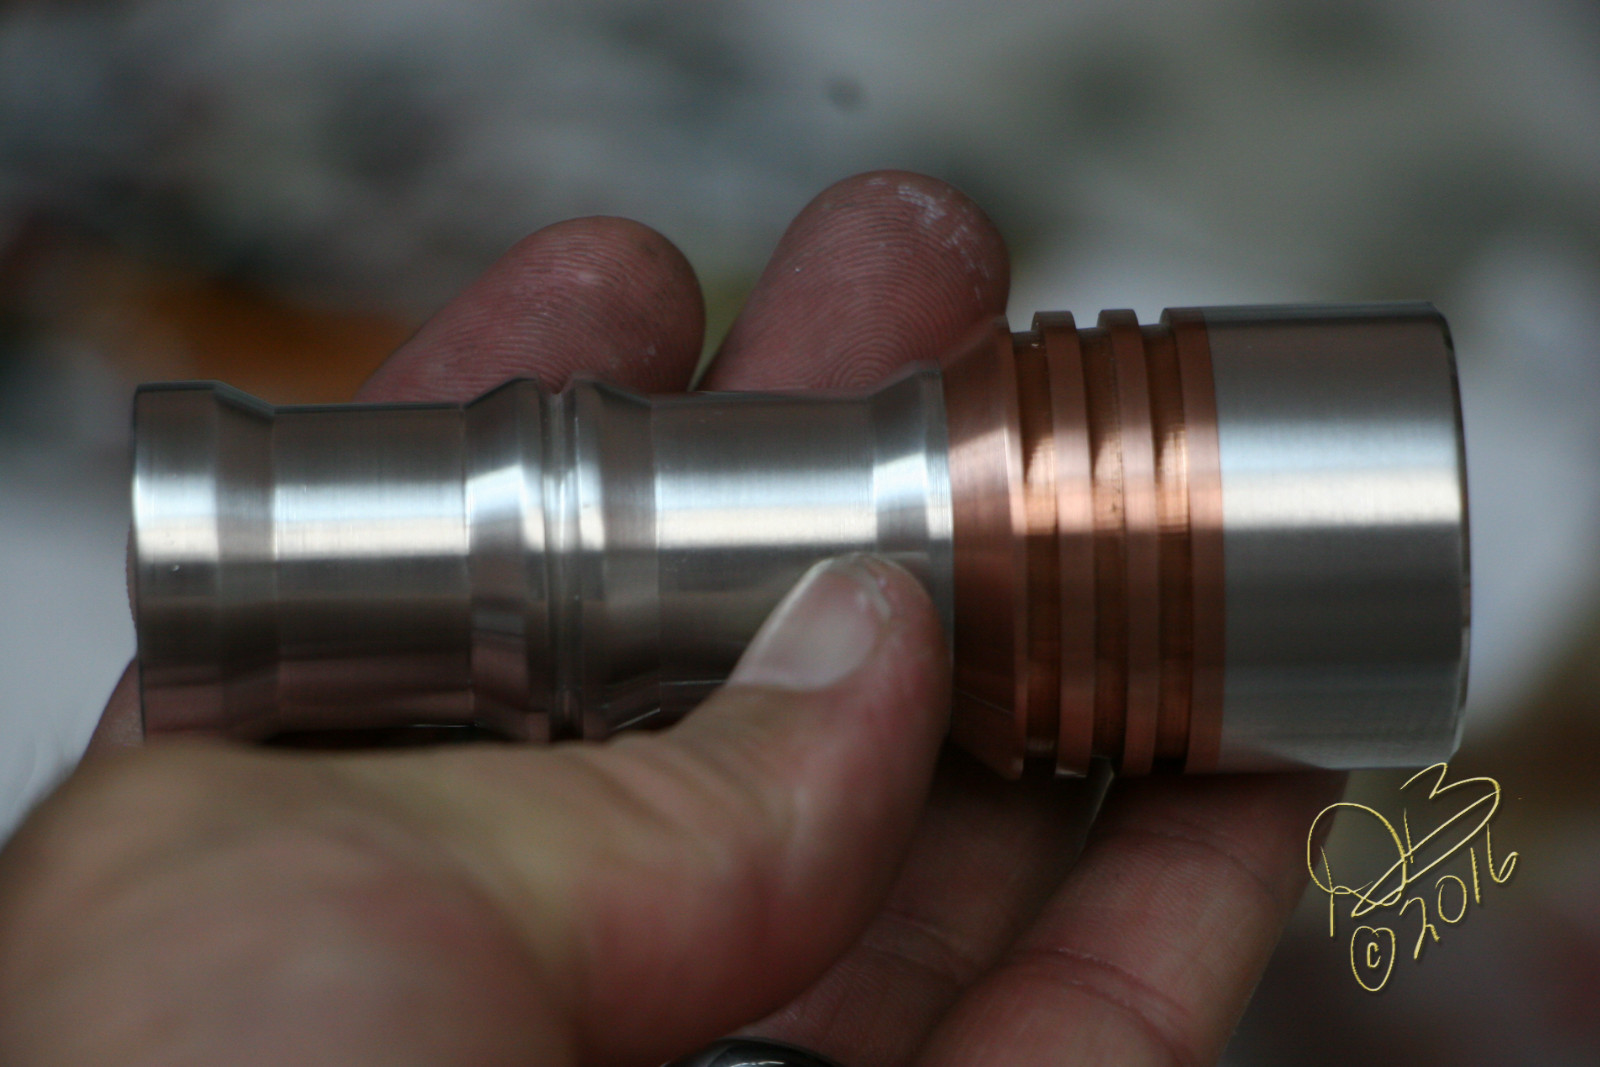
(Edit: For the record, the head is 33mm in diameter, smaller sections of battery tube are 23mm while the raised sections are 28.6mm. Overall length is 92.8mm. It weighs 181 grams with an Efest purple IMR18350 cell installed.)
Before, with Carclo quad optics…
After, with the Khatod…
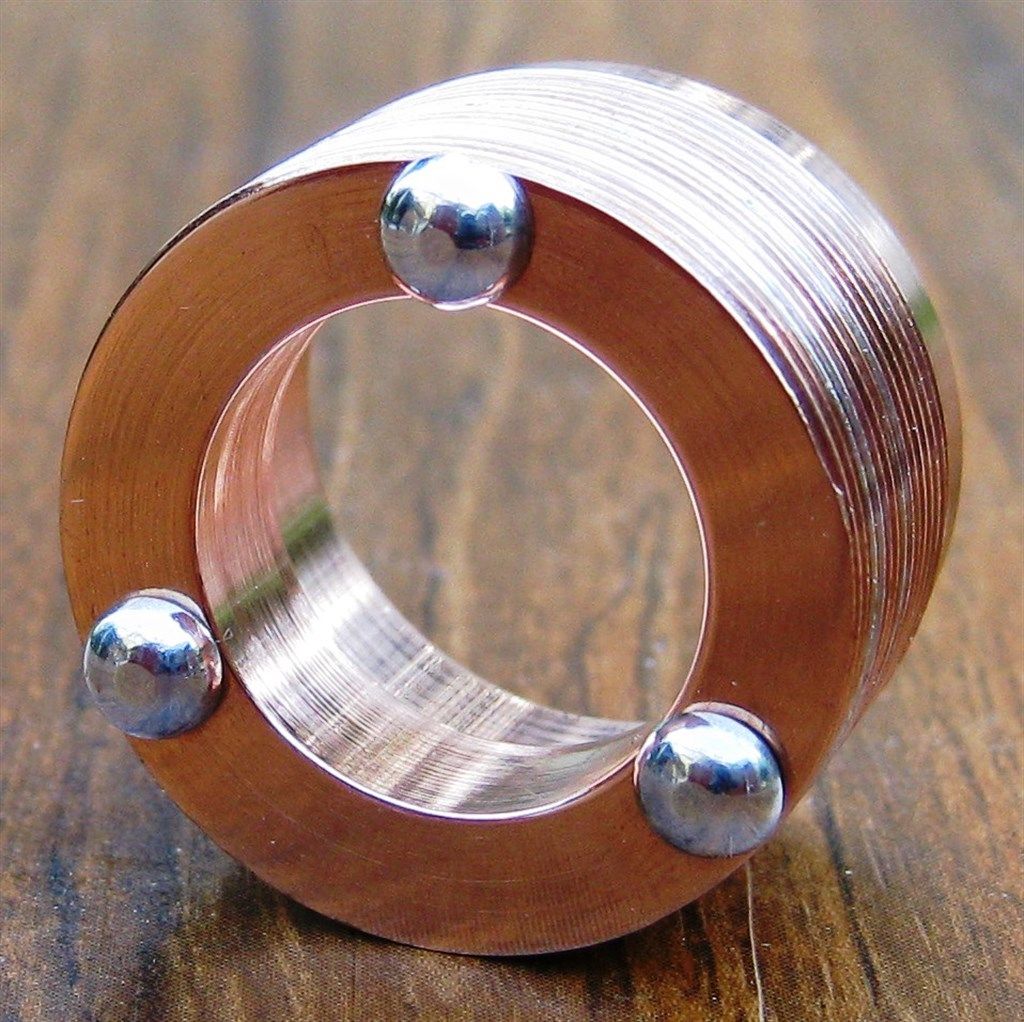
I really love how two metals merge when machined together…
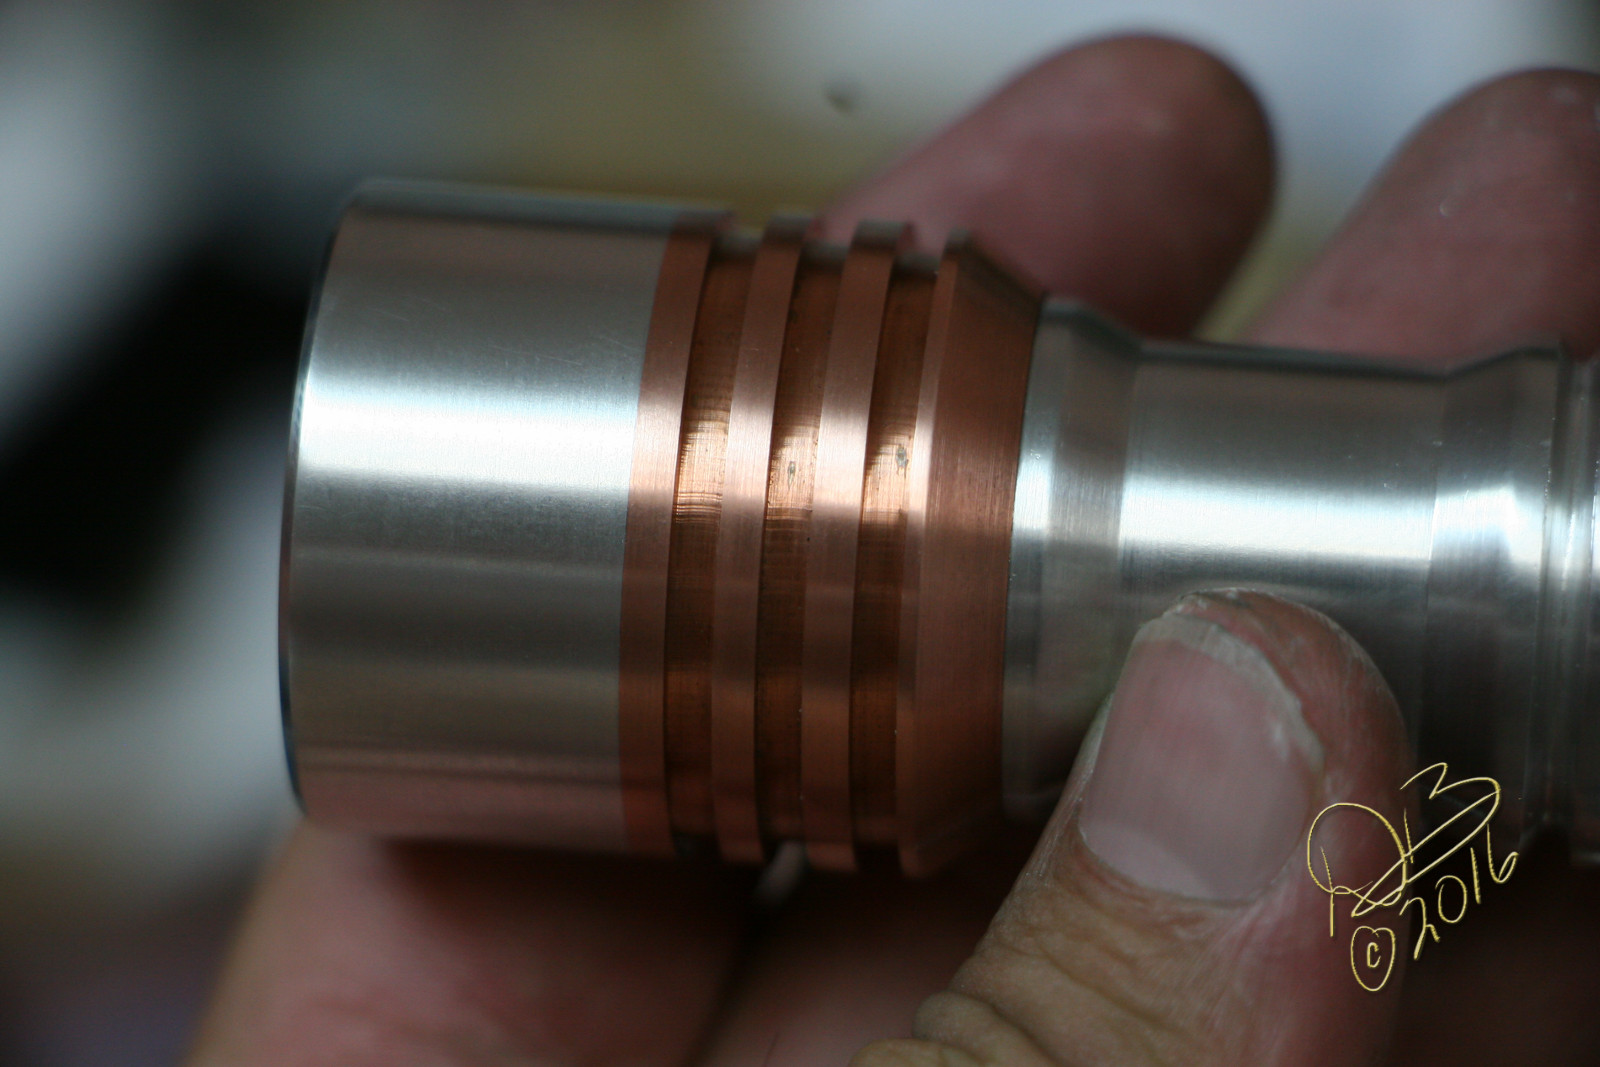
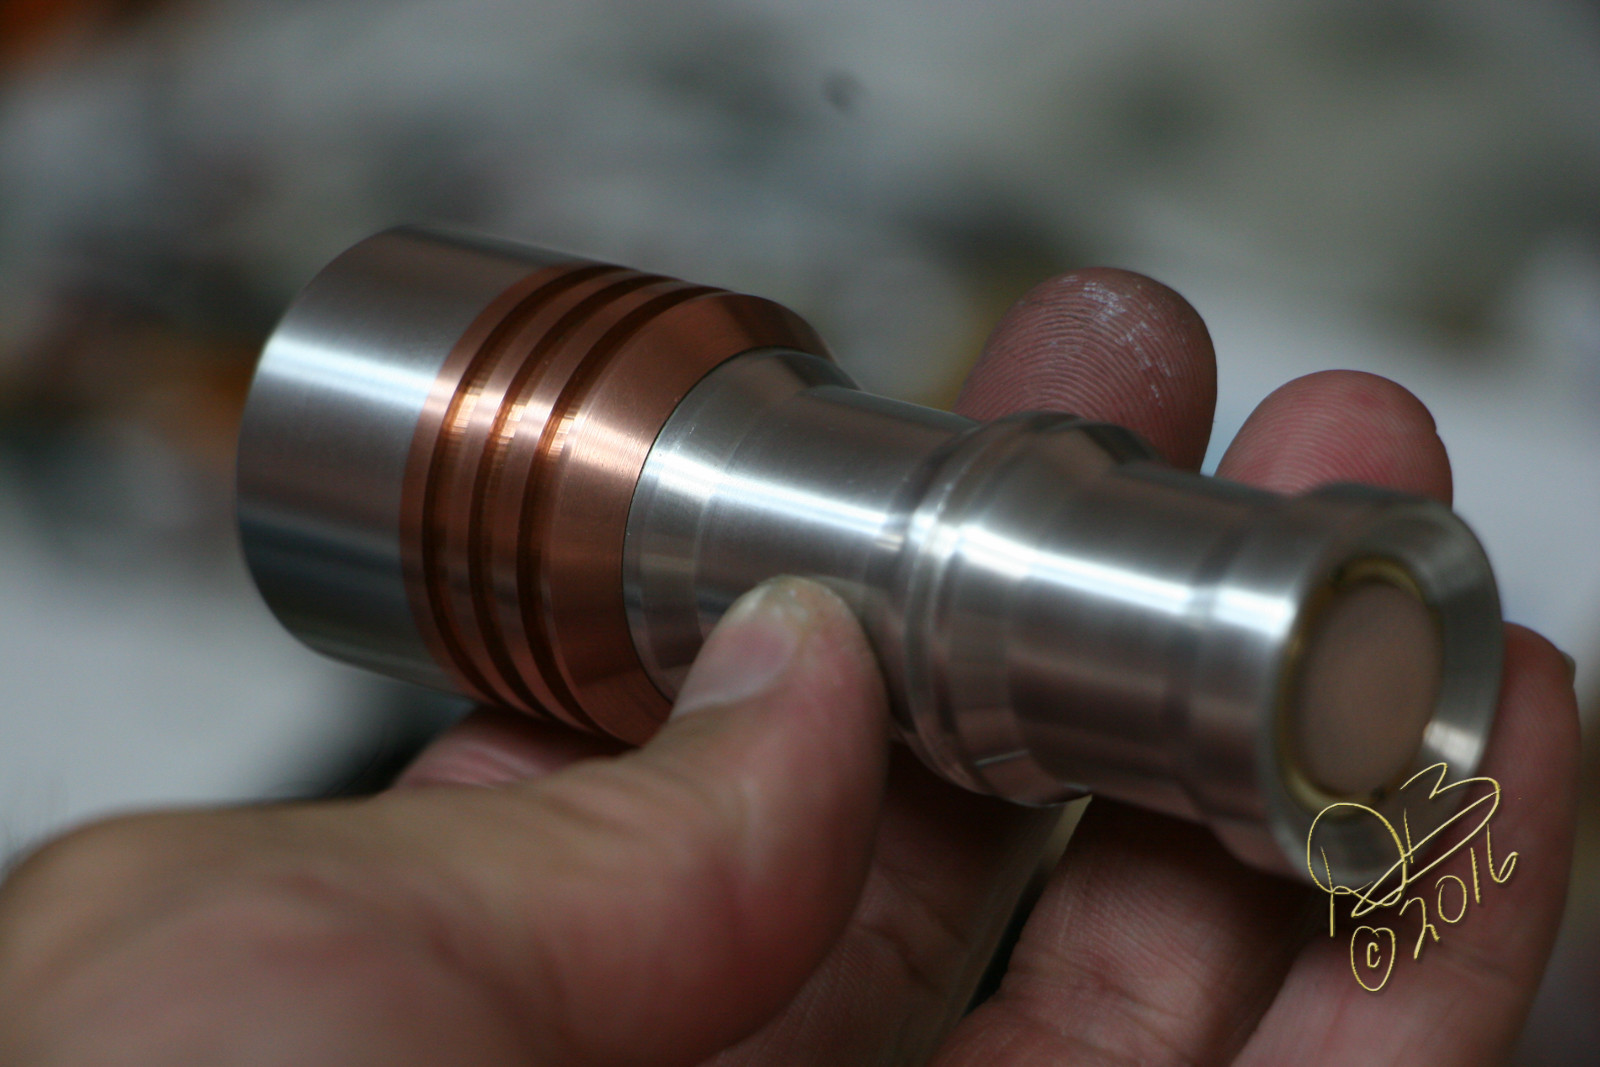
All in all, a fun little light with some punch, and plenty of copper to handle it.
Thanks for checking it out, one of these days I might actually get good with the lathe and start doing things “right”!
Edit: 5-20-16 9:49PM
I pulled the bezel and optics and put a 20ga loop between the pad and negative lead, got a direct amperage measurement.
0.01 Amps
0.18
0.86
3.05
7.57 Amps at 2680 lumens
So each of the XP-G3 S5 3A is getting just under 2A, which is the spec max for these new emitters. This is on the Efest IMR18350 cell, which has been taking a beating lately, lol.
I’ve squared away the switch seat, made a brass cover plate for the top of the switch, so I know every ground point is as solid as I can make it. Pulled the resistors off the lighted tail cap in favor of full functionality of the Bistro driver. All the coulda, shoulda, woulda’s, have been addressed.
EditII: 5-21-16 11:32PM
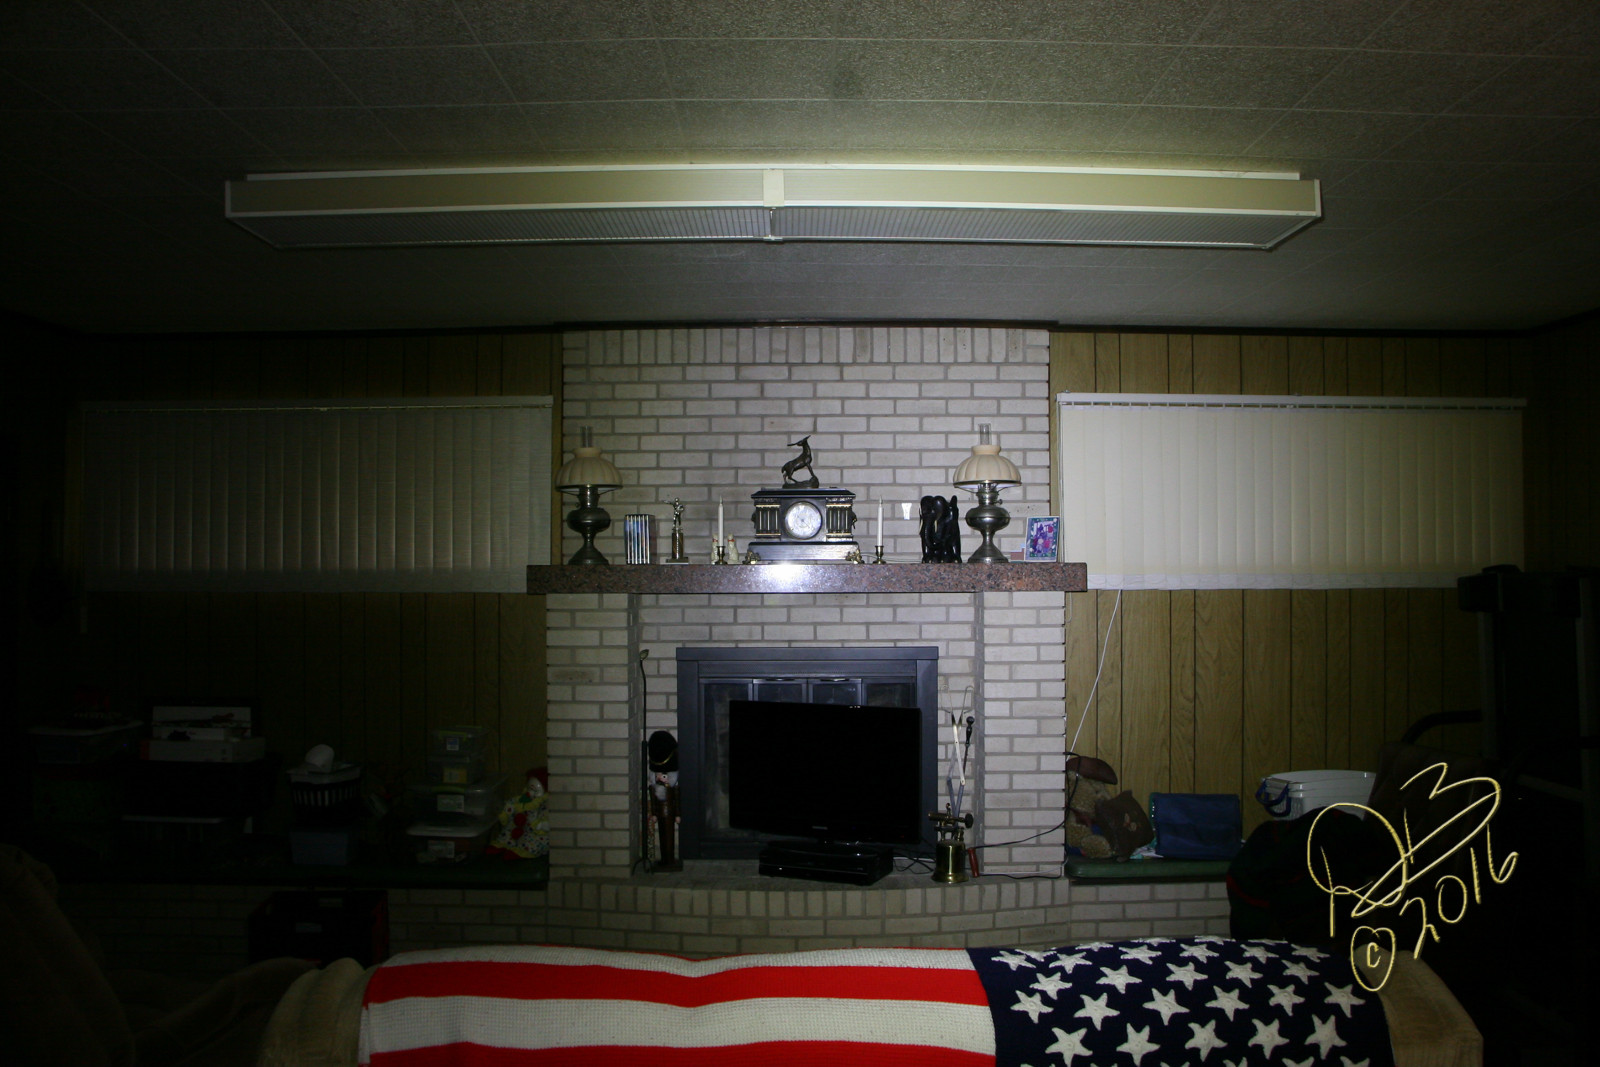
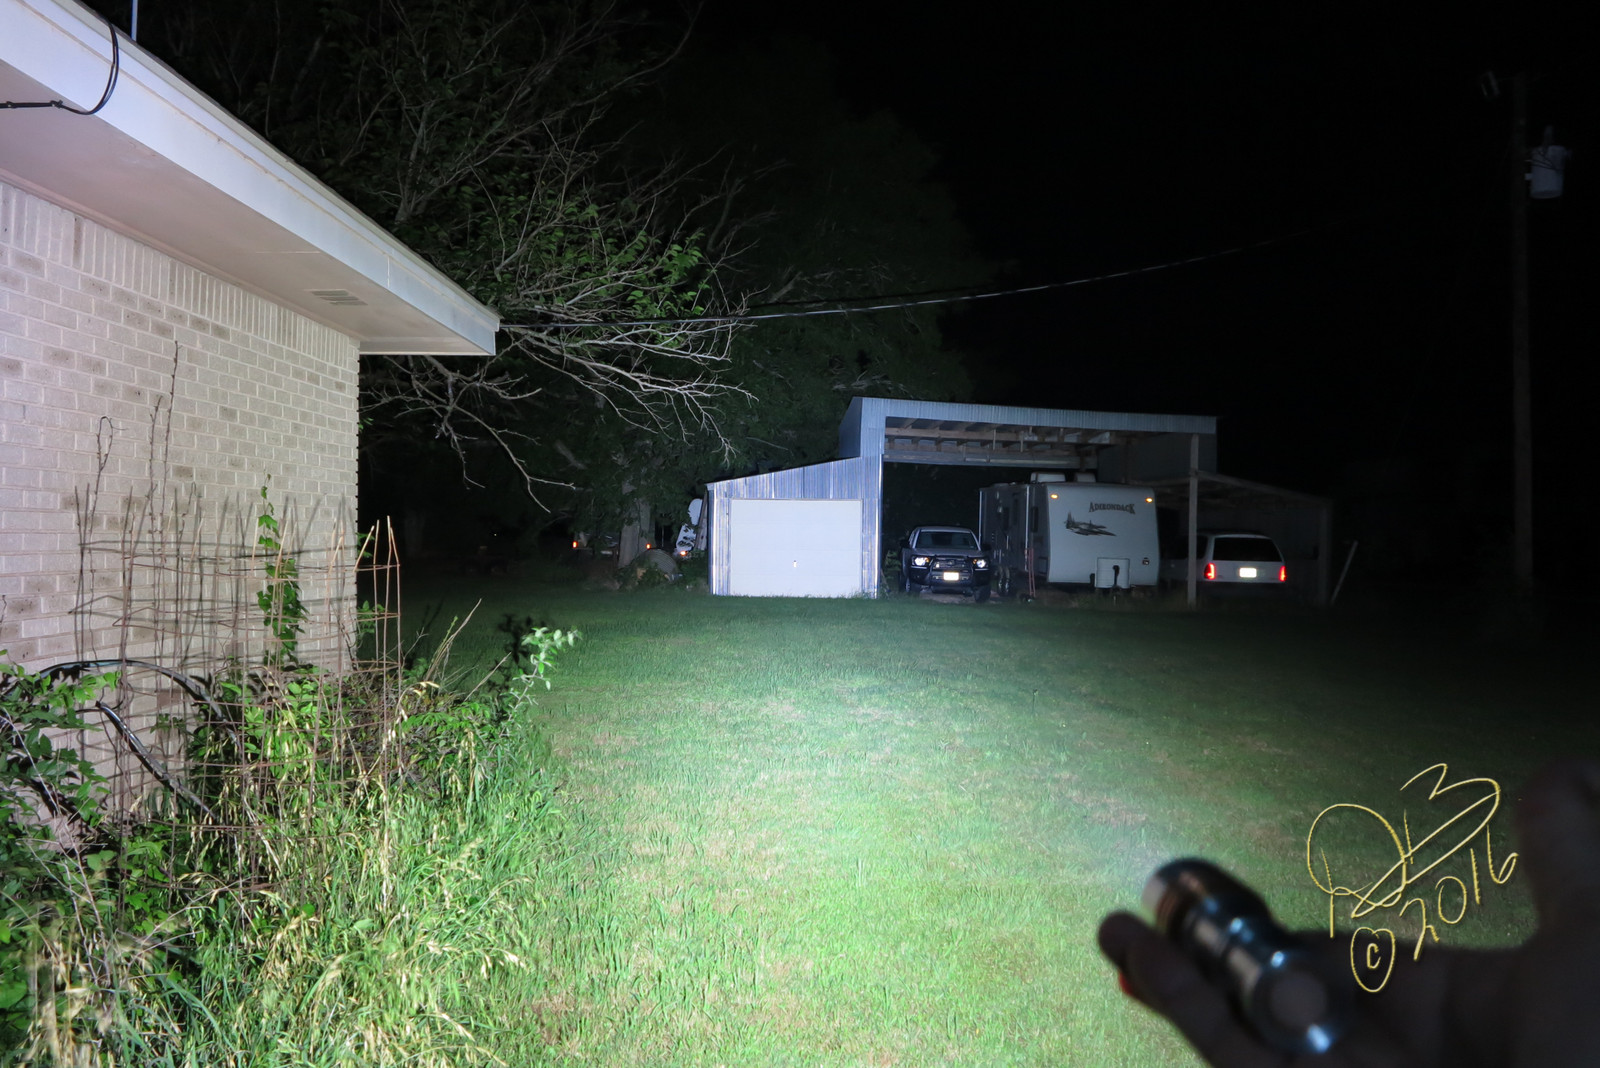
A quick beam shot at about 35 yds.
Schoolgirl giggles, silly boy grins.
And now it’s my EDC, stealing that spot from my Quad Cu X5 that’s been there since Nov 4 ’15, since Dec 22 as a quad.
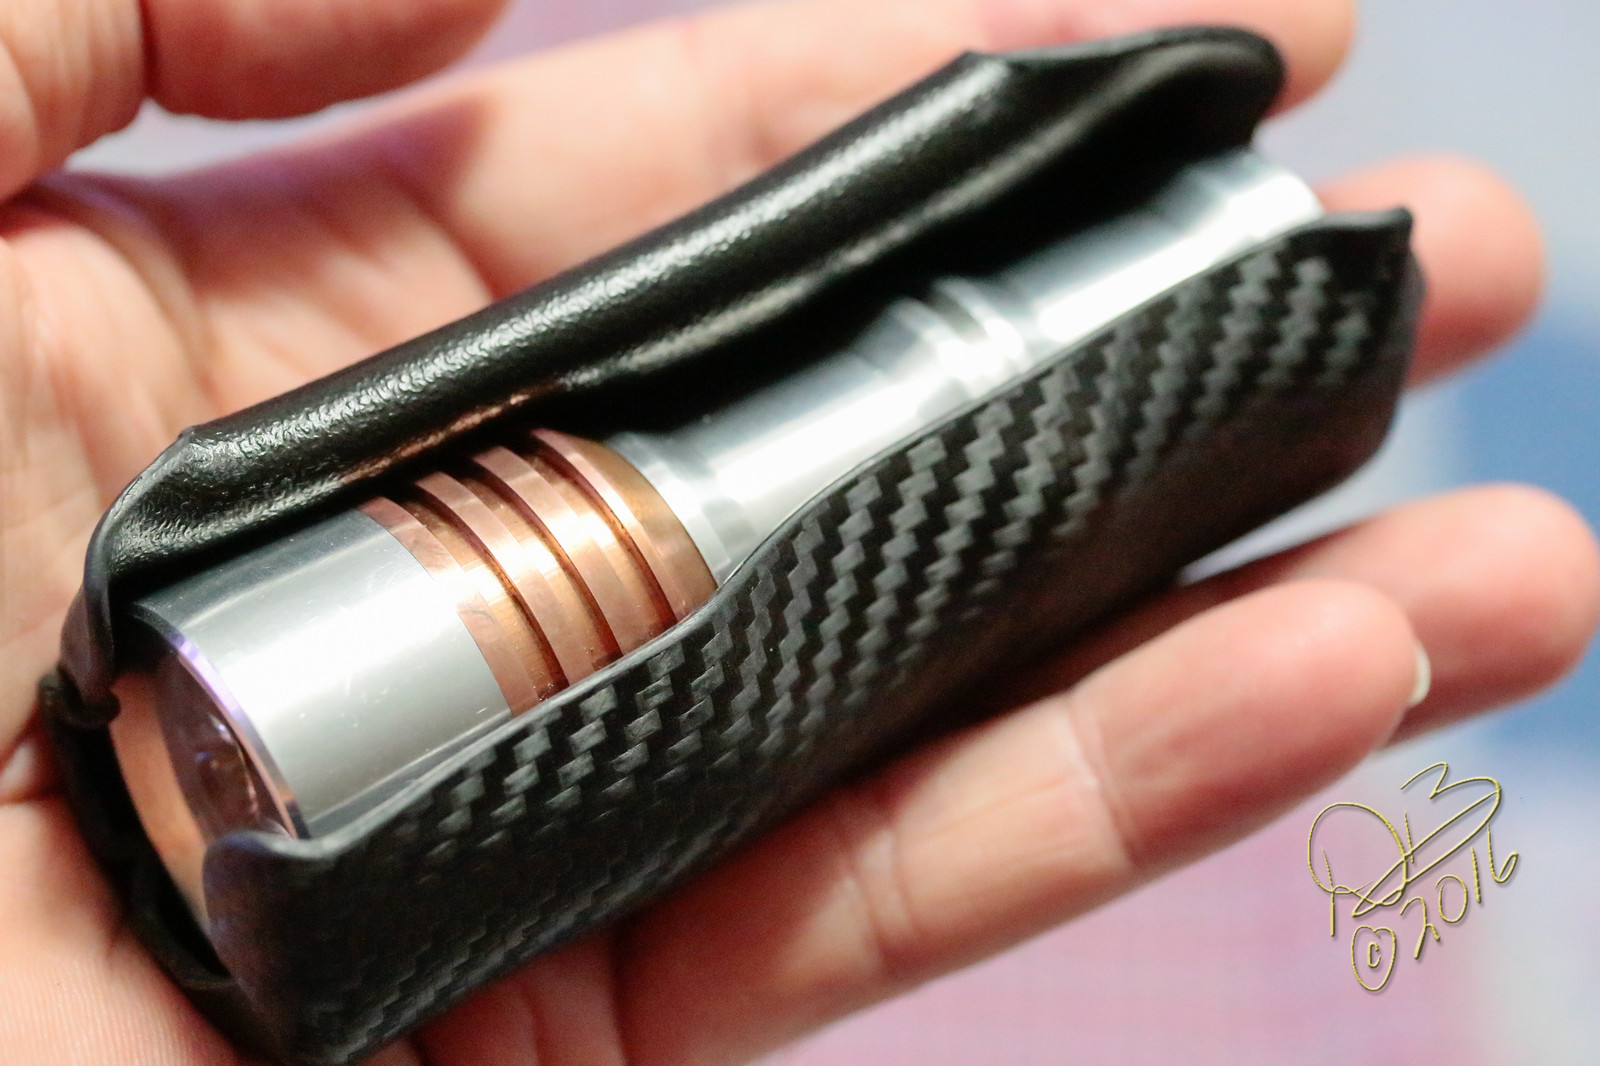
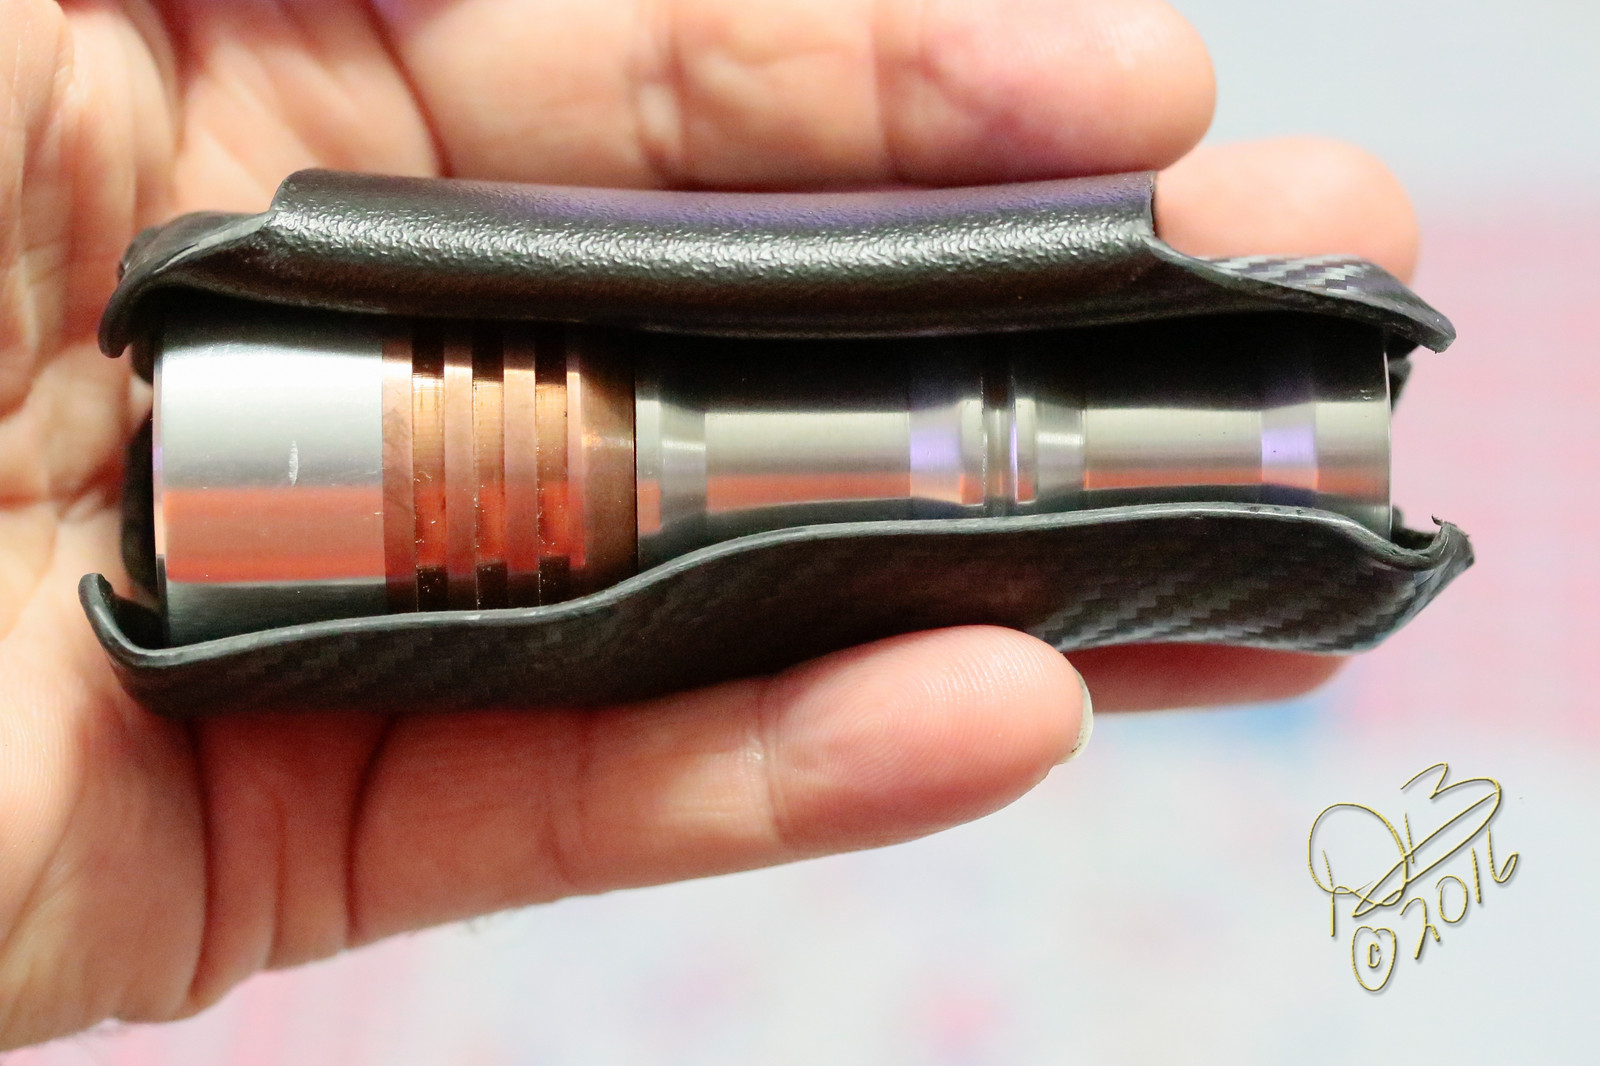
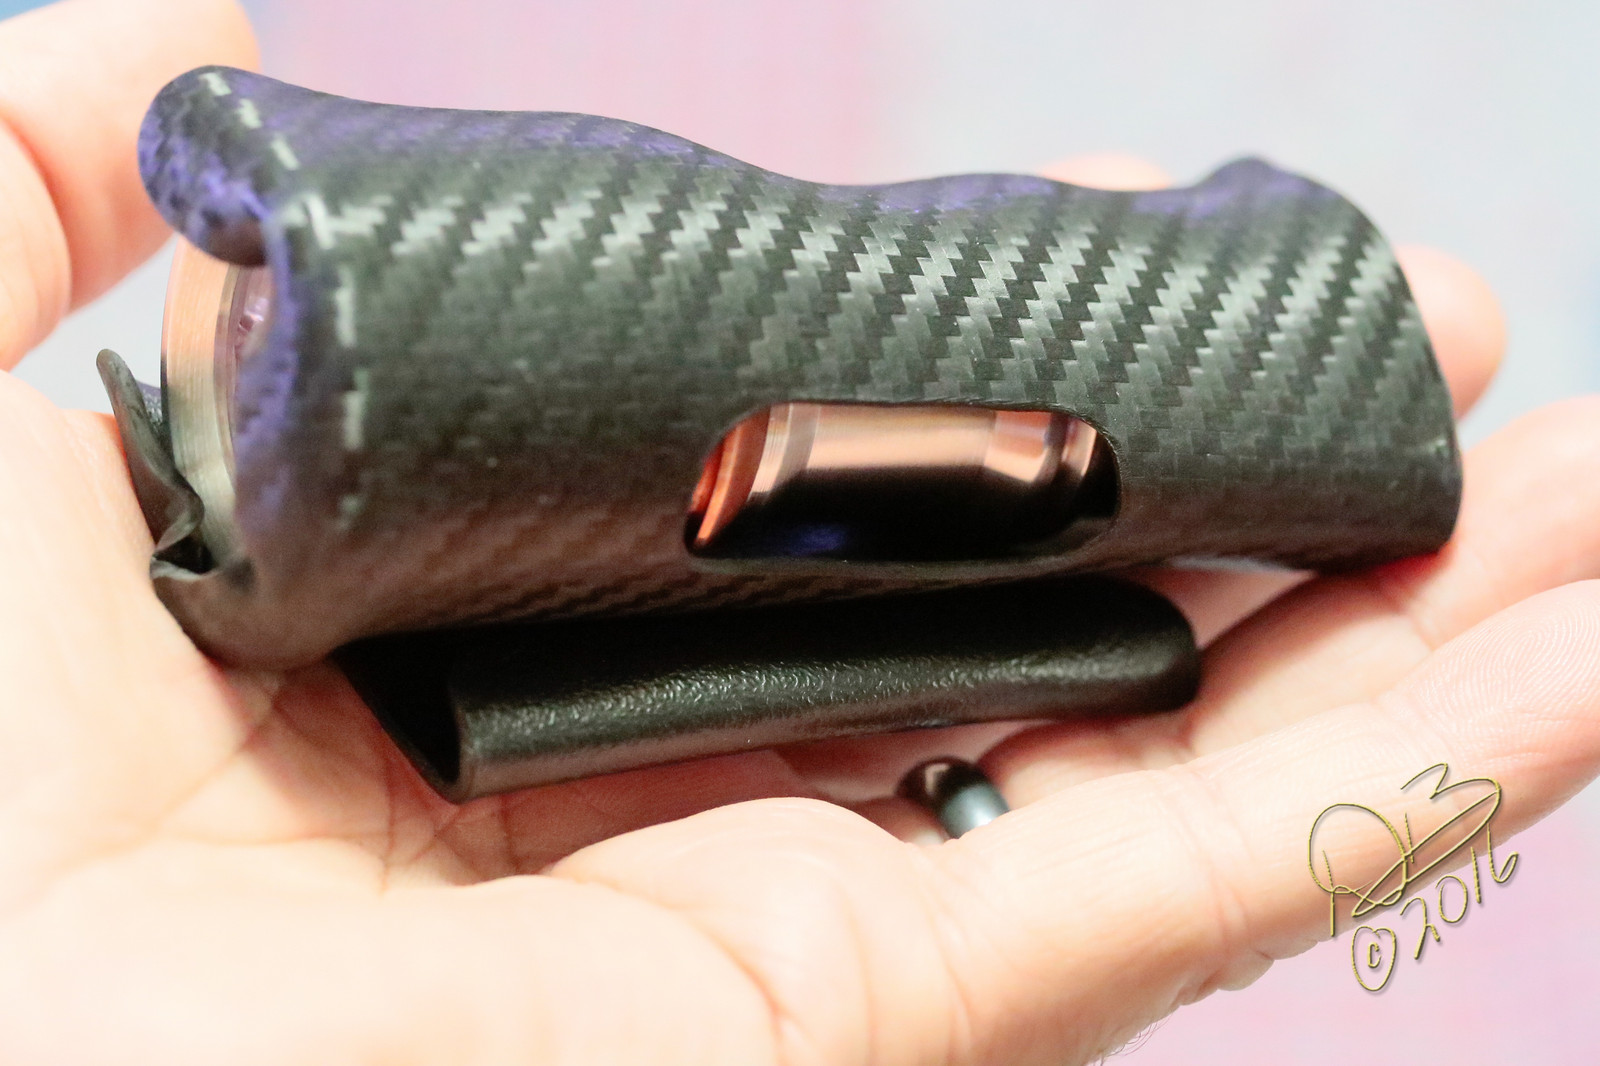
The belt loop acts as a hook that also catches the hem of shorts, so I can even wear it and deploy the light without having it on my belt. Works pretty sweet, but as with so many things I do, I forgot to double check orientation when I built it… I’ve carried the X5 with the head facing left, on the left side, so when it comes out my thumb is in place over the switch and ready to shine from a tactical grip. This time, I made the sheath with the light facing right, carried left, so it’s opposite and will take some getting used to. Oh well, forgetfulness rears it’s ugly head in so many ways….
Amazing work!
Dale, nice work. The tail pcb you have there is actually of pyro1son’s design. You should try one of the Rev5 boards sometime too. They’re more efficient so more appropriate for the smaller cells.
My Favorite Modded Lights: X6R, S8 , X2R , M6, SP03
Major Projects: Illuminated Tailcap, TripleDown/TripleStack Driver
pd, this one allows the adjustable pot in the center of the spring, I figured with a quad set-up on an 18350 the poor little cell just couldn’t afford the additional drain of a couple of tiny LED’s.
You can combine the two versions too. Rev5 efficiency + pyro1son’s easy pot control = real winner.
Basically what I’m saying is, your tailcap isn’t complex enough
My Favorite Modded Lights: X6R, S8 , X2R , M6, SP03
Major Projects: Illuminated Tailcap, TripleDown/TripleStack Driver
But I’ve got the latest and greatest in quad mcpcb’s and the freshest XP-G3’s and the rarest Khatod Optic and the elusive Tellurium Cu… should count for SOMETHING!
Edit: You’re gonna make me populate the lighted tail cap aren’t ya?
Nice Dale. You and that little lathe will / are becoming good friends. There isn’t much that’s more enjoyable than just building something as you think of it. I don’t get to do that too often but I sure like it when it can happen. Nice clean work.
Keep it up. Dan.
Texas Lumens Website… http://www.texaslumens.com
WE LIVE IN THE LAND OF THE FREE ONLY BECAUSE OF THE BRAVE!
Thanks Dan, appreciate it. I thought of you more than once when I was doing this one, rest assured!
Two things Dale. Take more sedatives and send me some. Love the light especially with the no tailcap in sight.
djozz quotes, "it came with chinese lettering that is chinese to me".
"My man mousehole needs one too"
old4570 said "I'm not an expert , so don't suffer from any such technical restrictions".
Old-Lumens. Highly admired and cherished member of Budget Light Forum. 11.5.2011 - 20.12.16. RIP.
What a beautiful creation. Congrats.
I like this picture. Kind of looks like you're in zero gravity and the parts are floating away.
Steve, I got the brass ring in tight with no holes drilled by using the point on a cutting tool. It had a sleek look that I wanted to keep, but the dang rubber post inside the boot was too long and the light wouldn’t tail stand without changing modes! So I had to drill the little holes so I could unscrew the retaining ring and get the boot out for that simple shave mod. Sure looked sleek without the tweezer holes. Oh well, I’ll probably put some LED’s and potentiometer on the switch board, it’ll give it that one more special look.
Showed it off tonight to a couple of Special Forces guys and they were totally freaked by the output and size. Got out the Trustfire TR-J20 and the guy was showing me money, wanted it bad! lol (13,500 lumens)
Ran it walking the trash can down to the road, pretty much a 10 minute walk, then those guys and the ex-cop neighbor used it for a while, ultimately came in to a cell down to 3.7V even though it’d been on for most of 30 minutes. So it works out really nice, carries easy, isn’t prone to slip even without gripping it firmly due to that double ridge in the middle. All in all a very handy light. The Khatod optics really make a difference, offering throw that the Carclo’s just can’t do.
Man that is beautiful… When is the production run? I need one ASAP.
interesting that you put the lighted tailcap board in it, yet you don’t want a lighted tail cap. SO that means this is for someone else
Amazing build, I like it a lot
Blog: https://lumenzilla.com
really awesome work, I will use this as inspiration to do a multi-emitter build one day…
This is how I screwed my boot retainer in without screw holes on a light similar to yours on the rear end.
djozz quotes, "it came with chinese lettering that is chinese to me".
"My man mousehole needs one too"
old4570 said "I'm not an expert , so don't suffer from any such technical restrictions".
Old-Lumens. Highly admired and cherished member of Budget Light Forum. 11.5.2011 - 20.12.16. RIP.
That light looks amazing. Only thing I woulda changed is add some grooves or knurling just so that it looks different than the tail cap.
Extremely nice build!
What a beauty Dale, are the two beamshots photo taken under the same setting? Amazing how much more light the kathod seems to put out! is this the 25mm 10° version?
USB power meter/tester thread
Wow, that light is beautiful. I wish I had even a quarter of the skill you have Dale.
Nice work.
- LEDs & Other Stuff - - UI CheatSheets - - CRX Flashlight Builds - - CRX Stuff for Sale -
Nice little beast.
http://atvillustrated.com/files/logo.2013.yamaha.racing.blue_.jpg
That looks nice with the copper. Makes me wish I had a lathe.
Ha… I see what your sayin’:)
Looks like an awesome little light. It’s fulfilling to see the works of your own hands, hey?
Very impressive light
Amazing looking and shining!
It is done when it is done

How my BLF Specials generally work, please read before asking Qs
The Q8, Exciting a groupbuy for a Premium BLF special high lumens soda can light!
The GT, A BLF special GIGA thrower
The FW3A, a TLF BLF special small, elegant, powerful triple
Lithium Ion safety 101 important read
Sorry grammarlovers, I am a real King Typo.
>> The crazy thing is, I did this while coming off a double dose of the sedatives I sometimes have to take. I mostly remember doing it, but the time it took seems kinda foggy. lol Just wandered out there and did it.
Well done. Really nice. I do not remember what would have happened if you had taken something more enhanced
Flux capacitor?
K.
Nice try Pat!
I was drugged Tuesday, from Monday nights issues, DHL brought new Cutter T-Pad quad boards Tuesday around 2:00 in the afternoon and I had just gotten the new XP-G3’s last week. I felt the need to use the new boards so I grabbed up the components needed… I’ve got small Omten and large Omten switches, but I don’t have switch boards sitting around. I only had the lighted board because someone was nice enough to give me a couple to play with.
At any rate, I grabbed what was readily available and headed out to the shop. I didn’t even take a rubber boot out there, so I guesstimated how thick the overall stack would be with the switch pcb, switch, cover plate and boot, cut the necessary pocket into the end of the battery tube and threaded it. Winging it, as it were. I remember pilotdog68 saying these pcbs were very robust and I didn’t need to worry about a through-board bypass, so it made sense to use one here.
The sedative I take is Ativan, used to sort of reboot my system. I have stress and/or cold related muscle spasms (medically referred to as a Conversion Disorder), if I get chilled it can happen and I can get a chill from a breeze on a 105º day when I’m sweating. Difficult to know really just what starts the process, even after nearly 16 years of it. I only take the sedative when the spasms make my head shake violently side to side. This has occurred often enough that over the years that now I get an instant splitting headache and Monday night it was bad enough to make me nauseous. So Tuesday, I had the micro concussion feeling as well as the left-over sedation… groggy, bit of a stagger, probably shouldn’t have worked on the lathe at all. I didn’t go out til like 2:30PM, but then I didn’t come back in til just after 8:30! Lost all track of time, but had TexasLumens’ voice nagging me about safety and keeping fingers and such. lol So yeah, I was making the effort to be careful, but did start getting hurried considering the time and that I hadn’t eaten and darkness was taking over. (the rats move into the shed at dark, and possibly a skunk, so I try to be gone…) I live in the country, there’s cattle fields surrounding the shed and hay stacked outside one wall, heck the adjoining section of shed is a stall and hay loft! So the varmints are to be expected, even if it’s a bit eerie.
As far as mad skills or the use of the lathe, it’s Justin’s fault. It’s all Justin’s fault.
Him and his crazy Scratch Build Challenges. That’s where it all started for me back with the .50 BMG flashlight build. So his challenge started it, now the lathe that came from him (and BLF) and so it goes, isn’t that always how “mad scientists” get created? 
Appreciate the compliments, really I do, am humbled.
When you learn to do things, you also criticize your work. Shoulda done this, coulda done that… and sometimes you re-do things that should have been left alone! I now have to take this DBC2 back apart and address how the driver is mounted. I need to make a threaded brass retaining ring to hold it down firmly and make better ground contact and will probably have to cut some threads off the end of the battery tube to keep fitment proper. (Sounds simple enough, right? I’ll probably have to seat the driver a bit deeper in the copper, so I’ll have to be cutting down into the hole where the threads are, easy to mess up copper threads by the way!)
Scary, as I really really like how the light is right now. But you know, it’s an addiction…
Awesome little light! I see the foundation for that 26650 special we have been working on in the other thread!
My Light Collection (Post 172)
For the record, the head is 33mm in diameter, smaller sections of battery tube are 23mm while the raised sections are 28.6mm. Overall length is 92.8mm. It weighs 181 grams with an Efest purple IMR18350 cell installed.
Yep…… you now know where a scratch builder lives in the world.
Your comment…
“ When you learn to do things, you also criticize your work. Shoulda done this, coulda done that… and sometimes you re-do things that should have been left alone! I now have to take this DBC2 back apart and address how the driver is mounted. I need to make a threaded brass retaining ring to hold it down firmly and make better ground contact and will probably have to cut some threads off the end of the battery tube to keep fitment proper. (Sounds simple enough, right? I’ll probably have to seat the driver a bit deeper in the copper, so I’ll have to be cutting down into the hole where the threads are, easy to mess up copper threads by the way!)
Scary, as I really really like how the light is right now. But you know, it’s an addiction… “
…… about sums it up. I never build a light that inside, I am 100% satisfied with. You sir are stuck on SQUARE ONE for the rest of your days. Tell me in the months to come that I am wrong… I’ll be waiting!! Ha!
I design, I build a prototype, I then build 10, 5, 20….whatever…. and somewhere throughout that I always find something I could have done better!!
You’re doing good!!! TL
Texas Lumens Website… http://www.texaslumens.com
WE LIVE IN THE LAND OF THE FREE ONLY BECAUSE OF THE BRAVE!
OOOOOO…. I like that!! I have noticed you are fond of that slot-less screw look!! Ship builder??
Sure a nice clean look!!! TL
Texas Lumens Website… http://www.texaslumens.com
WE LIVE IN THE LAND OF THE FREE ONLY BECAUSE OF THE BRAVE!
Will, I thought about a before and after pic while on the way out to make changes, so I grabbed my 20D and took a quick shot, turned it off and went to the shop. When I was done I picked back up the 20D and took another shot. I THOUGHT I had put it in manual, but it must have been in Aperture Priority… that or I bumped a control wheel in handling it which is why Pro’s use Pro Bodies, those kinds of inadvertent settings changes don’t happen with a Pro body like a 1DsMkII but with the consumer level cameras, juggling flashlights and cameras and what not can lead to a wheel getting bumped. Shutter speed would have been controlled by the large wheel on the back of the camera, the easiest one to mess up with, so that’s probably what happened. I seldom use the 20D, my primary camera is the 1DsMkII. Both the 5DMkII and 7DMkII will easily suffer the same issue as the 20D, as will the G1X. Too many cameras…
The shot with the Carclo was at f5.6, 1/60, ISO800
The shot with the Khatod was at f5.6, 1/30, ISO800
Which is why it looks so much brighter. Sorry about that. I was “focusing” on the beam profile and spot size, totally missed the settings difference.
Pages