I received the Olight S1R curtesy of Sean from olightstore.com
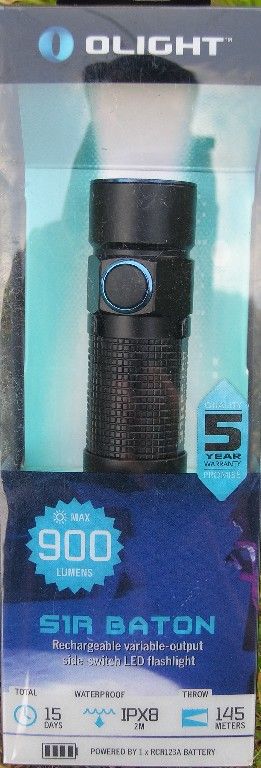
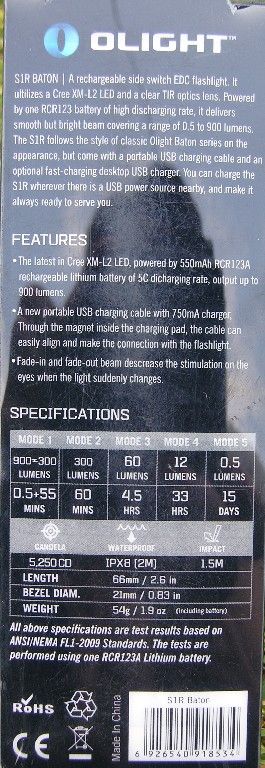
Olight specs:
• Cree XM-L2 LED
• Powered by a 550mAh RCR123 customized battery of five times discharging rate, giving a maximum output up to 900 lumens
• The flashlight can be charged through the magnetic contact charging port (other batteries may also be used in S1R, but cannot be charged)
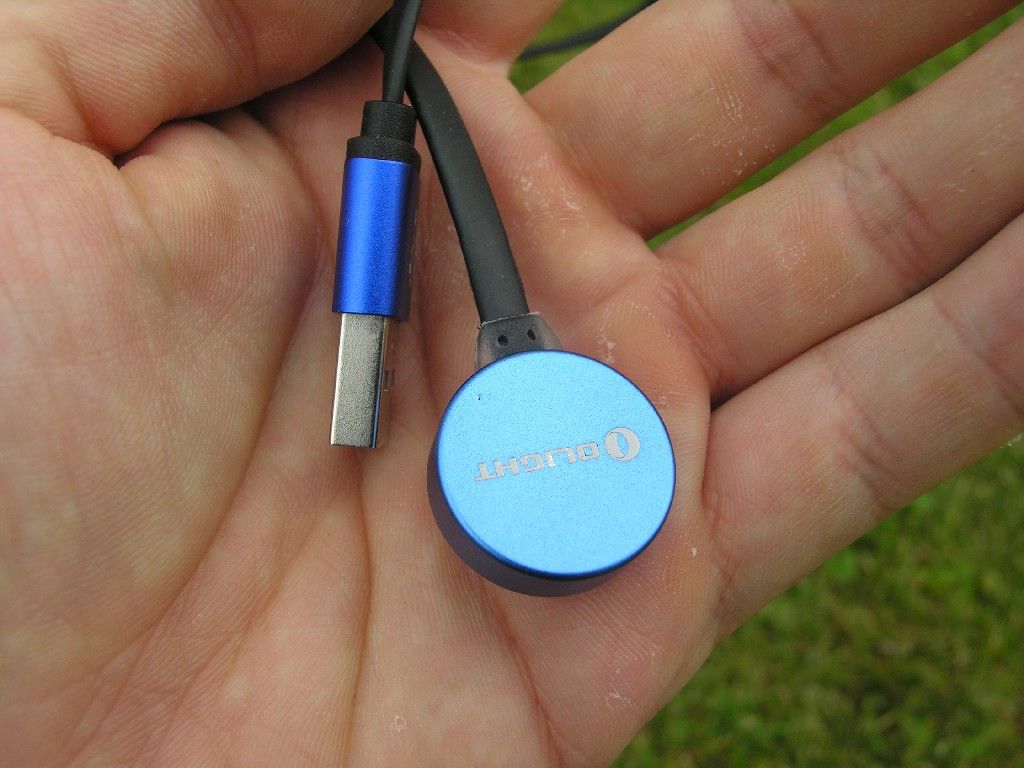
• New 750mA portable USB charging cable
• Brightness increases or decreases gradually: when the flashlight is switched on/off, it will light up or fade gradually to protect eyes from the stimulation caused by sudden brightness changes
• Flat magnetic tailcap that allows it to be secured to ferrous metal surfaces as a hands-free option
• Lockout mode can be activated on the side switch for accidental triggering protection, along with a low-voltage indicator underneath
• Reverse polarity protection circuits
• Timer Setting: Short (3 minutes) and long (9 minutes)
• The standby current is below 30uA

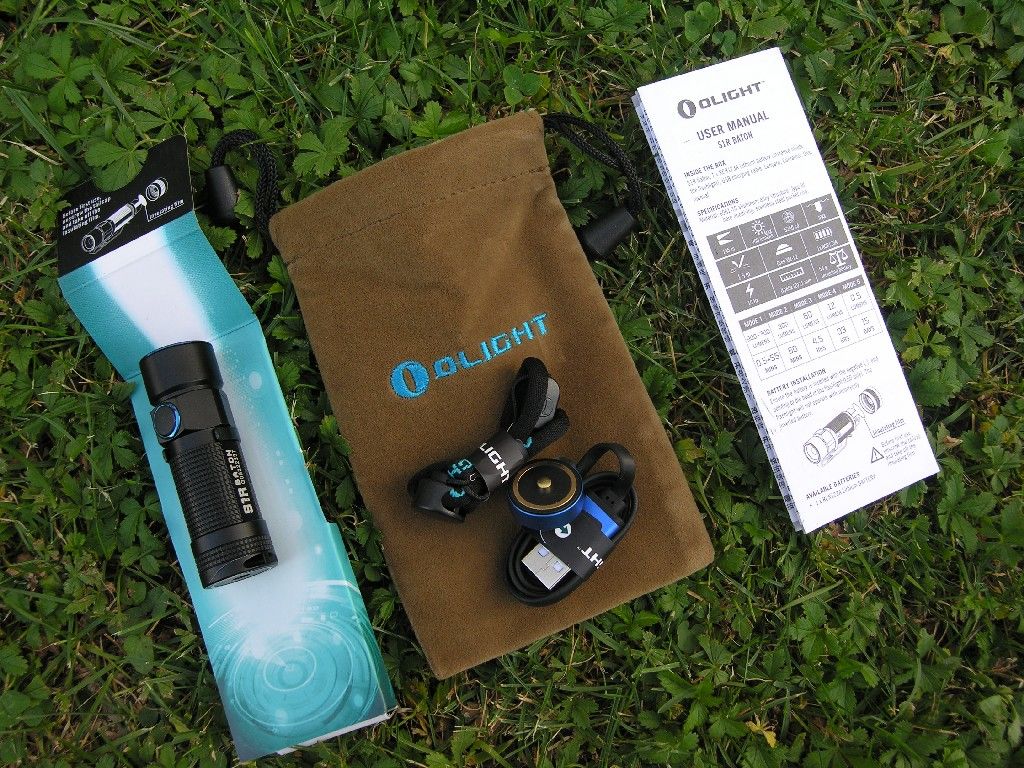
ACCESSORIES
• Lanyard
• Pouch
• User Manual
• Micro dok (optional)
• MCC Magnetic Charging Cable
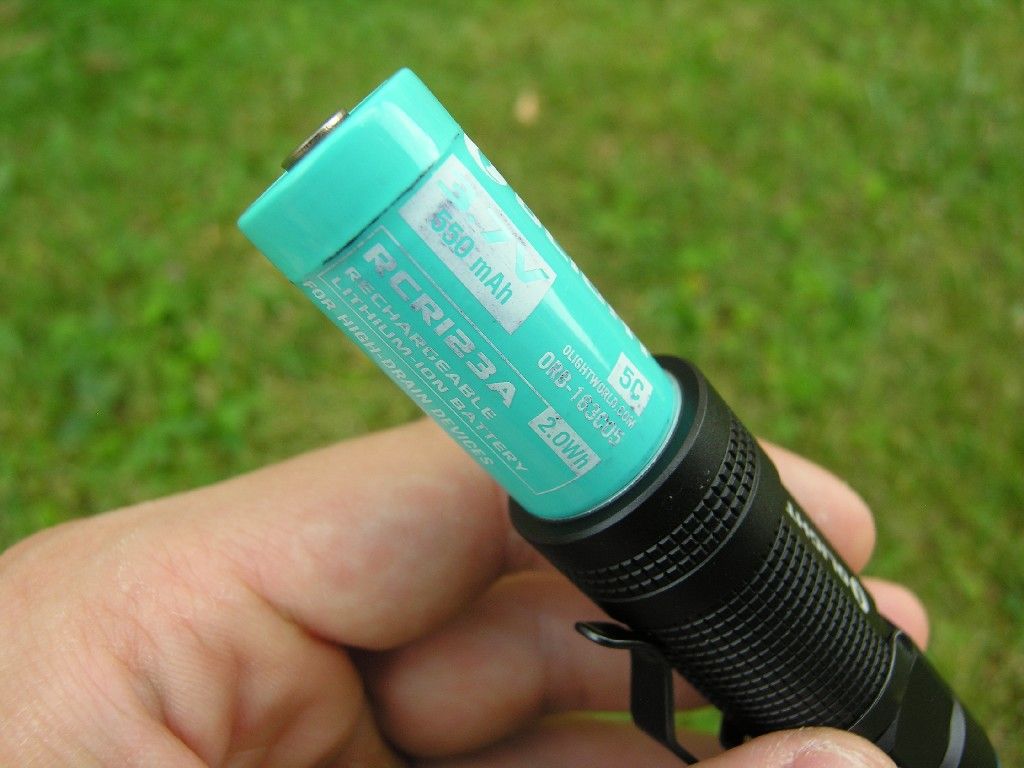
• 550mAh 5C RCR123A Battery
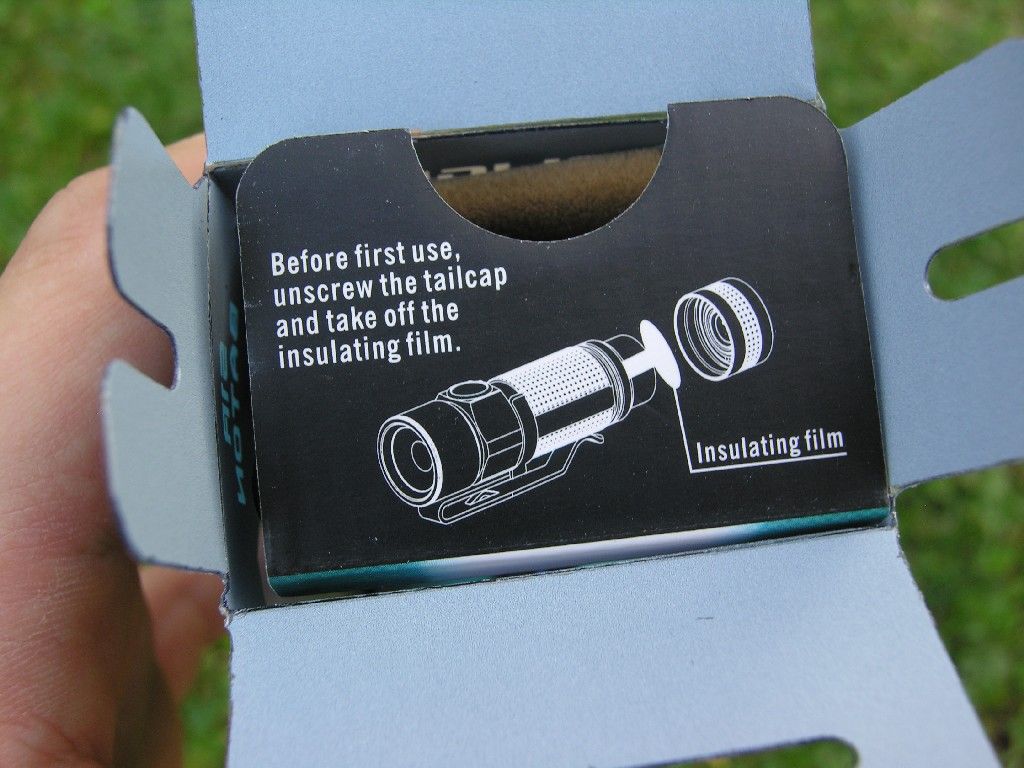
The S1R comes in this modern packaging, where you can see the lights and the specs.
You need to have a degree in tetris to project a so compact package where everything has its space.
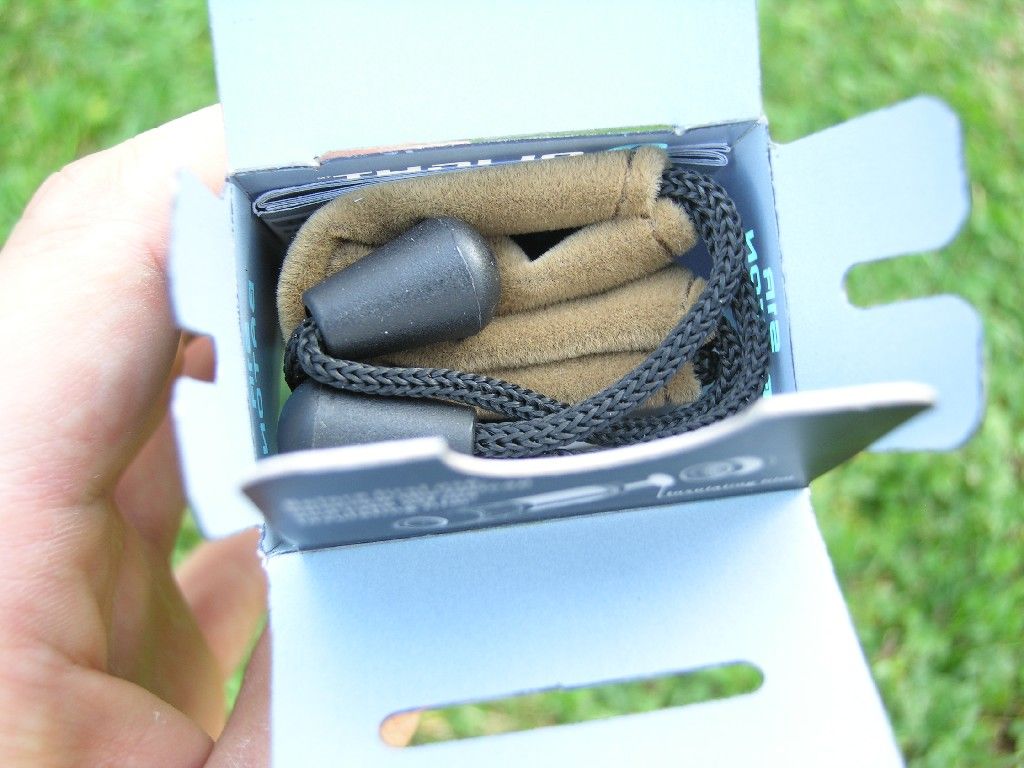
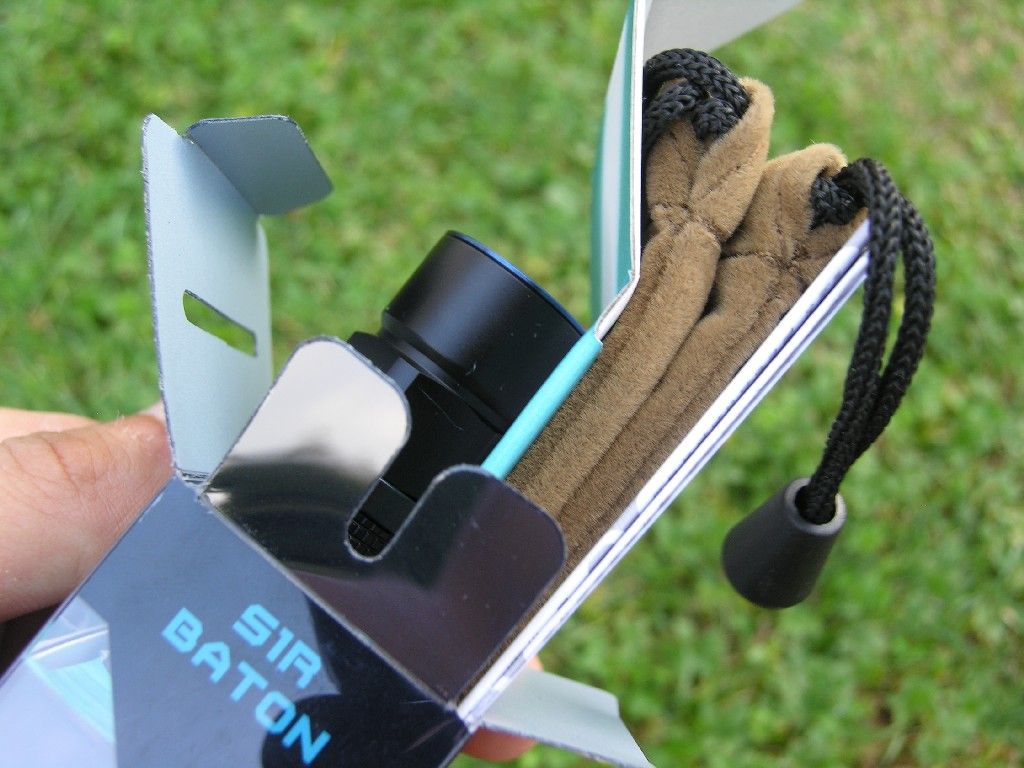
Inside the box: the S1R, Olight 16340 IMR battery, the magnetic charging base, lanyard, a very nice embroided pouch and manual in many different languages (Italian for once included).
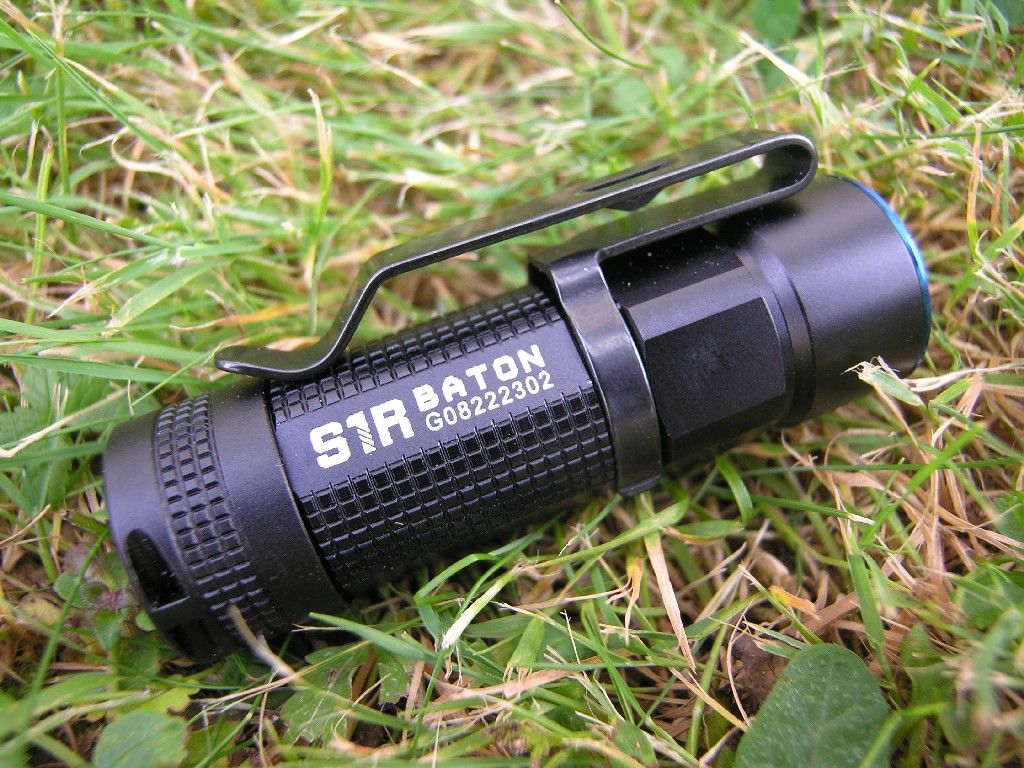
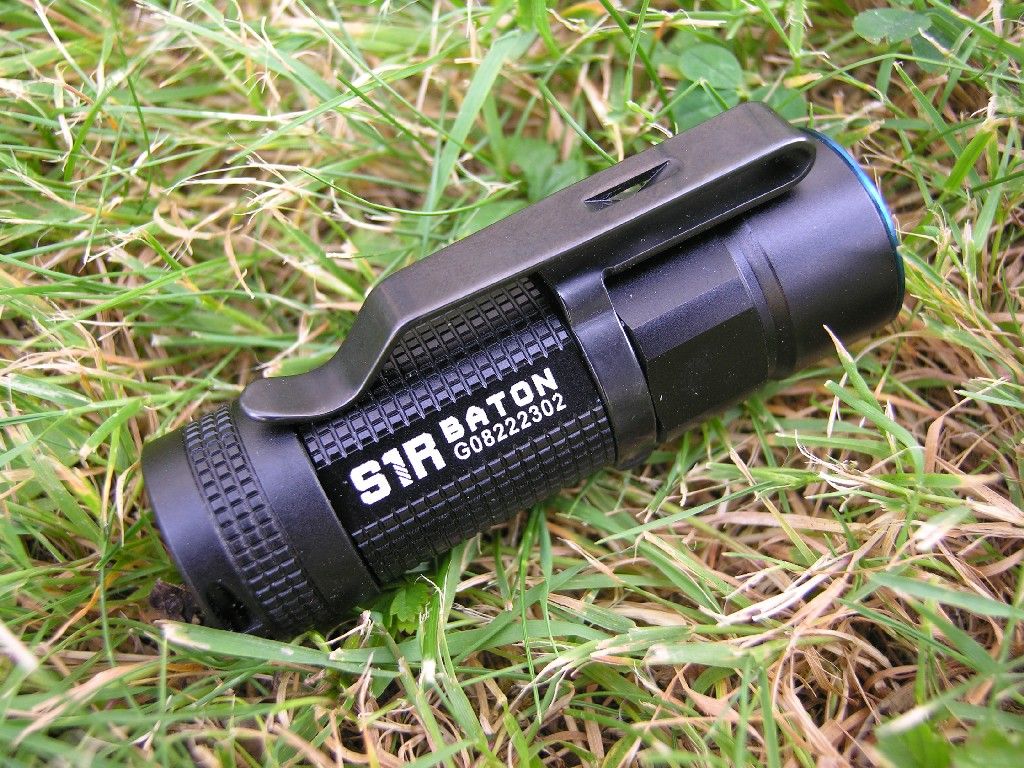
The S1R
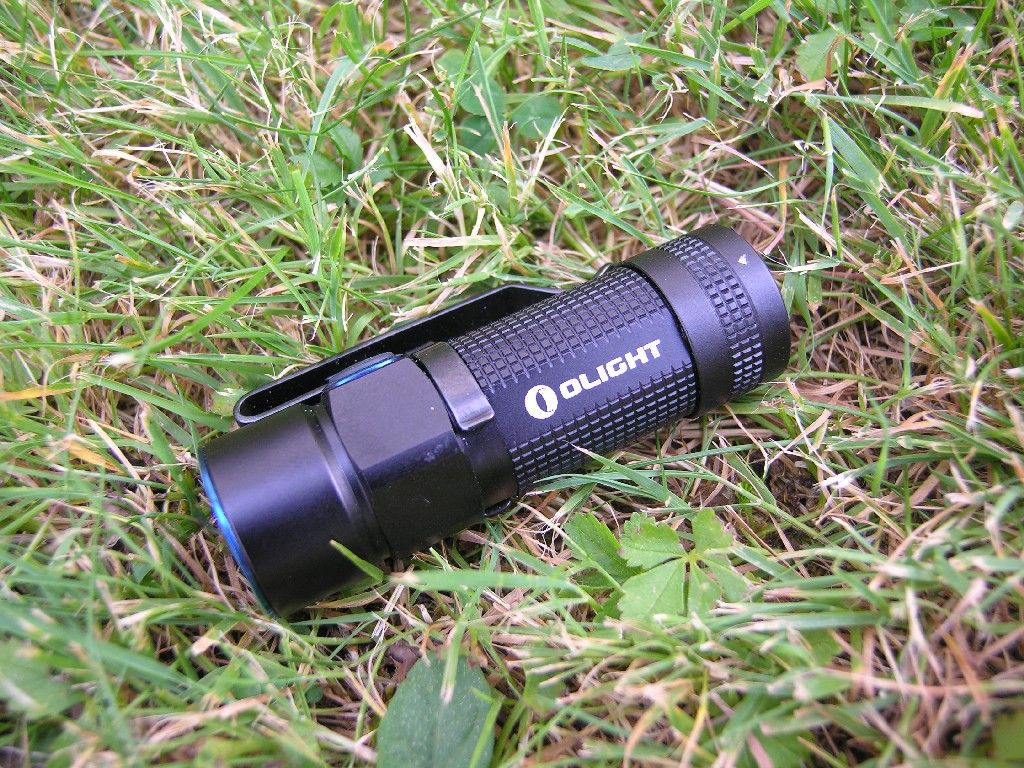
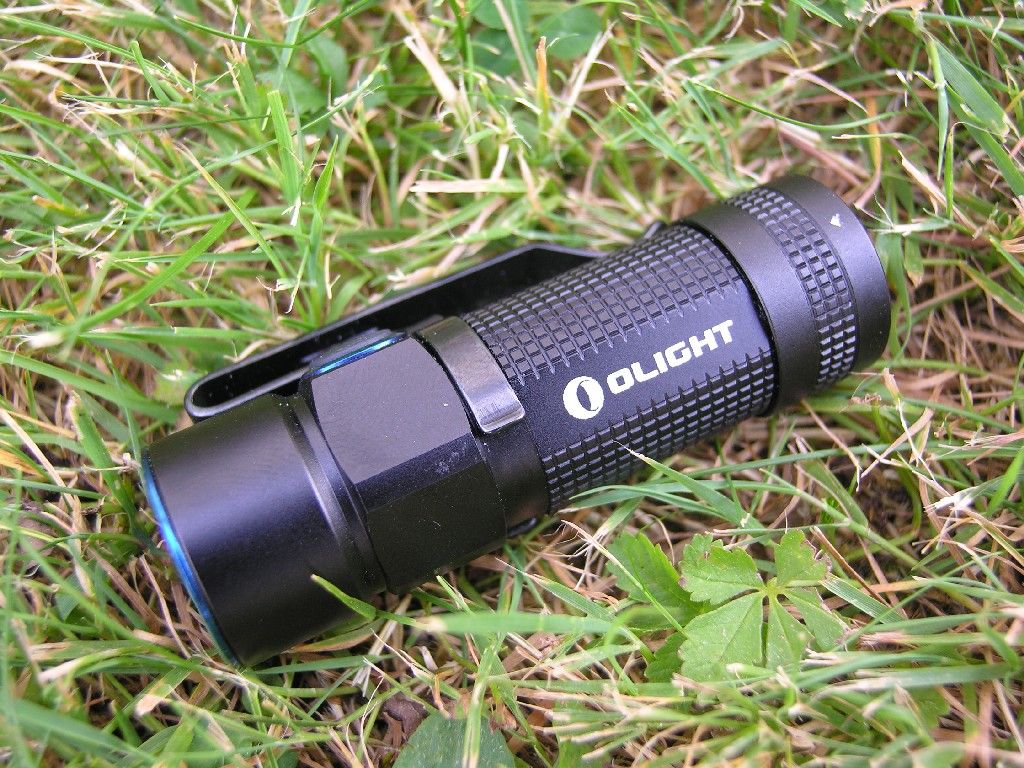
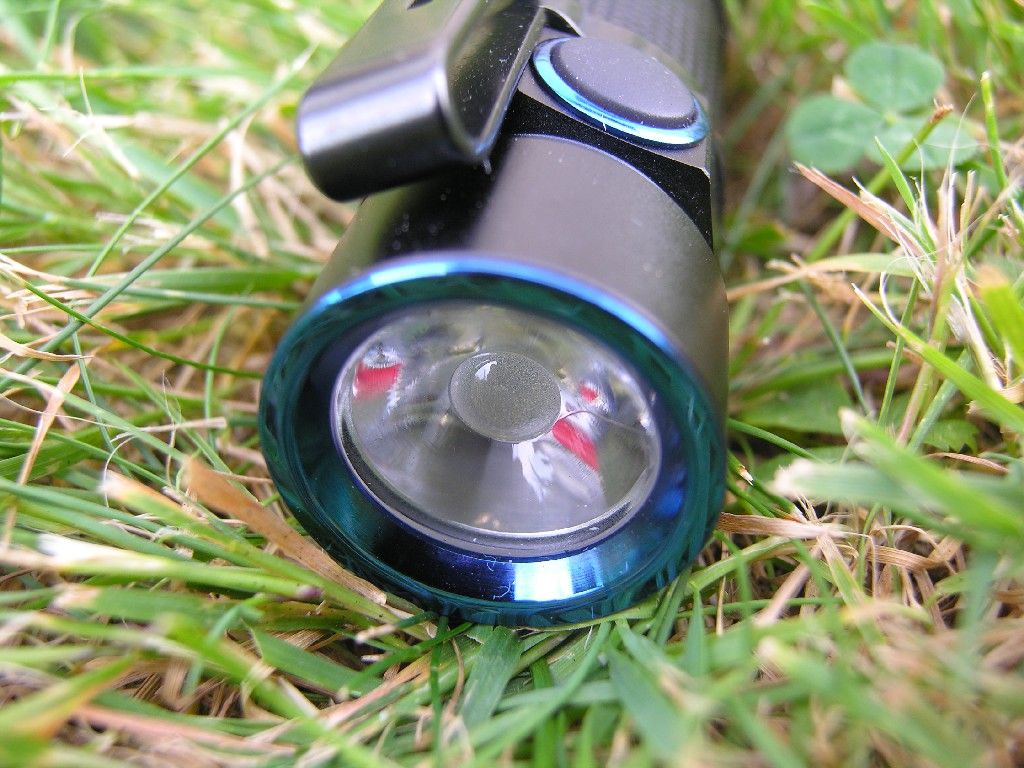
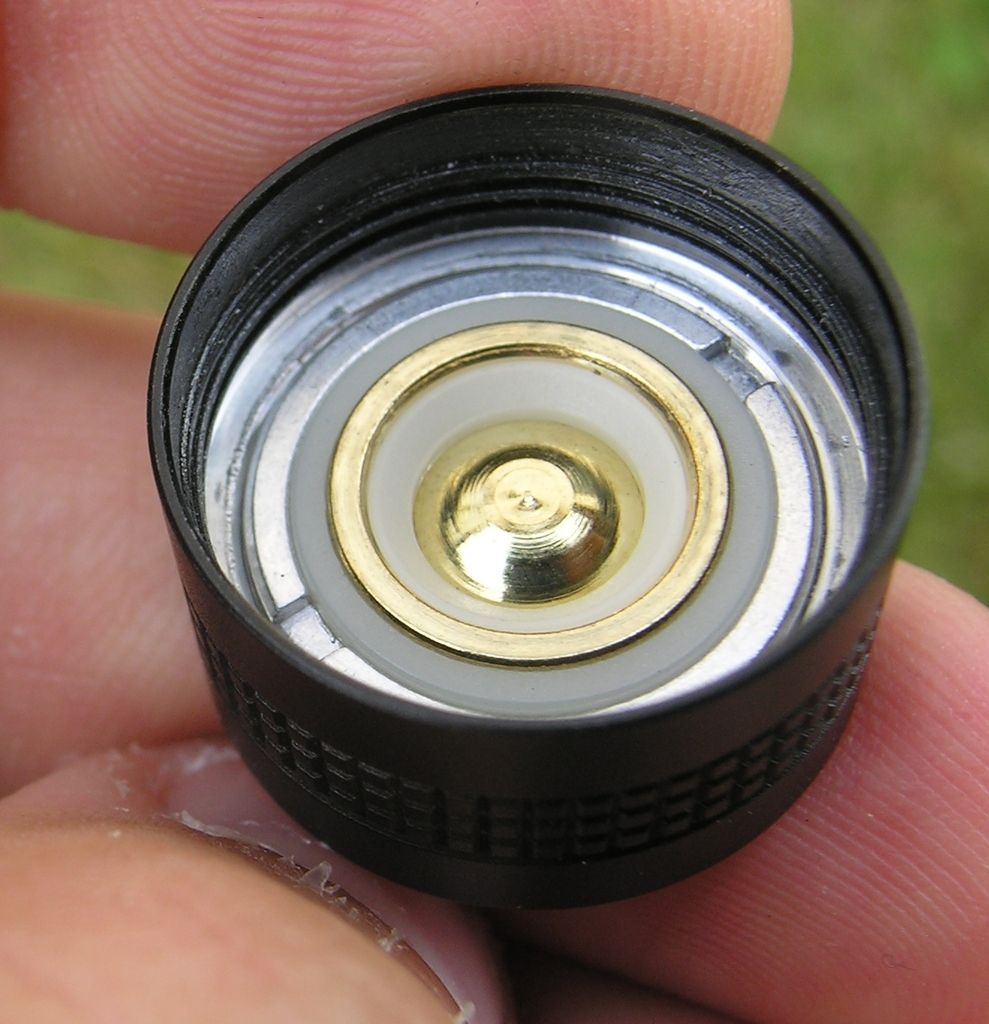
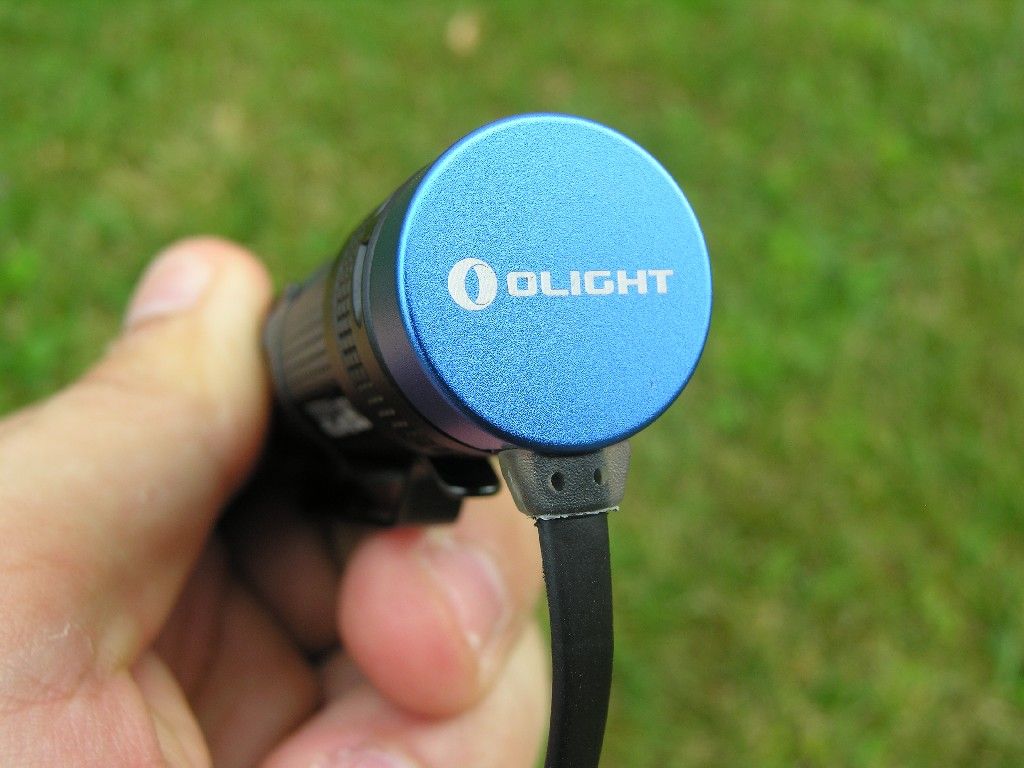
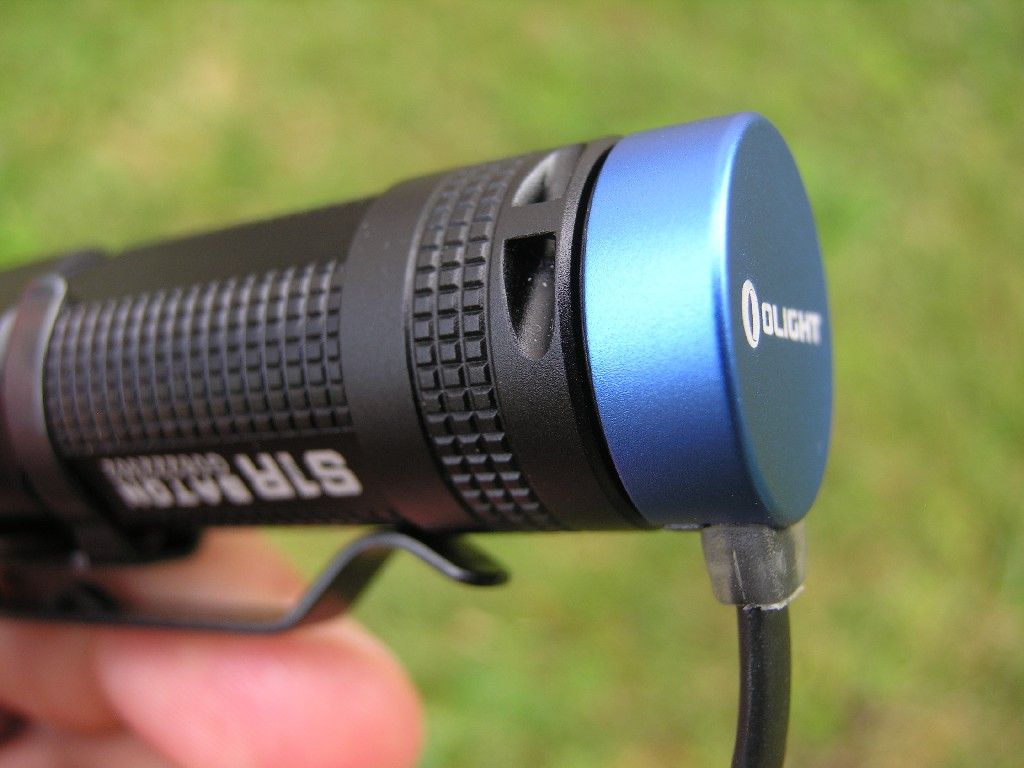
Many Olight lights have this distinctive blue PVD bezel and the TIR optics with the frosted center.

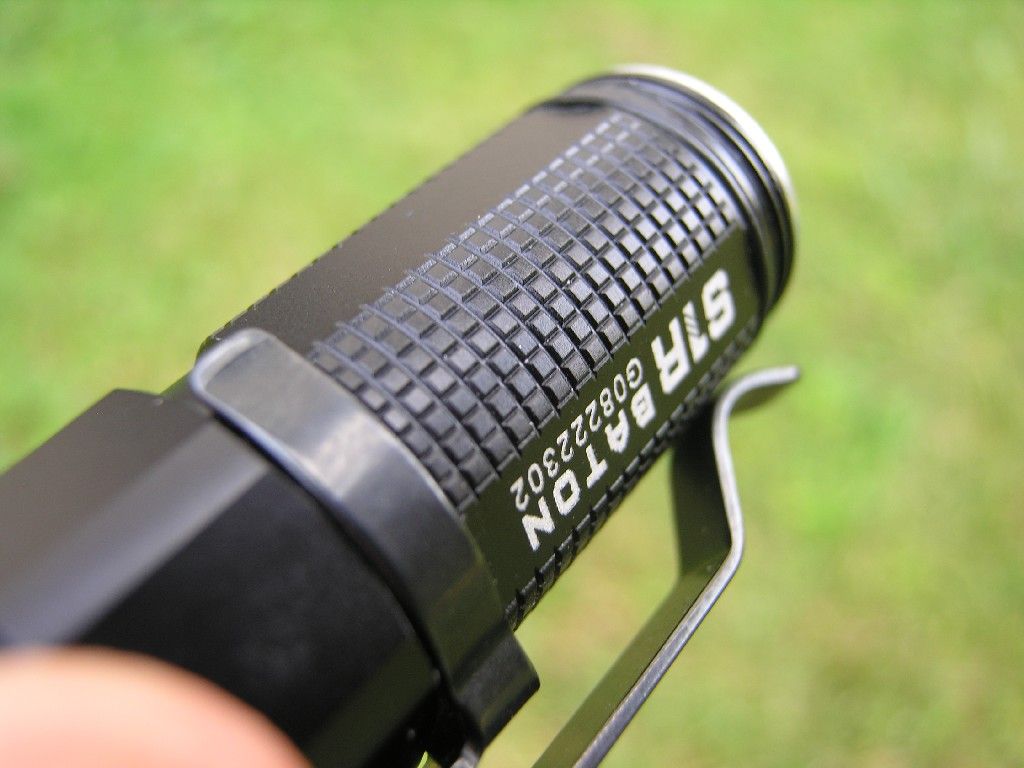
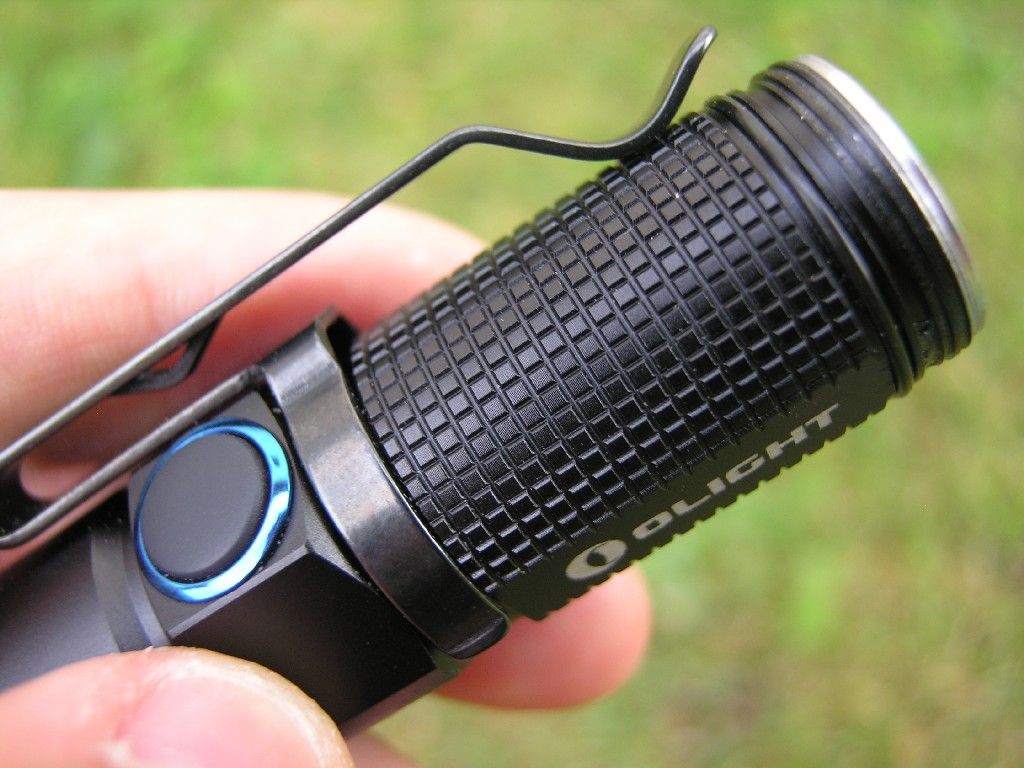
Details of the knurling of the body
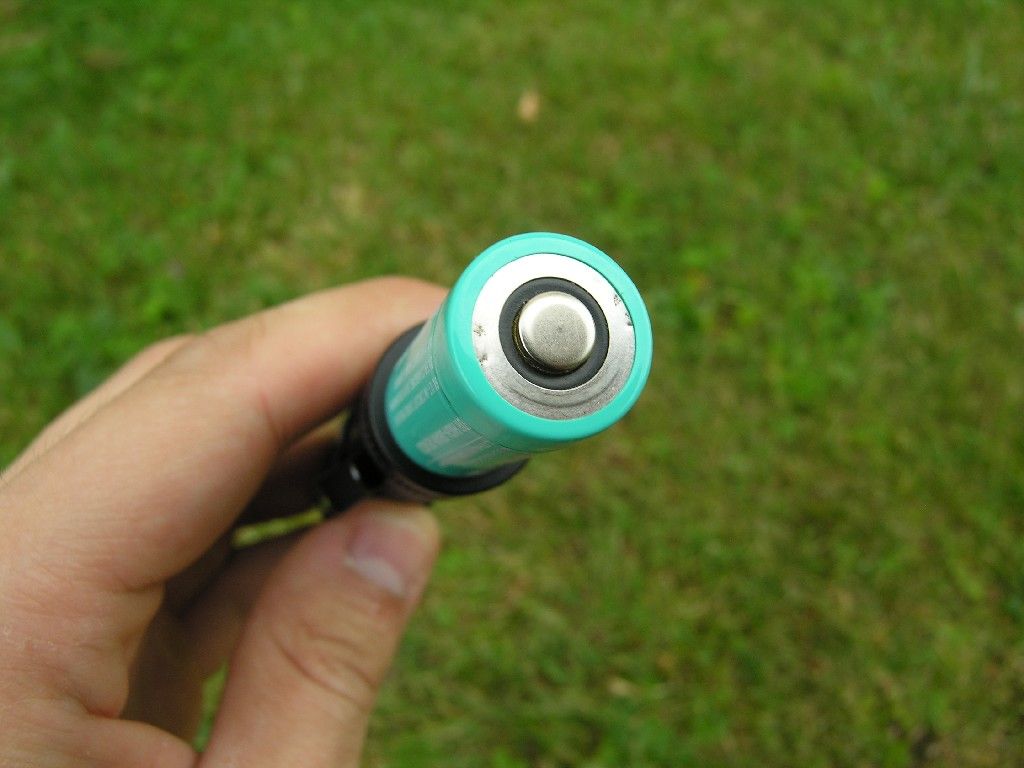
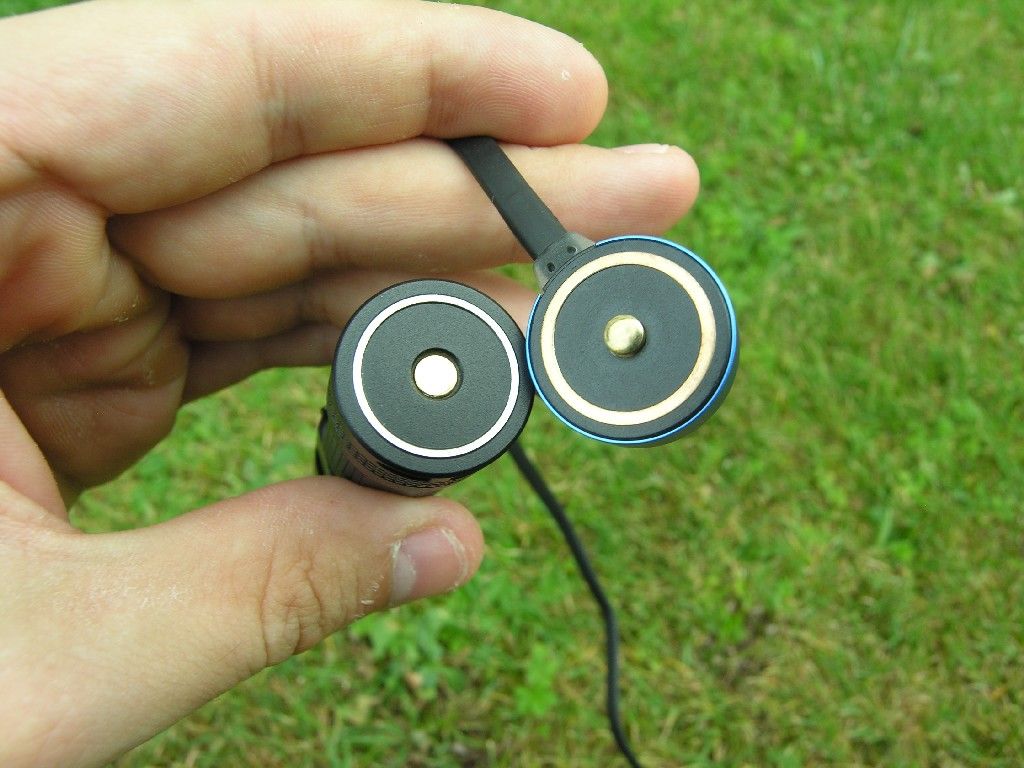
At the tailcap there is a not removable magnet, that in this pics holds the provided battery in place.
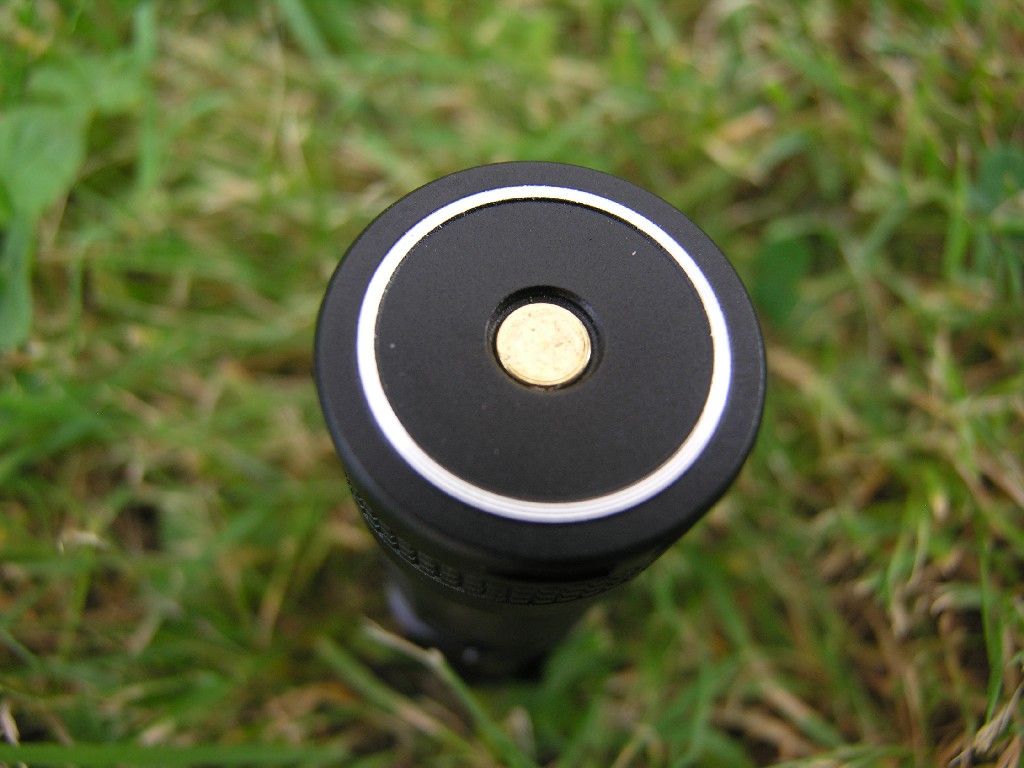
Short squared threads are anodized and allow physical lockout
On the S1R the batteries goes with the positive pole at the tailcap. In case you insert it backwards, the light has a mechanical protection against polarity inversion (only button top cells in this light)
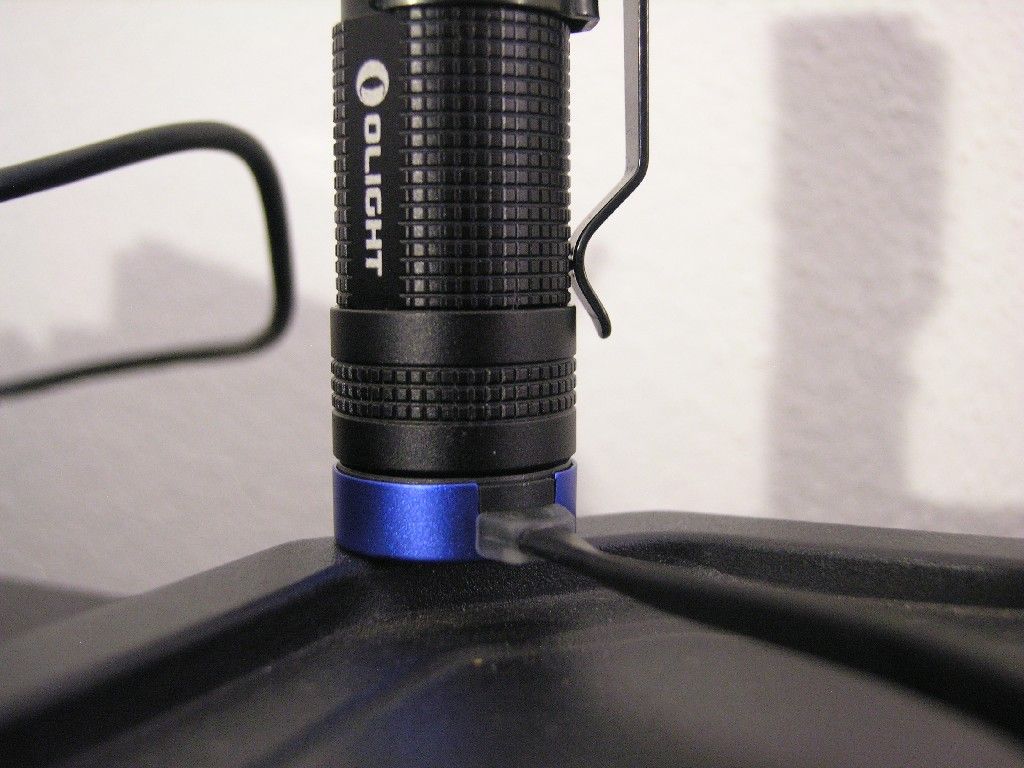
Also the magnetic base for charging has some blue elements.
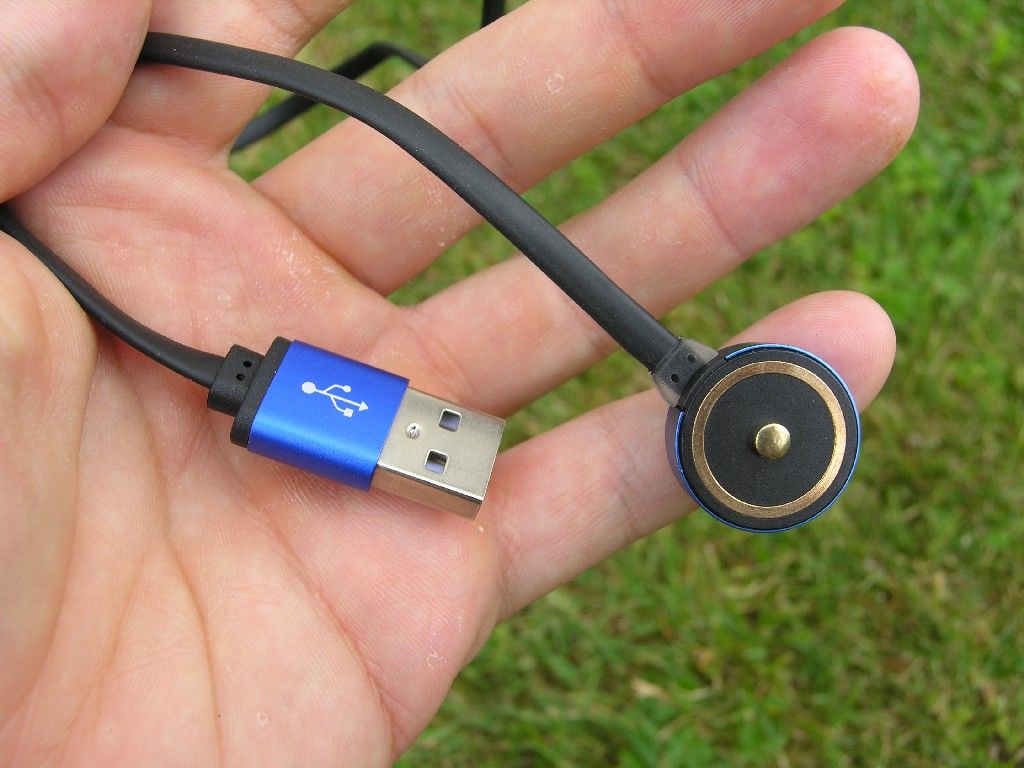
The magnetic base and the light connect with great ease, always in the correct position
The clip allows deep carry of the light and works fine. There’s some room to accommodate big belts or thick clothes.
It can be attached on hat’s visor so you can use the S1R as a headlamp.
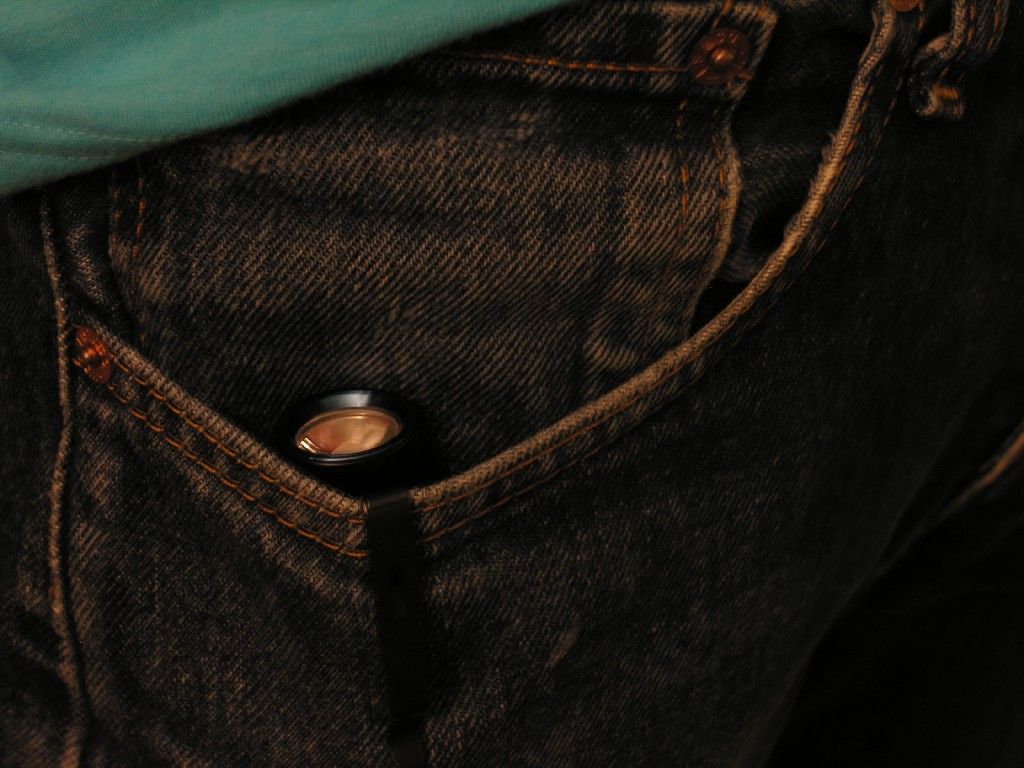
I think this kind of clip works better if you carry the light on your torso, like in the pockets of a t-shirt or inside a jacket.
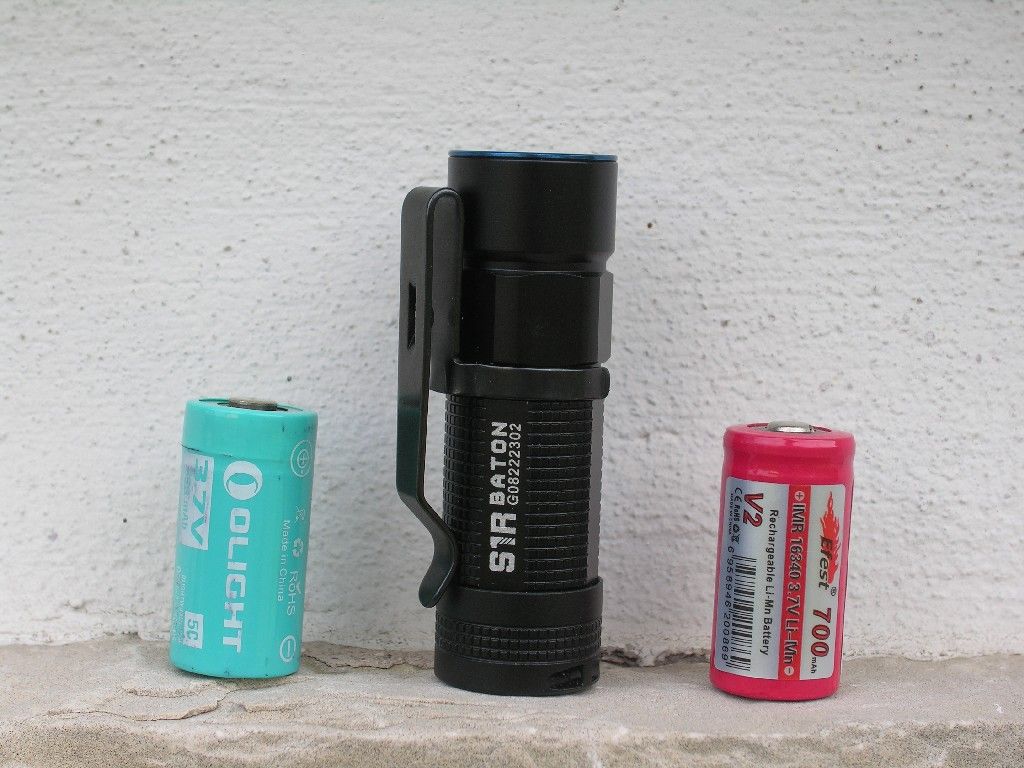
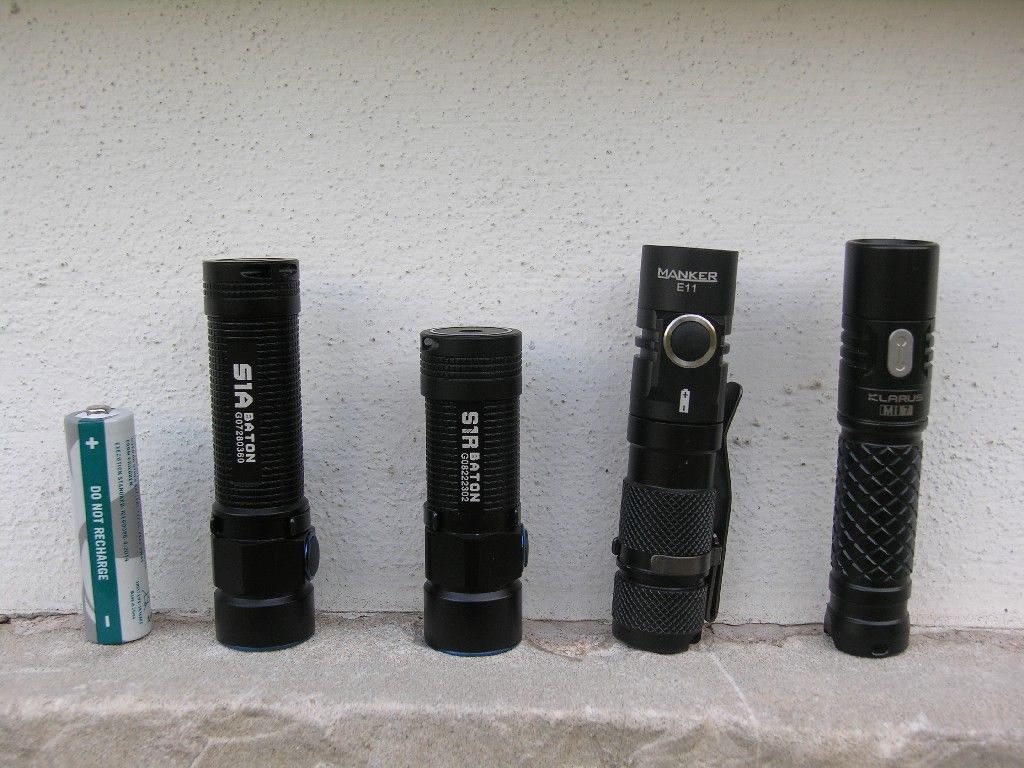
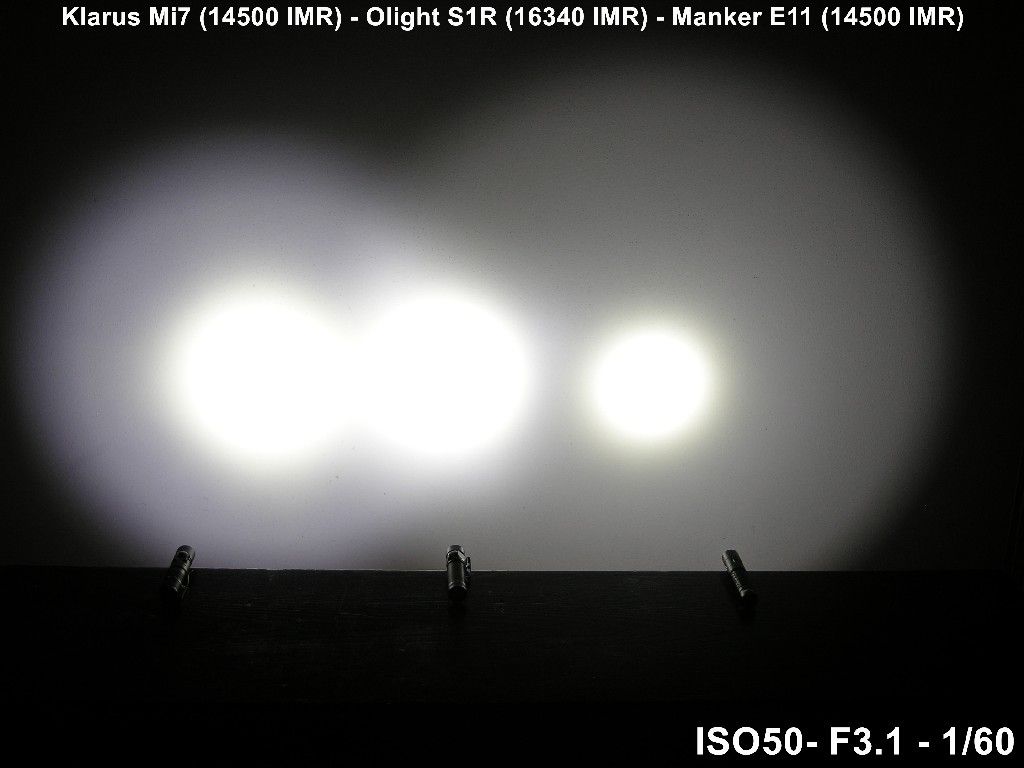
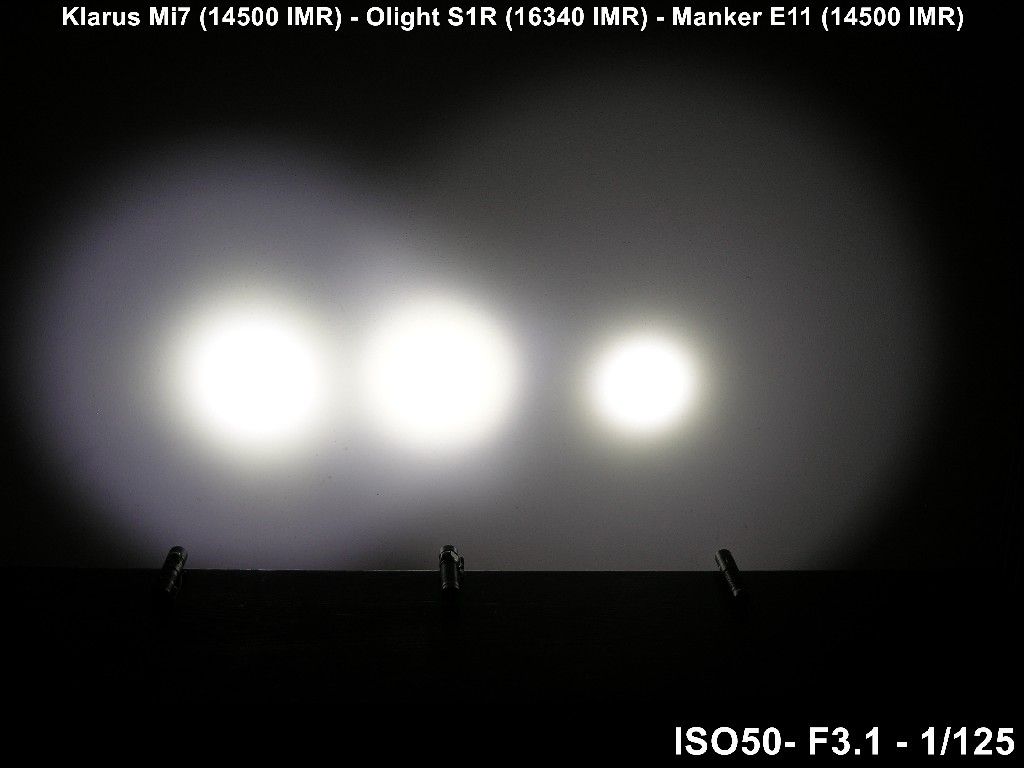
Size comparison (lacking of any other CR123/RCR powered lights): Olight IMR 16340 battery, Olight S1R, Efest IMR 16340 battery,
AA battery, Olight S1A, Olight S1R, Manker E11, Klarus Mi7
UI
The switch has a short run, and I would describe the force needed to push it as medium.
A short click turn the light on and off.
A long click will cycle the levels: low, mid, hi, low, mid, hi, in loop.
From off, a long click will turn the light on at moonlight (when cycling the levels with a prolonged push of the switch it is not available).
From off a double click will make the light go into hi mode, and a triple click will activate strobe mode.
Lockout: from off, keep pressed: the moonlight mode will turn on, but keep pressing. The light will turn off and the light will be locked. If you press the switch now the light will remain off and the red led under the switch will glow for a few seconds. To turn off the lockout keep pressed the light until it turns on.
There is a red led under the switch that will turn on when the battery is running low.
There is also a timer: when the light is on make a double press to set a timer for the current level: a further single click will set the timer at 9 minutes, while a double click will set the timer at 3 minutes. The light will turn off automatically when the timer time is passed.
The base of the light can be used with the proprietary magnetic base to charge the light only with the proprietary battery, that has positive and negative pole on the same size. Charging with the magnetic base is super easy thanks to the strong magnets that will tent to align when connecting the two pieces.
There is a led under the base: when the light is not in position or is charging it is red, when the charging is done, it becomes green.
No power:
Charging:

Charging done:

One of the advantages of the IMR battery is that it can be charged quickly.
With the XTAR USB meter I measured 0,78A at the beginning of a charge, and the current slowly decreases until it measures 0,00A when the charging is done and the battery is at 4.20 volts.
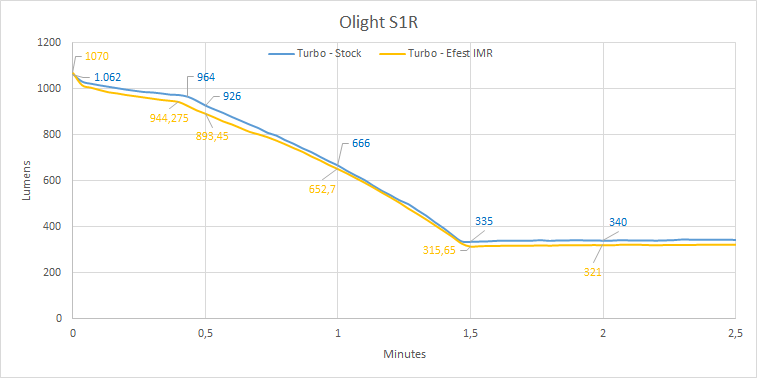
Output and Runtime
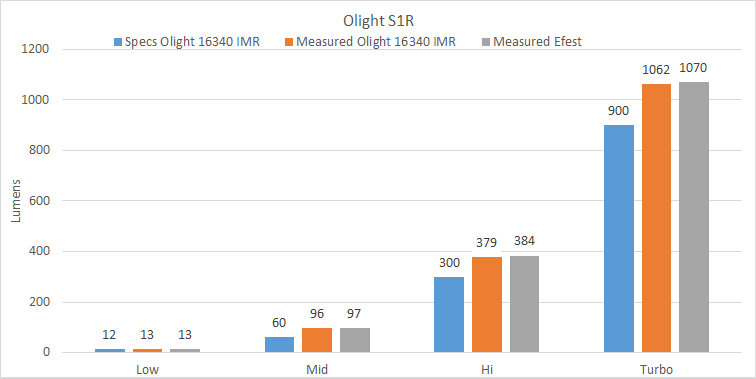
Olight specs doesn’t include protected RCR batteries. For the best performance I’d advise you to run quality IMR batteries. Running RCR with PCB will result in unnecessary stress of the batteries and early tripping of the PCB at higher modes.
The tests have been done with the Olight IMR 16340 battery (that comes with the light) and with an Efest IMR 16340 650 mAh battery.

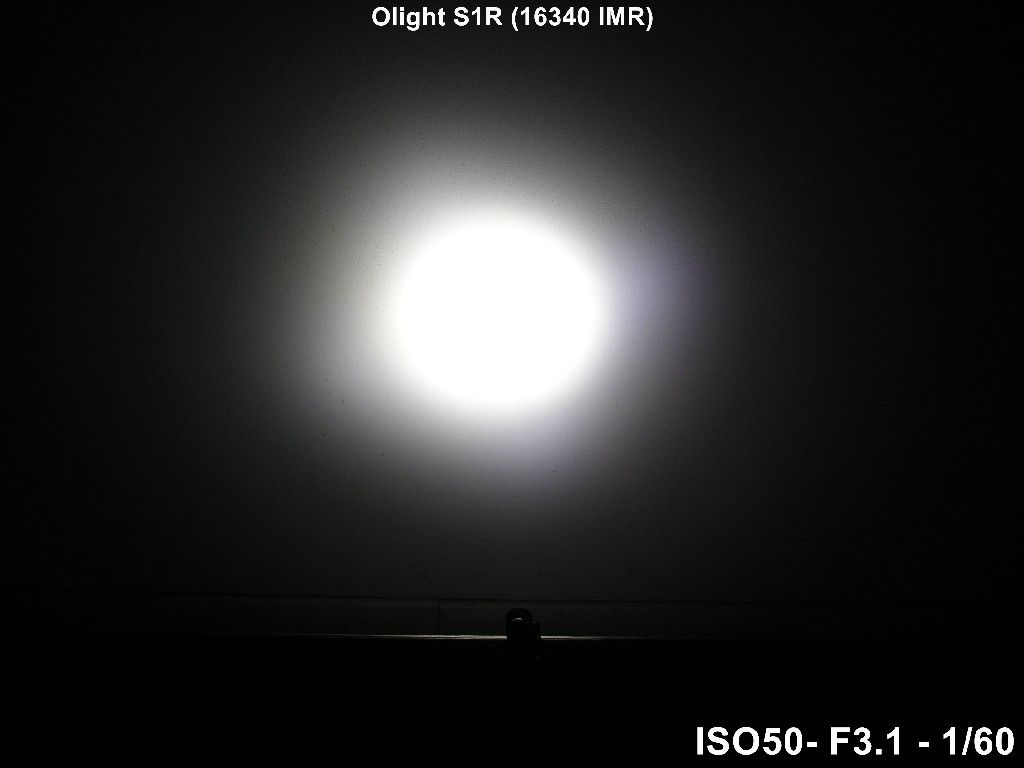
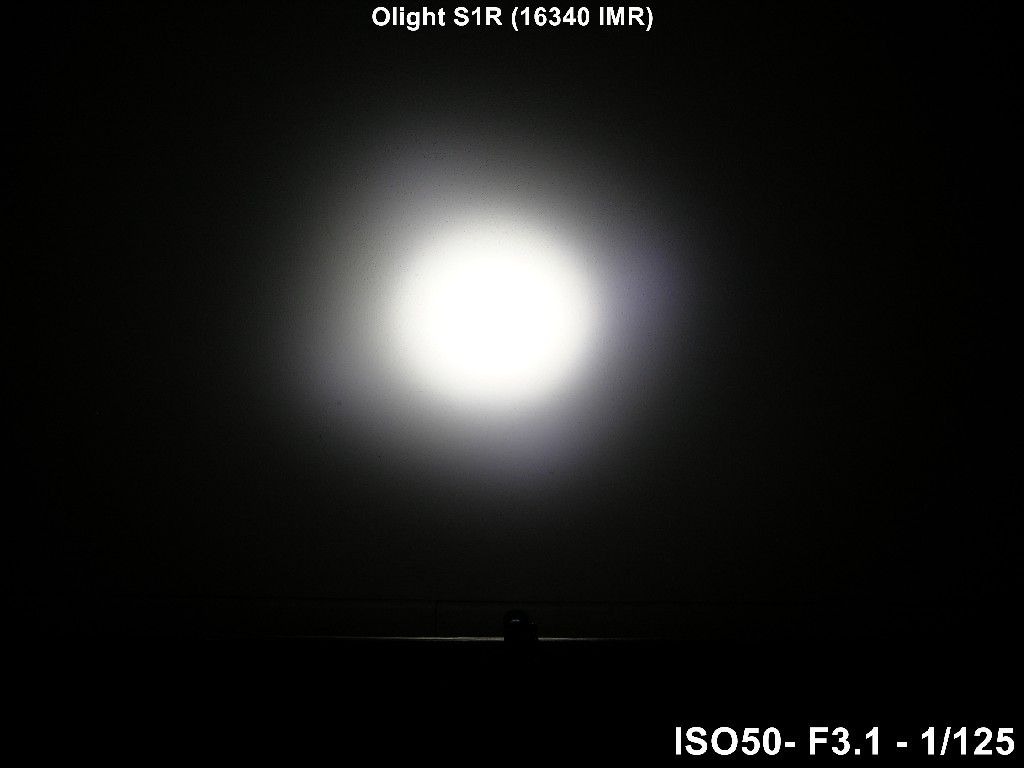
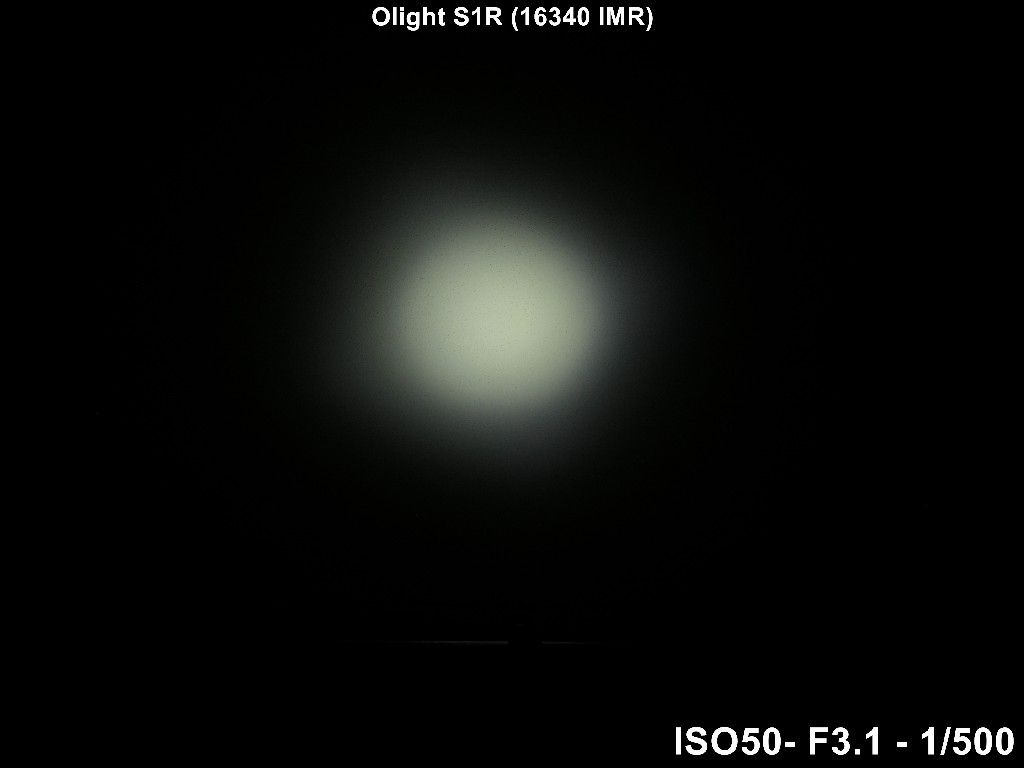
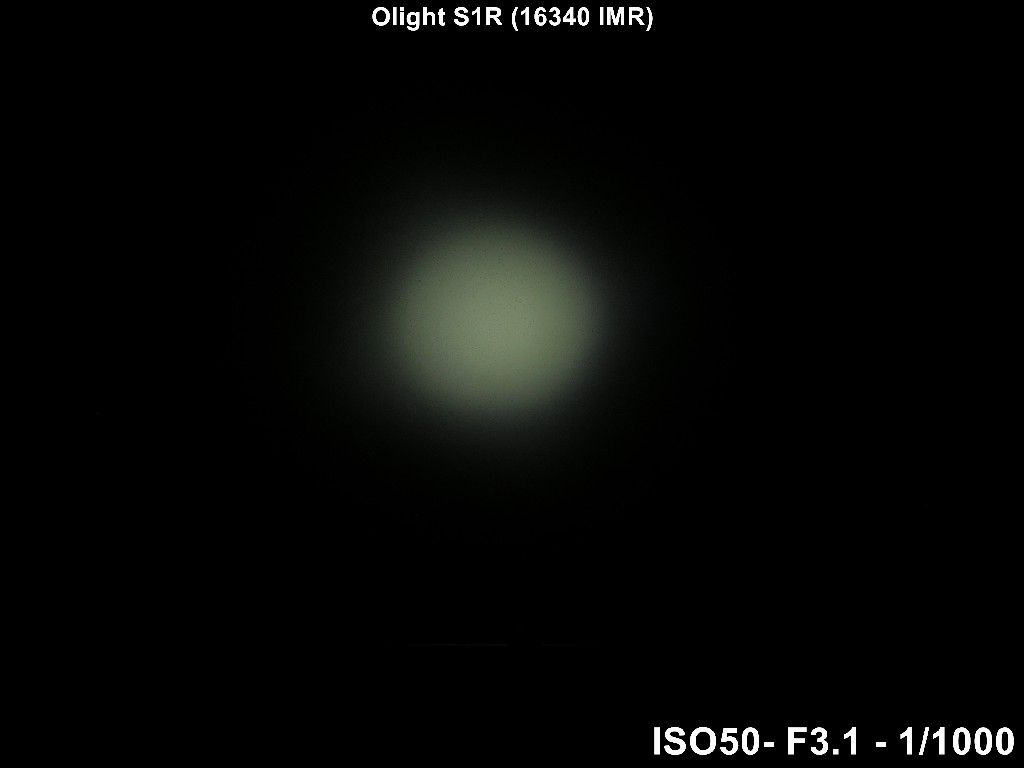
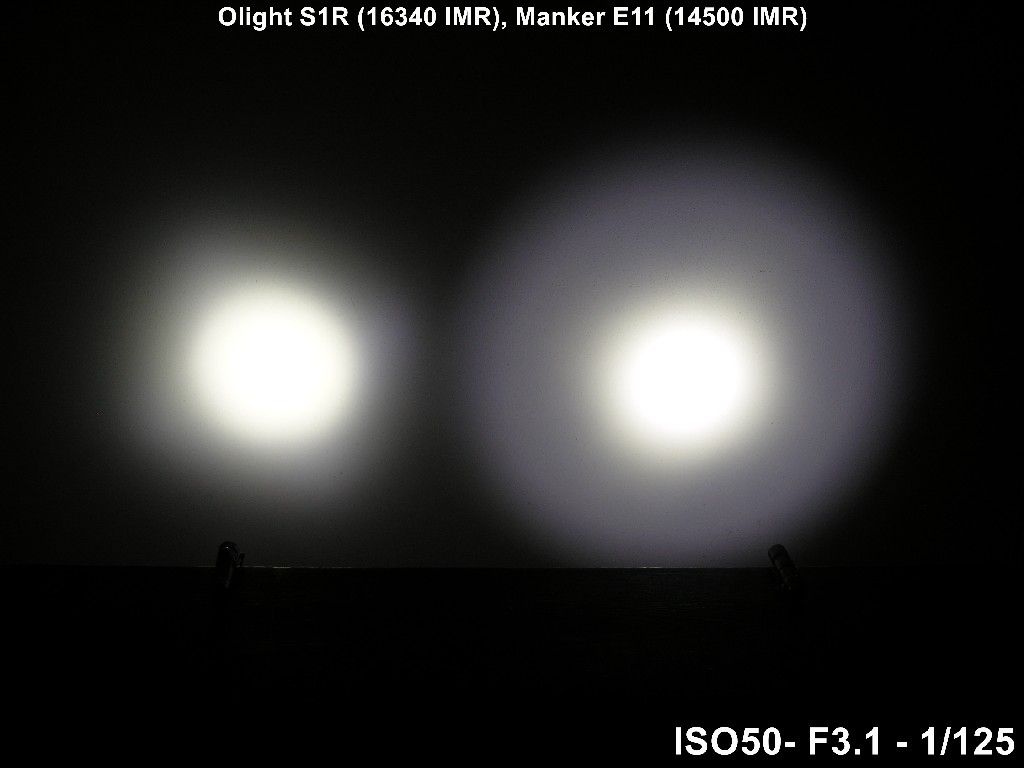
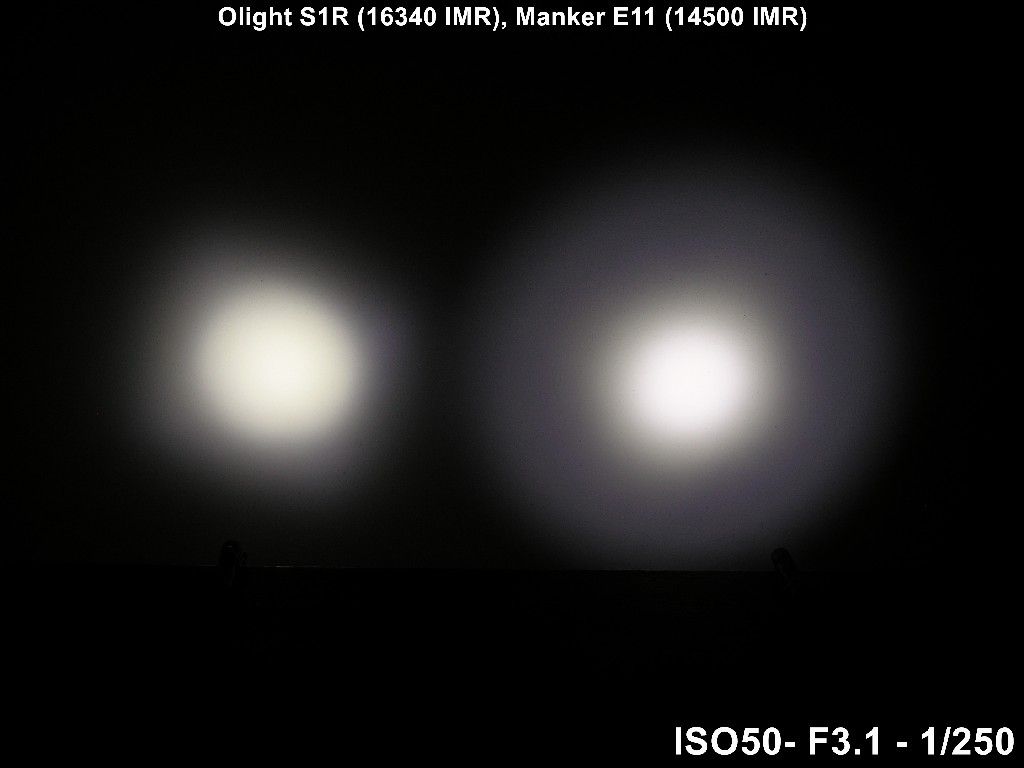
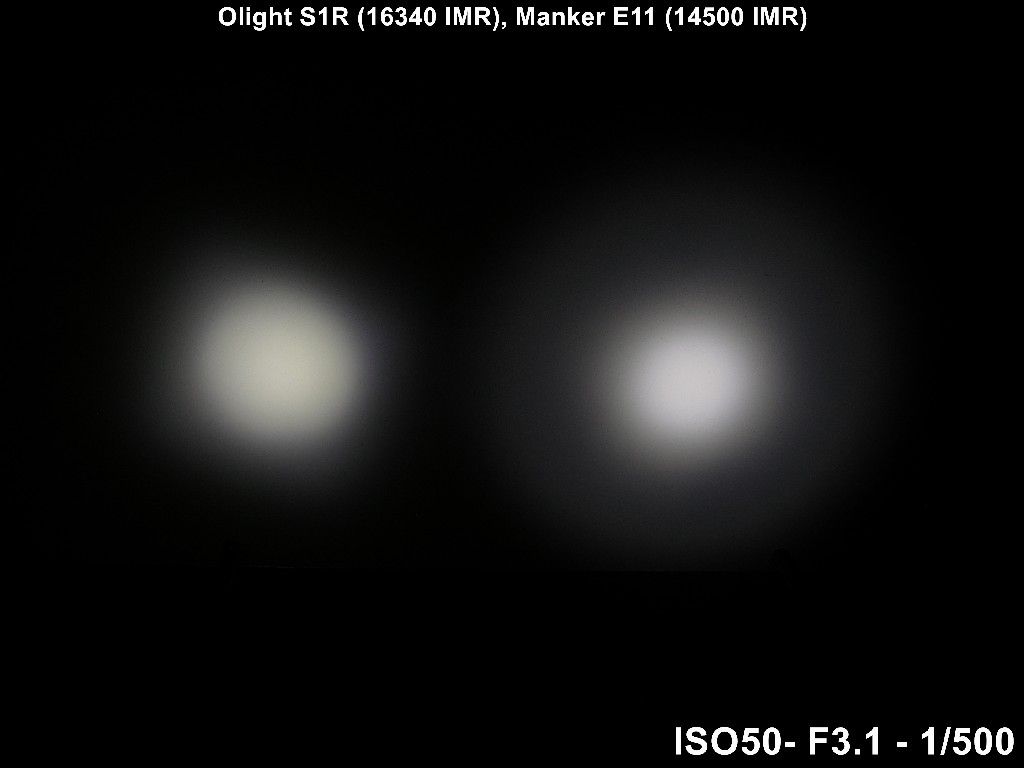
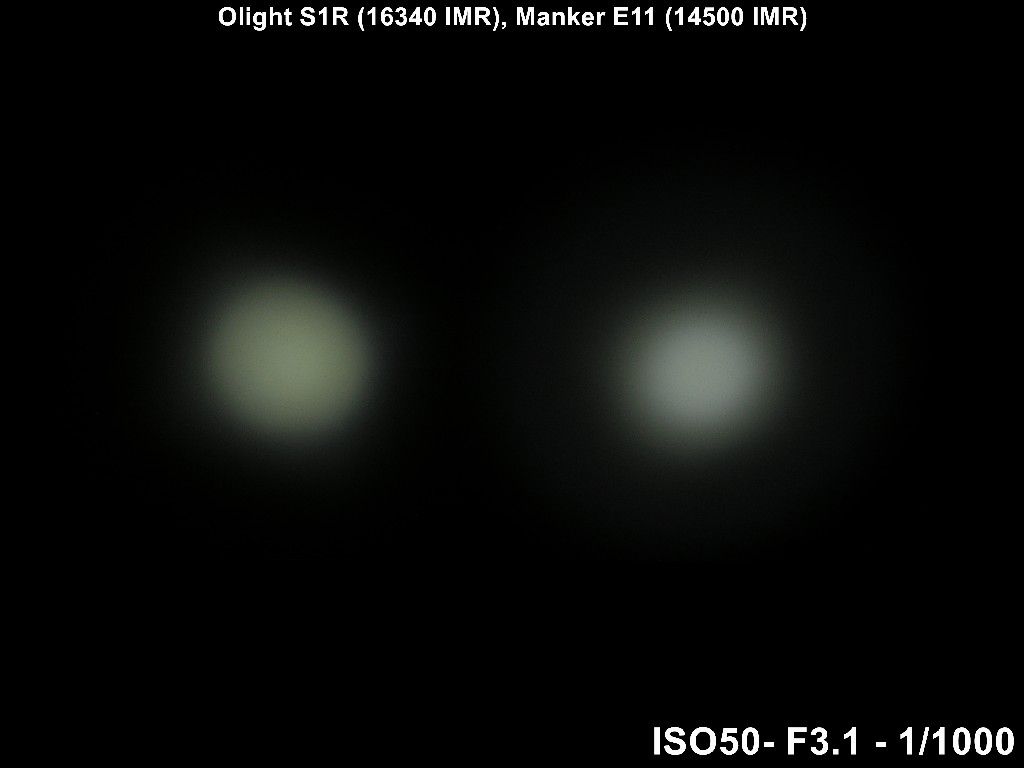
Beamshots at 0,5 meters from the wall.
The optic on the S1A with the XM-L2 emitter will concentrate most of the output in the spot, and the spill will be very wide and homogeneous but with less brightness (on the pics it almost disappears).
To my eyes I can see the spot as it is composed by 2 close concentric circles.
On the camera these 2 circles sometimes appear as a square. Don’t know why.
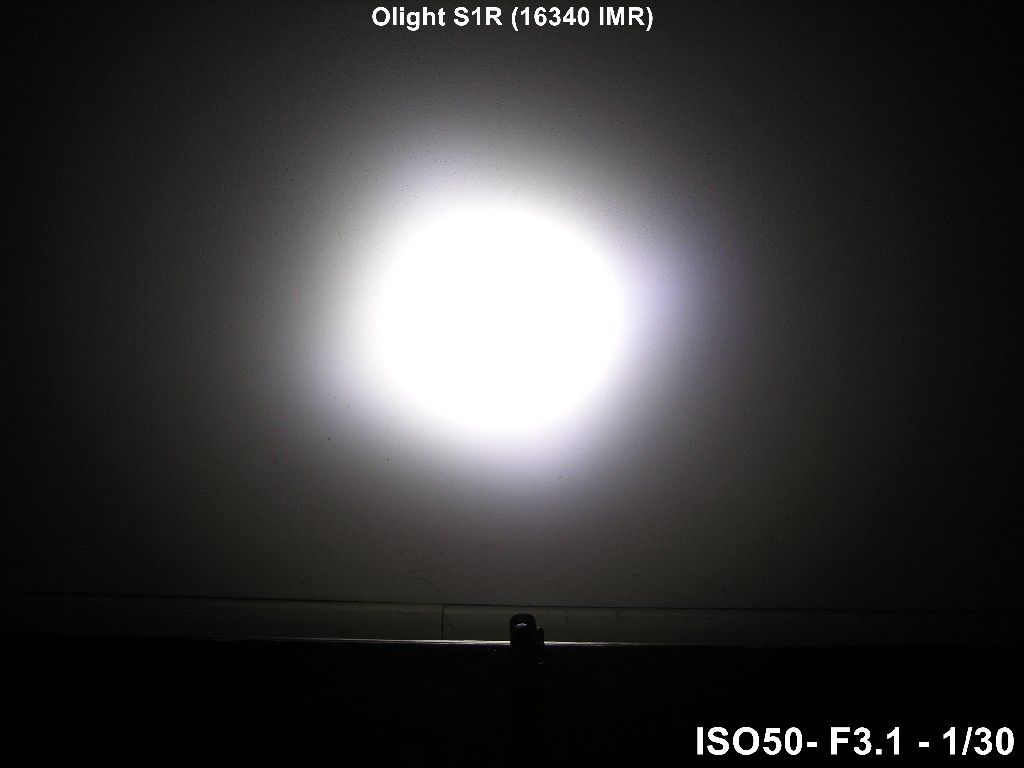
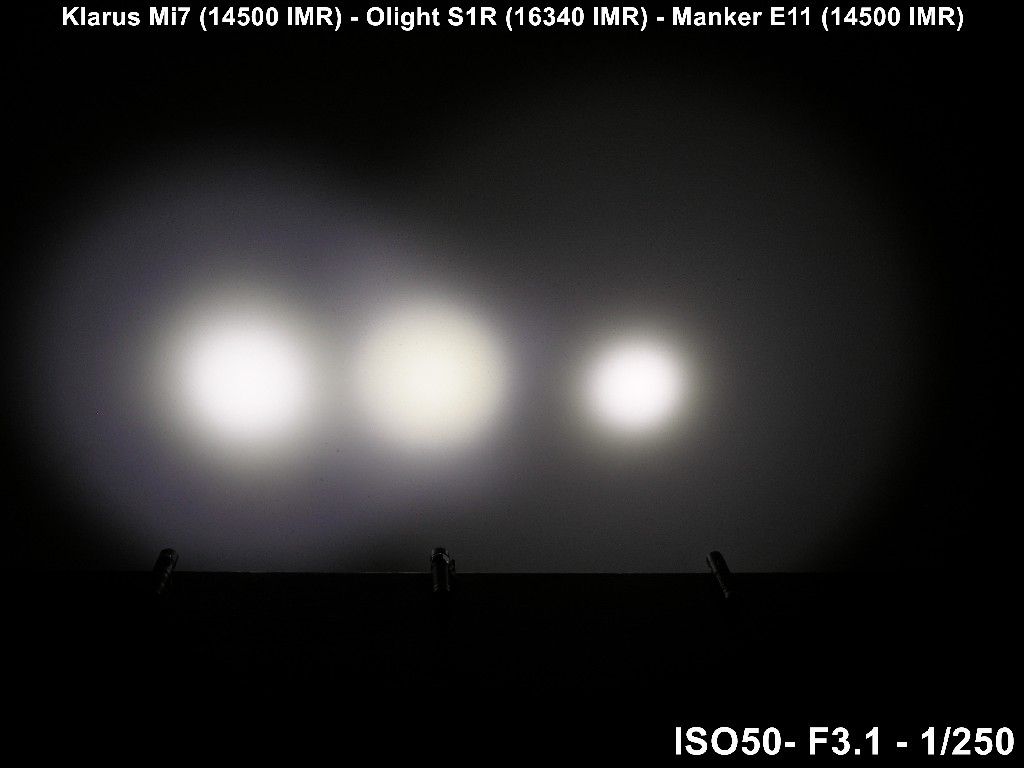
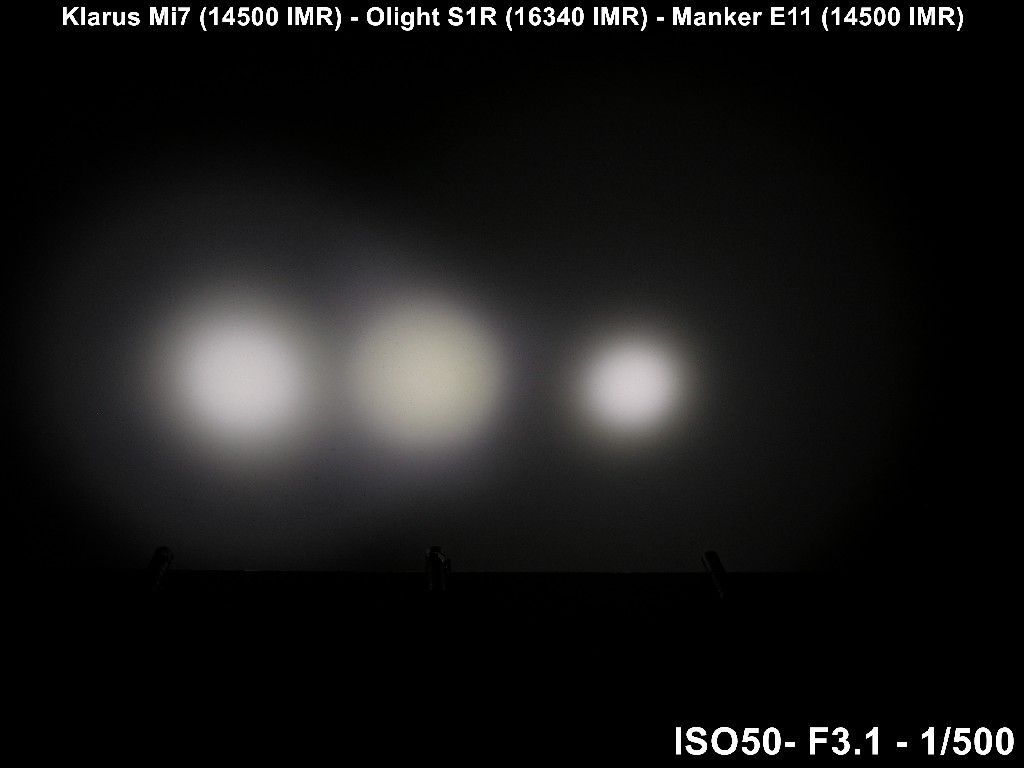
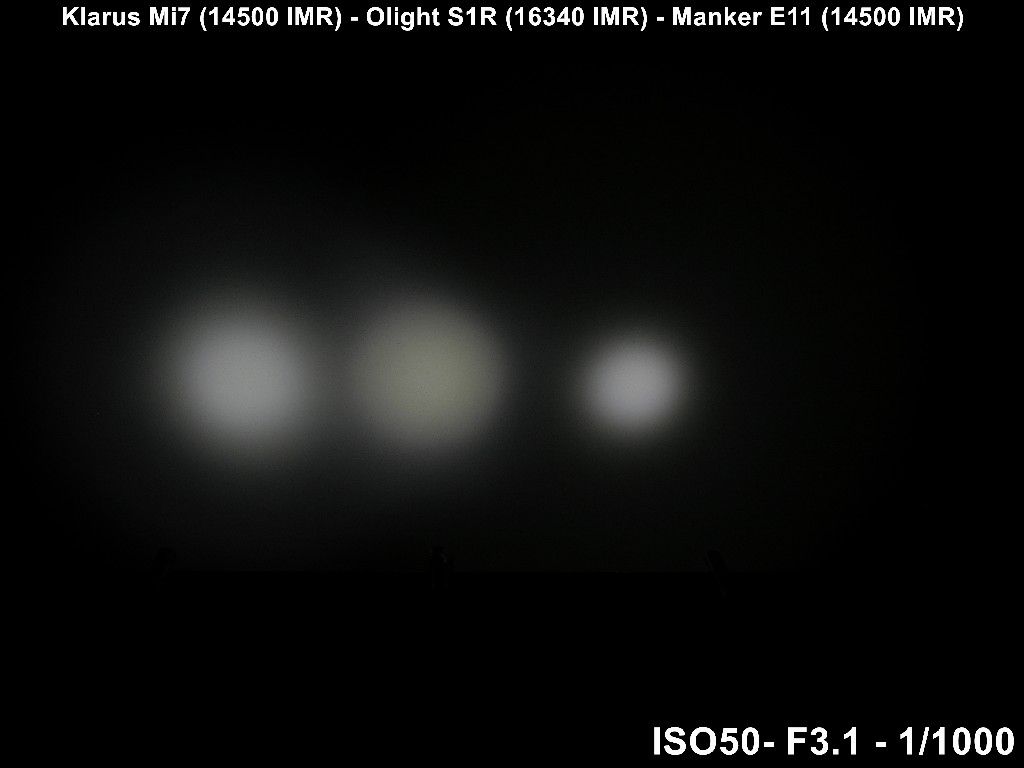
When holding the light in your hand with your arm relaxed the spill begins a few centimeters from your feet.
It is worth mentioning that every change in brightness (turning the light on or off, switching level) is not sudden. Every time for the brightness to change takes a small fraction of a second in order to make the transition gentle for your eyes. I find this a nice feature.

My thoughts
The light is well built and easy to use. The 4 modes are well spaced and easy to access.
The magnetic charging system allows to retain IPX8 standards and is easier to use compared to the standard micro USB charging port where you have to dig out with your fingers the rubber cover and insert the connector in the right direction.
The drawback is that it works only with the proprietary battery and charging base.
The magnet in the tailcap is useful to attach the light to metallic surfaces, but on this light is not removable.
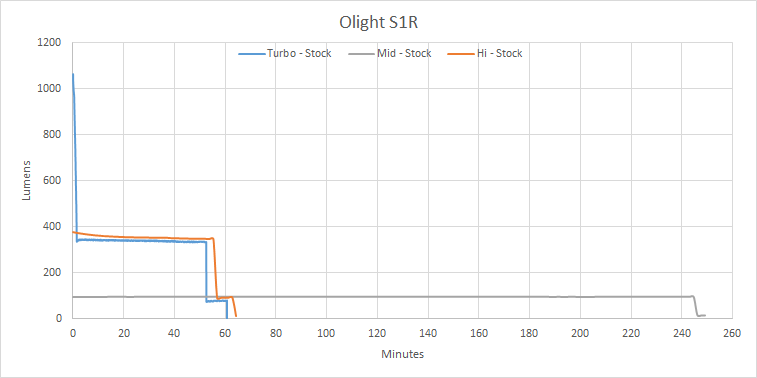
I have tested the runtime with an unprotected IMR cell with slightly higher capacity.
IMHO the difference in output and runtimes are very small (see the second and third runtime plots), compared to the greater commodity of the charging system, and also you will have to check the battery voltage with non Olight protected IMR batteries: turn the light off when you see the output drop since the S1R doesn’t have protection against over-discharge. Apart from this, the light can be used without any problem with non proprietary batteries.
I believe this light is a good EDC, and also a gift: multi-language manual, comes with a battery optimized for the light, is easy to use and charging is a no brainer.
Adding the charging not proprietary batteries (and featuring over discharge protection) would be the biggest improvement that most people will like.
I’d like to see an upgraded version of this S1R, featuring XP-L/XP-L Hi/XP-G3 emitter, with NW tint option.
Thanks to AntoLed for the camera and the luxmeter
Thanks for reading.
