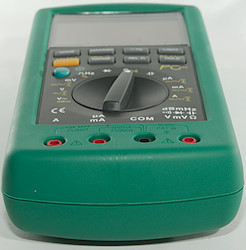
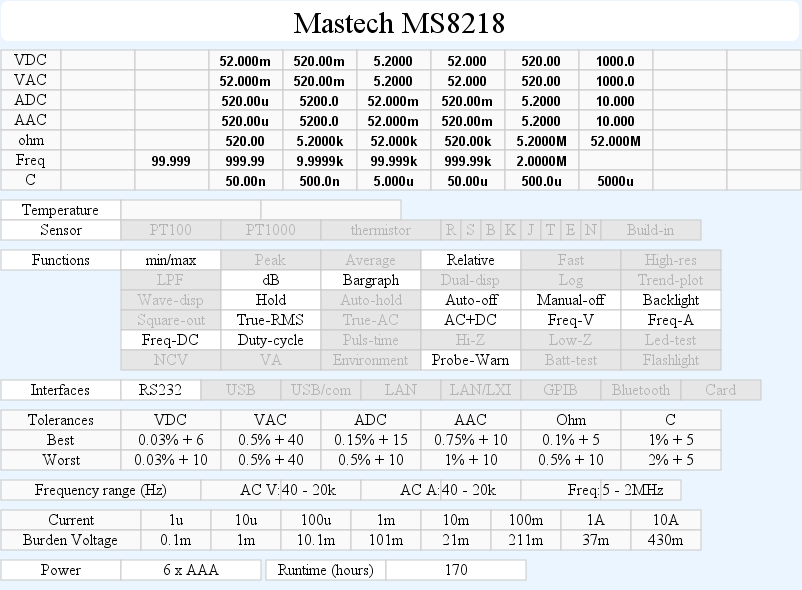
DMM Mastech MS8218
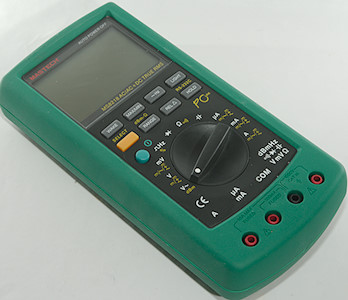
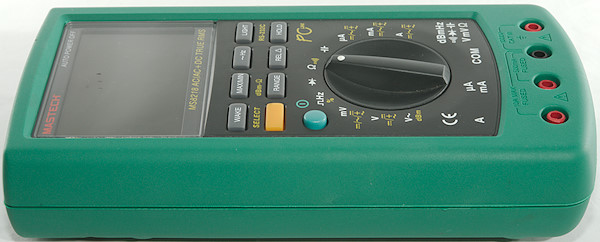
This is the top Mastech meter with very high precision and PC connection. The meter is a fairly old design.
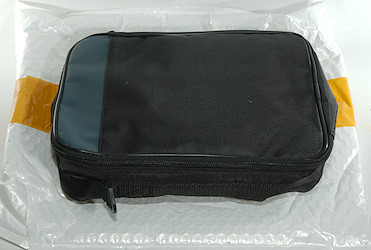
I got the meter in an envelope with the meter in its bag.
Everything was inside the bag.
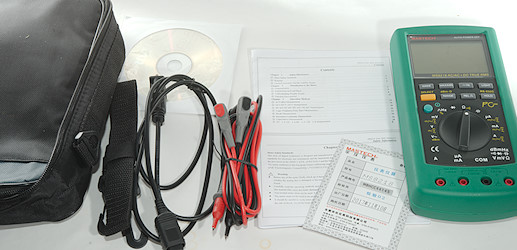
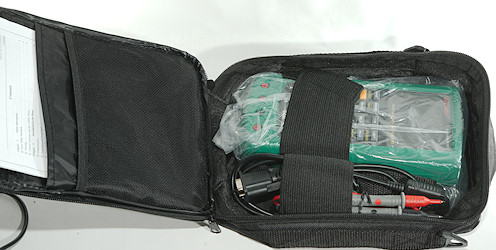
It included the DMM, a pair of probes, a shoulder strap for the bag, the bag, a CD with software, a opto to RS232 cable, some instructions sheets and a calibration certificate in Chinese.


Probes are branded with Mastech and has removeable tip covers. The CAT rating is the usual with with II without covers and III & IV with covers.
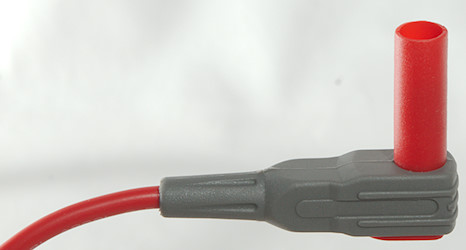
The plug is fully shrouded and standard probe plug size.


The meter is heavy and the tilting bale can hold it while the range switch is used or the buttons is pressed.
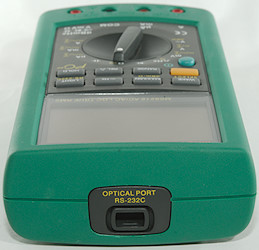
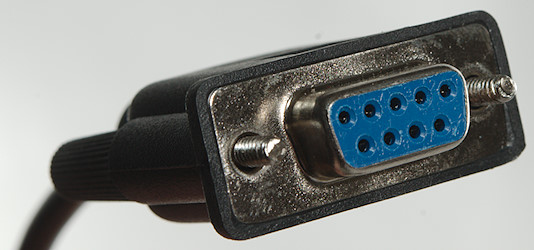
The optical port is one led, i.e. only transmitting of data, it is not possible to send command to the meter.
Display
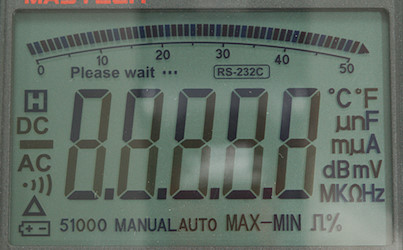
The above picture shows all the segments on the display.
The 51000 is used to show selected range when using manual range, i.e. it can show 5, 50, 500, 5000 and 1000

Typical display during usage, it will show the main number and what measurement is selected.
Functions
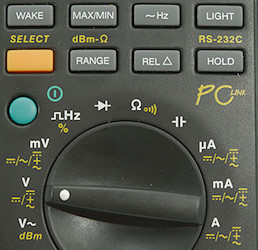
Buttons (Many buttons, but not that many functions):
-
Wake: Used to wake the meter from automatic power down mode. Holding down the wake key while turning on power will disable auto power off.
-
Max/min: Select max/min mode, press to toggle between max/min/max-min, hold down to disable again.
-
Hz: Select Hz display in voltage and current modes, there is no duty-cycle on these ranges.
-
Light: Turns on the background light for a very short time.
-
Select (Yellow): Select between the different modes on each position of the range switch.
-
Range: Manual range selection, hold down to return to automatic ranging. When dB is selected it will change reference impedance between 20 values.
-
Rel: Shows values relative to current value
-
Hold: Freezes the display, hold down to activate RS232 data streaming. This do not disable auto power off, see Wake key.
-
Power (Green): A mechanical switch to turn power on/off.
Rotary switch:
-
VAC and dB: AC voltage and dB, use range to select reference impedance for dB, Hz for frequency display.
-
VDC and AC+DC: DC voltage and combined AC+DC rms.
-
mV: Milli volt for DC, AC and AC+DC
-
Hz: Logical frequency, this range requires square wave input and will show duty-cycle (use SELECT).
-
 : Diode, works up to 2.5V, but bargraphs works up to 3V.
 -
 : Resistance and continuity
 -
 : Capacitance
 -
uA: Microampere range, use SELECT to select AC or AC+DC.
-
mA: Milliampere range, use SELECT to select AC or AC+DC.
-
A: Ampere range, use SELECT to select AC or AC+DC.
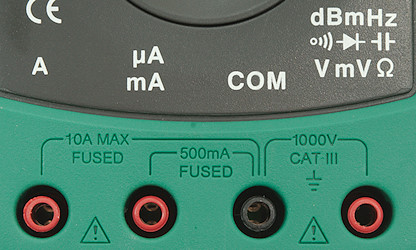
Input
-
A: High current, maximum current is 10A
-
mAuA: The lower current ranges.
-
CON: The common terminal for all ranges.
-
xxx: All other ranges.
Measurements
-
Volt and frequency
-
Frequency input has a trigger point around 1.5V
-
Voltage input requires a zero crossing on DC ranges for frequency measurement, on AC the input capacitor handles that.
-
Frequency input requires a square wave signal and enough level or it will show 0 or a wrong value.
-
At 4Vpp input frequency range is from 1Hz to 1.6MHz
-
At 100mVrms input on mV range, frequency range is from 1Hz to 199.99kHz
-
Duty cycle works from 3% to 99% at 100kHz with 4Vpp, precision is within 3.0.
-
1 VAC is 5% up at 70kHz (RMS will not work at the frequency).
-
Max/min needs about 650ms to capture a voltage.
-
Auto range works when doing min/max and relative.
-
If there is a large AC voltage on DC range and 0 DC, it will show a DC value
-
Input impedance is 10-11Mohm on DC, on mV AC/DC it will drop to 20kohm when above 3V and to 3kohm above 13V
-
AC input has a capacitor
-
Frequency input is around 20kohm up to 10V, then it drops to 2kohm.
-
Rated overload protection is 250VDC/VAC in mV range and frequency ranges.
-
-
Current
-
Overload protection in uA and mA: 0.6A/500V 6.3x32mm fuse
-
Overload protection in A: 10A/500V 6.3x32mm fuse
-
There is an audible warning and display turns off when using non current ranges with a probe in mAuA or A input.
-
-
Ohm, continuity, diode and capacity
-
Ohm needs about 2.0s to measure 100ohm
-
Ohm is 1.2V open and 0.81mA shorted
-
Continuity is fast (About 10ms).
-
Continuity beeps when resistance is below 50ohm
-
Continuity is 3.2V open and 0.81mA shorted
-
Diode range uses 3.2V, max. display is 2.4999V at 0.18mA, max. current is 0.81mA shorted, bargraph works up to 3.2V
-
4000uF takes about 58 seconds to measure.
-
1000uF takes about 16 seconds to measure.
-
10uF takes about 4 seconds to measure.
-
Rated overload protection is 250VDC/VAC
-
-
Miscellaneous
-
Current consumption of meter is 5.8mA, IR link uses spikes of 9mA, but do not change average significantly (25mA with backlight)
-
Meter works down to 5.8V where segments starts to fade, display is completely faded at about 5V, battery symbol show at 6.5V.
-
Below 5.8V on the battery readings will change very significant.
-
Backlight will fade with dropping battery voltage and is completely out at around 5.5V
-
The meter need a couple of updates before the reading is correct.
-
Viewing angle is good
-
Display updates around 2,5 times/sec
-
Bargraph updates at same rate as display
-
Backlight will turn off in 6 seconds
-
Will automatic turn power off in about 15 minutes without any warning.
-
Standard probes fits perfectly into sockets on meter.
-
Generally the precision is nearly “spot on”, i.e. usual only a few counts out.
-
Weight is 615g without accessories, but with batteries.
-
Size is 210 x 104 x 50mm.
-
-
Probes
-
Probe resistance 24mOhm for one.
-
Probe wire is soft and 100cm long.
-
Comminication cable is 112cm long
-

A look at the capacity measurement waveform.
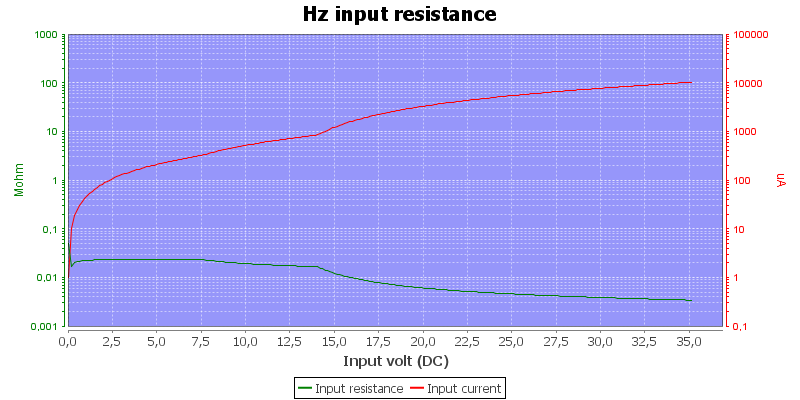
Frequency iput resistance.
Shows –40VDC when measuring DC voltage on 230VAC
Software
The supplied software looks fairly standard for Chinese multimeter software. This means fairly simple and with some limitations.
One limitation is COM ports, it would not work with COM3, but it worked with COM1 (I did not find any settings for COM port).

The data logging cable uses an optical port and a RS232 connector. The RS232 is rather old fashion today, but a RS232 to USB cable will help.
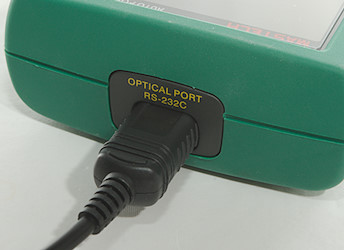
The data logging cable connected to the optical port.
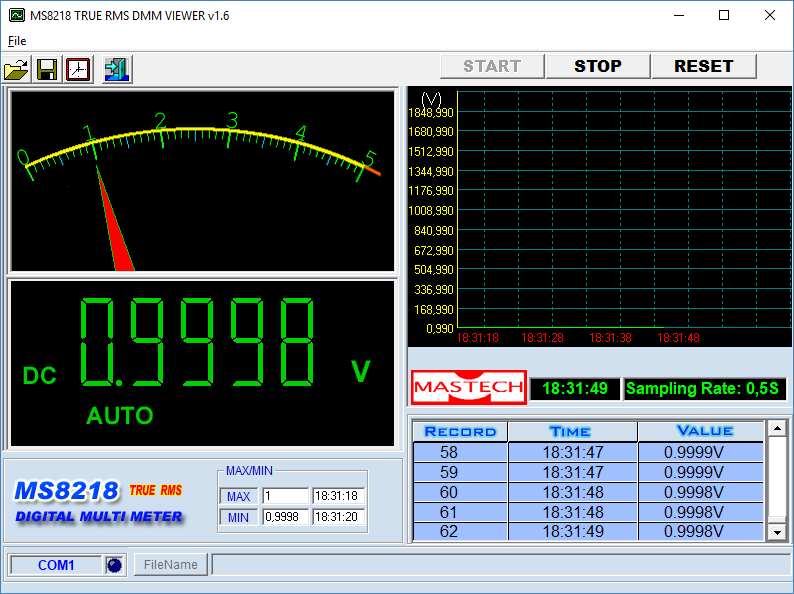
The software has 5 areas: Analog meter, Digital meter, Chart, Table and min/max. Neither the chart or table keeps the data for long, due to the 0.5s sampling range.
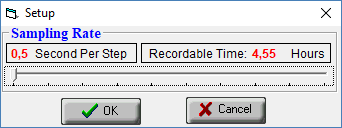
It is possible to reduce the sampling rate, this also makes it possible to record for longer time (The software has a rather small data buffer).
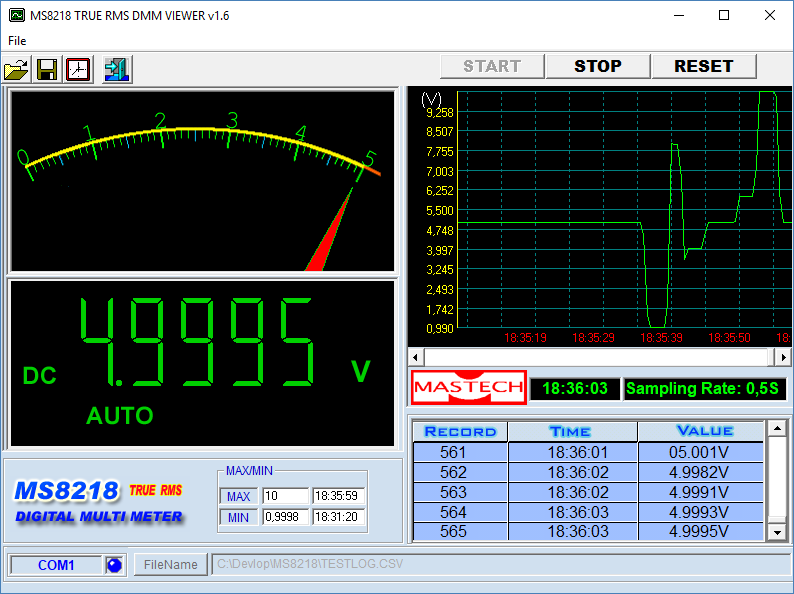
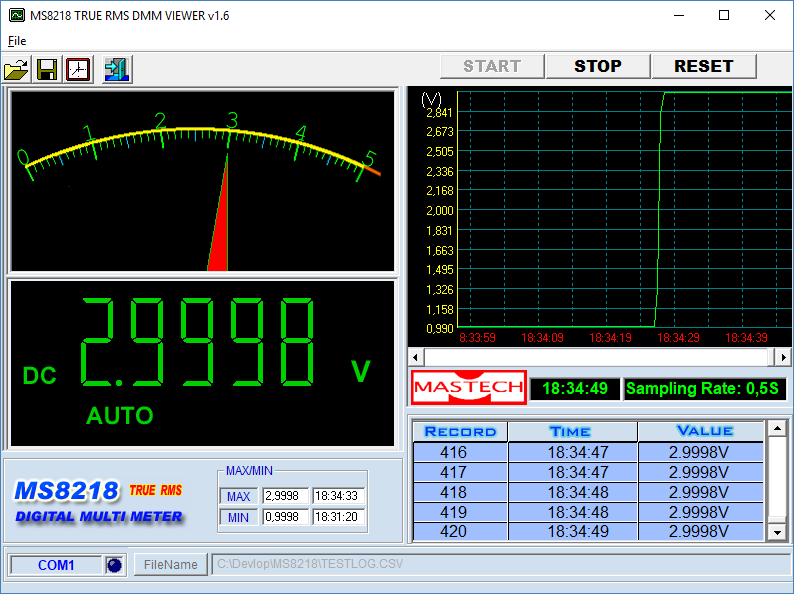
Here I varied the input voltage fast enough and got a curve in the chart area.
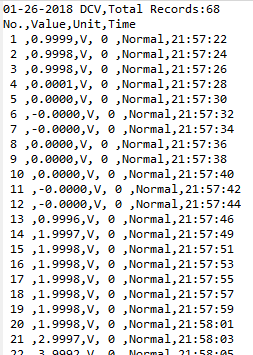
The data can first be saved to a file after they are recorded. The format looks like a standard CSV file and is easy to handle.
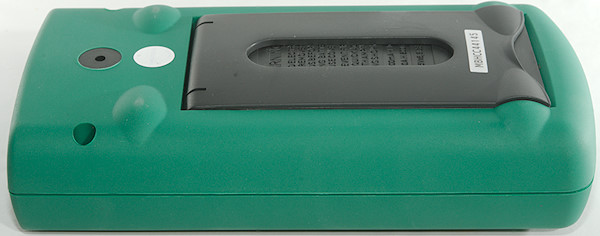
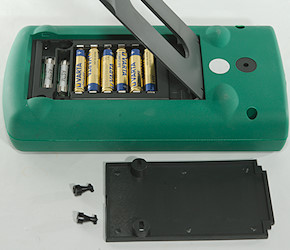
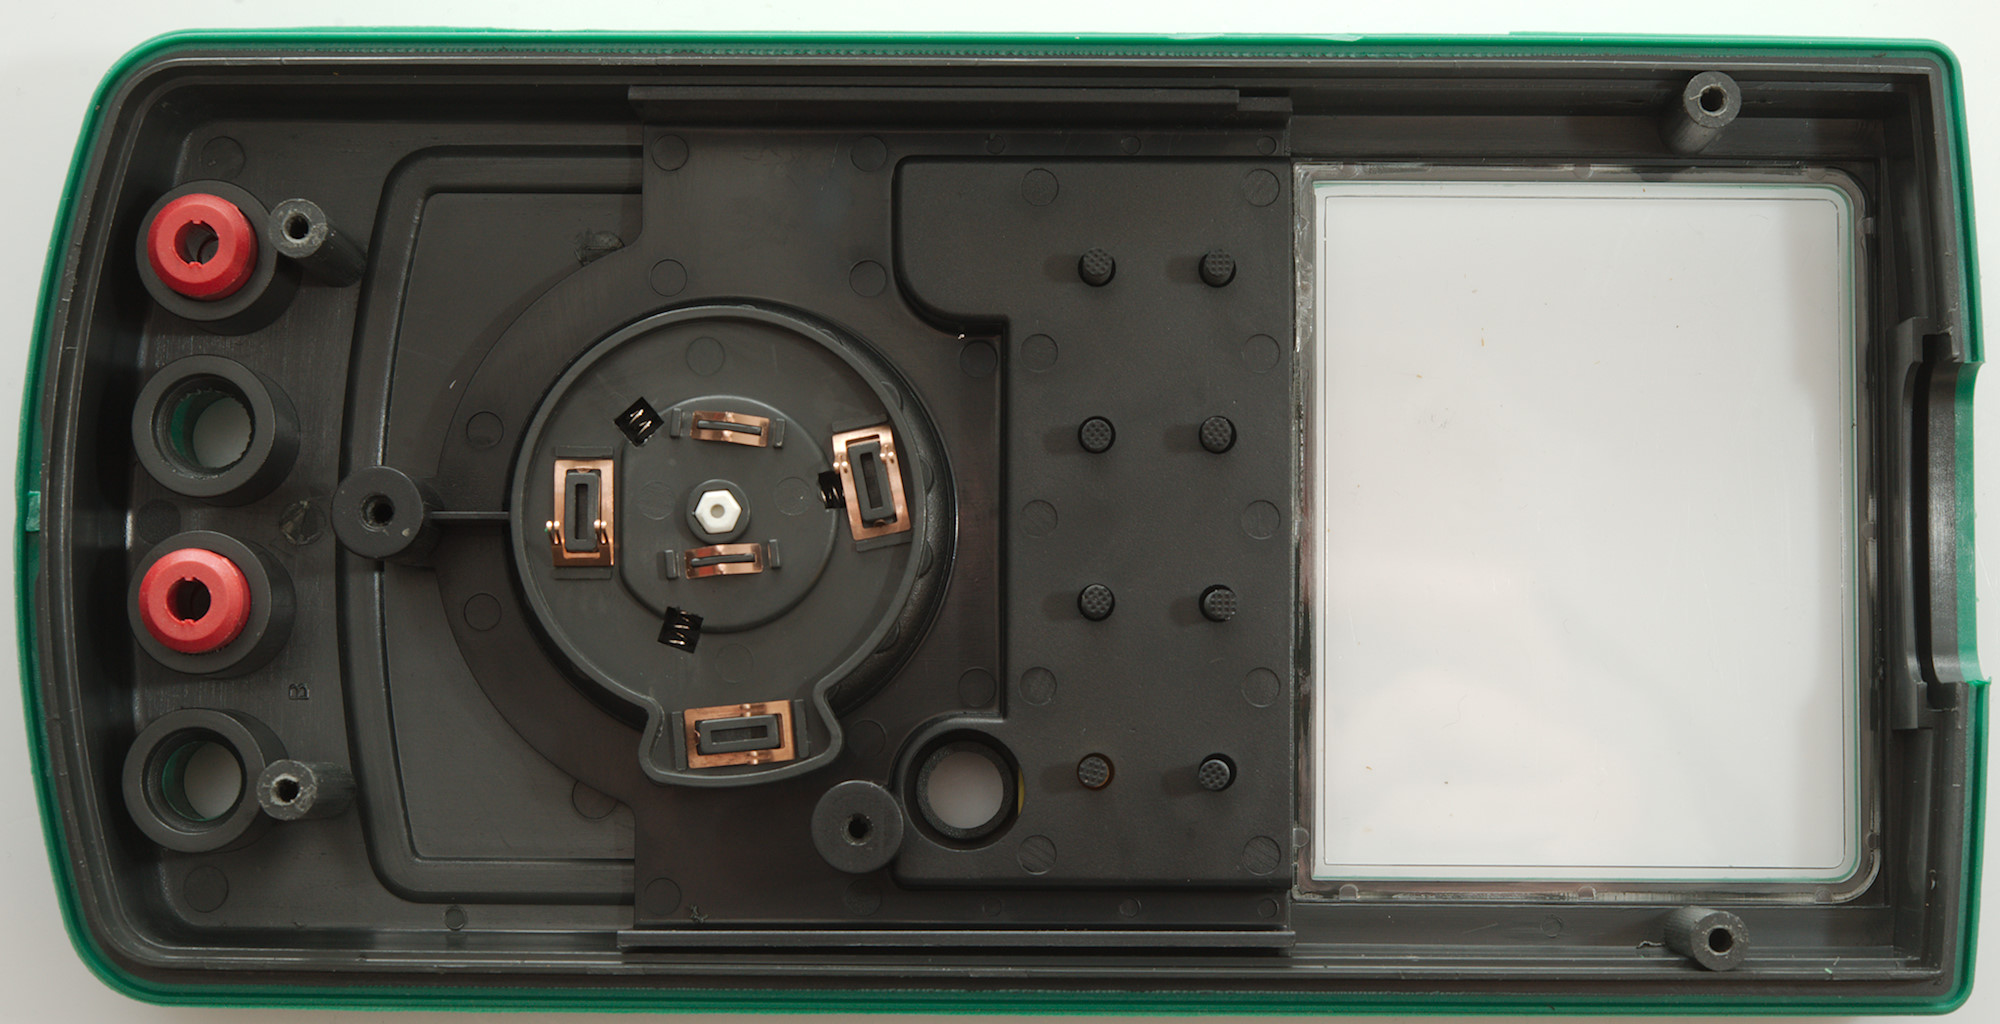
Tear down
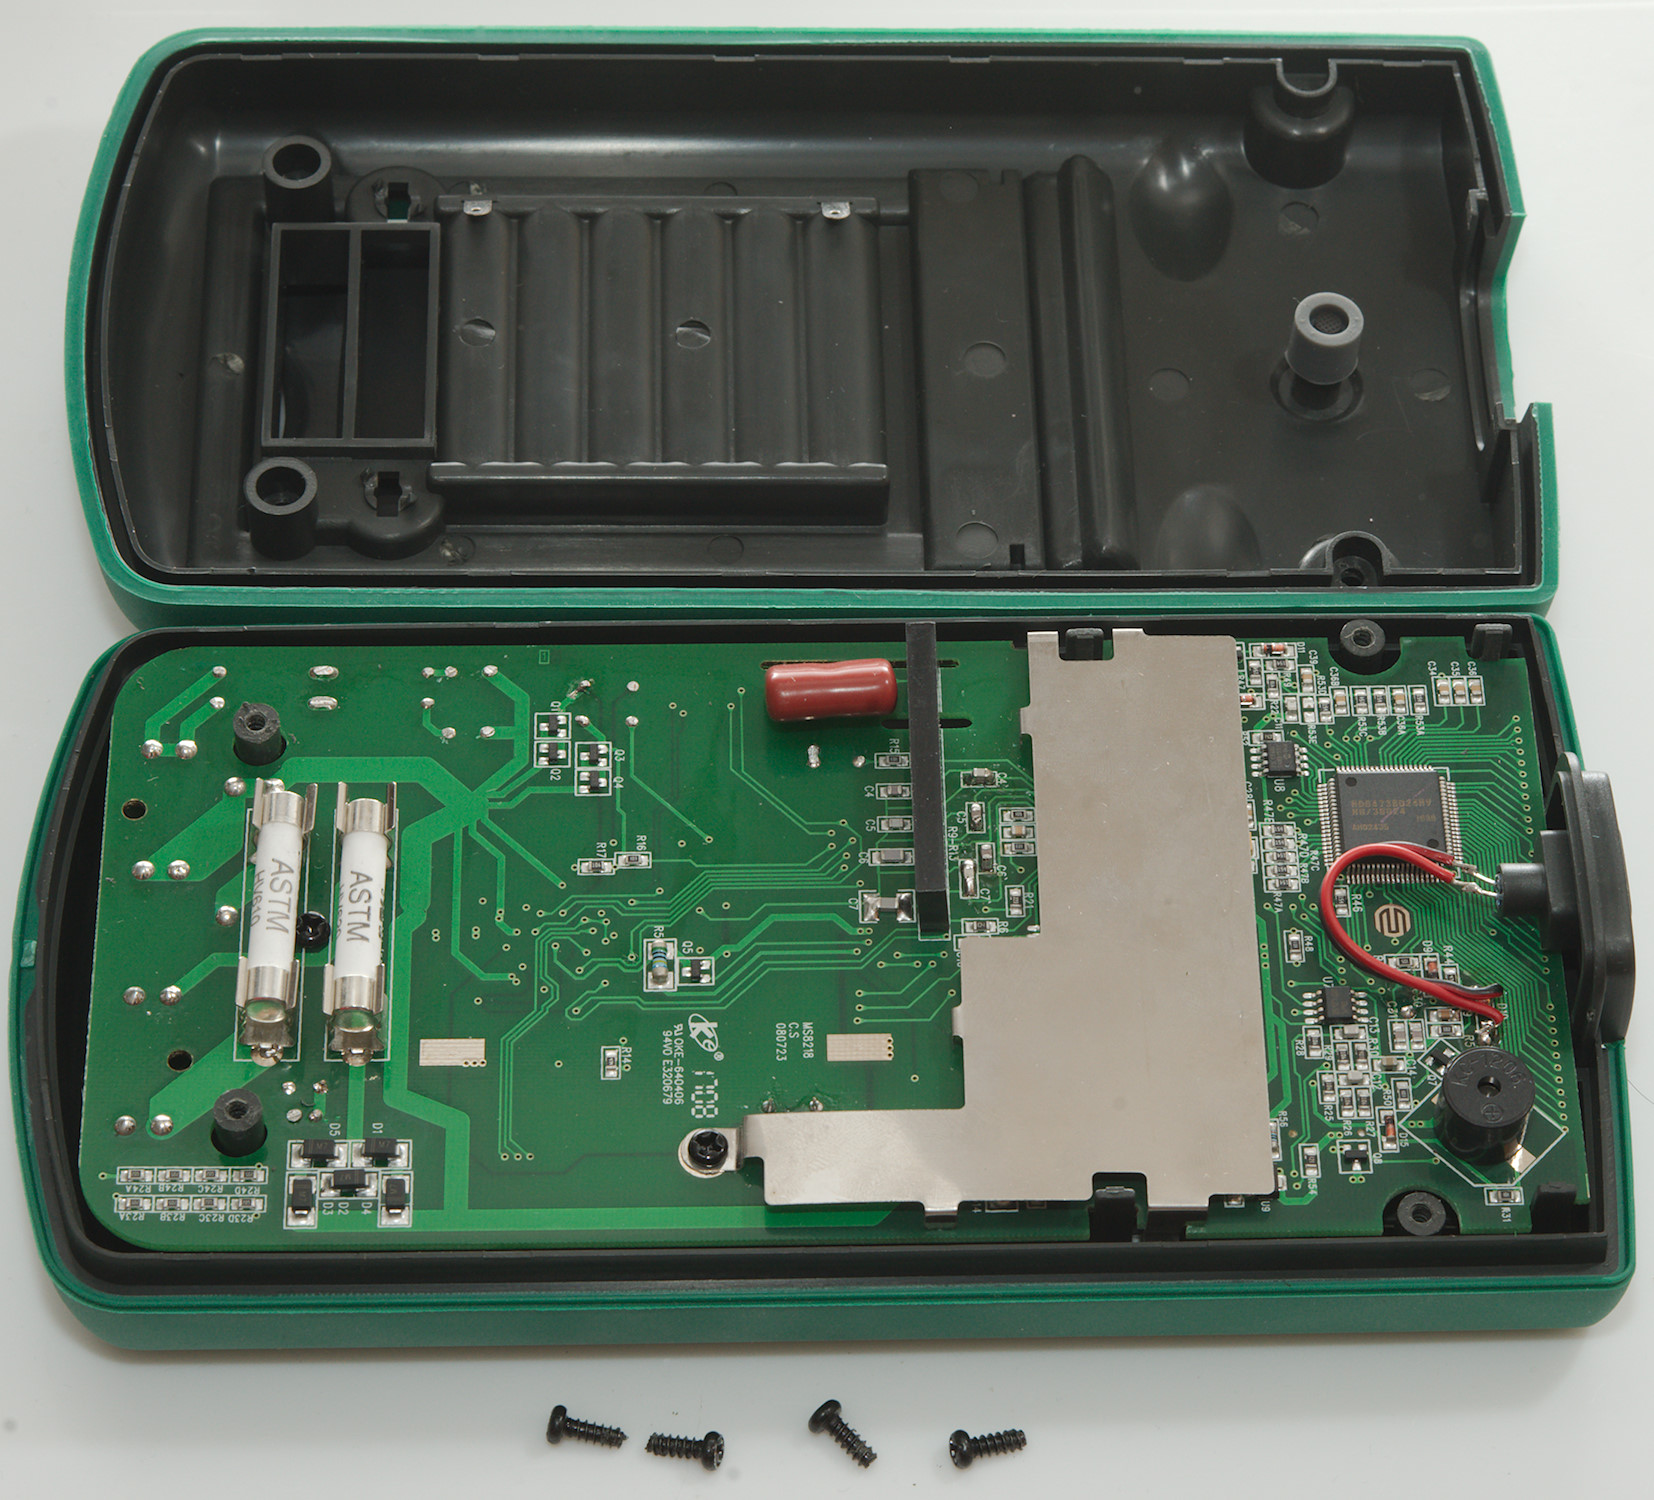
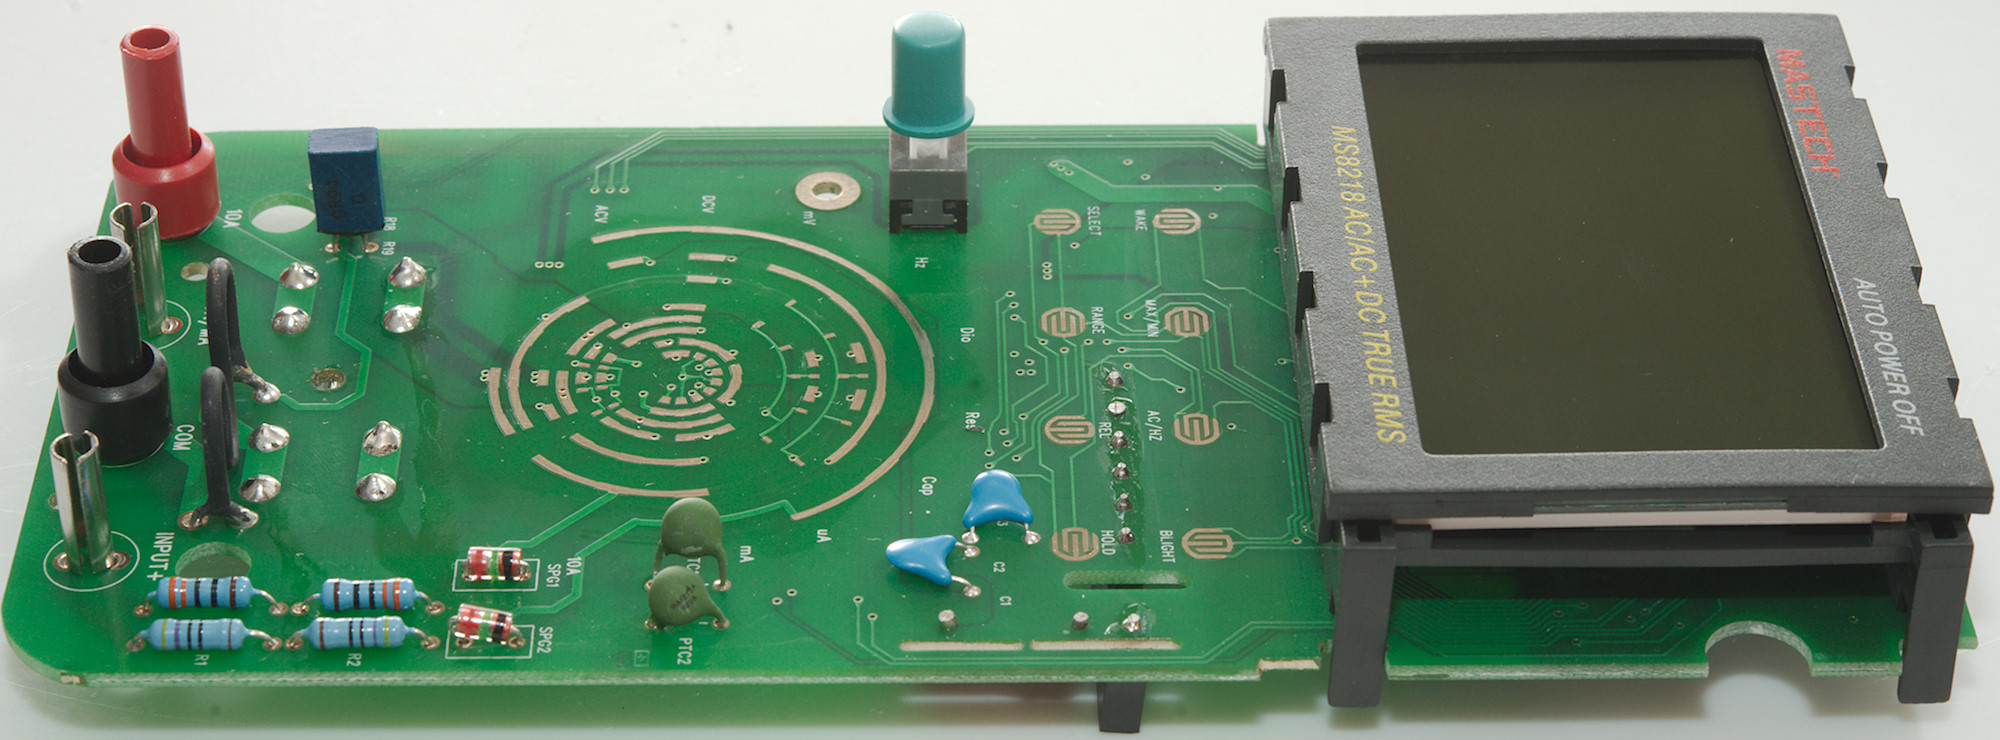
4 screws and the back could be removed.
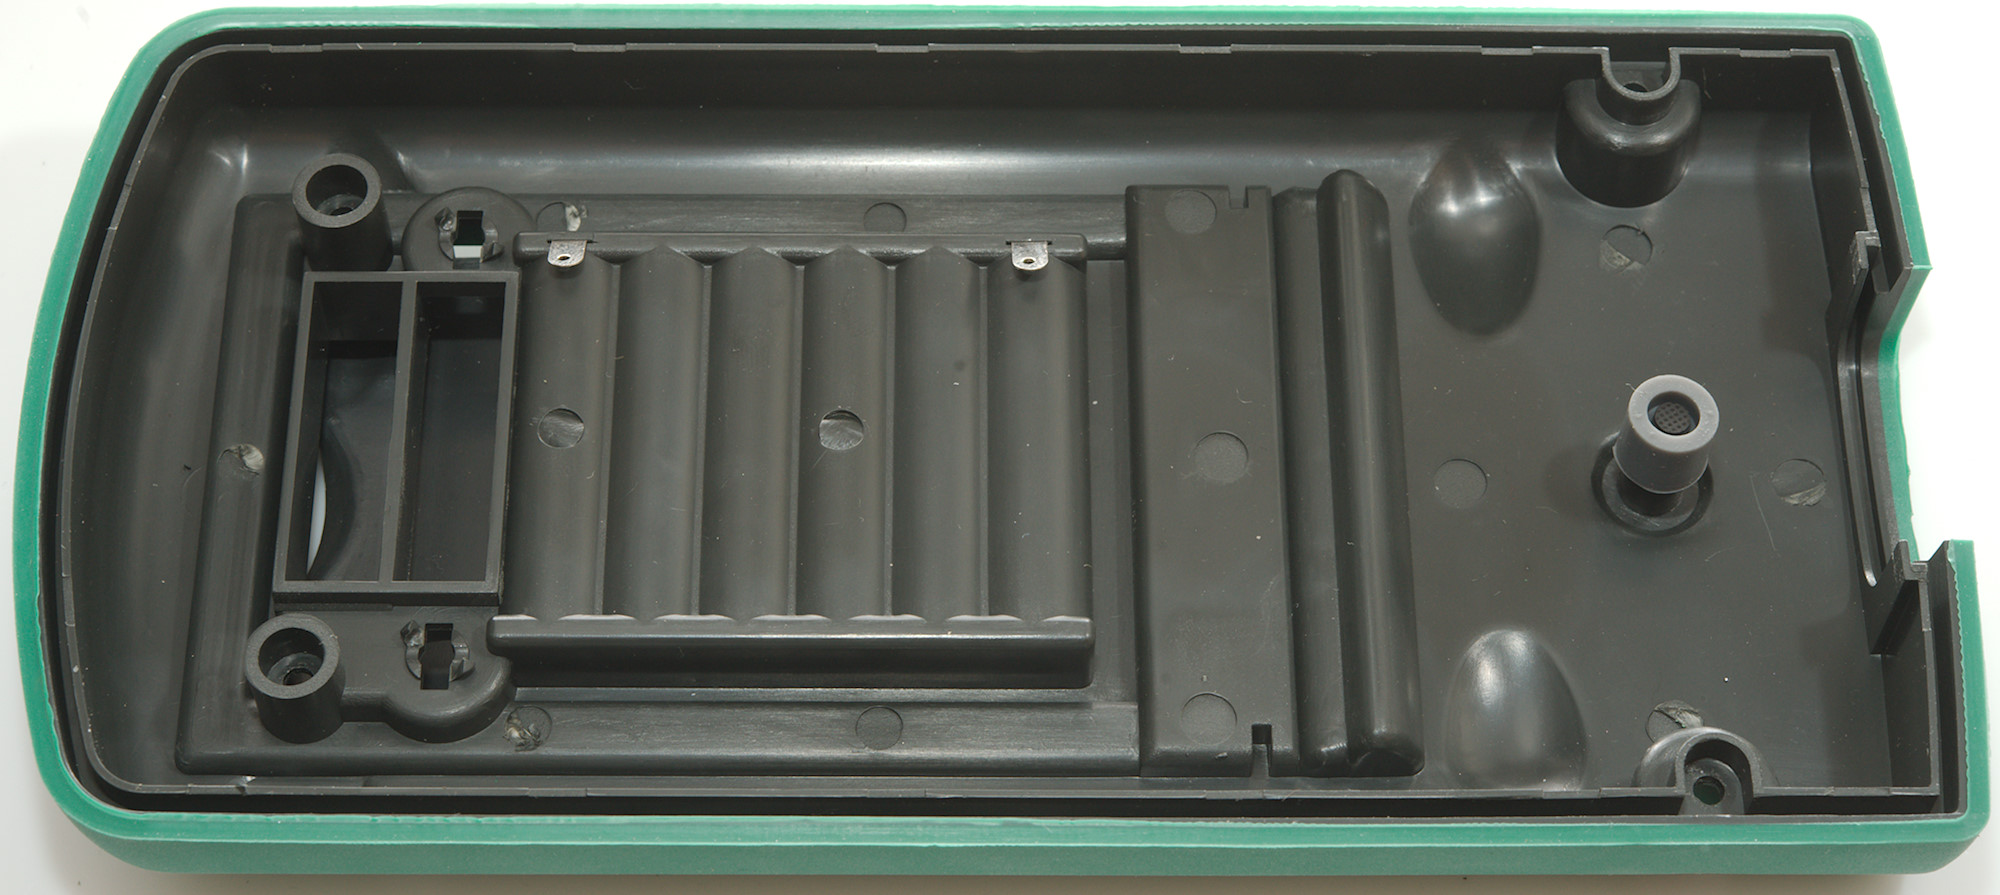

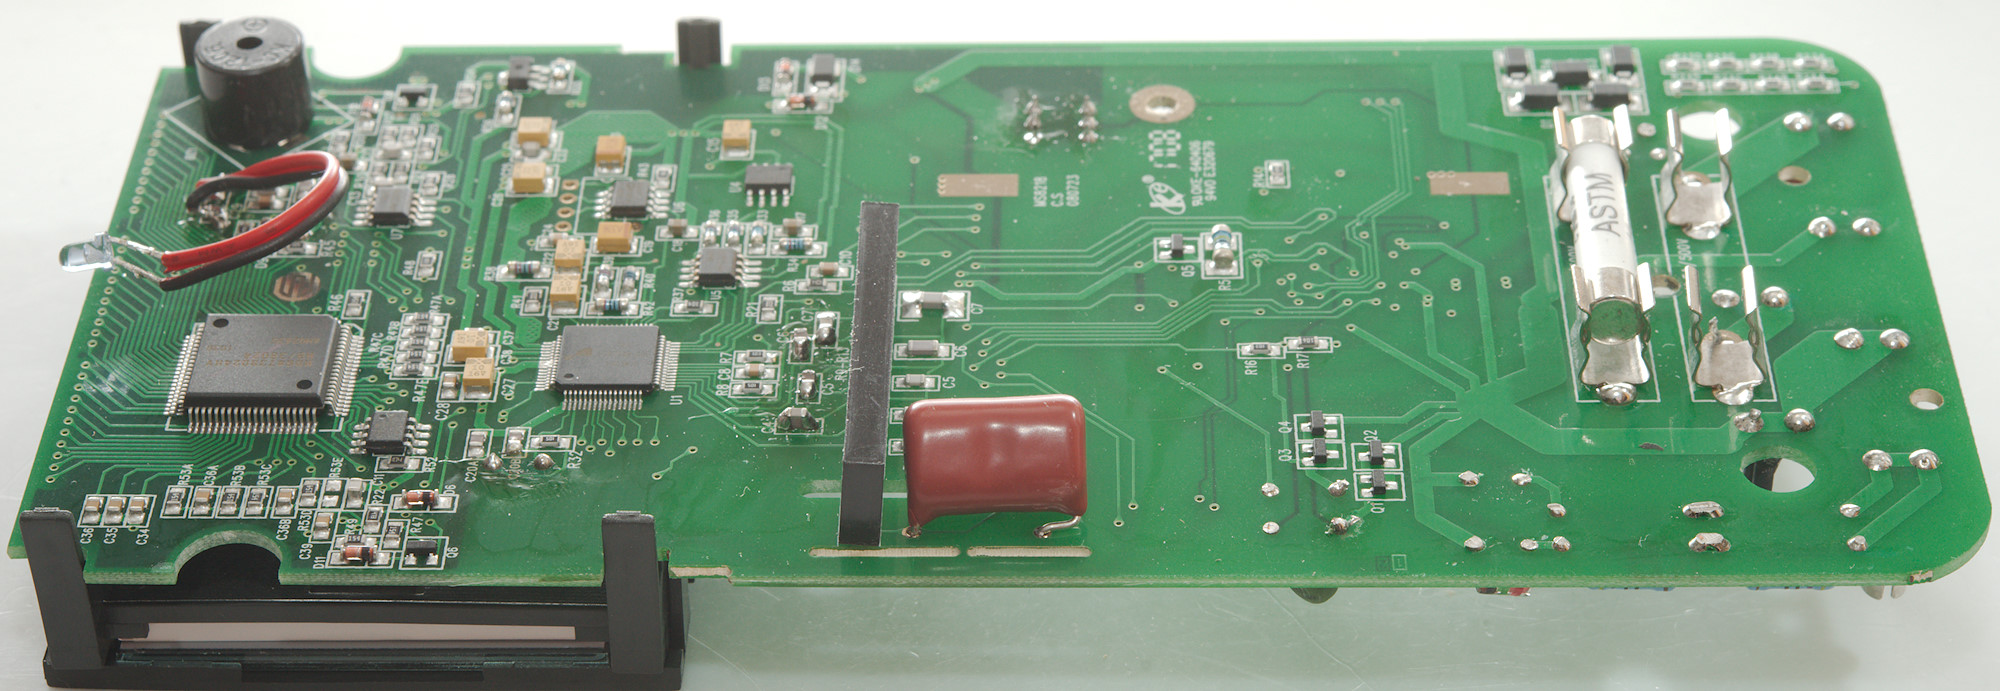
The circuit board is fairly rectangular in shape and uses most of the space in the meter. There is shielding over part of the circuit board.
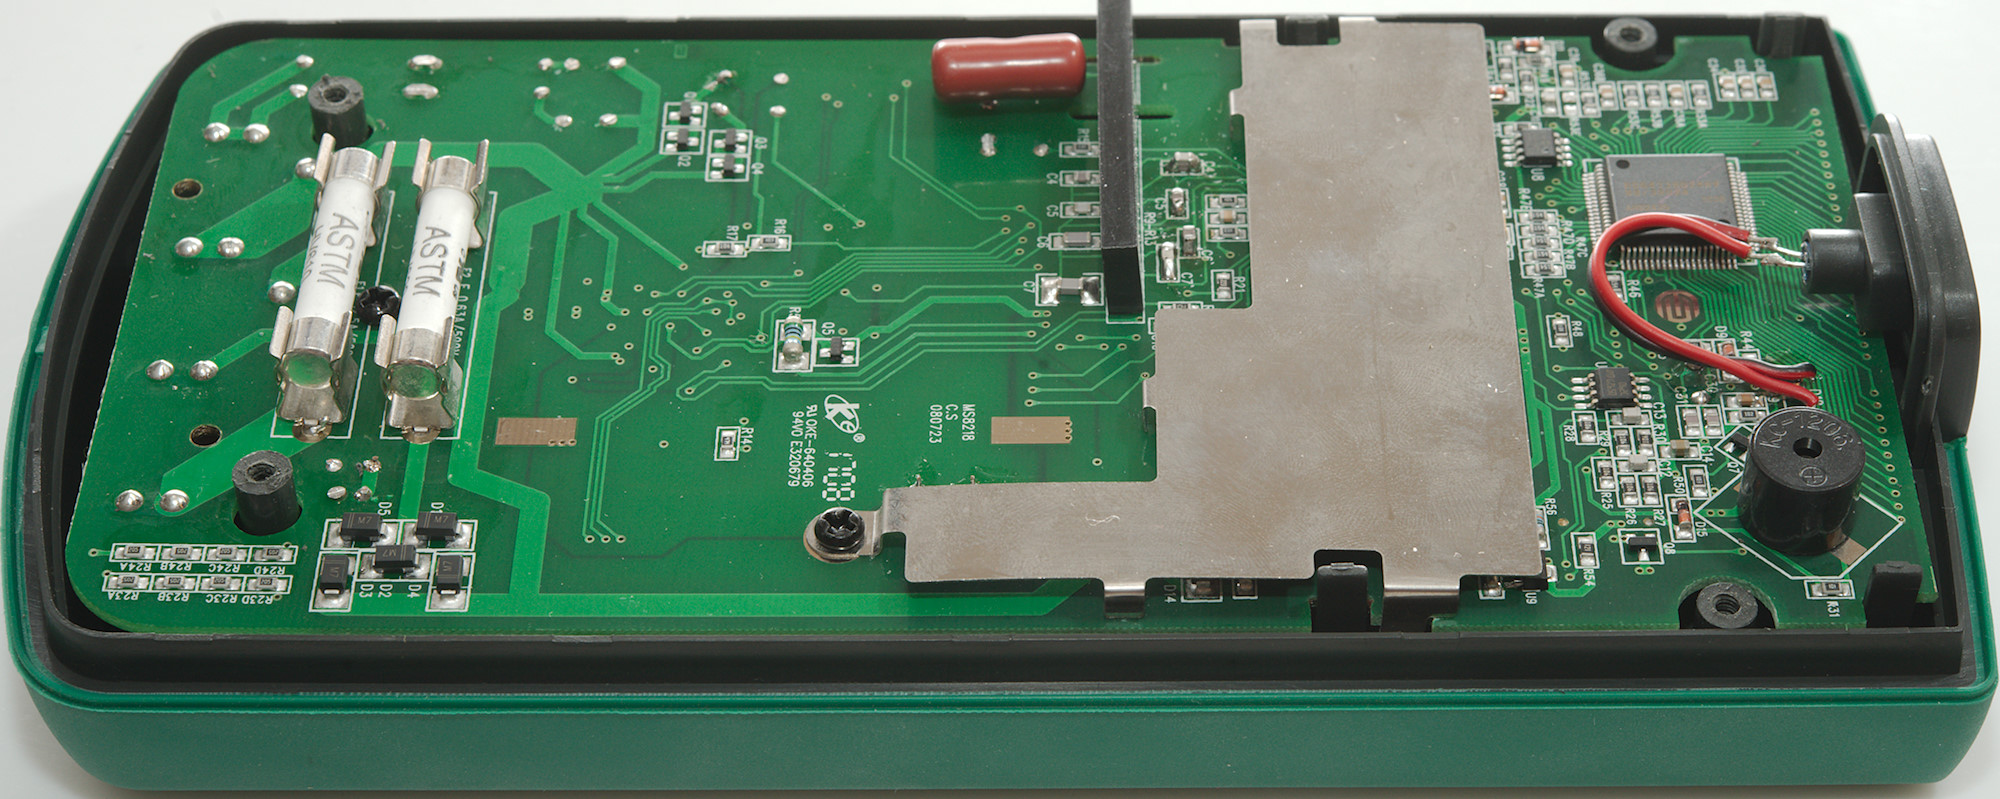

Two screws (one between the fuses and one holding the shield) and I could remove the circuit board.
I am a bit surprised about the fairly bad moounting of the circuit board (2 screws are not much). The lid may apply some pressure at a few points.

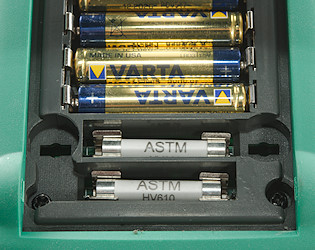
The two fuses are good quality, but 500V fuses in a 1000V meter? The mA and uA current shunts are on the other side of the circuit board, but here is the diode protection of the shunts (D1..D5). There is also resistors for the input terminal sensing (R23A..R23D and R24A..R24D: 8x2Mohm).
There is two input transistor clamps (Q1 & Q2 and Q3 & Q4) they work together with two PTC’s on the other side of the circuit board.
There is a big black box (R9-R13) that contains the resistor network, the big capacitor is used before the input resistor on AC voltage. At the input a precision OpAmp is used (U4: MAX6166), there is a true rms converter (U6: AD737J). Two chips marked GZ650 (U5 & U7, probably OpAmps) and a memory chip (U8: 93LC56B) for calibration.
The actual DMM frontend chip (U1: FS9704) and a microprocessor to handle it (HD64738024). Notice the contact pattern next to it, it is probably for calibration, there is a “unused” switch pattern on the circuit board.
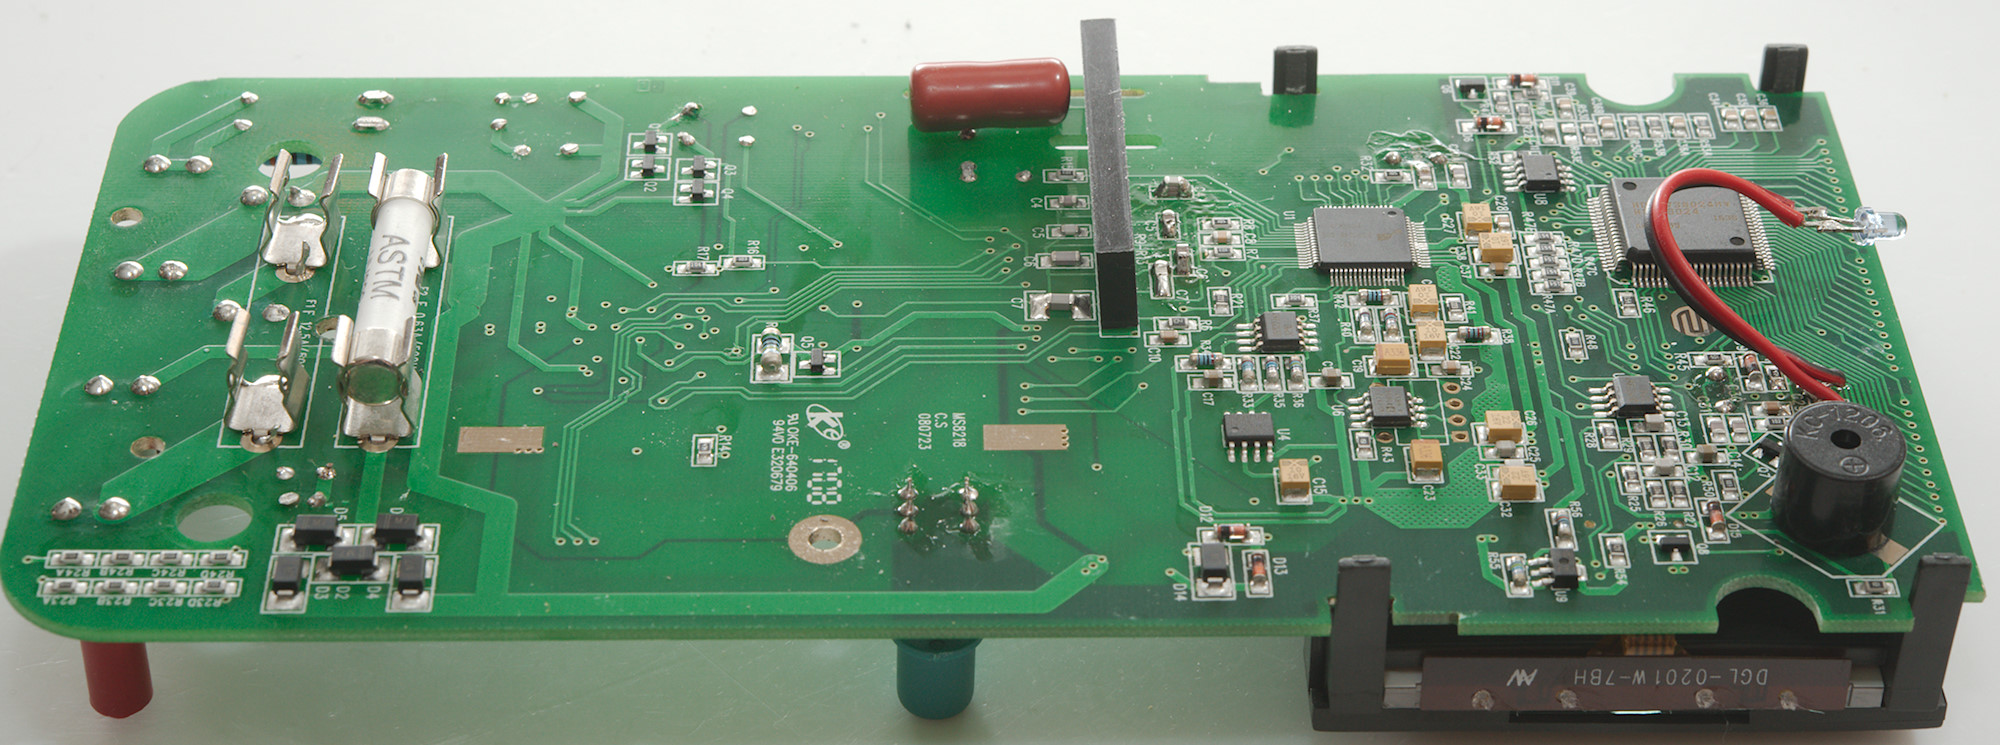
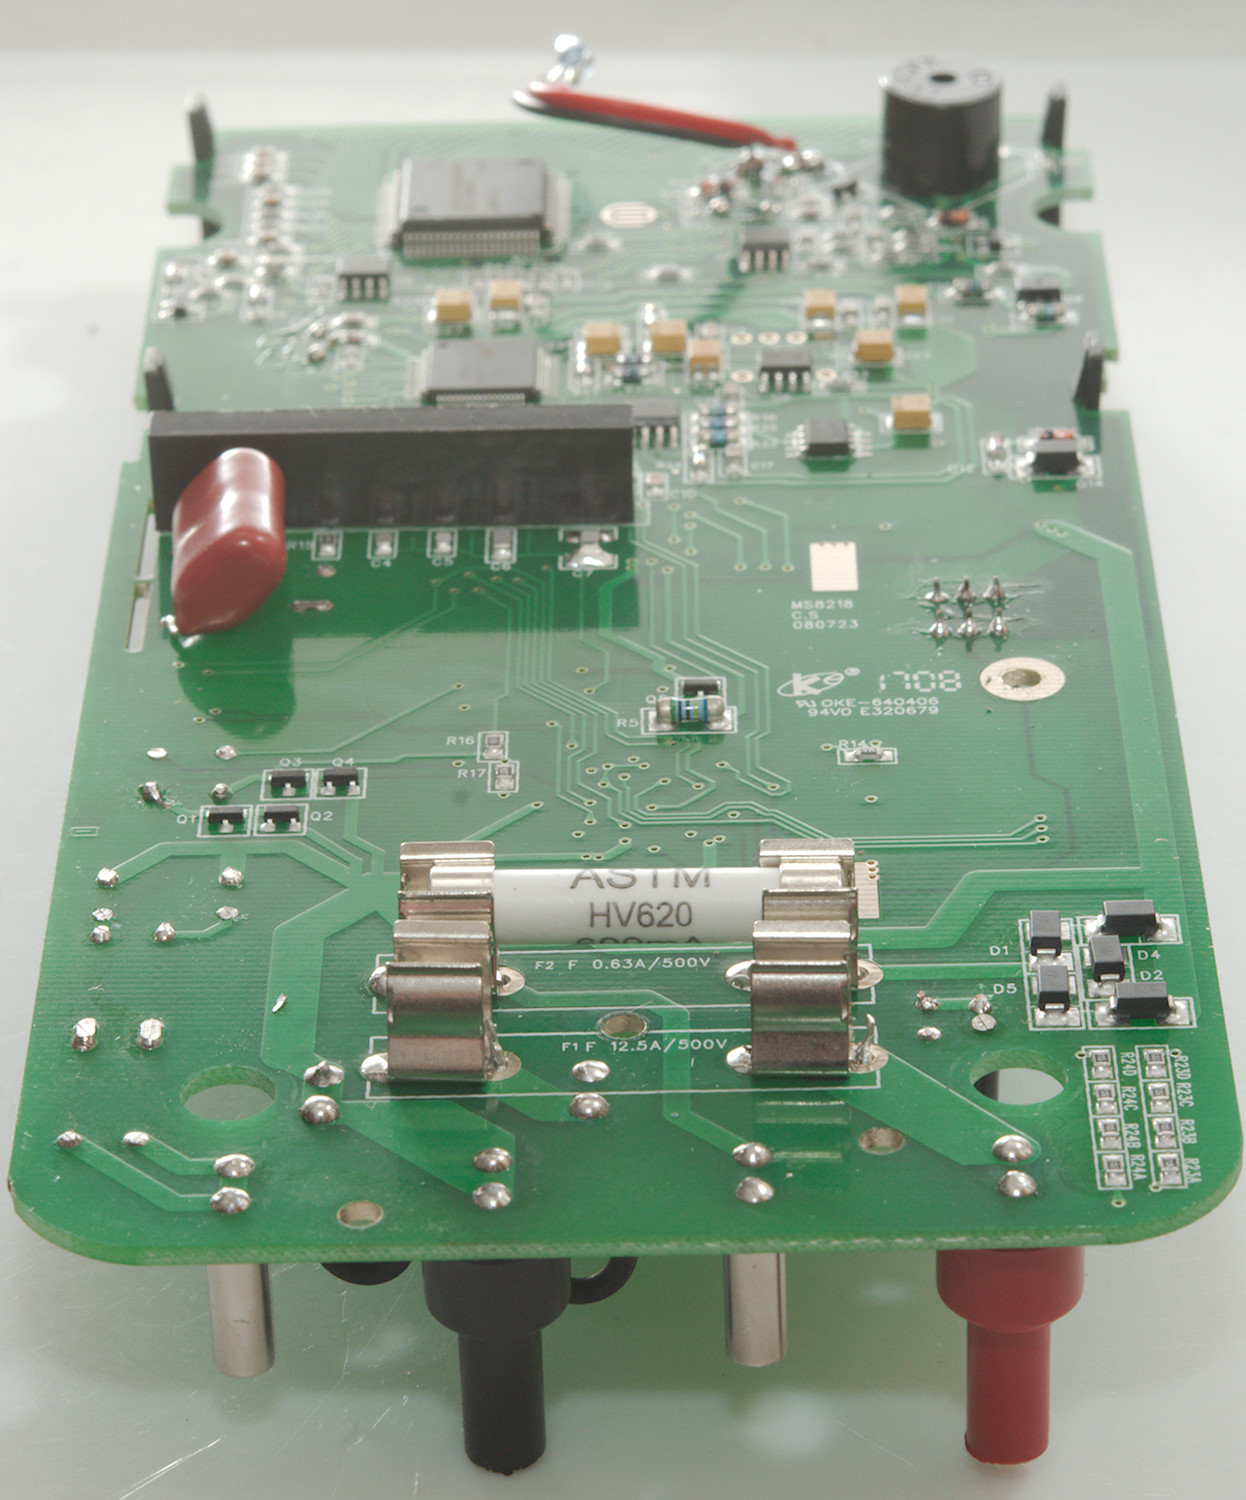


On this isde are the current shunts for uA and mA) (R18 & R19) and also A (The black wire). The voltage input terminal has two paths, one with about 940ohm (R1 & R2) and one with about 660ohm (R3, R4), both clamped with a GDT (Sparkgap) to the minus terminal. This works fine for low energy pulses, but will fry the resistors on a high energy pulse. The two PTC’s (PTC1 & PTC2) are used for ohm output and low voltage input.
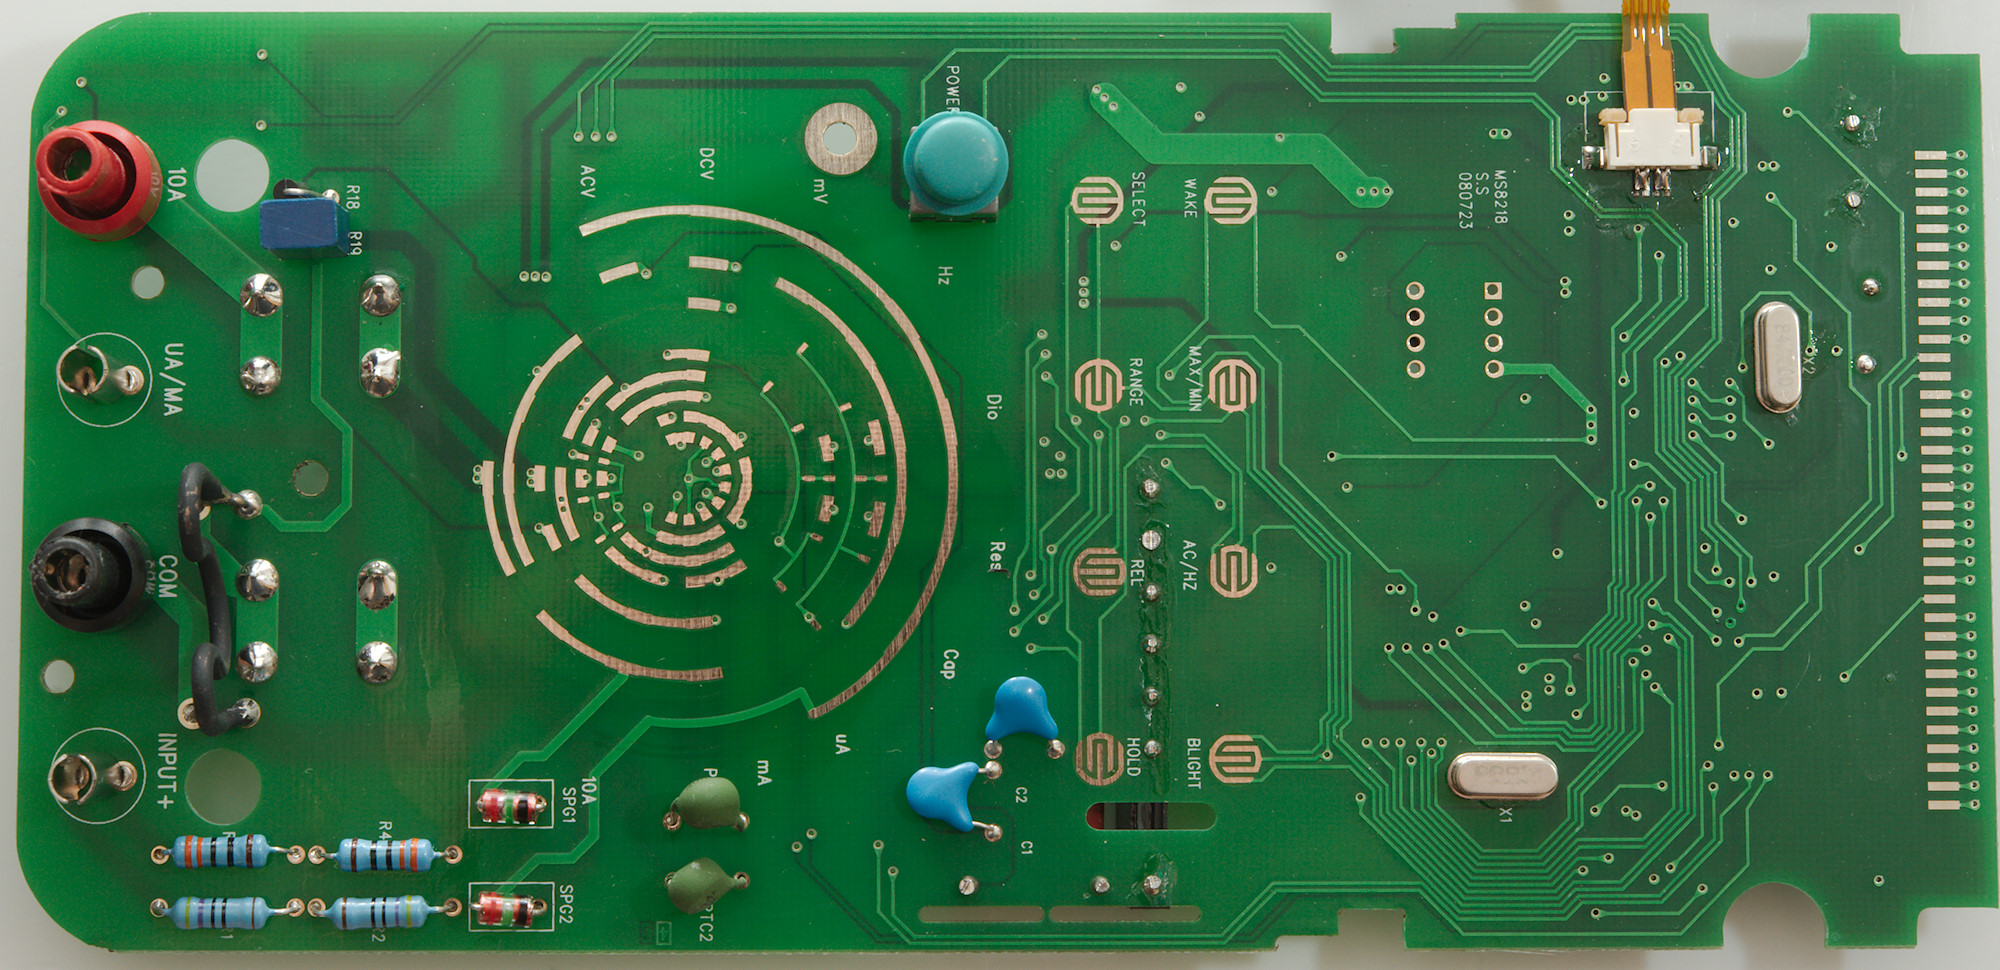
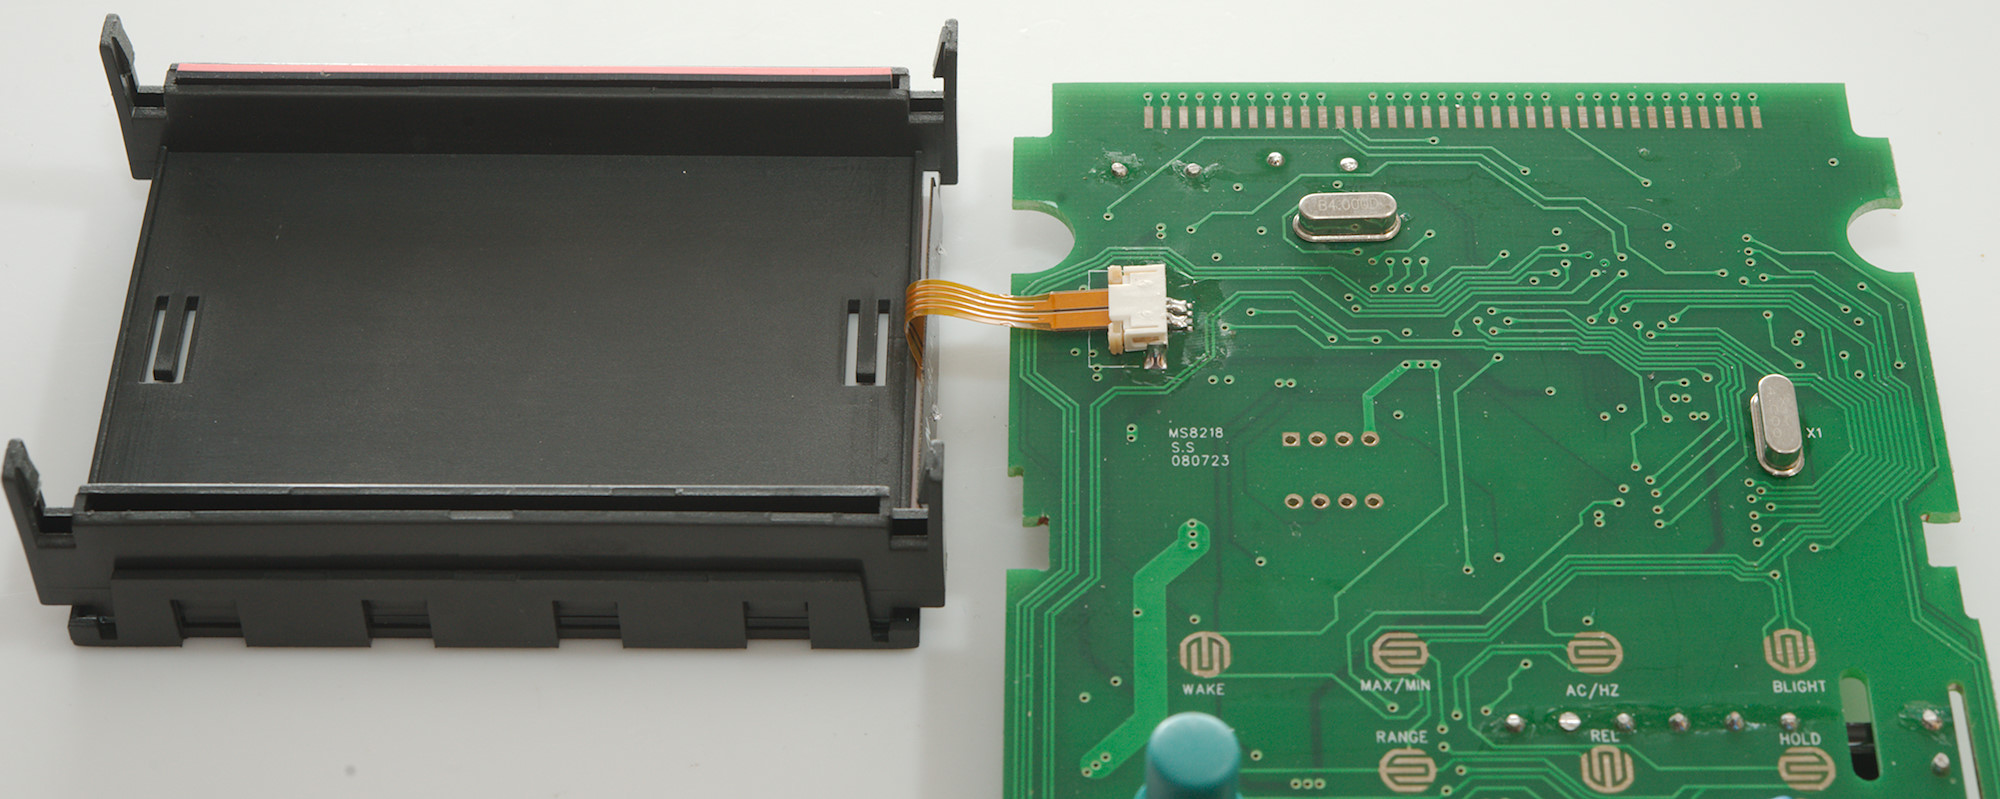
Below the display is two crystals, one for the DMM chip and one for the microprocessor.
Conclusion
As usual I doubt the CAT rating, but it is fairly well protection and I do not see any problems using it at mains voltages (120VAC & 230VAC).
This is a very precise multimeter, but for this high end multimeter I am missing a few functions like temperature and average, I would also have prefered a faster bargraph. The RS232 connection shows that it is a old design. The Hz input is a bit special in requiring square wave input.
For the price it is a great meter, if you need precision.
Notes
How do I review a DMM
More DMM reviews