RD USB Meter UM25C
Official specifications:
-
Display screen: 1.44 Inch color LCD display
-
Voltage measurement range: 4-24.000V
-
Voltage measurement resolution: 0.001V
-
Current measurement range: 0-5.0000A
-
Current measurement resolution: 0.0001A
-
Capacity accumulation rannge: 0-99999mAh
-
Voltage measurement accuracy: ±0.5‰+2digits?
-
Energy sccumulation range: 0-99999mWh
-
Current measurement accuracy: ±1‰ +4 digits
-
Load impedance range:0.8ohm-9999.9ohm
-
Time measurement range:0-99h59min59s
-
Temperature range: –10°C 100°C/0°F 200°F
-
Temperature measurement error: ±3°C/±6°C
-
Screen brightness setting: 0-5 levels
-
Auto screen off time: 0-9mins
-
Voltage graphing range: 0-24.00V
-
Current graphing range: –5.0000A
-
Refresh rate:2Hz
-
Quick charge recognition mode: QC2.0, QC3.0, APPLE 2.4A/2.1A/ 1A/0.5A, Android DCP, SAMSUNG
-
Product size: 71.2mmx30.5mmx12.4mm(UM25C)/71.2mmx30.5mmx11.3mm(UM25)
-
Product weight: 23.74g(UM25C)
I got it from RD official store
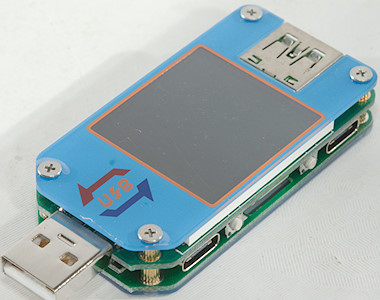
RD makes a couple of electric products, including a few models of usb meters. This meter is a high precision one with Bluetooth build in, it includes USB-C connectors.
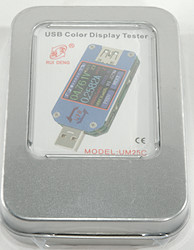
I got the meter in a small metal can
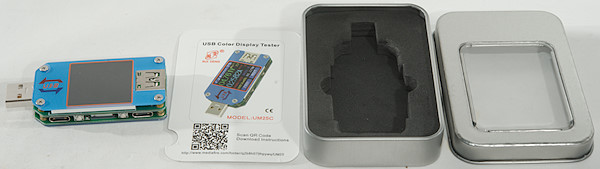
It contained the meter and a inlay with a link to the application.
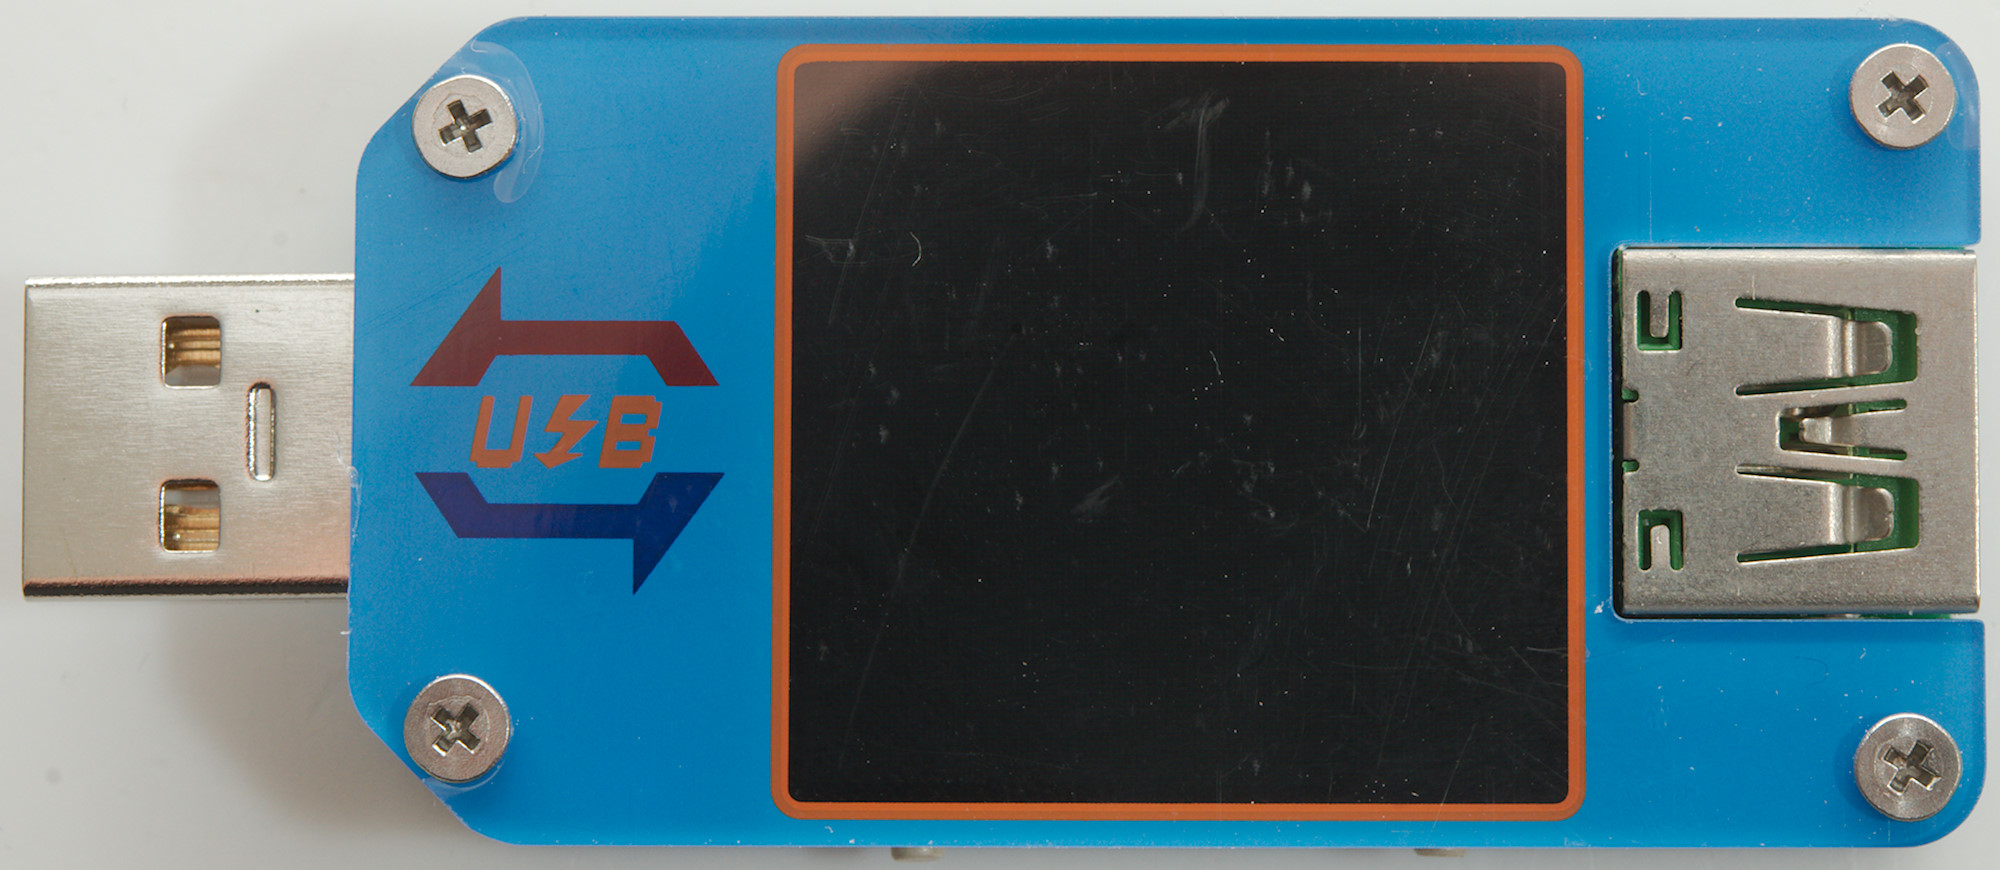

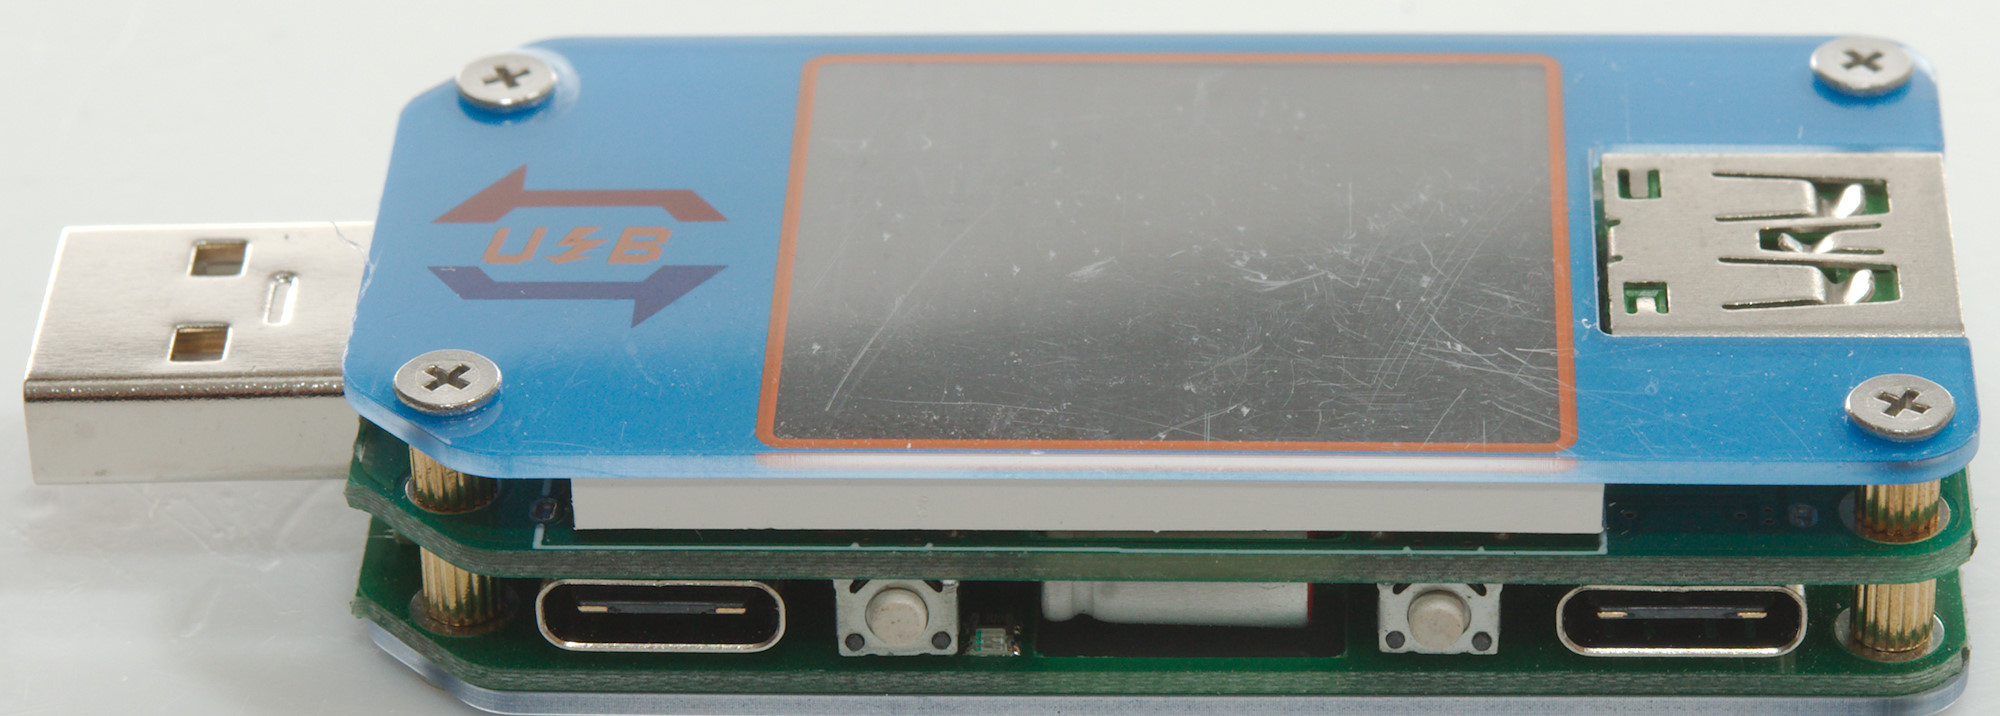
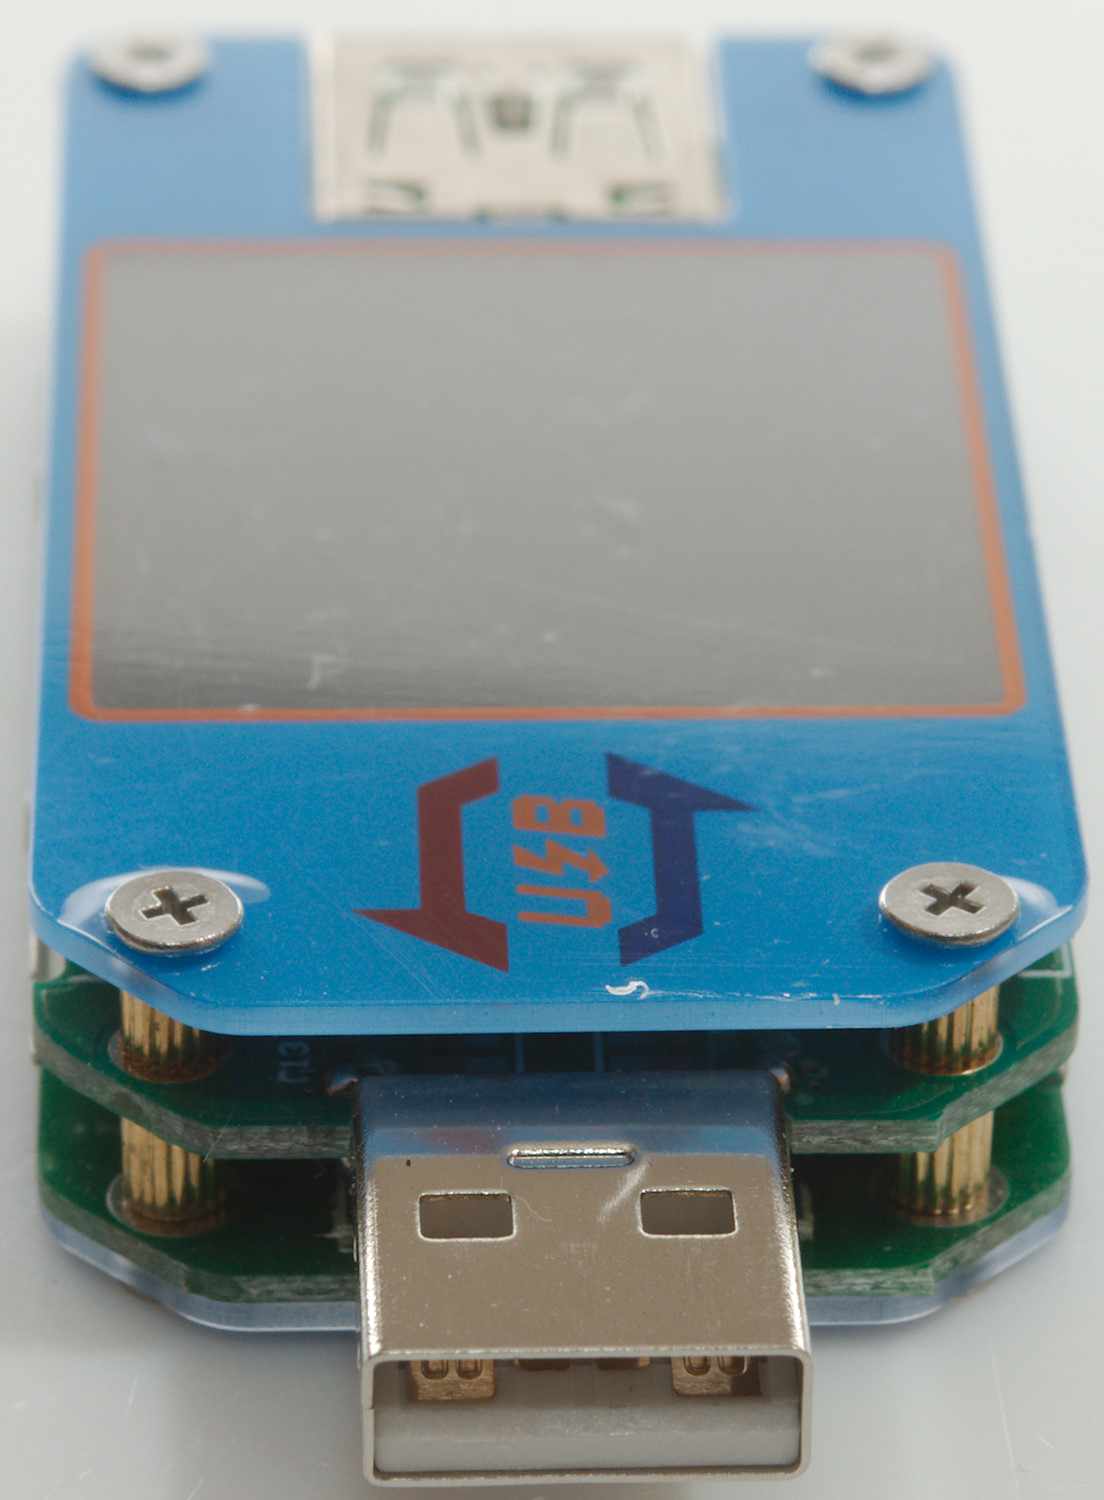
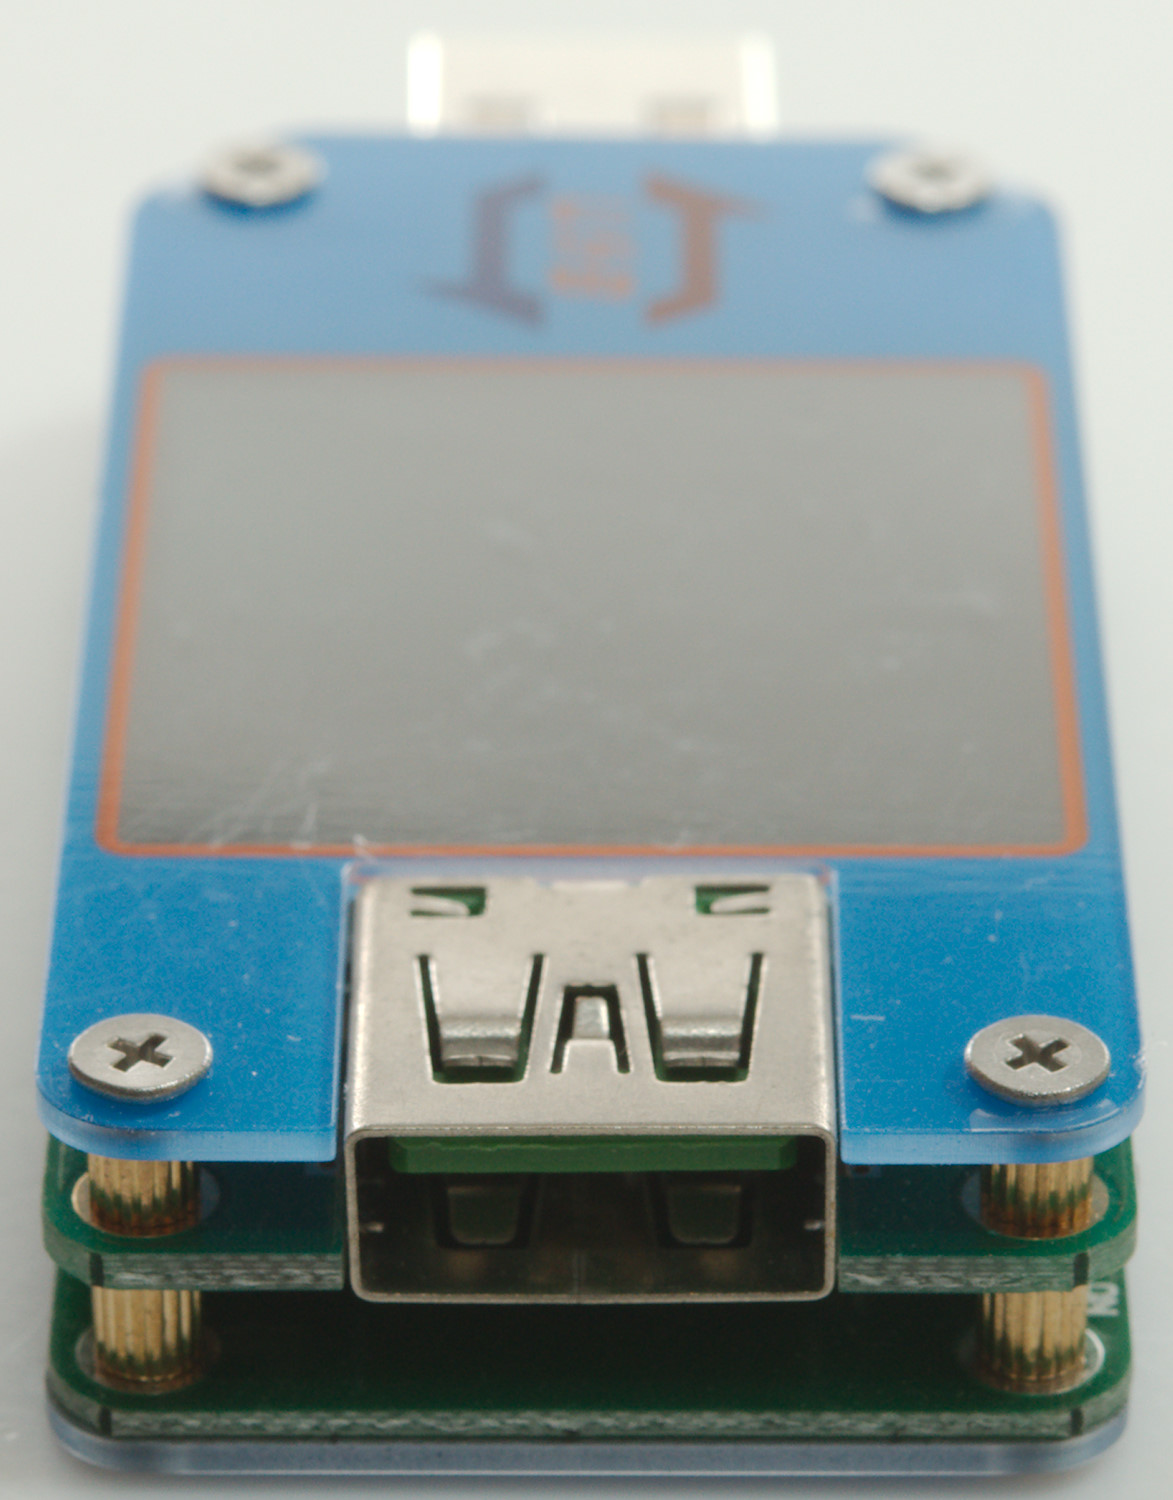
The meter has four buttons one for each corner of the display. There is also two USB-C connectors, one for input and one for output, they are parallel with the usb A connectors.
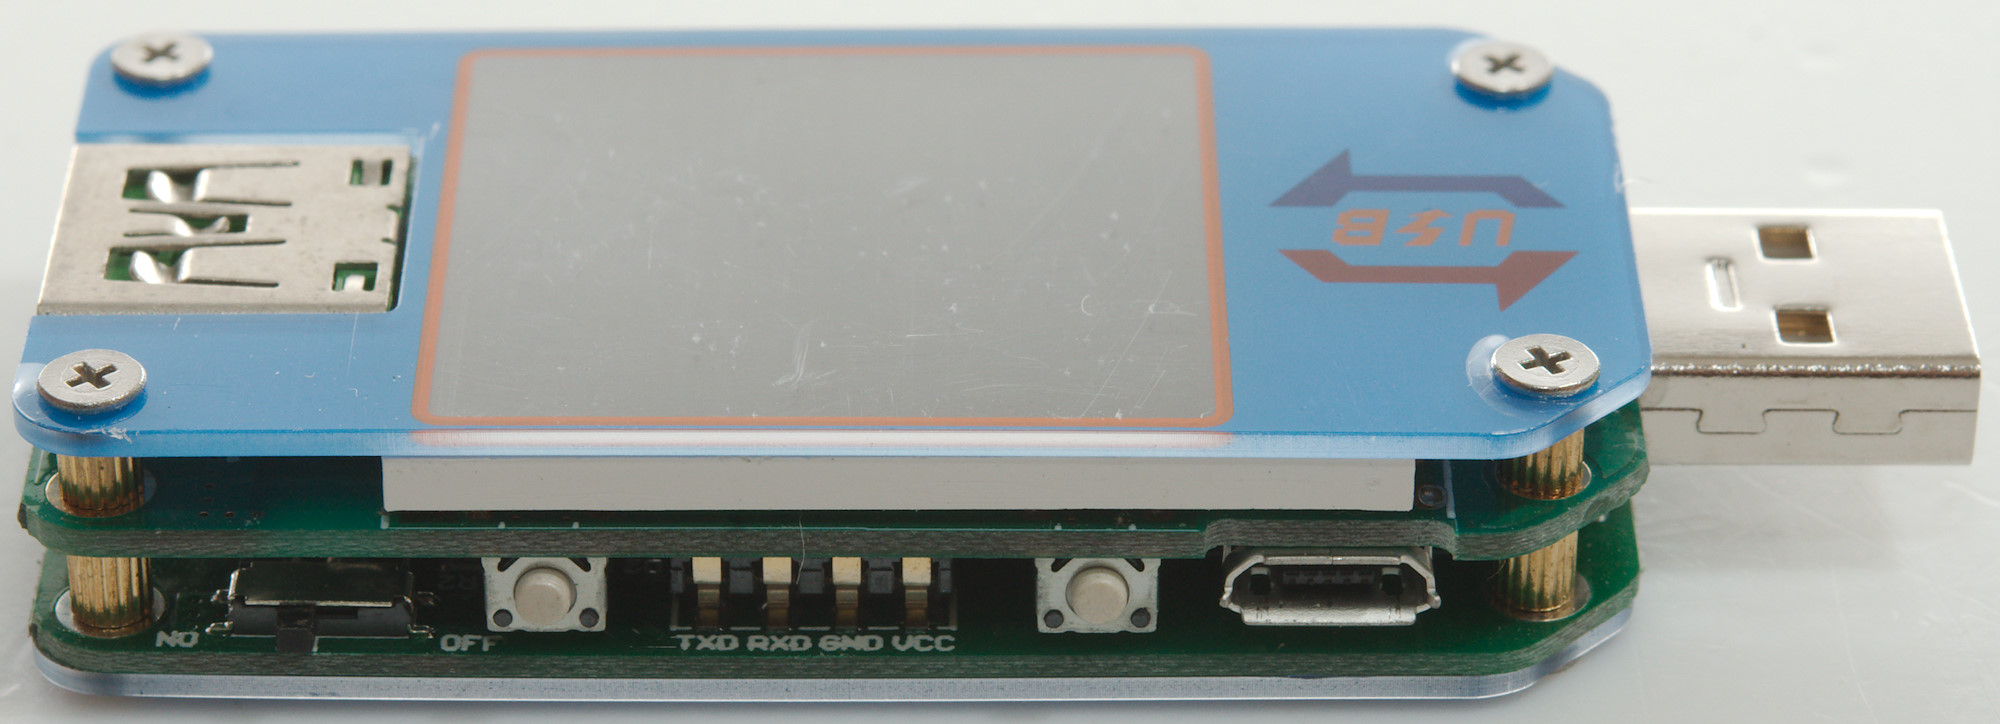
On this side is a micro usb connector in parallel with the main A input connector.
On the Bluetooth model there is a sliding switch to turn Bluetooth on/off.
Display and functions
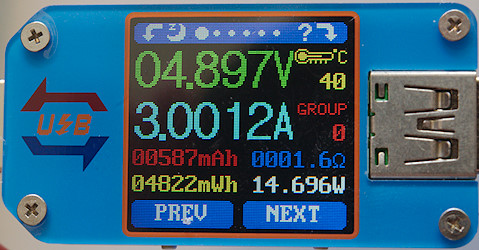
The meter has a couple of screens, here is the voltage, current and summations (mAh, mWh), together with load impedance and load power. There is also a temperature display showing the internal temperature of the processor. The groups (0-9) can be used to save the summations temporary, group 0 will automatic clear when a new recording is started, the other groups must manually be cleared.
To change between screens use NEXT or PREV buttons.
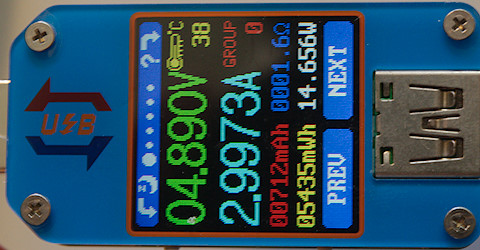
The two top buttons will rotate the display when held down, it can be rotated to all 4 orientations.
The functions of the buttons will rotate with the display.

One of the top buttons (the one with ?) will show a simple help screen when pressed, it will change depending on screen shown.
The other top button (with a z and a moon) will turn the display off/on.
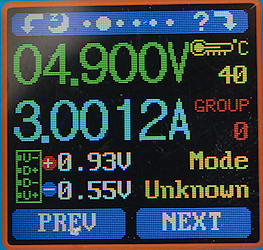
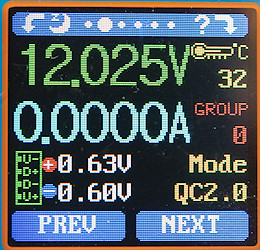
This screen shows voltage and current, in addition to voltage on data lines and fast charge mode (data lines are often used to select fast charge mode).
With a QC charger at 12V both data lines will be at about 0.6V
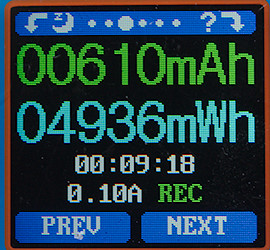
This screen is the capacity (mAh) and energy (mWh) and over how long time they are collected. There is also a setting for when to start recording, here it is at 0.1A, but it can be adjusted.
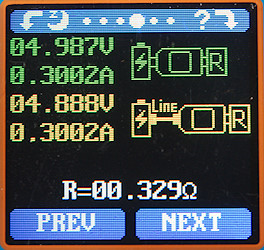
This screen is for measuring the resistance of a cable and connections. It requires a constant current load is connected to the output and then first recording the voltage and current without a cable and next with a cable. With these measurement measured the resistance will be calculated and shown.
If the test current is too high the display will turn off, not the best way to report an error!
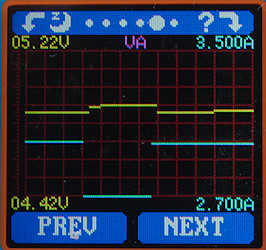
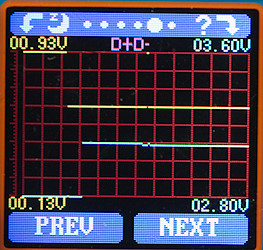
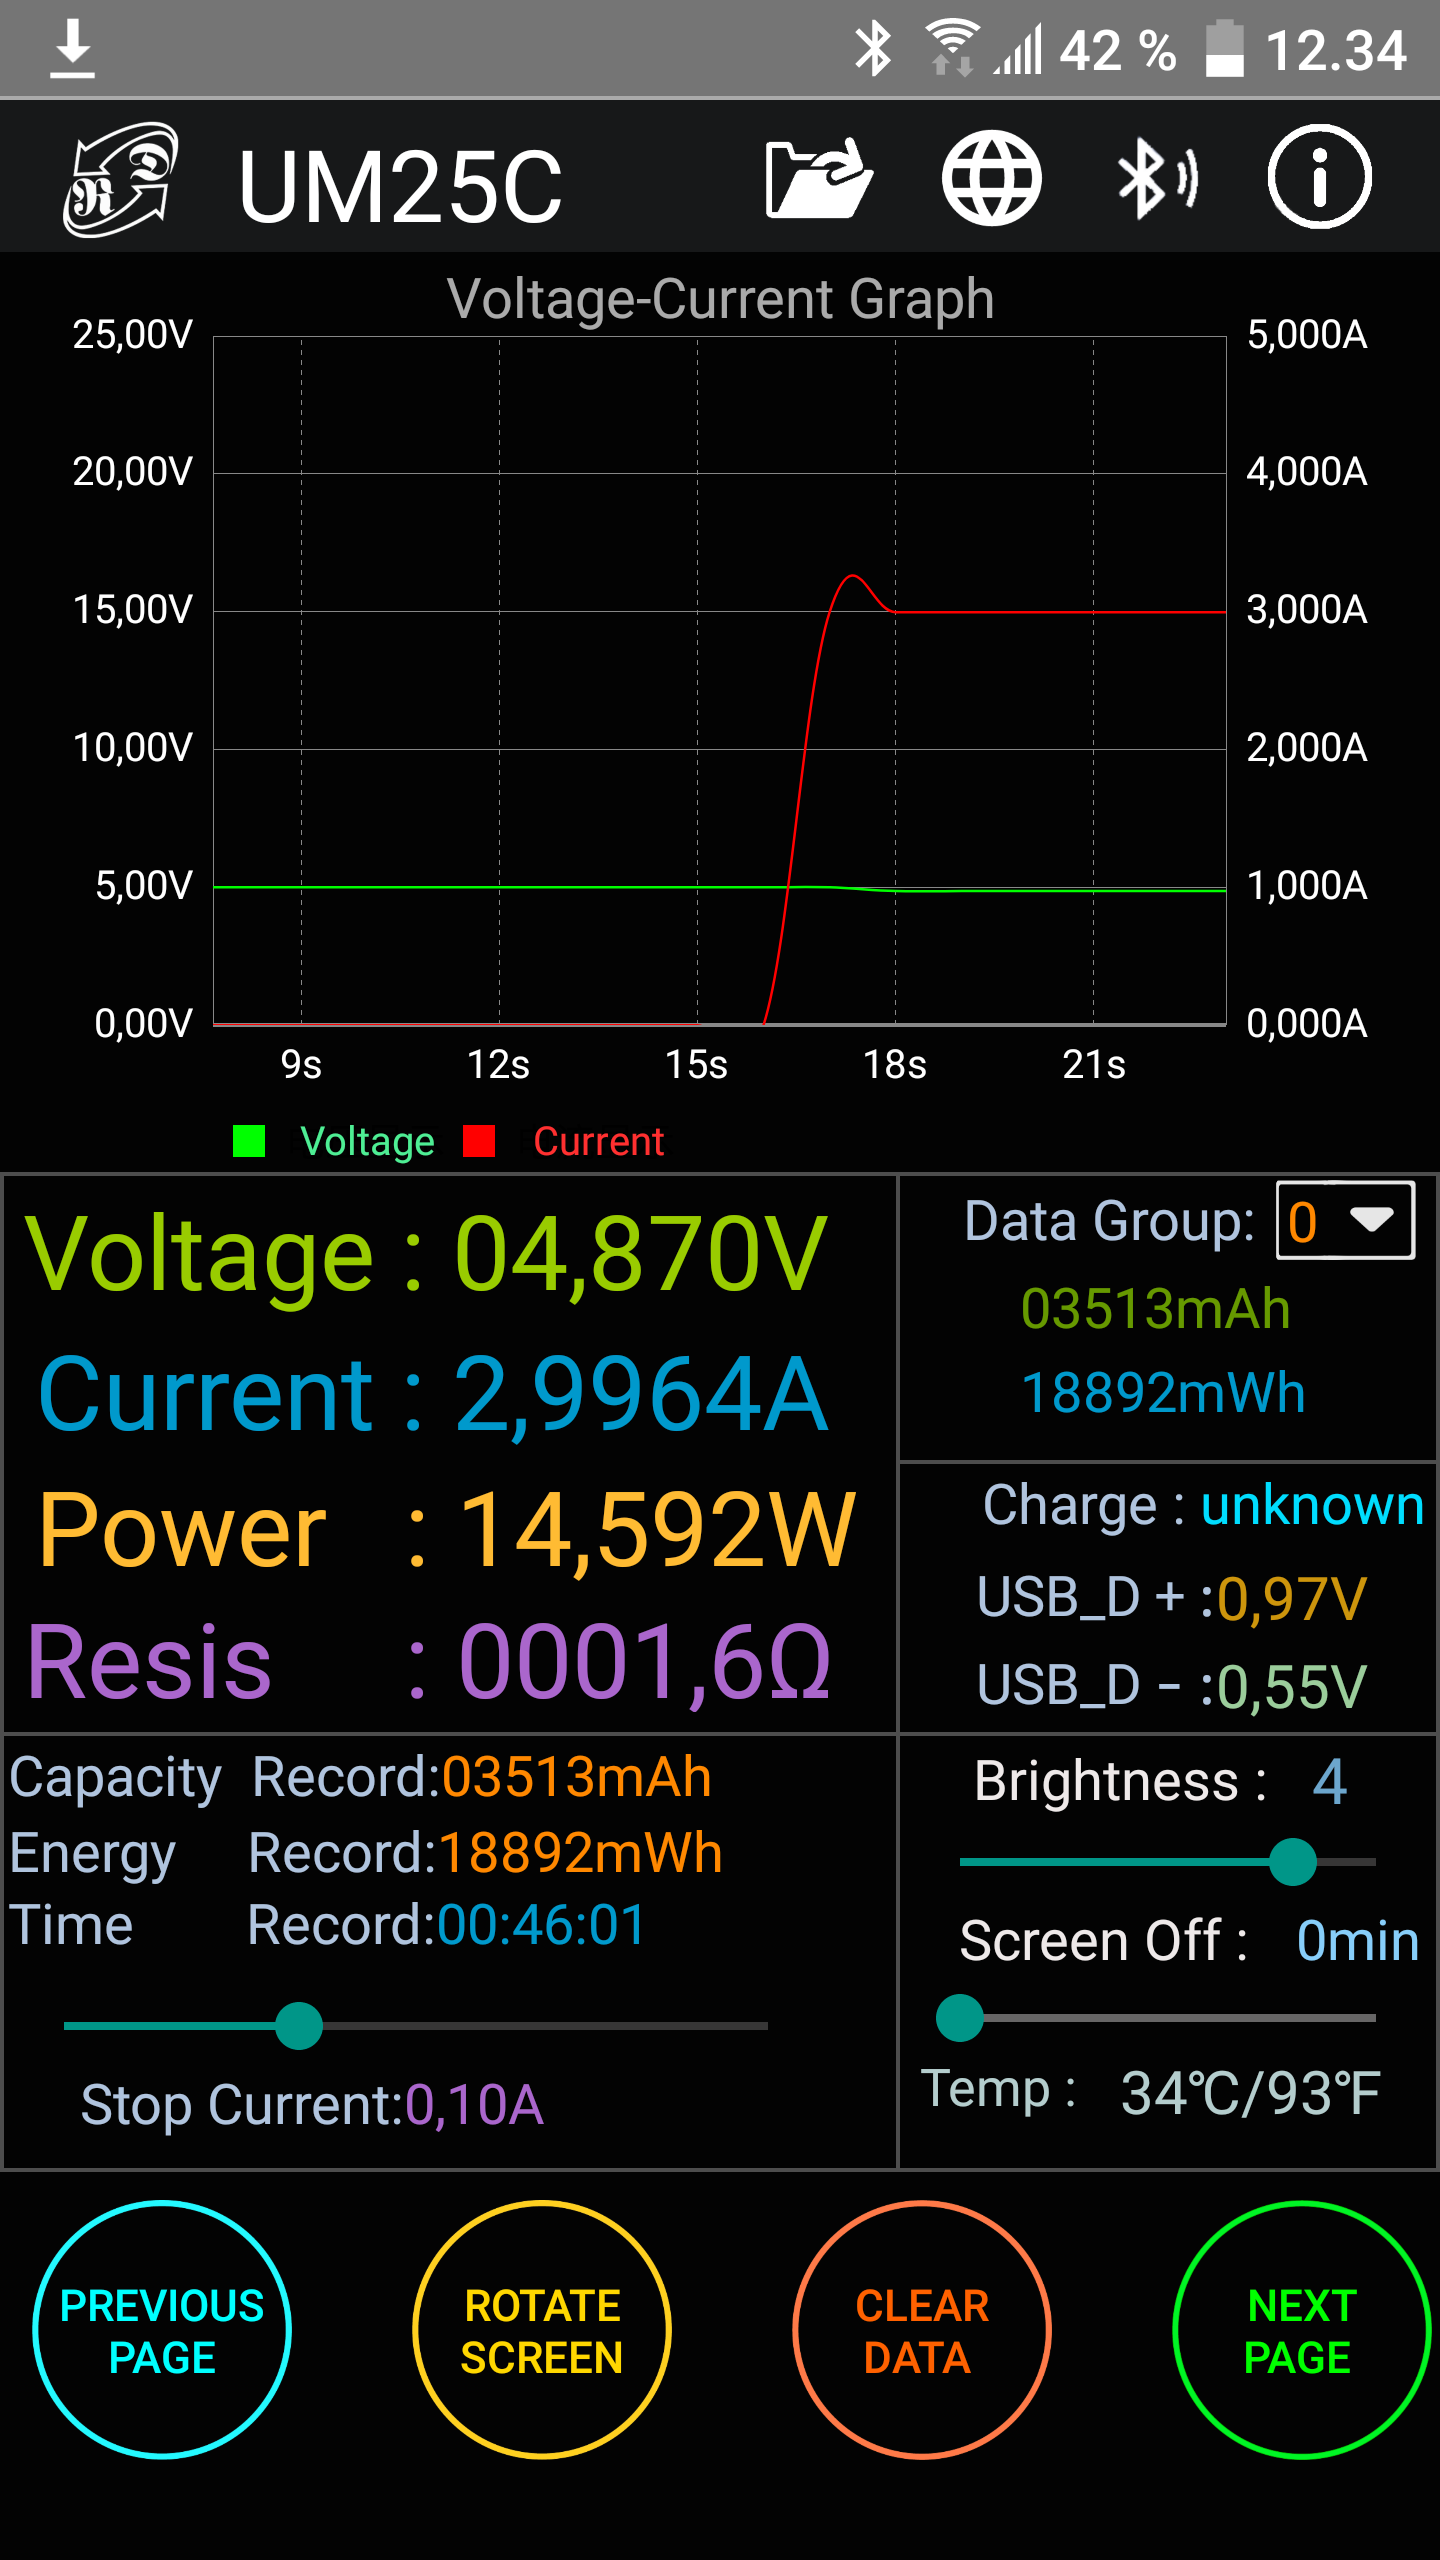
This screen is used for charting the voltage and current or the voltage for the two data pins, the update rate is fixed.
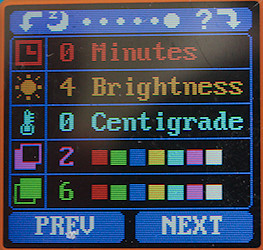
The configuration screen
Measurements
-
USB-C do not contain any trigger and will not turn a USB-C supply on, this must be done by a device connected to USB-C out.
-
The usb meter uses about 32mA current with normal brightness (4), 19 with display off and Bluetooth connected.
-
The usb meter uses about 26mA current with normal brightness (4), 13 with display off and Bluetooth in idle mode.
-
The usb meter uses about 23mA current with normal brightness (4), 10 with display off and Bluetooth off.
-
The internal resistance is about 0.065ohm (This includes both connectors).
-
Usb meter will remember measured values when power is removed.
-
USB meter uses software V2.0
-
Fast charge protocols supported: QC2, QC3, Apple, Samsung, DCP
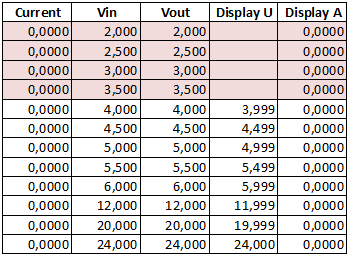
The voltage display is very precise with no current flowing.
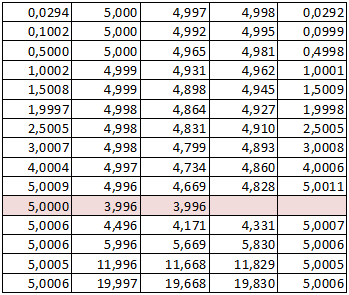
The current display is also very precise and will not change with voltage.
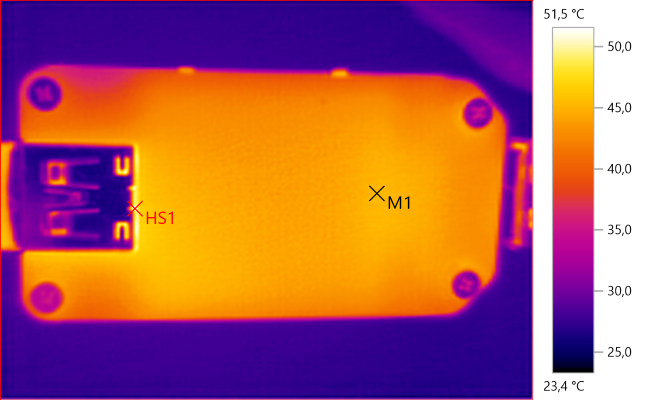
M1: 45.2°C, HS1: 51.5°C
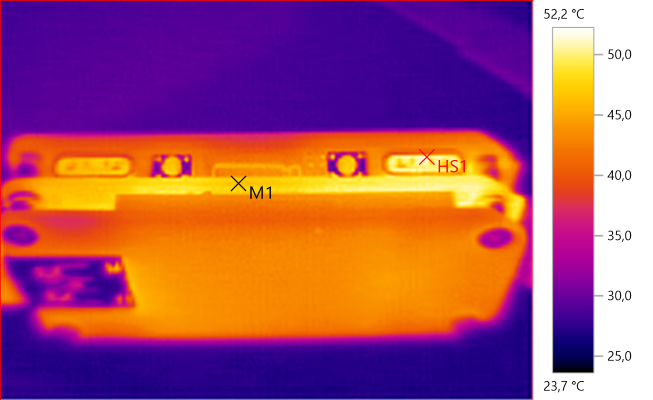
M1: 46.8°C, HS1: 52.2°C
The above IR photo was taken after 30minutes with 5A, during that time the readouts did not change..
Android application
-
Application will show an ad for another RD product when started.
-
Application is not on Google.
-
RD uses a file download service that opens ads in minimized windows.
The Bluetooth interface makes it possible to connect to a Android phone or a PC with Bluetooth interface.


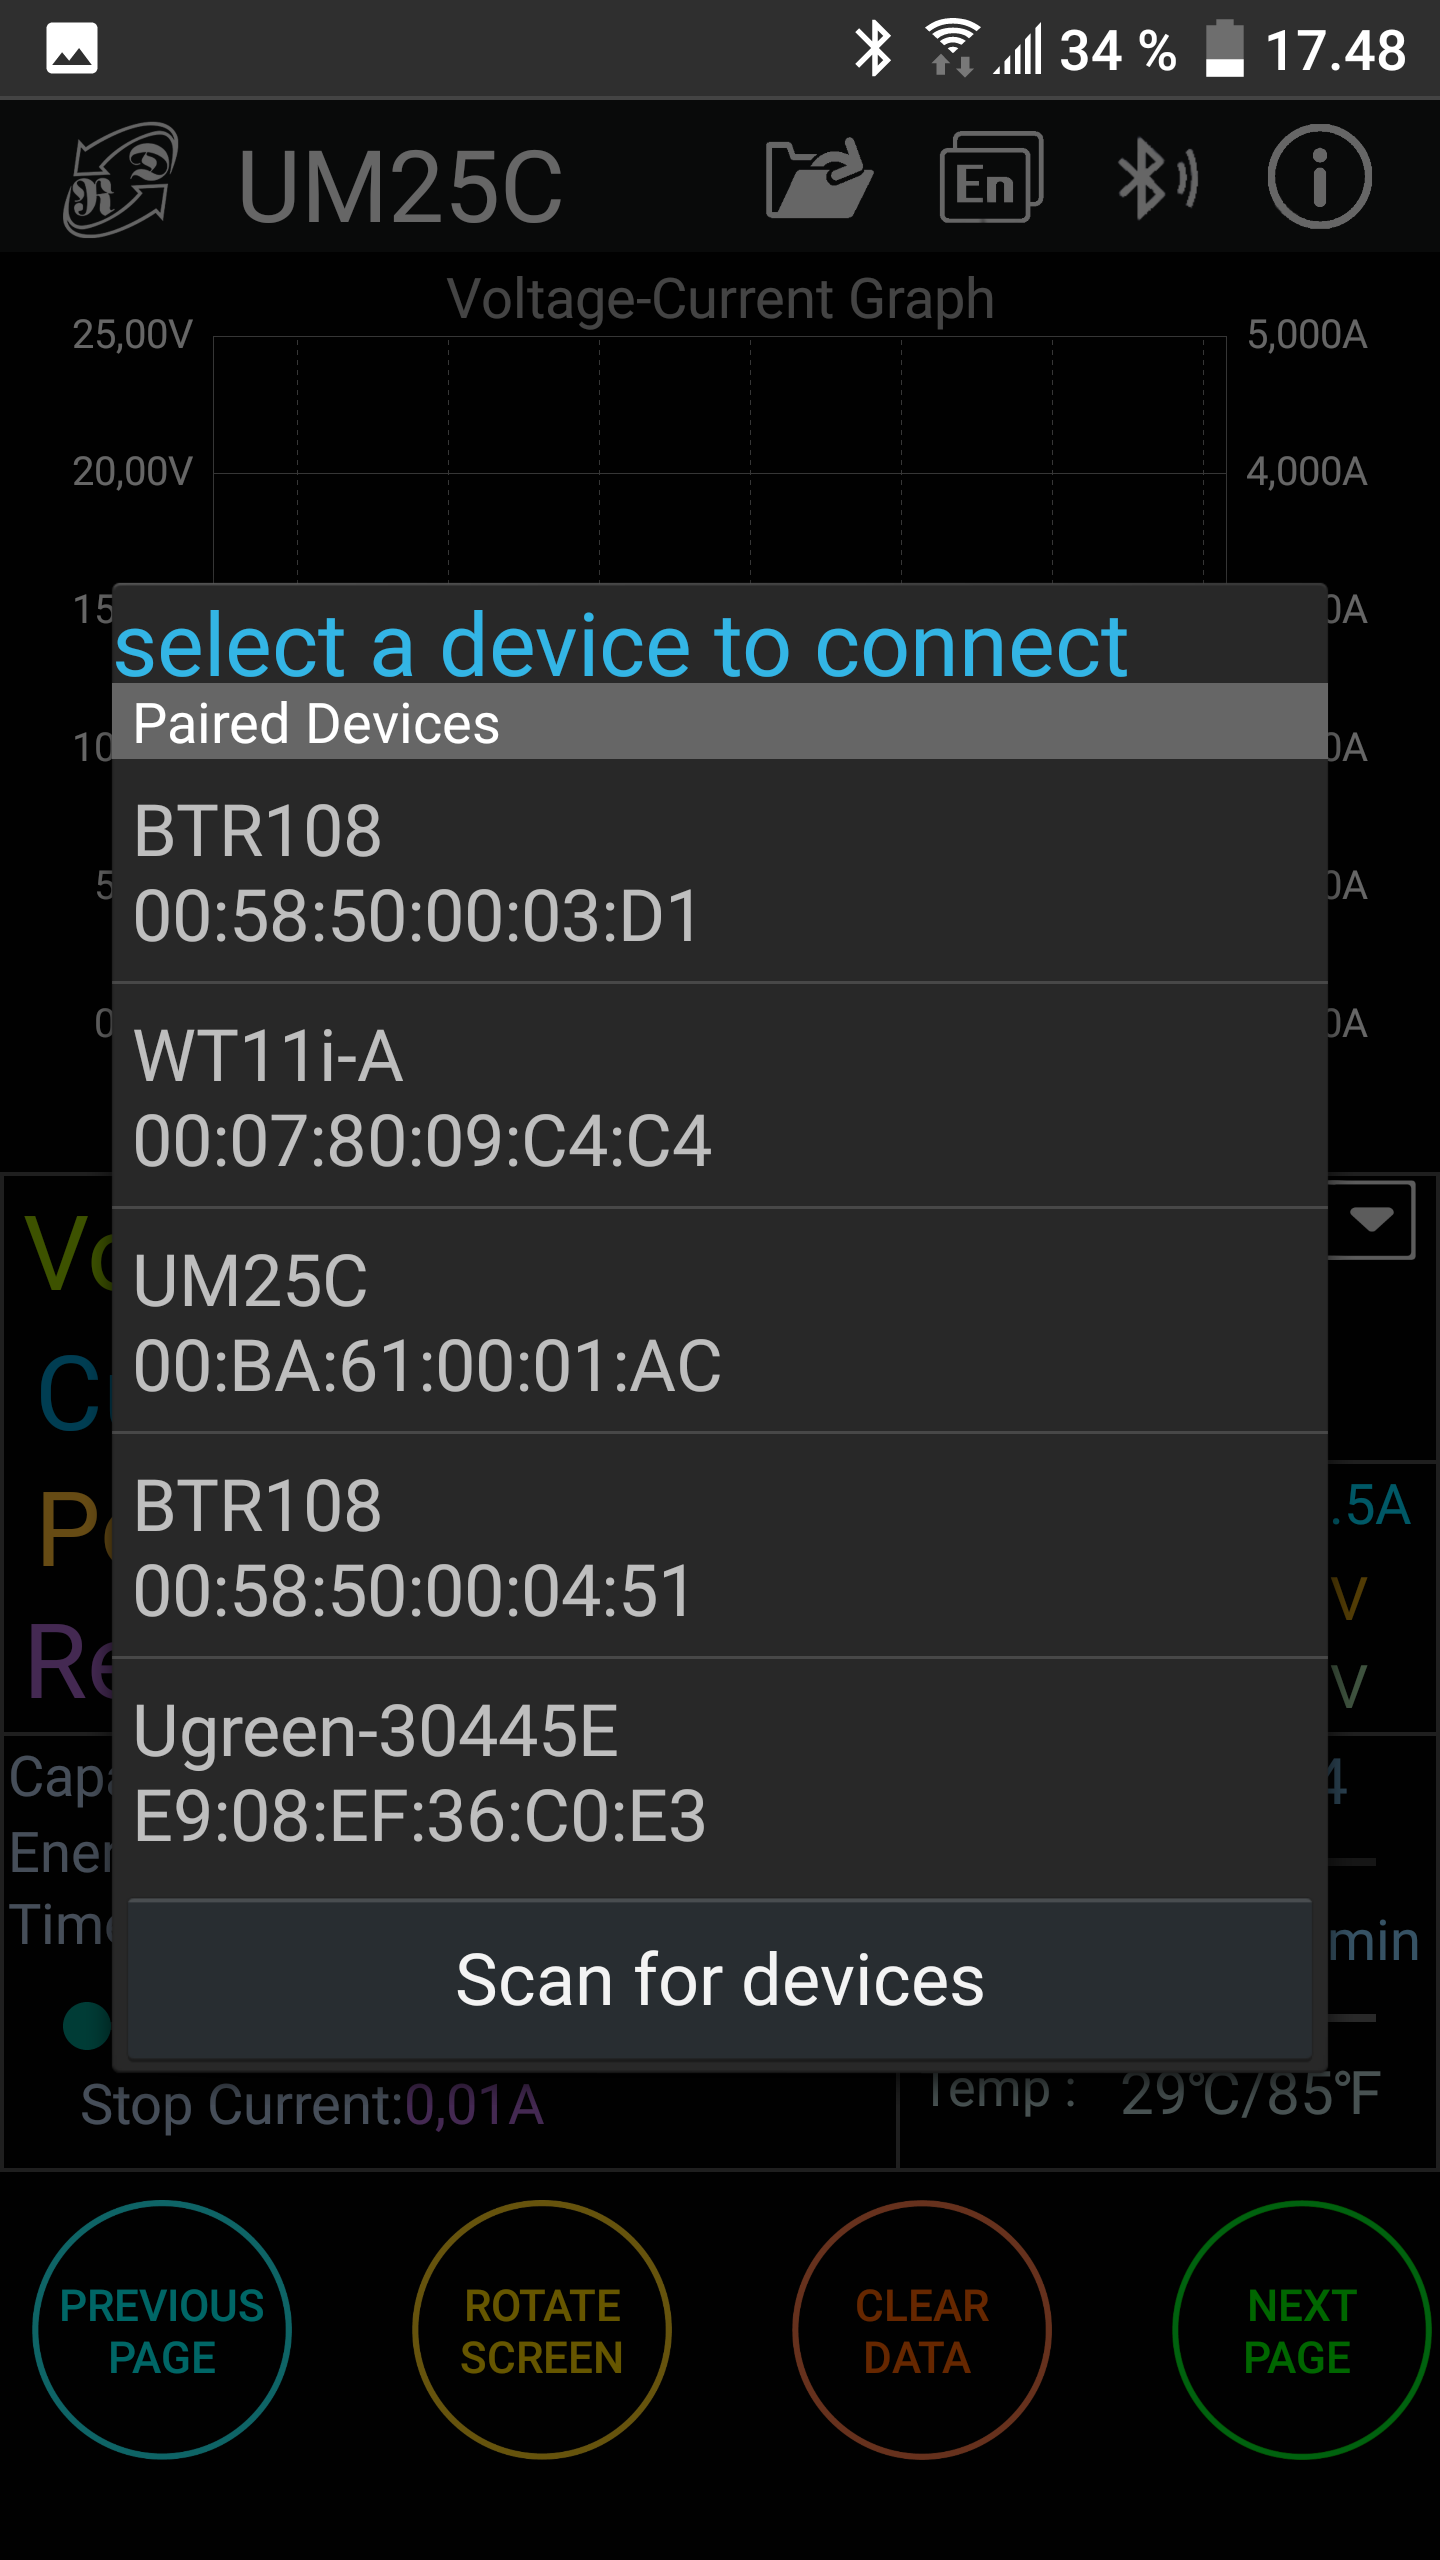
The interface basically shows all screens (Except cable test) at once and makes it possible to send the four button presses to the usb meter and change configuration on the meter.
The chart can be zoomed in/out and scrolled sideways.
With the globe it is possible to select a different languages (The list is long than shown above because it can scroll).
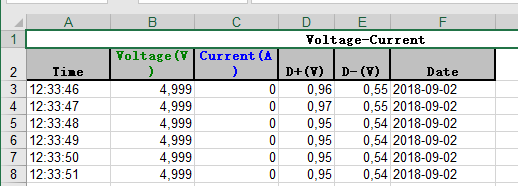
It is possible to save the data to the memory in the phone, the format is an Excel datafile, but always with the same name, i.e. it is not possible to save multiple data sets.
PC application
-
Application is a 250MB download
-
Application is very slow to install.
-
I could not export to Excel, maybe because Excel was not installed on that computer.
-
The screen is a fixed size (964 x 654 pixels), there is no resize options.
-
RD uses a file download service that opens ads in minimized windows.
The Bluetooth interface makes it possible to connect to a Android phone or a PC with Bluetooth interface.

Installation is both the application and some libraries from National Instruments and it is, of course, the NI part that takes up all the space.
A supplied font file is not automatic installed. This is the reason for the slightly large letters in all the screen shots.
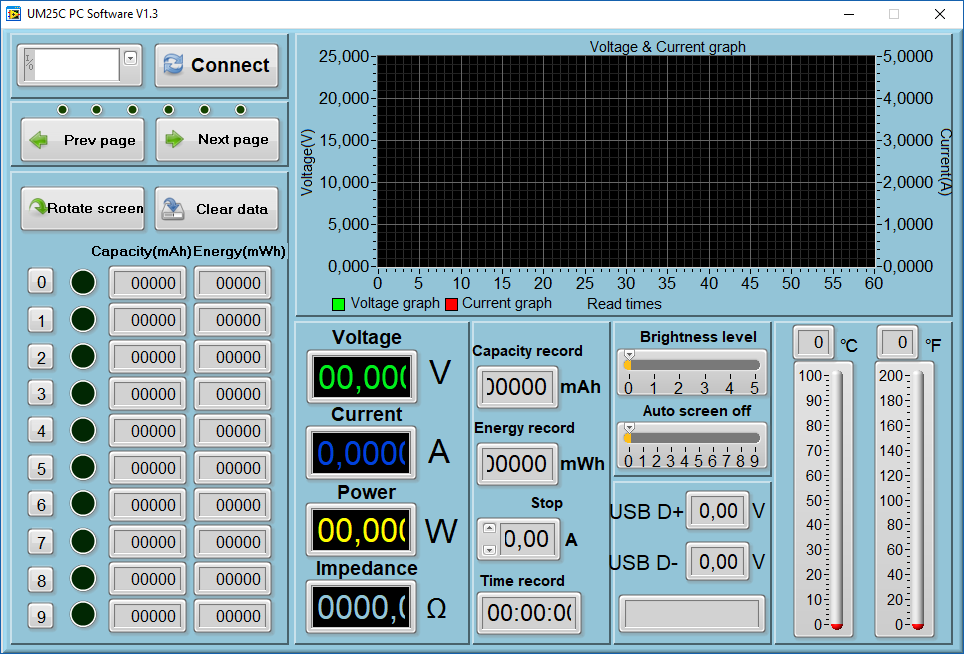
When started the application shows 0 values in all fields. To start it select the virtual com port that is assigned to the Bluetooth device and press connect.

The display is one page with all information on it. It is possible to send commands and change configuration on the meter.
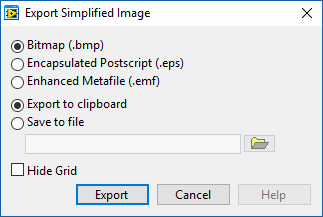
A right click on the chart makes it possible to export the data, either as image or as data.
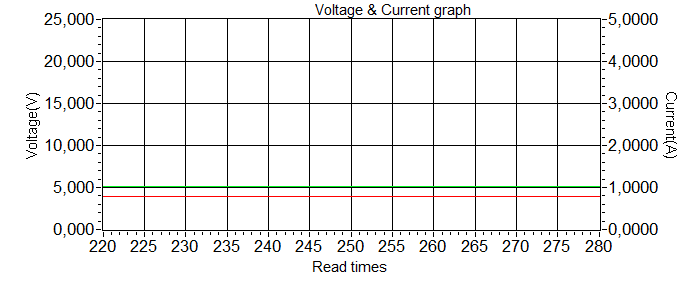
Here is the BMP version of the image (I have converted to PNG).

The data export to clipboard with TAB delimiters, this is not nearly as nice as the format used by the Android application.
Tear down

It is very easy to open, there is four screws on each side.
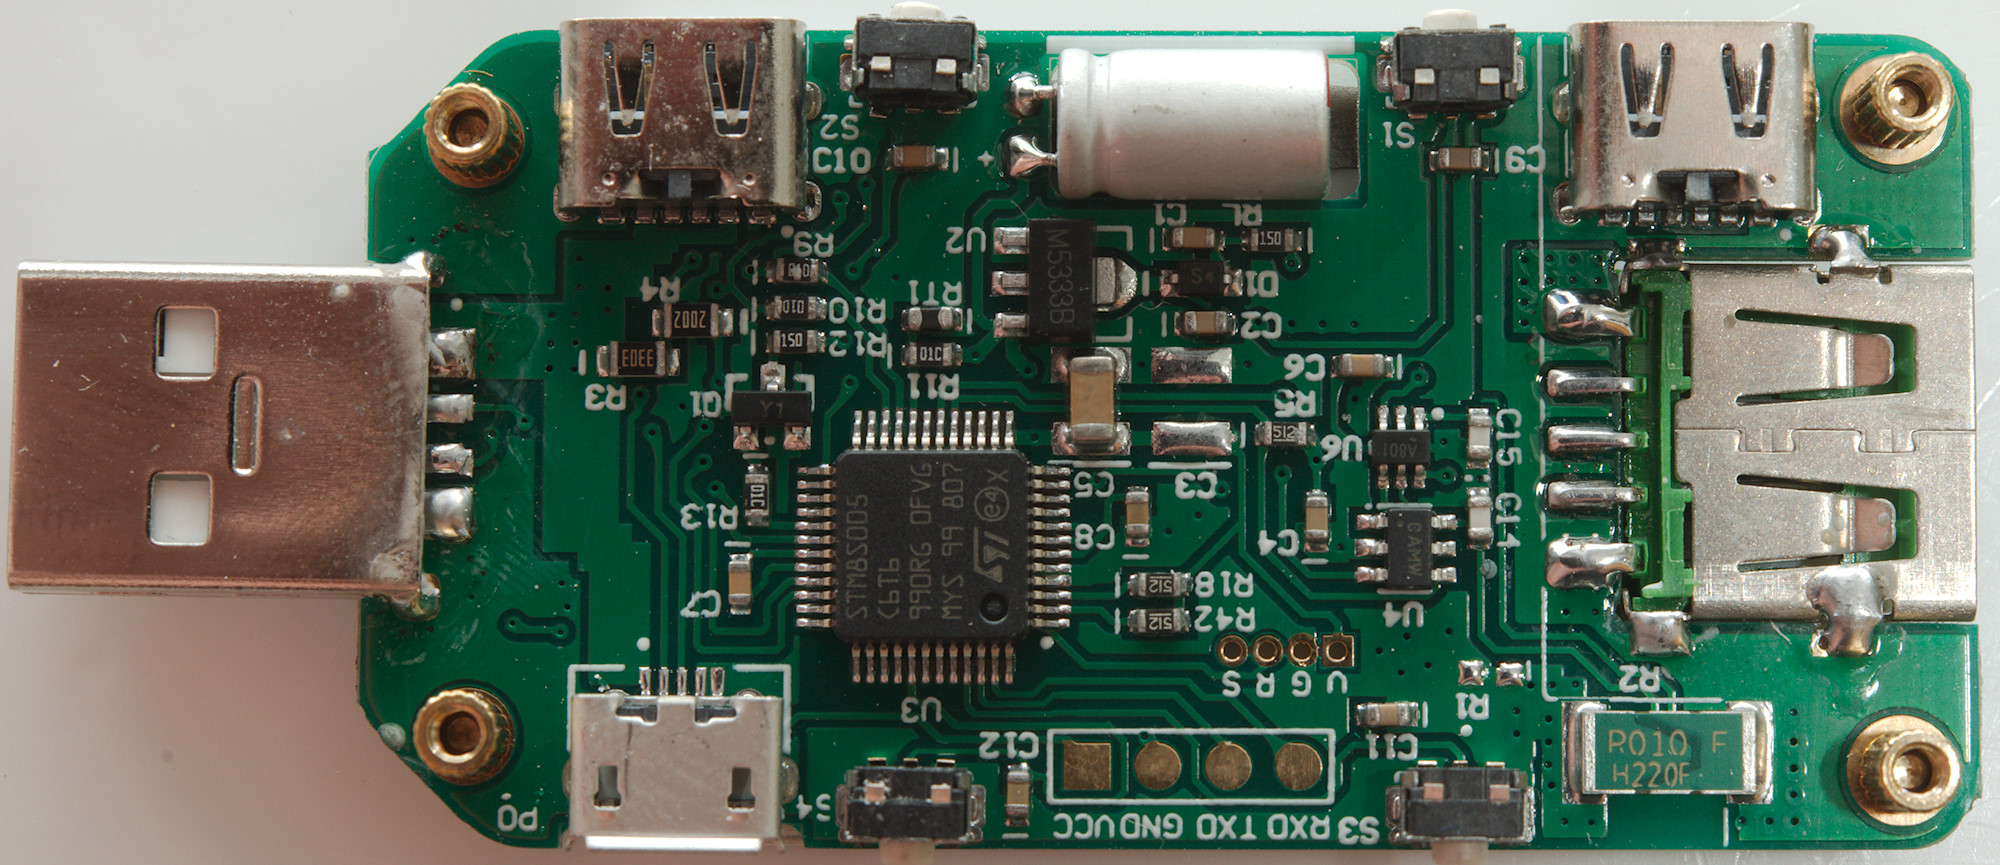
The processor (U3: STM8S005C6) only has a 10 bit ADC, this means there must be an external ADC (U4: marked CAMW) and it looks like there is a chip (U6: marked A801) to multiplex between voltage and current from the shunt (R2: 0.01ohm). The circuit also has a 3.3V regulator (U2: M5333B).
I wonder why the big capacitor, it might be because the processor only saves values when the power goes low (The EEPROM can “only” handle 100000 writes).
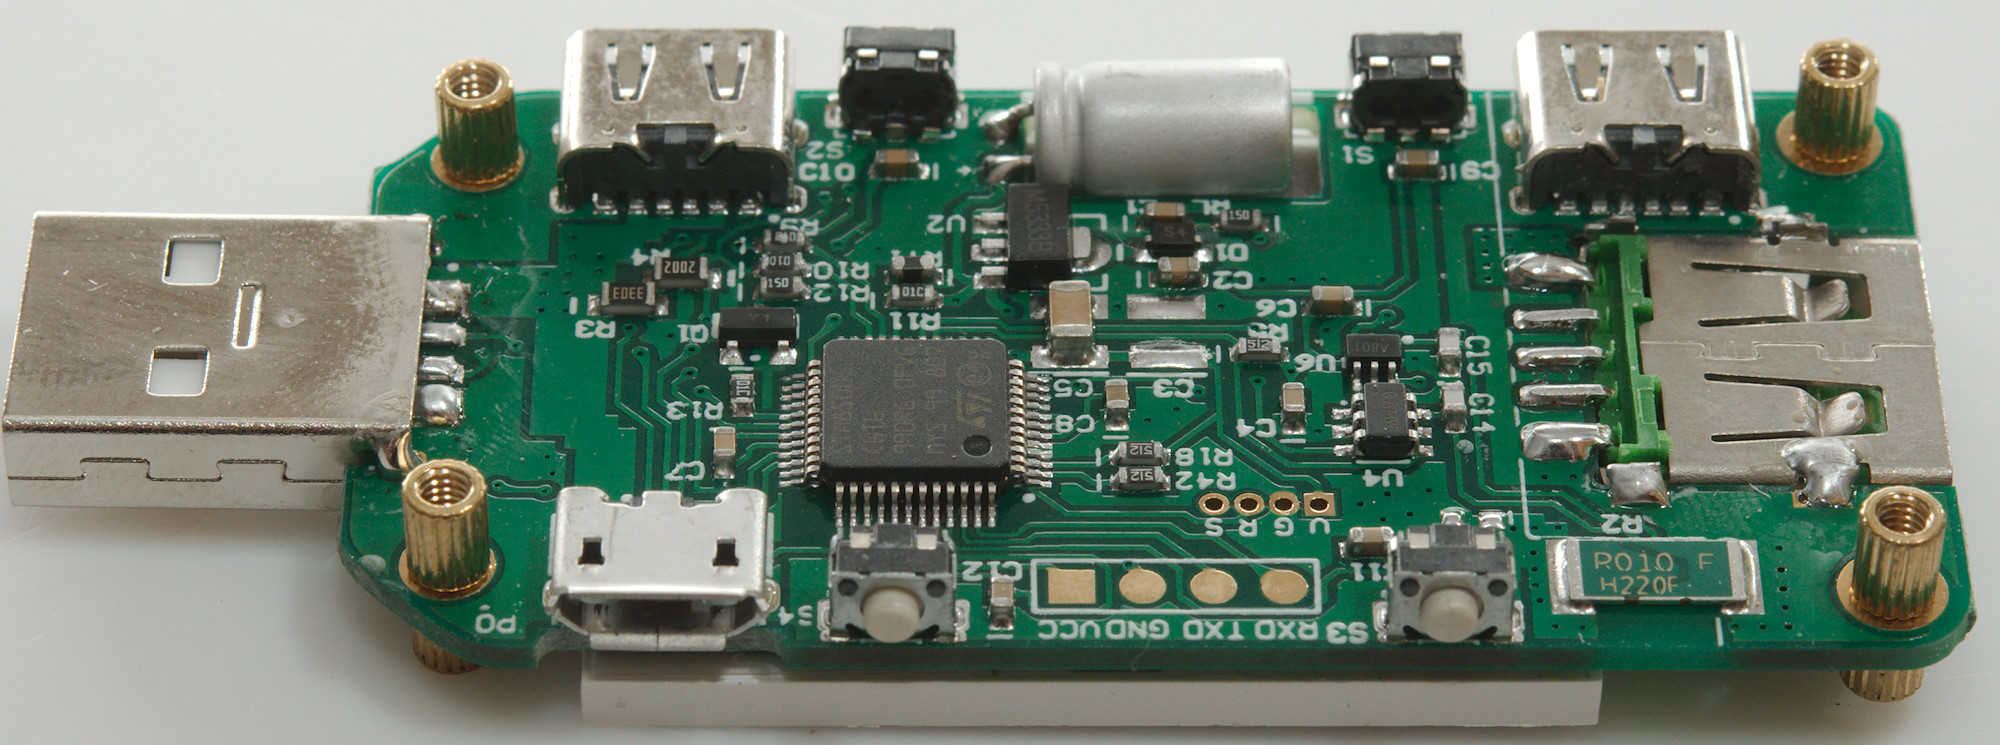


On the display side there is space for another chip, but it is obvious not used.


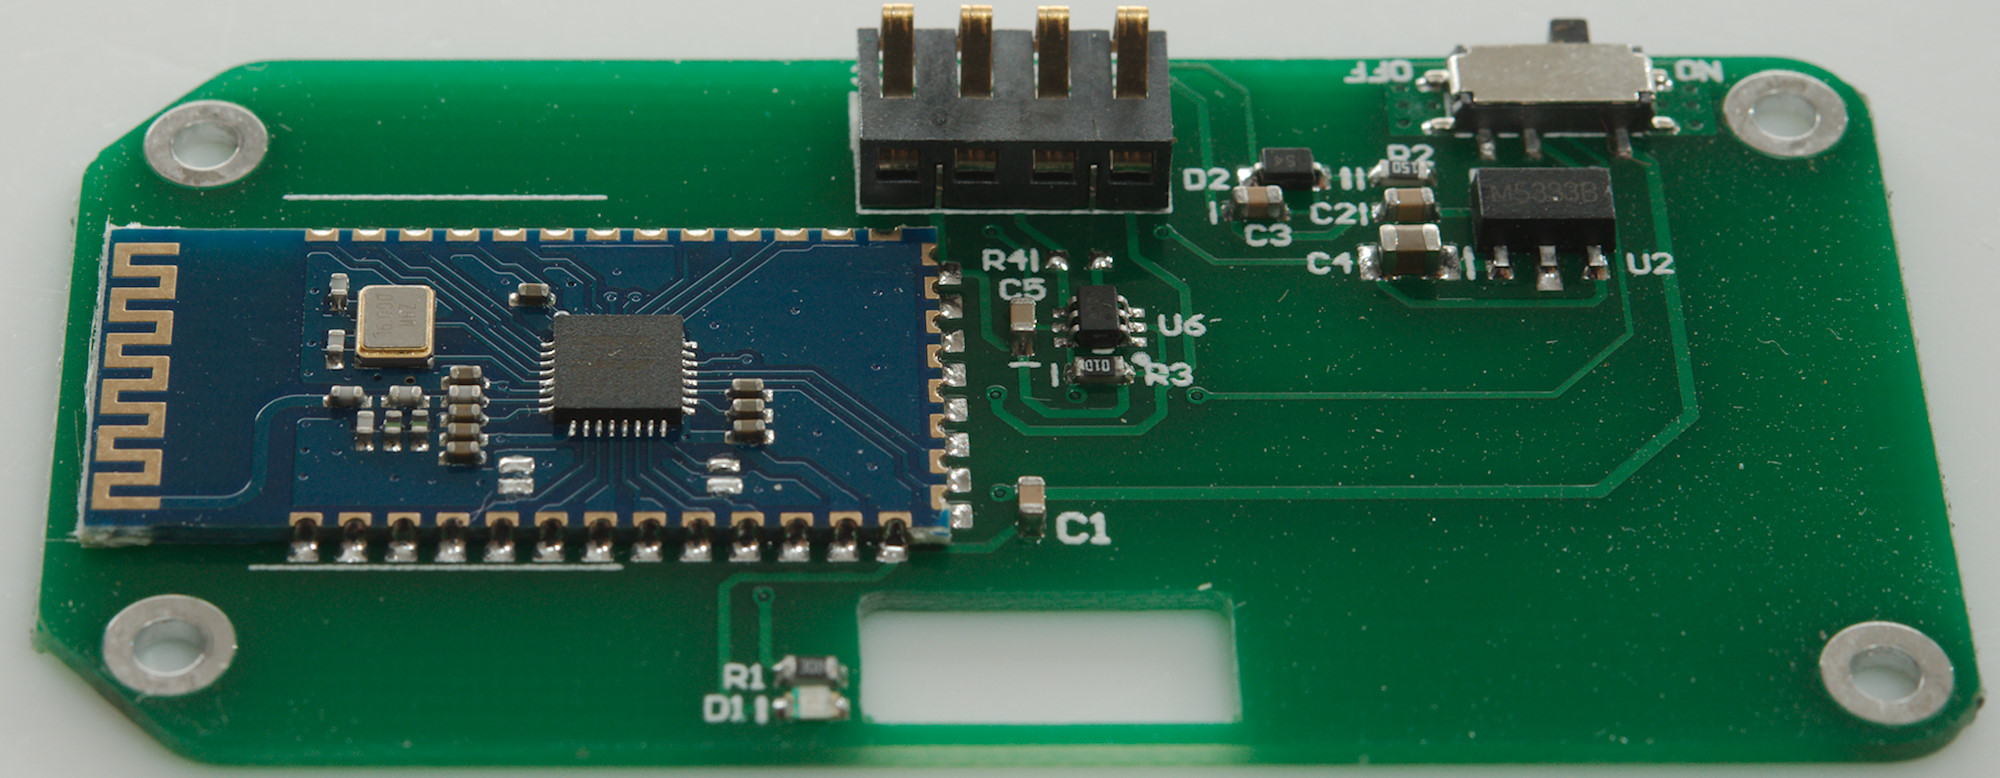
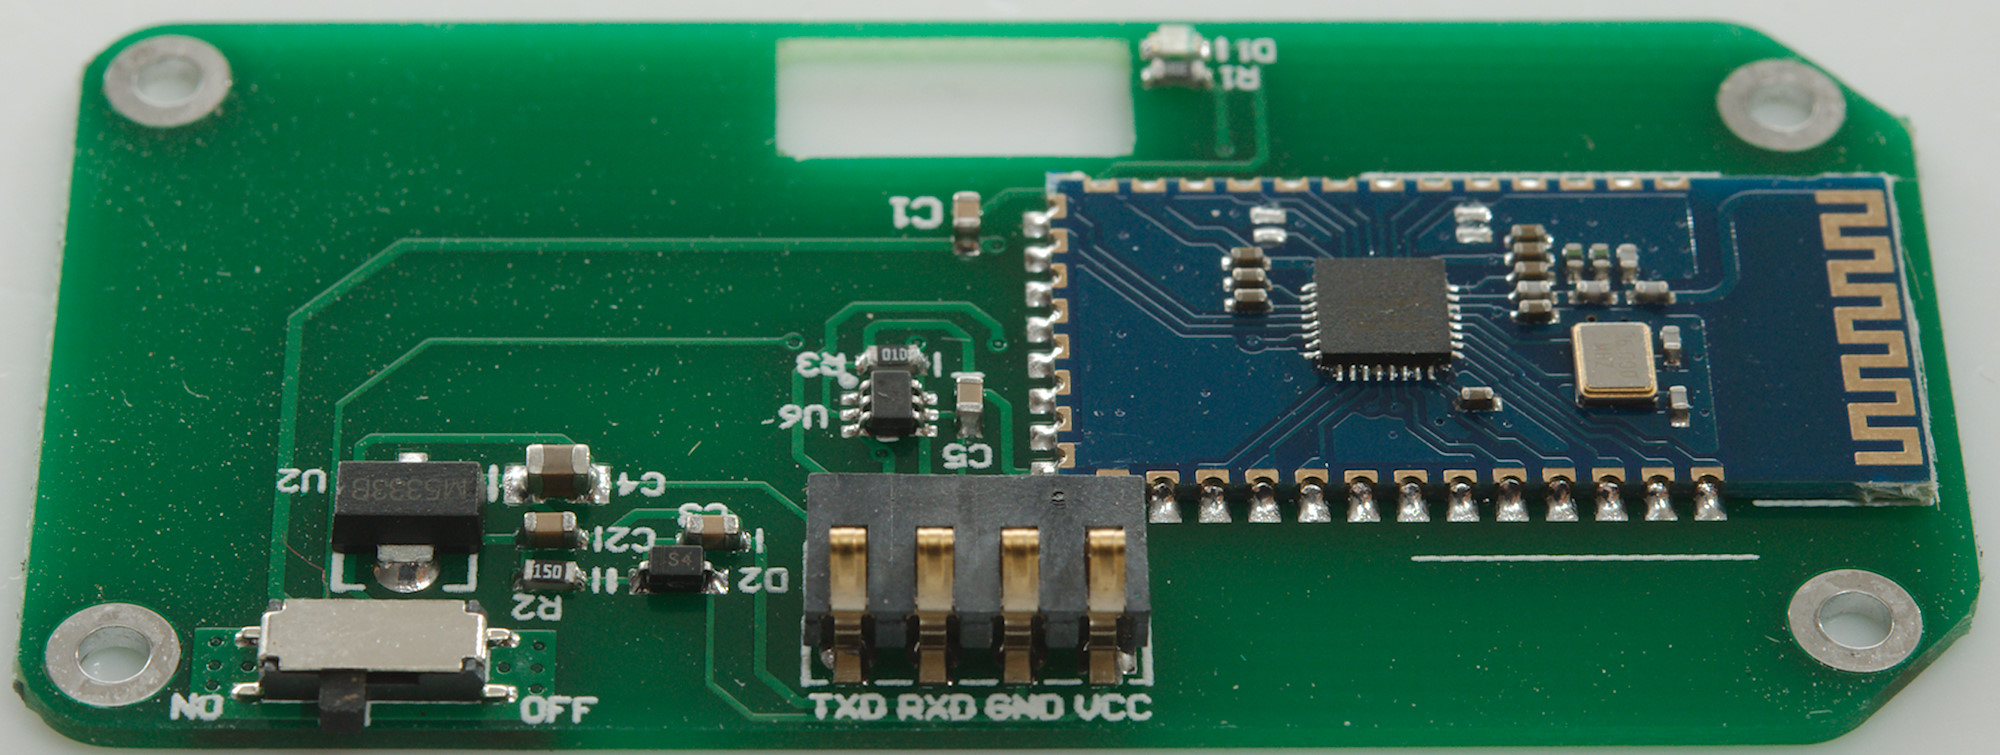
The bottom is the Bluetooth module, including the switch. It has its own voltage regulator (U2: M5333B).
There is also a mux (U6: marked A801) here, it is connected from the data in on the Bluetooth module to the RXD pin.
There is no parts mounted below the display.
Conclusion
This is a very precise usb meter with both capacity and energy summation and can show the most common fast charge protocols. The cable resistance checking is a nice feature and the screen illustrates how to do it very nicely, but turning the screen off to show error is a bad idea.
I am not very impressed with the PC application
Notes
For these USB meters I used precise equipment (Keithley: DMM7510, 2280S, Keysight: 34470A).
The tester was supplied by RD for review.
How do I make the test