Custom quad XHP70.2, 200W. Driving lights.

First post in this forum…

I have been playing with XHP35, 50 and 70 for long distance driving lights and made some prototypes. I have settled with Ledil Crystal and Flare Maxi lenses and XHP series LEDs, but I am open to suggestions that can improve the designs.
The main issue is how to control light spill, while keeping a diffused spot (sharp spot is not good for driving).

Ultimate goal: illuminate the road 500m ahead and 50 meters to the sides for driving safely at highway speed in remote roads (bears, elk, deer and all sorts of smaller animals going around).

Build 1: Wide angle and spot combination

  • LED XHP50.2, dedomed
  • 4A driver
  • Waterproof fans
  • Ledil Crystal RS for spots
  • Ledil Flare Maxi for wide angle. Assembled 35 degrees pointing outwards.
  • Controlled by the car’s high beam relay

This gives a great combination to illuminate far ahead and sides. You can see yards to each side of the road, which is great for finding deer before they are in front of your car.

Disadvantage: too much light illuminating the road close to the car, which “blinds” the driver. Possible solution is using XHP35 to have less spill.

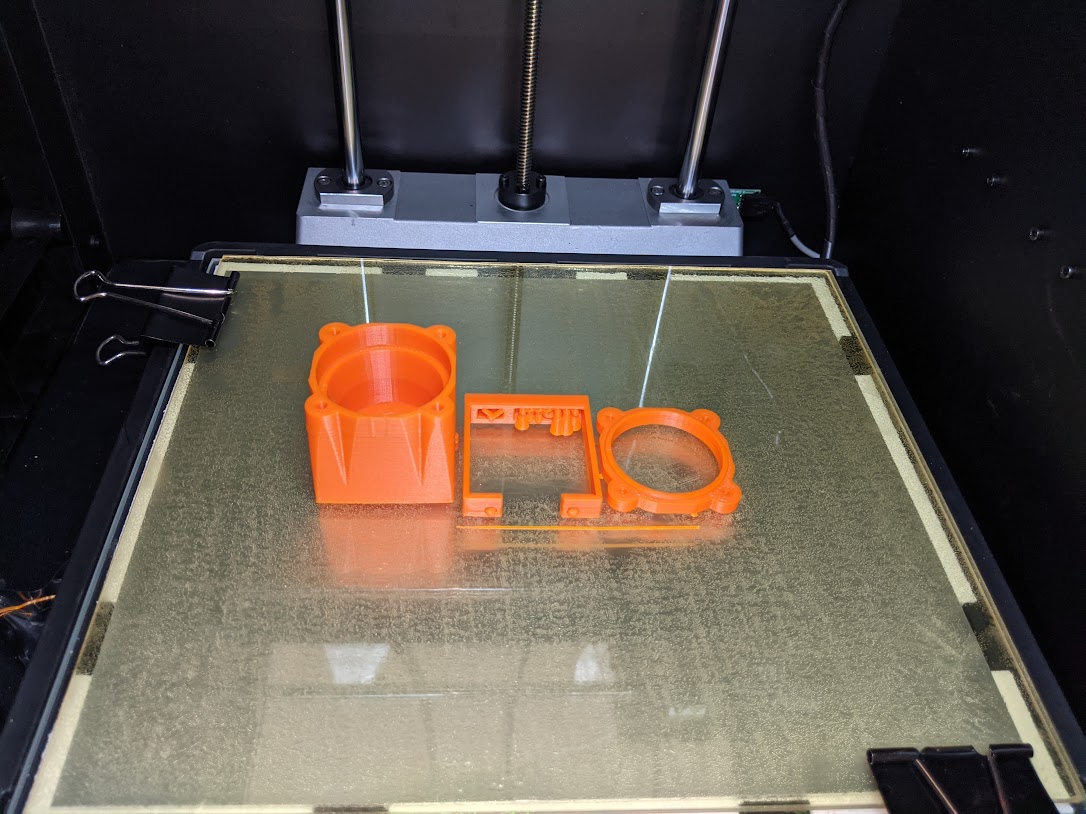
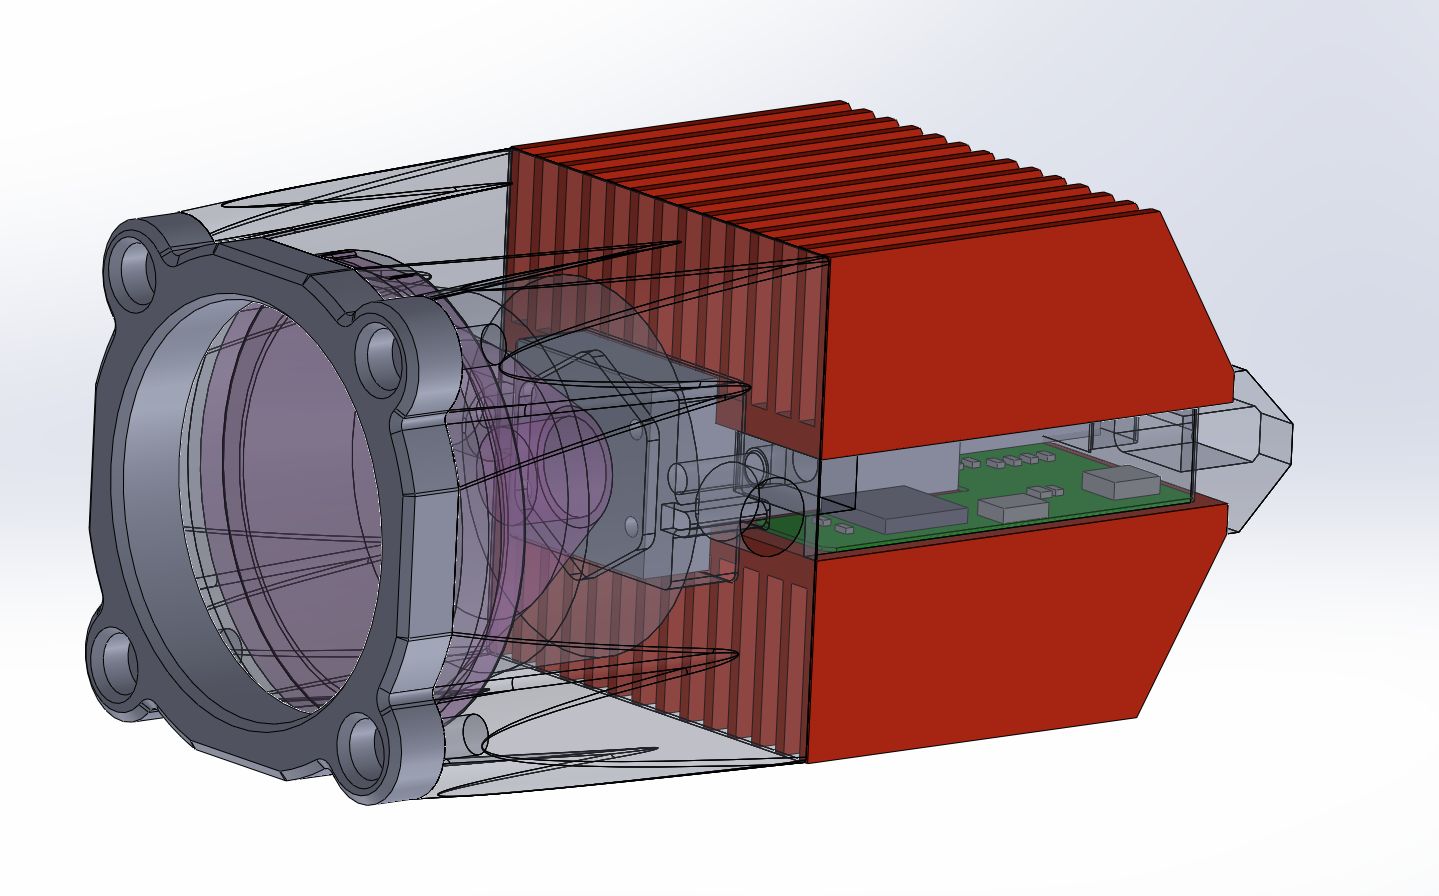
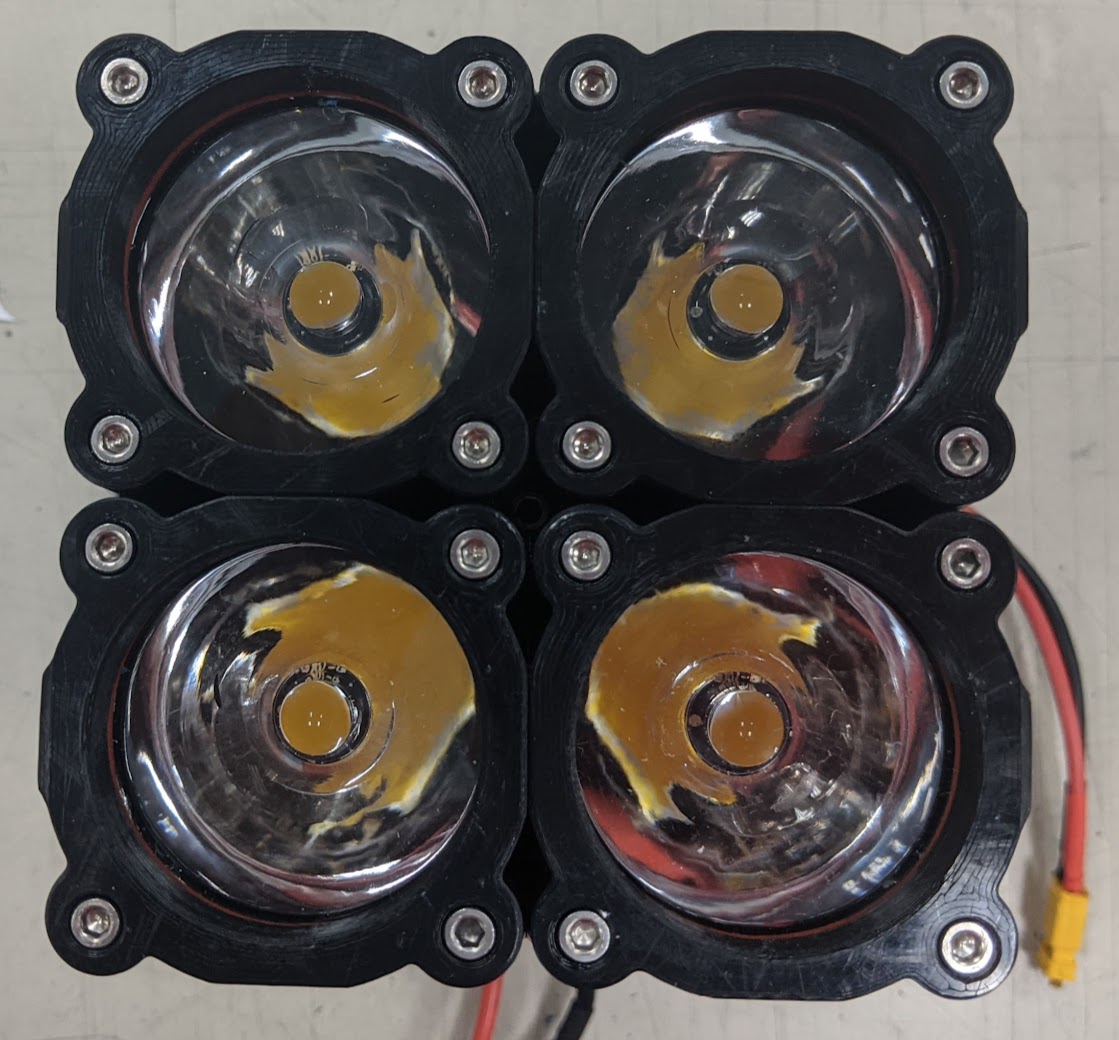
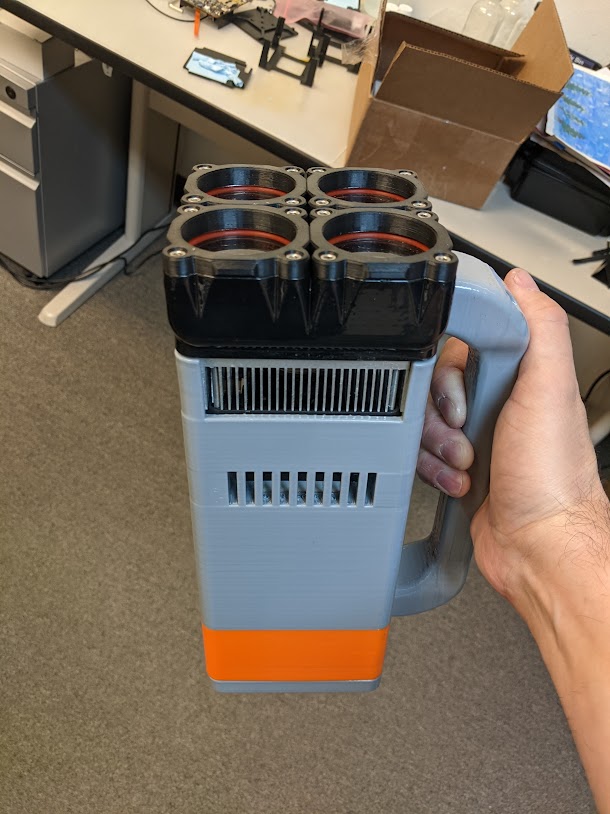
Build 2: The super bright flashlight

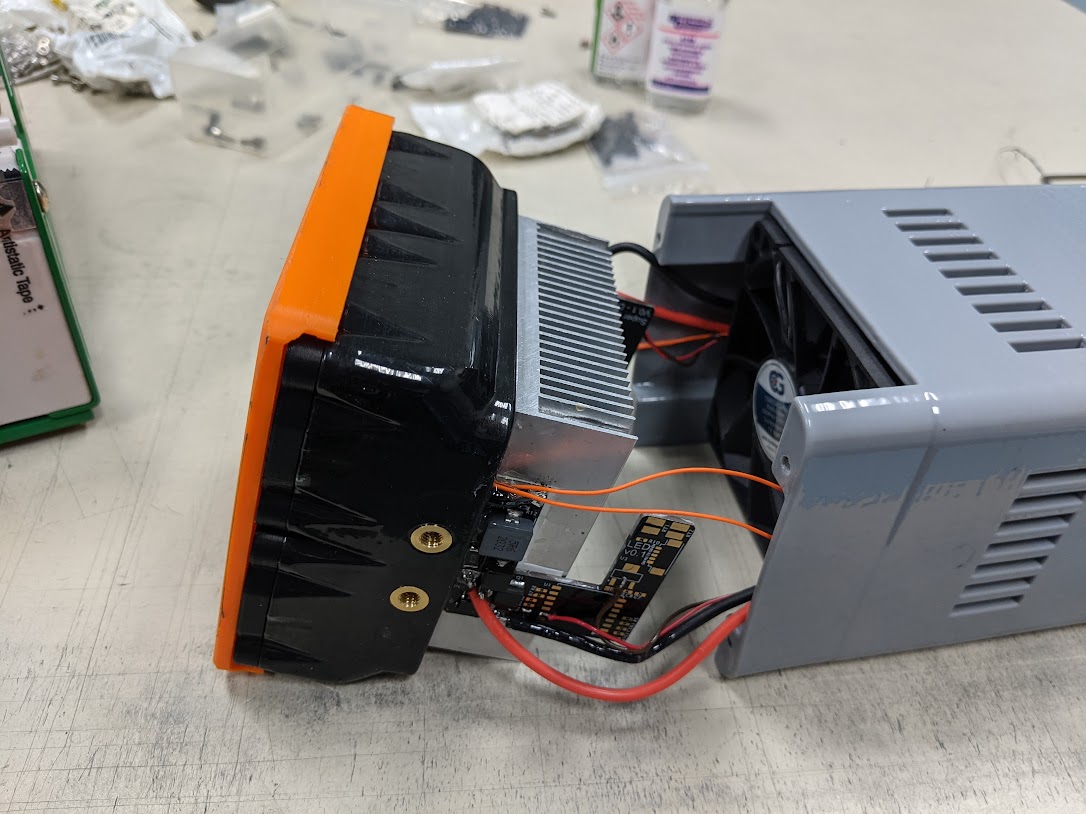
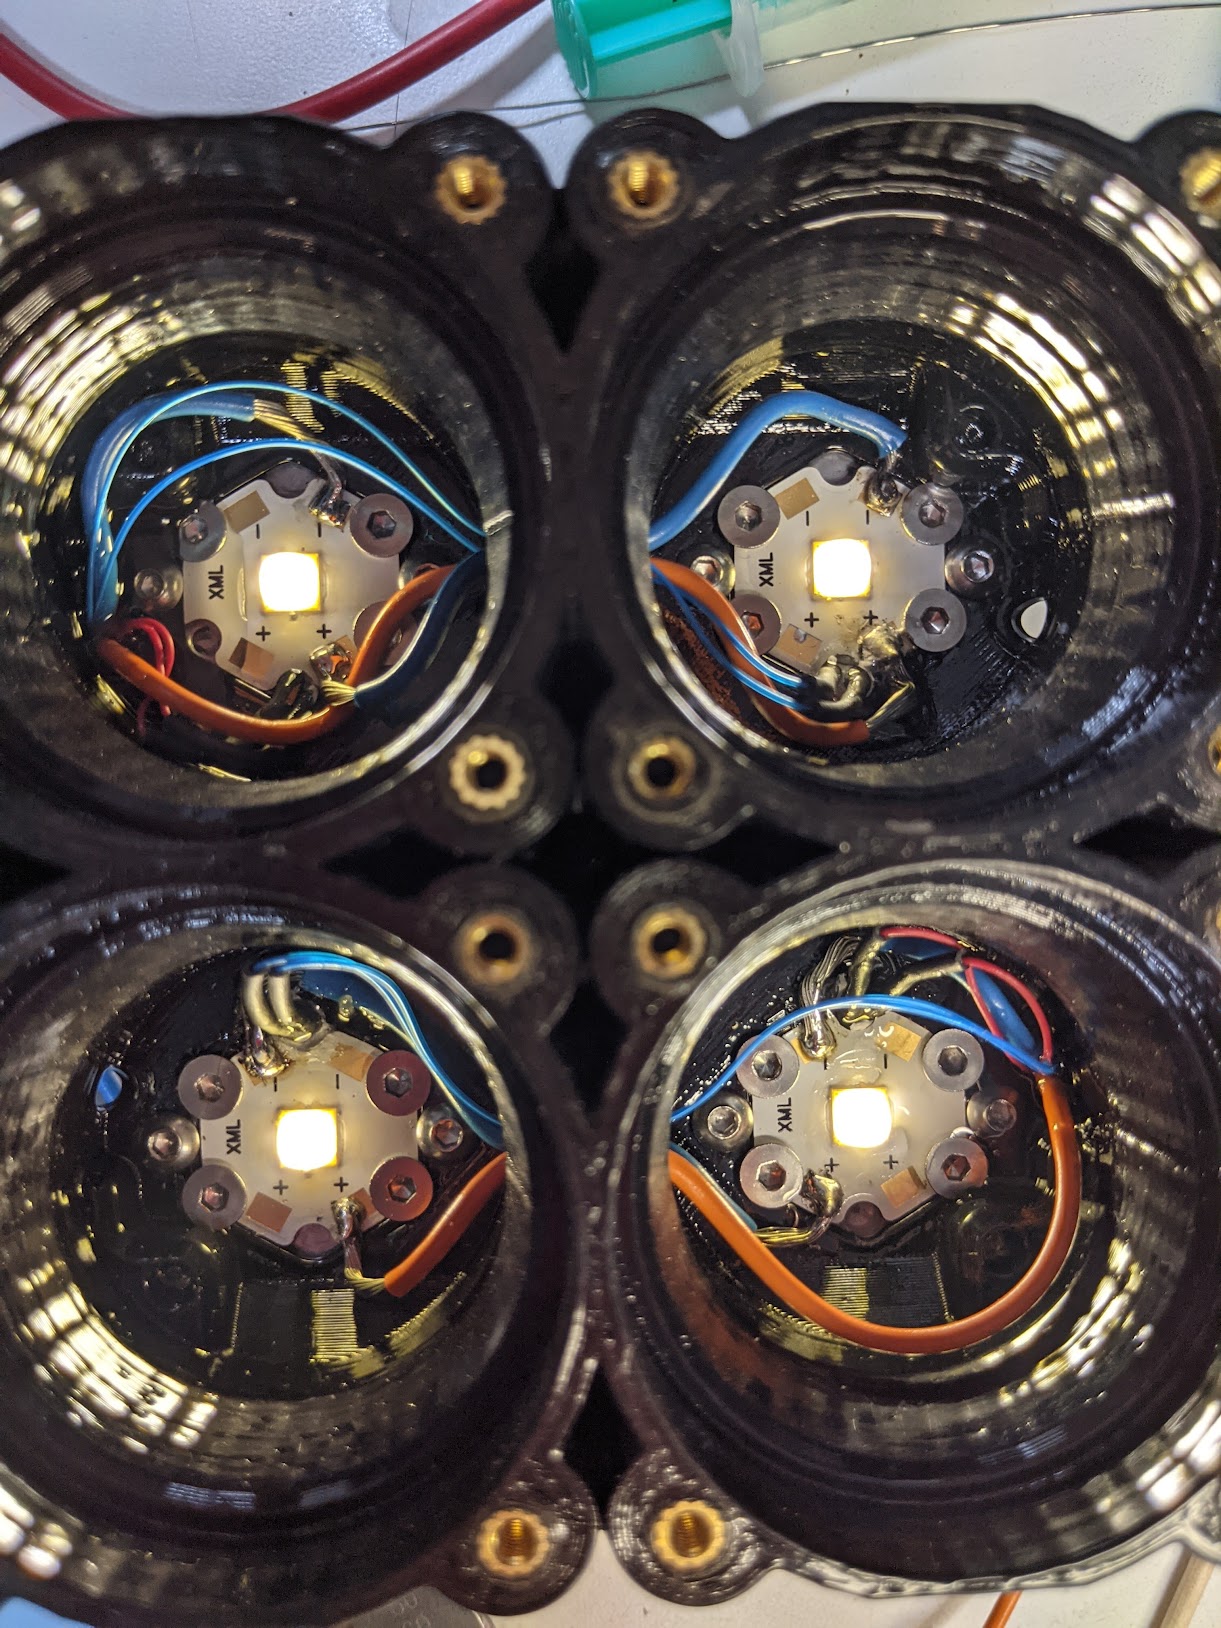
  • LED 4 x XHP70.2, dedomed
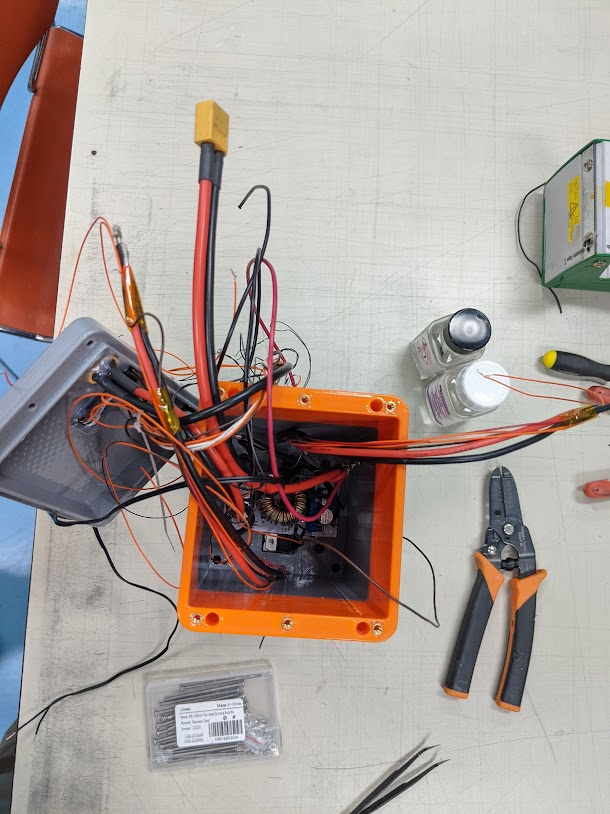
  • 8A driver. Custom PCB design
  • ~215W going to the LEDs
  • Waterproof fan
  • Lens: 4 x Ledil Crystal RS
  • Battery: 18 cells of 3400mA 18650. 22.2v, 10.2A
  • Controller: ESP32
  • Wifi or pushbuttons
  • Modes: 0.1, 1 5, 50 and 100% (of 8A going to each LED)

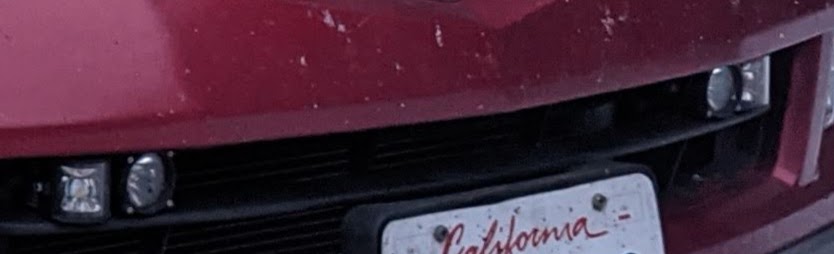
This flashlight can be controlled with pushbuttons or via WIFI. The idea is to mount it temporarily on the roof and link it to a cellphone or to the car’s high beam switch.

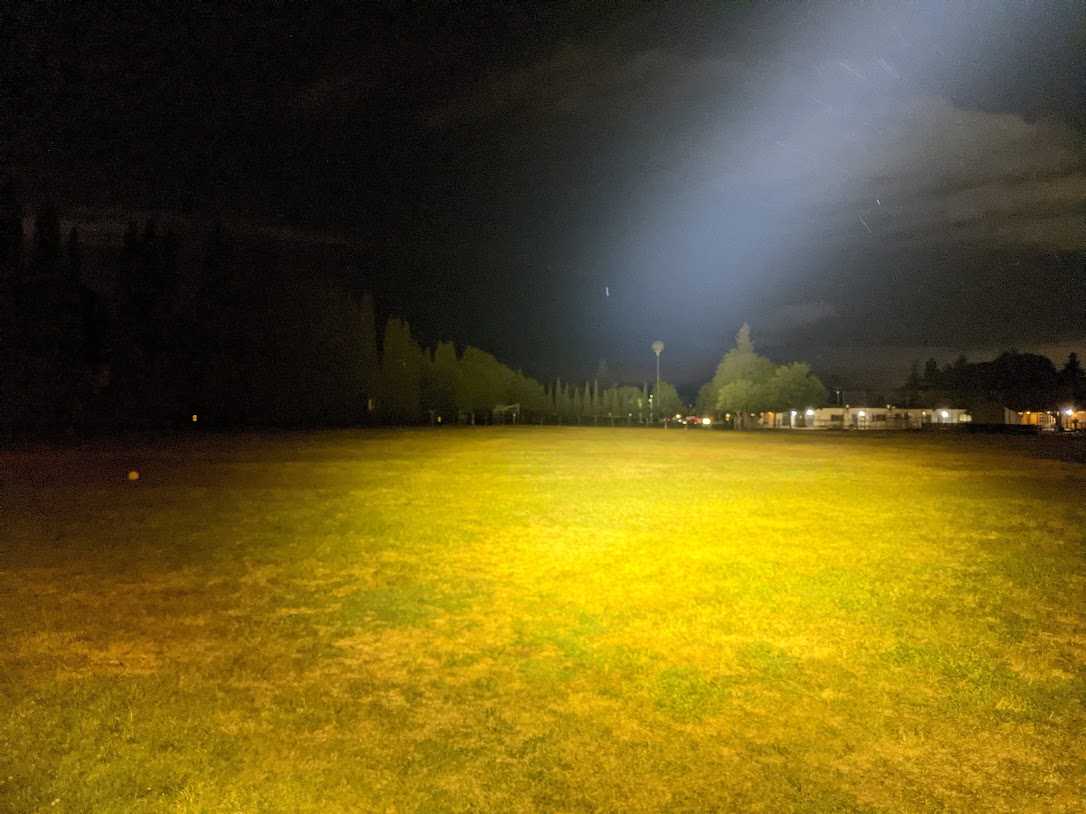
Test at full power. The trees are ~350 meters away.

Build 3:

  • LED XHP50.2, dedomed
  • 4.5A driver. Custom PCB design
  • Lens: Ledil Crystal RS
  • Controller: ESP8266
  • Wifi operation only

The idea of this is to have a network of light modules connected to 12V and controlled by a cellphone or by the high beam relay.

Cool projects. I think you are on the right track with using TIRs to get a diffuse spot with less spill. But in your first build, with the lights so close to the ground it’s hard to avoid lighting up the ground too much. Maybe recess the TIR in a tube to physically block the spill light? That is maybe not a very elegant solution since it “throws away” light, but depending on the TIR the spill might be a pretty small fraction of the total output.

It's good to have you here, pgodoy!

I do not mind “throwing away light” because I have a lot of light :smiley: I did not try with a tube, but I did try with a flat plate to block the light going to the ground. It works well, but it needs to be fairly big.

Mounting higher: totally agree. Ideally at hood level. The picture is for my daily driver, so I did want to mount the light at a discrete location.

Roof mount is out of the question for high speed. Great for cutting the light going to the ground, but small bugs give you a heart attack every few minutes because they are illuminated way too close to your eyes.

That’s one of those things where you’re just going to have to experiment with. 26mm TIRs would probably be better’n 20mm, but you have a variety of emitters, beam-angles, and mixing circular and elliptical, to get the beam-spread you want.

Very interesting projects. What caught my attention particularly here was the good thinking of making use of mixing the spot and wide lenses to make the most of the light for the road use. The driver blinding spill is obviously from the Flare Maxi, I’d guess, rather than from the spot lenses, correct? I like the use of fans for improved heat dissipation thus improving the LEDs efficiency.

Have you considered using tight spot only lenses or reflectors with diffuser lenses in front? One option is to use spot reflectors with smaller than maximum size LED that would fit the reflector, it is supposed to tighten the spot. You could use for example reflectors made for 13mm COB LEDs in combination with XHP70.2/.3. and from there modify the beam with diffuser lenses, oval diffuser spreading the spot beam horizontally, which shouldn’t add to the vertical spill significantly thus eliminating the driver blinding close range light. You may need to adjust the angle of the oval diffused spots making them point more to the sides of the road, but that’s what you had done already to your current lights, so there shouldn’t be a problem with that either.

For example Ledil Leia tight spot lens has an optional oval sublens, as they call it, which is effectively an oval diffuser and it could be fitted in front of both round lenses or reflectors that are less than 48mm in diameter, should also fit in front of the Ledil Crystal-RS. Mouser Electronics for example carry a nice selection of various diffusers from BJB brand. Using diffuser in front of a TIR lens may have more loss in brightness, compared to a reflector covered with bare diffuser, but can’t tell if it’s really at deal breaker level. I think one key to success is also to fine tune the balance of brightness between the various beam shapes and why not make them even adaptable to the various driving situations.

I’ve been sketching bicycle high-beam and/or off-road MTB lights with a friendly electrician. The beam design was one of the main reasons I got interested in chances of making my own lights, since very few of the high power MTB lights, especially the frugal ones, provide any information about their beam design in the first place, which often is much too floody, or can be something like medium spot, which still leaves room to hope for both width and throw and spills vertically too much for comfort. Even tight spot isn’t totally unheard of, but less common and suitable only for the road, while leaving the sides unlit, which is less than optimal. We’re in process of modifying some lights with custom PCBs, drivers and more energy efficient LEDs aka higher lm/W and further on aiming to make some lights of our own design.

Keep up the good work, your projects seem initially well thought out and are quite inspiring as such.

My first post/comment here too.

You probably want to use aspheric lenses to avoid spill. Try to mount them as far away from your eyes are possible to avoid retro reflections.

Great project you got going! I’d really like the see some more beam patterns when you get a chance. Particularly interested in the quad crystal RS with the dedomed xhp50.2’s.

Either way, keep up the good work!

The blinding spill is coming from the spots hitting the ground too close to the car. They are aimed parallel to the ground, but mounted low.

The Flare Maxi has a great pattern. Light hits the ground very close to the car, but as these are wide angle, the amount of light close to the car is not that much.

Some comments to your post:

  1. I tried the Leia with and without the oval diffuser. But, this lens is not very efficient, so the hot spot is less bright compared to Crystal. Lots of light never make it out of the lens.

2. My error was trying to maximize lumens, not pattern. I discarded the XHP70.2 due the the beam divergence. The XHP50.2 have a hot spot that is 1.5x brighter with Crystal lenses compared to the XHP70.2. But, I should have tested the XHP35. Less lumens, but brighter hotpot and less spill. two XHP35 assemblies mounted at ~5deg horizontal should give the same beam width of a single XHP50.2, but with less vertical spill.

3. I simplified the circuit and connected the Flare Maxi and Crystal together. I do see the advantage of controlling the wide and spot beams independently, so that is next in the list.

4. Flare Maxi illuminates far to both sides. Driving the same roads, I now see many animals that I had not idea that they were there before.

5. Next step is to assemble the same (Flare Maxi and Crystal), but with XHP35. That should put more light where is needed, even for a lower total lumen output.

6. I also experimented with the Ledil 150mm lens. 0 spill and that thing can illuminate all the way to the future, but it is not practical due to its size.

I have many PCBs with a current driver and ESP controller if you want to use them for your bike lights. You can control them directly from your phone with any value between 0% to 100% power. I can send you a few for free, but you would need to source and load the electronic components (I am only offering bare PCBs).

Any suggestion for how to capture the beam pattern?

A picture against a white wall does not really show the pattern.

I do have quad working assemblies for XHP70.2 and XHP50.2, both dedomed, so I could take a picture of the beams if you tell me how.

I am including a few pictures of the assemblies here.

Wow not one bit several large scale builds in one thread. This is awesome :partying_face: :nerd_face:

Thank you for the update, good to hear about the progress and finds you’ve made on the way.

Did you try placing the spot lights higher yet, near the bonnet edge or so? Much difference?

You should also direct the spots slightly upwards to a degree where the majority of the driver dazzling close range lighting on the road is eliminated - that’s usually done for the auxiliary headlights anyway. Parallel to road won’t work probably in any other than fog lights and laser high beams.

That’s good to know. Did you test the oval diffuser in front of the Crystal-RS by any chance and if so, what were the results?

Yes, using smaller emitter than what the lens or reflector was designed for will result that.

Sounds good, it’s a good option to be able to fine tune the bias of lighting according to the driving conditions.

Great to hear you’ve gotten your desired results with those lenses.

How about putting many XHP35.2 spotlights side by side for higher lumens?

Seanna? That’s a huge lens with extremely narrow beam, probably waste of space on any vehicle smaller than a truck, or a train, to think about the throw you get with it and a high power LED. There are at least two youtube videos where people show extreme thrower flashlight builds using that lens, check those out.

Thank you, very generous of you and much appreciated! I’ll PM you soon.

There are basically two ways of visualizing the beam pattern in precision, one is projecting the beam directly to a white wall in 90-degree angle, the other is projecting the light along the white wall sideways in 0-degree angle, you have to able to get on the side of the wall to make it work.

Camera exposure control is the key especially in the 90-degree projection. Also free form shots can do, but they’re not very specific and most people tend to overexpose them so that the pictures are often “light washed”.

This may help for context: I drive long distances regularly, but the crazy light setup is for our second run of the Panamerican Highway (www.panamericanrun.com)

Did you try placing the spot lights higher yet, near the bonnet edge or so? Much difference?

Yes. On top of the hood it makes a huge difference. But I am testing with my daily driver, so the only discrete mounting location was at fog light height.

You should also direct the spots slightly upwards to a degree where the majority of the driver dazzling close range lighting on the road is eliminated – that’s usually done for the auxiliary headlights anyway. Parallel to road won’t work probably in any other than fog lights and laser high beams.

They may not be aimed exactly parallel. I tried to balance not illuminating the road too close and not illuminating the sky.

That’s good to know. Did you test the oval diffuser in front of the Crystal-RS by any chance and if so, what were the results?

Yes. It does make the beam wider in one axis. Does not change the beam in the other axis. It is not a diffuser, it is an array of cylindrical lenses.

How about putting many XHP35.2 spotlights side by side for higher lumens?
That was my point of using two XHP35 assemblies mounted with an angle. So the resulting beam is wide in the horizontal axis and narrower in the vertical axis. But, I am still trying to minimize the number of assemblies. There are lots of other things that I need to mount at the front of the car.

Seanna? That’s a huge lens with extremely narrow beam, probably waste of space on any vehicle smaller than a truck, or a train, to think about the throw you get with it and a high power LED. There are at least two youtube videos where people show extreme thrower flashlight builds using that lens, check those out.(link is external)

I know, I know. But I could not resist the temptation to test that lens with a XHP70.2. I can tell you that it reaches far... XHP70.2, with dome, gives the best combination of beam pattern (~4-6 deg) and no spill.

headlighter wrote: There are basically two ways of visualizing the beam pattern in precision, one is projecting the beam directly to a white wall in 90-degree angle, the other is projecting the light along the white wall sideways in 0-degree angle, you have to able to get on the side of the wall to make it work. Camera exposure control is the key especially in the 90-degree projection. Also free form shots can do, but they’re not very specific and most people tend to overexpose them so that the pictures are often “light washed”.

I probably need a camera with better dynamic range and manual controls. All the wall shots of different beams look the same with my camera.

But, I do like the idea of having the beam parallel to the wall. That is much better than showing the spot.

Respect for the Panamerican run. Puts in context the level you’re operating at, I may not have that much to add, you clearly know your stuff already.

Discrete mount on the daily runner though, could it be also to the top and behind the radiator grille?

Diffusing spot beam with an oval diffuser widens it horizontally indeed, but doesn’t compress it vertically. If your spot is of narrow angle enough to start with, you may get a nice wide beam from it without too much vertical spill, beam even par to fog lights, but also the oval diffusers may often be too wide so that it decreases the throw of the beam significantly, so you may need to add units to get enough brightness out there. But assemble an oval diffuser the wrong way and you’ll get a tall and narrow beam, useless for any purpose that I can think of.

Oval diffuser is actually made of a set of vertical prisms set side by side. Diffusers for lights can be of different kinds. The most usual kind that may come in mind for people is “frosty” lens that simply smooths the edges of a spot. The frost can be of different densities too. If a lens is marketed as an oval one for example, in the case of Ledil lenses at least, it usually means that it’s some level of spot TIR with an integrated set of vertical prisms in front of the lens to widen the projection.

Isn’t it that you often have to try things at least once to know better? You could still make roof top assemblies with a couple of Seannas and XHP70.2s, tight spot lights for tight spots you might run into on your second Panamerican, no? Search lights with phone wi-fi controlled servos, yes? Hope we’ll get to see here your solutions for the lighting to that tour.

Discrete mount on the daily runner though, could it be also to the top and behind the radiator grille?

Yes. I will probably move them there. It is more work for the installation, but that is probably the best location.

Diffusing spot beam with an oval diffuser widens it horizontally indeed, but doesn’t compress it vertically. If your spot is of narrow angle enough to start with, you may get a nice wide beam from it without too much vertical spill, beam even par to fog lights, but also the oval diffusers may often be too wide so that it decreases the throw of the beam significantly, so you may need to add units to get enough brightness out there. But assemble an oval diffuser the wrong way and you’ll get a tall and narrow beam, useless for any purpose that I can think of.

If the spot is 5deg to 10deg, no need for a horizontal diffuser for this application. There are two areas to cover with these lights: far range (see clearly the road and sides 500m ahead) and near ditch. The rest is well covered with the car headlights. For next run the headlights are 6 Morimoto projectors (3 per side, 4 x 55W, 2x35W amber, all with foreground limiters).

I know that the setup is extreme, but we have had many close calls with large animals. Most are avoidable with good illumination.

Isn’t it that you often have to try things at least once to know better?

I have accumulated more lenses and LEDs than I care to admit...

Seanna lenses would be better for a long throw flashlight. But Crystal RS and XHP50 or XHP70 give a great beam - long and wide reach -.

The rooftop light is the quad flashlight. Charged during the day and mounted with a magnet at night. But this is only for emergencies. All rooftop lights I have tested are terrible at highway speed in less than perfect weather. Also, having an absurdly bright searchlight is never a bad thing.