Noctigon KR1 with SFT40 (a quick mod)

I ordered a Noctigon KR1 from intl-outdoor,com (https://intl-outdoor.com/led-flashlights/noctigon-kr1-tail-e-switch-pocket-thrower.html)

to do this little LED swap with the New Luminus SFT40 emitter. I ordered the sst40 version of the KR1 from Hank after an email exchange with him revealed that he puts a 7.5amp driver in the sst40 version of the KR1. I already had the W2 version with the osram CSLPM1 but that has a 5amp driver, and according to Djozz's awesome SFT40 review and test (https://budgetlightforum.com/t/-/67043) it looks like the SFT40 is only getting warmed up at 5amps and really performs the best at around 9-10 amps. So the 7.5amp driver seemed like the best option Hank had to offer. Although i didn't ask him if the new 9amp DT8 driver (running Anduril 2) could be installed, i probably should have asked that ...

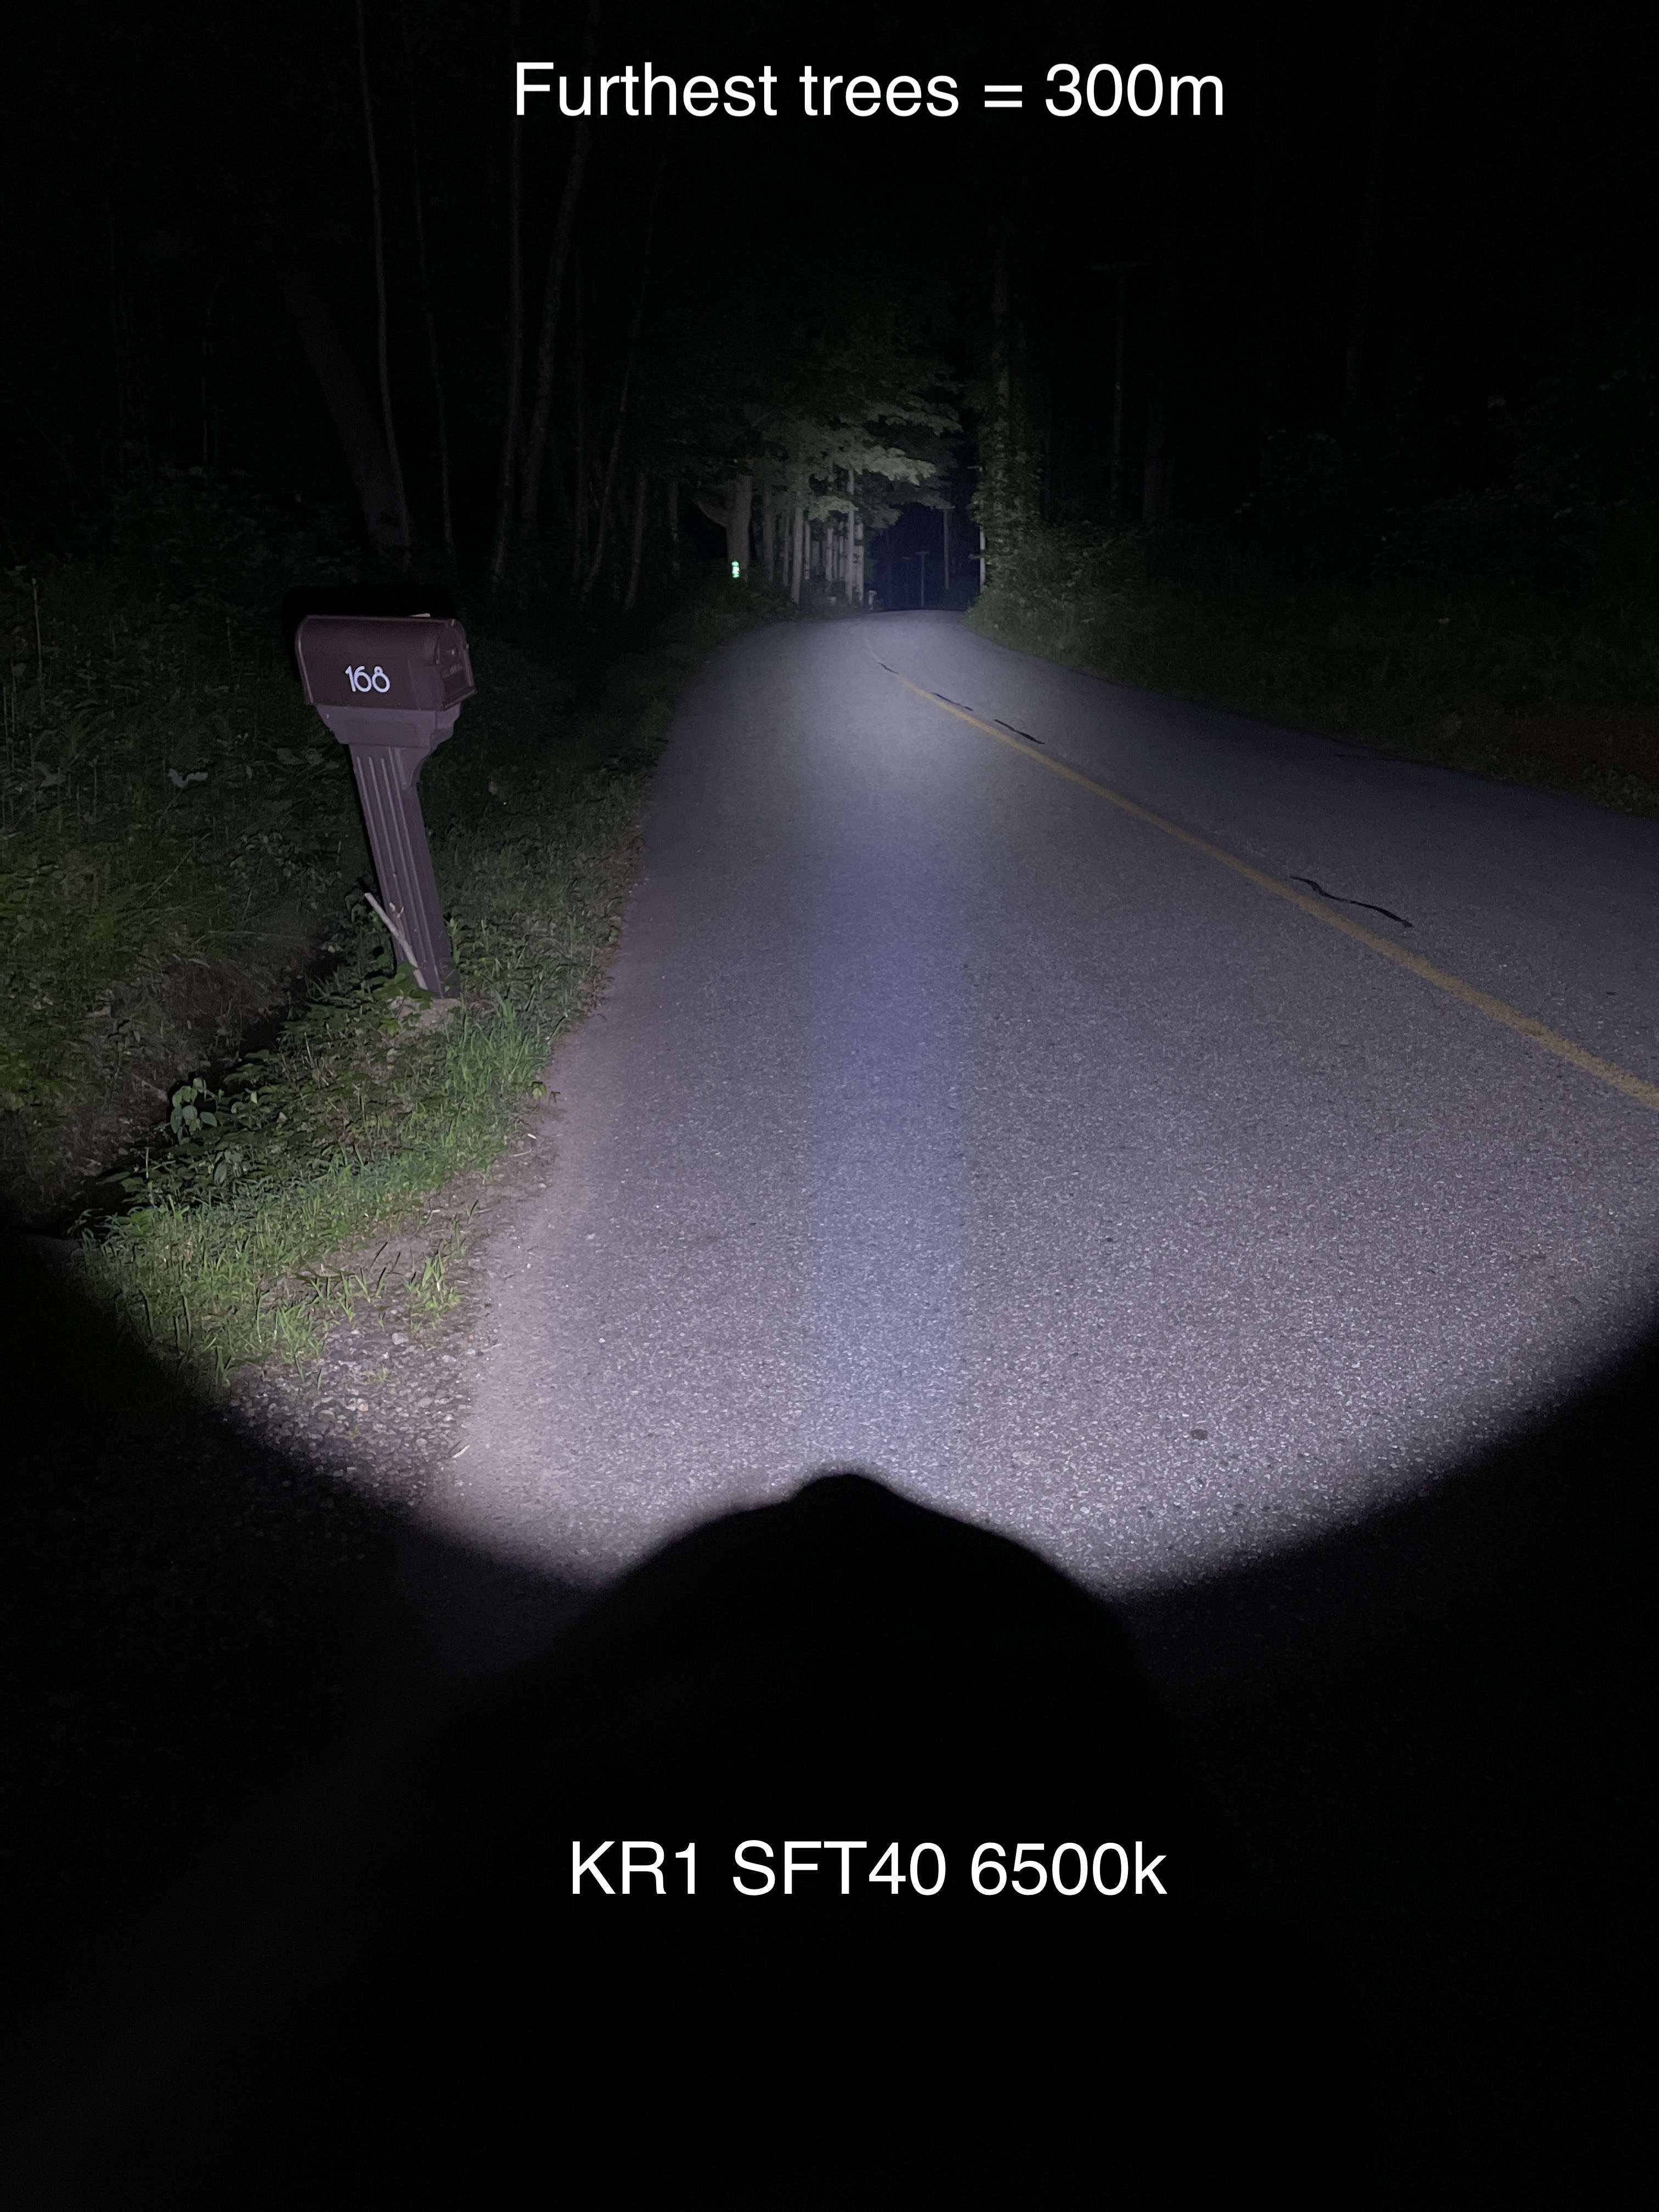
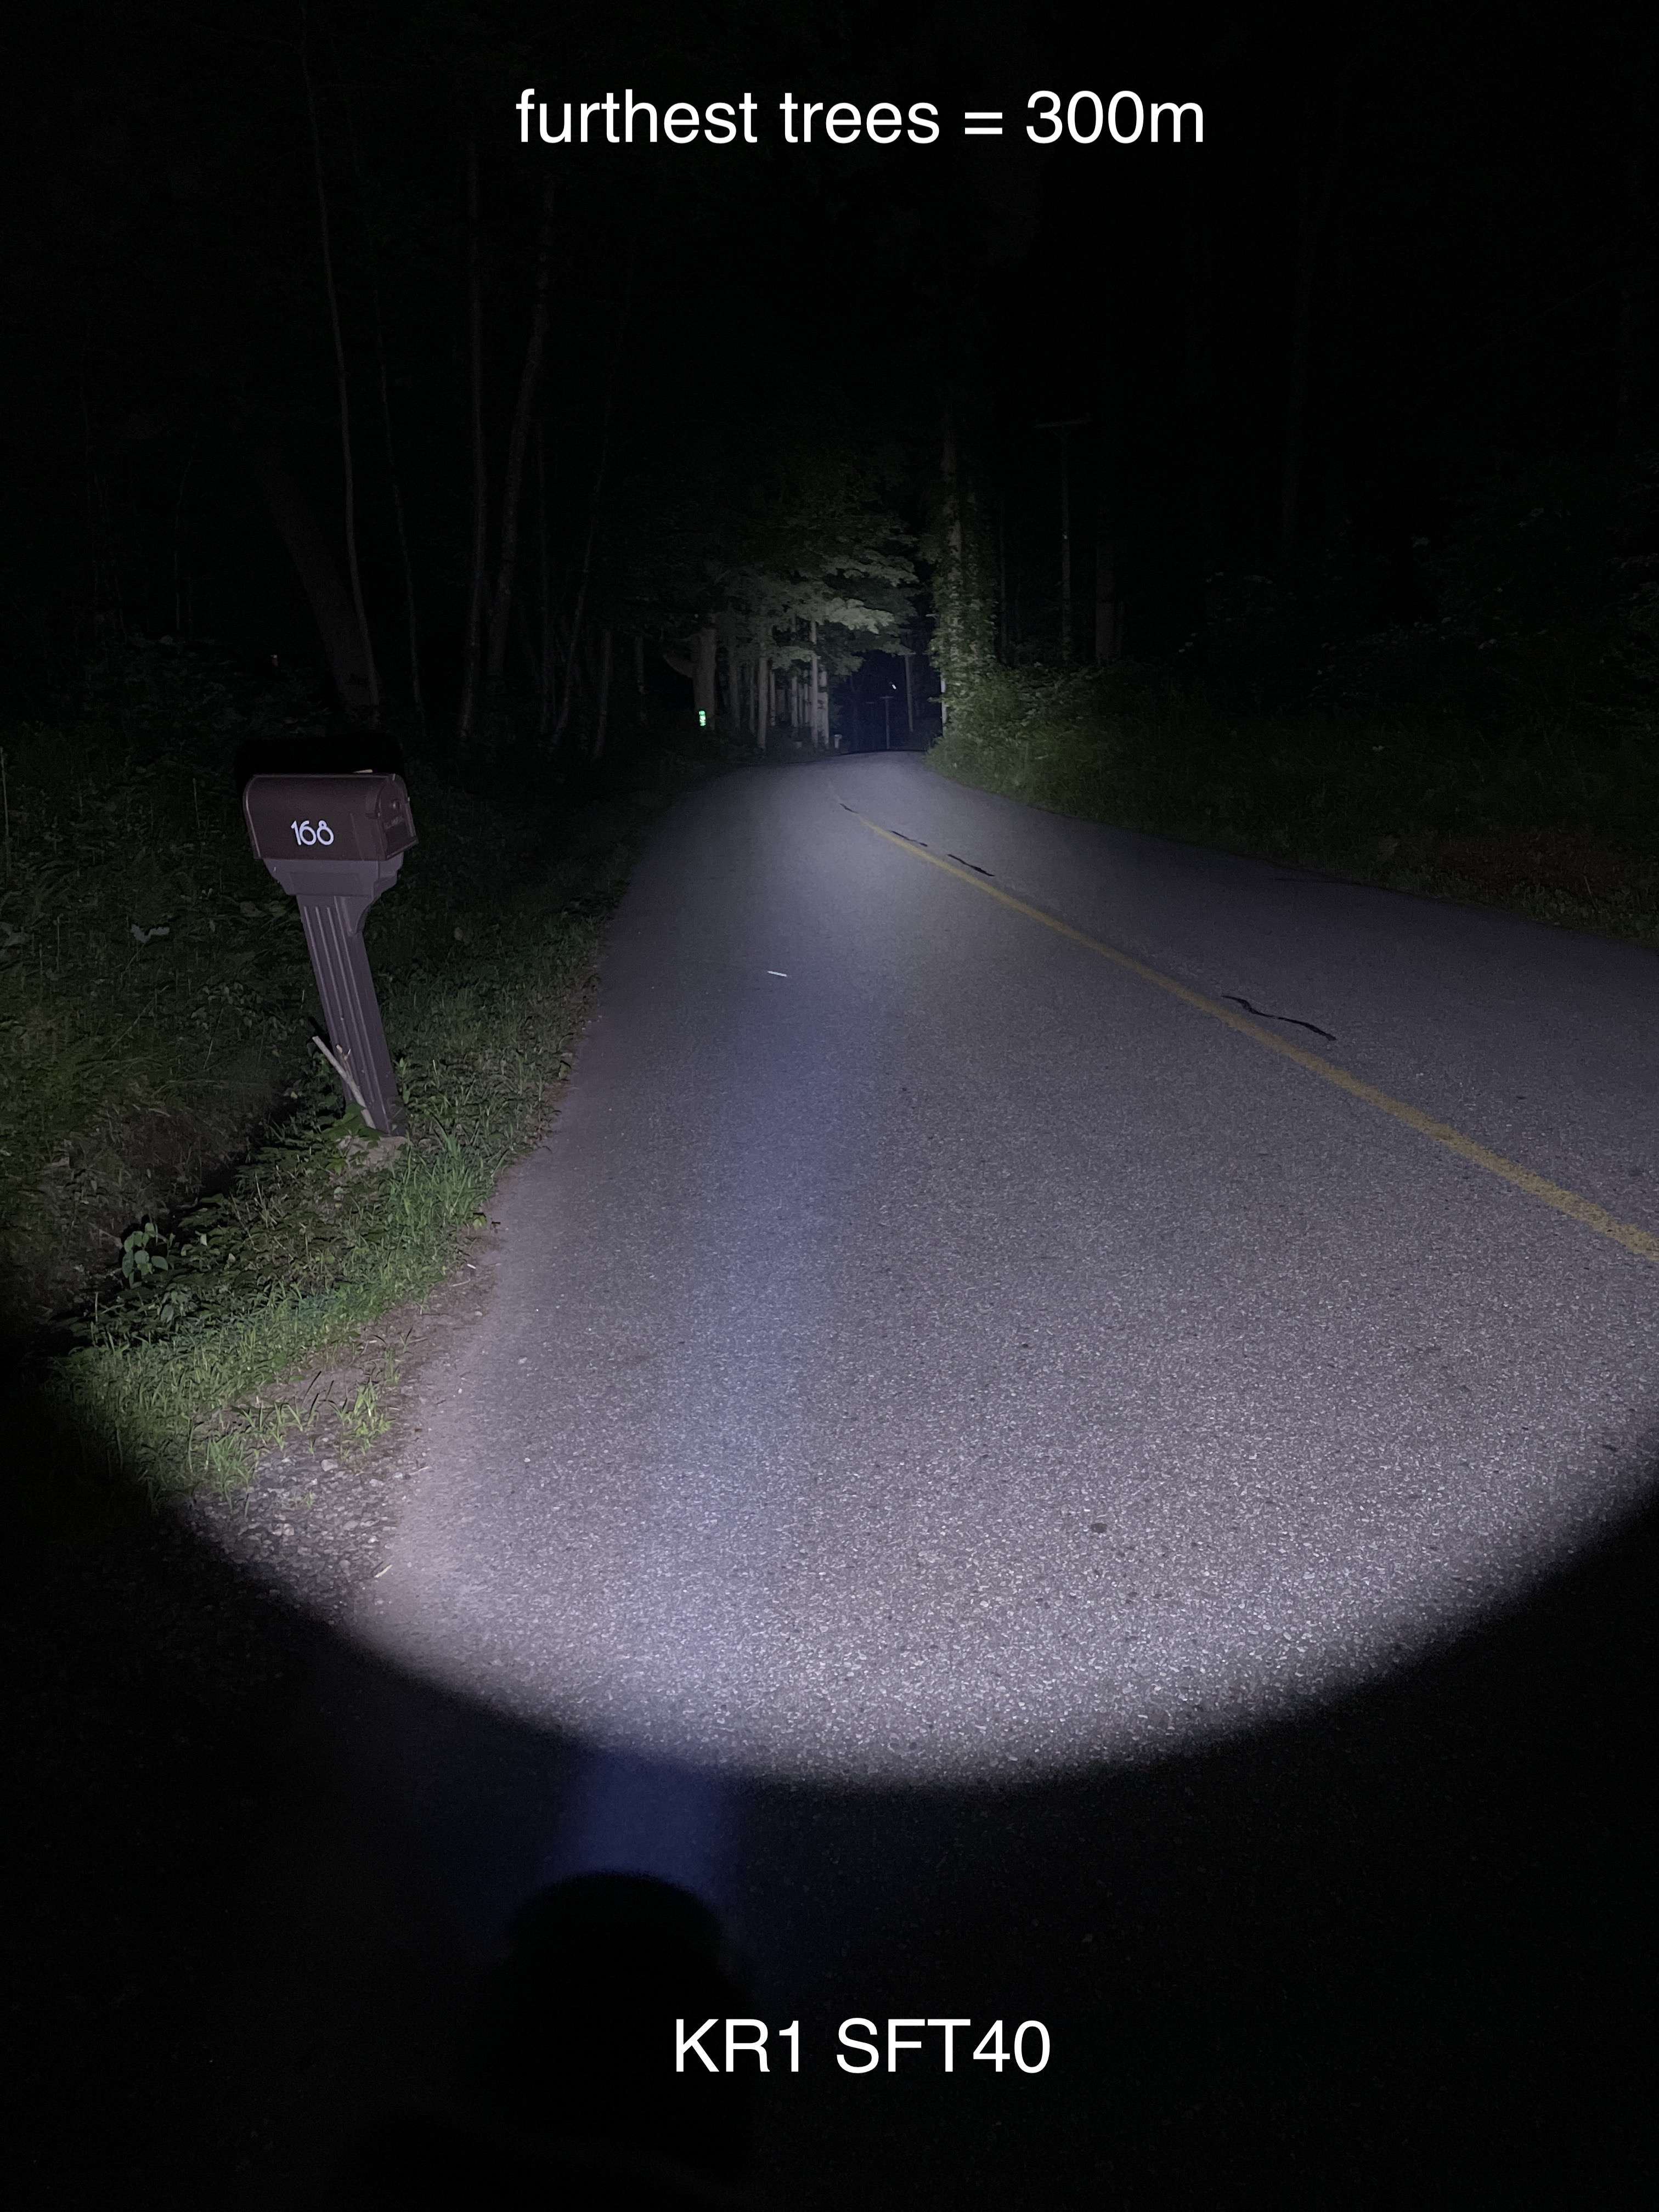
Anyway, this is a quick one. i have a couple pics and a couple shots outside, but last night (when I did this) wasn't the best night for taking beam shots with the humidity. I also would like to find a little better place thats more open to show these LED's at work.

The KR1 is still one of my favorite lights due to its pocket-ability and performance, plus form factor.


The SFT40 beam looks like how I would imagine an SBT90.2 would look (beam-wise) in the KR1 reflector (everything looks so good in the KR1, every LED I have ever put in it has a nice even beam consistency) with a wide hotspot, and wide, full spill. The only difference is the SFT40 is of course half the lumen of the SBT90.2.

The heat was actually not too bad, the SFT40 version with the larger driver heated up at the same rate or maybe even slower than the W2 version.


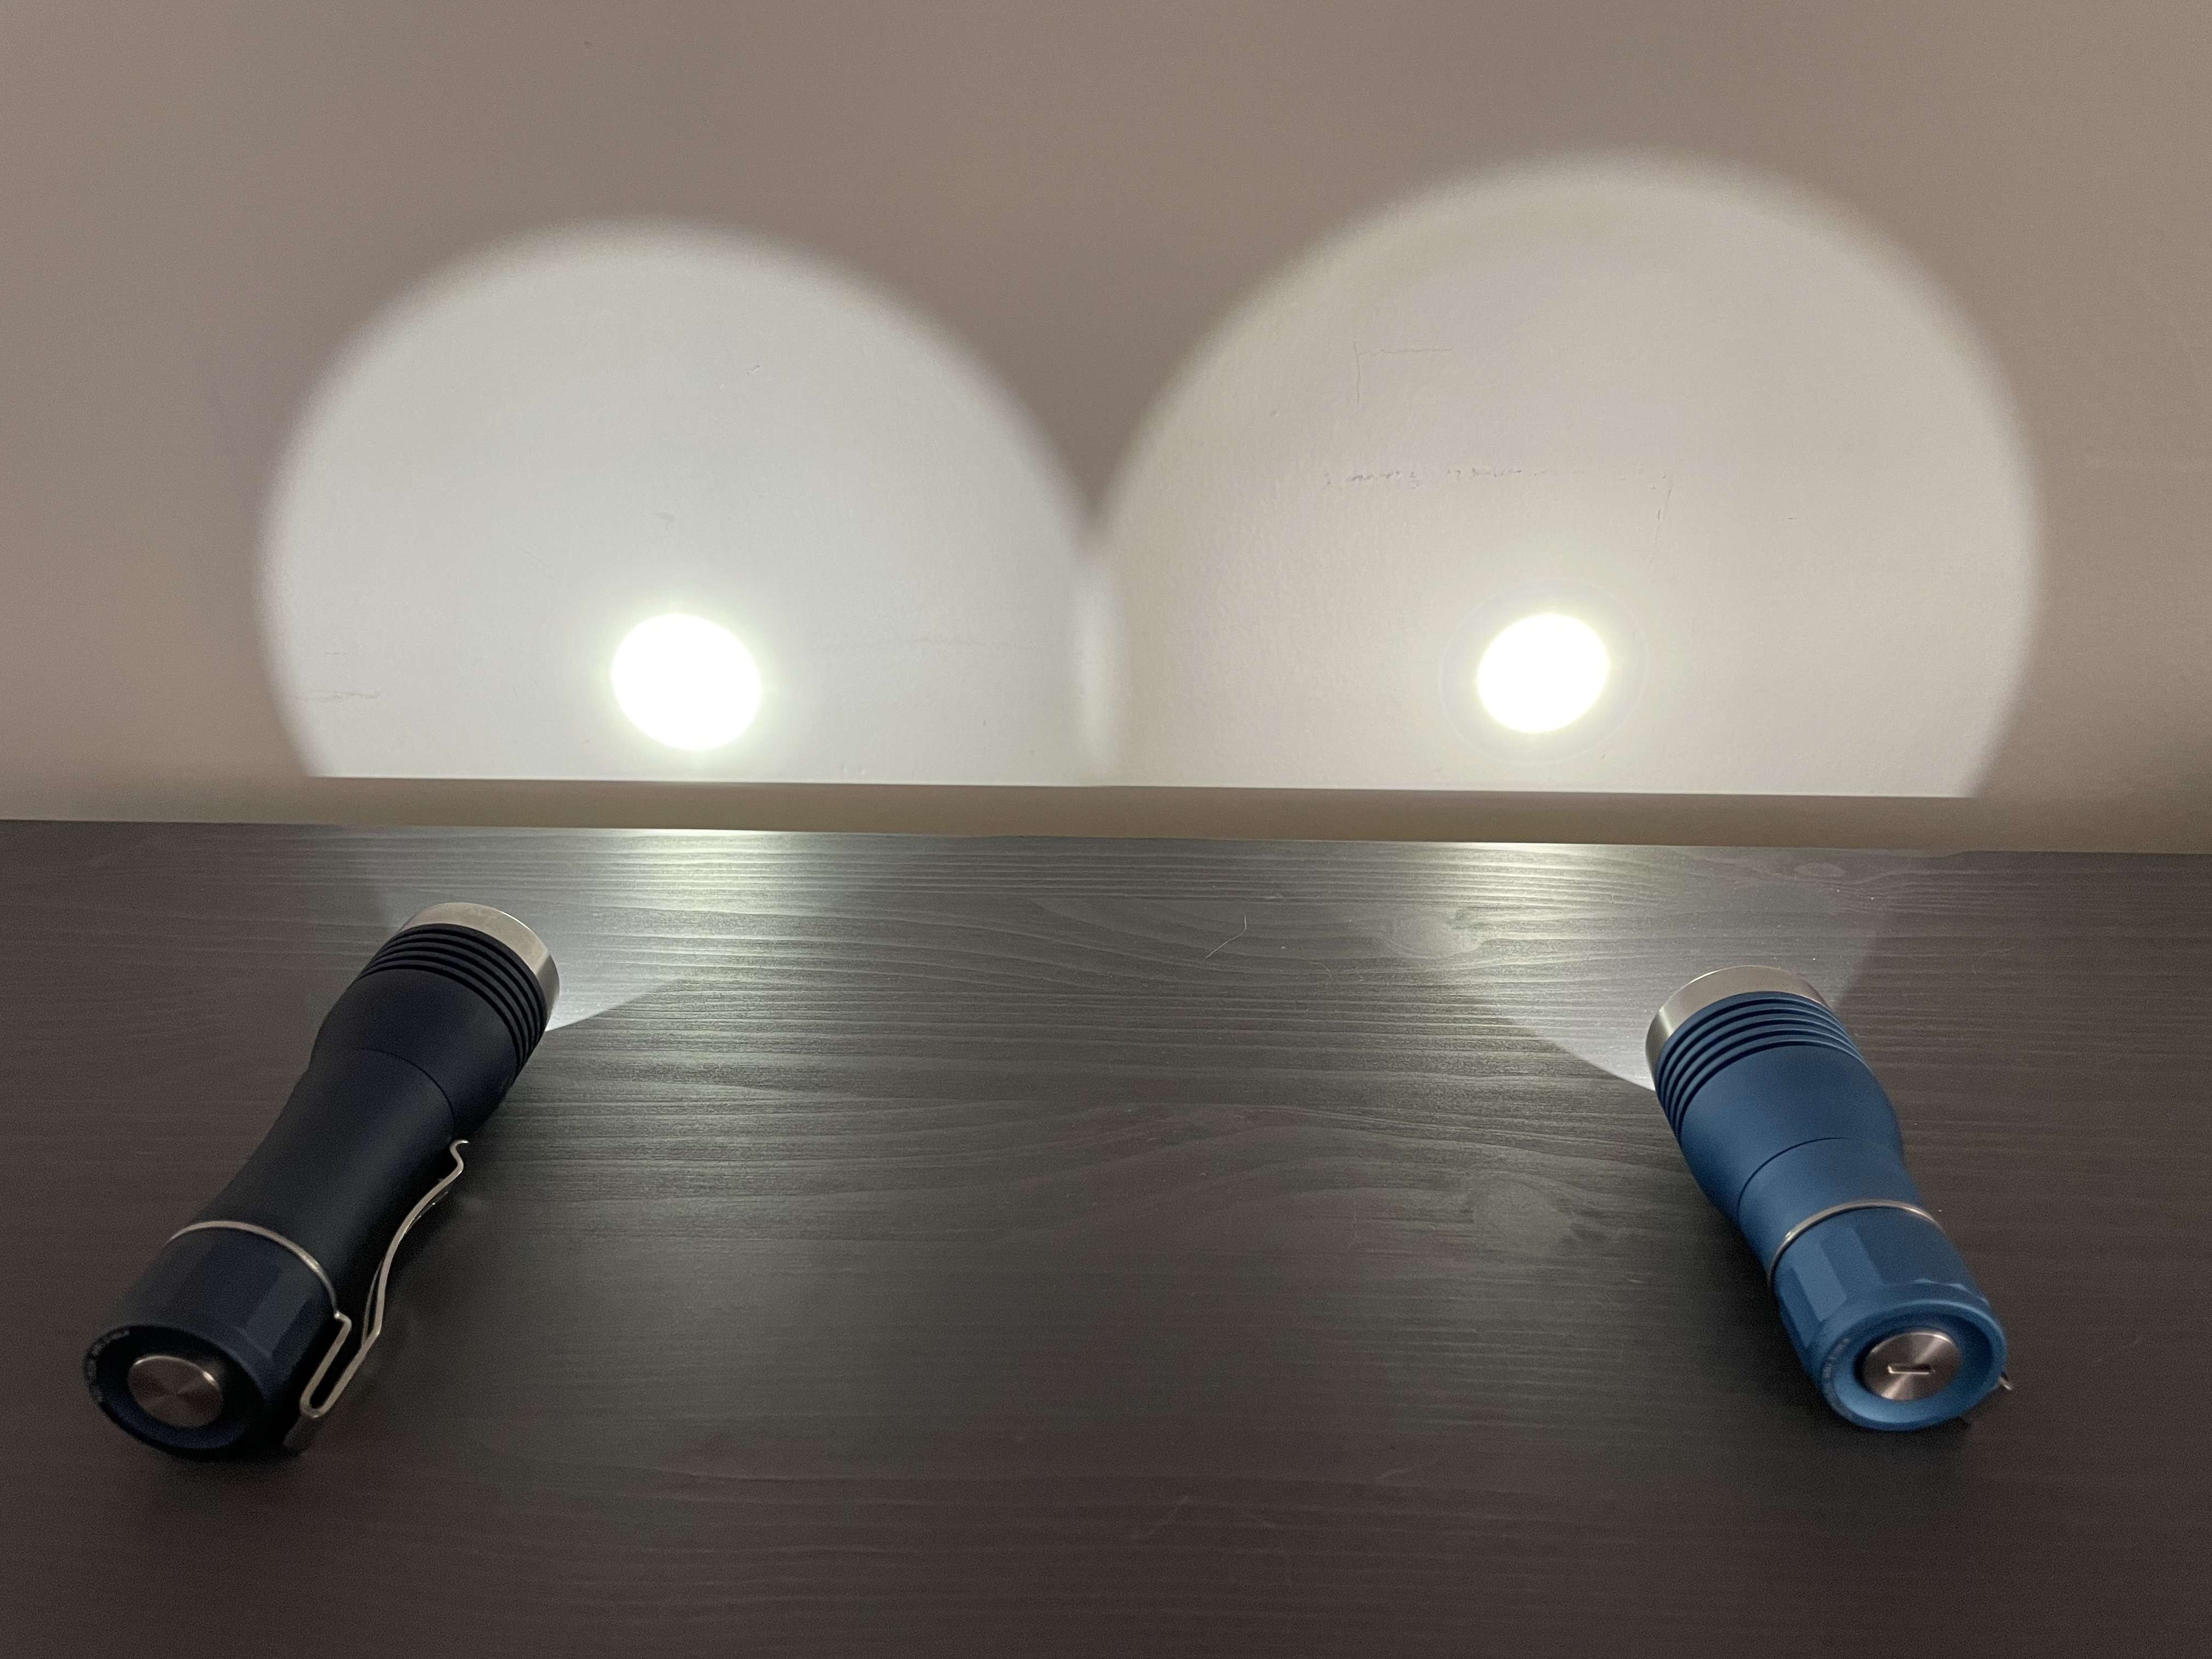
The throw is visually the same or maybe 10% less than the W2 CSLPM1, but the usable beam is easily double and the lumen output looks double in Real Life, and in practical use. Its hard to determine from the pictures, but the spill on the SFT40 version is awesome and impressive! I can't wait for the next 2-3 lights to come in for this LED.

SST40 Stock

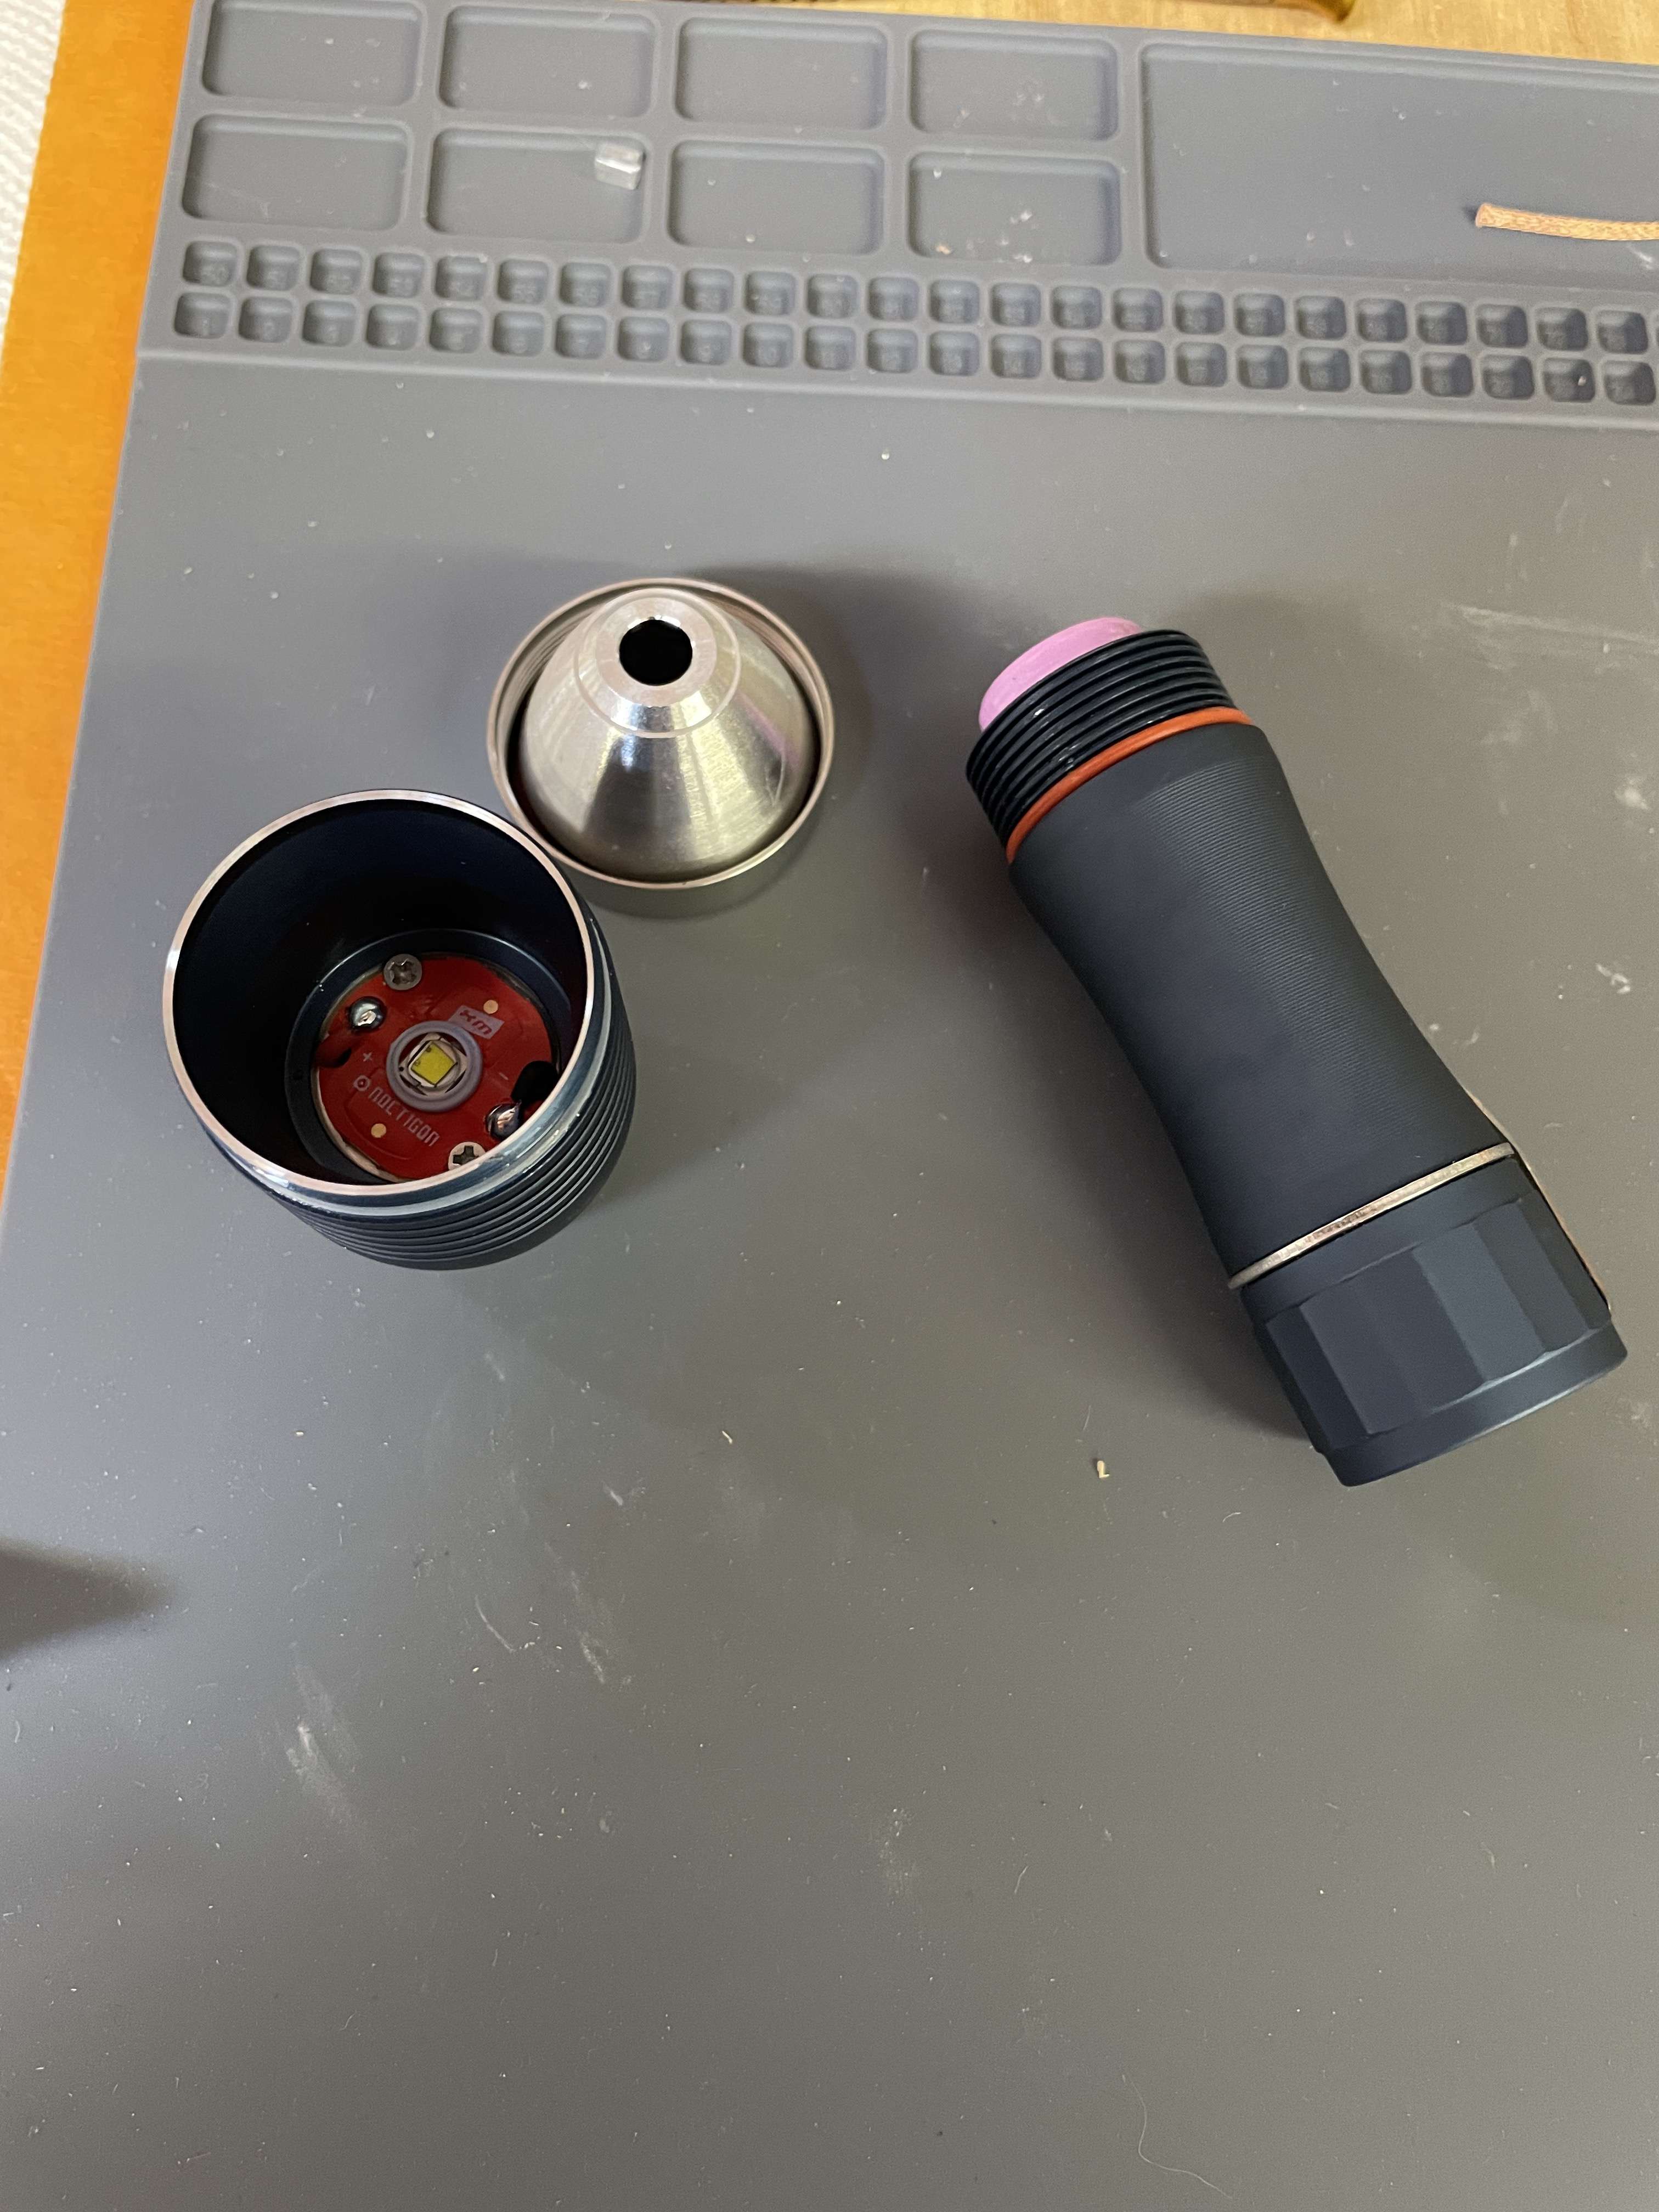
Convoy board fits perfectly, used original centering ring too
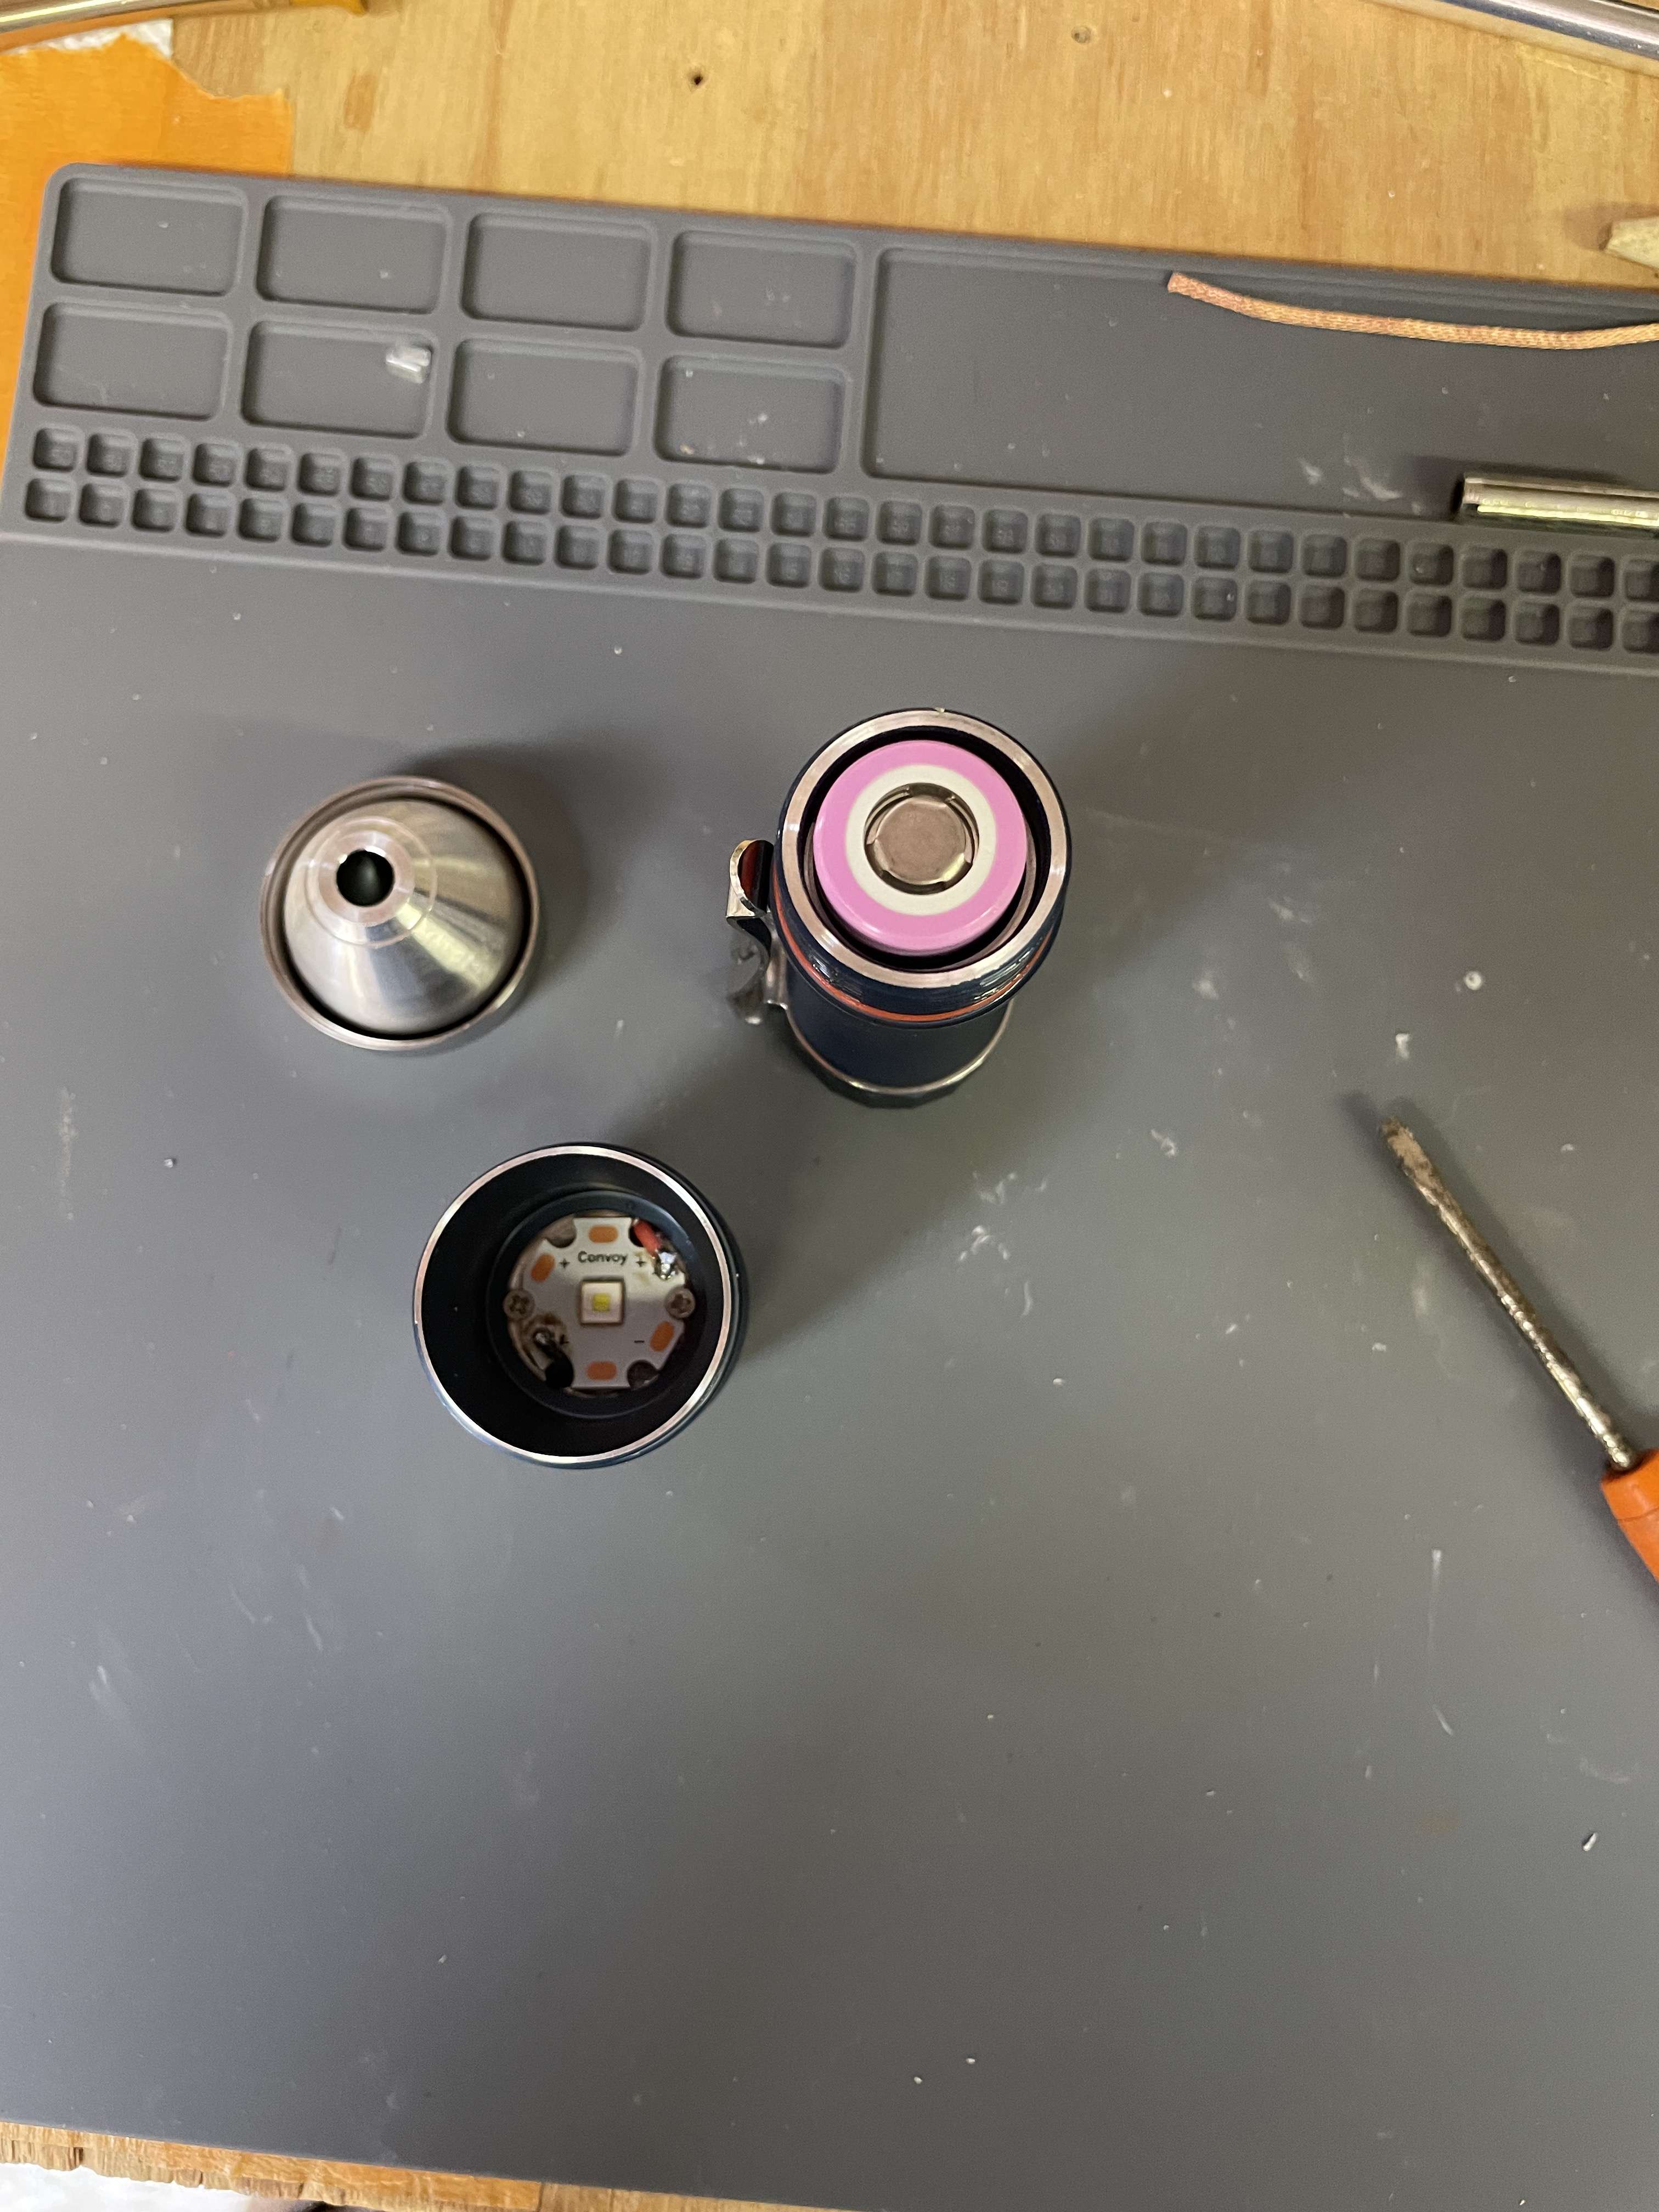
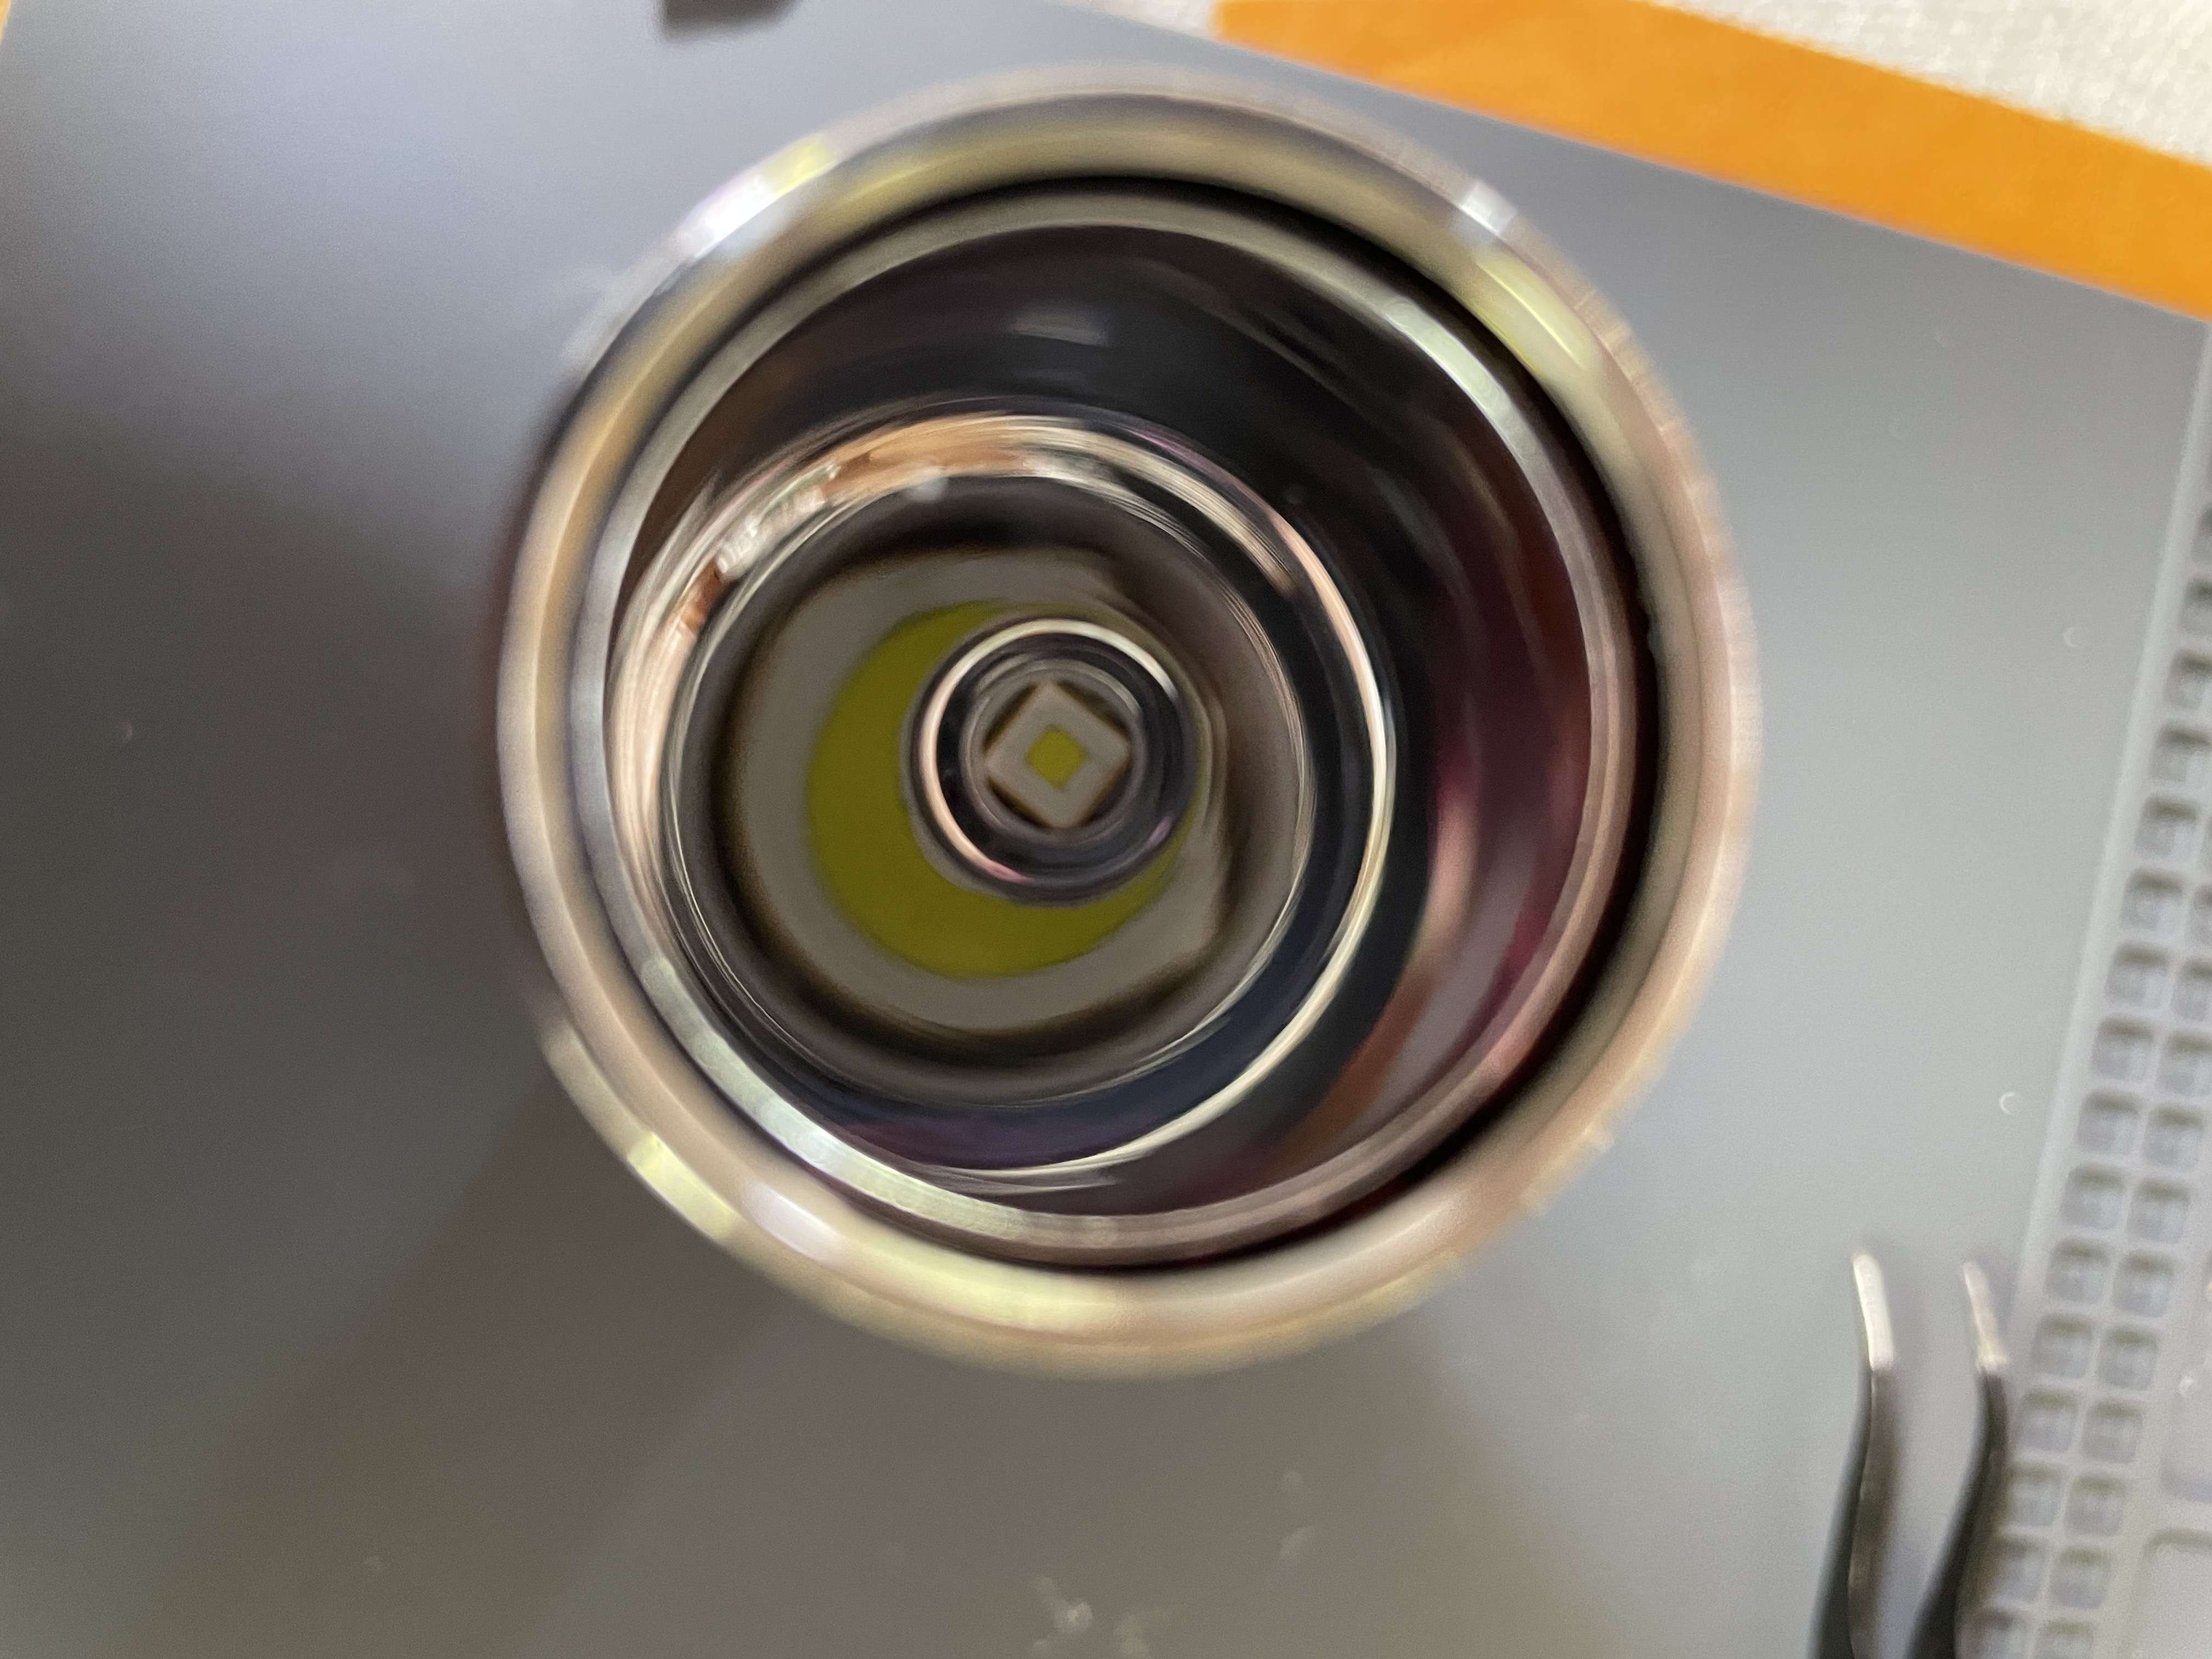
All back together

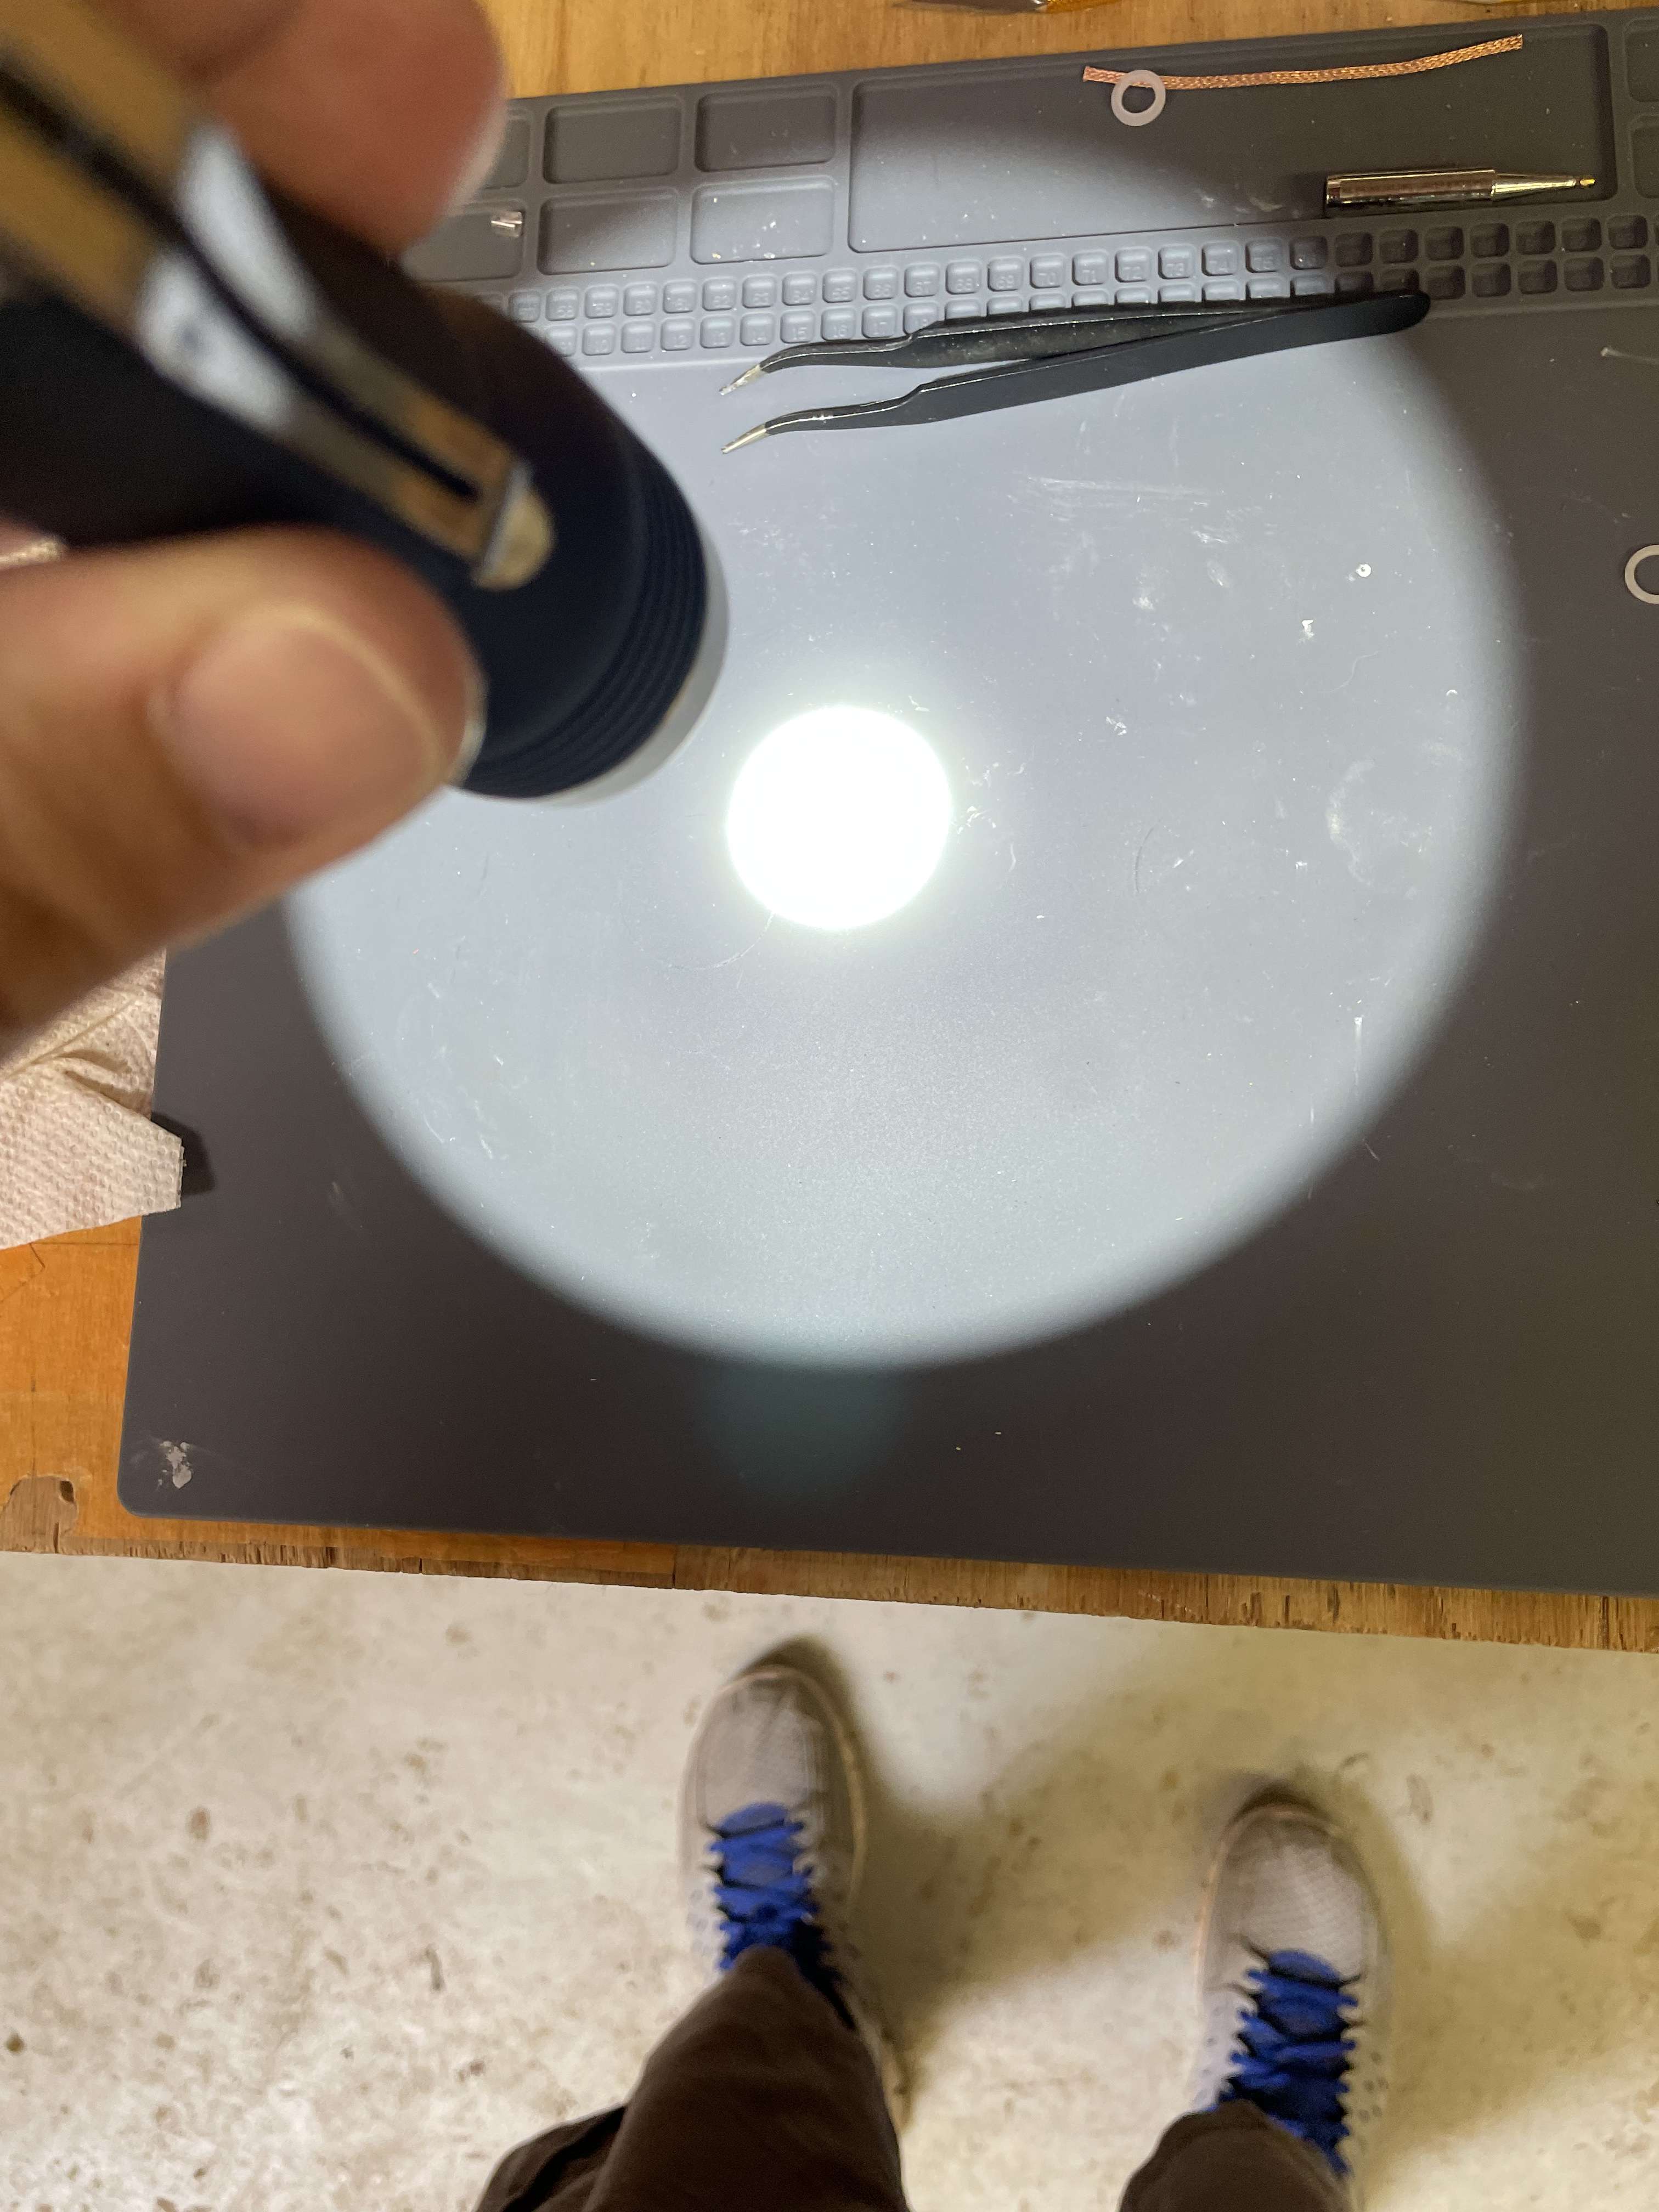
quick beam shot, and my shoes

Side by side with KR1 "W2"

Awesome, nice write up.

Nice mod! I’ve wondered how this LED will do in a K1 as well. I also have a spare Led4power 50/50 40/40 board for a Q8 which is quite tempting for these LED’s.

Have you bought a light meter yet? Cd measurements are pretty easy to do and would be interesting to see what this is putting out.

Awesome!

About that KR1 with W2, I thought the W1 was 5A and the W2 about 7,5A.

Do you know if the reflector between all KR1 types are identical?
Iow, can i just use another gasket? (And mcpcb board)

So in direct drive it would be as good or really close to the W2?

Nice! Thing is, the sft-40 can be driven a lot harder than the W2 and even boost HX so it will be brighter, bigger hotspot, more useable spill. The difference in cd would be compensated for with the difference in output. At 8 amps the Boost HX is doing maybe 1200-1300 lumens wereas the sft is about 1700 lumens or more. Plus better thermal efficiency on the 5050 versus 3030/4040. Sft is a winner all around.

If only they would release better tints

Nice work, Artie!! Can’t wait for my L21B to show up.

For sure. Maybe next year after all the commercial buyers have their fill of the good bins/tints

Me too! im considering buying another K1 just to try it. at first i thought it would be too similar to a xhp35 HI, but i think it would throw better so its more interesting to me now.

I do have a light meter, and i have never used it. im overwhelmed by how to do the math / figure it out /the right setting. im a little ashamed, because i do all these mods and put different LED's in different lights and neevr check the damn throw / CD. I have to just get that thing turned on and use it. This KR1 will the first one. The worst part is i have the perfect spot in my back yard with natural markers at the 5 /10/20 meter marks.. I need to measure it.

Hi there they are all identical. i have owned the W1, W2, and SST40 and they have the same reflector with different gaskets. You can ask Hank to install whcihever driver you want in it, but if you dont ask him he installs the (i think) the 5amp for the W1 and W2, and the colored leds and xpl-hi and sst20, and the 7.5a fr the sst40. there is also the new 9amp with anduril 2 :)

100% agree! the heat is handled much better in this versus the W2 version.

I am on the fence to buy that ! i see its in stock again, and i just watched rusty joe's video! looks awesome, what a nice reflector!

it worries me that on the data sheet Simon @ Convoy shared that they dont even mention other tints, but i do believe it was somehting like a "preliminary" data sheet, hopefully meaning it will get updated,and they will have AT LEAST a 5700k?? i mean they do it with the sbt90.2, why not this LED?

Nice, thanks for showing.

Plan: Waiting for a SFT40 with nicer CCT, then order the fat driver from Hank.

I absolutely love the SBT90 white and red in the KR1 body. Thanks for mentioning how lucky we are to have it. =]

This is cool! So do have to work inside the head to resolder the two wires? Seems cramped in there… I guess you hold the wire down with the soldering iron and bring solder with your second hand, holding a length of solder wire from outside the head cavity?

Is there some fidling (unscrew, screw back,…) to center the mcpcb after that?

I’d rather learn all the traps before I open up my kr1, I want to replace my w2 for a .fy yellow w1 (this is my most fun light and the yellow-orange looks so weird during the day :laughing:. I’ll also have to limit the nofet firmware for the 7.5A driver but that’s another issue….

Hi there!

So you do have to work inside the head to do the mod (for any emitter swap). It is not as cramped as it looks. here is my process that i find the easiest and most effective (mind you i had no experience with soldering at all before this year, so i only know what i have seen in youtube videos and read here - basically, there may be a better way! actually, there most likely is a better way! but this works for me):

- I set the soldering iron to 800 degrees (pretty much as hot as it goes, probably does not need to be this hot)

- I clean the soldering tip on steel bristle, and "Preload" solder onto the flat end of the round tip. this way you dont need to use both hands to solder the joint. the solder is already on the tip.

- I use long tipped needle-nose tweezers to hold down the wire onto the pad i'm soldering it to.

  • then I touch the "preloaded" solder tip to the wire and hold for a second or two, i release the solder tip, wait a second or two, then release the tweezers. this way the joint gets a second to "cool" or "setup" before i release the pressure off of the wire i am holding down. I have had it happen where i released the tweezers first, or at the same time as the soldering tip, and the wire "pops off" the pad, because there is some tension on the wire from bending it into place. So i always hold the wire down for a couple seconds after soldering the joint to ensure it says in place. once soldered, it is rock solid though.

  • There are 2 screws that hold down the mcpcb, you need to remove them (AFTER you unsolder the wires, makes it easier) and then reinstall them (before you solder the board back in again). It is not difficult to get it centered, i just turn the screws in a 1/4 turn at a time going back and forth so that the board is not pushed to one side or the other.

Otherwise it is a pretty straight forward swap.

I will say - i really like the Yellow-orange Osram, and i put it in the KR1 i had that came with the W2 white osram led, and that driver was too powerful for the led. When put on turbo with the W2 KR1 driver, the Yellow-Orange osram dropped significantly in output (which is a clear sign it is being over-driver much too hard).

This tells me that Yokiamy was correct above in the comments, when they said that they thought the W2 KR1 came with a 7.5 amp driver. Because I dont think that the 5 amp driver would make the Orange-Yellow Osram to drop in output like it did.

all of that to say - if you put the yellow-orange Osram into the KR1 that came with a W2 osram, you either need to:

Not use turbo (so you dont burn out the emitter). just use Top Of Ramp - it is still plenty bright and FUN.

Use a lower amp output battery (Like a 6amp max Panasonic 18650 or almost any 18350 would be good)

Hope this helps! feel free to ask any questions!

I still hope to make a short, simple video showing how to solder and unsolder a mcpcb board from a flashlight head, as a demo. Also how to quickly reflow an LED on a board too. One day i will record myself doing these two things, they are surprisingly quick to do. It opens up so many possibilities with your existing flashlights, it has really transformed how i look at this hobby. No more Not Buying a light because your preferred emitter is out of stock! Unless it's a Zebralight of course. :))

Great thanks for this answer! I do have a flat round tip, this seems like a more repeatable way to get the wires in the right position on first try. I would add some flux first in the wire and the pad, because this technique will burn off the flux from the solder-wire.

I will try the technique first on a piece of similar gauge wire to get a sense of how much solder to put on the tip.

Side question: Do you reflow your leds on a heating plate or with an iron? (I don’t have a plate yet but they seem easy amd cheap to acquire).

Yeah, It’s weird how much I lust for this settup. The kr1 is just great to use as an indoors pointer ( as in “laser pointer”). I need restraint to not temporarily sacrifice a d4v2 to do it now but I might donit anyway since I’ll then be swapping some other leds on it (e21a 2000k, xpl-hi 4000k or 5000k, or maybe w2)…Will Hank ship kr1 and d4v2 mcpcb’s with any led if I ask him?

3rd optuon: modify the nofet ramp in the nofet config file to not go to max. I think this is possible by not going all the way to 255… TDB.


About soldering - yes practice first on similar gauge wire, but you do not need too much to flow a joint between the wire and mcpcb.

I do use a hot plate, because like you said, they are pretty cheap and easy to get. i paid $18 on Amazon. lol

Hank will ship nay setup on those boards you mentioned, and you can actually select those boards in his "components" part of his online store and many of them give you options to add leds to them. but you could also just email him first asking if he will and what the price is, then you just paypal him to the account he specifies.

Your 3rd option - Way over my head! haha, nice observation! i have no idea how to reflash so if that does workout (which it sounds ike it should),then let me know! I am pretty sure i have heard that there is a "219B Flashing" of Anduril that accounts for like 80% of turbo as no to overpower the emitters. You would want something like that, only difference being you are not limiting the FET in the KR1 W2 driver, but you are limiting the CC output to, say, 75%.