When I said Woodie, where did your mind go? Huh?
Mine went to the old cars with the wood on the sides - A Woodie, not a Woody.
I forgot the Song for the thread
I'm in this old style phase, where I want to create stuff that reminds me of the old hot rods and old cars of yesteryear. I love wood and I used to refinish old furniture as a hobby. I have wanted to make a Maglite with wood on the body, but it's only been a thought, since I know I don't have a wood lathe to turn one out.
I finally decided to try one with veneer. It's not like making one on a lathe, but it's the closest I will get and it might just be something others will want to try.
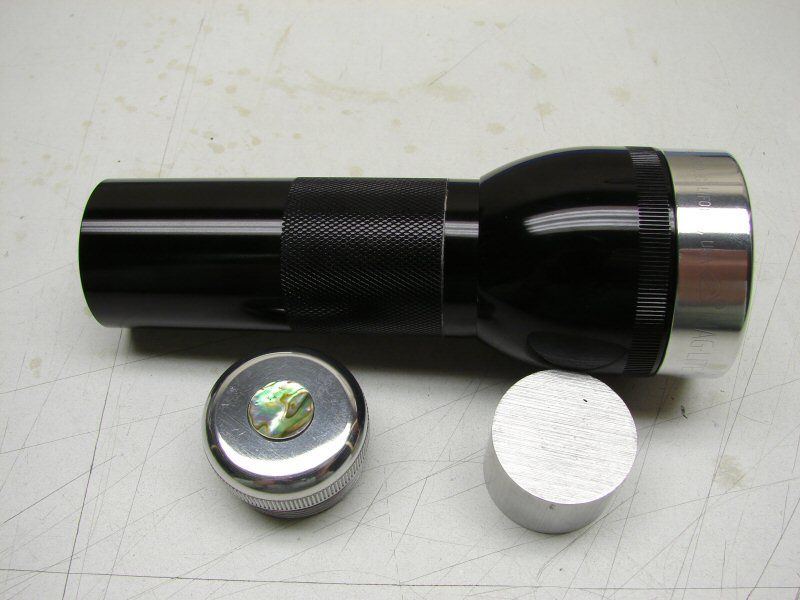
I started with a basic 1D Maglite.

The tail cap switch will have an abalone button. I think it will go with the wood on the body.
I bought a small piece of Burl Walnut from Joe Woodworker aka veneersupplies.com
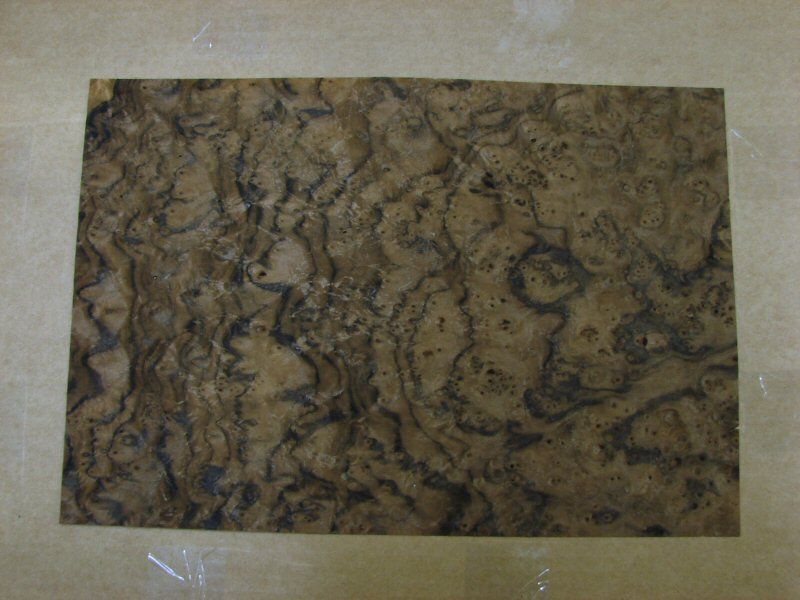
I love the look of Burl, but it's hard to work with, especially when you want to roll it onto something like a flashlight, so I bought some Super Soft 2, which is a veneer softener. I did not buy a veneer knife, as I already was at my spending limit for this light. I probably should have bought one.
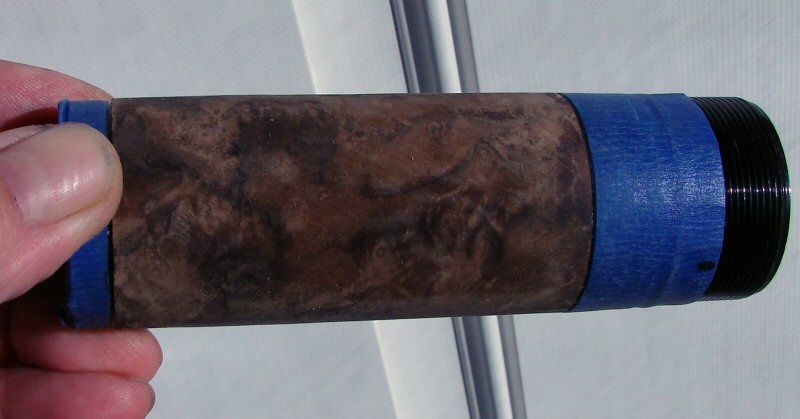
This is still a work in progress and I have managed to make a first attempt. So far, it's probably doable, but I have to learn some of the ins and outs of veneer yet. I cut my piece with a straight edge and an exacto knife, but I can see where the veneer knife would be better. I have also soaked it in the softener and tried to roll it onto the light body. Well, that will take some more thought and time. What I finally figured out was that I had to roll it tight enough to place it inside the body and let it form in there, so the two sides of the seam would lay down. If it's formed smaller than the OD you want, it can be opened up a hair and slid on.
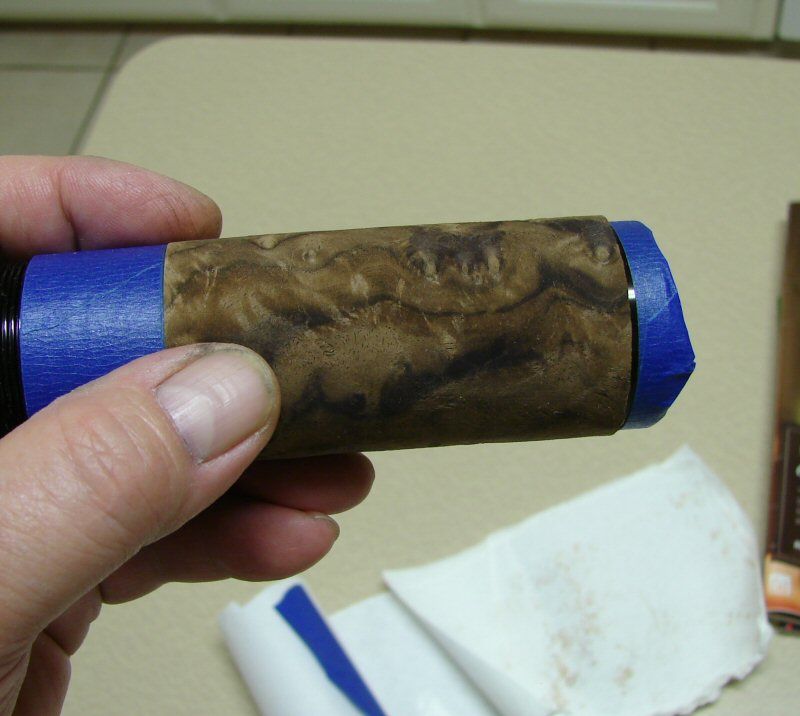
I don't have a lot of photos of the process. You know how you get working on something and don't or can't stop to take photos, but I will develop a process and do a video of it, if anyone is interested... or even if they are not, LOL.
It's not ready to put on yet. Once the wood is soaked with the softener, it takes about 5 days for it to dry back out, so it will be a while till I can finish this mod. I plan on covering the body with epoxy, sliding on the burl and then covering the burl with epoxy and possibly using a plastic wrap to hold it in place, till it hardens. Then I can sand it smooth, give another coat and finish off with a clear coat acrylic.
Time will tell, - later gator.
------------------------------------------------------------------------------------------------
Progress has been made. The burl is now applied to the light with 2 part epoxy and it will sit another 24 hours till I work on the outside. Sanding and finishing is next.
---------------------------------------------------------------------------------------------------
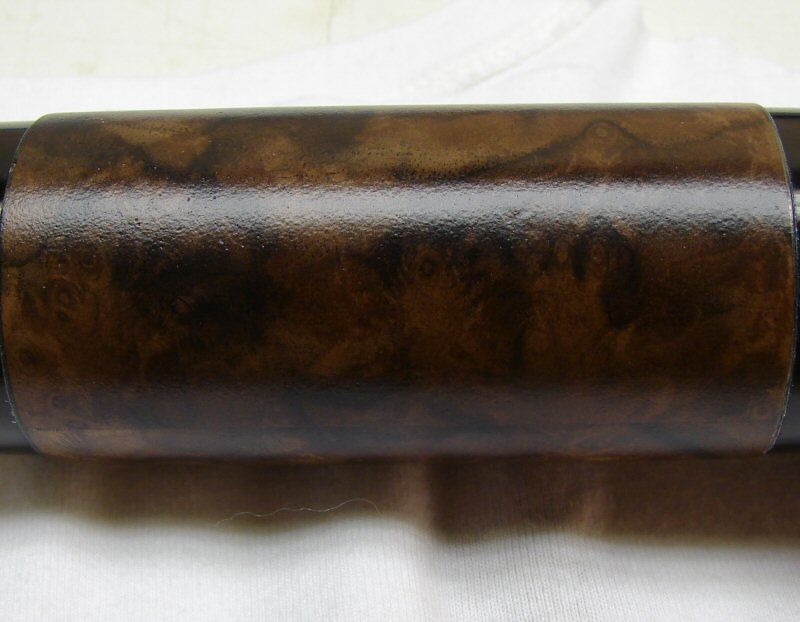
Well, I've managed to do a little more. I coated the outside with Epoxy and after 24 hours, I sanded it all back down to mostly bare wood. Now I have sprayed Polyurethene finish on it. It's Satin Poly and I am trying to do it so that there will be texture to it. Hopefully it will grip a little that way. These are just the first three coats and it's probably going to be a week or longer before it's done. 72 hours till I touch it again and then the same process all over again.
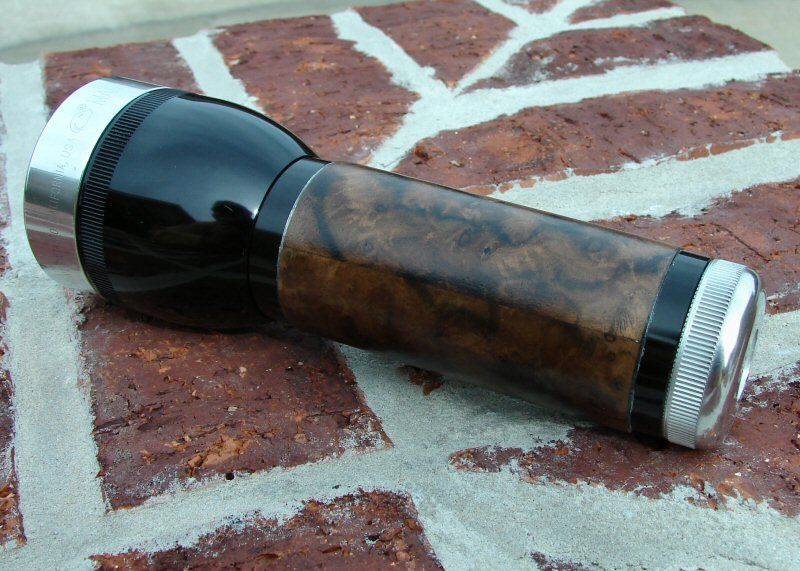
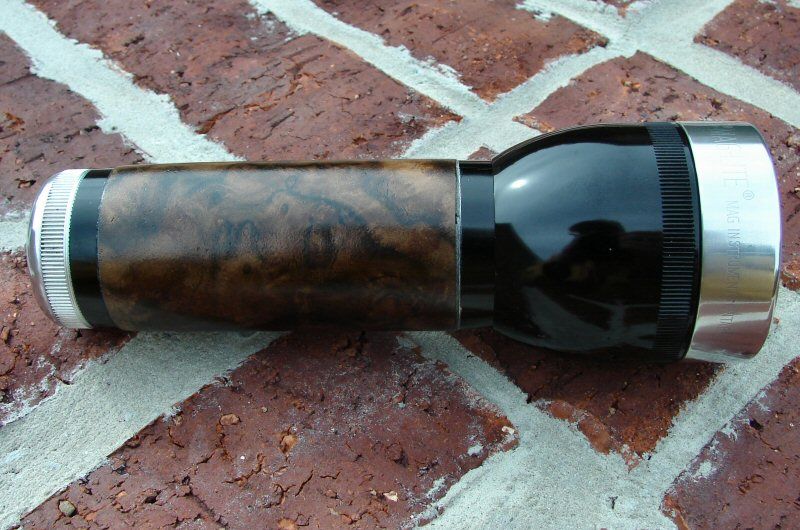
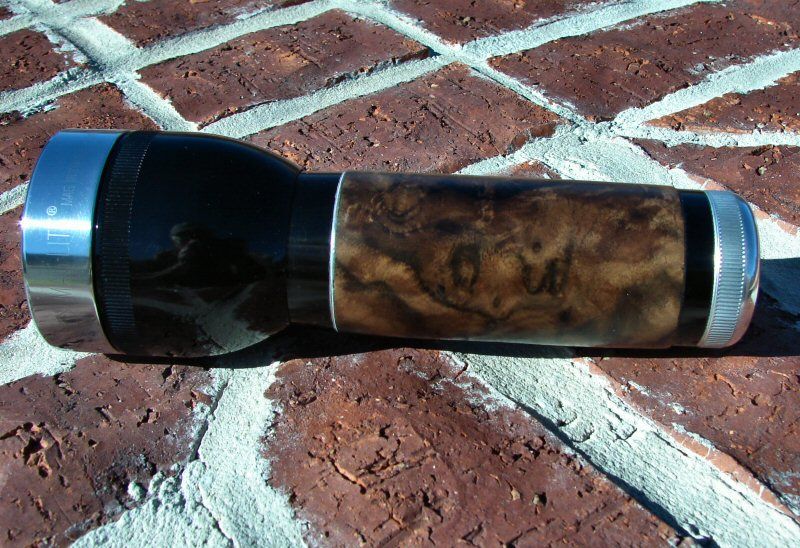
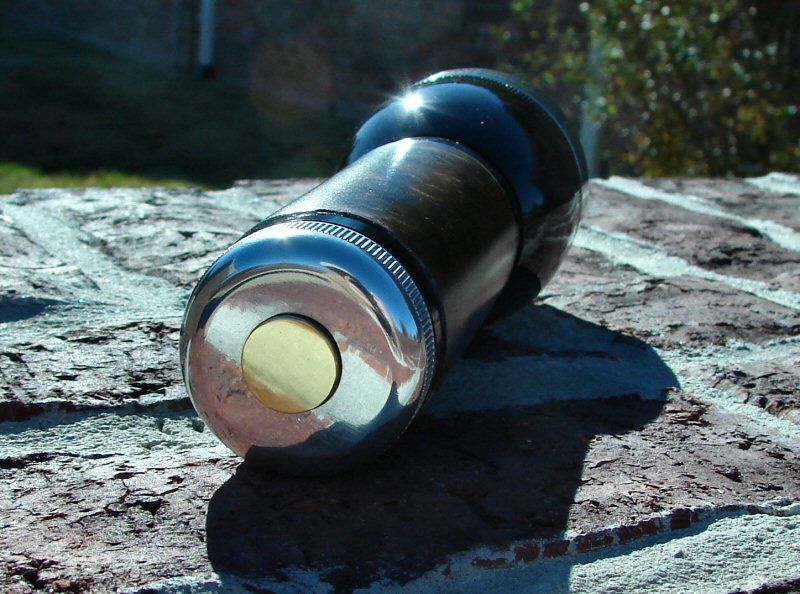
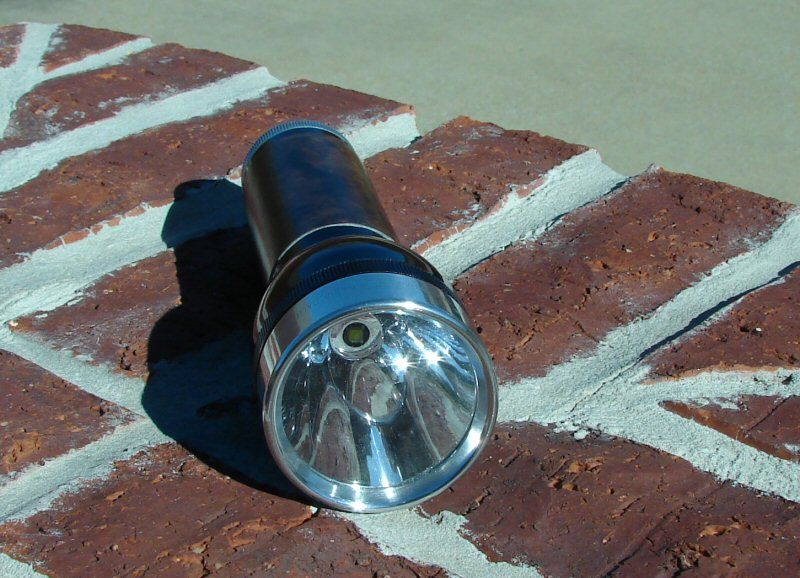
Here's a couple of teasers of the whole light. I still have plenty to do and wood finish sometimes takes a long time to do it right, or to do it half right, LOL.
------------------------------------------------------------------------------------------------------------------
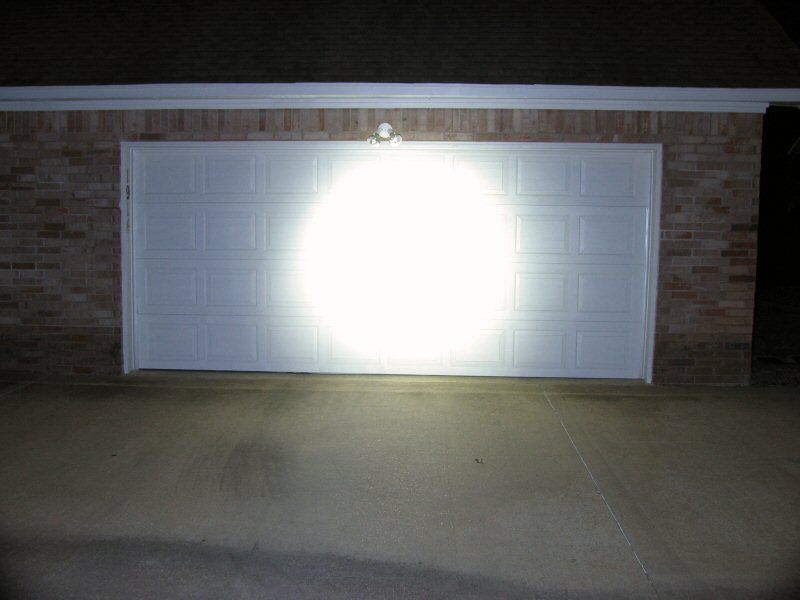
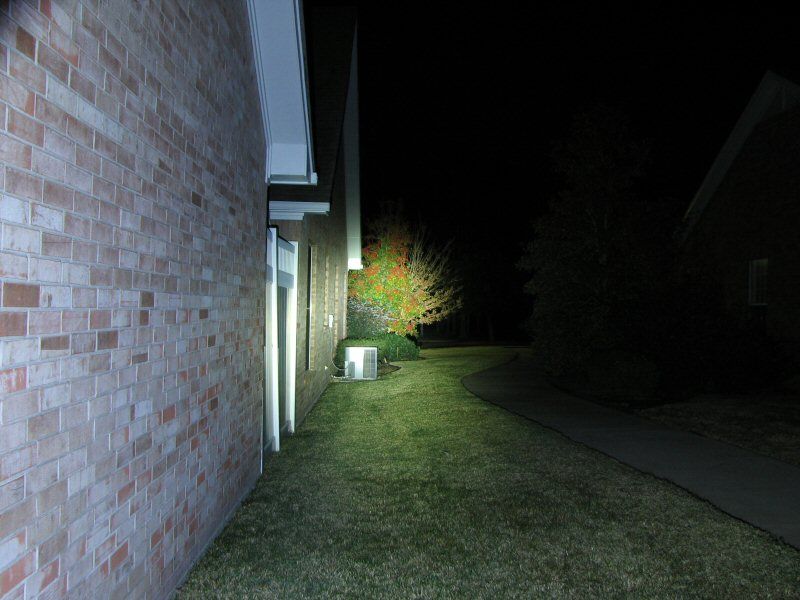
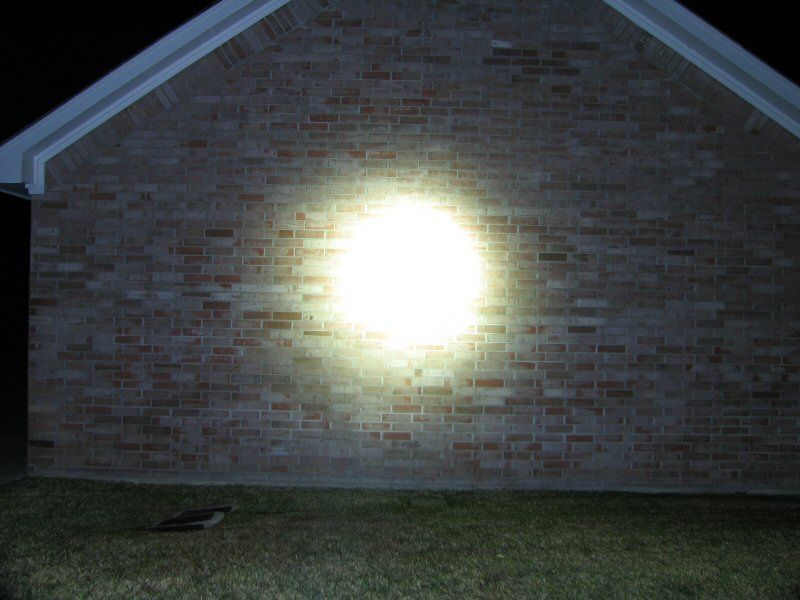
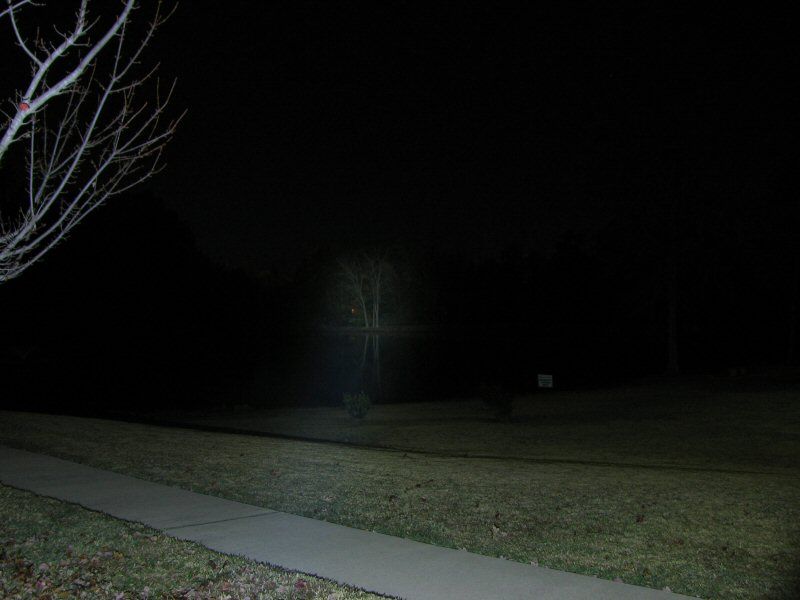
Not much left to show. I used my normal Aluminum heat sink. Direct Drive. A deep reflector and an XM-L U2 1A led.
I can say that this was the most challenging mod I have done. Trying to use wood veneer is harder than it looks. I wasted most of the sheet I had trying to do it. Never again, at least not with Walnut Burl. Probably never again at all, so this might just be a one of a kind.
I will do beam shots tonight.