![]()
I really admire your craftsmanship. The fitting on the USB-C connector looks so precise!
I think if I were building a rectangular flashlight I’d be tempted to round or bevel the corners. Yours looks like it wouldn’t need it - that’s a good size to nest in the palm.
Here’s three images and a little text that perhaps can help out anyone else who is using wood in a project. This works for power sanding equipment; I have never tried it on handheld sandpaper.
Sandpaper is a very handy tool. Wood does tend to clog the grit though and make the sandpaper lose effectiveness. Rather than toss the sandpaper away and change to new paper, it is possible to remove, or erase, the debris that is clogging the grit.
Here’s a belt with some wood fibers stuck in the 180 grit… (for sense of scale that is a 4 inch wide belt)
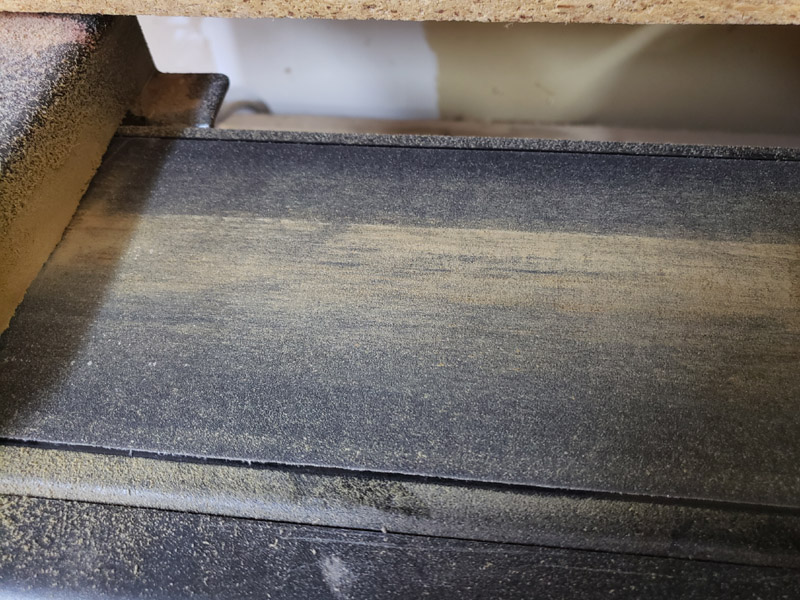
Here’s a shot of my rubber sanding eraser… (the belt moves to the left)

The rubber stick is held against the belt (or disc) with the sander turned on. Move the rubber stick back and forth. The debris is removed. This works on wood and metal but not so good on things like saned off paint.
A few swipes back and forth and the belt is much cleaner; almost as good as new.

No other update tonight but most likely there will be one tomorrow.
Thanks for the tip. ![]()
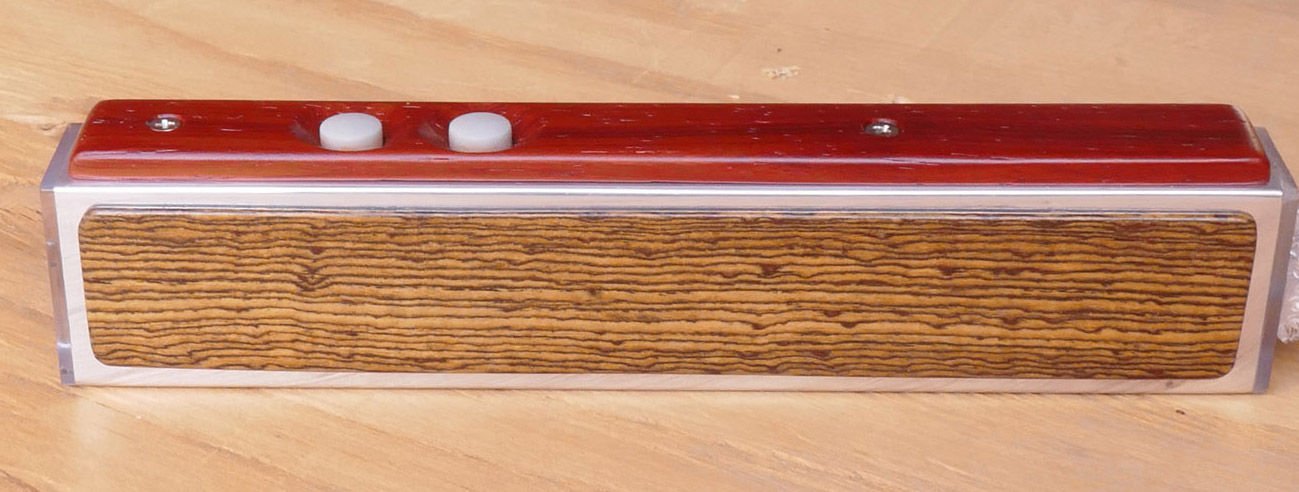
Tada!! I’m finished with this by the looks of it. I do reserve the right to make changes before the contest ends, though.

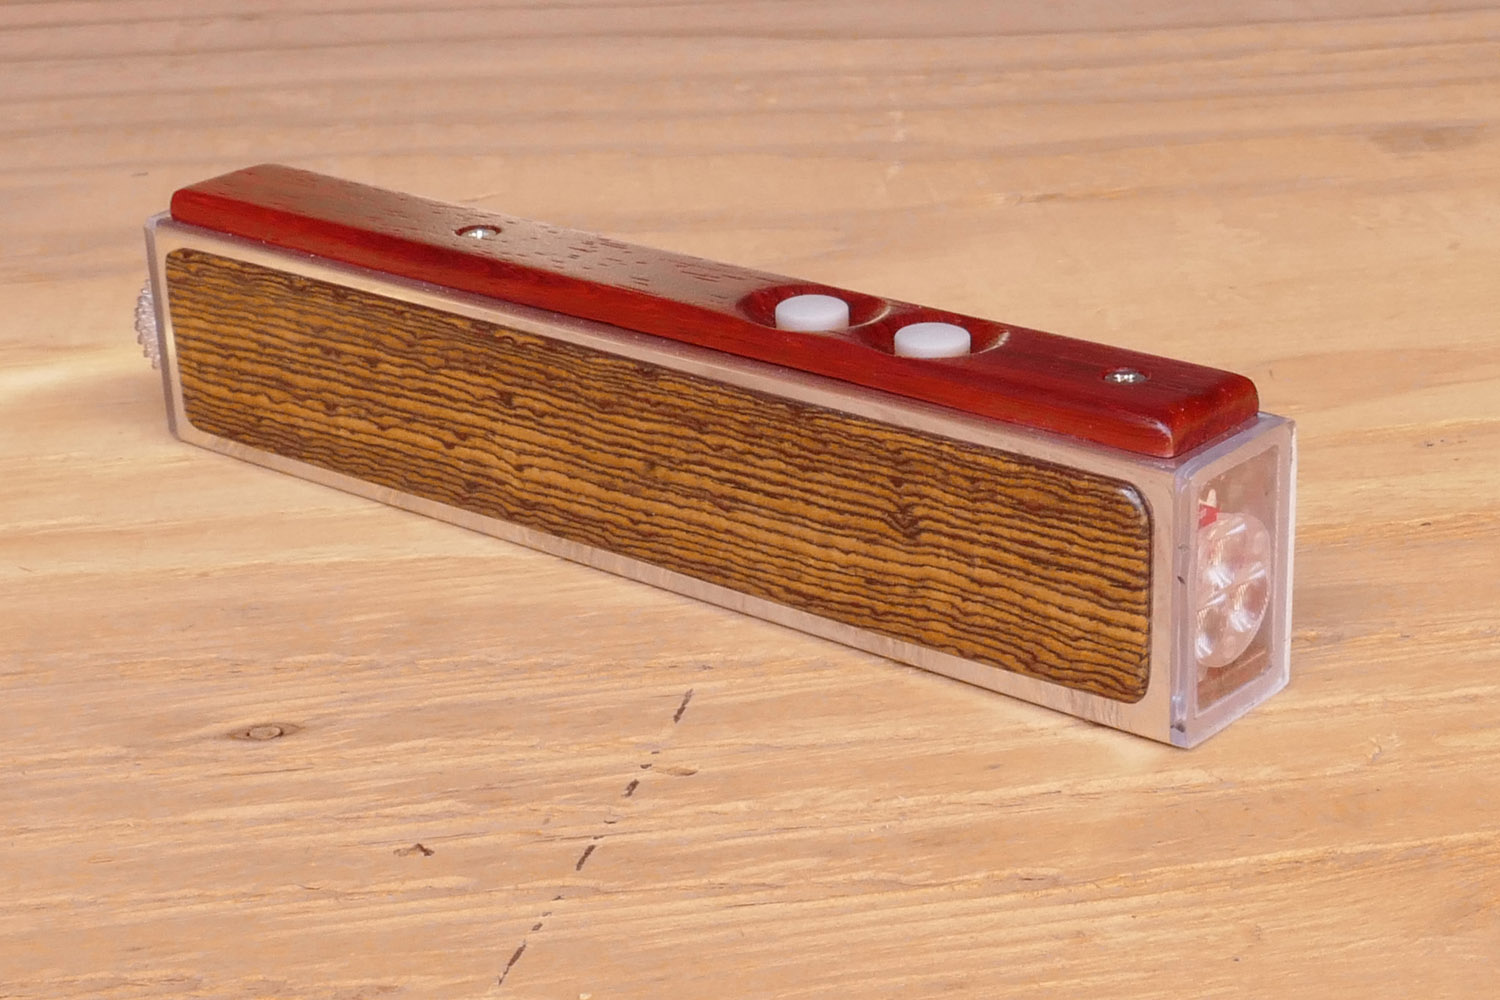
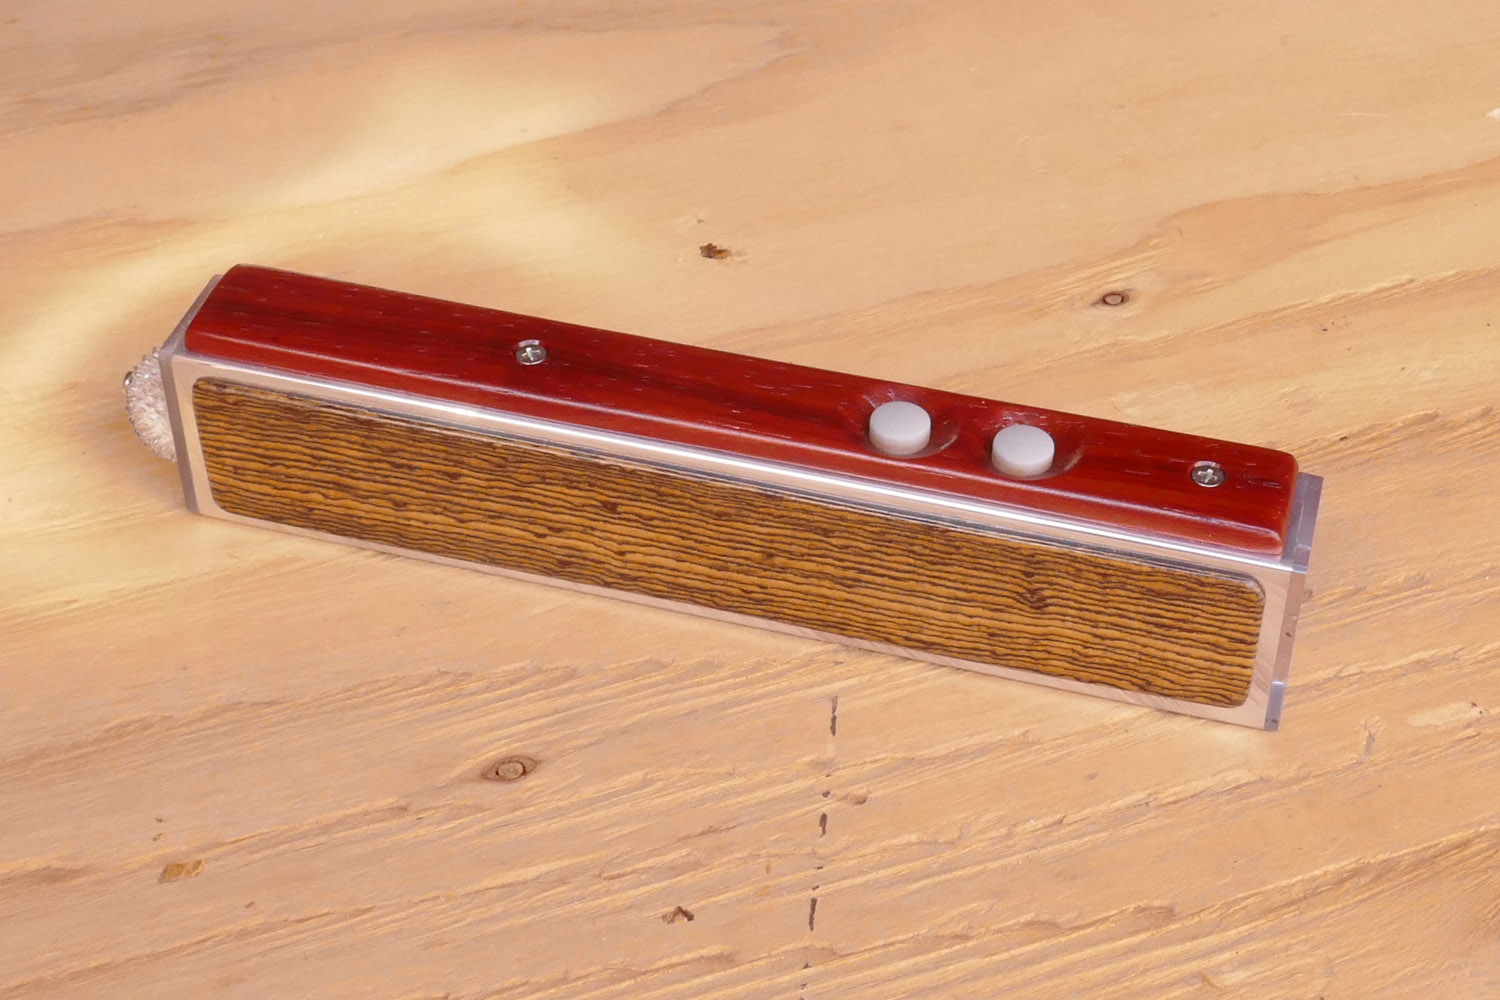
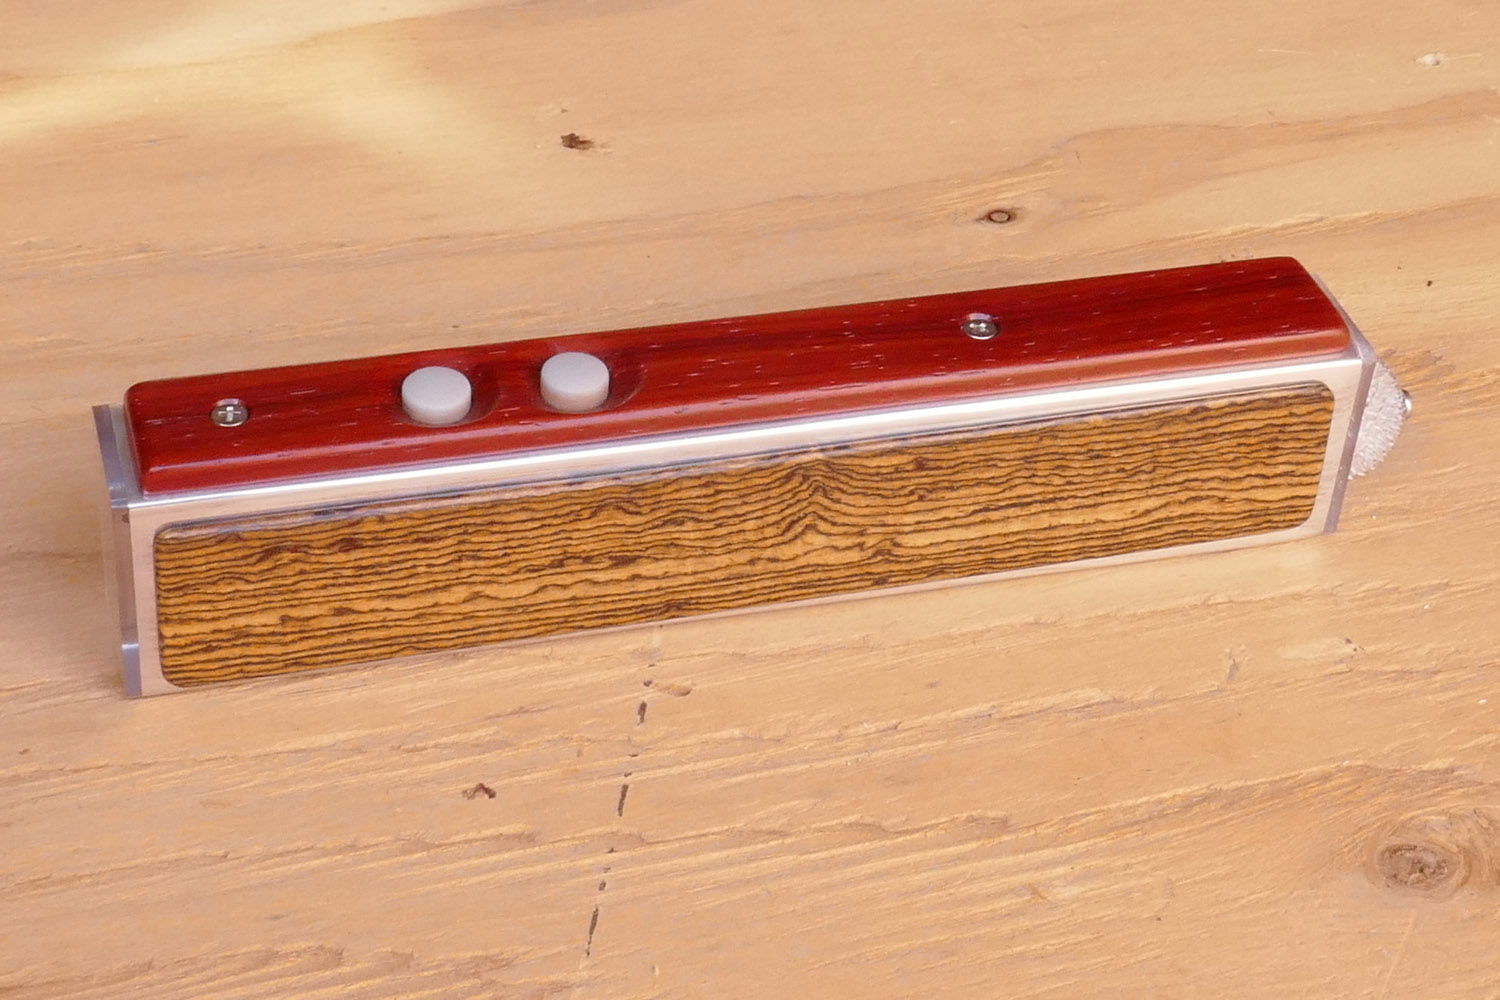
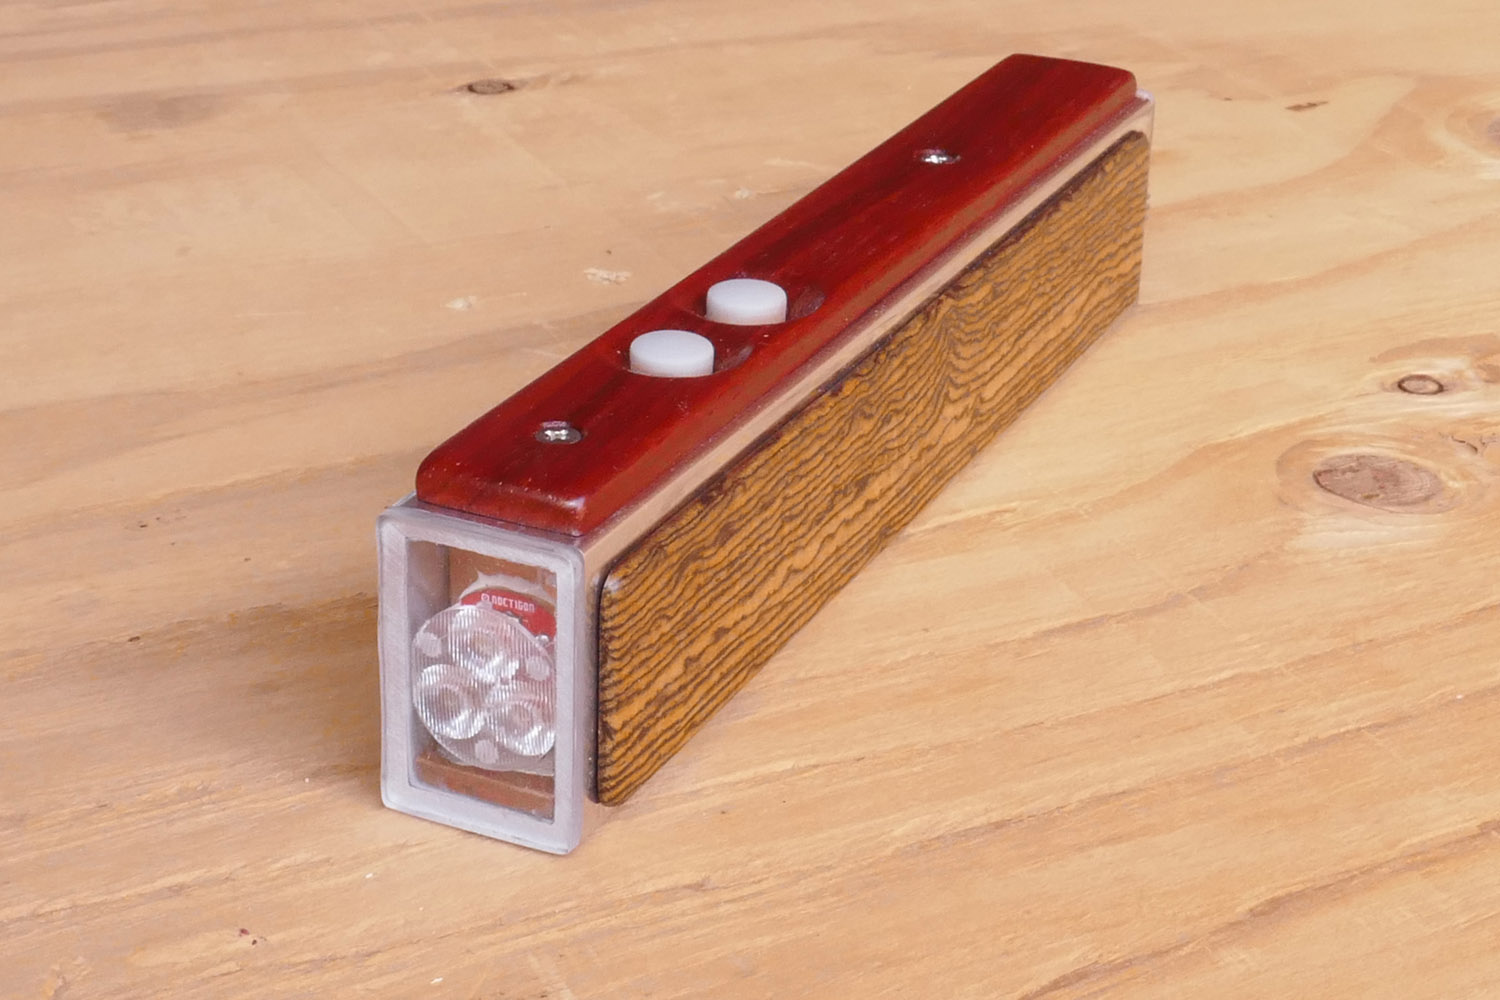


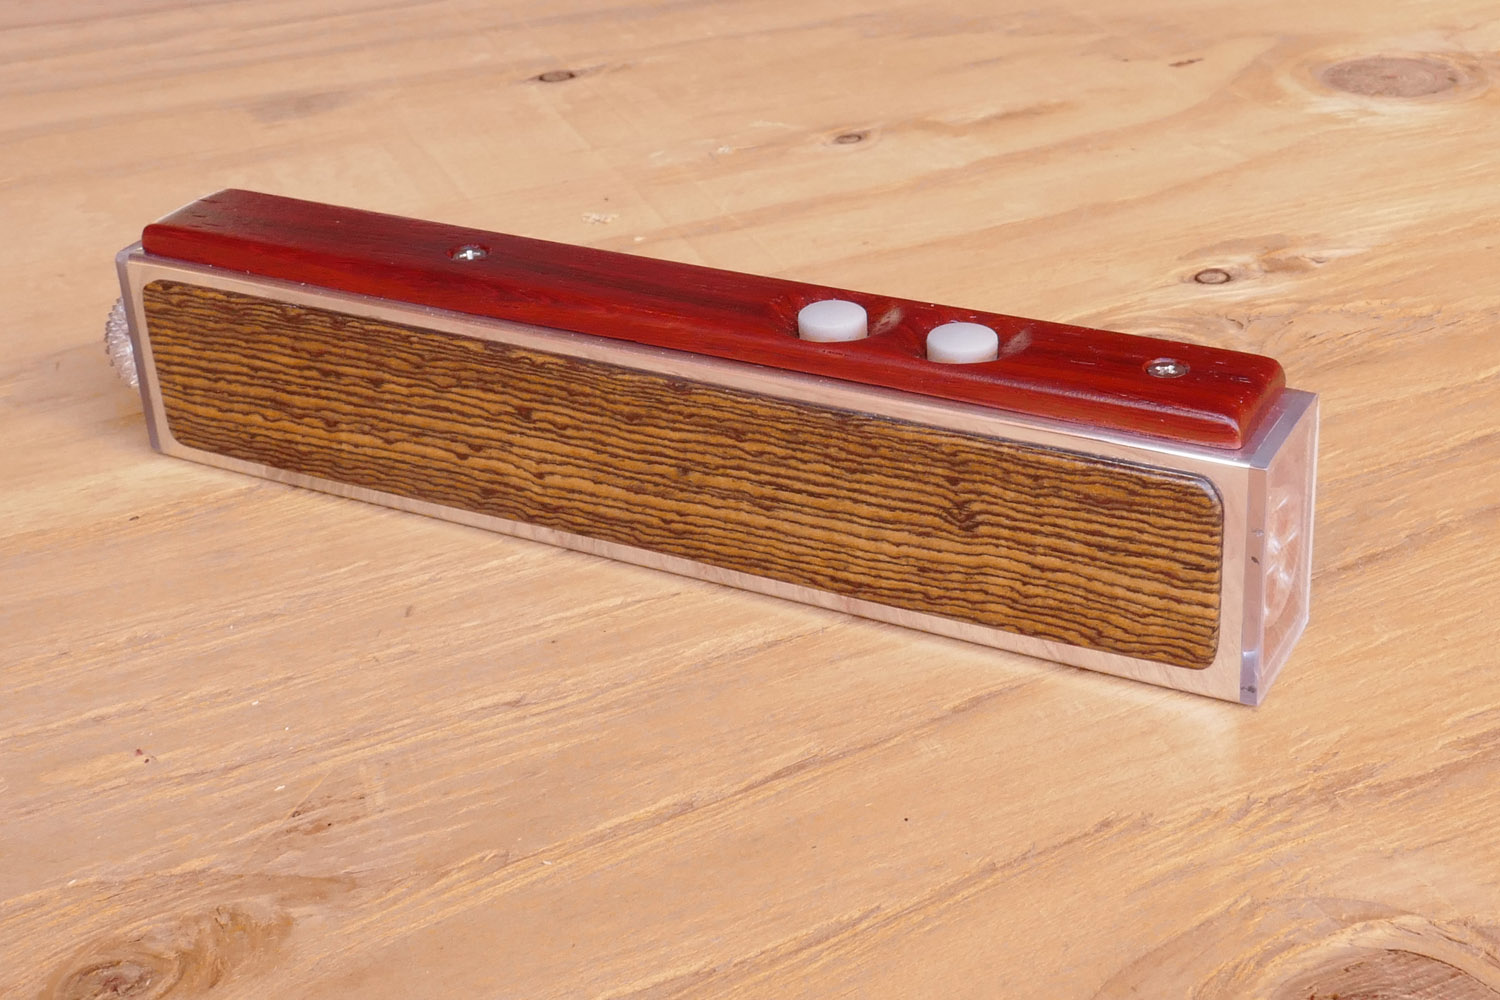
I swapped the black screws I had used to secure the padauk top strip to chrome screws for a better match with the polished aluminum.
The following is the write up and photos that tells about the progress from where I last made a post and the above pictures of the completed light. Sort of like a move that jumps back.
Well, it is about time to get serious about the exterior surfaces of this light. I did make a start a short time ago when I tried out polishing working through a few grades of very fine grit sandpapers.
I’ve gone through a few ideas and have decided. First of all the padauk wood top strip that holds the switches needs some fine grit sanding. I decided to round the top corners of the padauk. Recently Photonica wrote “…if I were building a rectangular flashlight I’d be tempted to round or bevel the corners… ” I have been thinking about that but had reserved the option until I was sure about what form the exterior treatment would take.
I planed a little off the left and right sides of the padauk before beginning to sand off the upper square edge.

I also shortened both ends of the padauk strip. Then rounded those ends as well.

I have decided to skin the sides. I cut some oak and stained them black. They’re okay but nothing spectacular. I’ve been eyeballing a piece of wood I’ve had left over from a furniture project. I’ve been saving, hoarding, it for some 30 years I think. Maybe only 25 years. ![]() It’s that piece of wood the Al tube is sitting on in the previous image. Called bocote, it grows in Mexico and Central/South America. Bocote is hard, quite dense, but very workable. I like the grain pattern. The color is a yellow-brown with darker brown stripes. When the bare wood is exposed to air and UV for a period it darkens to the darker shade pictured.
It’s that piece of wood the Al tube is sitting on in the previous image. Called bocote, it grows in Mexico and Central/South America. Bocote is hard, quite dense, but very workable. I like the grain pattern. The color is a yellow-brown with darker brown stripes. When the bare wood is exposed to air and UV for a period it darkens to the darker shade pictured.
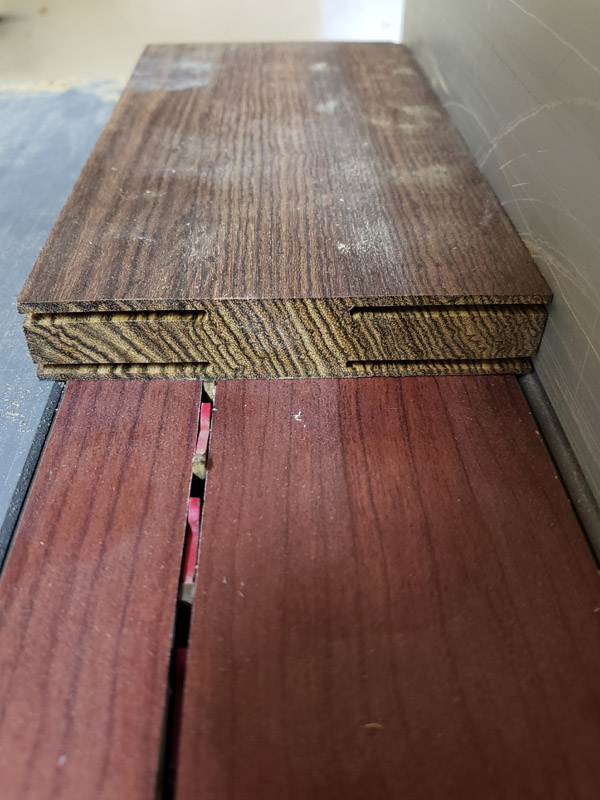
When freshly cut or sanded the wood is lighter colored. I am cutting some thin strips from an 8 inch long piece of the 30 x 4 inch remnant board. I used the table saw, beginning by cutting 4 slots as pictured. Then the fence and blade was reset and I cut the narrow thin strips from the main body.
The strips are about 5/64” or 2 mm thick; approx 1-3/8 inches wide. Please pardon the slight out of focus image. The grain and color is pleasing to me. When a clear coat is applied the yellow becomes more brown.

I used the belt sander (180 grit belt) to remove the fine striations left by the rip saw blade and then slightly radius the upper edges and round the corners. Here are the two strips I selected for use, sanded and with the first two or three clear coats applied.

After the first two or three thin coats I sand lightly with 220 grit sandpaper. After another two coats I switch to 320 grit and give one or two clear coats more. I did 2 more, for a total of 7 thin coats. I used Minwax spray polycrylic in a satin finish.
I polished the Aluminum tube some more. And some more. I worked through finer and finer grits from the previously used 220, 320, 400 and 600 grits to 800, 1200, 1500, 2000 and 3000 using the wet/dry type with water. The sandpapers use waterproof adhesives. The water lubricates and also floats away the debris making for a smoother finish. Next I used a cotton buffing wheel and the brown tripoli polishing compund. Then I switched to using Mothers Mag and Aluminum Polishing compound. First with a small diameter cotton wheel chucked in the Dremel tool. Then I switched to hand rubbing. That is rather messy, especially with the Dremel if the speed is set too high. ![]()
Some hours after beginning I had a pretty shiny length of aluminum tube.

A side by side comparison. The shiny flashlight body on the left, The rough cutoff piece with the corners sanded round as a test. The short little piece shows the original square side corners. A total of three images at slightly different angles.


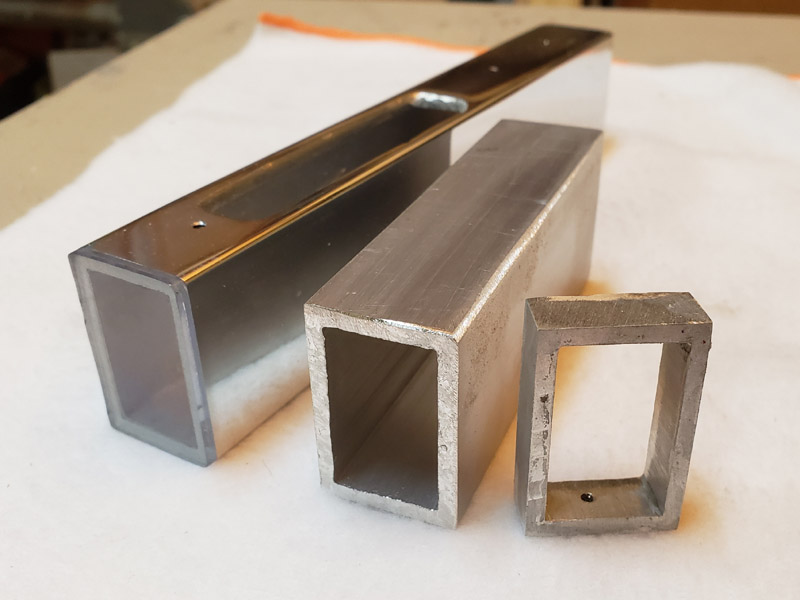
There are a few imperfections in the polished sides. I am not concerned as those areas will be covered by the top or side plates, for the most part.
Here’s a shot of the sanded and clear coated padauk top strip and its reflection in the aluminum tube side.

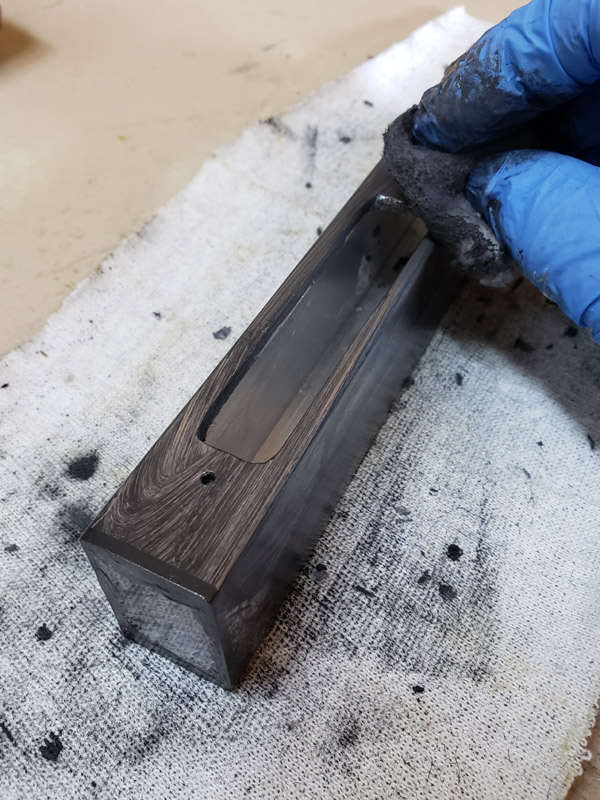
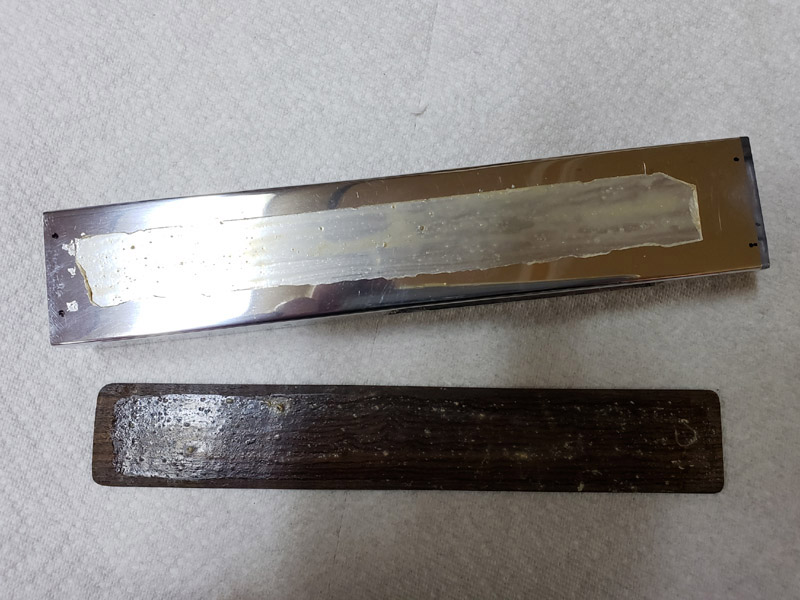
The bocote strips are glued to the aluminum tube using 3M Fastbond 30-NF contact adhesive. I could have used epoxy, but there is usually some squeeze out around the perimeter. That is unsightly and difficult to clean. Cyanoacrylate works but the bond can be readily broken by impact. Contact adhesive works well but you do have to be careful when placing the pieces being glued.
I like the 3M Fastbond 30-NF because it is much less flammable than traditional contact adhesives. (NF= non-flammable) There are other brands of non-flammable adhesive. They cost less than the 3M product. My experience with them has not been great. The 3M costs $40 to $45 dollars a quart, but is worth it as it works. Before it dries it is also water soluble for cleanup.

The above shot shows the adhesive in a wet state. Below is the dried and ready to use state
Thanks to all who viewed and special hanks to all who commented; extra special thanks to Old Lumens and his spirit of making ’lights.
Looks nice. And I hope it works nice as well. ![]() Any nightshots?
Any nightshots?
No night shots yet. I’ll see what I can do about that though.
That is a Beautiful light, and a fantastic presentation as well. Congratulation on a project well done. ![]()
I really like the addition of the pakuda scales. Looks great Don!
![]()
Old hardened silicon rod (taken out from last year unused caulk tube) works great as well.
Two things…
(1) I made a small mod. The diffuser lens on the rear end looked like a wart. I probably really don’t need so much side vision. So I removed it. In the dark the red tail light is bright enough as it is through the plain lens. So I removed the diffuser, countersunk the lens for the retaining screw and reinstalled the lens with a shorter screw. Now it can tail stand too.

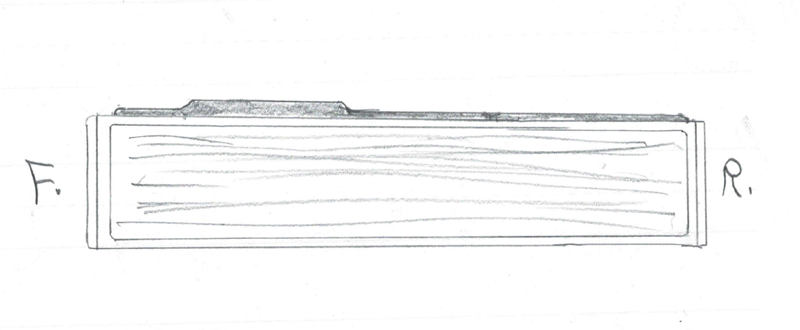
(2) I have a question. What is your opinion on this idea? I am wondering if the top strip would look better if it was thinner at the front before the switches and also thinner behind the switches. Below is a quick drawing to illustrate what I mean. I’m not sure that I could thin the front and rear areas down to the same thickness as the side skins. But the area around the switches would be a definite hunp. Thoughts/comments?
Go from this….
…to this?…
Amazing craftsmanship Don! ![]()
In between rain sprinkles I took a couple of night/beam shots. Snow coming tonight and I am getting over a cold and did not feel like ventuing any further. I also need to dust off the camera with manual settings rather than use the camera phone…. @ shots though, one with the front light and one with the rear red led on full and steady (blinky off).
Very floody elliptical Carclo optic used in the front. It is quite obvious in live real time that it spreads the light to each side and cuts off the up and down spread.

The rear is pretty much a mule, no optic

.
.
.
FYI, the hardware used to make this light, includes…
Front light: 3 - XP-L HI 1A led’s on a Noctigon triple mcpcb
Carclo 10510
Driver: Qlite 105C with 8 x 7135’s, the 380 mA version for total 3.04 amps
Firmware: Star off time, levels, 6, 15, 30, 50, 100%, plus moonlight
Rear light: 3 - XP-E2 red led’s on a Kaidomain triple mcpcb
Driver: Nanjg AK47A with 3 x 7135’s, 350 mA each. 1.05 amps total
Firmware: oldie by Toykeeper, “tail-light”. It has some blinkie modes and memory that holds last used mode including the blinkies. I like that for this light.
Switches: Two Omten 1288 reverse clicky
Charger: a TP5000 based 1 amp board with remote indicator red/blue led
USB-port: type C on a small pcb
Cell: Panasonic NCR18650B
Flat top with spot welded tabs added
Rear diffuser:
Ledil C15419 Zorya-Mini lens
Body tube: 1” x 1.5” (25 x 38 mm) 0.125” (3.3 mm) wall aluminum tube
Carrier/sled materials: copper, 3/4” (19 mm) wide x 1/8” (3.3 mm) bar for the main bottom section
Other copper: 1/4” (6 mm) thick bar scrap for front mcpcb mount and assorted 16 or 18 gauge copper sheet
2 - 17 to 20 mm adapter rings for the mcpcb mounting
3/32” (2.29 mm) lexan sheet for lenses
Fiber optic material, 5/32” (4 mm) diameter
Padauk and bocote wood for exterior and a scrap of pine for the internal usb port block.
Many of the components were previously used in some other project, or were bought just to have on hand because I was ordering something else and it was cheap to add a few switches, for example.
Your side view with the wood slimmed down looked ok in profile. It wood be a personal preference what you do though.
More details the better ![]()
I might be inclined to make a sort of ergonomic palm groove behind the switches on the top wood for the operating hand to sit in, leaving the front & very back level where it is if that makes sense.
Makes sense. I need a bar of modeling clay cut to the same size. Then squeeze it and see what/where to carve.
Maybe that will be V.2.0 I have enough aluminum tube, lots of woods, more leds and stuff….
Maybe I should have looked at using screws to mount the side skins/scales? Easy to change. V.2.0
I just made my very first flashlight video to illustrate the front and rear light outputs.
I am not a videographer by any stretch of anyone’s imagination. I seldom shoot videos; the last one I can remember (sandhill cranes) was something like 3 years ago.
I made this here at home in a subdued daylight illuminated room. In a dark room the auto exposure on the simple camera tends to brighten the lower levels too much and then the brighter levels all end up being washed out very bright points of light.
Anyhow here goes. The first video shows the modes and levels of the rear red light. The second the front white light levels. Rear light runs on 4 x 7135 regulators and the front 8 x 7135.


I enjoyed your videos MtnDon and I like what you did to the rear diffuser. The flashlight looks awesome to me!
Now that it is evening, I’ll try a darkened room video; white front light from off and then up through the 5 steps to full.
