Hi guys, the following is how a very good friend of mine modified his Solarforce M6. I asked him to write a short teardown/disassembly for the forum:

So I must start off with an apology to all flashlight owners, and especially Solarforce lovers. A flashlights is like one's wife, treat them with love and respect and they will be your life long companion and confidant. Last night I abused my flashlight, excessive brute force was applied …
The first thing you may be wondering is why? Well, nowhere on-the-line has anyone posted on modding the very sexy Solarforce M6. I was hunting last weekend in the Eastern Cape (in the deepest darkest South Africa that is my loving home), and the little M6 did not perform as desired. The dim is to bright and its too much effort to get it onto bright when you have a hunting rifle in the other hand. It was obvious, the driver had to go, this is how...
After reading a post from Dale (DBCstm) on the M8 (https://budgetlightforum.com/t/-/21092), I feared the M6 would be the same PitA to open. No surprises there. It is identical in construction, but I will repost here none the less with the steps and the trick with the new driver. You should read Dale's post carefully as he is a better orator than I.
The lens and reflector was easily removed by unscrewing the front half of the head. On top of the XML you will see a neat plastic retaining ring.

I was over eager and drilled two 4 mm holes on each side, but a 3mm hole on side would be better and would suffice. The plastic retaining ring is press fitted, so pry it out. Under it, you will see the XML (this M6 is only a month old and was ordered as an XML2, so why am I not seeing an XML2, but that is a different debate). The XML is also easily removed.


Next, take a small drift or if you don’t have the right tool, use a screwdriver. There is a thick brass ring that is press fit into the flashlight head. The driver is press fit from the top and the contact/baffle plate from the bottom. There is unfortunately no way to get the driver out in 1 piece. Break the driver into pieces through the two little holes. When you have access to the contact/baffle plate, push it out. It’s also a press fit, but comes free with some force without damage.

Here you can clearly see the brass ring that is press fit into the head.

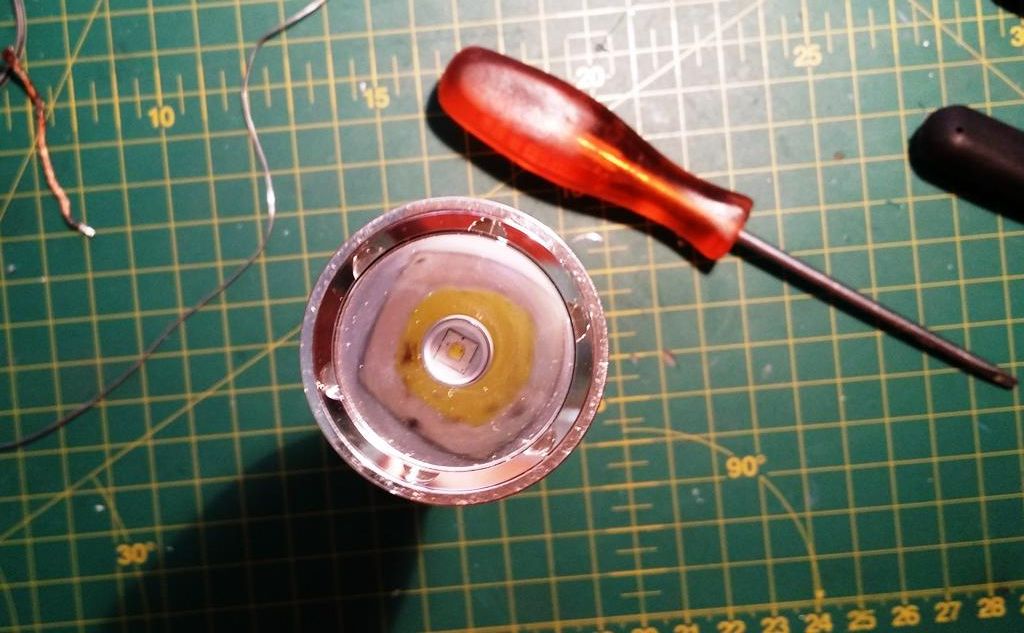
Voila, you now have an M6 that is open, but that does not work. Maybe it's too late to mention it now, but you will need a spare driver (105C/BLF17DD or similar). Clean the heat transfer paste off the pill.
Here is where my little trick comes in, the driver fits down the brass sleeve, but cannot mount anywhere and will roam free. So to prevent any shorts, I connected the 105C driver to the '+' of the contact plate with some stout copper wire so there is around 5 mm away from the base of the pill. Don’t forget to connect the '-'. The contact plate is marked with a '+' and '–' and you will see where you detached the now defunct driver and I kept it the same, just because, but you could wire it differently. There is also a secondary – on the PCB in close proximity to the '+', so I blanked it off with insulation tape, for just-in-case.


All the bits are loose, and this is what I love about the torch now. Everything is held in place when you screw it together!!!! How cool is that  Ok, place the led wire through the holes and then screw the battery tube back into place to keep it all in place. Push the extra wire back in behind the pill as there is enough space.

See, looks perfectly OEM from this side:

Put the heat since paste on the base and place the LED on it. Unfortunately, I didn't have any spare domed XML2's. All I have is a well used and dedomed (and with a burn mark on the die) XML2 U2 1A on 16mm sinkpad. The dedomed XML2 will be replaced by a XML2 U2 3C. The 16mm sinkpad fits perfectly into the plastic retaining ring. Solder the wires and don’t stress if it is not centered. When you place the white plastic retaining back on, it will center the LED by itself.


Voila – again. Now you have a working M6 again  .
.

The dedomed XML2 makes the M6 more of the "thrower" with a smaller spot that I would have preferred, as well the colour is too white when you are in the bush (harsh contrast), so it will definitely be swopped out with a domed XML2 U2 3C. The beam shots are with a Trusfire P60 with XML T6 5B with LD25 driver.

ARRRRRGGGGHHHH, I forgot about the forward switch! Life is not as peachy as you would think. I have a spare switch, which I thought would be quick to change, but alas no. A special switch is needed. A job for next year, for now this will have to do.
Also, I tried to remove the now obsolete High-Low strobe print on the head with turpentine as it’s no longer needed, but its stuck fast. Any ideas? And no, I’m not going to angle grind it…
Some food for thought: an abused and worked on torch is now a better torch. I wonder if what I said in my opening statement still holds true…. 