Ooh, I want one! If you are are looking at any changes from the brass pineapple I would like to suggest a slight bump in the ML mode to 0.3 lumen and maybe an OP reflector for a less-ringy beam. I still like it very much as is though.
Just received mine, a bit quick shipping from BG.
Over all it’s a nice brass flashlight but I think Rey needs to pay attention on the details in the future.

LED is off-center and the metal switch cap is scratched.
I have several flashlight with scratches because of usage (battle scars) and it’s okay. But receiving scratched flashlight at the first place is a bit unpleasing.
It’s okay, Rey, I’m not complaining. Just an advise.
fyi, it is not necessary to use abrasives to remove patina. It comes off with Vinegar, or lemon juice, or ketchup, just by soaking
correct, vinegar removes patina from copper and brass, but vinegar creates patina on steel, opposite effects… Do not use Vinegar if you want to patina brass or copper, but do use Vinegar if you want to remove patina from brass or copper…
Congrats on the new TiApple design, looks very Tritty!![]()
Sorry to hear that, I should pay more attention to the quality control.
Confession time.
Saw the Pineapple announced, before it was named. Initially, the $500 estimate forced me to look away. When I saw the renderings, I immediately did not like it.
Then… much later when the proofs came in, Rey threw up photos of the flashlight… LOVED the host. I wasn’t around to poke about PWM when it could have mattered… my fault. Ordered the light, with the hopes that there was only PWM on the middle two modes. Well, disappointment. I can’t use this flashlight as stock.
However, the 4000K 219C with HighCRI is amazing. It is far and away the most beautiful emitter I have. The PWM is intolerable, the existence of reflector ring artifacts are hard to understand (intentional?), the tail switch is too springy, feels gummy to me, and tail switch protrudes too far for solid tailstanding.
The tail switch can be mitigated with gunga’s instruction, and I can replace the driver with a CC driver. I’m not sure when/how I can get a loose, identical 219C. But when I do, all will be good. I’ll live with the reflector. But I am definitely keeping this host. It is really attractive, and I can not reconcile why I still don’t like it looking at the CGI rendering.
Now Rey posts pics of the other host. Again, I hated the rendering. But by the pictures posted, it looks really attractive, and I like it.
Thanks, Rey.
Just take it in stride that you can do 1000 things right, and one thing wrong, and guess which people will talk more about, ad nauseum?
It’s not you, Rey… it’s us. ![]()
Thanks for the feedback. The new batch changed the PWM to 9K, it is not visible under iphone 7 camera.
We also reduce the thickness of SS button for a better tailstanding.
BTY. it is available on Massdrop now. It is even 1$ cheaper than earlier pre-order price, not free shipping though.
Cool Rey - thanks for the info.
Is the new one on Massdrop the higher 9K PWM and slimmer button — I see that you indicate that but just wanted to double-check. thanks!
Yes.
Got mine on Tuesday. Love it. The heft, the smell, holding it in my hand, the output, the UI, the simple and someway archaic design… ![]()
The tint of my Pineapple is quite a bit warmer than that of my Astrolux Copper Nichia 219B, hard to believe both are 4000K… I like the warmer tint, so great, just wondered. ![]()
The clip is functionally totally fine, but IMHO a bit cheapish looking, and out of place vs. the body. However, removed it anyway, because I don’t use clips.
Will order spacers (above knuckle finger rings from Ebay) for both gaps, will look fine I think… And sew a leather holster.
…
Anyone out there having two or even three pineapples at hand? Just had a close look - I think it’s possible to screw two or even three body tubes together and use two or three batteries. The tail end thread is 2mm longer than the front one, but the spring in the bottom part of the light should be long enough to reach the batteries even when three of them in (the batteries 4mm further inside the tubes)…
2x1.5V? 3x1.2V? ![]()
as to patina
try soaking in very hot baking soda saturated water
Nothing left of the ReyLight logo after more than one hour with an old sock and ako POLISH. ![]()
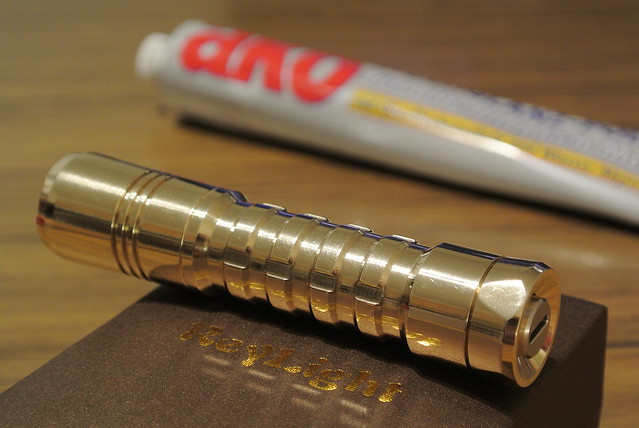
Ready now for natural aging, being used and fondled.
As far as I concerned, there are a number of people who doesn’t want to use this flashlight in stock format. Should we start another thread to discuss what spare parts are fit with this “host”?
Beautiful polish! I polished mine too, and really like it. It is one of my favorite lights - the heft is great, I like the modes (although a brighter top mode would be nice) and the Nichia 219C 4000K is a winner in my eyes; I, too, like its slightly ‘archaic’ look (as Meich mentions above).
Using it reminds me of wandering around the dark in the Uncharted games with Nathan Drake’s retro flashlight. The heft, the archaic look, the weathering I added, the warmth of the beam, the throwy beam pattern, and even the ring in the spill area… somehow it all goes together to give a feeling of adventure. Some of these things would normally bug me, but in this case I think it works.
Yep… adventure. An orange trit goes quite nicely with it - the warm glow fits the archaic charm; looks a bit like an inner flame.
Agree!
I was thinking about what trit color to put and you give this idea. :+1:
I, me myself and I, all of us, do not like constant current. I “REQUIRE” PWM. So there. Whew! Feel so much better having gotten that off my chest!
Love the Titanium version Rey, HAVE to have one! ![]()
I just solved the wobbly-button- and not-quite-tailstanding- “problem at once with a simple workaround.
Button wobbliness is caused by a quite big gap between the button and the hole it’s in. Button is app. 9.7 mm, hole is 10.0 mm. The drilling inside the tail, in which the collar part of the button is in, is app. 10.7 mm in diameter. So there’s a theoretical 0.5 mm of space between the button and the inner drilling.* My idea was to put a wire in which is slightly smaller in diameter than this 0.5 mm, so that the button side play is minimized. (The idea came to me reading a posting of gunga’s at CPF saying ”The only real solution is to add a thin spacer between the button and the tailcap”)
First try was with 0.5 mm Sterling silver wire which I have lying around. ![]() Cut 30 mm off and bent it to a circle. Was too tight, button went through, but not back, the spring force of the switch not high enough. Some thinking later I found the perfect material: a bristle from my stainless file brush! My caliper showed something between 0.3 and 0.35 mm - perfect!
Cut 30 mm off and bent it to a circle. Was too tight, button went through, but not back, the spring force of the switch not high enough. Some thinking later I found the perfect material: a bristle from my stainless file brush! My caliper showed something between 0.3 and 0.35 mm - perfect!
Cut, formed a rough circle, put it in, removed the two layers of tape from the switch, and reassembled the tail.
Works like a charm! Only very little play left now, and the button ist recessed enough for the light to tailstand on the brass itself. A little less smooth-running now, the button, but this may be mainly due to the spacer circle not being really perfectly round. And a little bit of grease could help too, probably…
And one could try different wire materials, copper maybe…
Will take some pics on Thursday, no time before then.
Good night, good sleep …
![]()
- EDIT: The play is not mostly due to the gap between the thinner 9.7 mm part of the button and the 10.0 mm outer drilling in the brass body, but because of the collar of the button being too tiny (don’t quite remember and no time to dissassemble now, but it’s 10.2 or 10.3 mm or so, vs. the 10.7 mm of the inner drilling in the brass). So the button is able to sit quite a bit angled, what it often does after clicking and pressed back by the switch. The tiny collar of the button extending into the outer drilling, having only two points of contact vs. the collar in the brass part. This behaviour is also caused / made easier by the convex shape of the top of the internal switch, on which the bottom of the button can slide easily a bit and sitting slightly angled when out of center.
I think the wire fix works fine also because it forms sort of a conical funnel, a ramp, in which the button is centered when coming back.
Hey. Awesome stuff. Great idea!