I’m always using plumbing parts for flashlights. Turnabout is fair play.
:laughing: Made my day.

Beautiful creation, I like it.
![]()
Wheres my glasses? :sunglasses:
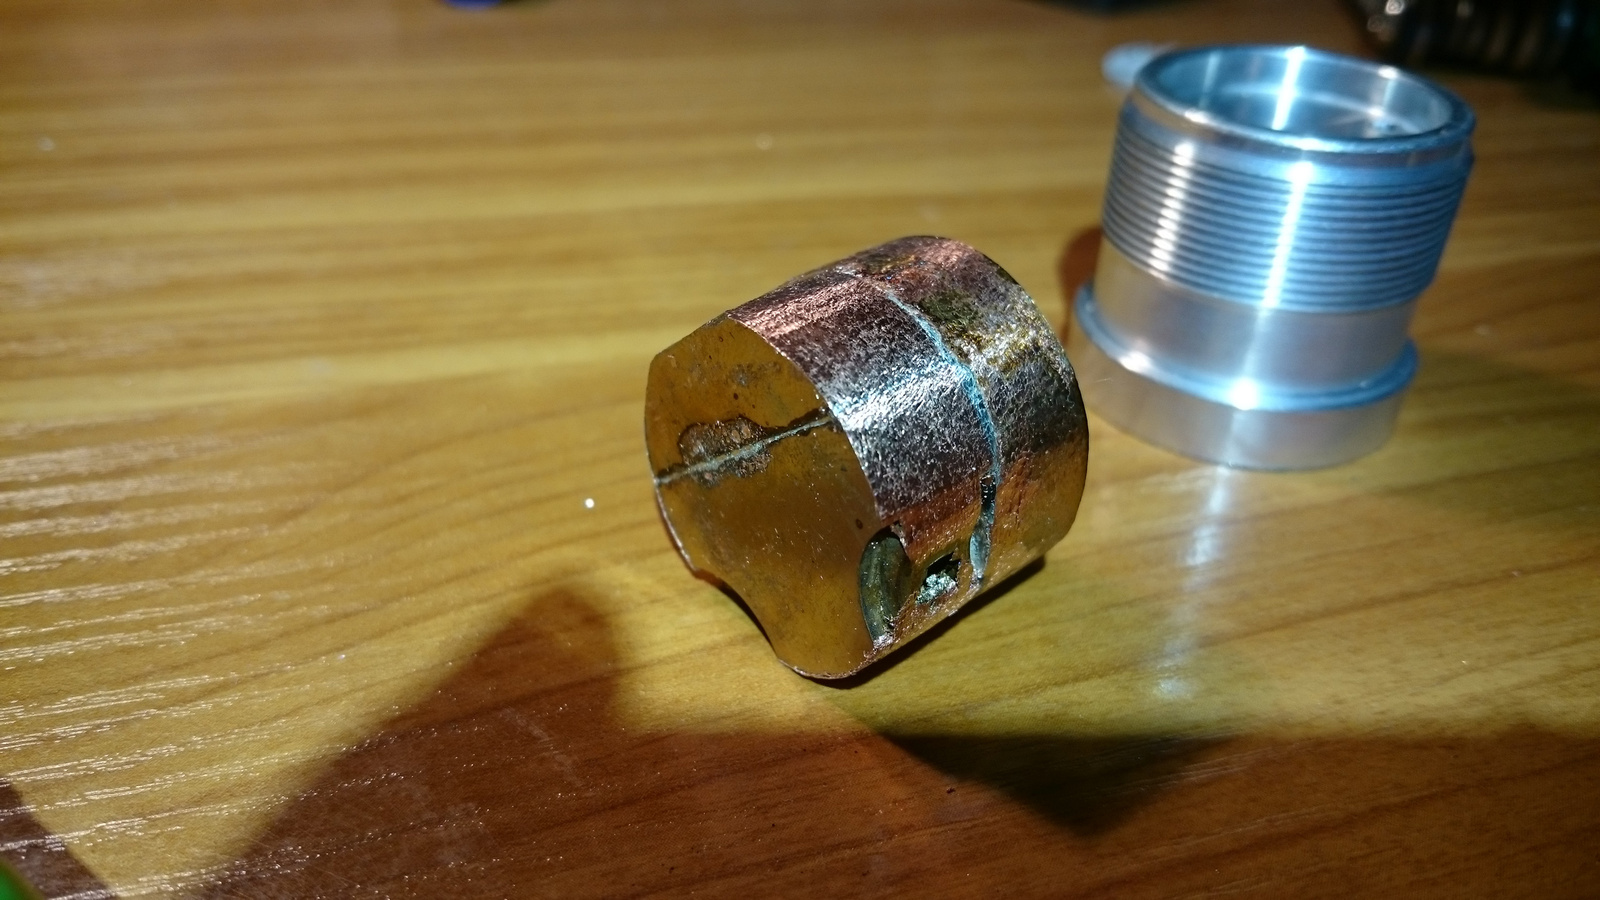
Last week I put together the Texas Avenger driver for my Small Sun ZY-T08 for an MT-G2 mod.
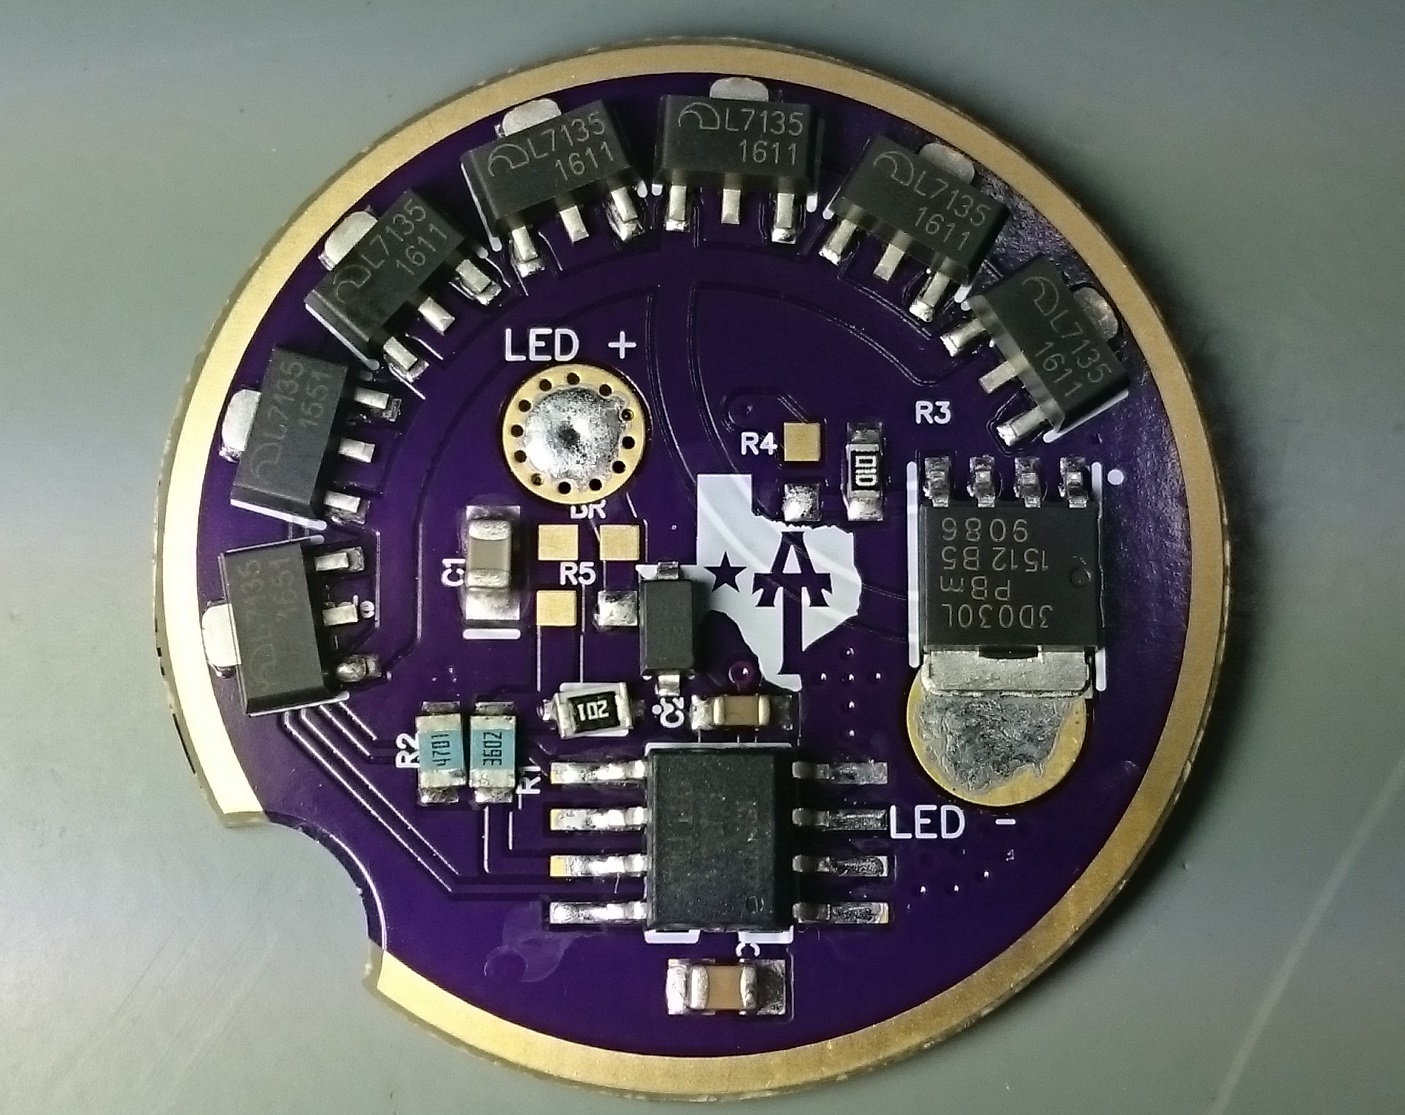
And today I started to modify the light to handle the heat. I have a 10mm thick copper piece. I cutted a circle from it to fit in the driver cavity.
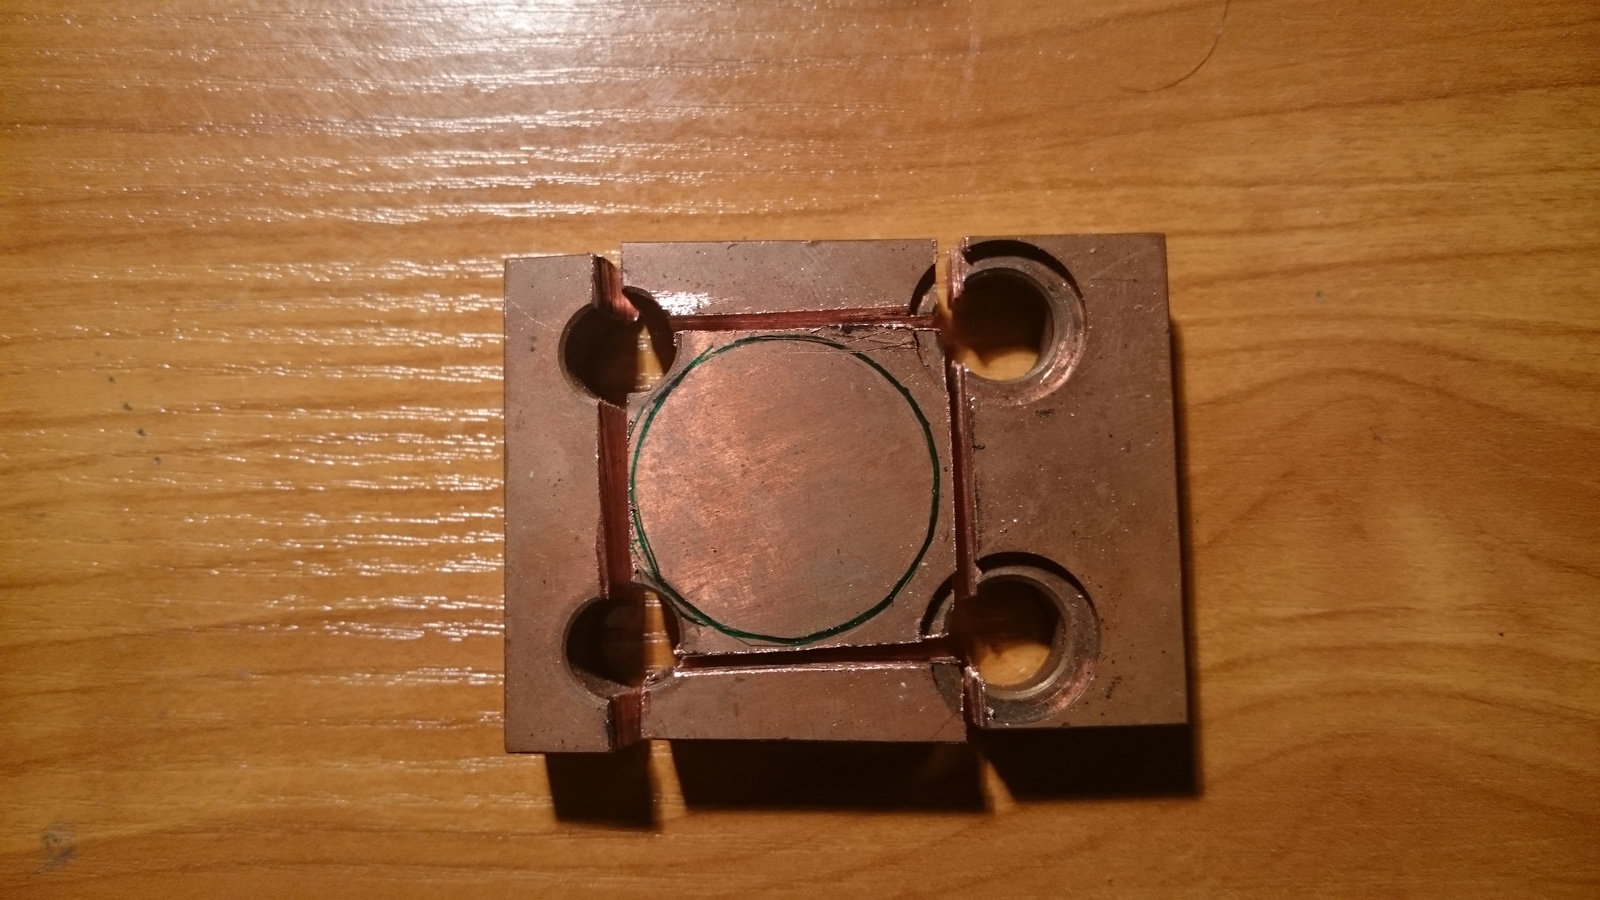
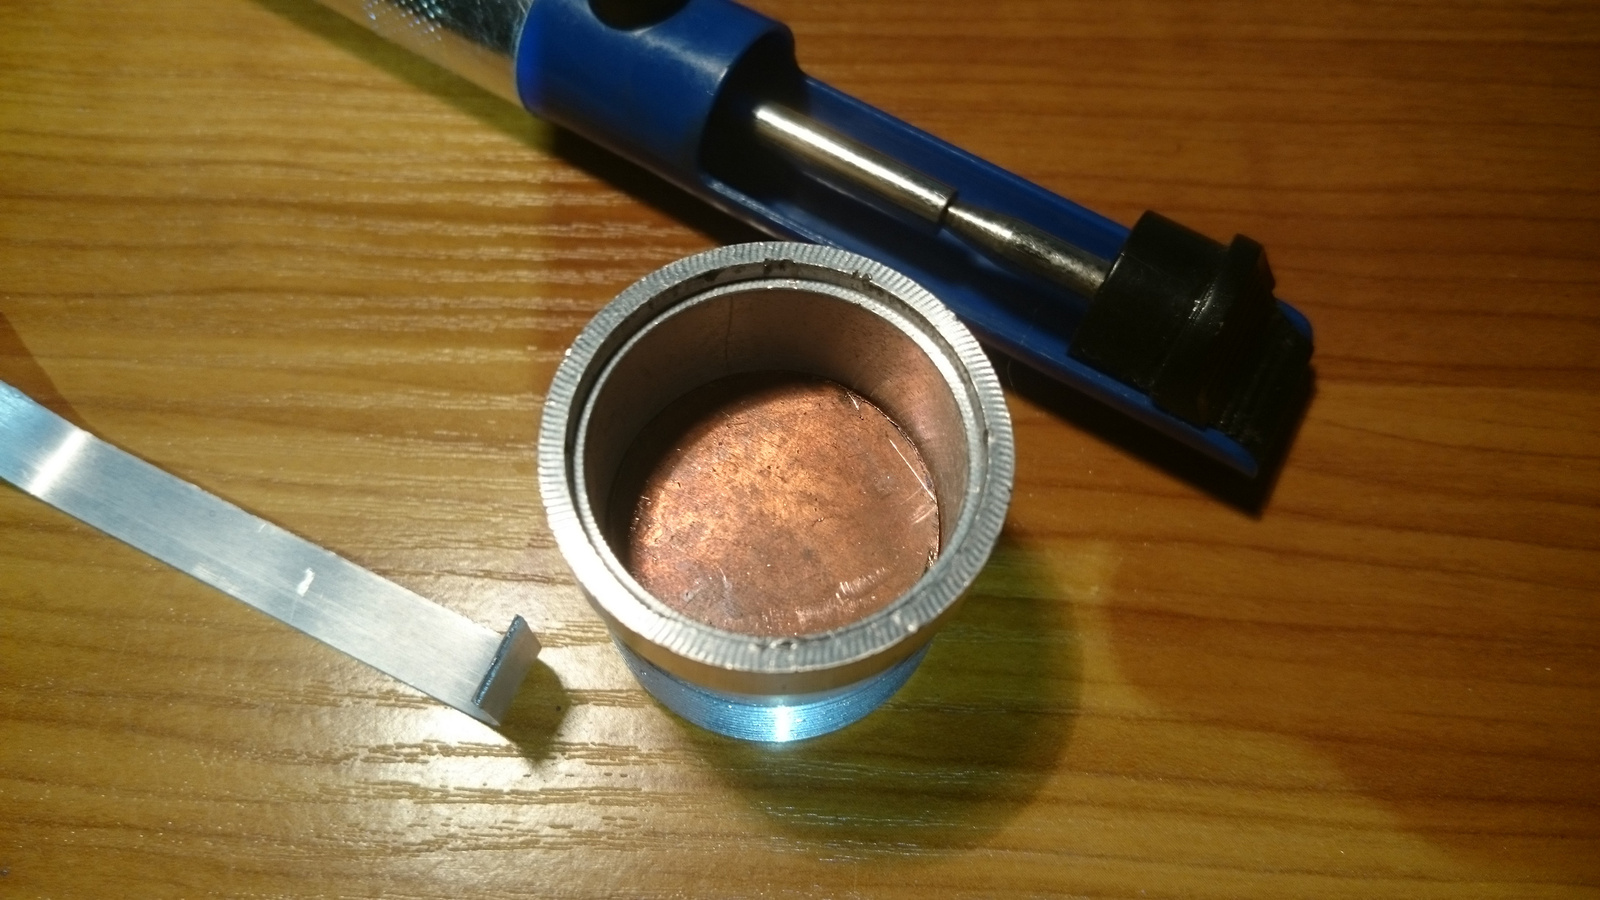
Then from the remain material I made another circle and soldered together to double the thickness.
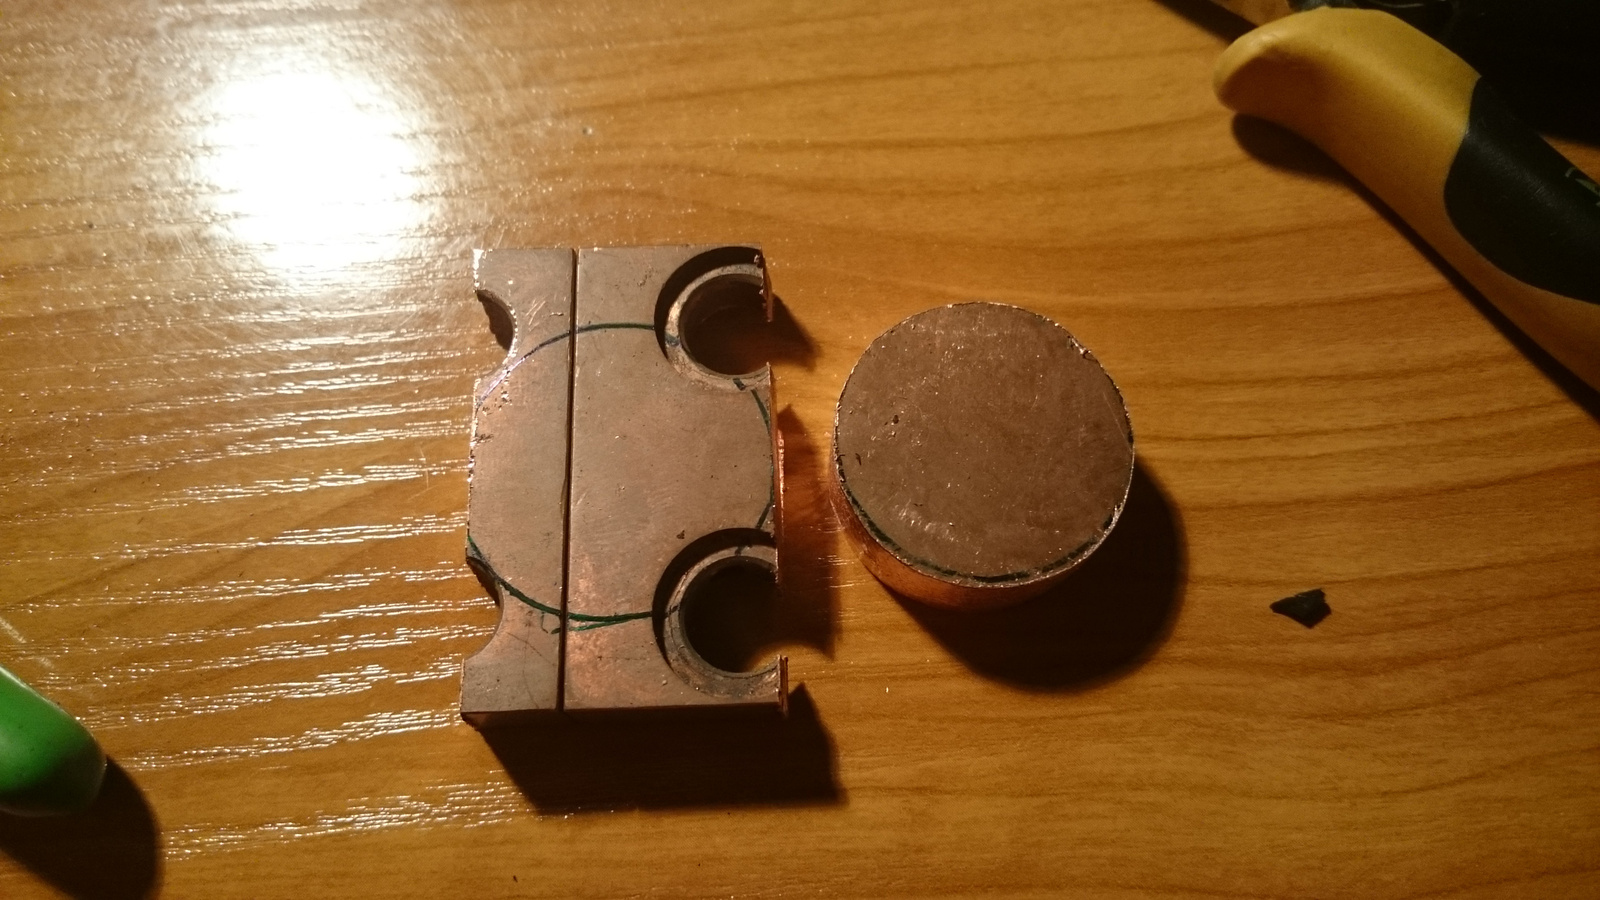
After that I cut out the led shelf from pill, and now I can put the led star directly on the copper.
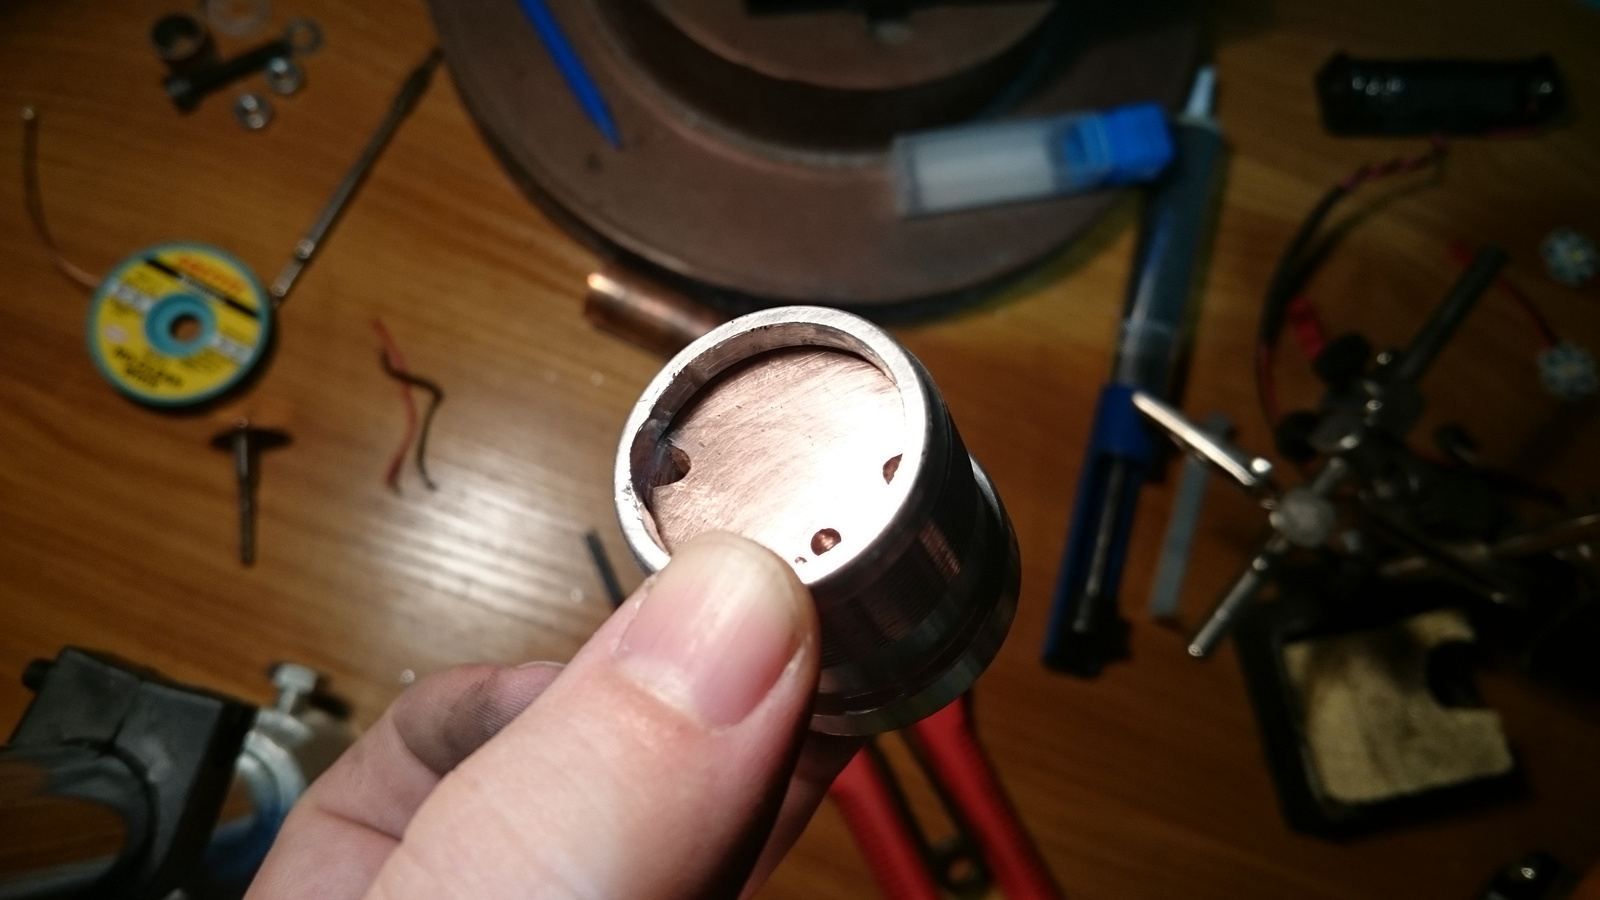
I need to glue in the copper with some fujik, then flash the driver, and modify the switch board for series battery contact, put in the led and solder wires. Maybe at the weekend I have time to finish it.
Yesterday, Nitecore NU20 with magnets, clip and auxiliary red LED


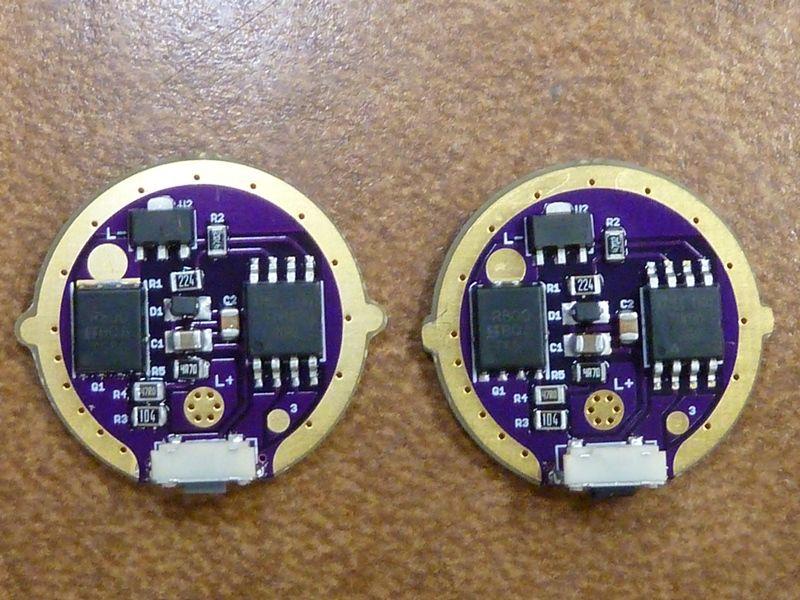
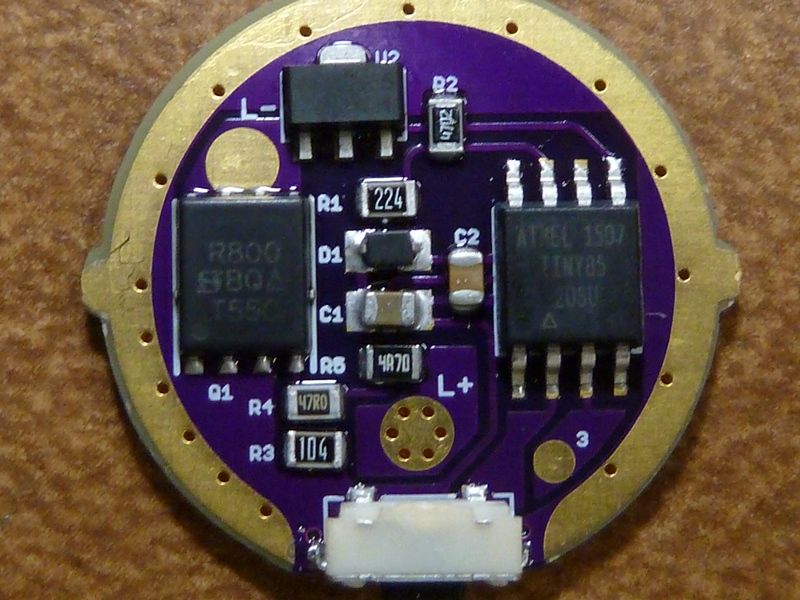
BLF 348 with a Tiny10DD.
Cool! I mean: Hot!
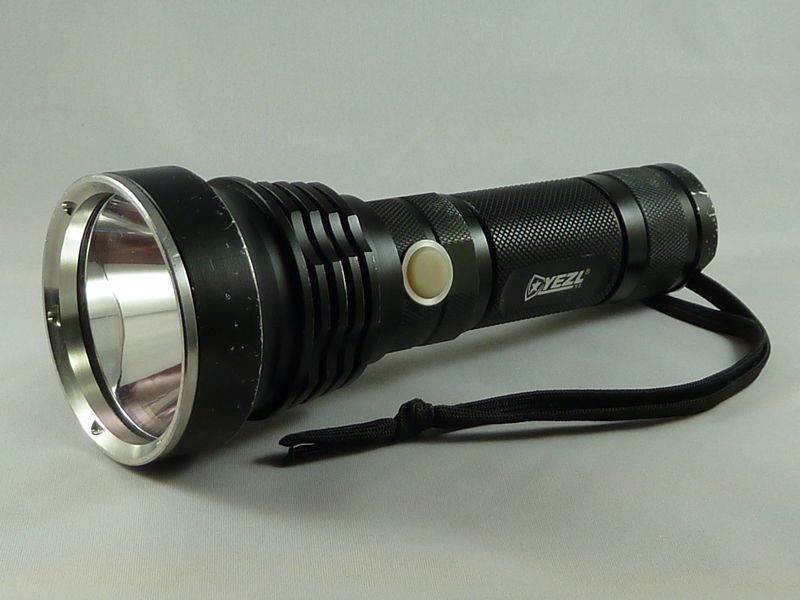
I posted this in DEL's OSHPark driver thread, but should have been done it here. Almost 3 years ago I modded a Yezl Y3 for my cousin's son who's into hunting. Frequently they are out before dawn and he wanted something powerful with some distance. I recommended the Y3 at the time. The original mod was a Nanjg nodded with a FET:
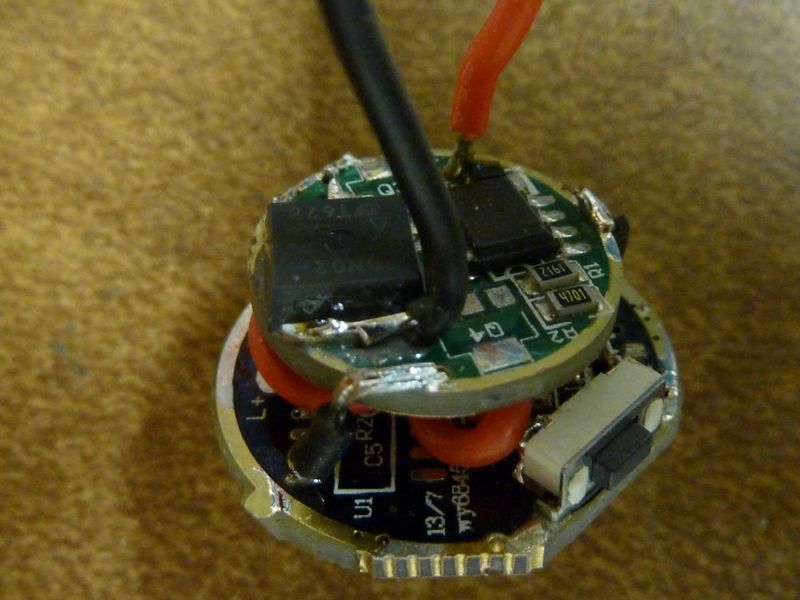
The switch eventaully gave out - didn't come loose, but internally there was no more spring action.
After it's all modded/cleaned up:
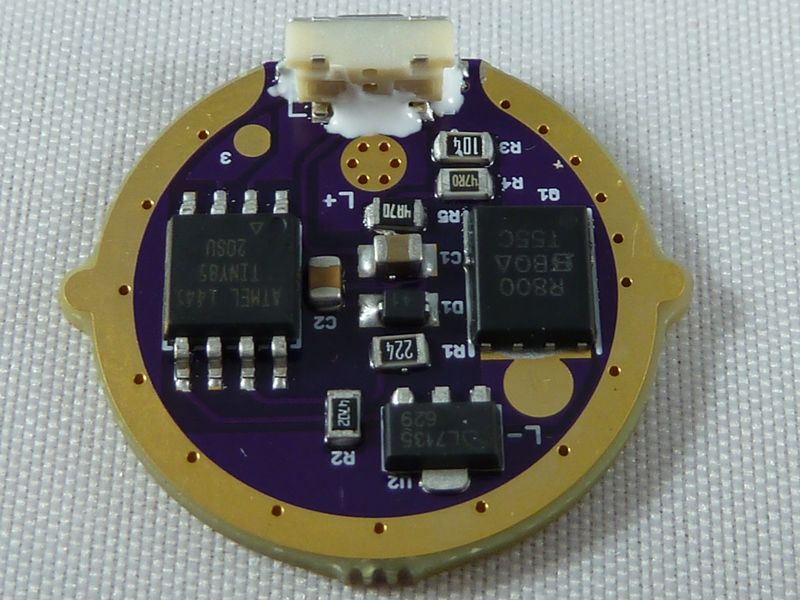
I did 2 boards. Will get to the 2nd some day:
I used Arctic Alumina epoxy to sure up the switch:
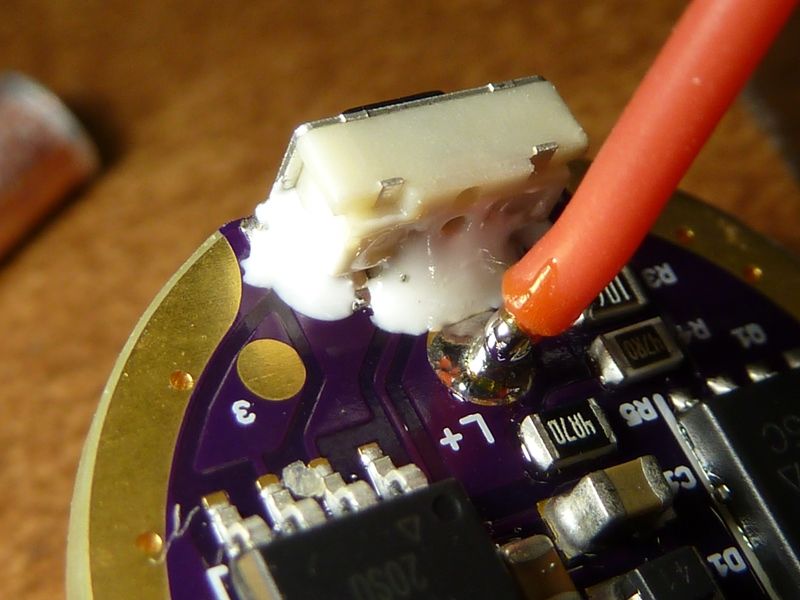
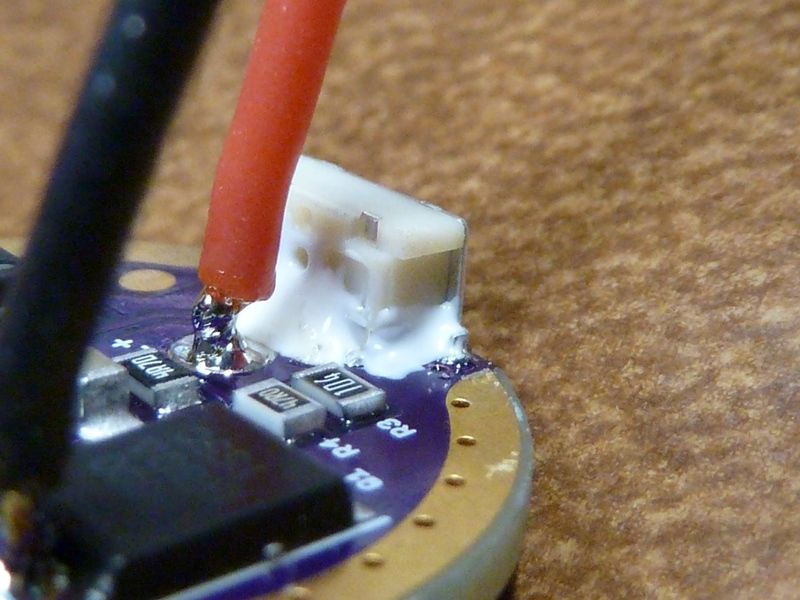
22 AWG bypass on the spring. I also applied some solder paste on one side of the LED+ pad, then the iron on the other - think the holes filled up well w/solder. The bypass is soldered to the pad with the thru holes, so minimum path to the LED wire:
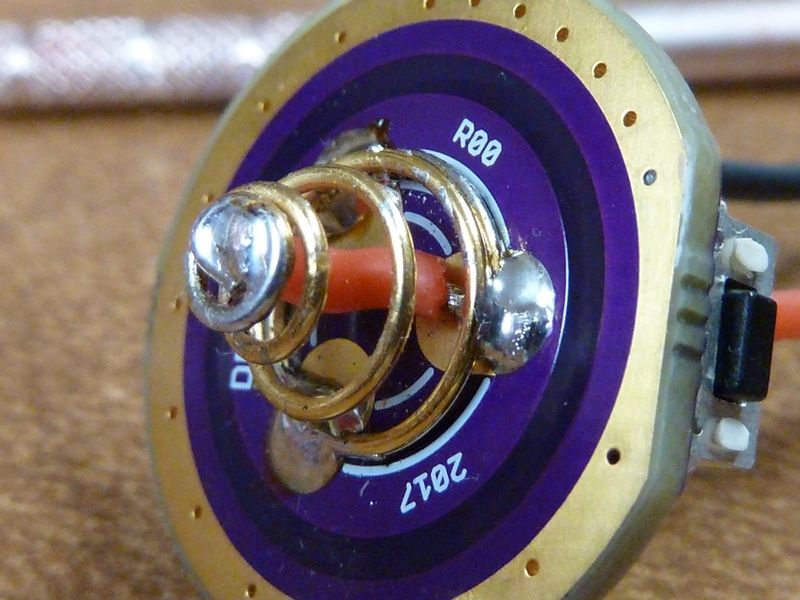
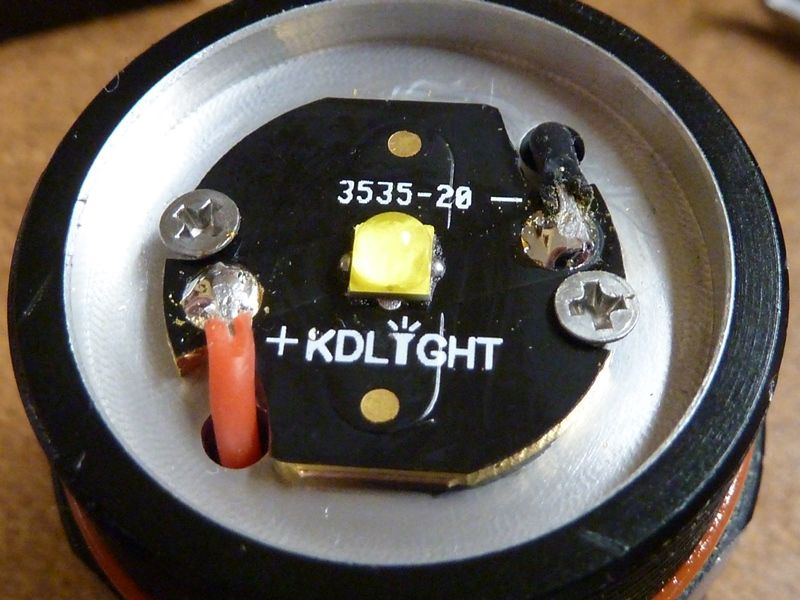
Seems to be my favorite LED right now. A KD XPL2 V6 3B, on a KD 20 mm MCPCB. Used 22 AWG because didn't think I'd get the clearance with 20 AWG. This is an early model Y3, and has a 23 mm wide flat reflector base. Later models I have use a smaller flat surface and different centering piece. The new ones need the centering piece significantly trimmed, sanded down, then the MCPCB is too low,so have to use a copper shim to elevate it. This one did not require a shim:
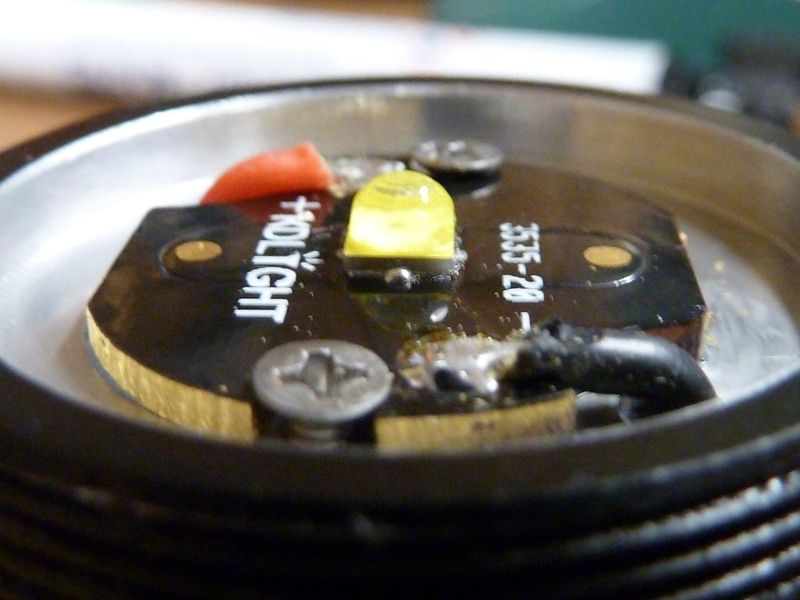
Here's a better shot in my lightbox studio on the 2nd driver:
Assembled view of the LED, 2nd in moon mode:
The driver fit great, nice and snug with just a little filing. The results? Well, it's impressive:
On a LK @4.20V:
- 8.9A at the tail (clamp meter) - wow!
- 2,280 lumens @start, 2,150 @30 secs
- 123 kcd measured at 5m (700 meters)
Originally, this light had a Nanjg jury rigged with a FET on it, and a XM-L2 U2 1A domed. This was from May 2014. Originally, this is what it did:
On a SONY 26650 fully charged (best performing cell at the time):
- 5.3A at the tail (DMM w/heavy gauge leads)
- 1,680 lumens @start, 1,600 @30 secs
- 121 kcd measured at 5m (696 meters)
So it got a 34% bump in lumens @30 secs, barely measurable bump in throw. The XPL2's don't throw as well as the XPL or XML2 - I've seen this in couple of other mods.
Today I took some time to mod my second S2+.
Replaced glass with AR coated one.
Replaced OP reflector with SMO.
Replaced XML U2 with XPL HI V2-1A
Replaced 7135x6 3/5 mode with 7135x8 with biscotti firmware
Also replaced stock wires with better ones and black tailcap with blue.


Having problems with driver working too fast and almost impossible to program modes. Ordered tools needed for flashing so I will try to fix it when arrives.
Nice work on these Y3s’ drivers TomE :+1:
XXX-Man , the light is way better now , you should try a fet driver for max results (just sayin) ![]()
Did the mod go smoothly or was it hard to do?
It's perfect now (for me) :)
I think fet would be too much, it's hot in seconds on max now.
The programming hardware costed me below 7€, with the hex file its easy to flash when you follow the programming threads steps
Dont forget to cut leg 5 on the MCU first
Is the throw of razor blade dedomed XP-L2s that bad too? … compared to a dedomed XP-L or XM-L2?
Dunno from what I've done - never attempted it, but from what I understand - yes, it's a bump from stock, loses lumens, but not doubling kcd. I think the bump is 50% of lower in kcd.
More so than it should have been since Dale sent it to me already assembled. The awg22 wires barely fit through the pill but were simply to bulky for the driver to drop completely into place so I swapped them for 28 Teflon. After that it was straightforward. Rich has the same small springs and I renewed the thermal grease(AS-5) as well.