Hi loneoceans, I’m planning on changing some values to the following…….
Vbatt x R4 / R3 + R4 =Vref
When battery level drops below 3.30V, Light up Red.————————- 3.3V x 360K/116K+360K = 2.5V
Vbatt x R6 / R5 + R6 =Vref
When battery level drops below ~3.00V, Turn off all LEDs.————— 3.0V x 360K/ 72K+360K =2.5V
Does this look right or should I decrease R4 to keep R3 at a lower value, sorry I looked up the datasheet and i couldn’t figure it out, what’s the rule when setting R2 value in a voltage divider circuit pertaining to the MAX9052BEUA+ datasheet? Also how do I factor in the voltage drop across the bleeder resistor to have compensated values for R3&R5….
Vi= Vt x Ri/ RB+R4+R3
So to set a trigger point of 3.3V, bleeder resistance= 100R, R4=360K, R3(compensated for bleeder)=115K. drop across R4= 2.5V
If any one need help setting different trigger point or led brightness, just PM me.
note a 100ohms bleeder is required… any higher value messes up the ref voltage for the compactor even if your calculations are correct, the video loneoceans posted implies that he’s hooking up a bench power supply without any resistance and I’m sure his driver must have some sort of resistance from positive to ground other wise it’ll short circuit, also not shown is an internal hysteresis of about 0.02V where both channels are trigger.
Also note that the 100R bleeder will be in parallel once the flashlight is turned on… consuming 37mah average, a minimum of 1/5 watt power rating required, 1/2 watt recommend for reliability to cope with the heat generated from the led, easily available in 0603 package.
I would add a 2.8V LDO to the tail cap, so you get constant brightness of the LEDs
R4/R6 should be large to have a low current over the voltage divider, so do not lower them
their current draw is even present when all LEDs are shut down
The reason the calculated brightness varies from calculated resistors id that the bleeder consumes voltage,
the drop differs with the current drawn from the LEDs, so constant current is at least easier to calculate
for example if your 6 LEDs draw together 0.3mA then on a regular 100 Ohms bleeder the voltage drops 30mV
Each LED draws 50uA
LEDs are powered over a 2.8V LDO so we do not have to mess with different currents on different battery voltages
LV 3.2V
SD 2.9V
on this example the current drawn of the 3 regular LEDs is removed when you hit 3.2V
so the current drops from 0.3 to 0.15mA also the drop on the bleeder jumps from 30mV to 15mV
so the comparator notices when 3 LEDs shut down a voltage rise of 15mV
The question is how big is the hysteresis of the comparator is this basically dictates how big the bleeder can be
With such a low hysteresis not really big LED currents or big bleeder of 1kOhm are possible without flickering
I looked in the datasheet of the comparator and adding 2 resistors per channel from Output adds hysteresis,
this would mean a bigger bleeder possible
I also noticed the comparator shows 130uA supply current which is more than many low brightness tail caps consume, so storing the light without checking tail color is not a good idea
Using an LDO would pretty much remove the need of a comparator with internal reference
Thanks Lexel, makes a lot of sense… I finally got it to work exactly as I want it, changed LEDs current & R3/R5 - R4/R6 values works good with no hysteresis noted, ill upload a video in a little bit. I have the compactor set for 3.7V LV and 3.5V SD.
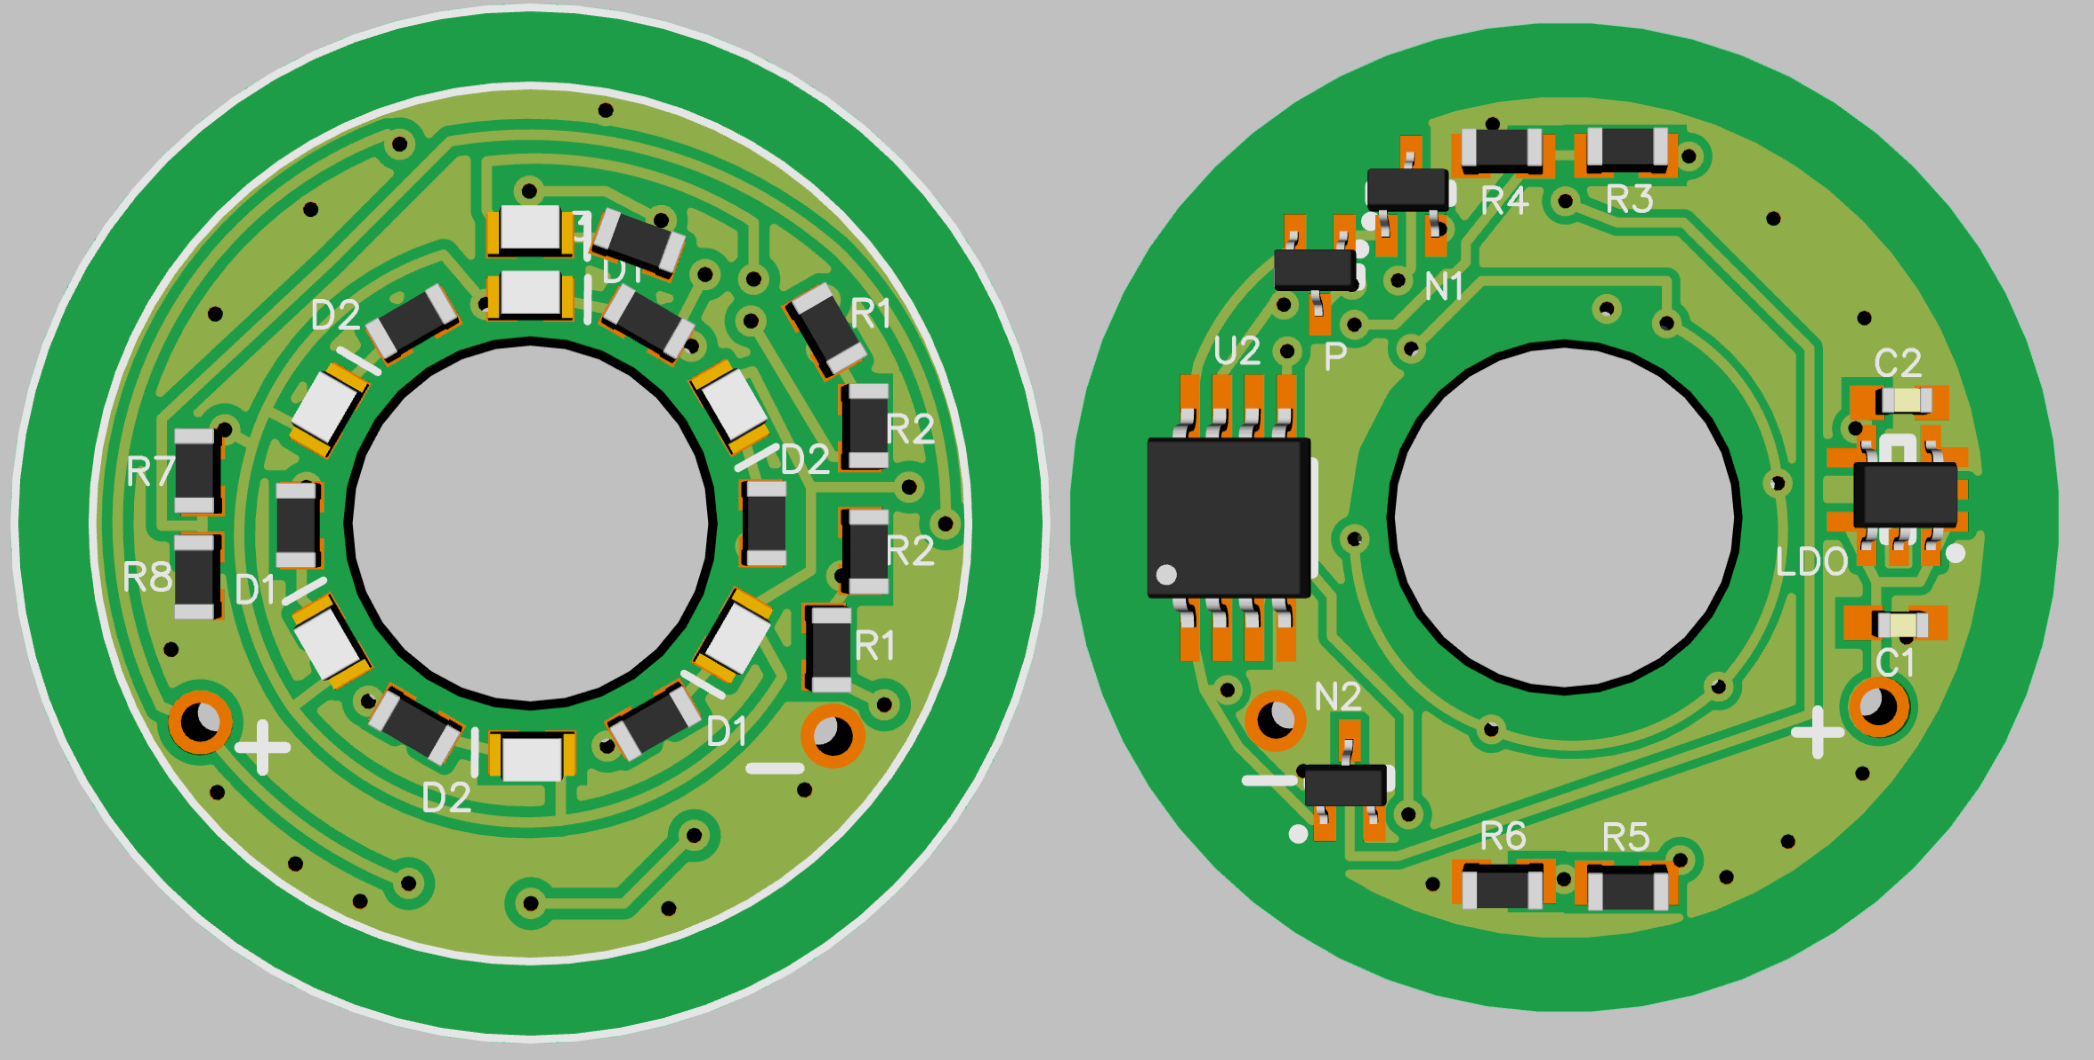
2x3 colors above first shut down
1 single LED for low battery signal
28uA 2.8V LDO up to 5.5V
dual pad for a 10V LDO for 2S lights
capacitors for LDO
2.8uA comparator without reference voltage, significantly reduced standby drain
the reference voltage comes from the 2.8V regulator and a voltage divider
added for each comparator a hysteresis voltage divider, so a larger bleeder like 470 or 1000 Ohms should be possible
If, like me, you have one of the S2+ lights with a black metal switch you can buy the stainless metal switches from Banggood and the light will shine through the clear gasket (barely). So my Tan/Sand colored S2+ has a stainless metal switch I replaced and then added a lighted switch to.