There never was any retaining ring or anything. So apparently this was one of the first hosts that he built and it doesn’t use a retaining ring on the tail, only the physical stem of the switch held it in. When I first had the issue and spoke with him he said if this would have been a slightly newer, as he calls them “first generation body” that it would have been no problem to send me parts to convert it to a standard setup (mini Omten) or w/e I needed but because this was one of the first ones he ever made and it was so different that he couldn’t offer me anything except superseded part numbers.
Its not gonna be a super hot rod or anything so I expect this Judco to hold up better than the original.
His very first ones had a brass end piece that had a plastic retaining ring holding the switch in. One piece body with a brass bezel holding the lens onto the reflector. At any rate, glad to see you got it working.
The partnr tells it is first generation Oslon Square (they are at gen4 now), but your pics show gen2: gen1 was least efficient but with the best tints that Osram ever made, with gen2 the tint already was a bit greenish, but I never found the 96CRI version (I think).
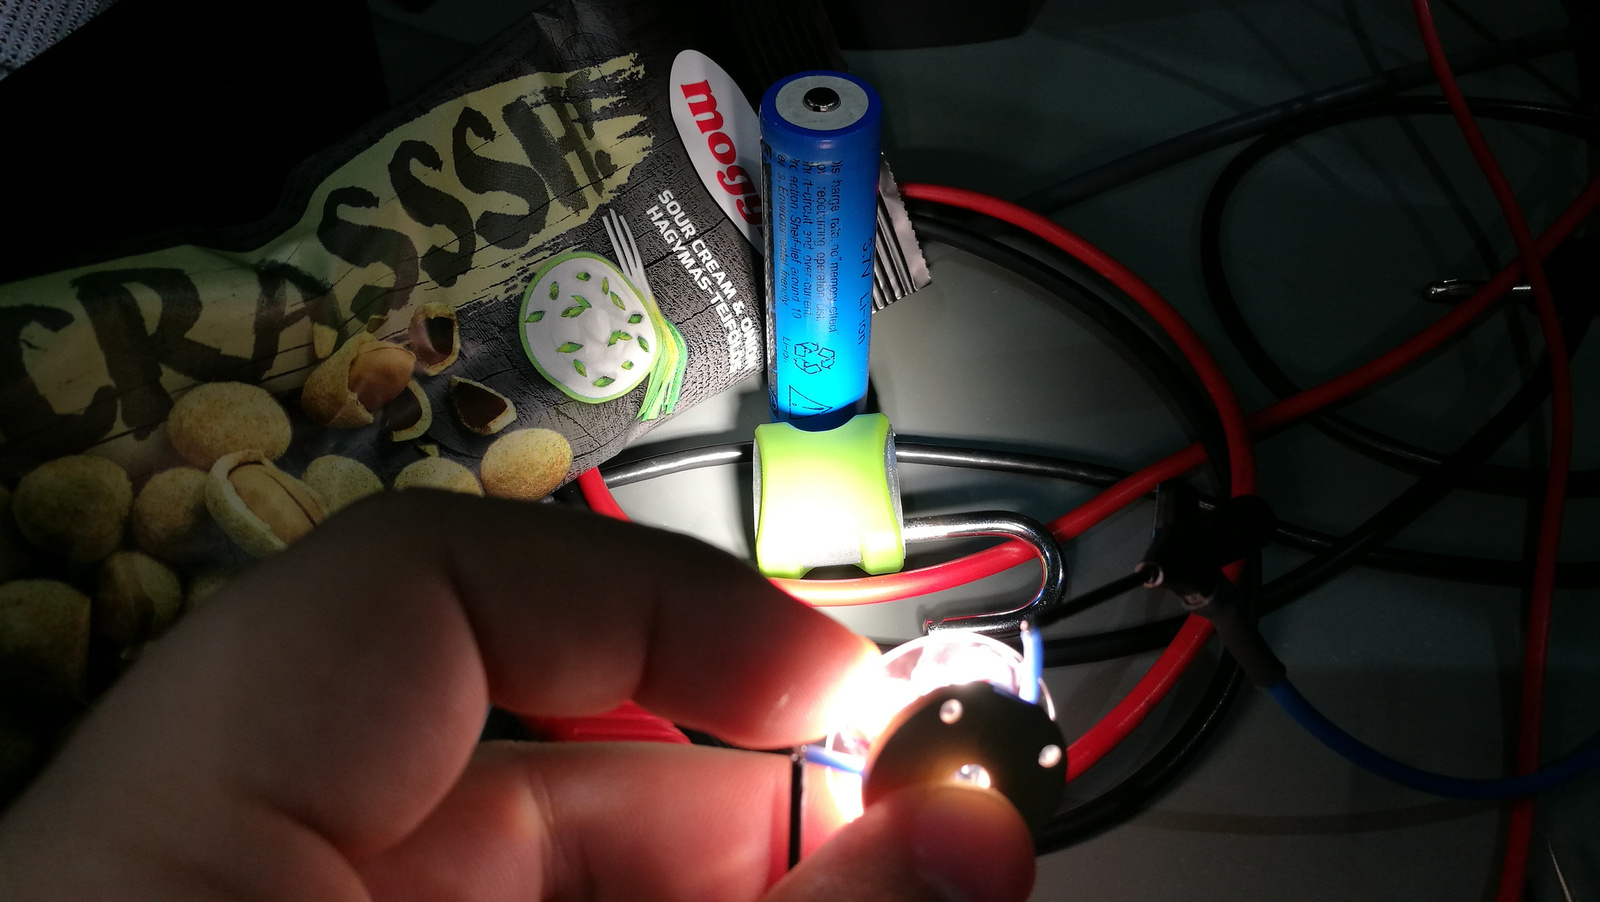
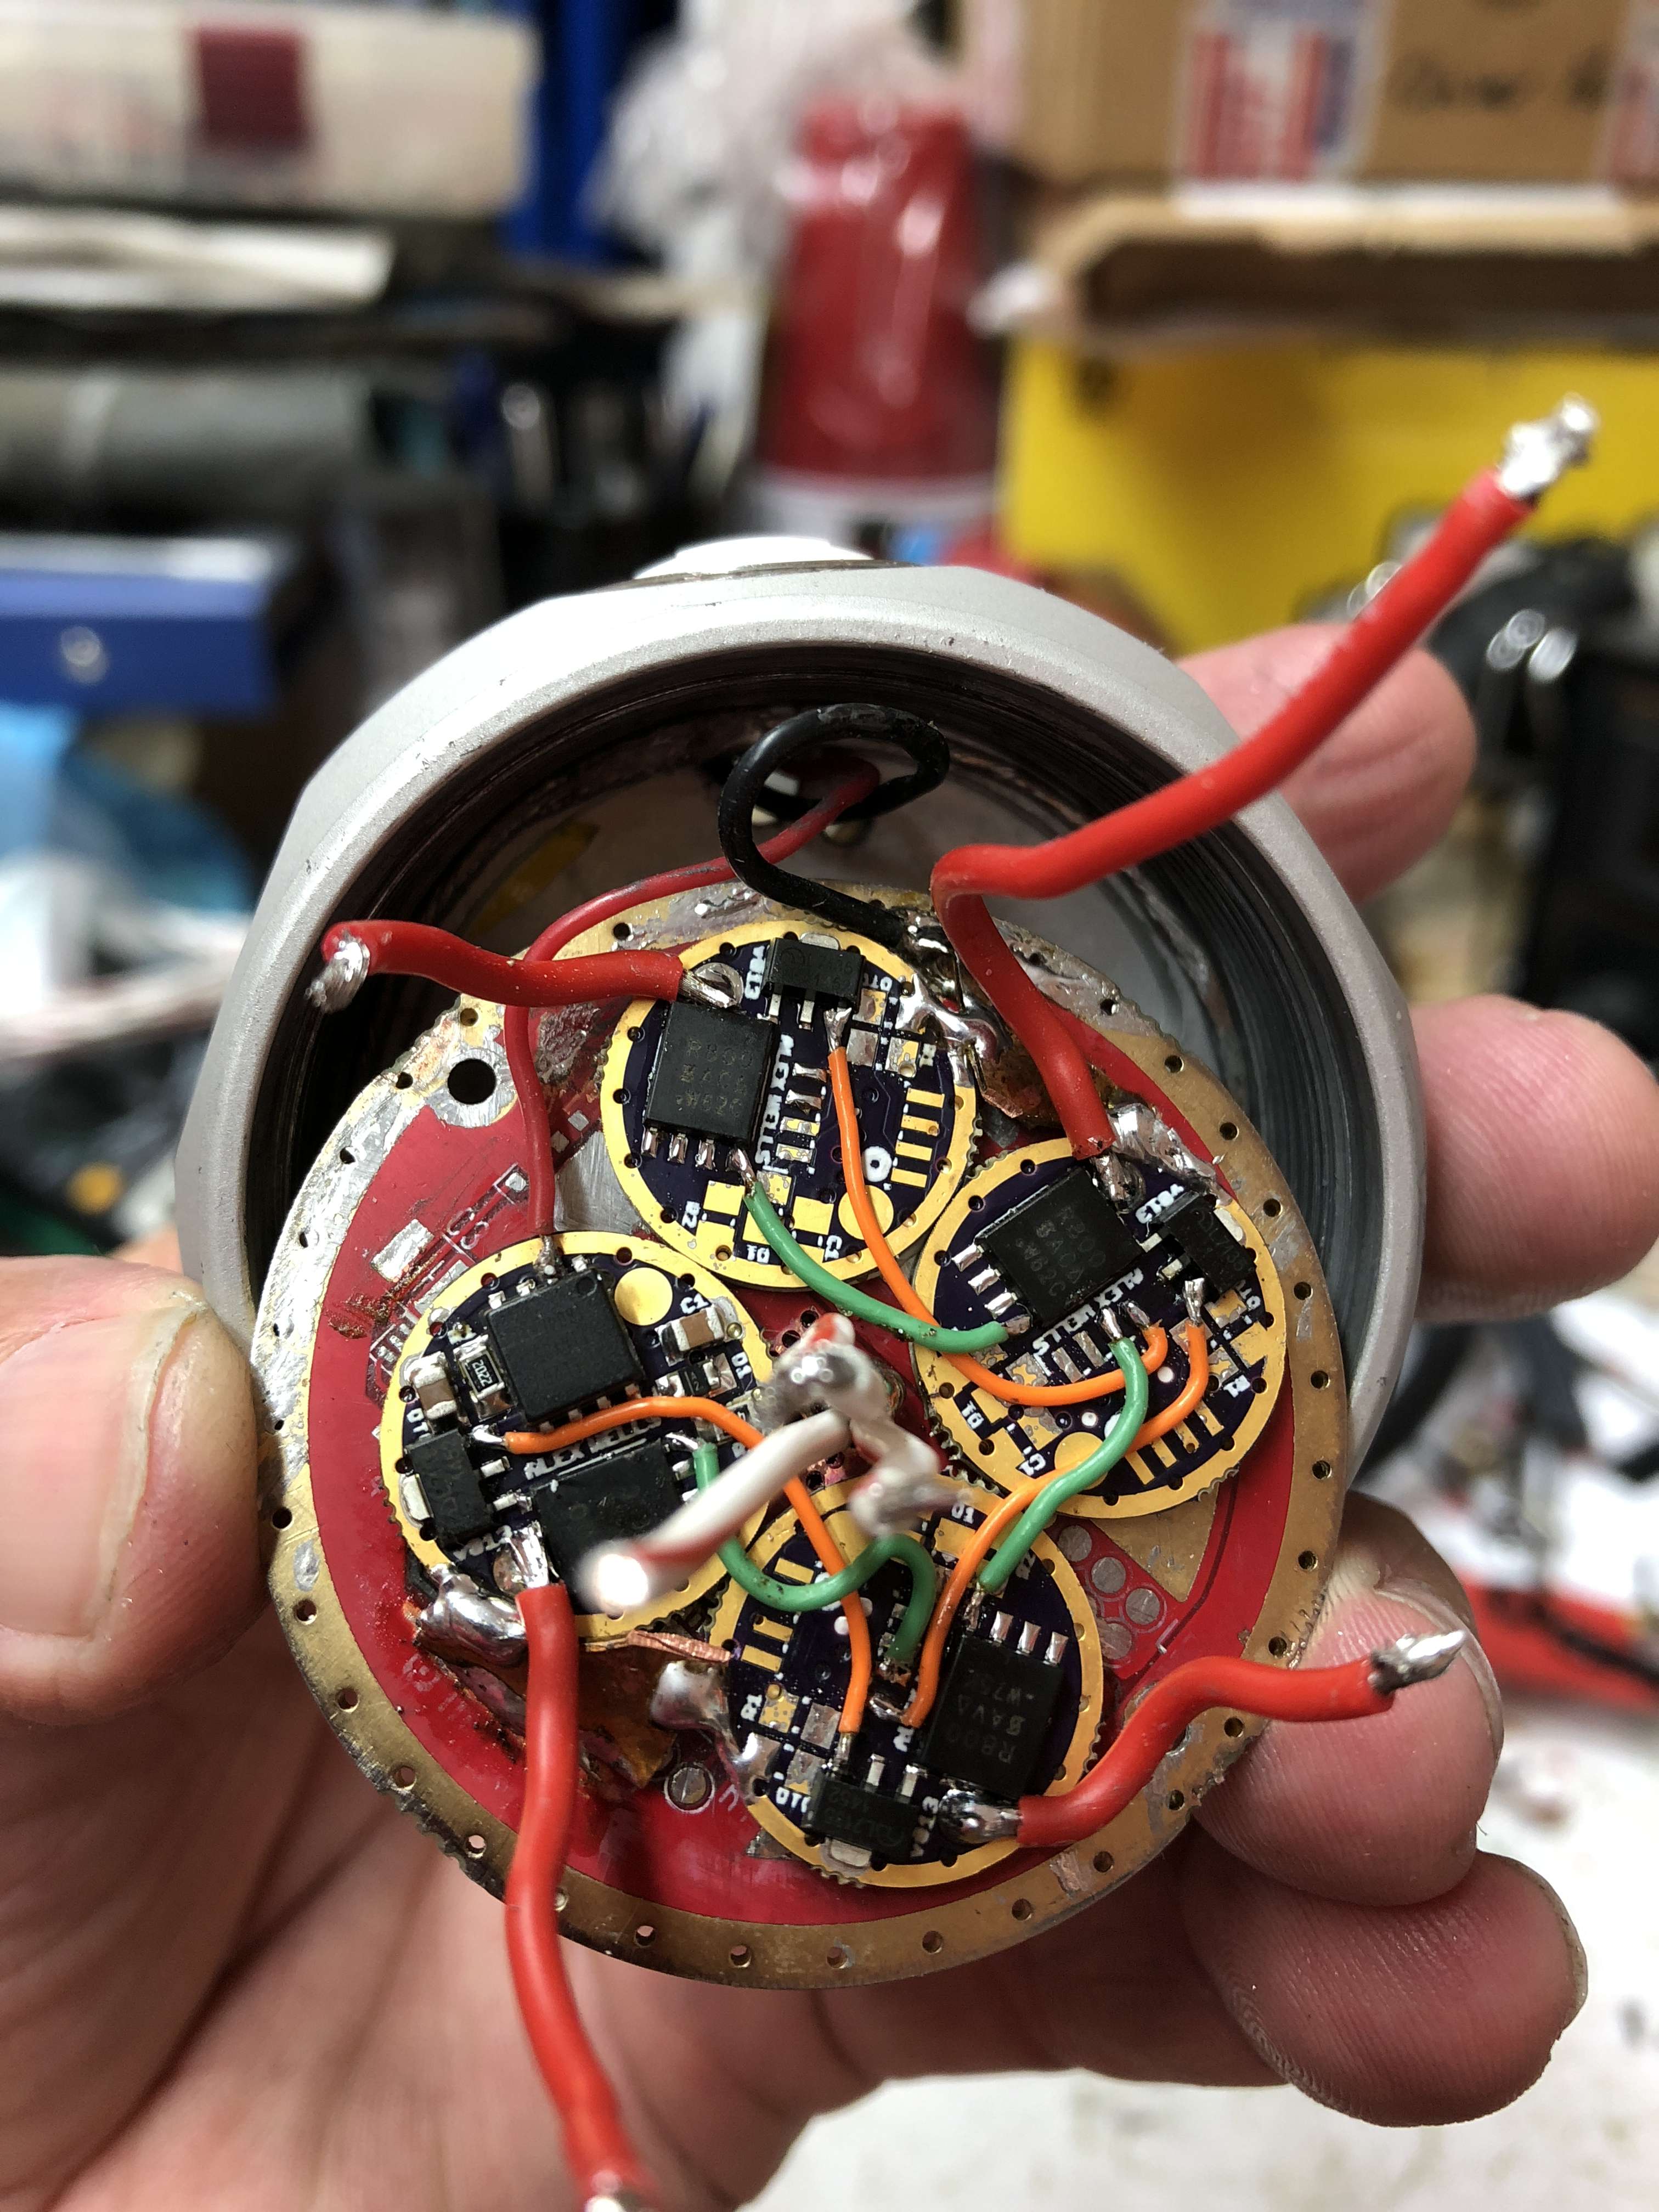
I finished a light I started a few weeks ago I’ve dubbed ‘The Frankenquad’
It’s a Thorfire C8s host (last version, with the aluminum pill). I installed a driver I built using Lexel’s 17mm TA driver PCB design I ordered from Oshpark. I used an oddball 20mm DTP MCPCB with four WW XP-G2, arranged in a 2x2 array (4p/3v electrical configuration), I got on Aliexpress and connected them up with 18 AWG silicone wire. Driver and tailspring got 20AWG bypasses.
Not surprisingly, the beam had a big dark spot in the center, so I tried reaming out an OP reflector. That helped, but not enough, so I applied to DCFix. That did the job, nice clean ( & very floody) beam. I tried the original reflector and the beam was still nice and clean, so I left it in place.
When tested with a UT210-E clamp meter, it pulled about 11A from a fully charged LG HG2. Not bad, but I wasn’t happy with it.
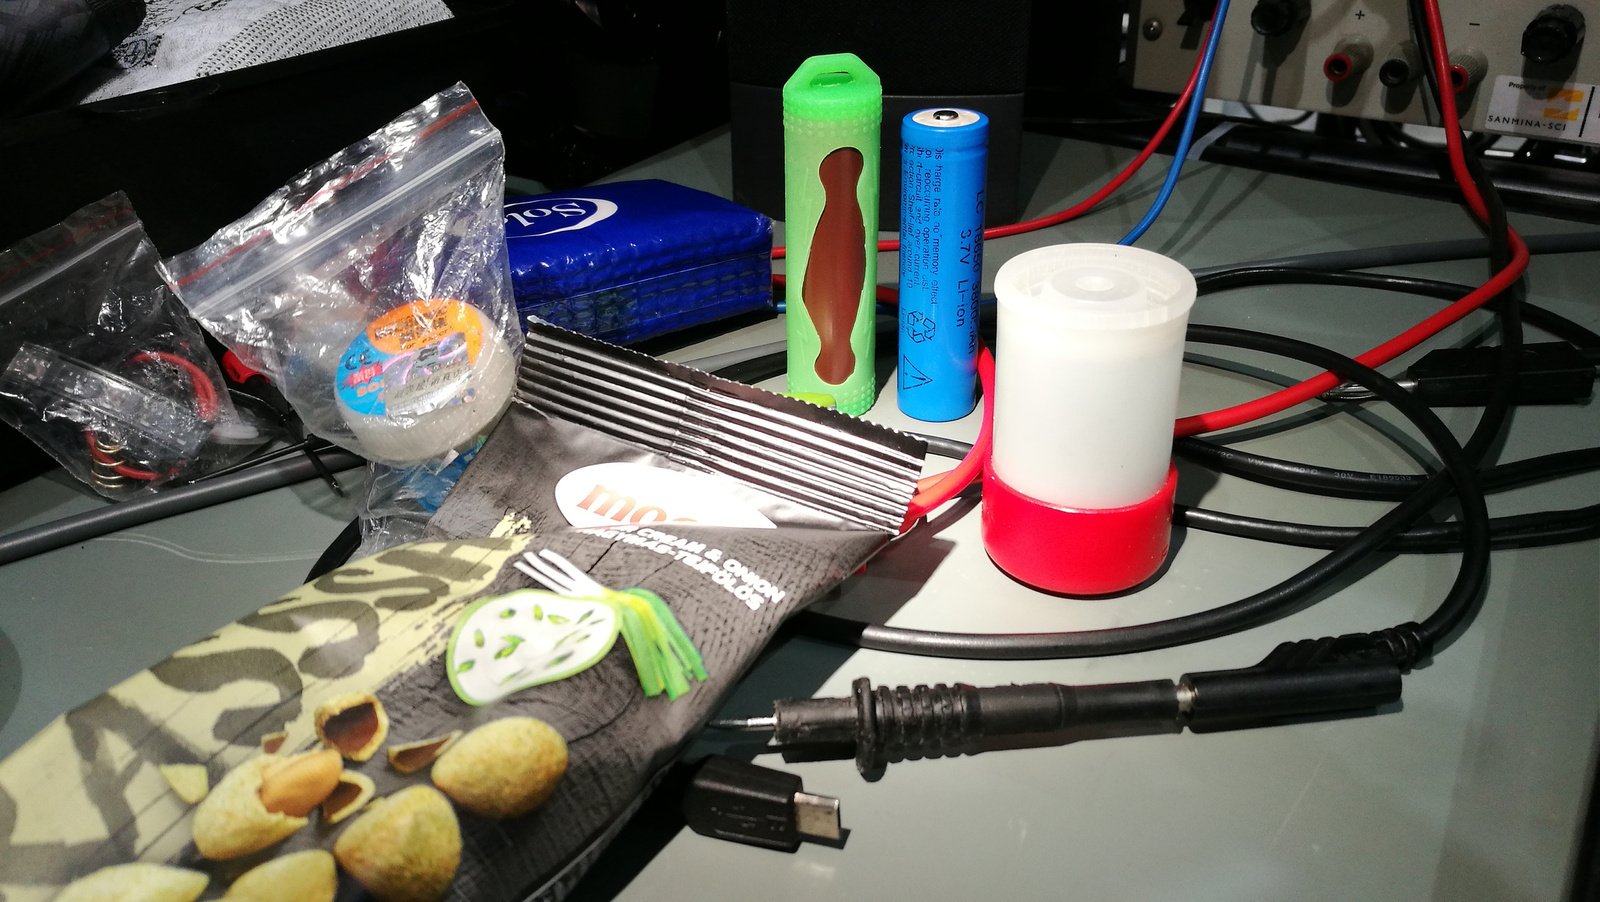
So, today, I reflowed some 90CRI LH351D emitters to another one of the oddball MCPCBs. I used 2x 4000K and 2x 5000k, mainly to avoid depleting stock of either emitter too much. New test results: ~17A peak with LG HG2 or Samsung 30Q, >18A with a Sony VTC5A; lots of nice high CRI light (and plenty of heat).
I think that’ll do. More on my blog. No beamshots yet, though. I have to redo them now that the new/final emitters are in place.
The GT Mini came up recently so I added an Anduril build target for it. It’s the same as the D1S build, but with button LED support. In case that’s of interest to anyone. It’ll get updated periodically along with the other supported targets.
Last month I finally got me a pair of round-nose pliers, and started to go ham with messing with my lights. First “mod” I actually performed was put a green boot on my otherwise boring black Convoy M1; its boring black boot went to a grey 3/5 S2 in my wardrobe. Turns out I enjoy my torches with a little splash of color
Next thing I’ll mod is swap drivers on that one S2 and a C8, going from 3/5 to Biscotti, and swap the reflector and lens on the S2 for a strip optic. The parts are already on the mail, because Simon is just that cool :laughing:
On a vaguely related note, this frenzy got me to finally mess with a few small Thrunites I have. Jewelry tweezers allowed me to unscrew the pills on a Ti3 and a TiS to get access to the lens, and with a pair of regular pliers I unscrewed the bezel on a T10. Because I don’t love throwing shade at brands, but damn, bro, those lenses were disgustingly grimy :confounded: After I washed them and put them back, even the beams’ tints and profiles improved. I also took the time to adjust the T10’s bezel o-ring, that was a bit displaced.
Dug out my old X10vn out for my first “real life” spring bypass with 20AWG wire. Reading went from 88k to 94k Lux. Overall it’s a bit low compared to what others read, but I guess the increase is what matters.
Made the mistake of pre-tinning a bit too furiously and the wire lost at bit of flexibility on the ends of the silicone, but since the spring is so huge I could easily bend them a bit in place, now it’s perfect.
Nice mod and very detail information I have saved for future mods , Thank You
I do have a Question , where did you get that honeycomb work mat ? nothing rolls off that !!
I might have gone a little too far this time. Modified (again) my Noctigon M43.
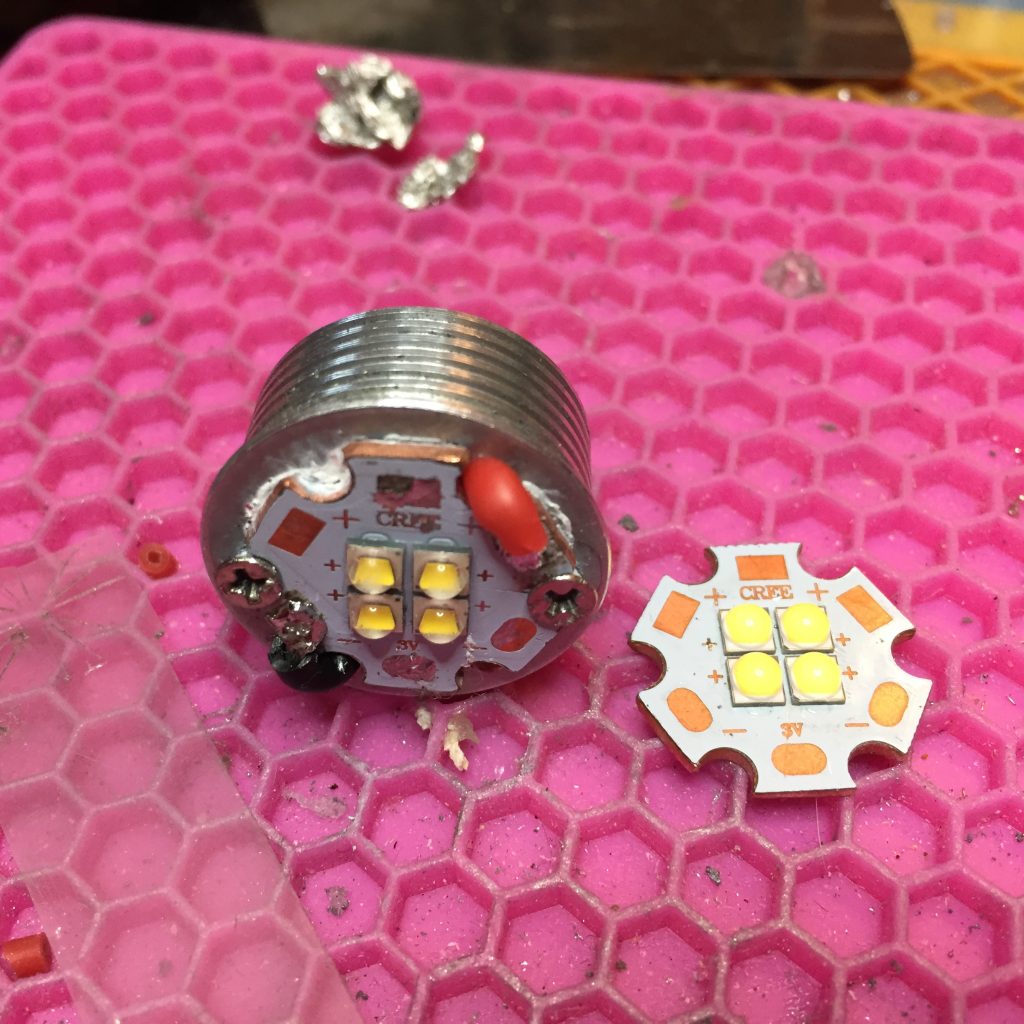
It now has 12 Samsung LH351D W2 5000K emitters and makes 17,284.5 lumens on 4 Samsung 30Q cells. I used an FET+1 driver that I built, flashed with Anduril and utilizing the SIR800DP MOSFET, with 3 slave boards each also having the SIR800DP and an 350mA 7135 chip. Each of the 4 FET’s control one triple board. I don’t know for sure but I’m assuming power draw is in the 60A territory.
Lightning on Anduril at 17,000 lumens is pretty awesome!
Thanks! I realize I left out one important bit, my motivation. I was looking for an inexpensive, readily available route to a high output 3v light, so I wouldn’t need the bulk of multiple cells, the expense of a high-current boost converter or a special host/optics/spacers. A 3v Luxeon MZ was my first thought, but then I saw these MCPCBs. For less than $5 with XP-G2s and $1 for a bare MCPCB, I figured it was worth a try. I still have a few empty PCBs, so I’ll probably do some more builds. I did have to hack on a centering ring/spacer, and even then, it probably intercepts some of the output.
As for the work mat, it’s a silicone potholder from Daiso (a Japaneese “dollar” store in the US that sells primarily chineese manufactured products). I started using it to insulate the worksurface, but it is handy for keeping things from getting away.