After missing the NightWatch Stalker NI40 with the 90.2 Luminus emitter I got to looking at mine and decided to use an older SBT-90 in it for something to do. It was on a square copper MCPCB so I filed that to round and mounted it up with 18 ga leads off the stock driver and bypassed the stock springs with 22ga leads. It pulls ~9A off a Samsung 30T for 2100 or so lumens. As usual, I removed the glass window for a better tint. Not the blazing output of the new emitter, but not at all bad for an emitter that’s been sitting around for over 3 years in my kit box….
Yesterday I switched the metal bodies from two Nitecore TIPs. I got a silver one (Cree XP-G2) on my keychain for some years and am pretty happy with it.
I never switched to the (not as bright) black Nichia TIP I got soon after because the silver one was already scratched.
Since I recently ordered the TIP2, I concluded I don´t need two cold white ones and switched the outer metal plates,
so the more beautiful looking Nichia is in the scratched body, and the black one is now ready to be gifted to my little brother.
*with a shorty tube from a Jaxman E2L
*a red tailcap
*a blob UV glue on the switch knob to compensate for the different dimensions of the red tailcap
*a Blue spring on the tailboard
*a 17mm 5A lineair Convoy driver
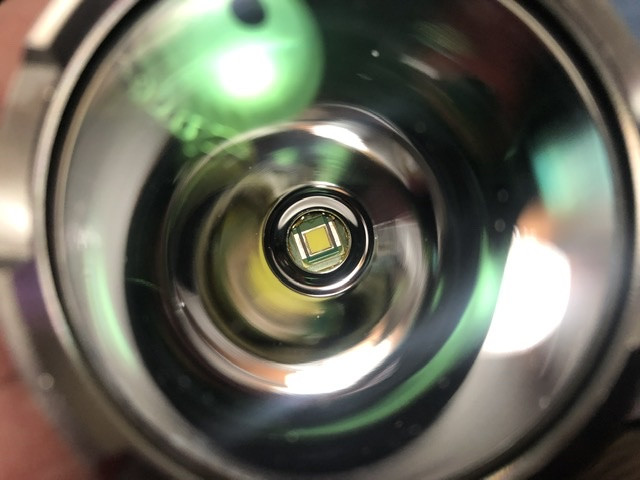
*a KW CULMN1-TG led on a 16mm 4040 led4power DTP board
*an adapted reamed and thinned centerpiece
*a smooth reflector from Convoy, reamed to fit the centerpiece, underside Kapton-taped against shorts from the ledwires
The most critical job as always with thrower-leds was adjusting the centerpiece, I spent 1.5 hours working on that tiny piece: adjusting-testing-adjusting-testing etc… The focus is now perfect, and the beam is super-nice thanks to the (aftermarket) convoy reflector (the S5 has the deep type Convoy reflector, unlike the S2+ that has a shallow one).
I had already modded a S8 shorty with a KW CSLNM1-TG (the 3030 variant of this led), but this new mod is smaller, has better focus, draws less current, has better tint (bit warmer) and throws just a bit better.
The current that measured on a full battery with a clamp meter without tail is 4.4A, and based on the output difference with tail in place or tail replaced by a copper shunt, the real current should be 4.3A. Based on led4power’s bare led results that should be about 895 led lumen. I usually take a factor 0.82 for reflector and lens loss, so output should be 740 lumen. But I measured only 530 lumen so I wonder a bit where those 200 lumen went.
But those 530 lumen do provide a fair amount of throw: 43 kcd at 30 seconds, which makes this my throwiest tube-style EDC to date
The typical centering technique is to have a plastic ring. It is fiddly to tweak…
Some manufaturers like Armytek use self-centering reflectors. Then tuning focus requires just centering LED on the shelf and … I’m not sure if you can tune reflector height. But with a pill based light, tweaking height would be easy.
Centering and focusing the White Flat in a smooth reflector is a matter of less than a 10th of a millimeter in all directions, anything other than physical guidance between led and reflector (=the centerpiece) will not be accurate enough to get the perfect hotspot that must be.
Successfully installed Lexel aux board on my friend’s FW3. Tight space and small solder pad makes soldering difficult. Solder is not neat here, after the first power on test, I re-tidied the solder and cleaned the rest of the flux. I was not able to reflash the firmware so I took power directly from the battery. Aux led always lights up even if the main led is on, but it does not affect the beam at all. Love the color combination of the led here.
I added a lighted tail, a ring of six 630nm leds plus two 4k7 resistors under the red silicon cap. It so appears that this Convoy driver leaks enough current for a weak lighted tail without using a bleeder resistor, and the operation is not affected. The current draw is 0.27 A so about half a year on a 1100mAh cell. The light is too weak to be considered bling but it makes the light very easy to spot in the dark.
Edit: I wasn’t happy about the low tail light so I added a 1K bleeder resistor to the driver, soldered at the battery side from the base of the spring to a self-made solder pad by scratching some solder mask from the ground pour. Operation of the light is still fine, the current went up to 0.600 mA (2.5 months on a 1100mAh cell) and the light output is way more visible and to my liking.
It uses a 18350 cell, the longer reflector of the S5 makes it 4mm longer than a S2+ shorty.
Almost that driver, it is the 5 amp version, but it looks the same. I like that it is cheap, that current is regulated and that it has 4 well-spaced modes and the low is a nice low-low. I do not like the memory it has because I need my lights to behave predictable.
I’ve tried to identify the regulator chip on Simon’s new driver, but no success. It appears to be labelled “SVA11” or something to that effect. I’ve used the QX7138 in a similar fashion, but it’s limited to 3A. You guys have any idea?
modded two original RRT-01 to sw40 9080, w kaidomain reflector and centering ring, xp star, and lubricated control ring w Nyogel 767a for very firm resistance, then fine tuned with a bit of nano oil to get the right “feel”.
Keep on experimenting Agro. Nothing beats a physical design that prevents unwanted activation, but a very convenient software solution is the next best thing.