I wanted to share my setup for LED reflow and star lapping for optimal heat transfer, in the hopes of inspiring more of the membership to attempt these procedures.
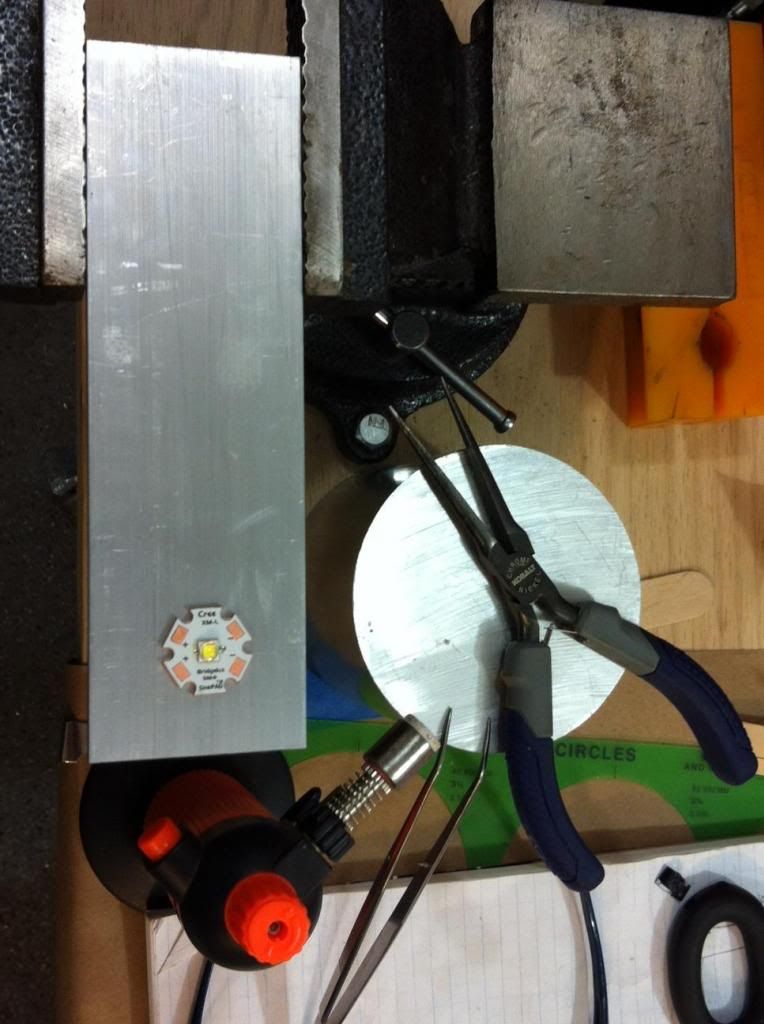
First, the reflow station. It consists of a ~3mm thick piece of aluminum, a small butane torch, and larger piece of 3.5-inch aluminum barstock:
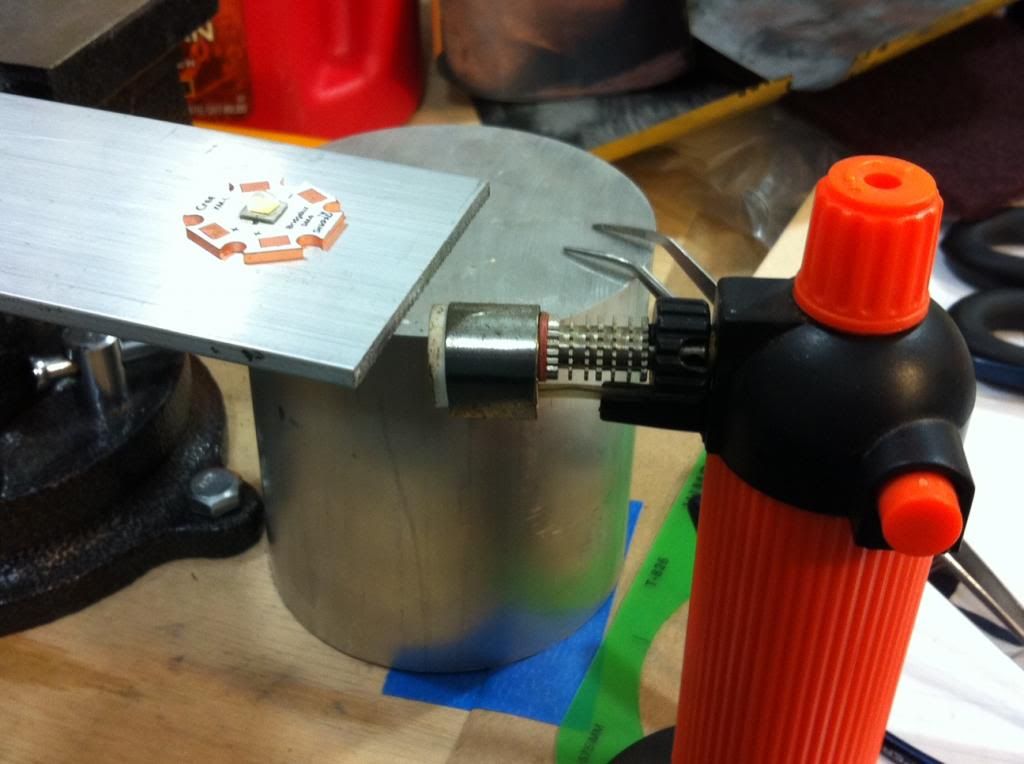
I use the torch to heat the flat aluminum piece from below, until the solder paste melts onto the star. After placing the LED onto the 'wet' solder, a bit more heat from below makes the LED move right into place on the star.
The MPCB then gets placed onto the large chuck of aluminum, which wicks away the heat rather quickly.
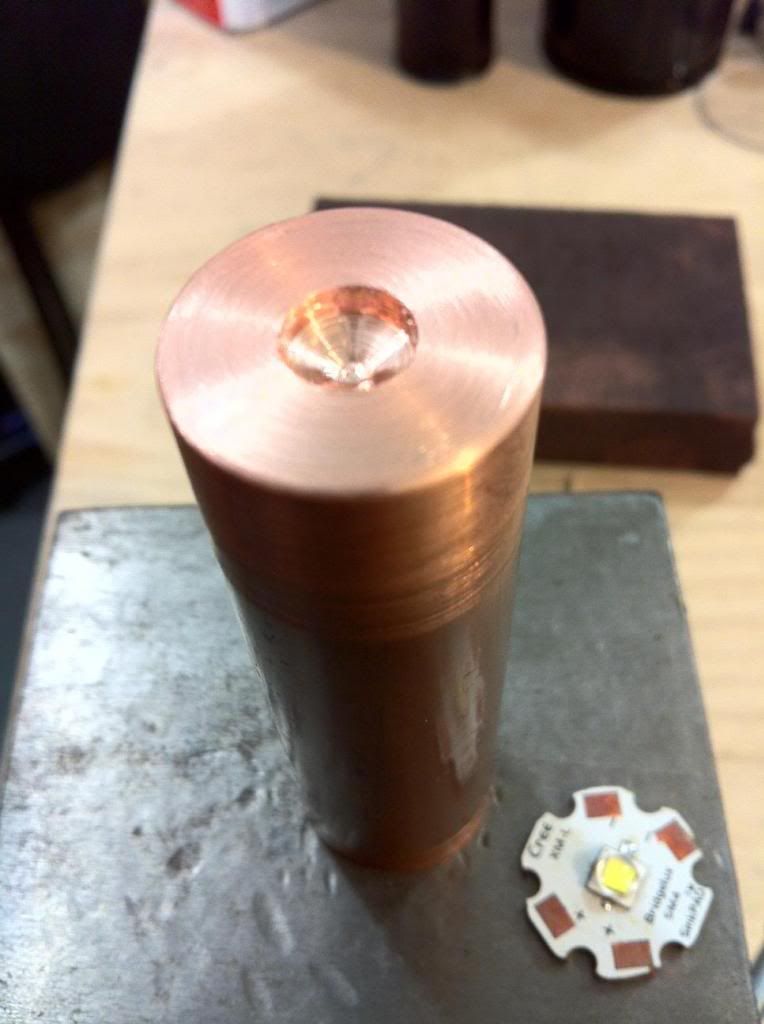
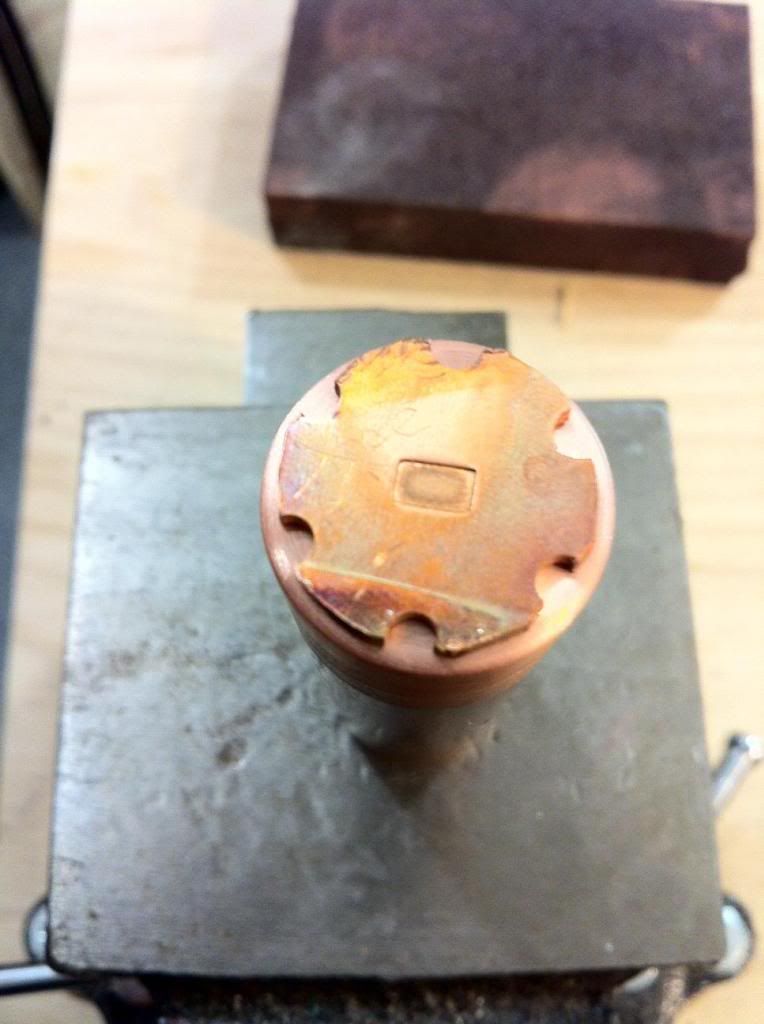
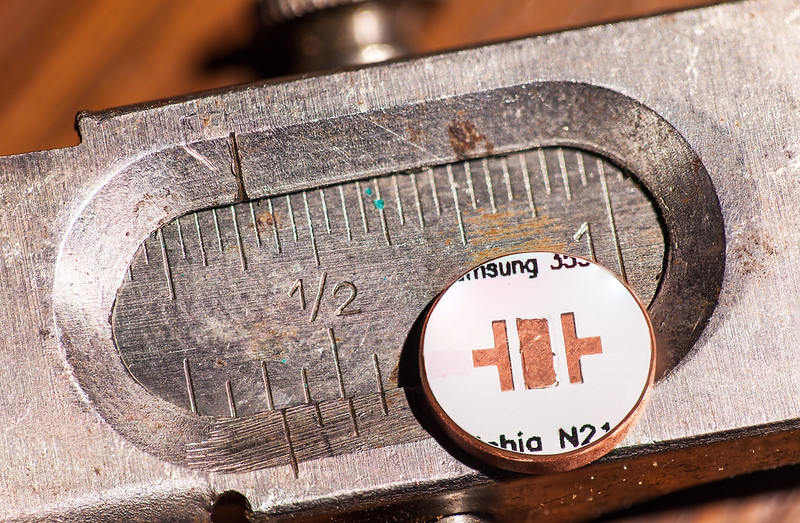
The lapping setup consists of a piece of copper rod, about 22mm in diameter. A 7mm recess has been drilled into one end, which allows the LED to be grasped by the corners of the substrate without touching the dome:
The weight of the copper bar provides just enough even pressure to nicely lap the bottom of the star, using a flat piece of steel as reference surface for the sandpaper:
I use an ascending assortment of grits, starting with 400 and culminating with 2000-grit. These are often found sold as a bundle in the automotive paint section of your local parts store. A thin film of WD-40 (or similar) acts as a nice lubricant for the lapping process. Final cleanup of the LED is accomplished using denatured alcohol, or Everclear - the choice is yours.
I hope this helped to demystify the reflow and lapping processes, and that a few more flashaholics will give them a try.
Ah, I see. Makes sense. Since I can’t rig something else to hold the star when it has an LED on it, I’ll probably just use some gloves and lap before reflow.
Do I basically just lay a sheet on sandpaper on the flattest surface I can find? How flat does this surface have to be considering that the sandpaper thickness probably won’t be so precise across a sheet anyway?
Doesn’t lapping involve both mating pieces? I.E. make the bottom of the star and the top of the pill as smooth/flat relative to each other as possible? Polishing only the star is good, but only half of the equation.
I’ve never tried doing any reflowing, but I would like to try the using a dedicated pan and the stove in my kitchen. It’s just a Samsung magnetic induction stove. I’ve used NG, regular resistance coils, and this is by far the easiest way to control temperature. I’ve seen the infomercial for the induction hotplates and I thought that this might be ideal for reflow? Anybody else have experience with using these it’s almost like magic?
Thanks ChicagoX. Do you have a picture of the star with just the solder paste on it to give us an idea how much to put on? I'm waiting for my solder paste to come in as this is supposed to work better than solder. Cheers.
Really appreciate the Tips Wayne, will definately put em to use. I just reflowed my first emitter, an XP-G2 onto a copper sinkpad day before yesterday. Held the star with a set of stats, clamped them into a ball head table-top vise, then leveled the pad by eye. Held an old Craftsman iron at 230 watts close to the bottom of the star first then touching it (pre-applied solder paste first, with a needle) and watched for the reflow action. Was surprised at the “liquid” that came out first then saw the emitter settle down and was done. But it’s not sitting dead center. What now? Wicked the liquid off with the edge of a paper towel (flux?) and the emitter works, and works well, so I guess it’ll be all right. I’ll turn the star down and make sure I center the emitter before doing so (my method for this is to JB Weld (JB Weld Stick) the star to a short piece of 1/2” 6061 rod, with only 5 minutes before setup I have to act fast…I run the drill slowly to show my center and make small adjustments with a press/twist action pushing the star onto the ball of JB Weld, spin it slowly again checking that it’s centered and adjust as necessary) Give it an hour to set up then use a thin metal cutting wheel on my dremel to cut the star down. Polish the edges with up to 600 grit paper, also cutting a small bevel on the top edge to keep pads away from the edges of the pill, then cut the assembly off the rod and file/sand the bottom of the star smooth.
The first two boards (only 2 boards) I’ve cut down this way I held a pencil to the board while turning it slowly to mark a circle around the pad, thereby showing me if it was centered or not. Not much time to get it right before the JB Weld Stick is cured enough that you can’t move it again.
For the cutting process, I took a large zip tie and loosely affixed it around the trigger of my cordless Makita drill. Cut off excess for handling ease. Then I can set the trigger to barely turn, steadily holding the cut-off wheel with the dremel I get a very round cut. Not a lathe cut but not too far off! Just takes a little time and careful handling. Rolling excess wads of the JB stick into the powdered copper makes a pretty little ball that has a copper sheen my kid likes playing with, lol.
This I’ve done twice now. If there’s an easier/better way, please let me know!
I used to, but I checked one, by resanding it after reflowing, and found that the bottom was no longer as perfectly flat.
that was with aluminum. I tried the same experiment with a copper star and their was very little deformation.
I think that with an oven/stone or even chicago-x’s method of reflowing, you’re less likely to get any deformation from heat, but I use a powerful soldering gun, so the heat is not as uniform (small contact area), and I probably get them a little too hot. maybe that makes them deform more…
We are not talking about micron-level smooth, or even optically perfect here. A piece of marble or glass seems to be the best practical option for the hobbyist.
The 'pill' in this case has already been faced relatively flat on the lathe, then wet-sanded while turning using the grit progression mentioned above. This is probably already overkill for the MPCB that will be affixed with Arctic Silver or similar.
If it's not dead-center, then there may be a bit too much solder involved. I was surprised how little was needed to self-level the LED with my setup.
I have one more LED to reflow, so I'll be sure and snap some pics of the paste then.
For me, seeing is believing, so yeah a picture of your board with solder paste ready to go would help enormously! It was difficult to figure how much to use, the sphere’s of solder are so tiny and there’s so much flux gel their suspended in that I just couldn’t decide. Wiped it off once and reapplied to get a bit less and perhaps still got too much. But I might also not have had uniform heat, I intended to use an 1/8” slab of SS in a 6” circle on a glass stove top, should have. The circular piece of stainless would keep the element from going on/off unnecessarily.
That would also let me melt the solder paste and apply the emitter to the “wet” solder, being able to adjust it slightly when it settles if it’s not just so, correct? Then sliding the plate over to the next element would allow it to cool slowly and not shock the emitter. Right?
I reflow in a similar manner.
I use copper sheet cut into a 3in x 5in rectangle and place the star at one end. I heat the copper sheet from the opposite end as preheat moving over to the star until she flows nice and easy. Havent killed an led that way and it seems to provide a non harsh reflow. Watching time is crucial in lifespan though.
But, doesn’t adding the emitter to the hot board and “wet” solder shock the emitter? Unless it’s sitting on the hot plate, warming up in time with the board itself, then getting picked up and placed, that would have it at or very near the same temperature as the board when placed, correct? Hmmmm……
Yes, this is what I use to lap the top of the pill before matting it with the lapped star,
Its a flat head specialty steel screw I bought at home depot and sanded it to a mirror polish on a glass surface using 2500 grit sand paper and flitz polish, I use it on a drill with progressively finer sand paper and it gives a very flat contact area between PCB and pill, very, very flat!