I have a bunch of 2-group (3/5 mode) Convoys, which I like, except for the 2-group thing. Having a firefly mode would be nice as well. As per the suggestions in this thread, I’d like to swap out the stock drivers to customize the lights to my liking. (The ROM flashing that was suggesting will be a later project.)
I thought I’d start with my Convoy M2, since it’s my least favorite. It’ll be my practice guinea pig, in case I ruin it.
One thing I can’t figure out: how do I remove the stock driver?
Or, if the driver will be a pain to remove, is it possible to source a replacement pill?
Here’s a pic of the stock pill assembly:

Unscrew the retaining ring.
It will be difficult do to the fact there is some sort of thermal adhesive on the ring, it should come loose but it will be a bit “stuck” without some horking on it
ConcreteRooster get a snap ring pliers, stick in the two holes, the ring should unscrew but it might take some effort
First remove the LED star. I dedomed (killed) mine while trying to unscrew the retaining ring.
That shouldn't be necessary. Loosen the driver retaining ring 3/4-1 turn, then if the contact plate is still turning with the ring, push it forward and away from the ring to break the adhesive. Then just unscrew the retainer and pull out the contact board.
Thanks guys! I didn’t realize that ring was actually a separate component. I managed to loosen it up just by using a precision screwdriver in one of those holes, and pushing tangent to the rotational direction.
…now I’m stuck again.  Looks like I’m going to need some hand-holding to get through this. Now I can see the PCB, but can’t figure out how it’s attached to the retaining ring.
(Although now that I can see the microcontroller, I’m starting to think flashing it’s ROM might be a better solution anyway…)

Flashing the MCU would be easiest at that point…only problem is it’s bonded to the ring so you tighten the ring you spin the wires, you could snap them off the driver
It looks like they have a contact board sandwiched with the driver, 20mm contact board w/ 17mm driver electrically soldered to the bottom pcb that the battery touches (this is why there were no 7135’s on the battery side of the PCB
In fact that is exactly what it is
If you look closely
Center of the large spring is a smaller spring, that is the 105C spring soldered into this 20mm contact plate
They are electrically connected unless you want to desolder them…best bet is to flash the MCU (unless you are good at soldering)
TexasPyro has a custom 20mm Nanjg OSHPark board, just strip the 17mm, solder all the components on the 20mm and viola
It looks a little something like this
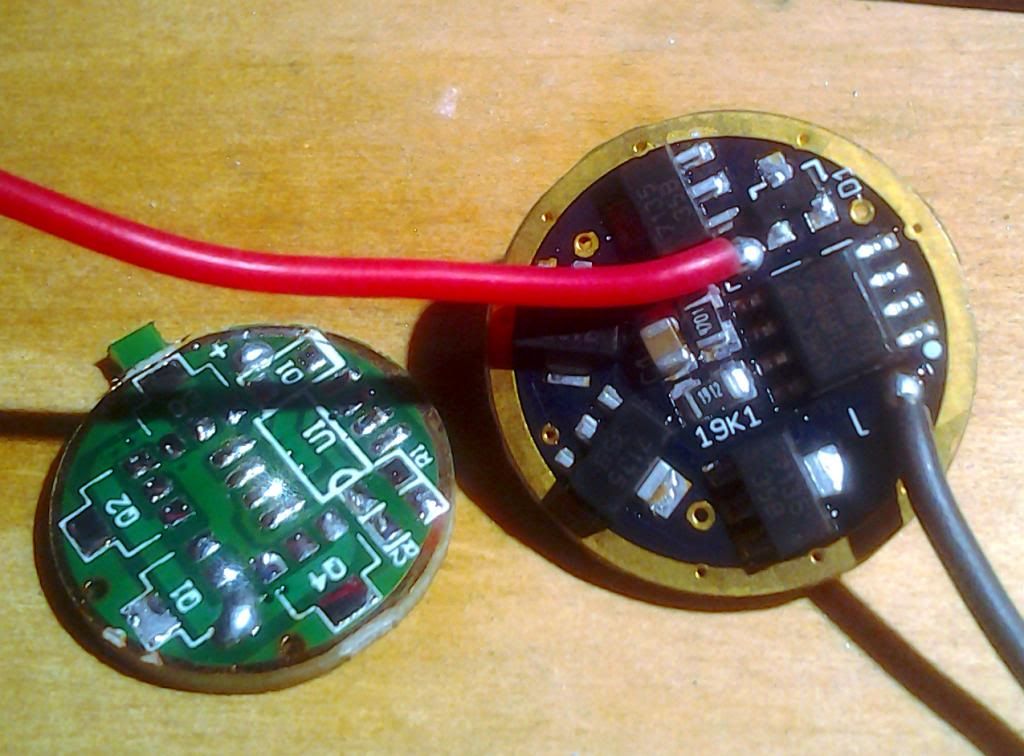
Go back and look on the battery side of the retainer/contact plate - see that white goop oozing out? That looks like Fujik thermal adhesive. It's just white silicone RTV stuff. Ease a razor blade between the contact board and the brass retaining ring and they should come apart easy.