Wow. That’s sweet. ![]()
![]()
This. :heart_eyes:
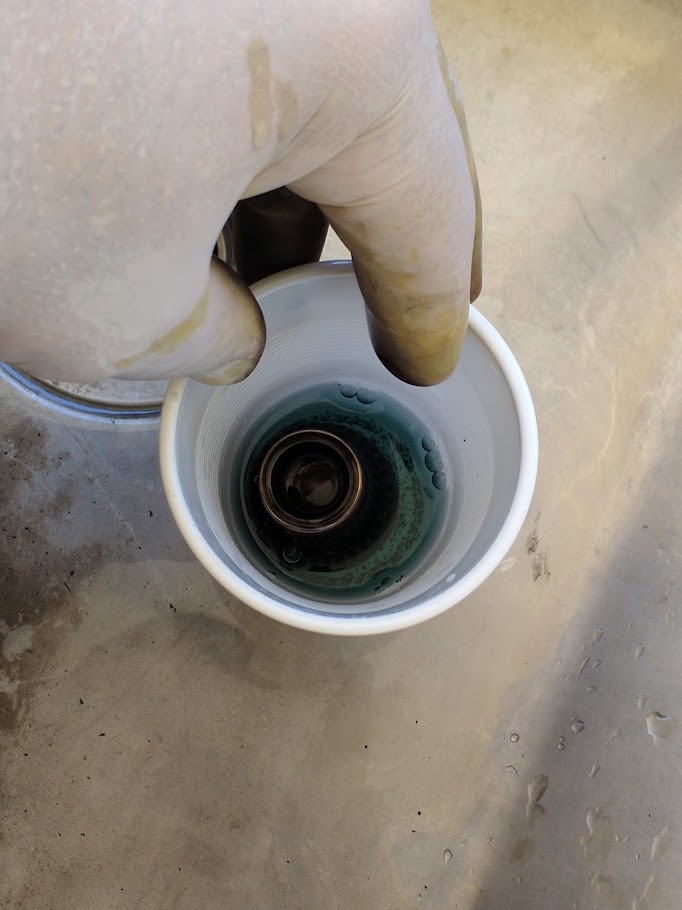
I got a little time tonight to try and lay some epoxy in the tail. It’s not 5min epoxy but I used a little extra catalyst to make it cure faster. After mixing I used a straw to suck it up and blow it into the tail while it was turning in the lathe. I was hoping this would cover all the holes while at the same time not let the epoxy drain out the holes. Whadya know, it worked!! ![]()


As you can see I’ve still got a problem with getting too many bubbles while mixing ![]() and I need to clean up the inside before I can install the switch again.
and I need to clean up the inside before I can install the switch again.
Very very nice. ![]()
Hooo-Leeee, this is fantastic ![]()
Genius, sheer brilliance at work! You Da Man!
Very clever. ![]()
That’s some high praise, thanks guys ![]()
I haven’t had much time to work on it the last few days (finishing up work for the xmas break). Hopefully i’ll get some time in the next few days to finish it before i go to Rottnest Island for a holiday ![]()
Enjoy the holiday mate. All the times I’ve been to Perth and thats one place I never visited.
So I tried something different on this light. It didn’t work as well as I hoped (again ![]() ) I dunked it in Jax copper blackener.
) I dunked it in Jax copper blackener.


I wanted to leave the front black as well but I don’t think that’s a good idea


Even though it didn’t turn out as good as I hoped I still want to do the same to the tail.
I think it goes well ![]()
Me to. ![]()
It can’t go wrong ![]()
The other day I picked up a little more brass to replace the aluminium retaining ring in the tail. After doing that I proceeded to blacken the tail. This time I used a toothbrush instead of my (gloved) fingers to work it in. The results came out better. I’m even thinking of re-doing the head with the toothbrush.


This flashlight is absolutely amazing looking!
Great job!
Nice work PP, we enjoy you inventiveness, you wear the ![]()
That is amazing design and craftsmanship. Wow ![]()
Thats a mesmerising show your putting on there pp. No idea how it works but looks real good. ![]()
Wow!
Lol, thanks guys. It’s a journey for me too ![]() In fact I need your help now. Mechanical stuff I can usually get my head around but electrical…. not so much.
In fact I need your help now. Mechanical stuff I can usually get my head around but electrical…. not so much.
I soldered it all up and plugged in a 30Q. The tail switch lit up but was dimmer than previous tests. I didn’t think much of it at the time (maybe the cell was low voltage or something…?). Hit the switch and… nothing. Tail light goes out but no action up front. A bit of stuffing around to discover the brand new xpl hi was not working. Swap in an old salvaged xpg2, of course I checked to see if it worked beforehand, only to have the same result. No insta-flash, just a half dim tail light. I’m thinking it’s impossible to have a short the way I had wired it up but I’m at a loss to realize what’s going on ??
So can anyone explain or guess what might be going on? 2 leds gone poof and I can’t work it out.


Looks like an XHP-35 HI to me, needs 12V. Touch direct leads from a cell to the pads and see if it lights up, or just touch it with the continuity probes from a multimeter and see if it shows a dim light. The XP-L HI can take some 6.6A so unless you have a 9A or 12A driver there the emitter should handle 6A if indeed it’s an XP-L.
The XP-G2 might have fried from too much current.
Make absolutely certain there are no single wires touching anything on the board from those emitter leads. This driver has a lot on it really close together and a short on the board can happen. Eyeball it with magnification if possible, an aspheric lens works well for this….